
Какие требования к оформлению заказа по оптовым ценам на вашем сайте?
Особых требований нет. Минимальная сумма заказа всего 10 000 рублей. Цены оптовые, с минимальной наценкой!
Мы работает с физическими лицами и организаторами совместных покупок. Для отправки заказа нужна только ваша Фамилия, Имя и Отчество, а также номер телефона и эл. почта для общения и ведения переписки. Эти данные вы вносите при регистрации на сайте или при оформлении заказа.
Как происходит работа с оптовым заказом?
Заказы оформляются через корзину на сайте! При оформлении заказа вы сможете указать нужную транспортную компанию и выбрать удобный Вам способ оплаты. Заказы по эл.почте, видеофайлы, смс, через мессенджеры и т.д. — не принимаются. Дозаказы к основному заказу присылайте по эл.почте.
После принятия заказа, мы вышлем вам на эл. почту реквизиты для предоплаты (50 — 60 % от стоимости заказа). После получения предоплаты мы начнём сборку заказа. В зависимости от объёма заказа и загруженности складов, сборка длится от одного до пяти рабочих дней. Вы можете сделать дозаказ по почте, указав в письме номер заказа, артикулы нужного товара и его количество. После сборки и проверки заказа на соответствие требованиям заказчика вам будет выслано письмо с «Итогом сборки» и реквизитами для оплаты полной суммы заказа. Накладную вы сможете скачать в своём Личном Кабинете. Если после сборки заказа предоплата превысила итоговую стоимость заказа, вы можете сделать дозаказ, оставить сумму для следующего заказа или выслать нам реквизиты для возврата переплаты на ваш счёт. После получения полной оплаты заказ передаётся в курьерскую службу для отправки выбранной вами транспортной компанией. После отправки заказа курьер привезёт накладную и мы вышлем вам письмо с указанием номера накладной, датой отправки и названием транспортной компании.
Внимание! Транспортные компании требуют паспортные данные для отправки оптового заказа. Высылайте номер и серию паспорта получателя дополнительным письмом на эл.почту info@elefante-shop.ru после оформления заказа.
Ответы на другие вопросы:

—————————————————————————-
Товары в розницу можно купить на нашем розничном сайте Elefante24.ru
![]()
—————————————————————————-
Небольшие оптовые заказы на сумму до 5000 рублей Вы можете оформить на сайте наших партнёров For-sp.ru
![]()
У нас в доме за остротой ножей следит муж. Он любит готовить правда делает это редко и когда берется за дело, просто не терпит, что нож тупой. Правда, как говорил мой дядя:
Это хозяева тупые, а ножи не точенные.
В общем, как ни крути, а ножи все равно точить надо. Вопрос встает чем. Об дно кружки (старинный проверенный способ) не серьезно. Покупать специальный точильный камень? Зачем? В наше время есть специальные точилки для ножей. Об одной из которых я хочу вам рассказать в этом отзыве. Точилка эта бюджетная. Заказывала я ее на wildberiies. Стоила она всего лишь 367 рублей. Муж попросил заказать. И выбрала я, честно признаться, одну из самых дешевых, если не сказать, что самую дешевую на момент покупки точилку.)))
Ну жалко мне денег на такую ерунду! Честное слово!)))
Общая информация о точилке:
Тип: ручная
Вес: 250 граммов
Артикул: 18768679
Количество лезвий: 3 шт.
Средняя стоимость: 350 рублей
Точилка пришла упакованная в коробку.
Мелочь, как говорится, а приятно. В коробке мы точилку не храним, это ни к чему. Но вот для транспортировки точилки, конечно же, коробка удобнее и надежнее.

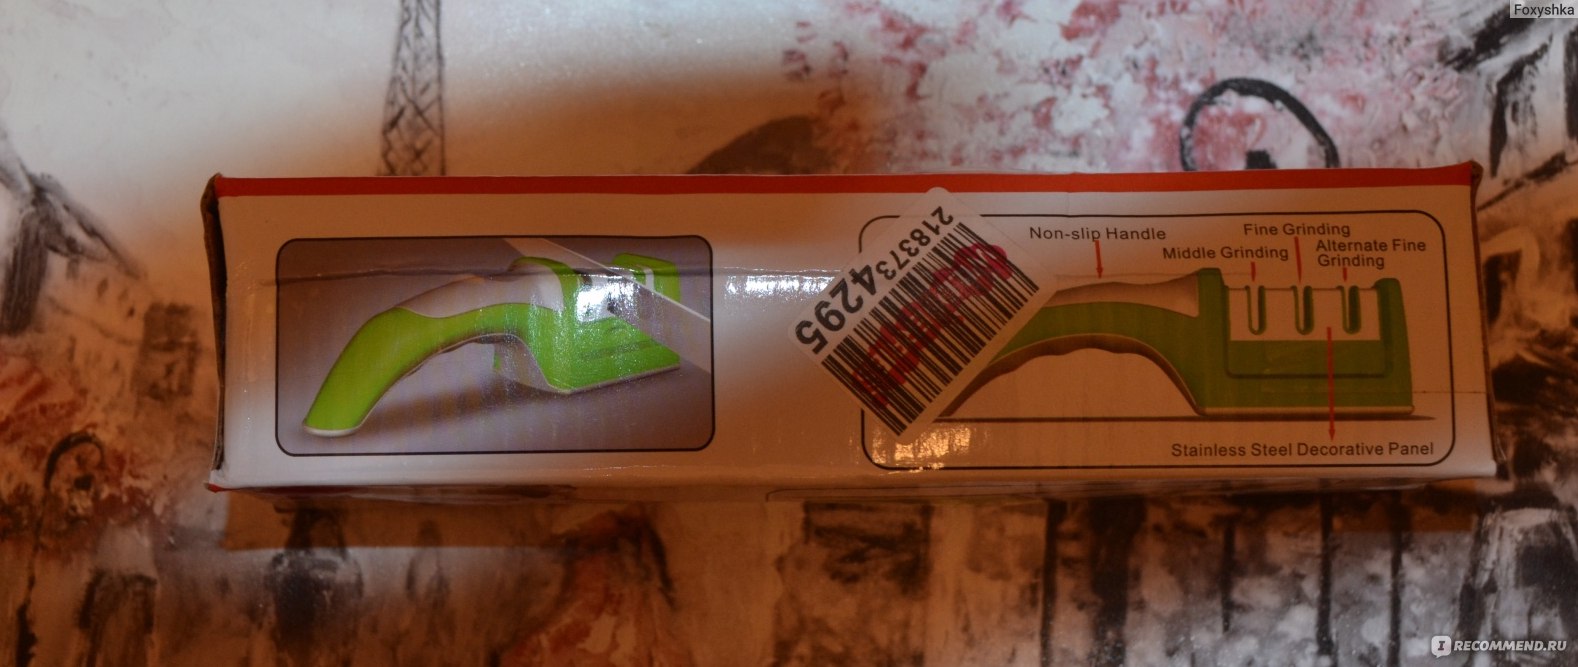
На коробке много информации о точилке, но она вся на английском языке.
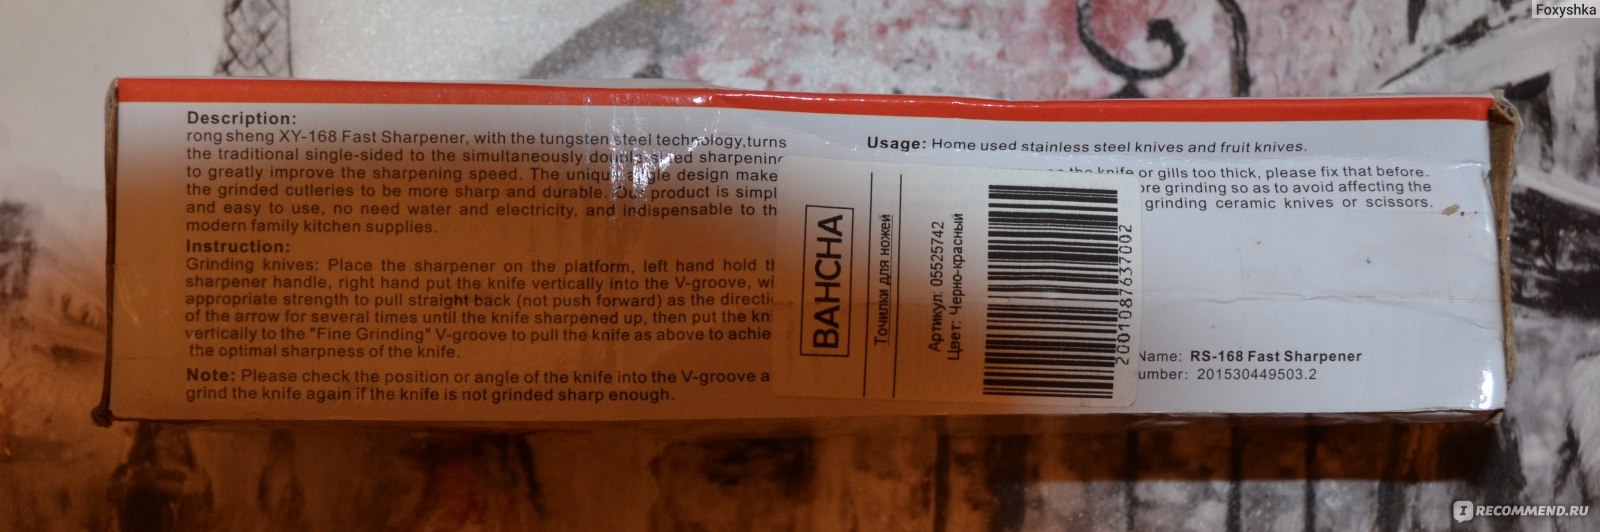
Поэтому выношу сюда в цитате информацию о точилке на русском языке:
Ручная тичилка для ножей 3 в 1 — Ваш новый помощник на кухне! Когда надо срочно поточить нож, а бежать в мастерскую нет времени, именно данная ножеточка и выручит Вас. Эта модель заточит любые ножи, даже самые тупые и поврежденные. Рукоятка выполнена из приятного на ощупь пластика, а основа является устойчивой и не скользящей и безопасной для ваших высококачественными ножами. Зона заточки отстегивается, точилку удобно мыть, даже в посудомоечной машине. Заточка ножей этой точилкой происходит в три этапа грубая и полирующая: 1. Абразивное покрытие выравнивает лезвие 2. Формирует идеальный V образный скос 3. Керамический элемент для полировки лезвия
Точилка внутри выглядит очень даже добротно. Даже и не скажешь, что она так дешево стоит.
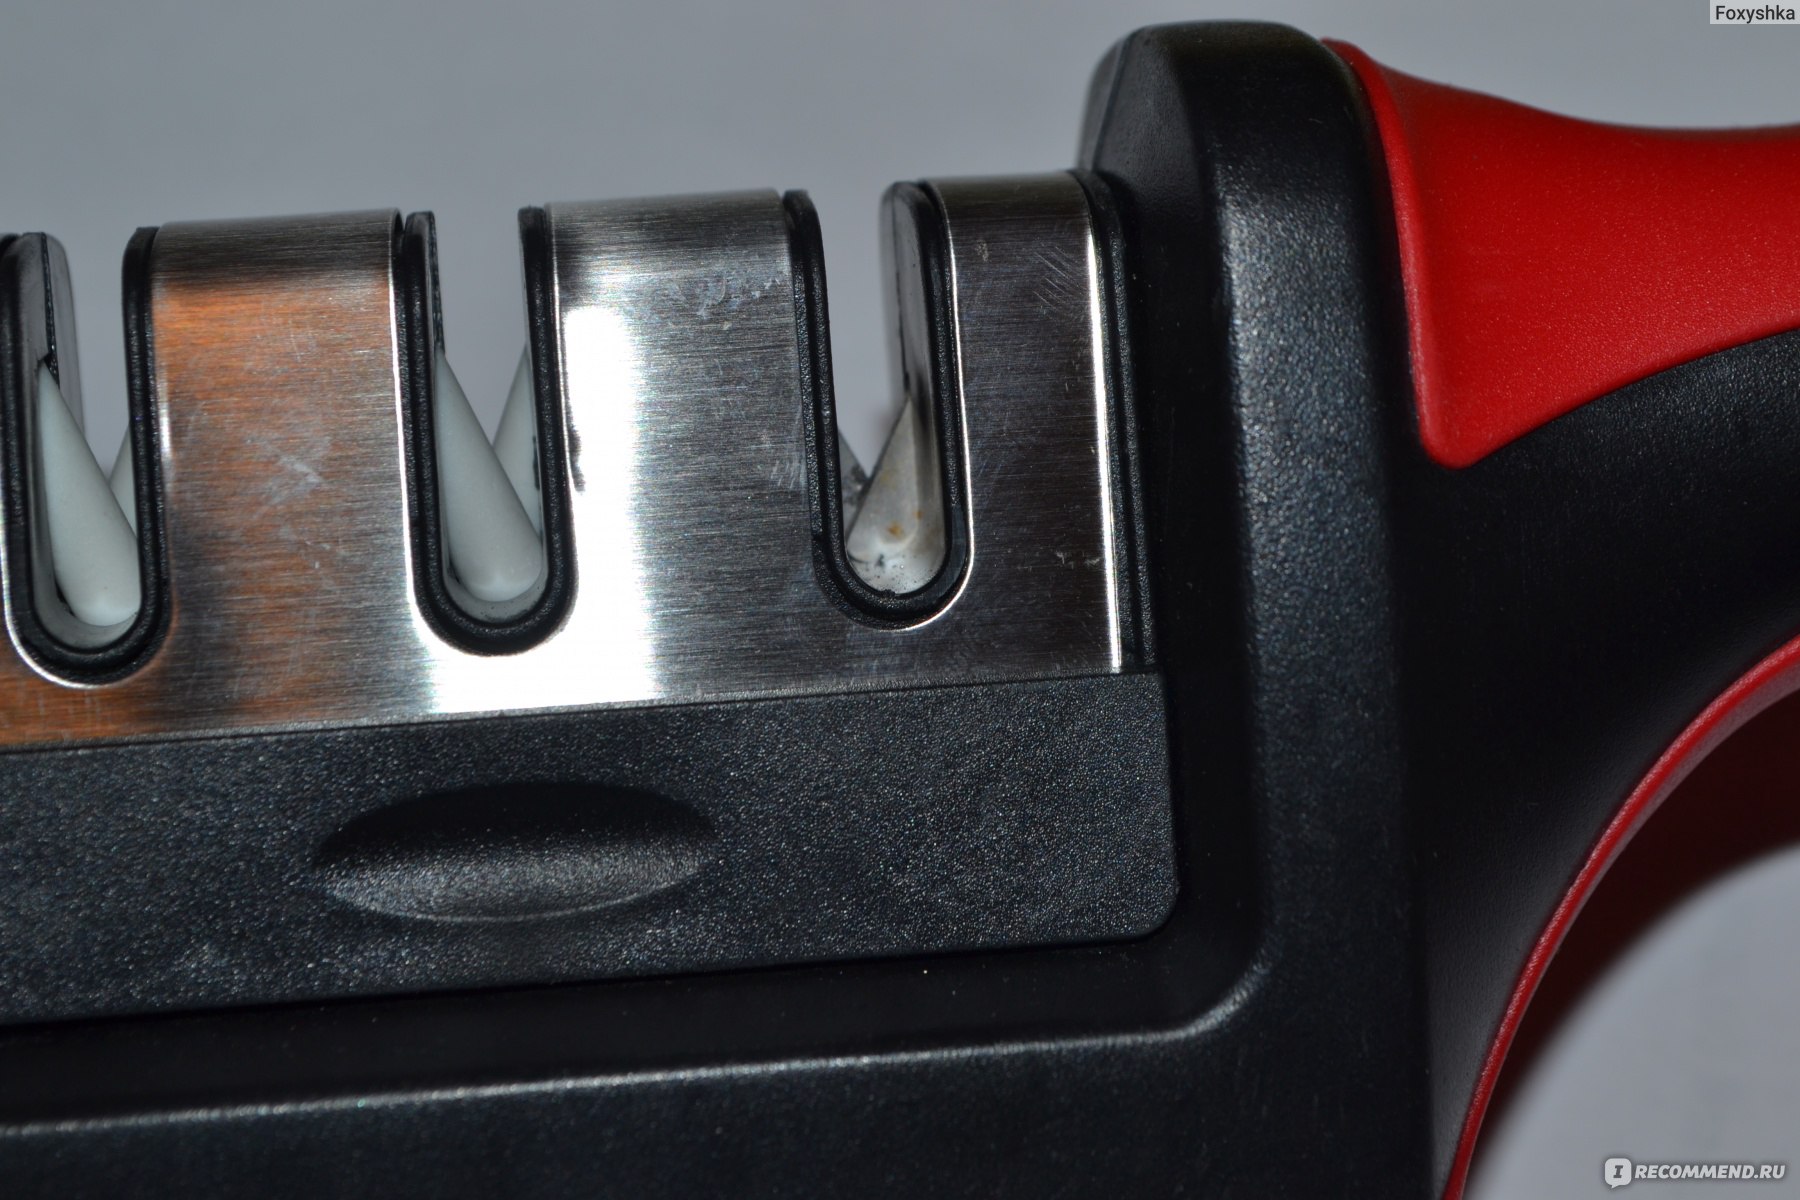
Точить ножи предлагается в три этапа. Собственно, муж так и сделал. И результат его более, чем устроил. Хотя сначала были большие сомнения, что точилка имеет три разные лезвия, предназначенные для различных видов заточки.
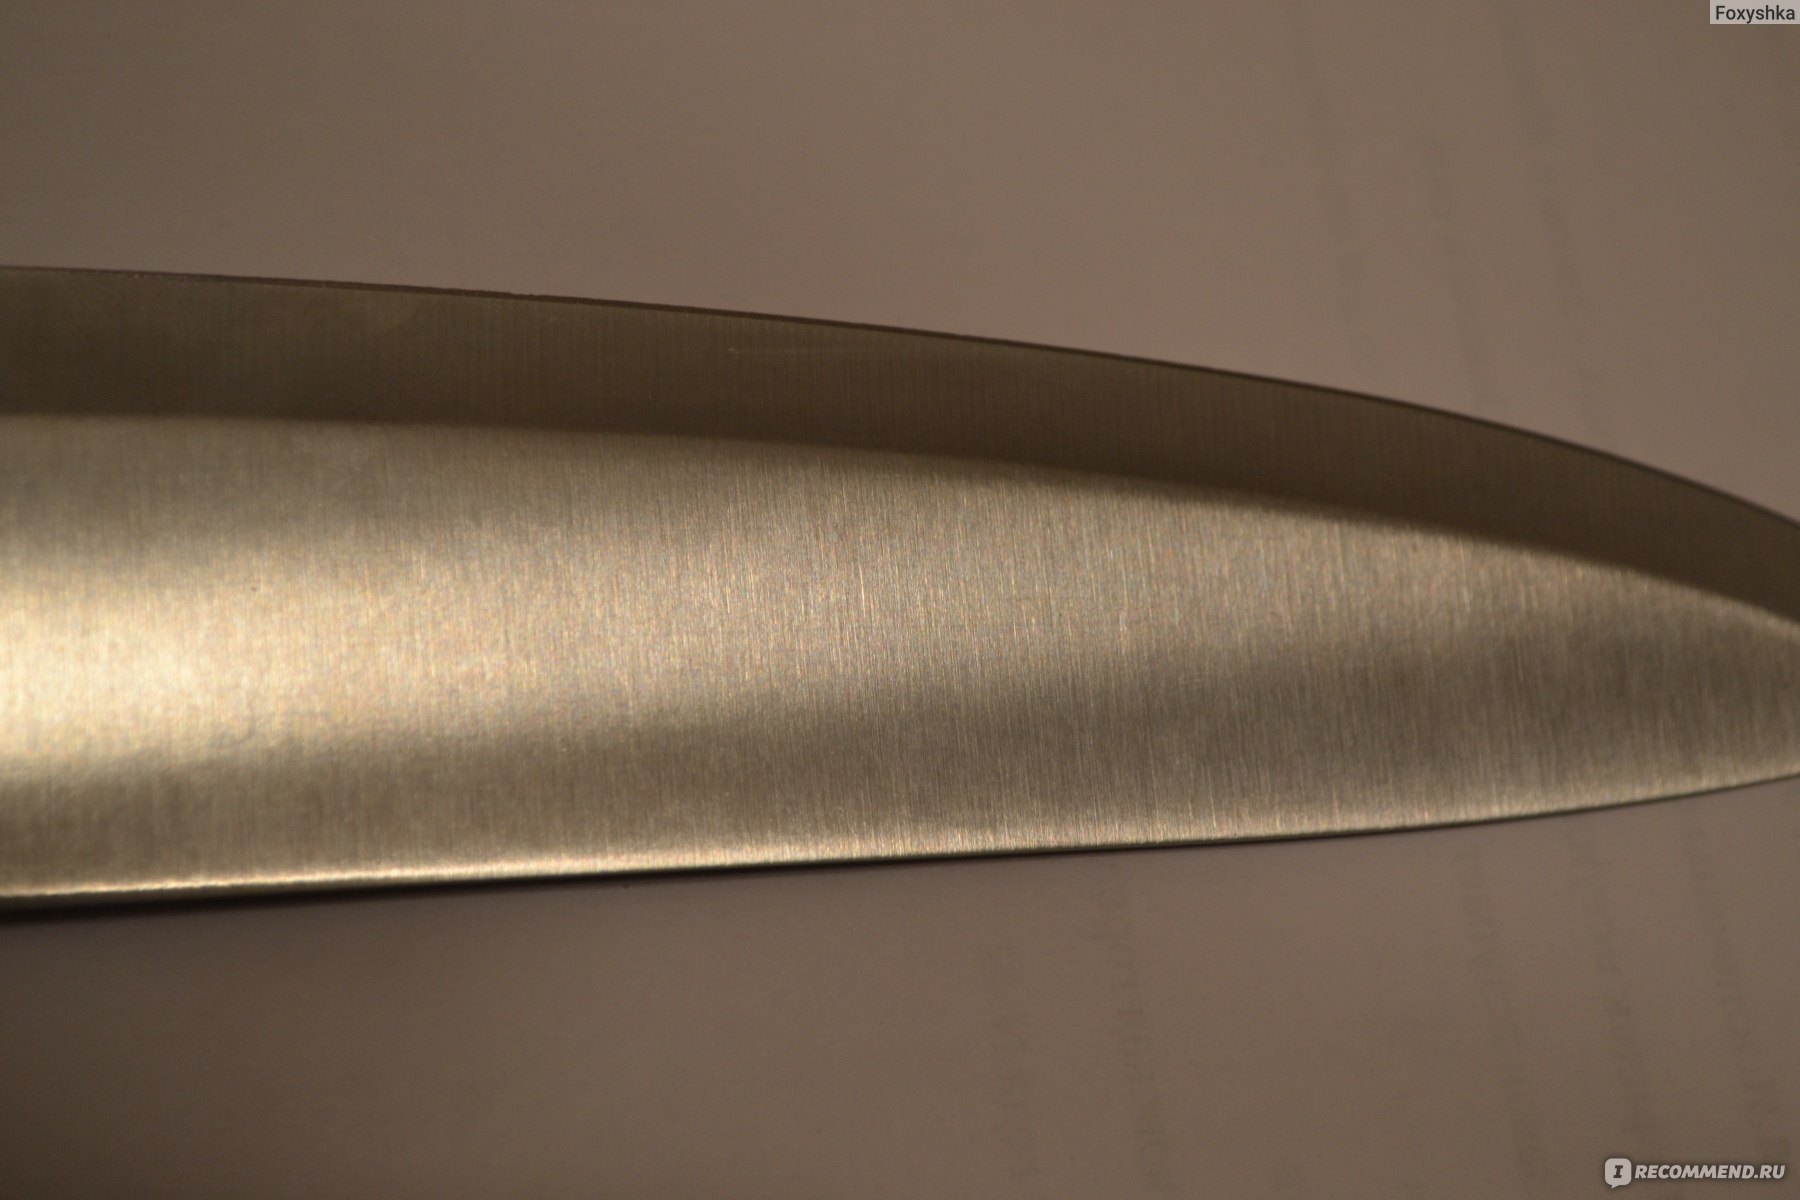
Для проведения экспериментальной заточки муж специально выбрал нож, имеющий зазубрину.
Точилка удобная. Ее легко держать в упор на столе. С заточкой ножей справится с помощью этой точилки не только мужчина, но и хрупкая женщина. Точилка, можно сказать, все делает сама. вам остается только проводить по лезвиям ножом.
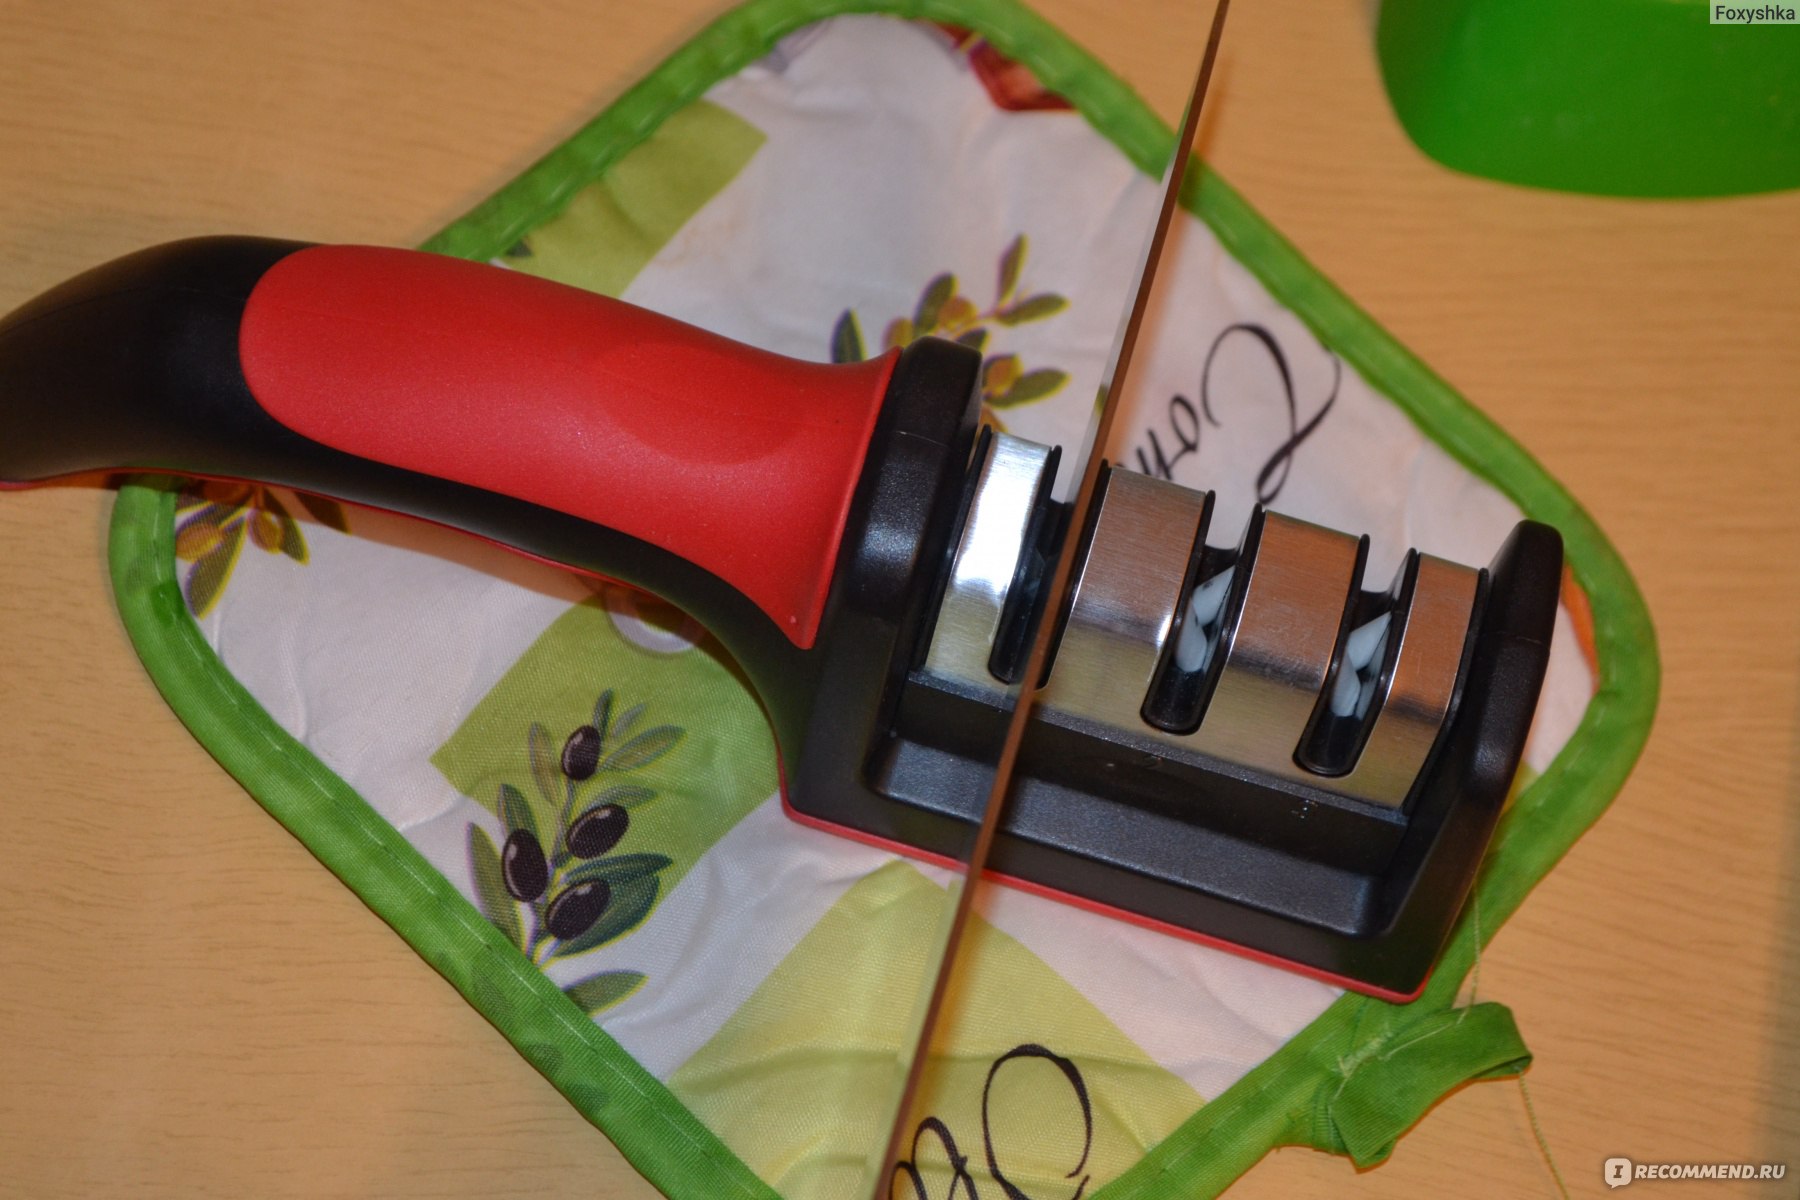
В итоге получился ровный нож, без зазубрин. Лезвия действительно выполняют разную функцию. Это только на первый взгляд они одинаковые.
В итоге имеем вот такой результат:

Нож стал на столько острый, что без труда разрезает тонкий лист бумаги на весу…

Что уж говорить, что все остальное нож тоже режет без труда.
В этот вечер в нашем доме все ножи стали резать очень хорошо.
А точилку эту я могу смело рекомендовать. Отличное качество по очень скромной цене.
Anyone interested in three-stage knife sharpening is likely to find a lot of sources on the Internet that offer the simplest solution — a manual or mechanical three-slot pull through sharpener. In the best situation, each of the slots is supposed to perform three different functions: the first slot for deburring, the second slot for sharpening, and the third slot for polishing.
If one continues to look further, however, one will see that it is not as simple as it seems and that there are some other ways and devices which allow you to use this technique for sharpening knives.
The first coarse sharpening or roughing step involves both profiling the cutting edge of the new blade and removing any chips or rolled-over parts. The second stage is aimed at shaping the proper geometry of the cutting edge, and the third stage is aimed at polishing or finishing. All three steps are designed to form the secondary bevel planes that form the cutting edge and must ensure that it is kept sharp.
In a technical sense, the design of the device, which should provide a three-stage sharpening, involves the presence of three different abrasives. That is, the device must contain three abrasives of different grit levels, which, working together, should be able to grind the surface of the secondary bevels after the previous abrasive at the proper level. The better the surface is cleaned, the more stable and sharper the cutting edge can be.
1. The differences in three-step sharpening methods
Sharpening your knife is necessary in two basic cases. A less common case in the domestic environment is a knife blade that has not been initially sharpened and has no secondary bevels. This rather specific issue is mostly known to professional sharpeners and experienced sharpening enthusiasts.
The second and most common case is a knife, the blade of which has the original factory secondary bevels or has already been sharpened in one way or another, and the cutting properties of which decreased significantly to the point where the knife has become blunt and does not perform its intended tasks.
To sharpen knives of all sizes and types in the household or in a kitchen one can resort to use of one of the three main ways of sharpening knives, and they are: the use of electric sharpening devices, the use of mechanical devices of various types, and manual sharpening.
The main differences in the approaches lie in the time required to process the blade, as well as in the level of training of the user.
1.1. Manual sharpeners
Manual sharpening is one of the most difficult methods in terms of controlling the sharpening angle, but it is also the most accessible and cheapest. However, this method is not relevant to the topic we are addressing.
1.2. Mechanical sharpeners
Many mechanical devices are suitable for such an approach, but the most popular are manual pull-through sharpeners.
Apex type sharpeners are mechanical sharpeners that can significantly speed up this type of process and significantly improve the quality of the sharpening result.
1.3. Electric sharpeners
We can distinguish the sharpeners equipped with three slots among the entire mass of electric sharpening devices, which, according to the manufacturers’ claims, carry out three-step sharpening of knives.
2. Instructions for three-step sharpening
2.1. Instructions for how to sharpen a knife with the pull-through manual knife sharpener
To use the device, place it on the table and hold it with your right or left hand, depending on whether you are right or left-handed.
Stage #1. The first slot is for honing blunt blades or blades with significant damage such as rolled-over parts or chips. Depending on the specific design, position your knife blade heel in the slot with maximum contact of the cutting edge with the abrasive discs. Try to keep the knife blade level vertical, preferably at all times. For sharpening, you should use translational motions from the heel of the blade to the tip for the whole length of the cutting edge. You should also apply an equal amount of force during the process. Proof of sufficient contact with the abrasive discs will be a characteristic sound. About 10 runs through this slot will be enough for a blade that is not very dull. For blunter or more massive blades, it may take more runs.
For easy repetition of the motion with the same force, in the most upright position and to capture the entire length of the cutting edge, try not to move the blade in both directions — back and forth, but after each pass start the movement from the heel of the blade to the tip. This way you will ensure that you are sharpening the whole blade.
To know that the sharpening stage was sufficient and successful, you should check whether the pre-grinding damage was removed. You can check if the cutting quality is acceptable with a simple test — cut a piece of paper. Hold the sheet of paper upright and try to cut it in one pass. A sharp blade should produce a clean cut without tearing the paper.
After that, you can move on to the next slot.
Stage #2. This slot is responsible for the main sharpening step. In terms of the mechanics of the sharpening process, there is no difference in the actions for this slot. Just follow the above-mentioned instructions.
The only difference may be the number of times you need to run the blade through this slot. As a rule, the abrasive is finer than in the previous slot, and with the same amount of force, you will need the same number of passes or less. Just test the cut on the paper and you will immediately see if the sharpness has improved compared to the previous slot.
Stage #3. The third slot is equipped with a fine abrasive and designed to provide a finer finishing of the secondary bevels, eliminate any flaws left by the previous slot and increase the retention of sharpness of the cutting edge after sharpening.
General Information. Despite the fact that many manufacturers advertise their sharpeners as three-step designs, the sharpening process itself remains two-step, because one of the slots can be for sharpening with 150-grit abrasive, and the other with 200-grit abrasive. That is, there may not be any grinding abrasive in such a design. The third slot in any case is for polishing. Before you purchase, you should ask what each of the slots is in technical terms, as the presence of these slots does not mean that it is a three-step sharpener in the full sense of the word.
An important technical feature of the pull through sharpener is the principle of the V-shaped mounting of the abrasive. All other sharpeners of this kind often do not sharpen, but destroy knife blades by carving grooves in them, which lead to pitting and chipping.
2.2. Instructions for how to sharpen a knife with the electric knife sharpener
Stage #1. As with the mechanical manual pull through sharpener, the first step of the electric sharpener provides an initial roughing of the blade to remove damage such as chips or rolled-over areas.
The main distinguishing feature of electric sharpeners is that for each side of the blade at each stage there are 2 slots in the form of individual slots for the left and right side of the blade. The blade is placed alternately in the left and right slots and is guided from the heel of the blade to the tip, resting on a guide or a magnet depending on the design. Thus, the blade will run in the slot at a constant angle.
Depending on the level of sharpness or the nature of the damage and the hardness of the steel, you may need to make five to ten runs in pairs. Follow the shape of the blade for proper sharpening or for fixing the entire plane of the secondary bevels, and at the end, to sharpen the tip, you can slightly raise the handle of the knife.
The quality of the coarse sharpening during the first stage is checked by the way the burr forms. To check the burr, simply run a finger across the cutting edge (not along!) and you will feel the burr. If the burr is present along the entire length of the cutting edge, it is a sign that this sharpening stage is complete.
Stage #2. During the sharpening process, the second step repeats the same operations as the first step. Take turns running the knife blade through the left and right slots from the heel to the tip. Depending on the quality of the steel, you may need about 10 runs in pairs to get rid of the burr.
Before proceeding to the polishing stage, the sharpness of the blade can be checked with an ordinary paper test. If the cut is not clean enough, a thin kitchen ceramic whetstone can be used to remove any remaining burr before proceeding to the third stage.
Stage #3. This step includes polishing or finishing of the blade with the fine stone. The actions are the same as in the previous stages. Make several pulls through the left and right slot and then check the sharpness. For a cleaner and smoother cutting you can make a few more pulls in pairs.
General Information. Quality electric sharpeners have the ability to sharpen not only in three steps, but also in a step mode, at different angles. However, such devices are not very common, and they are quite expensive for simple kitchen or household use.

2.3. Instructions for how to sharpen a knife with the Apex type mechanical household knife sharpener
There are mechanical sharpening systems with replaceable abrasives on the market that also provide three-stage sharpening.
The approach here is slightly different. Whereas in the case of a pull-through and electric sharpener, the abrasives are fixed elements of the device, in sharpening systems with replaceable abrasives such as Apex, the consumables have to be individually picked.
Stage #1. During the first stage, depending on the design features of each individual sharpening system, it is necessary to use its manual to clamp the knife blade in the sharpening mechanism, as well as to calibrate and adjust the roughing or coarse sharpening angle. One side of the secondary bevel is profiled by moving the abrasive in both directions — back and forth along the edge of the blade. After the burr is formed, you should switch to sharpening the back side of the blade, until the burr is formed on the other side. Only then you can move on to sharpening with the next abrasive.
To remove the burr, the same abrasive can be used to make a few light pushing strokes along the entire secondary bevel where the burr is. The purity of the cutting edge can be checked with a sheet of paper without removing the knife blade from the clamps. It is enough to hold the sheet of paper with both hands and run it across the entire blade. This will show if you have sharpened the entire length of the cutting edge or not.
Stage #2. During the sharpening process, the second stage repeats the same operations as the first stage, with the only difference that you will need to replace the abrasive with a fine stone. The way to check the quality of the edge and the conditions of the transition to the next abrasive are the same.
Stage #3. The fine abrasive in the finishing stage is used in the same way as in stages 2 and 3. At the end, you should make a few pushing strokes alternately on each side of the blade and that is it.
General Information. The use of some models of mechanical sharpening systems in combination with various interchangeable abrasives may in some cases be somewhat more expensive than using the most advanced pull through sharpener, but it will give you a much higher quality. At the same time, they can be much cheaper than electric sharpeners. There are a number of complete solutions with interchangeable abrasives designed to solve the three-stage sharpening process for different purposes at the highest level.
Conclusions
You should understand that the very concept of sharpening knives in three stages can be achieved with three abrasives, but this is not always effective for some steels and not for all types of knives. It is correct to understand this process as roughing, sharpening and finishing — these are the processes that are intended to form a stable cutting edge and increase the sharpness retention of the blade. That said, there can be more than three abrasives close to each other, for example with 5 abrasives you will get the higher quality of the secondary bevels.
Electric sharpeners provide a high speed of processing and do not require much knowledge or experience from the user. On the contrary, to use a high-quality mechanical household sharpener the user will need to have a high level of specialized knowledge and experience. The maintenance takes considerably longer when using a household knife sharpener.
The difference between sharpening the same knife on a professional electric and a mechanical sharpener can be quite significant, and the result depends on the experience of the person doing the sharpening. Considering that the range of abrasives on mechanical sharpeners is much wider, it makes sense to sharpen expensive knives with this type of sharpeners, because three-stage sharpening is not suitable for expensive knives.
The cost of materials in both cases can be in the average price segment, and often far exceed it.
![]()
Download Article
![]()
Download Article
There is nothing more frustrating than trying to chop vegetables for your dinner, only to find that your knife is too dull and is smashing rather than slicing. You can easily remedy this problem by using a manual or electric knife sharpener, and it shouldn’t take you more than several minutes to restore your knife’s sharp edge. If you don’t have a manual or electric sharpener, you could explore using a whetstone, a honing rod, or even sending your knives off to a professional.
-

You may already know that your knife is dull, but if you aren’t sure, fold a piece of newspaper in half (or just use a single sheet of computer paper), hold it up in the air, and bring your knife down to cut through it. If your knife doesn’t slice through the paper, it’s time to sharpen it.[1]
- The knife should continuously cut through the paper without stopping if it is sharp and in good shape.
-
Most manual sharpeners have at least 2 settings: 1 labeled “coarse,” and 1 labeled “fine.” The coarse setting will actually remove steel from the blade to resharpen the edge, while the fine setting is used for everyday knife maintenance.
- These settings are the same on electrical sharpeners, though an electric sharpener may have an additional slot between “coarse” and “fine.”
Advertisement
-
Insert the blade into the manual sharpener at the base, which is where the blade meets the handle. Use gentle force, pushing the blade down as you pull it through the slot, toward your body. Repeat this action 3 to 6 times, 3 for a mildly-dull blade, or more for a severely-dull blade.
- This action resets the blade, restoring it to its original sharpness.
- Use enough force when you pull the blade through that you hear an audible grinding sound. If you’re using an electric sharpener, you won’t need to press down—the whirring mechanisms will take care of everything for you.
-
Each time you bring the knife through the sharpener, you won’t just pull it straight through. Instead, follow the curve of the knife so that the handle comes up and is higher at the end than it was at the beginning. This way, the entirety of the blade will get sharpened.[2]
- If you’re pressing down, you’ll be able to tell by the sound and feel that you’re moving the blade the right way. If you no longer hear the grinding noise or feel the resistance of the blade, you probably aren’t following the contour closely enough.
-
After you’ve finished pulling the blade through the “coarse” setting, you need to give it a few finishing touches to refine its edge. You don’t need to use as much force with the “fine” setting, and the grinding sound won’t be nearly as loud as it was in the “coarse” setting.
- If your sharpener has more than one setting, pass the knife through each in-between setting 1 to 2 times, making sure that you end at the “fine” setting. These additional settings are just gradations of grinding and help fine-tune your knife even more.
-
and dry it with a lint-free towel. Use warm, soapy water to rinse away any lingering steel remnants before using your knife again.[3]
Feel free to use a sponge or dishtowel to give the knife a quick wipe down. Dry the knife off completely to prevent it from rusting, and return it to its knife block or similar storage space.[4]
- Avoid running your knives through the dishwasher. They can get banged up or damaged by other items.
-
The general rule of thumb is to pull your knife through the fine setting once for every 2 hours of use. Depending on how often you cook, you may not need to do this every day, but keep it in mind as a helpful way to keep your knife sharp.
- If you do a daily or semi-weekly pass through the manual sharpener, chances are you won’t need to do much more to keep your knives sharp.


Advertisement
-
Electric sharpeners themselves are more expensive than manual sharpeners, running about $40 to $100, depending on the brand you get. They’re more intuitive, though, and are really easy to use as they will just pull the blade through for you. It takes less time and effort to sharpen your knives than the other manual methods require.[5]
- Make sure to do your research before ordering your electric sharpener. Some brands are meant for specific kinds of knives, and some include extra features, like a lifetime warranty.
-
This is a really nice choice for your everyday home cook who doesn’t spend more than an hour or 2 in the kitchen every day. They’re smaller than the electric versions, making them easier to store, and they’re fantastic to use for daily touchups or for grinding a dull blade back to sharpness. They cost anywhere from $10 to $60, depending on the brand you choose.[6]
- There’s something to be said for the feeling of manually sharpening your own knife, too. Lots of cooks enjoy the physicality of taking care of their knives and you do get more control over your movements with a manual sharpener than you would with an electric sharpener.
-
Opt for a whetstone for a gentle, temperature-controlled sharpener. Whetstones are generally just a small block of material that you’ll run your knife down to sharpen its blade. Always soak it in water for at least 5 to 10 minutes before you use it. Hold the knife at a 22-degree angle and slide it forward down the whetstone, with the blade touching the stone.[7]
Repeat the movement 5 to 10 times to sharpen your knife.[8]
- The cold-water soak keeps your knife from overheating as it’s being sharpened. If a knife gets too hot, it’s chemistry can change and the blade can become brittle and warped.
- Do double-check the instructions before wetting your whetstone. While the majority of them do need to be soaked beforehand, there are a few brands and types of stones that aren’t meant to get wet.
-
Use a honing rod to quickly realign the edges of the blade. A honing rod is also often called a sharpening steel, and they often come along with a block-knife set. Honing doesn’t actually remove any steel from the knife and doesn’t technically sharpen it, but it does push out-of-line edges back into place, which in turn makes your cuts sharper and more precise.[9]
It doesn’t require much pressure, and it’s something you can use on a daily basis to keep your blades sharp.[10]
- Don’t use a honing rod in lieu of sharpening your knives with an alternative method from time to time. It can bend the edge over time, making it hazardous to use.
-
It costs about $1.50 to $2.25 per inch to have your knives sharpened by a professional.[11]
Some companies allow you to ship your knives to them if you don’t live nearby (you’ll need to pay the shipping costs, though).[12]
- Check out your warranty! Some knife brands offer free sharpening for life, so that might be something you could take advantage of, too.


Advertisement
Add New Question
-
Question
Do you move the knife back and forth or just in one direction?

Pull the knife toward you. Do this several times until the blade is very sharp. The sharpener is designed to sharpen in one direction only. Pushing the blade instead of pulling it could possibly damage it.
Ask a Question
200 characters left
Include your email address to get a message when this question is answered.
Submit
Advertisement
Video
-
While knife sharpeners typically work best for kitchen knives, many can also be used for other blades, including pocket knives and field knives used by hunters and fishermen. For these blades, however, manual knife sharpeners are typically easier to carry and more effective than electric versions.
Thanks for submitting a tip for review!
Advertisement
References
About This Article
Article SummaryX
Before you sharpen a knife with a manual sharpener, try holding up a folded sheet of paper and slicing down through it with the knife. If the knife can’t cut through the paper without stopping, insert it into the “coarse” slot on a manual sharpener. Pull the blade of the knife through the slot 3 to 6 times, following the contour of the blade and moving from base to tip. Next, pull the knife through the “fine” slot once or twice to refine the edge. When you’re done, rinse the knife and dry it with a clean towel before putting it away. For more tips, including how to sharpen knives with an electric sharpener or a whetstone, keep reading!
Did this summary help you?
Thanks to all authors for creating a page that has been read 276,649 times.
Reader Success Stories
-

«I just bought a manual knife sharpener from Amazon. It came in a typical box with color graphics and advertising…» more
Did this article help you?
1. Получите точилку для ножей Sharpener. Убедитесь, что она находится в хорошем состоянии и не имеет повреждений.
2. Подготовьте ножи, которые нужно заточить. Убедитесь, что они чистые и лишены каких-либо остатков пищи или загрязнений.
3. Расположите точилку на ровной и стабильной поверхности, такой как стол или рабочая поверхность.
4. Зафиксируйте точилку, чтобы она не двигалась во время заточки. Некоторые точилки оснащены присосками или специальными хомутами для крепления к поверхности. Если вашей точилке необходима фиксация, следуйте инструкциям, предоставленным с точилкой.
5. Определите угол заточки, подходящий для ваших ножей. Обычно точилки имеют предустановленные углы заточки, которые подходят для большинства ножей, но некоторые модели имеют возможность настройки угла. Если вы не уверены в правильном угле заточки, посмотрите на рекомендации производителя ножей или воспользуйтесь общепринятым углом заточки в 20 градусов для обычных ножей.
6. Положите нож в точилку так, чтобы клинок был направлен вниз. Убедитесь, что нож плотно прилегает к роликам или штифтам на точилке.
7. Проведите нож по точилке, применяя умеренное давление. Двигайтесь от начала до конца клинка, сохраняя угол заточки. Повторите этот процесс несколько раз, пока не достигнете желаемой остроты.
8. Повторите те же шаги для каждого ножа, который требуется заточить.
9. После завершения заточки промойте ножи водой, чтобы удалить остатки стружки и проверьте их на остроту. Будьте осторожны и обращайте внимание на остроту ножей, чтобы предотвратить возможные травмы.
Советы:
— При использовании точилки Sharpener обязательно прочтите и следуйте инструкциям, предоставленным производителем.
— Начинайте заточку с более грубым шлифовальным элементом и постепенно переходите к более мелким, чтобы достичь лучшего результата.
— Если ваш нож имеет зазубрины или серьезные повреждения, может потребоваться более профессиональная заточка или ремонт, обратитесь к специалисту.
— Пользуйтесь точилкой с осторожностью и никогда не тяните нож вверх по точилке, чтобы избежать травмы.
ВИДЕО-ОБЗОР ЗДЕСЬ
Ручная ножеточка 3 в 1 — отличный помощник на кухне, когда надо срочно поточить нож, а бежать в мастерскую нет времени. Заточка ножей этой точилкой происходит в 2 этапа грубая и полирующая:
1. Абразивное покрытие выравнивает лезвие
2. Формирует идеальный V образный скос.
Эта модель заточит любые ножи, даже самые тупые и поврежденные. Небольшие размеры механической ножеточки обеспечат удобное хранение, ее всегда можно иметь под рукой.
Чтобы не мучатся с точильными камнями и попытками заточить нож «красиво», чтобы не ждать когда муж освободиться и заточит, или не тратить деньги на мастерскую, в которой еще не факт, что сделают хорошо — Вам просто приобретите ручную ножеточку и она всегда будет под рукой.
Для заточки ножей некоторые люди обращаются к профессионалам. Но это не всегда удобно, т.к необходимо заранее продумывать время, ждать, пока подточка понадобится нескольким инструментам. Чтобы облегчить жизнь, лучше иметь точилку дома.
На современном рынке представлено множество вариантов механических или электрических моделей. Такое приспособление не займет много места, но поможет всегда поддерживать ножи в рабочем состоянии.
Выбор эксперта
FISKARS Xsharp

Точилка от известного бренда, которая выполнена в присущих ему цветах. Данная модель предназначена не только для ножей, но и для топоров. «Режим» можно изменить нажатиями на боковые стороны. Для предотвращения скольжения нижняя сторона инструмента имеет специальное покрытие.
Предохранительная планка защищает пальцы при заточке. Точильный элемент составляет жесткий керамический диск с канавками, который позволяет быстро реанимировать затупленное лезвие. Также особенности конструкции позволяют без труда создать оптимальный угол заточки.
Основные характеристики
| Материал абразива | керамика |
| Зернистость | мелкая, сверхмелкая, средняя, крупная |
| Длина | 17 см |
| Вес | 90 г |
Плюсы и минусы
Наличие двух режимов заточки, которые легко переключаются, небольшие размеры и противоскользящее покрытие
Пользователи отмечают, что процесс заточки довольно длительный и к точилке нужно приспособиться
Топ-10 лучших точилок для кухонных ножей в 2023 году по мнению КП
1. BAUM ZINDECH

Точилка для ножей и ножниц поможет легко и быстро вернуть остроту вашим инструментам. Корпус инструмента выполнен из авиационной нержавеющей стали. Точилка имеет три разъема: первый (COARSE) с резцами из победита, который позволяет устранить повреждения лезвий. Второй (MEDIUM) с алмазным абразивом Diamant Fräser обеспечит среднюю заточку, если не нужны кардинальные правки. Разъем FINE предназначен для полировки с помощью керамических стержней. Также имеется отдельный разъем c алмазным абразивом Diamant Fräser для ножниц. Нескользящее основание обеспечивает максимальную безопасность при работе.
Основные характеристики
| Материал абразива | натуральный камень |
| Зернистость | мелкая, сверхмелкая, средняя, крупная |
| Размер (ДхШхВ) | 22,5хх5х22,5 см |
| Вес | 200 г |
| Возможность использования | для серрейторных лезвий, для ножниц |
Плюсы и минусы
Качественные материалы и исполнение, точилка имеет несколько разъемов для разных операций

2. HOTTER HX-1099

Рассмотрим электрическую модель с заменяемым точильным блоком. Первый слот предназначен для грубой заточки, чтобы устранять повреждения лезвий и их изъяны. Второй слот — полировочный для инструментов, которым нужна незначительная заточка или доводка.
Благодаря тому, что точильный блок имеет алмазное покрытие, долговечность и прочность обеспечена. Также такой материал прост в эксплуатации, достаточно промыть инструмент водой для очистки. Отлично подходит для заточки даже керамических ножей.
Основные характеристики
| Материал абразива | керамика |
| Зернистость | мелкая, сверхмелкая, средняя, крупная |
| Размер (ДхВ) | 23,5х9 см |
| Вес | 900 г |
| Возможность использования | полировка и шлифовка, заточка |
Плюсы и минусы
Электрический тип позволяет легко и быстро заточить инструменты
Пользователи отмечают, что лезвие точится не полностью и рядом с ручкой остается необработанный участок
3. Knife sharpener

Достаточно бюджетный вариант трехступенчатой механической точилки. Первый слот предназначен для грубой заточки, второй слот — для заточки средней степени и последний — для доводки лезвий. В каждом разъеме использованы разные материалы: вольфрамовое покрытие, керамическое и алмазное.
Точильный блок съемный, поэтому инструмент легко мыть, а также при необходимости можно заменить старый блок. Точилка имеет удобную нескользящую ручку и благодаря своей форме и компактным размерам легко поместится в ящик для посуды.
Основные характеристики
| Размер (ДхШхВ) | 20х20х5 см |
| Вес | 200 г |
| Возможность использования | три варианта заточки под разные типы стали |
Плюсы и минусы
Удобная форма, компактный размер и три варианта заточки
Некоторые пользователи отмечают, что пластиковый корпус точилки быстро царапается
4. BergHOFF 1100033

Данная модель имеет три точильных элемента. Первый слот с алмазной поверхностью готовит лезвие к заточке. Второй разъем с элементом из металлического абразива затачивает лезвие, придавая ему правильный угол. Третий разъем полирует лезвие и выравнивает все возможные неровности благодаря вставке из керамики.
Точилка выполнена из качественных материалов, имеет нескользящее покрытие и удобную ручку, обеспечивая безопасность при ее использовании. Такое приспособление подходит как для поддержания ножей в рабочем состоянии, так и для правки поврежденных лезвий.
Основные характеристики
| Материал абразива | керамика |
| Размер (ДхШхВ) | 20,5х5х7,5 см |
Плюсы и минусы
Эргономичная форма и три слота для заточки дают возможность легко поддерживать остроту ножей в домашних условиях
Используя первый слот, нужно приложить физическое усилие, поэтому заточка нескольких ножей подряд может доставить неудобства
5. VICTORINOX Sharpy 7.8715

Инструмент имеет удобную форму и оптимальный размер как для удобства заточки, так и для хранения. Рукоятка изделия изготовлена из прочного полипропилена, который устойчив к внешним воздействиям. Точильный блок съемный и при необходимости легко заменяется.
Данная модель отлично подходит для поддержания остроты лезвий, но при сильном повреждении лезвия требуется предварительная обработка. Особенностью является то, что при заточке нож располагается на столе острием вверх, а манипуляции следует производить точилкой.
Основные характеристики
| Материал абразива | карбид |
| Зернистость | мелкая, сверхмелкая, средняя, крупная |
| Размер (ДхШхВ) | 13,5х8,7х2,4 см |
| Вес | 72 г |
Плюсы и минусы
Точилка имеет оптимальные размеры, а благодаря качеству материалов и исполнения прослужит долгие годы
Для заточки необходимо прилагать определенные усилия, поэтому обработка нескольких ножей подряд может доставить неудобства

6. Lansky Blade Medic PS-MED01

Компактная функциональная механическая точилка. Она имеет 4 рабочих поверхности для ножей различных типов. Два V-образных слота позволяют легко заточить ножи под углами. Один подходит для грубой обработки и выполнен из керамики, а другой — из карбида вольфрама — предназначен для шлифовки.
Дополнительно на боковой поверхности есть керамический брусок для заточки серрейторных ножей, а также складной алмазный стержень для всех типов лезвий. Небольшой размер позволяет без проблем хранить инструмент и даже брать его с собой.
Основные характеристики
| Материал абразива | карбид, керамика |
| Зернистость | мелкая, сверхмелкая, средняя, крупная |
Плюсы и минусы
Несмотря на компактный размер, инструмент включает четыре точильных элемента
Некоторым пользователями из-за небольшого размера точилку неудобно держать в руке при использовании, поэтому появляется риск получения травмы
7. Samura KSS-3000

Дизайн конструкции обусловлен особенностью фиксации данной модели. При использовании точилка надежно крепится к поверхности с помощью рычага вакуумной присоски для удобства и максимальной безопасности. Инструмент имеет три точильных элемента. Первый и второй слоты предназначены для обработки ножей: грубая заточка и шлифовка.
С помощью третьего слота можно точить ножницы. Правильное положение элементов позволяет затачивать ножи под нужным углом без усилий. Благодаря стильному дизайну и компактным размерам такая точилка отлично впишется на любую кухню.
Основные характеристики
| Материал абразива | карбид |
| Зернистость | мелкая, сверхмелкая, средняя, крупная |
| Размер (ДхШхВ) | 13,5х8х4 см |
Плюсы и минусы
Наличие вакуумного крепления для удобства и безопасности
Пользователи отмечают,что пластиковый корпус быстро царапается
8. Xiaomi Huo Hou Mini Sharpener

Это компактная точилка с тремя слотами. Первый — для грубой заточки, второй для правки лезвия, а третий разъем — шлифовочный. Благодаря точильному элементу из твердых победитовых пластин, инструмент подходит для заточки всех видов ножей, а также ножниц. В целях безопасности производитель предусмотрел специальные присоски для креплению к столу.
Точилка имеет небольшие размеры и современный дизайн, благодаря чему отлично впишется в любой интерьер и не доставит проблем с хранением.
Основные характеристики
| Материал абразива | керамика, сталь |
| Зернистость | мелкая, сверхмелкая, средняя, крупная |
| Размер (ДхШхВ) | 7,3х7,3х6,1 см |
| Вес | 105 г |
Плюсы и минусы
Хорошо подходит для правки ножей при компактных размерах, наличие крепежа-присоски
Пользователи отмечают, что надежность крепежа не всегда хороша

9. BLACK HORN 00541

Стоит обратить внимание на эту бюджетную модель: это яркий инструмент с одним слотом для заточки. Главный элемент состоит из твердосплавных пластин из карбида кремния. Корпус выполнен в таком виде, что при заточке руки находятся в специальных кольцах, которые осуществляют защитную функцию.
Чтобы добиться хорошего результата понадобиться легкое нажатие. Данное приспособление для ручной заточки ножей подходит к большинству стандартных лезвий.
Основные характеристики
| Материал абразива | карбид |
| Зернистость | мелкая, сверхмелкая, средняя, крупная |
Плюсы и минусы
Точилку легко использовать, и она не занимает много места
Некоторые пользователи отмечают, что инструмент неудобно держать при заточке ножей
10. URM

Один из самых бюджетных вариантов, который есть почти в каждом доме. Это точилка-«рыбка». За счет формы инструмент удобно держать в руке, не боясь его выскальзывания. Может применяться как приспособление не только для заточки ножей, но и ножниц, кос, лопат и других инструментов.
Имеет два разъема: первый проходит для грубой заточки, а второй для шлифовки и доведения лезвия. Точильный элемент выполнен из прочного сплава, а корпус — из пластмассы.
Основные характеристики
| Материал абразива | ВК-8 |
| Размер (ДхШхВ) | 14,5х2х5 см |
Плюсы и минусы
Точилка проста в использовании, но при этом хорошо справляется с заточкой различных инструментов
Качество материалов, из которых изготовлена точилка, низкого качества
Как выбрать точилку для кухонных ножей
На рынке представлены точилки для ножей не только разные по стоимости, но и по форме, способу заточки, количеству слотов и т.п. Чтобы подобрать удобный инструмент, нужно учитывать следующие параметры:
- Точилка должна удобно лежать в руке, либо иметь специальное крепление к поверхности, это прежде всего сказывается на безопасности, а также влияет на результат заточки.
- Лучше выбирать товары зарекомендовавших себя производителей, так как контроль качества у них в целом выше, чем у нонеймов, и вы будете уверены в надежности и долговечности приобретаемого инструмента.
- Также вы можете выбрать точилку, которая подходит не только для ножей, но и других инструментов.
- У многих точилок есть несколько слотов для разных видов заточки ножей — определитесь заранее, насколько это актуально для вас.
Популярные вопросы и ответы
Чтобы не ошибиться с выбором такого приспособления и обратить внимание на нужные характеристики, КП обратилась к Максиму Соколову, эксперту онлайн-гипермаркета «ВсеИнструменты.ру».
Все ли ножи надо затачивать?
Не стоит точить в домашних условиях следующие виды ножей:
— керамические – проходят специальную заточку в заводских условиях, которую не удастся выполнить в быту;
— зазубренные – в отличие от прямых лезвий не могут быть заточены обычным бытовым способом из-за риска испортить рабочую часть;
— с магнитной прослойкой или напылением – одни из самых острых ножей, не нуждающихся в заточке, так как при попытке обработать такое лезвие вручную можно наоборот затупить его.
Можно ли сделать точилку для ножей своими руками?
Можно оклеить деревянный брусок наждачной бумагой и получить заточный брусок. Существует еще несколько народных способов заточки подручными средствами: о керамическую тарелку, камень или кирпич. Но стоит отметить, что эти вещи подходят только в безвыходной ситуации, когда под рукой нет точилки. Разовая заточка такими приспособлениями не страшна. Но постоянно их использовать не стоит. Лучше купить специально предназначенный для этого инструмент.