
-
Страница 1
Avaya 1120E IP Deskphone User Guide Avaya Communication Server 1000 Document Status: Standard Document Version: 06.01 Part Code: NN43112-10 3 Date: October 2010[…]
-
Страница 2
© 2010 Avaya Inc. Al l Rights Re served. Notic es While reas onable eff orts have bee n made to en sure that the informa tion in this do cument is complete an d accurate a t the time of printing, Avaya assumes no liab ility for any errors. Avaya reserves the right to make changes and co rrections to the informatio n in this documen t without the o[…]
-
Страница 3
Revision history 3 Revision history October 2010 Standard 06.01. This document is up-issue d to support Unistim 5.0 and Avaya Communication Server Release 7.5. June 2010 Standard 05.02. This docume nt is up-issued to reflect changes in technical content for Call Log Optio ns. June 2010 Standard 05.01. This document is up-issued to suppor t Avaya Co[…]
-
Страница 4
Revision history 4 January 2009 Standard 02.04. This document is up-issued to support Communications Server 100 0 Release 5.5 for UNIStim 3.0. Added technica l content in the section Making a call u sing the Redial List. April 2008 Standard 02.03. This document is up-issued to support Communications Server 100 0 Release 5.5 for UNIStim 3.0. May 200[…]
-
Страница 5
Contents 5 Contents About the Avaya 1120E IP Desk phone . . . . . . . . . . . . . . . . 11 Basic features . . . . . . . . . . . . . . . . . . . . . . . . . . . . . . . . . . . . . 11 Telephone controls . . . . . . . . . . . . . . . . . . . . . . . . . . . . . . . . . 14 Telephone display . . . . . . . . . . . . . . . . . . . . . . . . . . . . . . .[…]
-
Страница 6
Contents 6 Configuring Telephone Options . . . . . . . . . . . . . . . . . . . . . 56 Using the Telephone Options menu . . . . . . . . . . . . . . . . . . . . 57 Adjusting the volume . . . . . . . . . . . . . . . . . . . . . . . . . . . . 59 Adjusting the display screen contrast . . . . . . . . . . . . . . . . 60 Selecting a language . . . . . . . […]
-
Страница 7
Contents 7 8. VPN Information . . . . . . . . . . . . . . . . . . . . . . . . . . . . . . 87 9. Certificate Information . . . . . . . . . . . . . . . . . . . . . . . . . 88 10. DHCP Information . . . . . . . . . . . . . . . . . . . . . . . . . . . 88 3. Network Configuration menu . . . . . . . . . . . . . . . . . . . . . . . 88 4. Lock Menu . . . .[…]
-
Страница 8
Contents 8 Using Attendant Recall . . . . . . . . . . . . . . . . . . . . . . . . . . . . . 110 Using Call Park . . . . . . . . . . . . . . . . . . . . . . . . . . . . . . . . . . . 111 Recording a Calling Party Number . . . . . . . . . . . . . . . . . . . . 113 Displaying incoming call info rmation . . . . . . . . . . . . . . . . . . 113 Tracing a[…]
-
Страница 9
Contents 9 Using the Buzz feature . . . . . . . . . . . . . . . . . . . . . . . . . . . . . 135 Using Call Page Connect to make an announceme nt . . . . . 135 Using Centrex/Exchange Line Switchhook Flash . . . . . . . . . 136 Charging a call or charging a forced call . . . . . . . . . . . . . . . 137 Using Enhanced Override . . . . . . . . . . . . […]
-
Страница 10
Contents 10 Using Maid Identification . . . . . . . . . . . . . . . . . . . . . . . . . . . 171 Displaying Room Status . . . . . . . . . . . . . . . . . . . . . . . . . . . . 172 Accessing External Server Applicati ons . . . . . . . . . . . . . 174 Flexible Feature Codes (FFC) . . . . . . . . . . . . . . . . . . . . . . 175 Quick Reference Card . .[…]
-
Страница 11
About the Avaya 1120E IP Deskphone 11 About the Avaya 1120E IP Deskphone The Avaya 1120E IP Deskphone brings voice a nd data to the d esktop by connecting direc tly to a Lo ca l Area Netw or k (L AN) th ro ug h an Ether ne t connection. In this guide, self-l abeled line/program mable feature key labels appear beside the keys, and conte xt-sensitiv […]
-
Страница 12
About the Avaya 1120E IP Deskphone 12 Note: Some Avaya 1120E IP Deskphone phones are not configur ed to support soft key functionality. Consult your system administr ator. • graphical, high-resolut ion LCD di splay, backlit, with adjustable contrast • high-quality speaker phone • volume control keys for adjusting ring er, speaker, handset, an[…]
-
Страница 13
About the Avaya 1120E IP Deskphone 13 • hearing aid compatibility • supports wideban d audio when the deskphone is equipped with a wideband-capa ble ha ndset. You must supply you r own wideband- capable handset. • supports wideban d audio when the deskphone is equipped with a wide-band capable headset. You must supply yo ur own wideband- capa[…]
-
Страница 14
About the Avaya 1120E IP Deskphone 14 Telephone controls This section describes the controls on the Avaya 1120E IP Deskphone . In some geographic reg ions, the Avaya 1120E IP Deskphone is offer ed with key caps that have English text l abels. In this document, text in parentheses indicates the labe ls that a ppe ar on the key caps, for example, (Se[…]
-
Страница 15
About the Avaya 1120E IP Deskphone 15 Use the Volume control buttons to adjust the volume of the ringer, handset, headset, speaker, a nd the Handsf ree feat ure. Press the top button to incr ease the volume, and press the b ottom butt on to decr ease volume . Your Mute key functionality is enab led or disabled by you r system administrato r. Contac[…]
-
Страница 16
About the Avaya 1120E IP Deskphone 16 Use the Navigation keys to scroll through menus and lists appearing on the LCD display scree n. The ou ter part of th is key cluster rocks for up, down, left, and right movement s. Use Up and Down to scroll up and down in lists, and the Left and Right keys to posit ion the cursor. In so me dialog boxes th at ap[…]
-
Страница 17
About the Avaya 1120E IP Deskphone 17 Use the Goodbye key to terminate an active call. When a message is wait ing, or there is an incoming call, the red Messa ge WaitingIncoming Call Indicator LED at the top center of the IP Deskphone flashes. The flash cadence fo r each alert is different. Note: You may als o he ar an aud io Message Waitin g Indi[…]
-
Страница 18
About the Avaya 1120E IP Deskphone 18 Press the Message/Inbox k ey to access your voice mailbox. Note: This function is not availab le on all phones; consult your ad ministrato r. Press the Directory key to access directory services. ( Msg/Inbox ) ( Directory )[…]
-
Страница 19
About the Avaya 1120E IP Deskphone 19 Press the Services key to open the Services menu, and use the navigation keys to access the following items: • Telephone Options: — Volume adjustment — Contrast adjustment — Language — Date/Time — Display diagnostics — Local Dialpad Tone — Set Info — Diagnostics — Call Log Options — Ring t[…]
-
Страница 20
About the Avaya 1120E IP Deskphone 20 • Password Admin: — Station Control Password The Password Admin menu is not availa ble on all Avaya 1120E IP Deskphone sets. • Display Network Diagnostics Utilities Only your sy stem adminis trator or s ervice provider can us e Disp lay Netwo rk Diagnostics Utilities to perform Internet diagnostics. • V[…]
-
Страница 21
About the Avaya 1120E IP Deskphone 21 Telephone display Your Avaya 1120E IP Deskphone has three display areas: • The upper display area pro vid es labe ls for the four self-labeled line/ programm able featur e key labels . • The middle display area contains single-line information for items such as caller number, c aller name, Call Timer, featu[…]
-
Страница 22
About the Avaya 1120E IP Deskphone 22 License Notification Notify your system administrator if your phone displays a message in a pop-up window about the lice nsing feature or evaluation per iod. License notification provides details to he lp diagnose why the features are disabled on the phon e. You can press the Stop key or lift the ha ndset to cl[…]
-
Страница 23
About the Avaya 1120E IP Deskphone 23 You can also cancel the audio using the following me thods: • if listening on the speake r, pressing the Handsfree key • if listening on the handset, placing the handset on hook • if listening on the headset, pre ssing the Headset key • by pressing the Cancel so ft key • by pressing any Line or Featur[…]
-
Страница 24
About the Avaya 1120E IP Deskphone 24 To change your passwo rd (SCPW): ( Services ) 1. Press the Services ke y. 2. Press the Up/Down navigation keys to scroll and highlight Password Admin . 3. Press the Enter key. 4. Use the dialpad to enter your password at the prompt. 5. Press the Up/Down navigation keys to scroll and highlight New Password . 6. […]
-
Страница 25
About the Avaya 1120E IP Deskphone 25 Note: The default configuration for Password Protection is off. To turn Password Protection on or off: 1. Press the Directory key. 2. Press the Up/Down navigation keys to scroll and highlight Change Protection Mode . 3. Use the dialpad to enter your password (if Password Protection is enabled). 4. Press the Ent[…]
-
Страница 26
Entering and editing text 26 Entering and editing text You can enter and edit text on your Avaya 1120E IP Deskphone using the following methods: • “Entering text using the dialpad” on page 26 • “Editing text using the soft keys ” on page 27 • “Entering text using the USB keyboa rd” on page 28 The use of any of these meth ods for t[…]
-
Страница 27
Entering and editing text 27 Editing text using the soft keys You can use soft keys to edit text when you u se features such as Personal Directory, Redial List, and Callers List. To edit an entry in your Personal Director y, press the Directory key, and select the desired entry from your Per s onal Directory. To edit text with the soft ke ys: 1. Pr[…]
-
Страница 28
Entering and editing text 28 Entering text usi ng the USB keybo ard You can use the USB keyboa rd, when con nected, to enter text in the tools and graphical applications. For number entry in phone ap plications (for example, when dialing), you can use the keyboa rd to enter digits (0–9 ), as well as * and #. Other characters ar e ign o re d. When[…]
-
Страница 29
Connecting the components 29 Connecting the components Figure 4 shows connections on the Avaya 1120E IP Deskphone. Figure 4: Avaya 1120E IP Deskphone connections WARNING Ensure that the prot ective rubber cap on the Accessory Expansion Module port is in place when the port is not in use. Connec ting anything ot her than the pr oper Avaya 1100 Serie[…]
-
Страница 30
Connecting t he components 30 Before you begin Connecting the components of the phone CAUTION Damage to Equipment Do not plug you r Avaya 1120E IP Deskphone into a regular phone jack. This resu lts in severe damage to the IP Deskphone. Consult your system administrator to ensure that you plug your pho ne into a 10/100/ 1000BaseT Ether n et jac k. C[…]
-
Страница 31
Connecting the components 31 Figure 5: Release the Avaya 1120E IP Deskphone from the stand Use the following steps to connect the components of your ph one.[…]
-
Страница 32
Connecting t he components 32 1. Remove t he stand co ver. Pull upwa rd on the center catc h as indicated in Figure 6 on pag e 32 , and remove the stand cover. The cable routing tracks are now accessible. Figure 6: Remove the stand cover 2. Connect the global power supply (o ptional). Connect the global power supply to the AC adapter jack in the bo[…]
-
Страница 33
Connecting the components 33 Ethernet, and an AC adapter is not requ ired. To use local AC power, the optional AC adapter can be ordered separately. Note 2: You must use CAT5e (or later) cables if you want to use gigabit Ethernet. 3. Install the handset. Connect the en d of the handset cable with the short straight section into the handset. C onnec[…]
-
Страница 34
Connecting t he components 34 Figure 7: Cable routing tr acks and mounting holes 8. Wall-mount your phone (o ptional). Your Avaya 1120E IP Deskphone can be mounted eit her by: (Metho d A ) usin g the mo u nt i ng holes on the bottom of th e p ho ne stand, o r (Method B) using a traditional-style wall-mount box with a n RJ-45 connector and a 15-cm ([…]
-
Страница 35
Connecting the components 35 Method B: Attach the 15-cm (6-inch) CAT5 e cable, position the stand over the mounting rivets, and slide the phon e down the wall so that the rivets fit into the slot s on the stand, indicated in Figure 7 on page 34 (Method B). 9. Replace the stand cov er. Ensure that all cables are ne atly routed and p ress the stand c[…]
-
Страница 36
Connecting t he components 36 In order to use your headset, you must configur e your deskphone to recognize the headset. For information on how to configure your deskphone to use the wideband headset, see “Cha nging 3. He adsets” on page 83 .[…]
-
Страница 37
Virtual Private Network 37 Virtual Private Network A Virtual Private Network (VPN) is a network that uses a public network infrastructure, such as th e Internet, to provide you with secure access to the private network of your organization. The IP Deskphone VPN feature allows you to conne ct to your organization’s private network from a public or[…]
-
Страница 38
Virtual Private Network 38 • .bin files (for example: 0625C7C.bin) • Java Virtual M achine (JVM ) version 1. 2 or later m ust be insta lled on your PC. Check Start , Settings , Control Panel , Ja va to see if JVM is installed on your machine and the ve rsion of it. If it is not installed, contact your system administration to help you to instal[…]
-
Страница 39
Virtual Private Network 39 Figure 8: IP Deskphone connected to the modem Figure 9: IP Deskphone connected to the router[…]
-
Страница 40
Virtual Private Network 40 Figure 10: IP Deskphone connected to the wireless access point and modem Note: If your home network is not configured as described in th e above figures, contact your syst em administrato r for assistance. Note: You cannot connect multiple PCs di rectl y to the PC port on the IP Deskphone. Note: The Avaya Phone VPN Config[…]
-
Страница 41
Virtual Private Network 41 Installing and configuring VPN Use the following procedure to install and configu r e VPN on your IP Deskphone. Note: Depe nding on th e version o f so ftware installed on your IP Deskphone you may need to upgrade the softwa r e on the IP Deskphone prior to configuring th e VPN feature. To install and configure VPN 1. Fol[…]
-
Страница 42
Virtual Private Network 42 4. Select your language pr eference. The following languages ar e su pported: • Arabic • Chinese — simplified • Chinese — tr aditional • Czech •D a n i s h •D u t c h • English •F i n n i s h •F r e n c h •G e r m a n •G r e e k •H e b r e w • Hungarian • Italian • Japanese — Katakana • Jap[…]
-
Страница 43
Virtual Private Network 43 The Equipment Setup and VPN window appears, as sho wn in Figure 12. Figure 12: Equipment Setu p and VPN window 6. Verify that the mode m, IP Deskpho ne, and PC are connec ted properly. 7. Disconnect any VPN connection currently runnin g on your PC. See figure 4 to confirm that your LAN Ethernet Port and PC Ethern et Port […]
-
Страница 44
Virtual Private Network 44 Figure 13: Locate Data Files window 9. Click Browse to locate the provisioning files provided by your system administrato r if the wiz ard was not able to locate the files. 10. Click Next . The Prepare Phone for Configuration window appe ars as shown in Figure 14.[…]
-
Страница 45
Virtual Private Network 45 Figure 14: Prep are Phone fo r Configuration window 11. Power o n your IP De skphone. Note: Depe nd in g on the curr en t so ftw are version on the IP Deskphone “Listening Mode” may not be detected. If your phone does not enter “Liste ning Mode”, follow the steps below. 12. After you hear the chimes tune a nd the […]
-
Страница 46
Virtual Private Network 46 The Prepare Phone f or Co nfigu ratio n (Try again) windo w appea rs, as shown in Fi gure 15. Figure 15: Prepare Phone for Configuration (Try again) window a. Power off your IP Deskphone and power it back on again.. 14. After you hear the chimes tune a nd the text Av aya appears on the IP Deskphone display screen, qu ickl[…]
-
Страница 47
Virtual Private Network 47 Click No to proceed to a software upg rade . Follow the next steps to perform a software upgrade on your phone The Prepare Pho ne for Configuration wind ow appears as shown in Fi gure 16. Figure 16: Prep are Phone fo r Configuration window c. Double-press the Servic es key on the IP Deskphone quickly. Select the Network C[…]
-
Страница 48
Virtual Private Network 48 Server IP addr ess) window appears, as shown in Fig ure 17. OR If you are not able to navigate and edit the ad dress in Provision: or (TFTP IP:) in the Network Configuration me nu or you were not able to edit this field, click No . The Prepare Phone for Configu ration (Alternat e Provisioning Server) window appe ars. See […]
-
Страница 49
Virtual Private Network 49 Note: To enter a dot (period) when entering an IP address using the IP Deskphone keypad, press the 1 key repe atedly or you can double- press the asterisk (*) key. Figure 18: Prepare Phone for Configuration (Input Provisioning Server IP address) window OR If you cannot locate the Provisioning Server address, contact your […]
-
Страница 50
Virtual Private Network 50 15. When the Autodiscover Phone window appears, as shown in figure 19 , click Autodiscover Phone to discover co nnected IP Deskphones. Note: Click Stop to stop the search. The text “Searching for co nnected phones” displays wh ile the connected IP Deskph ones are loca ted. The text “Autodiscovery complete” display[…]
-
Страница 51
Virtual Private Network 51 Figure 19: Autodiscover Phone window 16. Click Next . If more than one connected IP Deskphone was discovered, th e Autodiscover Phone (More than one phone was discover ed) window appears. See Figur e 20 .[…]
-
Страница 52
Virtual Private Network 52 Figure 20: Autod iscover Phone (more than o ne phone wa s discovered) w indow a. Obtain the MAC address of the IP Deskphone for which you are configuring th e VPN. The M AC address is printed on a label located on the back of the IP Deskphone. b. Select the IP Deskphone to configure from the drop-down list. c. Click Next […]
-
Страница 53
Virtual Private Network 53 Figure 21: Configure phone window The progress bar displays the per cent complete of the provisioning file transfer. Configuring phone is displayed during the file transfer. 18. When Phone c onfiguration complete is displayed, click Next . The Confirmation & Fin is h window appears. See Figure 22.[…]
-
Страница 54
Virtual Private Network 54 Figure 22: Confirmation & Finish window 19. Verify that the IP Deskphone is successfully configured. Note: You may be prompted to enter a User ID and Password before the IP Deskphone registers with the system. This information is provided by your system administrator. The follo wing list provides character k ey mapp i[…]
-
Страница 55
Virtual Private Network 55 a. Look for the following information on the IP Deskphone display: —D a t e —T i m e — Type of call server — Directory number b. Lift the IP Deskphone handse t and listen for a dial tone. If the IP Deskphone is not configured successfully, ensure that the basic requirements are met; rep eat the steps in the Avaya […]
-
Страница 56
Configuring Telephone Options 56 Configuring Telephone Options Your Avaya 1120E IP Deskphone Services menu lists the following submenus: •T h e Telephone Options menu enables you or you r system administrator to configure pho ne preferences. The Telephone Options menu offers the optio ns shown in Figure 2 3 . • Password Admin menu enables you o[…]
-
Страница 57
Configuring Telephone Options 57 Using the Telephone Options menu Use the Telephone Options menu to access the following: • “Adjusting the volume” on page 59 • “Adjusting the display screen cont rast” on page 60 • “Selecting a language” on page 60 • “Selecting date and time format” on pa ge 61 • “Accessing display diagno[…]
-
Страница 58
Configuring Telephone Options 58 3. Press the Enter key. 4. Use the Up/Down navigation keys to scroll and highlight an option (for example, Language… ). 5. Press the Enter key. The display provides information require d to adjust your selection. 6. Choose one of the following: — Press the Select soft key to save changes and return to the Teleph[…]
-
Страница 59
Configuring Telephone Options 59 Adjusting the volume To adjust the volume, press the Services key, select Tele phone Options , and select Volume adjustment… To adjust the vo lume : 1. Press the Up/Down navigation ke ys to scroll and highlight one of the following: — Ringer — Handset listen — Handsfree listen — Headset listen —B u z z e[…]
-
Страница 60
Configuring Telephone Options 60 Adjusting the display screen contrast To adjust the LCD disp lay screen con trast, press the Services k ey, select Telephone Options , and se lect Contrast adjust ment . Note 1: If you have an Avaya 1100 Series Expansion Module attached to your IP Deskphone, adjusting the telephone’s LCD screen contrast also adjus[…]
-
Страница 61
Configuring Telephone Options 61 If the Lang uage settin g is passwor d-protec ted, you mu st enter a password (SCPW) to change the langu ag e. If you enter an incorrect password, an error message is displayed. If you enter an incorrect password mor e than thr ee time s, th e passw ord function a lity is locked. Contact your system administrator to[…]
-
Страница 62
Configuring Telephone Options 62 To select a date and time format: Accessing dis play diagnostics The Display diagnostics option tests th e IP Deskphone display screen and indicator lights. To access display diagnostics, pr ess the Services key, select Telephone Opt i ons , and select Display diagnostics . To select Display diagn ostics: Choosing l[…]
-
Страница 63
Configuring Telephone Options 63 dialpad. To choose a local dial pad tone, press the Services key, select Telephone Options , and se lect Local DialPad Tone . To choose a local dialpad tone : Viewing telephone information The Set Info option displays the fo llowing phone-sp ecific information: • General Info • Set IP Info • Ethernet Info • […]
-
Страница 64
Configuring Telephone Options 64 To view IP Deskphone information: Diagnostics The Diagnostics option displays the fo llowing phone-specif ic information: • Diag Tools (Ping, do Route Traces) • EtherStats (Speed, Auto Neg, CRC Errors, Collision) • IP Stats (Packet Info) • RUDP Stats (Msg receive/trans) •Q O S S t a t s To view di agnostic[…]
-
Страница 65
Configuring Telephone Options 65 Configuring call log options Use the call log option to co nfigur e the following preferences: • “Configuring the Caller s List log” on page 65 • “Configuring New Call Indica tion” on pag e 66 • “Configuring Preferred Name Ma tch ” on page 67 • “Configuring Area Code Setup” on pa ge 68 Config[…]
-
Страница 66
Configuring Telephone Options 66 To log all incoming calls including ca lls while your IP Deskphone is busy, press the Services key and select Call Log Option from the Telephone Options menu. To log all incoming calls inc luding ca lls while IP Deskpho ne is busy: 1. Press the Up/Down navig a tion keys to scroll and highlight th e Incoming Call s o[…]
-
Страница 67
Configuring Telephone Options 67 Configuring Preferred Name Match You can configure your Avaya 1120E IP Deskphone to display the name of the caller as defined in your Personal Directory. Th e de fault configuration is Off. To configure Preferr ed Name Match, press the Services key, selec t Telephone Options , and select Call Log Option . To configu[…]
-
Страница 68
Configuring Telephone Options 68 Configuring Area Code Setup Use the Area Code Setup menu to save up to three area co des. When an incoming call arrives with an area code that matches one of the three stored area codes, the incoming call numb er is reordered to display th e phone number followed by the area code (as opposed to the area code followe[…]
-
Страница 69
Configuring Telephone Options 69 To edit area code display: 3. Press the Up/Down navigation keys to scroll and highlight one of the following: — Area Code # 1 — Area Code # 2 — Area Code # 3 4. Press the Enter key. 5. Use the dialp a d to enter th e nu m be r at the prompt. 6. Choose one of the following: —P r e s s t h e Select soft key to[…]
-
Страница 70
Configuring Telephone Options 70 Choosing a ring type The Ring type… option configures the phone’s ring ton e. To choose a ring type, press the Services key, select Telephone Options , and select Ring type… To choose a ring type: 3. Press the Up/Down navigation keys to scroll and highlight one of the following: — Area Code # 1 — Area Code[…]
-
Страница 71
Configuring Telephone Options 71 Enabling or disabling Call Timer The call timer measures how long you ar e on each call. To enable Call Timer, pre ss the Services key, select Telephone Options , and select Call Timer . To enable o r disable Call Timer: 2. Press the Play soft key to sample the ring tone. 3. Choose one of the following: —P r e s s[…]
-
Страница 72
Configuring Telephone Options 72 Enabling OnHook Default Path The OnHook Defa ult Path option allo ws co ntr o l whet he r a he ad se t or the Handsfree feature is used to operate you r IP Deskphone while it is on- hook. To enable OnHook Default Path, press the Services key, select Telephone Options , and se lect OnHook Default Path . To enable OnH[…]
-
Страница 73
Configuring Telephone Options 73 If the feature key label setting is password-protected , you must enter a password (SC PW) to cha nge the feat ure key la bel. If you e nter an incorrect password, an error message is displayed. If you enter an incorrect pass wor d mor e th an three time s, th e pa ssw or d fu nct ionality is locked. Contact your sy[…]
-
Страница 74
Configuring Telephone Options 74 To restore default labels, pr ess the Services key, selec t Telephone Options , and select Ch ange feature key labels . Configuring the na me display format You can configure your Avaya 1120E IP Deskphone to display the name of the incoming calling part y in the following formats: • first name, last name • last […]
-
Страница 75
Configuring Telephone Options 75 To configure name display forma t: Configuring Live Dialpad The Live Dialpad option activates the Primary DN key when you make a call by dialing a directory number o n the dialpad without picking up the handset or pressing the hand sfr ee key. To configure Live Dialpad, pr ess the Services key, select Telephone Opti[…]
-
Страница 76
Configuring Telephone Options 76 To configure Live Dialpad: Configuring Caller ID display order Caller ID display order appears in 2 formats: • Number, nam e (d ef ault) • Name, Number Use the following procedure to configure Caller ID display order. 1. Press the Services key, select Telephone Opti ons an d select Caller ID display order . 2. P[…]
-
Страница 77
Configuring Telephone Options 77 — Name, number 3. Press th e Select soft key to save the configuration, else press the Cancel key to cancel the modifications. Configuring Normal mode indication The Normal mode display indication can be On or Off when the IP Deskphone is in normal mode. Use the following procedure to configure Normal mode indicat[…]
-
Страница 78
Configuring Local Menu options 78 Configuring Local Menu options Note 1: Many of the options discussed in this section are for administrator use only. Do not make any changes unless instructed by an adm inistrator. Note 2: Your system administrator can establish a password for the Local Tools menu. When the password is enabled, a password prompt di[…]
-
Страница 79
Configuring Local Menu options 79 The key functions in dialog boxes ar e de scribed in Table 6. When you are w orking in Edit m ode, the firs t field of the it em is highlight ed and a blinking cursor is to the right of the current edit position. The navigation key functions in Edit mode are described in Table 7 . Enter digits on the dialpad Select[…]
-
Страница 80
Configuring Local Menu options 80 Note: If you are using a USB mouse, you can right-click on the Telephony screen to open the Local Tools menu, and click on an item to select it. 1. Preferences submenu The Local Tools menu 1. Prefere nces subm en u of fe rs th e follo win g choices: • “Changing 1. Display Settings” on page 80 • “Changing […]
-
Страница 81
Configuring Local Menu options 81 To configure Contras t or Sleep tools: 1. Press the Up/Down arrow keys to scroll and highlight one of the following: — Contrast — Sleep Note: Sleep is displayed in the format xxx, where xxx is a time in minutes or hours. 2. Press the Enter key. 3. Press the Up/Down arrow keys to increa se or decrea se the selec[…]
-
Страница 82
Configuring Local Menu options 82 Changing 2. Language Use the Language menu ite m to configure local preferences. Use the Language tool to select the lan gua ge used on your phone. Note: This language setting controls the langu ag e used in the local menus on your phone onl y. To select the language used by features on your phone, press the Ser vi[…]
-
Страница 83
Configuring Local Menu options 83 Changing 3. Headsets Headset Configurat ion Each headset has its own tuning parameters, and your d eskphone must be configured to use th e proper parameters. If you do not configure the deskphone for the proper tu ning parameters, you may not be taking full advantage of the audio qu alities of the headset. Selectin[…]
-
Страница 84
Configuring Local Menu options 84 To enable HI D Commands: Avaya Mobile Headset Adap ter properties You can use the Avaya Mobile H eadse t Adapter to answer calls whenever the Avaya 1120E IP Deskphone is ru nning. To access the Avaya Mobile Headse t Adapter (MHA) properties, press the Services key twice to open th e Local Too ls menu, pr ess the 1 […]
-
Страница 85
Configuring Local Menu options 85 Table 8 describes the features of the Avaya Mobile Headset Adapter. Table 8: Avaya Mobile Head set Adaptor elem ents and functions Key Function Answer key Press to an sw er an incoming call. If there is no incoming call, the IP 1120E handset selects a line and you hear a dial tone. This is also referred to as Off-h[…]
-
Страница 86
Configuring Local Menu options 86 2. Local Diagnostics submenu Use the Local Tools menu 2. Loca l Diagnostics submenu to access the following: • “1. IP Set Information” on page 86 • “2. Network Diagnost ic Tools” on page 86 • “3. Ethernet Statistics” on page 86 • “4. IP Network Stat istics” on page 87 • “5. USB Devices?[…]
-
Страница 87
Configuring Local Menu options 87 4. IP Network Statistics The IP Networks Statistics tool is used to view reports about network operation. This tool is for ad ministrator use only. 5. USB Devices The USB devices tool pro vides information about Univer sal Serial Bus (USB) devices that connec t to your phone. Your Avaya 1120E IP Deskphone automatic[…]
-
Страница 88
Configuring Local Menu options 88 9. Certificate Information The system administrator can use the Ce rtificate Informa tion menu to view certificate information. 10. DHCP Information The system administrator can use the DHCP Information menu to view license information. 3. Network Configuration menu The Network Configuration to ol displays informat[…]
-
Страница 89
Configuring Local Menu options 89 5. Press Apply . The phone reboots. 4. Lock Menu Your system ad ministrato r can use the lo ck menu tool to protect the L ocal Tools menu items from accidental or unwanted changes. This tool is for administra to r us e on ly[…]
-
Страница 90
Making a call 90 Making a call This section de scribes feat ures associa ted with ma king a call. Yo u can make a call from your Avaya 1120E IP Deskphone using any of the following methods: • “Using Off-hook dialing ” on page 91 • “Using On-hook dialing” on page 91 • “Using handsfree dialing” on page 92 • “Using the Directory […]
-
Страница 91
Making a call 91 Using Off-hook dialing Using On-hook dialing 1. Lift the handset. 2. Dial the number. or 3. To terminate the call, choose one of the following: — Replace the handset into the cradle. — Press the Goodbye key. 1. Leave the hand set in the cr adle. 2. Press the line (DN) key. 3. When the dial tone sounds, di al the number. 4. When[…]
-
Страница 92
Making a call 92 Using handsfree dialing Use handsfree dialing to use a built-in microph one and speaker, or a headset, instead of the handset. While on an active call, you can switch between Hand se t an d Han d sfr ee mo de . To use handsfree dialin g: To discontinue a handsfree call: 5. To terminate the call, choose one of the following: — Rep[…]
-
Страница 93
Making a call 93 To mute a handsfree call: To switch from handsfree to handset: To switch from handset to hand sf ree: To use a headset: 1. Press the Mute key. The LED indi cator flashes. 2. Press th e Mute key again to return to a two-way handsfree conversation. Lift the handset. 1. Press the Handsfree key. 2. Replace the handse t. 1. Connect the […]
-
Страница 94
Making a call 94 To switch from handsfree to headset: Using the Directory applications You can make calls using the following Directo ry applications available on your Avaya 1120E IP Deskphone: • “Making a call using Corporate Direct ory” on page 94 • “Making a call using the Personal Dir ectory” on page 95 • “Making a call using th[…]
-
Страница 95
Making a call 95 To scroll to a specific number : Making a call using the Personal Directory The Personal Directory featur e allo ws you to store a maximum of 100 entries consisting of names and nu mb e rs. To use the Per sonal Dir ectory, press the Directory key and select Personal Directory . For information 2. Press the Search soft key to find t[…]
-
Страница 96
Making a call 96 on how to configure and use the Personal Director y, refer to “Using the Personal Directory” on page 147 . To make a c a ll using the Personal Director y: Making a call usin g the Callers List The Callers List feature auto matica lly stores up to a maximum of 100 callers. After 100 callers h ave been stored, each additional cal[…]
-
Страница 97
Making a call 97 Making a call using the Redial List The Redial List feature automatically stores a maximum of 20 previously dialed phone numbers. To use the Redial List, pr ess the Directory and select Redial List . For inform ation on how to con figure an d use the Redial List, refer to “Using the Redial List” on page 152 . To make a call usi[…]
-
Страница 98
Making a call 98 To view date and time of a call: Using Predial Use the Predial feature to enter, pr eview, and edit numbers before dialing. To use Pred ial: 1. Press the Up/Down navigation keys to scroll and highlight a n ame in the Redial List or Caller List . 2. Press the Right navigation key t o display the D N of the sele cted entry. 3. Choose[…]
-
Страница 99
Making a call 99 To edit a Predial nu mb er: Using AutoDial Use the Au toDial fea ture to di splay, st ore, and a utomatica lly dial phone numbers. 2. Press a line key to dial the numb er. 3. Lift the handset when the called pa rty answers or, if in hand sf re e mo d e, beg i n to speak. 1. Use the dialpad to enter the number . 2. Choose one of the[…]
-
Страница 100
Making a call 100 To store an AutoDial number: To display an AutoDial number: 1. Without lifting the handset, press the appropriate AutoDial key. Note: The display screen displays the word Autodial next to th e appropr iate key. 2. Using the dialpad, dial the p hon e number (including access code) to be stored on the selected AutoDial key. 3. Press[…]
-
Страница 101
Making a call 101 To use AutoDia l: Using Ring Again Use the Ring Again feature if you rece ive a busy tone or if there is no answer. Your IP Deskphone ri ngs wh en the person you called becomes available. Ring Again automatically redials the number. To activate Rin g Ag ai n : To call a Ring Again party when you receive notifica tion: 1. Lift the […]
-
Страница 102
Making a call 102 To deactivate Ring Again before n o tification: Using Last Number Redial Use the Last Number Re dial feature to autom atically redial th e last dialed number. To use Last Number Redial: 2. Press the Ring Again soft key to automatica lly dial th e nu m ber. Choose one of the following: — Press the Ring Again soft key a second tim[…]
-
Страница 103
Making a call 103 Using Speed Call Use the Speed Call feature to place internal and external calls by dialing a one-, two-, or three-di git code to store, edit, and automatically dial frequently called phone number s. To store a Speed Call numbe r: To make a Speed Call: 1. Press the Speed Call Controller soft key. The triangular icon flashes, indic[…]
-
Страница 104
Making a call 104 Using System Speed Call Use the System Speed Call fea ture to dial Speed Call codes that override dialing restri ctions placed on your IP Deskphone. To make a Syst em Speed Call: Using HotLine Use the HotLine feature to automa tically dial a specific numbe r. To use HotL ine: 3. Dial the Speed Call code to automatica lly dial th e[…]
-
Страница 105
Making a call 105 Using intercom calling Use the Intercom feature to call a member o f your intercom group by pressing the code assigned to ea ch member. To make an int ercom call: To answer an intercom call while on a line other than your intercom group line: 1. Lift the handset. 2. Press th e Intercom key. 3. Dial the one- or two-digit code for t[…]
-
Страница 106
Answering a call 106 Answering a call Each incoming call caus es the phone to ring, the LCD indicator ( R ) beside the Line (DN) key to flash, and the Messa ge Indica tor lamp to flash. To answer a call: Choose one o f the followin g four opti ons: or •L i f t t h e handset. or • Press the Handsfree button loca ted on the left side of the hands[…]
-
Страница 107
While on an active ca ll 107 While on an active call This section describ es the fo llow i ng features, available during an active call: • “Placing a call on hold” on page 107 • “Transferring a call” on page 108 • “Using Timed Reminder Recall” on page 109 • “Using Attendant Recall” on page 110 • “Using Call Park” on pa[…]
-
Страница 108
While on an active c all 108 Transferring a call Use the Transfer feature to redirect a call to the appr o pr i at e pe rs on . To transfer a call to a third party: To return to the original call, if the transfer is incomplete: 1. Press the Transfer so ft k ey. The othe r party is put on hold and a dial t one sounds. The LCD indicator light flashes[…]
-
Страница 109
While on an active ca ll 109 Using Timed Reminder Recall Use the Timed Reminder Re call feature to receive a reminder tone when a transferred call is not answered . To use Timed Reminder Recall: 1. Press th e Transfer soft key. The call is put on hold. 2. Dial the number to which you are transferring the ca ll. or 3. Choose o ne of the f ollowing t[…]
-
Страница 110
While on an active c all 110 If the transferred call is not answere d, your IP Deskphone rings: Using Attendant Recall Use the Attendant Recall feature to contact an atten dant during a call and to connect the caller to the attendant. To contact the atten dant while on a call: 1. Lift the handset to reconnect to the original caller. 2. Choose one o[…]
-
Страница 111
While on an active ca ll 111 Using Call Park Use the Call Park feature to hold temporarily (park) and r etrieve a call from any IP Deskphone. Using Call Park do es not tie up a line . When configured network-wide, Call Park can be used across networks. A System Park extension can be configured to auto matically park most calls. To park a call on th[…]
-
Страница 112
While on an active c all 112 To park a call using the SPRE code or FFC: To retrieve a parked call: 1. Choose one of the following: — Press the Transfer s oft ke y. — Press the Conference soft ke y. 2. Dial the Call Park FFC. 3. To use an altern ate DN from the System Park DN or your own DN, dial the DN where you want to par k the call. Otherwis[…]
-
Страница 113
While on an active ca ll 113 Recording a Calling Party Number Use the Calling Party Num ber feature to record a caller’s number, or to charge a call to an account numbe r, during an established call. To record a caller’s number for acc ount ing purposes: Displaying incoming call information Use the Display feature to display a second incoming c[…]
-
Страница 114
While on an active c all 114 Tracing a malicious call Use the Call Trace feature to trace nu isance calls within your system. Note: This is not a default feature. Contact your system adm inistrator to configure this feature on yo ur IP Deskphone. To use Call Trace while on a call: To use Call Trace without a Call Tr ace key: 2. Press the flashing l[…]
-
Страница 115
Incoming calls 115 Incoming calls You can use the following featur es when you have an incoming call: • “Using Automatic Answerback” on page 115 • “Using Call Pickup” on page 115 • “Using Call Waiting” on page 117 Using Automatic Answerback When the Automatic Answerback featur e is active, your IP Deskphone automatically answers i[…]
-
Страница 116
Incoming calls 116 To answer an incoming call in another call pickup group: To answer a call at a specific extension in any pickup group: or 2. Choose one of the following: — Press the Pickup key. — Enter the Pickup Ringing Number FFC. 1. Lift the handset. 2. Press the Group Pickup key or ente r the Pickup Group FFC. 3. Dial the pickup group nu[…]
-
Страница 117
Incoming calls 117 Using Call Waiting The Call Waiting feature alerts you to an incoming call by producing a tone. It also puts the current call on hold while you answ er the new call. To answer an incomin g call while on another call: To return to the first IP Deskph one call: 3. Dial the DN of the IP Deskphone that is ringing (and th at is not in[…]
-
Страница 118
Incoming calls 118 If you do not have a Call Wa iting key: 2. Press the line (DN) key associ ated with the first call. 1. Press the Goodbye key to end the current call. 2. Press the line (DN) key beside the flashing status icon to answer the incoming call. (Goodbye)[…]
-
Страница 119
While away from your desk 119 While away from your desk You can use the following featur es when you are away from your desk: • “Using Call Forward” on page 119 • “Using Internal Call Forward” on page 120 • “Using Remote Call Forward” on page 121 • “Securing your IP Desk phone” on page 123 Using Call Forward Use the Call For[…]
-
Страница 120
While away from your desk 120 To deactivate Call F orward: To reinstate Call For ward to the same number: Using Internal Call Forward Use Internal Call Forw ard to accept on ly calls originating at internal DNs to ring at another DN. Calls originating outside your IP Deskphone system still ring at your IP Deskphone. Current incoming calls cannot be[…]
-
Страница 121
While away from your desk 121 To deactivate Int e rnal Call Forward: To reinstate Call For ward to the same number: Using Remote Call Forward Use the Remote Call Forward featu r e (from any phone othe r than your own) to forward calls to any IP Deskphone. To activate Remote Ca ll Forward: 2. Dial the DN to which you are forwarding your internal cal[…]
-
Страница 122
While away from your desk 122 To deactivate Remo te Call Forward: 2. If you are calling from an IP Deskphone outside the system, dial your direct system access number and wait for the dial tone. 3. Dial the Remote Call Forward Activate FFC to activate the feature. 4. Dial your Station Control Password . A dial tone sounds. 5. Choose one of the foll[…]
-
Страница 123
While away from your desk 123 Securing your IP Deskphone Use the Electronic Lock feature to prevent other s from making calls from your IP Deskphone. The Electron ic Lo ck feature is controlled using your Station Control Password (SCPW). To change your Station Co ntrol Password, please refer to “Sec urity features” on page 23 . To lock your IP […]
-
Страница 124
While away from your desk 124 To unlock your IP Deskpho ne: 3. Dial your Station Control Password . or 4. Choose one of the following: — If you are dialing loca lly, pr ess the Goodbye key. — If you ar e dialing the FFC remo tely, dial your DN. 1. Lift the handset. 2. Dial the Electronic Loc k De ac ti va te FFC. 3. Dial your Station Control Pa[…]
-
Страница 125
Talking with more than one person 125 Talking with more than one person Use the following features to enable co nversations between more than two people: • “Using the Call Join feature” on pa ge 125 • “Setting up a c onference call” on page 126 • “Using Conferee Selectable Display” on page 127 • “Using Group Call” on page 12[…]
-
Страница 126
Talking with more than one pe rson 126 Setting up a conference call Use the Conference feature to set up a conference call for a maxim um of three or six people including yourself. Th e maximum number of people the conference feature supports de pends on the configuration of your IP Deskphone. To set up a conference call: If the person you atte mpt[…]
-
Страница 127
Talking with more than one person 127 Using Conferee Selectable Display Use the Confer ee Selectable Displa y and Discon nect feature to list active conferees and disconnect a co nfer ee from the conference call. To view active conferees: To disconnect a con feree: 2. Press the line (DN) key beside the flashing status icon to return to your origina[…]
-
Страница 128
Talking with more than one pe rson 128 Using Group Call Use the Group Call feature to automatically call members of a predefined group, one at a time, until all members answer. To call group members: 2. Press the line (DN) key on which the conference call is established. 3. Choose one of the following: — For a single conferee, pr ess the Goodbye […]
-
Страница 129
Talking with more than one person 129 To answer a group call: 2. Press th e Group Call key or enter the Group Call FFC . — The feature automatically calls al l group members. The ico n flashes until all members answer. — The phone number s of the group members appear on the disp lay as they answer. When the last person answers, the Group Call i[…]
-
Страница 130
Talking with more than one pe rson 130 To end a group call: Press the Goodbye key. Note: When the person who made the group call disconnects, the call terminates for all members o f the group. However, the members of the gr oup call can disconnect from the call and not affect other me m be rs on th e call. (Goodbye)[…]
-
Страница 131
Working without interruption 131 Working without interruption This section de scribes the Activating Ma ke Set Busy fe ature, which provides uninterrup ted work t ime. Activating Make Set Busy Use the Make Set Busy feature to make your IP Deskpho ne a pp ear bu sy to all callers. To activa te Make Se t Busy: To deactivate Make Set Busy: Call Deflec[…]
-
Страница 132
Working without interruption 132 configuration. Contact your system administrator to learn which treatment is configured for your IP Deskphon e. Figure 24: Call Defl ect Key If you press the Deflect key and no spec ial ca ll treatme nt ha s be en configured, your caller receives a busy sig nal. Using Record On Demand key If your call recording serv[…]
-
Страница 133
Working without interruption 133 • Bulk Recording — For an active call or unregistered DN/Position ID, call recording is init iated even though the ROD key is not pressed.. Using SAVE key Use the SAVE feature key to save the recording of an active call. Th is key is associated with the active user ID and is operational only if a call is active. T[…]
-
Страница 134
Additional call features 134 Additional call features Contact your system administrator to determine if the following call features are available on your IP Deskphon e. • “Using AutoDial Transfer” on page 134 • “Using the Buzz feature” on pag e 135 • “Using Call Page Connect to make an annou ncement” on page 135 • “Using Centr[…]
-
Страница 135
Additional call features 135 Using the Buzz feature Use the Buzz feature to notify another pers on of a call, a visitor, or a request. Two IP Deskphones that are linked to gether enable one person to signal the other. The person sig naled hears a buzz. To buzz the IP Deskphone linked t o your IP Deskphone: Using Call Page Connect to make an announc[…]
-
Страница 136
Additional call features 136 Using Centrex/Exchange Line Switchhook Flash Use the Centrex/Exchange Line Switchhoo k Flash feature during an established call to use a Centrex service, such as Call Transfer or Three- Way Calling. To use Centrex /Exchange Line Switchhook Flash: 2. Dial the Page Trunk Access Code to complete the connection to the page […]
-
Страница 137
Additional call features 137 Charging a call or charging a forced call Use the Call Charge feature to charge a ca ll to a specific account. The Forced Charge featur e charges long-distance calls from an IP Deskphone restricted to local calls. To charge a lo cal or long-dist ance call to an account before y ou dial: To charge a call in progre ss: 1.[…]
-
Страница 138
Additional call features 138 To charge a call to an account when you transfer a call: 2. Choose one of the following: — Press the Charge soft key. — Dial the Call Detail Recording FFC. 3. Dial the charge account number. 4. Press the line (DN) key to return to the call. 1. Press the Transfer soft k ey. The call is on hold. 2. Choose one of the f[…]
-
Страница 139
Additional call features 139 To charge a call to an acc ount when you add someone to a conferen c e ca ll : 5. Press the Transfer soft key w hen you hear the IP Deskphone ring. Note: You can talk privately to the person at the transfer number befo re you press the Transfer soft key. 1. Press th e Conference s of t ke y. Th e c al l is placed on hol[…]
-
Страница 140
Additional call features 140 Using Enhanced Override Use the Enhanced Override feature to override an active call after you attempt a Forc ed C amp -o n. Use Enhanced Ov er rid e to mak e a call or a consultation call, such as placing a call on hold and calling another party. To use Enhanced Override: You receive a busy signa l afte r dialin g a ph[…]
-
Страница 141
Additional call features 141 Using Forced Camp-on Use the Forced Camp-on featur e to au tomatically ring another IP Deskphone (internal or external) imme diately after tha t IP Deskphone disconnects from its current call. To use For ced Camp-on: Answerin g a ca ll ca mped — o n to yo ur ex te n si on : You receive a busy signa l afte r dialin g a p[…]
-
Страница 142
Additional call features 142 Overriding a busy signal Use the Override feature to overrid e a bu sy signal and interrupt another call. To override a busy signa l: Using Privacy Release Use the Privacy Release feature to enable one or mor e people who share your DN to join a call. 1. You receive a bu sy sig na l afte r dialing a phone number. 2. Cho[…]
-
Страница 143
Additional call features 143 To use Privacy Release in an establis hed state: Using Radio Page Use the Radio Page feature to page a person an d stay on the line until they answer. The paged person answe rs the call after entering a special Page Meet-me code from any IP Deskphone. To use Automati c Presel ection (Me et -me page ): Press the Privacy […]
-
Страница 144
Additional call features 144 To use Automati c Po st -s el ec ti o n: The called party is either busy on the IP Deskphone or away from their desk. To page the called party, you do not need to re dial the number of the called party. To answer a Radio Page: 4. If your call go es unanswere d for a preset time period and a 15-second hig h- pitched tone[…]
-
Страница 145
Additional call features 145 If you carry a Radio Pager, a page indi ca tes that someone dialed your DN. If the Radio Page system is configured to function in Meet-me mode, you can answer the p a ge call from any IP Deskphon e. Using Voice Call Use the Voice Call feature to make an ann oun cement through someone else’s IP Deskphone speaker . To m[…]
-
Страница 146
Additional call features 146 To respond to a voice c a ll: Your IP Deskphone rings once and the caller’s voice transmits th rough your speaker. Lift the handset .[…]
-
Страница 147
Additional phone features 147 Additional phone features The following features are de scribed in this section: • “Using the Personal Directory” on page 147 • “Using the Callers List” on pa ge 150 • “Using the Redial List” on page 152 • “Using Virtual Office” on page 154 • “Using Media Gateway 1000B” on page 163 Using t[…]
-
Страница 148
Additional phone features 148 To edit a n entry: 2. Use the dialpad to enter the name. 3. Press the Next soft key. 4. Use the dialpad to enter the phone number. 5. Choose one of the following: — Press the Done soft key to save the new entry. —P r e s s t h e Cancel soft key to discard the new entry and return to the Add screen. 1. Press the Up/[…]
-
Страница 149
Additional phone features 149 To delete an entry: To search for an entry : 3. Choose one of the following: — Press the Done soft key to save the changes. — Press the Cancel soft key to return to the Personal Directory without saving your changes. 1. Press the Up/Down navigation keys to scroll and highlight the entry. 2. Press the Delete soft ke[…]
-
Страница 150
Additional phone features 150 Using the Callers List The Callers Lis t feature lo gs all incoming ca lls. The Callers List can store up to 100 entries. When the list is full, the system overwrites the olde st entry. Use the Callers List fe atur e to r eview missed calls and to dia l calls. The Callers List contains: • the caller’s last and firs[…]
-
Страница 151
Additional phone features 151 To dial an ent ry: To delete an entry: To delete the entire Caller s List: 1. Press the Up/Down navigation keys to scroll and highlight the desired entry. 2. Press the Dial sof t key. 1. Press the Up/Down navigation keys to scroll and highlight the desired entry. 2. Press the Delete soft key. 3. Choose one of the follo[…]
-
Страница 152
Additional phone features 152 Using the Redial List The Redial List feature logs all outgoing calls. The Redial List can store up to 20 e ntries. When th e list is full, th e system overwrites the oldest entry. Use the Redial List feature to review calls made and to redi al previously dialed calls. The Redial List contains: • the last and first n[…]
-
Страница 153
Additional phone features 153 To delete an entry: To delete th e en ti re Red ia l Li st :. 2. Press the Dial sof t key. 1. Press the Up/Down navigation keys to scroll and highlight the desired entry. 2. Press the Delete soft key. 3. Choose one of th e following soft keys: — Yes to delete the entry — No to return to the previous screen 1. Press[…]
-
Страница 154
Additional phone features 154 Using Virtual Office The Virtual Office feature provides a service you can use while you are away from y our desk to transfer calls , and all your office IP Deskphone features, to a remote IP Deskphone. Virtual Office makes this possible by allowing you to use another IP Deskphone (the Remote phone) to log in to your o[…]
-
Страница 155
Additional phone features 155 Note 1: When logged into an Avaya 1120E IP Deskphone or an Avaya 2050 IP Softphone using Virtual Office, feature keys 4 and 5, and the Shift key, are not ava ilable to the Avaya 1120E IP Deskphone. Note 2: A Virtual Office login to an Avaya 1120E IP Deskphone from an Avaya 1110 IP Deskphone, IP Phone 2001, Avaya 20 33 […]
-
Страница 156
Additional phone features 156 A successful login transfers all the feat ures , time, date, an d t ones to your Remote IP Deskphone from yo ur Office IP Deskphone. 1. Press the Virtual soft k ey. 2. At the prompt, enter your us er ID. 3. Press the Enter key. 4. At the prompt, enter the home Station Control Password (SCPW) . Note 1: If the user ID is[…]
-
Страница 157
Additional phone features 157 Using Virtual Office on your Remote IP Deskphone Because the display characteristics, including size, vary from one IP Deskphone model to the n ext, your Office Avaya 1120E IP Deskphone display is different on each Remote phone. Figure 26 shows a n Avaya 1120E IP Deskphone logged in as a Remote phone to an Avaya 1120E […]
-
Страница 158
Additional phone features 158 Figure 27: Logged in to an Avaya 1120E IP Deskphone using an Avaya 1140E IP Desk phone Figure 28 shows an IP Softphone 2050 logged in as a Re mote phone to an Avaya 1120E IP Deskphone Office phone. In this case, the informati on display is arranged in a d ifferent fashion, but all the information is visible at one time[…]
-
Страница 159
Additional phone features 159 Using Virtual Office on your Offi ce IP Deskphone Figure 29 shows the Avaya 1120E IP Deskphone display when the phone is logged out due to rem o te access. Figure 29: Offic e phone displ ays the messa ge Logged Out When activate d for Virtual O ffice by a Remote IP Deskphone, your Office IP Deskphone is lo gged out and[…]
-
Страница 160
Additional phone features 160 To regain operation of an IP Deskphone being used for Virtua l Office: Logging out of Virtual Office To log out of Virtual Office, press the Virtual soft key. Automatic log out from Virtual Office Your remote Virtual Office IP Deskphon e may be configured to automatically log out of Virtual Office af ter a predetermine[…]
-
Страница 161
Additional phone features 161 Note: Some IP Deskphones are configured as Virtual Office-only telephones and have no assigned DN. However, these IP Deskphones can still be used to make emergency calls. “Emergency Calls only “ is displayed on the IP Deskphone display when not logged in to Virtual Office. When the phone goes off-hook, d ial tone i[…]
-
Страница 162
Additional phone features 162 Invalid ID (3) Incorrect User ID entered. Enter correct User ID. User ID in Gatekeeper database points to originating Call Server. Notify system administrator. Locked fro m Login Three failed attempts to enter the correct Station Control Password. Wait one hour for th e lock to clear automatically, or notify system adm[…]
-
Страница 163
Additional phone features 163 Using Media Gateway 1000B The Media Gateway 1000 B (MG 1000B) provides a means of extend ing Avaya Communication Server 1000 Releas e 4.5 features to one or more remotely located branch office s using the Branch Office feature. A branch office is a remote location in th e network where IP Deskphones, PSTN access, and T[…]
-
Страница 164
Additional phone features 164 can return to No rmal Mode (see “Using Resume Normal Mode” on page 164 ) or by waiting for 10 minutes. Local Mode If the WAN connection fails, the IP Deskphon e loses co mmunication with the Main Office Telephone Preferenc e Service (TPS). It the n registers with the MG 1000B and receives IP Deskphone services from[…]
-
Страница 165
Additional phone features 165 Note: If you do not use the Resume Normal Mode command after testing, the IP Deskphone automatically returns to Normal Mode in 10 minutes. Troubleshooting MG 1000B The MG 1000B can display error messages on-scr een . Table 11 lists error messages and describes actio ns to correct the causes. 1. Press the Services ke y.[…]
-
Страница 166
Additional phone features 166 Local Mode Invalid ID (2) Branch User ID not found in any equipped TN. Notify system administrator. Table 11: Troubleshooting MG 1000B (Part 2 of 2) Display Message Probable Cause Actions[…]
-
Страница 167
Using Hospitality features 167 Using Hospitality features Hospitality features are intended for hotel operations. The following features are discussed in this section: • “Configuring Automatic Wak e-Up” on page 167 • “Activating M essage Registr a tion” on page 169 • “Using Maid Identification” on page 171 • “Displaying Room S[…]
-
Страница 168
Using Hospitality features 168 To cancel an Automat ic Wake-Up call: To verify the time fo r the Auto ma ti c Wa ke -U p ca ll: 4. Press the Goodbye key. 1. Lift the handset. 2. Dial the Automati c Wak e-Up Qu it FFC. 3. Press the Goodbye key. 1. Lift the handset. 2. Dial the Automati c Wake -Up Verify FFC. 3. Dial the Automati c Wake -Up time in a[…]
-
Страница 169
Using Hospitality features 169 Activating Message Registration Use the Message Registration fe ature to read, change, or reset meters that log your hotel IP Deskphone calls. To read me ters: To change a meter: 4. Press the Goodbye key. 1. Press the Message Reg i stration key. 2. Dial the room Directory Number (DN). 3. Press the Message Reg i strati[…]
-
Страница 170
Using Hospitality features 170 To reset a meter to zero: 4. Press the * key. 5. Press the Message Reg i stration key. 1. Press the Message Reg i stration key. 2. Dial the room DN. 3. Press th e * key. 4. Press the Message Reg i stration key. MRK MRK MRK[…]
-
Страница 171
Using Hospitality features 171 Using Maid Identification Use the Maid Identification feature to tra ck the cleaning status of rooms. The maid enters the information from the IP Deskphone in each room. To enter cleaning st atus: 1. Press the Room Status key. 2. Dial the DN for the room. 3. Dial one of the following cleaning status codes: 1 = Cleanin[…]
-
Страница 172
Using Hospitality features 172 Displaying Room Status Use the Room Status feature to disp lay the status of a room using the Display Module. To read the status of a room: Changing the status of a room: 1. Press the Room Status key. 2. Dial the DN for the room. The DN is displayed followed by a two- dig it code.The first digit indicates the occupanc[…]
-
Страница 173
Using Hospitality features 173 2. Dial the DN for the room. The DN displays followed by a two- digit code.The first digit indicates the occupancy status: 0 = Room vacant 1 = Room occupied The second digit indicates the cleaning status of the room : 1 = Cleaning requeste d 2 = Cleaning in progress 3 = Room cleaned 4 = Room passed inspection 5 = Room[…]
-
Страница 174
Accessing External Server Applications 174 Accessing External Server Applications Use External Server Applications to access a variety of applications directly from your Avaya 1120E IP Deskphone. To find out what feat ures and se rvices are available, contact your system administrator. Depending on what is available on your system, your phone can p[…]
-
Страница 175
Flexible Feature Codes (FFC) 175 Flexible Feature Codes (FFC) Use Table 12 to keep track of the FFCs assigned by your system administra tor. Table 12: Flexible Feature Codes (Part 1 of 2) FFC Feature FFC Feature Automatic Wake-Up Activate Make Set Busy Activate Automatic Wake-Up Deactivate Make Set Busy Deactivat e Automatic Wake-Up Verify Maliciou[…]
-
Страница 176
Flexible Feature Codes (FFC) 176 RingAgain Deactivate Virtual Office T erminal L og Off Station Control Password Change Virtual Office Term in al Log On Table 12: Flexible Feature Codes (Part 2 of 2) FFC Feature FFC Feature[…]
-
Страница 177
Quick Reference Card 177 Quick Reference Card This chapter is the Quick Reference Card for the Avaya 1120E IP Deskphone. Print this chapter as a re ference guide. Feature operation AutoDial Store Use Display Call Forward Activate Deactivate Reinstate View number Call Pickup Call Waiting Answer Return to first call Conference Handsfree Activate (to […]
-
Страница 178
Quick Reference Card 178 Legend Services and Telephone Options menus When notified Deactivate Transfer Adjust volume or Icon Action ( ) Indicates the key cap text label. For example, (Message). Lift the handset, press th e line (DN) key or the Handset key. Replace the handset, or press to end the call. Press a line/feature key. Dial a number. An ic[…]
-
Страница 179
Quick Reference Card 179 Note : The Directory key provides access to Corporate Direc tory, Persona l Directory, Redial List, and Callers List. Pick one of: Ringer Handset Listen Handsfree Listen Headset Listen Buzzer Contrast adjustment Language Note : This langu age setting c ontrols the language us ed by feature s on your phone onl y. To set the […]
-
Страница 180
Quick Reference Card 180[…]
-
Страница 181
Regulatory and safety information 181 Regulatory and safety information This equipment has been tested and found to comply with the limits for a Class B digital device, pursuant to part 15 of the FCC Rules. These limits are designed to provide reasonab le protection against harmful interference in a resident ial installation. This equ ip m en t ge […]
-
Страница 182
Regulatory and safety information 182 この装置は、情報処理装置等電 波障害自主規制協議会(V CCI)の基準に基づくク ラス B 情報技術装置です。この装置は 、家庭環境で使用すること を目的としていますが、こ の 装置がラジオやテレビジョン受 信機に近接して?[…]
-
Страница 183
Regulatory and safety information 183 Other Safety Appr ovals: IEC 60950-1: ITE e quipment — Safety — Part 1: General requirements. Other US/Canada : Hearing Aid Compatibility (HAC) as per FCC Part 68 This equipment complies with the CE Marking re quirements. EU Countries : This device complies with the essential requireme nts and other relevant pr[…]
-
Страница 184
Regulatory and safety information 184 DenAn regulatory notice for Japan[…]
-
Страница 185
Third party terms 185 Third party terms Third Party Terms for UNIStim sw releases 4.1 thru 5.0 (Jan 2010 — Nov 2010) Certain portions of the pr oduct («Op en Source Components») are licensed under open source license agreem ents that require Avaya to make the source code for such Open Source Components available in sour ce code format to […]
-
Страница 186
Third party terms 186 * * This software/database is a «U nited States Governm ent Work» un der the terms of the United States Copyr ight Act. It was written as part of the author’s official duties as a United Sta tes Government employee and thus cannot be copyrighted. This software/database is freely available to the public for use. […]
-
Страница 187
Third party terms 187 away your freedom to share and change it. By contrast, the GNU Gene ral Public License is intended to gu arantee your freedom to sh are and change fre e software- -to ma ke sure the s oftware is free for all its users. This General Public License applies to most of the Free Software Foundation’s softwa re and to any othe[…]
-
Страница 188
Third party terms 188 another language. (He reinafter, translat ion is included without limitation in the term «modification».) Each licensee is addressed as «you». Activities other than cop yin g, distr i butio n an d m od ifica tio n ar e no t co ver e d by th is License; they are ou tside its scope. Th e act of running th[…]
-
Страница 189
Third party terms 189 to work written entirely by you; rather, the intent is to exercise the right to control the distributio n of derivat i ve or collective works based on the Program. In addition , mere agg regation of ano ther wo rk not based on the Program with the Program (o r with a work based on the Program) on a volume of a storage or distr[…]
-
Страница 190
Third party terms 190 or distribute the Progra m or its derivative works. These actions are prohibited by law if you d o not ac cept this Lice nse. Ther efore, by modifying or distributing the Progr a m (or an y wor k ba se d on the Program), you indicate your acceptance of th is Licen se to do so, and all its terms and conditions for copying, dist[…]
-
Страница 191
Third party terms 191 Free Software Foundation may publish revised and/or new versions of the General Public License from time to time. Such new versions will be similar in spirit to the present versio n, but may differ in detail to addr ess new problems or concerns. Each ver sion is given a distinguishing version number. If the Program spe cifies […]
-
Страница 192
Third party terms 192 want it to be of the greatest possible use to the public, the best way to achieve this is to make it free software which everyone can redistr ibute and change unde r thes e te rm s. T o do so, att ac h the following notic es to the progra m. It is safest to attach t hem to the start of each source file to most effectively conv[…]
-
Страница 193
Third party terms 193 OpenSSL The following component is lic ensed un d er Ope nS S L licen se : OpenSSL 0.9.7b OpenSSL License /* ================ ============== ============== ========= * Copyright (c) 1998-2008 The Op enSSL Project. All rights reserved. * * Redistribution and use in source and binary forms, with or without modification, are perm[…]
-
Страница 194
Third party terms 194 * 6. Redistributions of any form whatsoe ver must retain the following acknowledgm ent: * «This product includes software develope d by the OpenSSL Project for use in the OpenSSL Toolki t (http://www.o penssl.org/)» * * THIS SOFTWARE IS PROVIDED BY THE OpenSSL PROJECT «AS IS» AND ANY EXPRESSED OR IMPLIE D[…]
-
Страница 195
Third party terms 195 * * This library is free for commercial and non-commer cial use as long as the following conditions are ahear ed to. Th e following conditions apply to all code found in this distribution, be it the RC4, RSA, lhash, DES, etc., code; not just th e SSL code. The SSL documentation included with this distribution is covered by the[…]
-
Страница 196
Third party terms 196 * THIS SOFTWARE IS PROVIDED BY ERIC YOUNG «AS IS» AND ANY EXPRESS OR IMPLIED WARRANTIES, INCLUDING, BUT NOT LIMITED TO, THE IMPLIED WARRA NTIES OF MERC HANTABILITY AND FITNESS FOR A PARTICULAR PURPOSE ARE DISCLAIMED. IN NO EVENT SHALL THE AUTHOR OR CONTRIBUTORS BE LIABLE FOR ANY DIRECT, INDIRECT, INCI DENTAL, SPECI[…]
-
Страница 197
Third party terms 197 1. The origin of this software must not be misrep re se n te d; yo u mu st not claim that you wrote the original software. If you use this software in a product, an acknowledgment in the pro duct documentation would be appreciated but is not required. 2. Altered source vers ions must be plainly marked as such, and must not be […]
-
Страница 198
Third party terms 198 dealings in this Software without prior written aut horization of the copyright holde r . END OF TERMS AND CONDITIONS Libpng The following component is lic ensed un d er libpn g licens e: Libpng 1.2.37 — June 4 , 2009 Libpng License This copy of the libpng notices is p rovided for your convenience. In case of any discrep ancy […]
-
Страница 199
Third party terms 199 libpng versions 0.97, January 1998, through 1.0 .6, March 20, 2000, are Copyright (c) 199 8, 1999 Glenn Rand ers- Peh rson, and are distributed according to the same disclaim er a nd license as libpng-0.96, with the following indiv iduals add ed to the lis t of Contr ibuting Auth ors: Tom Lane Glenn Randers-Pehrson Willem van […]
-
Страница 200
Third party terms 200 consequen tia l dama ge s, wh ich m ay re su lt from the us e of th e PNG Reference Library, even if advised of the possibility of such damage. Permission is hereby grante d to use, copy, modify, and distribu te this source code, or portions hereof, fo r any purpose, withou t fee, subject to the following restrictions: 1. The […]
-
Страница 201
Third party terms 201 .» This code is derived from softwar e cont ributed to Ber keley by Ch ris Torek. Redistribution and use in source and binar y for ms, with or without modification, are permitted provided tha t the following conditions are met: .» 1. Redistributions of source co de must retain the above copyright notice, this list […]
-
Страница 202
Third party terms 202 Convert UTF ConvertUTF License Copyright 2001 -2004 Unicode, Inc. Disclaimer This source code is provided as is by Unicode, Inc. No claims are made as to fitne ss for any particular pu rpose. No warranties of any kind are expressed or implie d. The recipient agrees to determine app licability of information provided. If th is […]
-
Страница 203
Third party terms 203 Redistributions in binar y form must re produce th e above copyright notice, this list of conditions and the following disclaimer in the documentation and/or other materials provide d with the distribution. Neither the na me of the <ORGANIZATIO N> nor the names of its contributor s may be used to en dorse or promot e pro[…]
-
Страница 204
Third party terms 204 (2) If only executable code is distributed, then the accompanying documentation must state that «this so ftware is based in p ar t on the work of the Independent JPEG Group». (3) Permission for use of this software is granted only if the user a ccepts full responsibility for an y undesirable consequenc es; the author[…]
-
Страница 205
Terms you should know 205 Terms you should know Avaya Communication Server 1000 Your office communication system. Calling Party Name Display Information appearing on the LCD displa y scr een, such as the caller’s name and telephon e number. The system must have CPND enabled. Category 5 (Cat5) Cable and associ ated connecting hardware ca pable of […]
-
Страница 206
Terms you should know 206 Directory Number (DN) A number consisting of one to seven digits for a telep hone, and also known as an extension number . Feature display An area tha t shows st atus infor mat ion about the feature in use. It also displays the name and status of the active session. Feature Status Lamp indicator An LCD or an LED that indic[…]
-
Страница 207
Terms you should know 207 Information line A one-line by 24-character area th at displays date an d time or application information. Interrupted dial tone A broken or pulsed dial tone that so unds when you access some features on your telephone. Message/Inbox A fixed key on your Avaya 1120E IP Deskphone that connects to your voice messaging system […]
-
Страница 208
Terms you should know 208 Shared Directory Number A DN (extension) that is shared by two or more persons. Special Prefix code (SPRE) Special codes entered using the dialpad, fo llowed by a two-digit access code, that enable features (for example, Call Forward All Calls requires entry of SPRE code + 74 ). Special dial tone The three consecutive tone[…]
-
Страница 209
Terms you should know 209 User interface Screen displays that interact with the end user as a result of an action or event. Visual Alerter/Message Waiting indicator An LCD or an LED that flashes to indicate that a message is waiting or when the ringer is on.[…]
-
Страница 210
Terms you should know 210[…]
-
Страница 211
Index 211 Index A Adjusting the display screen con- trast 60 Adjusting the volume 59 Area Code Setup 68 Attendant Recall 110 AutoDial 99 AutoDial Transf er 134 Automatic Wake-Up 167 B Buzz feature 135 C Call features and Flexible Feature Codes 21 Call Forward 119 Call Join 125 Call log options 78 Call Page 135 Call Page Connect 135 Call Park 111 Ca[…]
-
Страница 212
Index 212 ties 20 Display Settings 80 Display settings 80 DN 206 E Electronic Lo ck 123 Enabling OnHo ok Default Pa th 72 Enabling/disabling Call Timer 72 Enhanced O verride 1 40 Enter key 16 Entering and editin g te xt 26 Editing te xt using the soft keys 27 Entering text using the USB keyboard 28 Expand key 16 External server applications 174 F F[…]
-
Страница 213
Index 213 N Navigation keys 16, 207 New Call indication 66 Normal mode 163 O Off-hook 207 Off-hook dialing 91 Onhook Default Path 72 On-hook dialing 91 Override a busy signal 142 P Paging tone 207 Personal Directory 95 Place a call on hold 107 Predial feature 98 Preferred Name Ma tch 67 Privacy Release 142 Q Quit/Stop key 17 R Radio Page 143 Redial[…]
-
Страница 214
Index 214 function keys 28 User Interface 209 V Viewing telephone information 78 Virtual Office 154 Virtual Office login 15 5 Virtual Office logout 160 Virtual Office on your Remote tele- phone 157 Voice Call 145 Volume adju stm e nt 59 Volume control 15 Volume control bar 15[…]
- Главная
-
Avaya
-
Радиотелефоны
-
1120E
На этой странице вы найдёте полный список документов на Радиотелефоны Avaya 1120E.
Выберите необходимый PDF файл.
-

Радиотелефоны
Avaya 1120E Инструкция по эксплуатацииТип файла
PDFРазмер
2.91 MbКол-во страниц
214Просмотров
10161Download / Read online
-
Радиотелефоны
Avaya 1120E Руководство пользователяТип файла
PDFРазмер
941 KbКол-во страниц
46Просмотров
4432Download / Read online
-
Радиотелефоны
Avaya 1120E Инструкция по началу работуТип файла
PDFРазмер
314 KbКол-во страниц
2Просмотров
2280Download / Read online
-
Радиотелефоны
Avaya 1120E ОбъявленияТип файла
PDFРазмер
244 KbКол-во страниц
10Просмотров
1648Download / Read online
-
Радиотелефоны
Avaya 1120E Краткое справочное руководствоТип файла
PDFРазмер
633 KbКол-во страниц
2Просмотров
1579Download / Read online
-
Радиотелефоны
Avaya 1120E Руководство пользователяТип файла
PDFРазмер
249 KbКол-во страниц
49Просмотров
0Download / Read online
-
Радиотелефоны
Avaya 1120E Руководство пользователяТип файла
PDFРазмер
1.16 MbКол-во страниц
216Просмотров
0Download / Read online
-
Радиотелефоны
Avaya 1120E Руководство пользователяТип файла
PDFРазмер
1.18 MbКол-во страниц
217Просмотров
0Download / Read online
-
Радиотелефоны
Avaya 1120E Инструкция по началу работуТип файла
PDFРазмер
173 KbКол-во страниц
2Просмотров
0Download / Read online


- 1
Другие Avaya Радиотелефоны
-
Avaya 1230 Руководство пользователя
PDF файлов
5Просмотров
25141 -
Avaya 1165E Руководство пользователя
PDF файлов
11Просмотров
23801 -
Avaya 1120E Руководство пользователя
PDF файлов
9Просмотров
21600 -
Avaya 1110 Руководство пользователя
PDF файлов
5Просмотров
14551 -
Avaya 1220 Руководство пользователя
PDF файлов
5Просмотров
11730 -
Avaya one-X Deskphone Value Edition 1608 Руководство пользователя
PDF файлов
4Просмотров
5718
Другие устройства Avaya
-
Настольные IP-телефоны
Avaya 1616/1616-I Руководство пользователяPDF файлов
2Просмотров
31369 -
Телефоны
Avaya 1608/1616 МануалPDF файлов
1Просмотров
21215 -
Настольные IP-телефоны
Avaya Communication Server 1000 IP Phones Fundamentals Руководство пользователяPDF файлов
2Просмотров
16835 -
Настольные IP-телефоны
Avaya 1608/1608-I Инструкция по эксплуатацииPDF файлов
1Просмотров
16026 -
IP-телефоны
Avaya 1150E Руководство пользователяPDF файлов
6Просмотров
14833 -
Роутеры Bay Router Series
Avaya Configuring IP Services Руководство пользователяPDF файлов
7Просмотров
14158
Вопросы
-
слабая батарея
Ноутбуки
Acer
1310
Alex 12.02.2016 17:26
Ранее вы смотрели
Производители
Audio2000’s
Federal Aviation Administration
Hobie
I-Data
Land Rover
Leggett & Platt
Oregon
RJTech
Sioux Tools
T+A Elektroakustik
Типы устройств
Грили
Зарядные устройства
Аппараты для приготовления горячих напитков
Вращательные соковыжималки
Инструменты для отделочных работ
Микрофокус и нанофоус
Вспомогательные принадлежности для линейной разметки
Заклепочники
Уход за кожей
Устройства
Avanti CK36-1
Blaupunkt BROOKLYN MP35
Canon SELPHY CP770
Cub Cadet HB59L
Delfield SSRPT
Mitsubishi 236CB Projector Mounting Adapter 236CB
Numark Industries DM1685
Planet Technology SW-501
TEFAL KO330827
U-Line Wine Captain Models Beverage Centers, Refrigerators, Freezers ULN-29RWH-09
freeuserguide.ru
About Us
Contacts
Disclamers
Privacy Policy
Эта страница полезна для вас? Поделитесь ссылкой:
-
Page 1: Avaya 1120E
Avaya 1120E IP Deskphone User Guide Avaya Communication Server 1000 Document Status: Standard Document Version: 06.01 Part Code: NN43112-10 3 Date: October 2010[…]
-
Page 2: Avaya 1120E
© 2010 Avaya Inc. Al l Rights Re served. Notic es While reas onable eff orts have bee n made to en sure that the informa tion in this do cument is complete an d accurate a t the time of printing, Avaya assumes no liab ility for any errors. Avaya reserves the right to make changes and co rrections to the informatio n in this documen t without the o[…]
-
Page 3: Avaya 1120E
Revision history 3 Revision history October 2010 Standard 06.01. This document is up-issue d to support Unistim 5.0 and Avaya Communication Server Release 7.5. June 2010 Standard 05.02. This docume nt is up-issued to reflect changes in technical content for Call Log Optio ns. June 2010 Standard 05.01. This document is up-issued to suppor t Avaya Co[…]
-
Page 4: Avaya 1120E
Revision history 4 January 2009 Standard 02.04. This document is up-issued to support Communications Server 100 0 Release 5.5 for UNIStim 3.0. Added technica l content in the section Making a call u sing the Redial List. April 2008 Standard 02.03. This document is up-issued to support Communications Server 100 0 Release 5.5 for UNIStim 3.0. May 200[…]
-
Page 5: Avaya 1120E
Contents 5 Contents About the Avaya 1120E IP Desk phone . . . . . . . . . . . . . . . . 11 Basic features . . . . . . . . . . . . . . . . . . . . . . . . . . . . . . . . . . . . . 11 Telephone controls . . . . . . . . . . . . . . . . . . . . . . . . . . . . . . . . . 14 Telephone display . . . . . . . . . . . . . . . . . . . . . . . . . . . . . . .[…]
-
Page 6: Avaya 1120E
Contents 6 Configuring Telephone Options . . . . . . . . . . . . . . . . . . . . . 56 Using the Telephone Options menu . . . . . . . . . . . . . . . . . . . . 57 Adjusting the volume . . . . . . . . . . . . . . . . . . . . . . . . . . . . 59 Adjusting the display screen contrast . . . . . . . . . . . . . . . . 60 Selecting a language . . . . . . . […]
-
Page 7: Avaya 1120E
Contents 7 8. VPN Information . . . . . . . . . . . . . . . . . . . . . . . . . . . . . . 87 9. Certificate Information . . . . . . . . . . . . . . . . . . . . . . . . . 88 10. DHCP Information . . . . . . . . . . . . . . . . . . . . . . . . . . . 88 3. Network Configuration menu . . . . . . . . . . . . . . . . . . . . . . . 88 4. Lock Menu . . . .[…]
-
Page 8: Avaya 1120E
Contents 8 Using Attendant Recall . . . . . . . . . . . . . . . . . . . . . . . . . . . . . 110 Using Call Park . . . . . . . . . . . . . . . . . . . . . . . . . . . . . . . . . . . 111 Recording a Calling Party Number . . . . . . . . . . . . . . . . . . . . 113 Displaying incoming call info rmation . . . . . . . . . . . . . . . . . . 113 Tracing a[…]
-
Page 9: Avaya 1120E
Contents 9 Using the Buzz feature . . . . . . . . . . . . . . . . . . . . . . . . . . . . . 135 Using Call Page Connect to make an announceme nt . . . . . 135 Using Centrex/Exchange Line Switchhook Flash . . . . . . . . . 136 Charging a call or charging a forced call . . . . . . . . . . . . . . . 137 Using Enhanced Override . . . . . . . . . . . . […]
-
Page 10: Avaya 1120E
Contents 10 Using Maid Identification . . . . . . . . . . . . . . . . . . . . . . . . . . . 171 Displaying Room Status . . . . . . . . . . . . . . . . . . . . . . . . . . . . 172 Accessing External Server Applicati ons . . . . . . . . . . . . . 174 Flexible Feature Codes (FFC) . . . . . . . . . . . . . . . . . . . . . . 175 Quick Reference Card . .[…]
-
Page 11: Avaya 1120E
About the Avaya 1120E IP Deskphone 11 About the Avaya 1120E IP Deskphone The Avaya 1120E IP Deskphone brings voice a nd data to the d esktop by connecting direc tly to a Lo ca l Area Netw or k (L AN) th ro ug h an Ether ne t connection. In this guide, self-l abeled line/program mable feature key labels appear beside the keys, and conte xt-sensitiv […]
-
Page 12: Avaya 1120E
About the Avaya 1120E IP Deskphone 12 Note: Some Avaya 1120E IP Deskphone phones are not configur ed to support soft key functionality. Consult your system administr ator. • graphical, high-resolut ion LCD di splay, backlit, with adjustable contrast • high-quality speaker phone • volume control keys for adjusting ring er, speaker, handset, an[…]
-
Page 13: Avaya 1120E
About the Avaya 1120E IP Deskphone 13 • hearing aid compatibility • supports wideban d audio when the deskphone is equipped with a wideband-capa ble ha ndset. You must supply you r own wideband- capable handset. • supports wideban d audio when the deskphone is equipped with a wide-band capable headset. You must supply yo ur own wideband- capa[…]
-
Page 14: Avaya 1120E
About the Avaya 1120E IP Deskphone 14 Telephone controls This section describes the controls on the Avaya 1120E IP Deskphone . In some geographic reg ions, the Avaya 1120E IP Deskphone is offer ed with key caps that have English text l abels. In this document, text in parentheses indicates the labe ls that a ppe ar on the key caps, for example, (Se[…]
-
Page 15: Avaya 1120E
About the Avaya 1120E IP Deskphone 15 Use the Volume control buttons to adjust the volume of the ringer, handset, headset, speaker, a nd the Handsf ree feat ure. Press the top button to incr ease the volume, and press the b ottom butt on to decr ease volume . Your Mute key functionality is enab led or disabled by you r system administrato r. Contac[…]
-
Page 16: Avaya 1120E
About the Avaya 1120E IP Deskphone 16 Use the Navigation keys to scroll through menus and lists appearing on the LCD display scree n. The ou ter part of th is key cluster rocks for up, down, left, and right movement s. Use Up and Down to scroll up and down in lists, and the Left and Right keys to posit ion the cursor. In so me dialog boxes th at ap[…]
-
Page 17: Avaya 1120E
About the Avaya 1120E IP Deskphone 17 Use the Goodbye key to terminate an active call. When a message is wait ing, or there is an incoming call, the red Messa ge WaitingIncoming Call Indicator LED at the top center of the IP Deskphone flashes. The flash cadence fo r each alert is different. Note: You may als o he ar an aud io Message Waitin g Indi[…]
-
Page 18: Avaya 1120E
About the Avaya 1120E IP Deskphone 18 Press the Message/Inbox k ey to access your voice mailbox. Note: This function is not availab le on all phones; consult your ad ministrato r. Press the Directory key to access directory services. ( Msg/Inbox ) ( Directory )[…]
-
Page 19: Avaya 1120E
About the Avaya 1120E IP Deskphone 19 Press the Services key to open the Services menu, and use the navigation keys to access the following items: • Telephone Options: — Volume adjustment — Contrast adjustment — Language — Date/Time — Display diagnostics — Local Dialpad Tone — Set Info — Diagnostics — Call Log Options — Ring t[…]
-
Page 20: Avaya 1120E
About the Avaya 1120E IP Deskphone 20 • Password Admin: — Station Control Password The Password Admin menu is not availa ble on all Avaya 1120E IP Deskphone sets. • Display Network Diagnostics Utilities Only your sy stem adminis trator or s ervice provider can us e Disp lay Netwo rk Diagnostics Utilities to perform Internet diagnostics. • V[…]
-
Page 21: Avaya 1120E
About the Avaya 1120E IP Deskphone 21 Telephone display Your Avaya 1120E IP Deskphone has three display areas: • The upper display area pro vid es labe ls for the four self-labeled line/ programm able featur e key labels . • The middle display area contains single-line information for items such as caller number, c aller name, Call Timer, featu[…]
-
Page 22: Avaya 1120E
About the Avaya 1120E IP Deskphone 22 License Notification Notify your system administrator if your phone displays a message in a pop-up window about the lice nsing feature or evaluation per iod. License notification provides details to he lp diagnose why the features are disabled on the phon e. You can press the Stop key or lift the ha ndset to cl[…]
-
Page 23: Avaya 1120E
About the Avaya 1120E IP Deskphone 23 You can also cancel the audio using the following me thods: • if listening on the speake r, pressing the Handsfree key • if listening on the handset, placing the handset on hook • if listening on the headset, pre ssing the Headset key • by pressing the Cancel so ft key • by pressing any Line or Featur[…]
-
Page 24: Avaya 1120E
About the Avaya 1120E IP Deskphone 24 To change your passwo rd (SCPW): ( Services ) 1. Press the Services ke y. 2. Press the Up/Down navigation keys to scroll and highlight Password Admin . 3. Press the Enter key. 4. Use the dialpad to enter your password at the prompt. 5. Press the Up/Down navigation keys to scroll and highlight New Password . 6. […]
-
Page 25: Avaya 1120E
About the Avaya 1120E IP Deskphone 25 Note: The default configuration for Password Protection is off. To turn Password Protection on or off: 1. Press the Directory key. 2. Press the Up/Down navigation keys to scroll and highlight Change Protection Mode . 3. Use the dialpad to enter your password (if Password Protection is enabled). 4. Press the Ent[…]
-
Page 26: Avaya 1120E
Entering and editing text 26 Entering and editing text You can enter and edit text on your Avaya 1120E IP Deskphone using the following methods: • “Entering text using the dialpad” on page 26 • “Editing text using the soft keys ” on page 27 • “Entering text using the USB keyboa rd” on page 28 The use of any of these meth ods for t[…]
-
Page 27: Avaya 1120E
Entering and editing text 27 Editing text using the soft keys You can use soft keys to edit text when you u se features such as Personal Directory, Redial List, and Callers List. To edit an entry in your Personal Director y, press the Directory key, and select the desired entry from your Per s onal Directory. To edit text with the soft ke ys: 1. Pr[…]
-
Page 28: Avaya 1120E
Entering and editing text 28 Entering text usi ng the USB keybo ard You can use the USB keyboa rd, when con nected, to enter text in the tools and graphical applications. For number entry in phone ap plications (for example, when dialing), you can use the keyboa rd to enter digits (0–9 ), as well as * and #. Other characters ar e ign o re d. When[…]
-
Page 29: Avaya 1120E
Connecting the components 29 Connecting the components Figure 4 shows connections on the Avaya 1120E IP Deskphone. Figure 4: Avaya 1120E IP Deskphone connections WARNING Ensure that the prot ective rubber cap on the Accessory Expansion Module port is in place when the port is not in use. Connec ting anything ot her than the pr oper Avaya 1100 Serie[…]
-
Page 30: Avaya 1120E
Connecting t he components 30 Before you begin Connecting the components of the phone CAUTION Damage to Equipment Do not plug you r Avaya 1120E IP Deskphone into a regular phone jack. This resu lts in severe damage to the IP Deskphone. Consult your system administrator to ensure that you plug your pho ne into a 10/100/ 1000BaseT Ether n et jac k. C[…]
-
Page 31: Avaya 1120E
Connecting the components 31 Figure 5: Release the Avaya 1120E IP Deskphone from the stand Use the following steps to connect the components of your ph one.[…]
-
Page 32: Avaya 1120E
Connecting t he components 32 1. Remove t he stand co ver. Pull upwa rd on the center catc h as indicated in Figure 6 on pag e 32 , and remove the stand cover. The cable routing tracks are now accessible. Figure 6: Remove the stand cover 2. Connect the global power supply (o ptional). Connect the global power supply to the AC adapter jack in the bo[…]
-
Page 33: Avaya 1120E
Connecting the components 33 Ethernet, and an AC adapter is not requ ired. To use local AC power, the optional AC adapter can be ordered separately. Note 2: You must use CAT5e (or later) cables if you want to use gigabit Ethernet. 3. Install the handset. Connect the en d of the handset cable with the short straight section into the handset. C onnec[…]
-
Page 34: Avaya 1120E
Connecting t he components 34 Figure 7: Cable routing tr acks and mounting holes 8. Wall-mount your phone (o ptional). Your Avaya 1120E IP Deskphone can be mounted eit her by: (Metho d A ) usin g the mo u nt i ng holes on the bottom of th e p ho ne stand, o r (Method B) using a traditional-style wall-mount box with a n RJ-45 connector and a 15-cm ([…]
-
Page 35: Avaya 1120E
Connecting the components 35 Method B: Attach the 15-cm (6-inch) CAT5 e cable, position the stand over the mounting rivets, and slide the phon e down the wall so that the rivets fit into the slot s on the stand, indicated in Figure 7 on page 34 (Method B). 9. Replace the stand cov er. Ensure that all cables are ne atly routed and p ress the stand c[…]
-
Page 36: Avaya 1120E
Connecting t he components 36 In order to use your headset, you must configur e your deskphone to recognize the headset. For information on how to configure your deskphone to use the wideband headset, see “Cha nging 3. He adsets” on page 83 .[…]
-
Page 37: Avaya 1120E
Virtual Private Network 37 Virtual Private Network A Virtual Private Network (VPN) is a network that uses a public network infrastructure, such as th e Internet, to provide you with secure access to the private network of your organization. The IP Deskphone VPN feature allows you to conne ct to your organization’s private network from a public or[…]
-
Page 38: Avaya 1120E
Virtual Private Network 38 • .bin files (for example: 0625C7C.bin) • Java Virtual M achine (JVM ) version 1. 2 or later m ust be insta lled on your PC. Check Start , Settings , Control Panel , Ja va to see if JVM is installed on your machine and the ve rsion of it. If it is not installed, contact your system administration to help you to instal[…]
-
Page 39: Avaya 1120E
Virtual Private Network 39 Figure 8: IP Deskphone connected to the modem Figure 9: IP Deskphone connected to the router[…]
-
Page 40: Avaya 1120E
Virtual Private Network 40 Figure 10: IP Deskphone connected to the wireless access point and modem Note: If your home network is not configured as described in th e above figures, contact your syst em administrato r for assistance. Note: You cannot connect multiple PCs di rectl y to the PC port on the IP Deskphone. Note: The Avaya Phone VPN Config[…]
-
Page 41: Avaya 1120E
Virtual Private Network 41 Installing and configuring VPN Use the following procedure to install and configu r e VPN on your IP Deskphone. Note: Depe nding on th e version o f so ftware installed on your IP Deskphone you may need to upgrade the softwa r e on the IP Deskphone prior to configuring th e VPN feature. To install and configure VPN 1. Fol[…]
-
Page 42: Avaya 1120E
Virtual Private Network 42 4. Select your language pr eference. The following languages ar e su pported: • Arabic • Chinese — simplified • Chinese — tr aditional • Czech •D a n i s h •D u t c h • English •F i n n i s h •F r e n c h •G e r m a n •G r e e k •H e b r e w • Hungarian • Italian • Japanese — Katakana • Jap[…]
-
Page 43: Avaya 1120E
Virtual Private Network 43 The Equipment Setup and VPN window appears, as sho wn in Figure 12. Figure 12: Equipment Setu p and VPN window 6. Verify that the mode m, IP Deskpho ne, and PC are connec ted properly. 7. Disconnect any VPN connection currently runnin g on your PC. See figure 4 to confirm that your LAN Ethernet Port and PC Ethern et Port […]
-
Page 44: Avaya 1120E
Virtual Private Network 44 Figure 13: Locate Data Files window 9. Click Browse to locate the provisioning files provided by your system administrato r if the wiz ard was not able to locate the files. 10. Click Next . The Prepare Phone for Configuration window appe ars as shown in Figure 14.[…]
-
Page 45: Avaya 1120E
Virtual Private Network 45 Figure 14: Prep are Phone fo r Configuration window 11. Power o n your IP De skphone. Note: Depe nd in g on the curr en t so ftw are version on the IP Deskphone “Listening Mode” may not be detected. If your phone does not enter “Liste ning Mode”, follow the steps below. 12. After you hear the chimes tune a nd the […]
-
Page 46: Avaya 1120E
Virtual Private Network 46 The Prepare Phone f or Co nfigu ratio n (Try again) windo w appea rs, as shown in Fi gure 15. Figure 15: Prepare Phone for Configuration (Try again) window a. Power off your IP Deskphone and power it back on again.. 14. After you hear the chimes tune a nd the text Av aya appears on the IP Deskphone display screen, qu ickl[…]
-
Page 47: Avaya 1120E
Virtual Private Network 47 Click No to proceed to a software upg rade . Follow the next steps to perform a software upgrade on your phone The Prepare Pho ne for Configuration wind ow appears as shown in Fi gure 16. Figure 16: Prep are Phone fo r Configuration window c. Double-press the Servic es key on the IP Deskphone quickly. Select the Network C[…]
-
Page 48: Avaya 1120E
Virtual Private Network 48 Server IP addr ess) window appears, as shown in Fig ure 17. OR If you are not able to navigate and edit the ad dress in Provision: or (TFTP IP:) in the Network Configuration me nu or you were not able to edit this field, click No . The Prepare Phone for Configu ration (Alternat e Provisioning Server) window appe ars. See […]
-
Page 49: Avaya 1120E
Virtual Private Network 49 Note: To enter a dot (period) when entering an IP address using the IP Deskphone keypad, press the 1 key repe atedly or you can double- press the asterisk (*) key. Figure 18: Prepare Phone for Configuration (Input Provisioning Server IP address) window OR If you cannot locate the Provisioning Server address, contact your […]
-
Page 50: Avaya 1120E
Virtual Private Network 50 15. When the Autodiscover Phone window appears, as shown in figure 19 , click Autodiscover Phone to discover co nnected IP Deskphones. Note: Click Stop to stop the search. The text “Searching for co nnected phones” displays wh ile the connected IP Deskph ones are loca ted. The text “Autodiscovery complete” display[…]
-
Page 51: Avaya 1120E
Virtual Private Network 51 Figure 19: Autodiscover Phone window 16. Click Next . If more than one connected IP Deskphone was discovered, th e Autodiscover Phone (More than one phone was discover ed) window appears. See Figur e 20 .[…]
-
Page 52: Avaya 1120E
Virtual Private Network 52 Figure 20: Autod iscover Phone (more than o ne phone wa s discovered) w indow a. Obtain the MAC address of the IP Deskphone for which you are configuring th e VPN. The M AC address is printed on a label located on the back of the IP Deskphone. b. Select the IP Deskphone to configure from the drop-down list. c. Click Next […]
-
Page 53: Avaya 1120E
Virtual Private Network 53 Figure 21: Configure phone window The progress bar displays the per cent complete of the provisioning file transfer. Configuring phone is displayed during the file transfer. 18. When Phone c onfiguration complete is displayed, click Next . The Confirmation & Fin is h window appears. See Figure 22.[…]
-
Page 54: Avaya 1120E
Virtual Private Network 54 Figure 22: Confirmation & Finish window 19. Verify that the IP Deskphone is successfully configured. Note: You may be prompted to enter a User ID and Password before the IP Deskphone registers with the system. This information is provided by your system administrator. The follo wing list provides character k ey mapp i[…]
-
Page 55: Avaya 1120E
Virtual Private Network 55 a. Look for the following information on the IP Deskphone display: —D a t e —T i m e — Type of call server — Directory number b. Lift the IP Deskphone handse t and listen for a dial tone. If the IP Deskphone is not configured successfully, ensure that the basic requirements are met; rep eat the steps in the Avaya […]
-
Page 56: Avaya 1120E
Configuring Telephone Options 56 Configuring Telephone Options Your Avaya 1120E IP Deskphone Services menu lists the following submenus: •T h e Telephone Options menu enables you or you r system administrator to configure pho ne preferences. The Telephone Options menu offers the optio ns shown in Figure 2 3 . • Password Admin menu enables you o[…]
-
Page 57: Avaya 1120E
Configuring Telephone Options 57 Using the Telephone Options menu Use the Telephone Options menu to access the following: • “Adjusting the volume” on page 59 • “Adjusting the display screen cont rast” on page 60 • “Selecting a language” on page 60 • “Selecting date and time format” on pa ge 61 • “Accessing display diagno[…]
-
Page 58: Avaya 1120E
Configuring Telephone Options 58 3. Press the Enter key. 4. Use the Up/Down navigation keys to scroll and highlight an option (for example, Language… ). 5. Press the Enter key. The display provides information require d to adjust your selection. 6. Choose one of the following: — Press the Select soft key to save changes and return to the Teleph[…]
-
Page 59: Avaya 1120E
Configuring Telephone Options 59 Adjusting the volume To adjust the volume, press the Services key, select Tele phone Options , and select Volume adjustment… To adjust the vo lume : 1. Press the Up/Down navigation ke ys to scroll and highlight one of the following: — Ringer — Handset listen — Handsfree listen — Headset listen —B u z z e[…]
-
Page 60: Avaya 1120E
Configuring Telephone Options 60 Adjusting the display screen contrast To adjust the LCD disp lay screen con trast, press the Services k ey, select Telephone Options , and se lect Contrast adjust ment . Note 1: If you have an Avaya 1100 Series Expansion Module attached to your IP Deskphone, adjusting the telephone’s LCD screen contrast also adjus[…]
-
Page 61: Avaya 1120E
Configuring Telephone Options 61 If the Lang uage settin g is passwor d-protec ted, you mu st enter a password (SCPW) to change the langu ag e. If you enter an incorrect password, an error message is displayed. If you enter an incorrect password mor e than thr ee time s, th e passw ord function a lity is locked. Contact your system administrator to[…]
-
Page 62: Avaya 1120E
Configuring Telephone Options 62 To select a date and time format: Accessing dis play diagnostics The Display diagnostics option tests th e IP Deskphone display screen and indicator lights. To access display diagnostics, pr ess the Services key, select Telephone Opt i ons , and select Display diagnostics . To select Display diagn ostics: Choosing l[…]
-
Page 63: Avaya 1120E
Configuring Telephone Options 63 dialpad. To choose a local dial pad tone, press the Services key, select Telephone Options , and se lect Local DialPad Tone . To choose a local dialpad tone : Viewing telephone information The Set Info option displays the fo llowing phone-sp ecific information: • General Info • Set IP Info • Ethernet Info • […]
-
Page 64: Avaya 1120E
Configuring Telephone Options 64 To view IP Deskphone information: Diagnostics The Diagnostics option displays the fo llowing phone-specif ic information: • Diag Tools (Ping, do Route Traces) • EtherStats (Speed, Auto Neg, CRC Errors, Collision) • IP Stats (Packet Info) • RUDP Stats (Msg receive/trans) •Q O S S t a t s To view di agnostic[…]
-
Page 65: Avaya 1120E
Configuring Telephone Options 65 Configuring call log options Use the call log option to co nfigur e the following preferences: • “Configuring the Caller s List log” on page 65 • “Configuring New Call Indica tion” on pag e 66 • “Configuring Preferred Name Ma tch ” on page 67 • “Configuring Area Code Setup” on pa ge 68 Config[…]
-
Page 66: Avaya 1120E
Configuring Telephone Options 66 To log all incoming calls including ca lls while your IP Deskphone is busy, press the Services key and select Call Log Option from the Telephone Options menu. To log all incoming calls inc luding ca lls while IP Deskpho ne is busy: 1. Press the Up/Down navig a tion keys to scroll and highlight th e Incoming Call s o[…]
-
Page 67: Avaya 1120E
Configuring Telephone Options 67 Configuring Preferred Name Match You can configure your Avaya 1120E IP Deskphone to display the name of the caller as defined in your Personal Directory. Th e de fault configuration is Off. To configure Preferr ed Name Match, press the Services key, selec t Telephone Options , and select Call Log Option . To configu[…]
-
Page 68: Avaya 1120E
Configuring Telephone Options 68 Configuring Area Code Setup Use the Area Code Setup menu to save up to three area co des. When an incoming call arrives with an area code that matches one of the three stored area codes, the incoming call numb er is reordered to display th e phone number followed by the area code (as opposed to the area code followe[…]
-
Page 69: Avaya 1120E
Configuring Telephone Options 69 To edit area code display: 3. Press the Up/Down navigation keys to scroll and highlight one of the following: — Area Code # 1 — Area Code # 2 — Area Code # 3 4. Press the Enter key. 5. Use the dialp a d to enter th e nu m be r at the prompt. 6. Choose one of the following: —P r e s s t h e Select soft key to[…]
-
Page 70: Avaya 1120E
Configuring Telephone Options 70 Choosing a ring type The Ring type… option configures the phone’s ring ton e. To choose a ring type, press the Services key, select Telephone Options , and select Ring type… To choose a ring type: 3. Press the Up/Down navigation keys to scroll and highlight one of the following: — Area Code # 1 — Area Code[…]
-
Page 71: Avaya 1120E
Configuring Telephone Options 71 Enabling or disabling Call Timer The call timer measures how long you ar e on each call. To enable Call Timer, pre ss the Services key, select Telephone Options , and select Call Timer . To enable o r disable Call Timer: 2. Press the Play soft key to sample the ring tone. 3. Choose one of the following: —P r e s s[…]
-
Page 72: Avaya 1120E
Configuring Telephone Options 72 Enabling OnHook Default Path The OnHook Defa ult Path option allo ws co ntr o l whet he r a he ad se t or the Handsfree feature is used to operate you r IP Deskphone while it is on- hook. To enable OnHook Default Path, press the Services key, select Telephone Options , and se lect OnHook Default Path . To enable OnH[…]
-
Page 73: Avaya 1120E
Configuring Telephone Options 73 If the feature key label setting is password-protected , you must enter a password (SC PW) to cha nge the feat ure key la bel. If you e nter an incorrect password, an error message is displayed. If you enter an incorrect pass wor d mor e th an three time s, th e pa ssw or d fu nct ionality is locked. Contact your sy[…]
-
Page 74: Avaya 1120E
Configuring Telephone Options 74 To restore default labels, pr ess the Services key, selec t Telephone Options , and select Ch ange feature key labels . Configuring the na me display format You can configure your Avaya 1120E IP Deskphone to display the name of the incoming calling part y in the following formats: • first name, last name • last […]
-
Page 75: Avaya 1120E
Configuring Telephone Options 75 To configure name display forma t: Configuring Live Dialpad The Live Dialpad option activates the Primary DN key when you make a call by dialing a directory number o n the dialpad without picking up the handset or pressing the hand sfr ee key. To configure Live Dialpad, pr ess the Services key, select Telephone Opti[…]
-
Page 76: Avaya 1120E
Configuring Telephone Options 76 To configure Live Dialpad: Configuring Caller ID display order Caller ID display order appears in 2 formats: • Number, nam e (d ef ault) • Name, Number Use the following procedure to configure Caller ID display order. 1. Press the Services key, select Telephone Opti ons an d select Caller ID display order . 2. P[…]
-
Page 77: Avaya 1120E
Configuring Telephone Options 77 — Name, number 3. Press th e Select soft key to save the configuration, else press the Cancel key to cancel the modifications. Configuring Normal mode indication The Normal mode display indication can be On or Off when the IP Deskphone is in normal mode. Use the following procedure to configure Normal mode indicat[…]
-
Page 78: Avaya 1120E
Configuring Local Menu options 78 Configuring Local Menu options Note 1: Many of the options discussed in this section are for administrator use only. Do not make any changes unless instructed by an adm inistrator. Note 2: Your system administrator can establish a password for the Local Tools menu. When the password is enabled, a password prompt di[…]
-
Page 79: Avaya 1120E
Configuring Local Menu options 79 The key functions in dialog boxes ar e de scribed in Table 6. When you are w orking in Edit m ode, the firs t field of the it em is highlight ed and a blinking cursor is to the right of the current edit position. The navigation key functions in Edit mode are described in Table 7 . Enter digits on the dialpad Select[…]
-
Page 80: Avaya 1120E
Configuring Local Menu options 80 Note: If you are using a USB mouse, you can right-click on the Telephony screen to open the Local Tools menu, and click on an item to select it. 1. Preferences submenu The Local Tools menu 1. Prefere nces subm en u of fe rs th e follo win g choices: • “Changing 1. Display Settings” on page 80 • “Changing […]
-
Page 81: Avaya 1120E
Configuring Local Menu options 81 To configure Contras t or Sleep tools: 1. Press the Up/Down arrow keys to scroll and highlight one of the following: — Contrast — Sleep Note: Sleep is displayed in the format xxx, where xxx is a time in minutes or hours. 2. Press the Enter key. 3. Press the Up/Down arrow keys to increa se or decrea se the selec[…]
-
Page 82: Avaya 1120E
Configuring Local Menu options 82 Changing 2. Language Use the Language menu ite m to configure local preferences. Use the Language tool to select the lan gua ge used on your phone. Note: This language setting controls the langu ag e used in the local menus on your phone onl y. To select the language used by features on your phone, press the Ser vi[…]
-
Page 83: Avaya 1120E
Configuring Local Menu options 83 Changing 3. Headsets Headset Configurat ion Each headset has its own tuning parameters, and your d eskphone must be configured to use th e proper parameters. If you do not configure the deskphone for the proper tu ning parameters, you may not be taking full advantage of the audio qu alities of the headset. Selectin[…]
-
Page 84: Avaya 1120E
Configuring Local Menu options 84 To enable HI D Commands: Avaya Mobile Headset Adap ter properties You can use the Avaya Mobile H eadse t Adapter to answer calls whenever the Avaya 1120E IP Deskphone is ru nning. To access the Avaya Mobile Headse t Adapter (MHA) properties, press the Services key twice to open th e Local Too ls menu, pr ess the 1 […]
-
Page 85: Avaya 1120E
Configuring Local Menu options 85 Table 8 describes the features of the Avaya Mobile Headset Adapter. Table 8: Avaya Mobile Head set Adaptor elem ents and functions Key Function Answer key Press to an sw er an incoming call. If there is no incoming call, the IP 1120E handset selects a line and you hear a dial tone. This is also referred to as Off-h[…]
-
Page 86: Avaya 1120E
Configuring Local Menu options 86 2. Local Diagnostics submenu Use the Local Tools menu 2. Loca l Diagnostics submenu to access the following: • “1. IP Set Information” on page 86 • “2. Network Diagnost ic Tools” on page 86 • “3. Ethernet Statistics” on page 86 • “4. IP Network Stat istics” on page 87 • “5. USB Devices?[…]
-
Page 87: Avaya 1120E
Configuring Local Menu options 87 4. IP Network Statistics The IP Networks Statistics tool is used to view reports about network operation. This tool is for ad ministrator use only. 5. USB Devices The USB devices tool pro vides information about Univer sal Serial Bus (USB) devices that connec t to your phone. Your Avaya 1120E IP Deskphone automatic[…]
-
Page 88: Avaya 1120E
Configuring Local Menu options 88 9. Certificate Information The system administrator can use the Ce rtificate Informa tion menu to view certificate information. 10. DHCP Information The system administrator can use the DHCP Information menu to view license information. 3. Network Configuration menu The Network Configuration to ol displays informat[…]
-
Page 89: Avaya 1120E
Configuring Local Menu options 89 5. Press Apply . The phone reboots. 4. Lock Menu Your system ad ministrato r can use the lo ck menu tool to protect the L ocal Tools menu items from accidental or unwanted changes. This tool is for administra to r us e on ly[…]
-
Page 90: Avaya 1120E
Making a call 90 Making a call This section de scribes feat ures associa ted with ma king a call. Yo u can make a call from your Avaya 1120E IP Deskphone using any of the following methods: • “Using Off-hook dialing ” on page 91 • “Using On-hook dialing” on page 91 • “Using handsfree dialing” on page 92 • “Using the Directory […]
-
Page 91: Avaya 1120E
Making a call 91 Using Off-hook dialing Using On-hook dialing 1. Lift the handset. 2. Dial the number. or 3. To terminate the call, choose one of the following: — Replace the handset into the cradle. — Press the Goodbye key. 1. Leave the hand set in the cr adle. 2. Press the line (DN) key. 3. When the dial tone sounds, di al the number. 4. When[…]
-
Page 92: Avaya 1120E
Making a call 92 Using handsfree dialing Use handsfree dialing to use a built-in microph one and speaker, or a headset, instead of the handset. While on an active call, you can switch between Hand se t an d Han d sfr ee mo de . To use handsfree dialin g: To discontinue a handsfree call: 5. To terminate the call, choose one of the following: — Rep[…]
-
Page 93: Avaya 1120E
Making a call 93 To mute a handsfree call: To switch from handsfree to handset: To switch from handset to hand sf ree: To use a headset: 1. Press the Mute key. The LED indi cator flashes. 2. Press th e Mute key again to return to a two-way handsfree conversation. Lift the handset. 1. Press the Handsfree key. 2. Replace the handse t. 1. Connect the […]
-
Page 94: Avaya 1120E
Making a call 94 To switch from handsfree to headset: Using the Directory applications You can make calls using the following Directo ry applications available on your Avaya 1120E IP Deskphone: • “Making a call using Corporate Direct ory” on page 94 • “Making a call using the Personal Dir ectory” on page 95 • “Making a call using th[…]
-
Page 95: Avaya 1120E
Making a call 95 To scroll to a specific number : Making a call using the Personal Directory The Personal Directory featur e allo ws you to store a maximum of 100 entries consisting of names and nu mb e rs. To use the Per sonal Dir ectory, press the Directory key and select Personal Directory . For information 2. Press the Search soft key to find t[…]
-
Page 96: Avaya 1120E
Making a call 96 on how to configure and use the Personal Director y, refer to “Using the Personal Directory” on page 147 . To make a c a ll using the Personal Director y: Making a call usin g the Callers List The Callers List feature auto matica lly stores up to a maximum of 100 callers. After 100 callers h ave been stored, each additional cal[…]
-
Page 97: Avaya 1120E
Making a call 97 Making a call using the Redial List The Redial List feature automatically stores a maximum of 20 previously dialed phone numbers. To use the Redial List, pr ess the Directory and select Redial List . For inform ation on how to con figure an d use the Redial List, refer to “Using the Redial List” on page 152 . To make a call usi[…]
-
Page 98: Avaya 1120E
Making a call 98 To view date and time of a call: Using Predial Use the Predial feature to enter, pr eview, and edit numbers before dialing. To use Pred ial: 1. Press the Up/Down navigation keys to scroll and highlight a n ame in the Redial List or Caller List . 2. Press the Right navigation key t o display the D N of the sele cted entry. 3. Choose[…]
-
Page 99: Avaya 1120E
Making a call 99 To edit a Predial nu mb er: Using AutoDial Use the Au toDial fea ture to di splay, st ore, and a utomatica lly dial phone numbers. 2. Press a line key to dial the numb er. 3. Lift the handset when the called pa rty answers or, if in hand sf re e mo d e, beg i n to speak. 1. Use the dialpad to enter the number . 2. Choose one of the[…]
-
Page 100: Avaya 1120E
Making a call 100 To store an AutoDial number: To display an AutoDial number: 1. Without lifting the handset, press the appropriate AutoDial key. Note: The display screen displays the word Autodial next to th e appropr iate key. 2. Using the dialpad, dial the p hon e number (including access code) to be stored on the selected AutoDial key. 3. Press[…]
-
Page 101: Avaya 1120E
Making a call 101 To use AutoDia l: Using Ring Again Use the Ring Again feature if you rece ive a busy tone or if there is no answer. Your IP Deskphone ri ngs wh en the person you called becomes available. Ring Again automatically redials the number. To activate Rin g Ag ai n : To call a Ring Again party when you receive notifica tion: 1. Lift the […]
-
Page 102: Avaya 1120E
Making a call 102 To deactivate Ring Again before n o tification: Using Last Number Redial Use the Last Number Re dial feature to autom atically redial th e last dialed number. To use Last Number Redial: 2. Press the Ring Again soft key to automatica lly dial th e nu m ber. Choose one of the following: — Press the Ring Again soft key a second tim[…]
-
Page 103: Avaya 1120E
Making a call 103 Using Speed Call Use the Speed Call feature to place internal and external calls by dialing a one-, two-, or three-di git code to store, edit, and automatically dial frequently called phone number s. To store a Speed Call numbe r: To make a Speed Call: 1. Press the Speed Call Controller soft key. The triangular icon flashes, indic[…]
-
Page 104: Avaya 1120E
Making a call 104 Using System Speed Call Use the System Speed Call fea ture to dial Speed Call codes that override dialing restri ctions placed on your IP Deskphone. To make a Syst em Speed Call: Using HotLine Use the HotLine feature to automa tically dial a specific numbe r. To use HotL ine: 3. Dial the Speed Call code to automatica lly dial th e[…]
-
Page 105: Avaya 1120E
Making a call 105 Using intercom calling Use the Intercom feature to call a member o f your intercom group by pressing the code assigned to ea ch member. To make an int ercom call: To answer an intercom call while on a line other than your intercom group line: 1. Lift the handset. 2. Press th e Intercom key. 3. Dial the one- or two-digit code for t[…]
-
Page 106: Avaya 1120E
Answering a call 106 Answering a call Each incoming call caus es the phone to ring, the LCD indicator ( R ) beside the Line (DN) key to flash, and the Messa ge Indica tor lamp to flash. To answer a call: Choose one o f the followin g four opti ons: or •L i f t t h e handset. or • Press the Handsfree button loca ted on the left side of the hands[…]
-
Page 107: Avaya 1120E
While on an active ca ll 107 While on an active call This section describ es the fo llow i ng features, available during an active call: • “Placing a call on hold” on page 107 • “Transferring a call” on page 108 • “Using Timed Reminder Recall” on page 109 • “Using Attendant Recall” on page 110 • “Using Call Park” on pa[…]
-
Page 108: Avaya 1120E
While on an active c all 108 Transferring a call Use the Transfer feature to redirect a call to the appr o pr i at e pe rs on . To transfer a call to a third party: To return to the original call, if the transfer is incomplete: 1. Press the Transfer so ft k ey. The othe r party is put on hold and a dial t one sounds. The LCD indicator light flashes[…]
-
Page 109: Avaya 1120E
While on an active ca ll 109 Using Timed Reminder Recall Use the Timed Reminder Re call feature to receive a reminder tone when a transferred call is not answered . To use Timed Reminder Recall: 1. Press th e Transfer soft key. The call is put on hold. 2. Dial the number to which you are transferring the ca ll. or 3. Choose o ne of the f ollowing t[…]
-
Page 110: Avaya 1120E
While on an active c all 110 If the transferred call is not answere d, your IP Deskphone rings: Using Attendant Recall Use the Attendant Recall feature to contact an atten dant during a call and to connect the caller to the attendant. To contact the atten dant while on a call: 1. Lift the handset to reconnect to the original caller. 2. Choose one o[…]
-
Page 111: Avaya 1120E
While on an active ca ll 111 Using Call Park Use the Call Park feature to hold temporarily (park) and r etrieve a call from any IP Deskphone. Using Call Park do es not tie up a line . When configured network-wide, Call Park can be used across networks. A System Park extension can be configured to auto matically park most calls. To park a call on th[…]
-
Page 112: Avaya 1120E
While on an active c all 112 To park a call using the SPRE code or FFC: To retrieve a parked call: 1. Choose one of the following: — Press the Transfer s oft ke y. — Press the Conference soft ke y. 2. Dial the Call Park FFC. 3. To use an altern ate DN from the System Park DN or your own DN, dial the DN where you want to par k the call. Otherwis[…]
-
Page 113: Avaya 1120E
While on an active ca ll 113 Recording a Calling Party Number Use the Calling Party Num ber feature to record a caller’s number, or to charge a call to an account numbe r, during an established call. To record a caller’s number for acc ount ing purposes: Displaying incoming call information Use the Display feature to display a second incoming c[…]
-
Page 114: Avaya 1120E
While on an active c all 114 Tracing a malicious call Use the Call Trace feature to trace nu isance calls within your system. Note: This is not a default feature. Contact your system adm inistrator to configure this feature on yo ur IP Deskphone. To use Call Trace while on a call: To use Call Trace without a Call Tr ace key: 2. Press the flashing l[…]
-
Page 115: Avaya 1120E
Incoming calls 115 Incoming calls You can use the following featur es when you have an incoming call: • “Using Automatic Answerback” on page 115 • “Using Call Pickup” on page 115 • “Using Call Waiting” on page 117 Using Automatic Answerback When the Automatic Answerback featur e is active, your IP Deskphone automatically answers i[…]
-
Page 116: Avaya 1120E
Incoming calls 116 To answer an incoming call in another call pickup group: To answer a call at a specific extension in any pickup group: or 2. Choose one of the following: — Press the Pickup key. — Enter the Pickup Ringing Number FFC. 1. Lift the handset. 2. Press the Group Pickup key or ente r the Pickup Group FFC. 3. Dial the pickup group nu[…]
-
Page 117: Avaya 1120E
Incoming calls 117 Using Call Waiting The Call Waiting feature alerts you to an incoming call by producing a tone. It also puts the current call on hold while you answ er the new call. To answer an incomin g call while on another call: To return to the first IP Deskph one call: 3. Dial the DN of the IP Deskphone that is ringing (and th at is not in[…]
-
Page 118: Avaya 1120E
Incoming calls 118 If you do not have a Call Wa iting key: 2. Press the line (DN) key associ ated with the first call. 1. Press the Goodbye key to end the current call. 2. Press the line (DN) key beside the flashing status icon to answer the incoming call. (Goodbye)[…]
-
Page 119: Avaya 1120E
While away from your desk 119 While away from your desk You can use the following featur es when you are away from your desk: • “Using Call Forward” on page 119 • “Using Internal Call Forward” on page 120 • “Using Remote Call Forward” on page 121 • “Securing your IP Desk phone” on page 123 Using Call Forward Use the Call For[…]
-
Page 120: Avaya 1120E
While away from your desk 120 To deactivate Call F orward: To reinstate Call For ward to the same number: Using Internal Call Forward Use Internal Call Forw ard to accept on ly calls originating at internal DNs to ring at another DN. Calls originating outside your IP Deskphone system still ring at your IP Deskphone. Current incoming calls cannot be[…]
-
Page 121: Avaya 1120E
While away from your desk 121 To deactivate Int e rnal Call Forward: To reinstate Call For ward to the same number: Using Remote Call Forward Use the Remote Call Forward featu r e (from any phone othe r than your own) to forward calls to any IP Deskphone. To activate Remote Ca ll Forward: 2. Dial the DN to which you are forwarding your internal cal[…]
-
Page 122: Avaya 1120E
While away from your desk 122 To deactivate Remo te Call Forward: 2. If you are calling from an IP Deskphone outside the system, dial your direct system access number and wait for the dial tone. 3. Dial the Remote Call Forward Activate FFC to activate the feature. 4. Dial your Station Control Password . A dial tone sounds. 5. Choose one of the foll[…]
-
Page 123: Avaya 1120E
While away from your desk 123 Securing your IP Deskphone Use the Electronic Lock feature to prevent other s from making calls from your IP Deskphone. The Electron ic Lo ck feature is controlled using your Station Control Password (SCPW). To change your Station Co ntrol Password, please refer to “Sec urity features” on page 23 . To lock your IP […]
-
Page 124: Avaya 1120E
While away from your desk 124 To unlock your IP Deskpho ne: 3. Dial your Station Control Password . or 4. Choose one of the following: — If you are dialing loca lly, pr ess the Goodbye key. — If you ar e dialing the FFC remo tely, dial your DN. 1. Lift the handset. 2. Dial the Electronic Loc k De ac ti va te FFC. 3. Dial your Station Control Pa[…]
-
Page 125: Avaya 1120E
Talking with more than one person 125 Talking with more than one person Use the following features to enable co nversations between more than two people: • “Using the Call Join feature” on pa ge 125 • “Setting up a c onference call” on page 126 • “Using Conferee Selectable Display” on page 127 • “Using Group Call” on page 12[…]
-
Page 126: Avaya 1120E
Talking with more than one pe rson 126 Setting up a conference call Use the Conference feature to set up a conference call for a maxim um of three or six people including yourself. Th e maximum number of people the conference feature supports de pends on the configuration of your IP Deskphone. To set up a conference call: If the person you atte mpt[…]
-
Page 127: Avaya 1120E
Talking with more than one person 127 Using Conferee Selectable Display Use the Confer ee Selectable Displa y and Discon nect feature to list active conferees and disconnect a co nfer ee from the conference call. To view active conferees: To disconnect a con feree: 2. Press the line (DN) key beside the flashing status icon to return to your origina[…]
-
Page 128: Avaya 1120E
Talking with more than one pe rson 128 Using Group Call Use the Group Call feature to automatically call members of a predefined group, one at a time, until all members answer. To call group members: 2. Press the line (DN) key on which the conference call is established. 3. Choose one of the following: — For a single conferee, pr ess the Goodbye […]
-
Page 129: Avaya 1120E
Talking with more than one person 129 To answer a group call: 2. Press th e Group Call key or enter the Group Call FFC . — The feature automatically calls al l group members. The ico n flashes until all members answer. — The phone number s of the group members appear on the disp lay as they answer. When the last person answers, the Group Call i[…]
-
Page 130: Avaya 1120E
Talking with more than one pe rson 130 To end a group call: Press the Goodbye key. Note: When the person who made the group call disconnects, the call terminates for all members o f the group. However, the members of the gr oup call can disconnect from the call and not affect other me m be rs on th e call. (Goodbye)[…]
-
Page 131: Avaya 1120E
Working without interruption 131 Working without interruption This section de scribes the Activating Ma ke Set Busy fe ature, which provides uninterrup ted work t ime. Activating Make Set Busy Use the Make Set Busy feature to make your IP Deskpho ne a pp ear bu sy to all callers. To activa te Make Se t Busy: To deactivate Make Set Busy: Call Deflec[…]
-
Page 132: Avaya 1120E
Working without interruption 132 configuration. Contact your system administrator to learn which treatment is configured for your IP Deskphon e. Figure 24: Call Defl ect Key If you press the Deflect key and no spec ial ca ll treatme nt ha s be en configured, your caller receives a busy sig nal. Using Record On Demand key If your call recording serv[…]
-
Page 133: Avaya 1120E
Working without interruption 133 • Bulk Recording — For an active call or unregistered DN/Position ID, call recording is init iated even though the ROD key is not pressed.. Using SAVE key Use the SAVE feature key to save the recording of an active call. Th is key is associated with the active user ID and is operational only if a call is active. T[…]
-
Page 134: Avaya 1120E
Additional call features 134 Additional call features Contact your system administrator to determine if the following call features are available on your IP Deskphon e. • “Using AutoDial Transfer” on page 134 • “Using the Buzz feature” on pag e 135 • “Using Call Page Connect to make an annou ncement” on page 135 • “Using Centr[…]
-
Page 135: Avaya 1120E
Additional call features 135 Using the Buzz feature Use the Buzz feature to notify another pers on of a call, a visitor, or a request. Two IP Deskphones that are linked to gether enable one person to signal the other. The person sig naled hears a buzz. To buzz the IP Deskphone linked t o your IP Deskphone: Using Call Page Connect to make an announc[…]
-
Page 136: Avaya 1120E
Additional call features 136 Using Centrex/Exchange Line Switchhook Flash Use the Centrex/Exchange Line Switchhoo k Flash feature during an established call to use a Centrex service, such as Call Transfer or Three- Way Calling. To use Centrex /Exchange Line Switchhook Flash: 2. Dial the Page Trunk Access Code to complete the connection to the page […]
-
Page 137: Avaya 1120E
Additional call features 137 Charging a call or charging a forced call Use the Call Charge feature to charge a ca ll to a specific account. The Forced Charge featur e charges long-distance calls from an IP Deskphone restricted to local calls. To charge a lo cal or long-dist ance call to an account before y ou dial: To charge a call in progre ss: 1.[…]
-
Page 138: Avaya 1120E
Additional call features 138 To charge a call to an account when you transfer a call: 2. Choose one of the following: — Press the Charge soft key. — Dial the Call Detail Recording FFC. 3. Dial the charge account number. 4. Press the line (DN) key to return to the call. 1. Press the Transfer soft k ey. The call is on hold. 2. Choose one of the f[…]
-
Page 139: Avaya 1120E
Additional call features 139 To charge a call to an acc ount when you add someone to a conferen c e ca ll : 5. Press the Transfer soft key w hen you hear the IP Deskphone ring. Note: You can talk privately to the person at the transfer number befo re you press the Transfer soft key. 1. Press th e Conference s of t ke y. Th e c al l is placed on hol[…]
-
Page 140: Avaya 1120E
Additional call features 140 Using Enhanced Override Use the Enhanced Override feature to override an active call after you attempt a Forc ed C amp -o n. Use Enhanced Ov er rid e to mak e a call or a consultation call, such as placing a call on hold and calling another party. To use Enhanced Override: You receive a busy signa l afte r dialin g a ph[…]
-
Page 141: Avaya 1120E
Additional call features 141 Using Forced Camp-on Use the Forced Camp-on featur e to au tomatically ring another IP Deskphone (internal or external) imme diately after tha t IP Deskphone disconnects from its current call. To use For ced Camp-on: Answerin g a ca ll ca mped — o n to yo ur ex te n si on : You receive a busy signa l afte r dialin g a p[…]
-
Page 142: Avaya 1120E
Additional call features 142 Overriding a busy signal Use the Override feature to overrid e a bu sy signal and interrupt another call. To override a busy signa l: Using Privacy Release Use the Privacy Release feature to enable one or mor e people who share your DN to join a call. 1. You receive a bu sy sig na l afte r dialing a phone number. 2. Cho[…]
-
Page 143: Avaya 1120E
Additional call features 143 To use Privacy Release in an establis hed state: Using Radio Page Use the Radio Page feature to page a person an d stay on the line until they answer. The paged person answe rs the call after entering a special Page Meet-me code from any IP Deskphone. To use Automati c Presel ection (Me et -me page ): Press the Privacy […]
-
Page 144: Avaya 1120E
Additional call features 144 To use Automati c Po st -s el ec ti o n: The called party is either busy on the IP Deskphone or away from their desk. To page the called party, you do not need to re dial the number of the called party. To answer a Radio Page: 4. If your call go es unanswere d for a preset time period and a 15-second hig h- pitched tone[…]
-
Page 145: Avaya 1120E
Additional call features 145 If you carry a Radio Pager, a page indi ca tes that someone dialed your DN. If the Radio Page system is configured to function in Meet-me mode, you can answer the p a ge call from any IP Deskphon e. Using Voice Call Use the Voice Call feature to make an ann oun cement through someone else’s IP Deskphone speaker . To m[…]
-
Page 146: Avaya 1120E
Additional call features 146 To respond to a voice c a ll: Your IP Deskphone rings once and the caller’s voice transmits th rough your speaker. Lift the handset .[…]
-
Page 147: Avaya 1120E
Additional phone features 147 Additional phone features The following features are de scribed in this section: • “Using the Personal Directory” on page 147 • “Using the Callers List” on pa ge 150 • “Using the Redial List” on page 152 • “Using Virtual Office” on page 154 • “Using Media Gateway 1000B” on page 163 Using t[…]
-
Page 148: Avaya 1120E
Additional phone features 148 To edit a n entry: 2. Use the dialpad to enter the name. 3. Press the Next soft key. 4. Use the dialpad to enter the phone number. 5. Choose one of the following: — Press the Done soft key to save the new entry. —P r e s s t h e Cancel soft key to discard the new entry and return to the Add screen. 1. Press the Up/[…]
-
Page 149: Avaya 1120E
Additional phone features 149 To delete an entry: To search for an entry : 3. Choose one of the following: — Press the Done soft key to save the changes. — Press the Cancel soft key to return to the Personal Directory without saving your changes. 1. Press the Up/Down navigation keys to scroll and highlight the entry. 2. Press the Delete soft ke[…]
-
Page 150: Avaya 1120E
Additional phone features 150 Using the Callers List The Callers Lis t feature lo gs all incoming ca lls. The Callers List can store up to 100 entries. When the list is full, the system overwrites the olde st entry. Use the Callers List fe atur e to r eview missed calls and to dia l calls. The Callers List contains: • the caller’s last and firs[…]
-
Page 151: Avaya 1120E
Additional phone features 151 To dial an ent ry: To delete an entry: To delete the entire Caller s List: 1. Press the Up/Down navigation keys to scroll and highlight the desired entry. 2. Press the Dial sof t key. 1. Press the Up/Down navigation keys to scroll and highlight the desired entry. 2. Press the Delete soft key. 3. Choose one of the follo[…]
-
Page 152: Avaya 1120E
Additional phone features 152 Using the Redial List The Redial List feature logs all outgoing calls. The Redial List can store up to 20 e ntries. When th e list is full, th e system overwrites the oldest entry. Use the Redial List feature to review calls made and to redi al previously dialed calls. The Redial List contains: • the last and first n[…]
-
Page 153: Avaya 1120E
Additional phone features 153 To delete an entry: To delete th e en ti re Red ia l Li st :. 2. Press the Dial sof t key. 1. Press the Up/Down navigation keys to scroll and highlight the desired entry. 2. Press the Delete soft key. 3. Choose one of th e following soft keys: — Yes to delete the entry — No to return to the previous screen 1. Press[…]
-
Page 154: Avaya 1120E
Additional phone features 154 Using Virtual Office The Virtual Office feature provides a service you can use while you are away from y our desk to transfer calls , and all your office IP Deskphone features, to a remote IP Deskphone. Virtual Office makes this possible by allowing you to use another IP Deskphone (the Remote phone) to log in to your o[…]
-
Page 155: Avaya 1120E
Additional phone features 155 Note 1: When logged into an Avaya 1120E IP Deskphone or an Avaya 2050 IP Softphone using Virtual Office, feature keys 4 and 5, and the Shift key, are not ava ilable to the Avaya 1120E IP Deskphone. Note 2: A Virtual Office login to an Avaya 1120E IP Deskphone from an Avaya 1110 IP Deskphone, IP Phone 2001, Avaya 20 33 […]
-
Page 156: Avaya 1120E
Additional phone features 156 A successful login transfers all the feat ures , time, date, an d t ones to your Remote IP Deskphone from yo ur Office IP Deskphone. 1. Press the Virtual soft k ey. 2. At the prompt, enter your us er ID. 3. Press the Enter key. 4. At the prompt, enter the home Station Control Password (SCPW) . Note 1: If the user ID is[…]
-
Page 157: Avaya 1120E
Additional phone features 157 Using Virtual Office on your Remote IP Deskphone Because the display characteristics, including size, vary from one IP Deskphone model to the n ext, your Office Avaya 1120E IP Deskphone display is different on each Remote phone. Figure 26 shows a n Avaya 1120E IP Deskphone logged in as a Remote phone to an Avaya 1120E […]
-
Page 158: Avaya 1120E
Additional phone features 158 Figure 27: Logged in to an Avaya 1120E IP Deskphone using an Avaya 1140E IP Desk phone Figure 28 shows an IP Softphone 2050 logged in as a Re mote phone to an Avaya 1120E IP Deskphone Office phone. In this case, the informati on display is arranged in a d ifferent fashion, but all the information is visible at one time[…]
-
Page 159: Avaya 1120E
Additional phone features 159 Using Virtual Office on your Offi ce IP Deskphone Figure 29 shows the Avaya 1120E IP Deskphone display when the phone is logged out due to rem o te access. Figure 29: Offic e phone displ ays the messa ge Logged Out When activate d for Virtual O ffice by a Remote IP Deskphone, your Office IP Deskphone is lo gged out and[…]
-
Page 160: Avaya 1120E
Additional phone features 160 To regain operation of an IP Deskphone being used for Virtua l Office: Logging out of Virtual Office To log out of Virtual Office, press the Virtual soft key. Automatic log out from Virtual Office Your remote Virtual Office IP Deskphon e may be configured to automatically log out of Virtual Office af ter a predetermine[…]
-
Page 161: Avaya 1120E
Additional phone features 161 Note: Some IP Deskphones are configured as Virtual Office-only telephones and have no assigned DN. However, these IP Deskphones can still be used to make emergency calls. “Emergency Calls only “ is displayed on the IP Deskphone display when not logged in to Virtual Office. When the phone goes off-hook, d ial tone i[…]
-
Page 162: Avaya 1120E
Additional phone features 162 Invalid ID (3) Incorrect User ID entered. Enter correct User ID. User ID in Gatekeeper database points to originating Call Server. Notify system administrator. Locked fro m Login Three failed attempts to enter the correct Station Control Password. Wait one hour for th e lock to clear automatically, or notify system adm[…]
-
Page 163: Avaya 1120E
Additional phone features 163 Using Media Gateway 1000B The Media Gateway 1000 B (MG 1000B) provides a means of extend ing Avaya Communication Server 1000 Releas e 4.5 features to one or more remotely located branch office s using the Branch Office feature. A branch office is a remote location in th e network where IP Deskphones, PSTN access, and T[…]
-
Page 164: Avaya 1120E
Additional phone features 164 can return to No rmal Mode (see “Using Resume Normal Mode” on page 164 ) or by waiting for 10 minutes. Local Mode If the WAN connection fails, the IP Deskphon e loses co mmunication with the Main Office Telephone Preferenc e Service (TPS). It the n registers with the MG 1000B and receives IP Deskphone services from[…]
-
Page 165: Avaya 1120E
Additional phone features 165 Note: If you do not use the Resume Normal Mode command after testing, the IP Deskphone automatically returns to Normal Mode in 10 minutes. Troubleshooting MG 1000B The MG 1000B can display error messages on-scr een . Table 11 lists error messages and describes actio ns to correct the causes. 1. Press the Services ke y.[…]
-
Page 166: Avaya 1120E
Additional phone features 166 Local Mode Invalid ID (2) Branch User ID not found in any equipped TN. Notify system administrator. Table 11: Troubleshooting MG 1000B (Part 2 of 2) Display Message Probable Cause Actions[…]
-
Page 167: Avaya 1120E
Using Hospitality features 167 Using Hospitality features Hospitality features are intended for hotel operations. The following features are discussed in this section: • “Configuring Automatic Wak e-Up” on page 167 • “Activating M essage Registr a tion” on page 169 • “Using Maid Identification” on page 171 • “Displaying Room S[…]
-
Page 168: Avaya 1120E
Using Hospitality features 168 To cancel an Automat ic Wake-Up call: To verify the time fo r the Auto ma ti c Wa ke -U p ca ll: 4. Press the Goodbye key. 1. Lift the handset. 2. Dial the Automati c Wak e-Up Qu it FFC. 3. Press the Goodbye key. 1. Lift the handset. 2. Dial the Automati c Wake -Up Verify FFC. 3. Dial the Automati c Wake -Up time in a[…]
-
Page 169: Avaya 1120E
Using Hospitality features 169 Activating Message Registration Use the Message Registration fe ature to read, change, or reset meters that log your hotel IP Deskphone calls. To read me ters: To change a meter: 4. Press the Goodbye key. 1. Press the Message Reg i stration key. 2. Dial the room Directory Number (DN). 3. Press the Message Reg i strati[…]
-
Page 170: Avaya 1120E
Using Hospitality features 170 To reset a meter to zero: 4. Press the * key. 5. Press the Message Reg i stration key. 1. Press the Message Reg i stration key. 2. Dial the room DN. 3. Press th e * key. 4. Press the Message Reg i stration key. MRK MRK MRK[…]
-
Page 171: Avaya 1120E
Using Hospitality features 171 Using Maid Identification Use the Maid Identification feature to tra ck the cleaning status of rooms. The maid enters the information from the IP Deskphone in each room. To enter cleaning st atus: 1. Press the Room Status key. 2. Dial the DN for the room. 3. Dial one of the following cleaning status codes: 1 = Cleanin[…]
-
Page 172: Avaya 1120E
Using Hospitality features 172 Displaying Room Status Use the Room Status feature to disp lay the status of a room using the Display Module. To read the status of a room: Changing the status of a room: 1. Press the Room Status key. 2. Dial the DN for the room. The DN is displayed followed by a two- dig it code.The first digit indicates the occupanc[…]
-
Page 173: Avaya 1120E
Using Hospitality features 173 2. Dial the DN for the room. The DN displays followed by a two- digit code.The first digit indicates the occupancy status: 0 = Room vacant 1 = Room occupied The second digit indicates the cleaning status of the room : 1 = Cleaning requeste d 2 = Cleaning in progress 3 = Room cleaned 4 = Room passed inspection 5 = Room[…]
-
Page 174: Avaya 1120E
Accessing External Server Applications 174 Accessing External Server Applications Use External Server Applications to access a variety of applications directly from your Avaya 1120E IP Deskphone. To find out what feat ures and se rvices are available, contact your system administrator. Depending on what is available on your system, your phone can p[…]
-
Page 175: Avaya 1120E
Flexible Feature Codes (FFC) 175 Flexible Feature Codes (FFC) Use Table 12 to keep track of the FFCs assigned by your system administra tor. Table 12: Flexible Feature Codes (Part 1 of 2) FFC Feature FFC Feature Automatic Wake-Up Activate Make Set Busy Activate Automatic Wake-Up Deactivate Make Set Busy Deactivat e Automatic Wake-Up Verify Maliciou[…]
-
Page 176: Avaya 1120E
Flexible Feature Codes (FFC) 176 RingAgain Deactivate Virtual Office T erminal L og Off Station Control Password Change Virtual Office Term in al Log On Table 12: Flexible Feature Codes (Part 2 of 2) FFC Feature FFC Feature[…]
-
Page 177: Avaya 1120E
Quick Reference Card 177 Quick Reference Card This chapter is the Quick Reference Card for the Avaya 1120E IP Deskphone. Print this chapter as a re ference guide. Feature operation AutoDial Store Use Display Call Forward Activate Deactivate Reinstate View number Call Pickup Call Waiting Answer Return to first call Conference Handsfree Activate (to […]
-
Page 178: Avaya 1120E
Quick Reference Card 178 Legend Services and Telephone Options menus When notified Deactivate Transfer Adjust volume or Icon Action ( ) Indicates the key cap text label. For example, (Message). Lift the handset, press th e line (DN) key or the Handset key. Replace the handset, or press to end the call. Press a line/feature key. Dial a number. An ic[…]
-
Page 179: Avaya 1120E
Quick Reference Card 179 Note : The Directory key provides access to Corporate Direc tory, Persona l Directory, Redial List, and Callers List. Pick one of: Ringer Handset Listen Handsfree Listen Headset Listen Buzzer Contrast adjustment Language Note : This langu age setting c ontrols the language us ed by feature s on your phone onl y. To set the […]
-
Page 180: Avaya 1120E
Quick Reference Card 180[…]
-
Page 181: Avaya 1120E
Regulatory and safety information 181 Regulatory and safety information This equipment has been tested and found to comply with the limits for a Class B digital device, pursuant to part 15 of the FCC Rules. These limits are designed to provide reasonab le protection against harmful interference in a resident ial installation. This equ ip m en t ge […]
-
Page 182: Avaya 1120E
Regulatory and safety information 182 この装置は、情報処理装置等電 波障害自主規制協議会(V CCI)の基準に基づくク ラス B 情報技術装置です。この装置は 、家庭環境で使用すること を目的としていますが、こ の 装置がラジオやテレビジョン受 信機に近接して?[…]
-
Page 183: Avaya 1120E
Regulatory and safety information 183 Other Safety Appr ovals: IEC 60950-1: ITE e quipment — Safety — Part 1: General requirements. Other US/Canada : Hearing Aid Compatibility (HAC) as per FCC Part 68 This equipment complies with the CE Marking re quirements. EU Countries : This device complies with the essential requireme nts and other relevant pr[…]
-
Page 184: Avaya 1120E
Regulatory and safety information 184 DenAn regulatory notice for Japan[…]
-
Page 185: Avaya 1120E
Third party terms 185 Third party terms Third Party Terms for UNIStim sw releases 4.1 thru 5.0 (Jan 2010 — Nov 2010) Certain portions of the pr oduct («Op en Source Components») are licensed under open source license agreem ents that require Avaya to make the source code for such Open Source Components available in sour ce code format to […]
-
Page 186: Avaya 1120E
Third party terms 186 * * This software/database is a «U nited States Governm ent Work» un der the terms of the United States Copyr ight Act. It was written as part of the author’s official duties as a United Sta tes Government employee and thus cannot be copyrighted. This software/database is freely available to the public for use. […]
-
Page 187: Avaya 1120E
Third party terms 187 away your freedom to share and change it. By contrast, the GNU Gene ral Public License is intended to gu arantee your freedom to sh are and change fre e software- -to ma ke sure the s oftware is free for all its users. This General Public License applies to most of the Free Software Foundation’s softwa re and to any othe[…]
-
Page 188: Avaya 1120E
Third party terms 188 another language. (He reinafter, translat ion is included without limitation in the term «modification».) Each licensee is addressed as «you». Activities other than cop yin g, distr i butio n an d m od ifica tio n ar e no t co ver e d by th is License; they are ou tside its scope. Th e act of running th[…]
-
Page 189: Avaya 1120E
Third party terms 189 to work written entirely by you; rather, the intent is to exercise the right to control the distributio n of derivat i ve or collective works based on the Program. In addition , mere agg regation of ano ther wo rk not based on the Program with the Program (o r with a work based on the Program) on a volume of a storage or distr[…]
-
Page 190: Avaya 1120E
Third party terms 190 or distribute the Progra m or its derivative works. These actions are prohibited by law if you d o not ac cept this Lice nse. Ther efore, by modifying or distributing the Progr a m (or an y wor k ba se d on the Program), you indicate your acceptance of th is Licen se to do so, and all its terms and conditions for copying, dist[…]
-
Page 191: Avaya 1120E
Third party terms 191 Free Software Foundation may publish revised and/or new versions of the General Public License from time to time. Such new versions will be similar in spirit to the present versio n, but may differ in detail to addr ess new problems or concerns. Each ver sion is given a distinguishing version number. If the Program spe cifies […]
-
Page 192: Avaya 1120E
Third party terms 192 want it to be of the greatest possible use to the public, the best way to achieve this is to make it free software which everyone can redistr ibute and change unde r thes e te rm s. T o do so, att ac h the following notic es to the progra m. It is safest to attach t hem to the start of each source file to most effectively conv[…]
-
Page 193: Avaya 1120E
Third party terms 193 OpenSSL The following component is lic ensed un d er Ope nS S L licen se : OpenSSL 0.9.7b OpenSSL License /* ================ ============== ============== ========= * Copyright (c) 1998-2008 The Op enSSL Project. All rights reserved. * * Redistribution and use in source and binary forms, with or without modification, are perm[…]
-
Page 194: Avaya 1120E
Third party terms 194 * 6. Redistributions of any form whatsoe ver must retain the following acknowledgm ent: * «This product includes software develope d by the OpenSSL Project for use in the OpenSSL Toolki t (http://www.o penssl.org/)» * * THIS SOFTWARE IS PROVIDED BY THE OpenSSL PROJECT «AS IS» AND ANY EXPRESSED OR IMPLIE D[…]
-
Page 195: Avaya 1120E
Third party terms 195 * * This library is free for commercial and non-commer cial use as long as the following conditions are ahear ed to. Th e following conditions apply to all code found in this distribution, be it the RC4, RSA, lhash, DES, etc., code; not just th e SSL code. The SSL documentation included with this distribution is covered by the[…]
-
Page 196: Avaya 1120E
Third party terms 196 * THIS SOFTWARE IS PROVIDED BY ERIC YOUNG «AS IS» AND ANY EXPRESS OR IMPLIED WARRANTIES, INCLUDING, BUT NOT LIMITED TO, THE IMPLIED WARRA NTIES OF MERC HANTABILITY AND FITNESS FOR A PARTICULAR PURPOSE ARE DISCLAIMED. IN NO EVENT SHALL THE AUTHOR OR CONTRIBUTORS BE LIABLE FOR ANY DIRECT, INDIRECT, INCI DENTAL, SPECI[…]
-
Page 197: Avaya 1120E
Third party terms 197 1. The origin of this software must not be misrep re se n te d; yo u mu st not claim that you wrote the original software. If you use this software in a product, an acknowledgment in the pro duct documentation would be appreciated but is not required. 2. Altered source vers ions must be plainly marked as such, and must not be […]
-
Page 198: Avaya 1120E
Third party terms 198 dealings in this Software without prior written aut horization of the copyright holde r . END OF TERMS AND CONDITIONS Libpng The following component is lic ensed un d er libpn g licens e: Libpng 1.2.37 — June 4 , 2009 Libpng License This copy of the libpng notices is p rovided for your convenience. In case of any discrep ancy […]
-
Page 199: Avaya 1120E
Third party terms 199 libpng versions 0.97, January 1998, through 1.0 .6, March 20, 2000, are Copyright (c) 199 8, 1999 Glenn Rand ers- Peh rson, and are distributed according to the same disclaim er a nd license as libpng-0.96, with the following indiv iduals add ed to the lis t of Contr ibuting Auth ors: Tom Lane Glenn Randers-Pehrson Willem van […]
-
Page 200: Avaya 1120E
Third party terms 200 consequen tia l dama ge s, wh ich m ay re su lt from the us e of th e PNG Reference Library, even if advised of the possibility of such damage. Permission is hereby grante d to use, copy, modify, and distribu te this source code, or portions hereof, fo r any purpose, withou t fee, subject to the following restrictions: 1. The […]
-
Page 201: Avaya 1120E
Third party terms 201 .» This code is derived from softwar e cont ributed to Ber keley by Ch ris Torek. Redistribution and use in source and binar y for ms, with or without modification, are permitted provided tha t the following conditions are met: .» 1. Redistributions of source co de must retain the above copyright notice, this list […]
-
Page 202: Avaya 1120E
Third party terms 202 Convert UTF ConvertUTF License Copyright 2001 -2004 Unicode, Inc. Disclaimer This source code is provided as is by Unicode, Inc. No claims are made as to fitne ss for any particular pu rpose. No warranties of any kind are expressed or implie d. The recipient agrees to determine app licability of information provided. If th is […]
-
Page 203: Avaya 1120E
Third party terms 203 Redistributions in binar y form must re produce th e above copyright notice, this list of conditions and the following disclaimer in the documentation and/or other materials provide d with the distribution. Neither the na me of the <ORGANIZATIO N> nor the names of its contributor s may be used to en dorse or promot e pro[…]
-
Page 204: Avaya 1120E
Third party terms 204 (2) If only executable code is distributed, then the accompanying documentation must state that «this so ftware is based in p ar t on the work of the Independent JPEG Group». (3) Permission for use of this software is granted only if the user a ccepts full responsibility for an y undesirable consequenc es; the author[…]
-
Page 205: Avaya 1120E
Terms you should know 205 Terms you should know Avaya Communication Server 1000 Your office communication system. Calling Party Name Display Information appearing on the LCD displa y scr een, such as the caller’s name and telephon e number. The system must have CPND enabled. Category 5 (Cat5) Cable and associ ated connecting hardware ca pable of […]
-
Page 206: Avaya 1120E
Terms you should know 206 Directory Number (DN) A number consisting of one to seven digits for a telep hone, and also known as an extension number . Feature display An area tha t shows st atus infor mat ion about the feature in use. It also displays the name and status of the active session. Feature Status Lamp indicator An LCD or an LED that indic[…]
-
Page 207: Avaya 1120E
Terms you should know 207 Information line A one-line by 24-character area th at displays date an d time or application information. Interrupted dial tone A broken or pulsed dial tone that so unds when you access some features on your telephone. Message/Inbox A fixed key on your Avaya 1120E IP Deskphone that connects to your voice messaging system […]
-
Page 208: Avaya 1120E
Terms you should know 208 Shared Directory Number A DN (extension) that is shared by two or more persons. Special Prefix code (SPRE) Special codes entered using the dialpad, fo llowed by a two-digit access code, that enable features (for example, Call Forward All Calls requires entry of SPRE code + 74 ). Special dial tone The three consecutive tone[…]
-
Page 209: Avaya 1120E
Terms you should know 209 User interface Screen displays that interact with the end user as a result of an action or event. Visual Alerter/Message Waiting indicator An LCD or an LED that flashes to indicate that a message is waiting or when the ringer is on.[…]
-
Page 210: Avaya 1120E
Terms you should know 210[…]
-
Page 211: Avaya 1120E
Index 211 Index A Adjusting the display screen con- trast 60 Adjusting the volume 59 Area Code Setup 68 Attendant Recall 110 AutoDial 99 AutoDial Transf er 134 Automatic Wake-Up 167 B Buzz feature 135 C Call features and Flexible Feature Codes 21 Call Forward 119 Call Join 125 Call log options 78 Call Page 135 Call Page Connect 135 Call Park 111 Ca[…]
-
Page 212: Avaya 1120E
Index 212 ties 20 Display Settings 80 Display settings 80 DN 206 E Electronic Lo ck 123 Enabling OnHo ok Default Pa th 72 Enabling/disabling Call Timer 72 Enhanced O verride 1 40 Enter key 16 Entering and editin g te xt 26 Editing te xt using the soft keys 27 Entering text using the USB keyboard 28 Expand key 16 External server applications 174 F F[…]
-
Page 213: Avaya 1120E
Index 213 N Navigation keys 16, 207 New Call indication 66 Normal mode 163 O Off-hook 207 Off-hook dialing 91 Onhook Default Path 72 On-hook dialing 91 Override a busy signal 142 P Paging tone 207 Personal Directory 95 Place a call on hold 107 Predial feature 98 Preferred Name Ma tch 67 Privacy Release 142 Q Quit/Stop key 17 R Radio Page 143 Redial[…]
-
Page 214: Avaya 1120E
Index 214 function keys 28 User Interface 209 V Viewing telephone information 78 Virtual Office 154 Virtual Office login 15 5 Virtual Office logout 160 Virtual Office on your Remote tele- phone 157 Voice Call 145 Volume adju stm e nt 59 Volume control 15 Volume control bar 15[…]
Пятница 06 Январь 2017 — 18:09:41 |
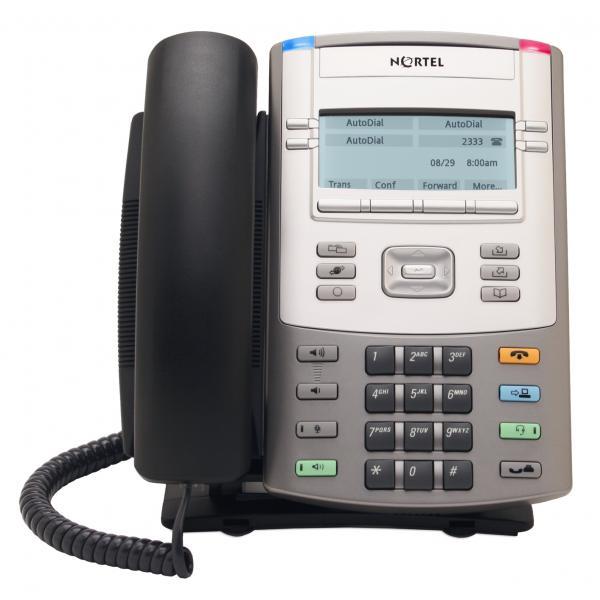 IP-телефон Nortel 1140E – это новое поколение настольных IP-терминалов, которое открывает перед пользователями широчайший спектр возможностей, связанных с быстрым доступом к современным приложениям. IP телефон Nortel 1120E утверждает новый стандарт функциональности IP-телефона, как эффективного средства связи, способствуя резкому росту производительности, как отдельных работников, так и целых предприятий.
http://mr-welk.livejournal.com/30641.html Ещё страница про настройку
Как прошить, проапгрейдить IP телефон Nortel Avaya 1120E 1140E
Делается все очень просто. Расскажу на примере модели 1120е, с 1140е все также, только переименовать соответствующие файлы и их содержимое.
1. Необходимо в папку, где запущен TFTP сервер положить следующие 5 файлов и обязательно с такими именами и расширениями:
1140e.cfg 1140eSIP.cfg users.dat Russian.lng SIP1140e04_04_10_00.bin
2. Содержимое 1140e.cfg
#————————————
#
# See NN43112-300
#
#[DEVICE_CONFIG] Device configuration file
#[LANGUAGE] Downloadable language files
# more than one can be specified in
# each section)
#[FW] Firmware image
#[DIALING_PLAN] Dialing plan
#[TONES] Downloadable tones (.wav files)
#[USER_CONFIG] IP Phone 1140E specific configuration file
# Provisioning is performed using the commands in the 1140eSIP.
#
#—————————————
[FW]
DOWNLOAD_MODE FORCED
VERSION SIP1140e04_04_10_00
PROTOCOL TFTP
FILENAME SIP1140e04_04_10_00.bin
3. Содержимое 1140eSIP.cfg
[FW]
DOWNLOAD_MODE AUTO
VERSION SIP1140e04_04_10_00
FILENAME SIP1140e04_04_10_00.bin
PROTOCOL TFTP [DEVICE_CONFIG]
DOWNLOAD_MODE FORCED
VERSION 000004
FILENAME users.dat [LANGUAGE]
DOWNLOAD_MODE FORCED
VERSION 000004
DELETE_FILES YES
FILENAME Russian.lng
4. Содержимое users.dat
DNS_DOMAIN yoursip.ru
SIP_DOMAIN1 yoursip.ru
SERVER_IP1_1 192.168.1.4
SERVER_PORT1_1 5060
SERVER_RETRIES1 3
DEF_USER1 NORTEL
SNTP_ENABLE YES
SNTP_SERVER 192.168.1.4
TIMEZONE_OFFSET 21600
FORCE_TIME_ZONE YES
DST_ENABLED NO
BANNER your logotype
VMAIL 5000
VMAIL_DELAY 300
DEF_LANG Russian
DEF_AUDIO_QUALITY High
ENABLE_LLDP YES
ADMIN_PASSWORD 26567*738
ADMIN_PASSWORD_EXPIRY 0
# Settings to disable extended license
MAX_LOGINS 1
USB_HEADSET LOCK
EXP_MODULE_ENABLE NO
ENABLE_SERVICE_PACKAGE NO
IM_MODE DISABLED
AVAYA_AUTOMATIC_QoS NO
VQMON_PUBLISH NO
SIP_TLS_PORT 0
ENABLE_BT NO
# Enable SSH
SSH YES
SSHID admin
SSHPWD admin 5. Скачать файл с готовым конфигом, прошивкой SIP1140e04_04_10_00.bin и Russian.lng
(SIP1140e04_03_09_00_MED.bin Russian.lng)
6. Это были прямые ссылки, а так все нужное здесь:http://support.avaya.com/downloads/download-details.action?contentId=C20127101120249200_5&productId=P0600
7. В телефоне зайти через сервисное меню нажимая конопку с пиктограмой «Глобус» в «Сетевые настройки» через пароль по умолчанию 26567*738 нажать самомаркирующуюся кнопку «Auto», чтобы увидеть чекбоксы и курсором опуститься до «Сервер подготовки» или «Provision server», снимаем с него галочку и нажимаем самомаркирующуюся кнопку «Настр» или «Config», и пишем ай-пи адрес нашего TFTP сервера и нажимаем самомаркирующуюся кнопку «Применить» или «Apply». Телефон перезагрузится, подключится к TFTP серверу и сначала прошьется на прошивку SIP и перезагрузиться, затем опять также зайдет на TFTP сервер и возьмет содержимое users.dat и Russian.lng из файла 1140eSIP.cfg и еще раз перезагрузиться, но уже после этой перезагрузки он будет SIP.
8. После перезагрузки редактируем домен (указывая: название, ip-адрес и порты). После чего заходим возвращаемся в сервесное меню в «сетевые настройки» и отключаем всё что связано с TLS и указываем SIP порты.
9. Если нужно будет вернуть телефон опять в Юнистим из SIP, то для этого нужно положить на тот же TFTP сервер соответствующую прошивку юнистим и изменить содержимое файла 1140eSIP.cfg на следующее:
[FW]
DOWNLOAD_MODE FORCED
VERSION
FILENAME 0624C7J.bin
Если у Вас нет TFTP сервера, то можно воспользоваться программой: tftpd32 в ней же есть и DHCP сервер. У меня два TFTP сервера на разных компьютерах, в одном находятся файлы для превращения Unistim to SIP, а в другом файлы для превращения SIP to Unistim. Я только каждый раз меняю ай-пи адрес «Сервера подготовки» или «Provision server». В файлеusers.dat в строке SERVER_IP1_1 192.168.1.4 укажите ай-пи адрес Вашего SIP сервера. В случае если телефон не захочет прошиваться, то нужно его будет сбросить на заводские установки, но он конечно должен быть зарегистрирован на АТС, делается так:[*][*][7][3][6][3][9][MAC][#][#] — где МАС-адрес IP-телефона, который можно найти на этикетке задней панели. Так как МАС-адрес может содержать буквы от А до F, буквы A, B и C можно вводится с помощью [2] на поле ввода номера и букв D, E и F можно ввести с помощью [3].
Например, IP-телефон с MAC-адресом 00:19: E1: E2: 17:12 будет сбрасывается в
Factory Default следующей последовательностью ** 73639001931321712 # # , вводится с клавиатуры. Я прошил SIP 4.4 (1120e04.04.10.00) — и после этого уже наткнулся в инете на инфу о том, что версии выше 2.0 требуют лицензий — и как этим бороться ? проще сразу перешиться на вторую версию http://blog.michaelfmcnamara.com/2009/10/factory-reset-nortel-ip-phone/
Restore to Factory Default (applies to IP Phone 2007, 1110, 1120E, 1140E, 1150E, 1210, 1220 and 1230) The UNIStim firmware release 3.0 for IP Phones introduces the ability to restore an IP Phone to a ‘factory default’ configuration. This can be useful when redeploying an IP Phone from one location to another, when starting to use an IP Phone with unknown history, or to reset to a known baseline configuration. With UNIStim firmware release 3.0, the following keypad sequence is used to reset all provisioning parameters to a ‘factory default’:
[*][*][7][3][6][3][9][MAC][#][#]
Where MAC corresponds to the MAC address of the IP Phone which can be found on a label on the back of the IP Phone. Since a MAC address can contain the letters A through F, the letters A, B and C can be entered via the [2] key on the dialpad, and letters D, E and F can be entered via the [3] key. For example, an IP Phone with MAC address 00:19:E1:E2:17:12 would be reset to ‘factory default’ when the sequence **73639001931321712## is entered on the keypad. Unfortunately there is no mechanism to reset Phase 2 sets to the factory defaulthttp://www.tek-tips.com/viewthread.cfm?qid=1696295 Домовитые парни из Avaya, после приобретения Nortel, решили срубить побольше бабла и с 3-ей версии прошивки ввели лицензии на SIP на самом телефоне, о которых ни слова не написали на сайте в разделе где давалась краткая спецификация 1120E. Ранее лицензировать требовалось только SIP подключения на самой АТС. VoIP телефоны ведущих вендоров по-прежнему стоят существенно дороже цифровых и тем более аналоговых портов… Мы оттестировали работу SIP прошивки с Asterisk на одном из наших Nortel 1120E и все необходимые функции отрабатывались замечательно. Примерно через неделею-полторы после запуска в работу CallCenter самый первый тестовый 1120E неожиданно перестал регистрироваться на Asterisk, сигнализируя о нехватке какой-то лицензии. Оказалось, что в телефоне «прошита» триальная лицензия, отрабатывающая 30 дней, после чего функционал SIP отключается. К счастью, откат на версию SIP 2.0 решал проблему с регистрацией, но при этом переставали работать USB гарнитуры Jabra 2400. После недели-двух общения с Avaya наконец удалось выяснить что за лицензия необходима (70$ MSRP или ~60$ со скидкой — не малые деньги для телефона за 300$). Причем после оплаты лицензий мы не могли их получить три месяца, т.к. никто в Avaya толком не знал каким образом нужно активировать лицензии на телефонах, т.е. горе-маркетологи Avaya как-то не подумали, что их телефоны с заявленной SIP функциональностью могут использоваться на оборудовании отличном от Avaya. http://www.bizkit.ru/2011/03/26/56/ Достоинства:
Bluetooth
Поддержка USB клавиатуры и мыши
Неплохой звук и качество передачи речи
Симатичный дизайн UNISTIM-прошивка 0625C39 не позволит перешиться на SIP (вопреки документации от Avaya) — надо сначала прошиться на более свежую UNISTIM (я шился до 0625C8G), и только потом получится прошиться до SIP. инструкция http://www.digitcom.ca/docs/website/1120E_User%20Guide.pdf
сброс стр 197 203 на англ разговоры про резет
http://blog.michaelfmcnamara.com/2009/10/factory-reset-nortel-ip-phone/
************************************************************************
Скачать 3CXPhone6.msi (Windows)
3CXPhone — бесплатный софтфон для осуществления звонков по технологии VoIP. Является расширением для системы IP-PBX 3CX. Существуют версии программы для операционных систем семейства Microsoft Windows, Android, iPhone. Установка 3CXPhone занимает всего несколько минут. Нет никаких лицензий и привязки к определённому VoIP-провайдеру. Функции 3CXPhone
- Доступна для Microsoft Windows, Android и iPhone.
- Возможность выбора интерфейса для Microsoft Windows (скины).
- Автонастройка.
- Многолинейность.
- Перевод вызовов.
- Запись разговоров.
- Хранение истории звонков.
- Поддержка кодеков G.711, GSM и Speex.
- Простая в установке и использовании.
- Поддержка стандартных USB-гарнитур и гарнитур Jabra (Microsoft Windows).
- Работает с 3CX Phone System, Asterisk и популярными VoIP-операторами.
-
Page 1
Avaya 1120E IP Deskphone User Guide Avaya Communication Server 1000 Document Status: Standard Document Version: 06.01 Part Code: NN43112-103 Date: October 2010… -
Page 2
Marks without the express written permission of Avaya or the applicable third party. Avaya is a registered trademark of Avaya Inc. -
Page 3: Revision History
Standard 05.02. This document is up-issued to reflect changes in technical content for Call Log Options. June 2010 Standard 05.01. This document is up-issued to support Avaya Communication Server 1000 Release 7.0. October 2009 Standard 04.01. Because of the similarity between Communication Server 1000 Release 6.0 for UNIStim 4.0…
-
Page 4
Revision history January 2009 Standard 02.04. This document is up-issued to support Communications Server 1000 Release 5.5 for UNIStim 3.0. Added technical content in the section Making a call using the Redial List. April 2008 Standard 02.03. This document is up-issued to support Communications Server 1000 Release 5.5 for UNIStim 3.0. -
Page 5: Table Of Contents
Contents About the Avaya 1120E IP Deskphone ….11 Basic features ……..11 Telephone controls .
-
Page 6
Contents Configuring Telephone Options ….. 56 Using the Telephone Options menu ….57 Adjusting the volume . -
Page 7
8. VPN Information ……87 9. Certificate Information ……88 10. -
Page 8
Contents Using Attendant Recall ……110 Using Call Park ……..111 Recording a Calling Party Number . -
Page 9
Using the Buzz feature ……135 Using Call Page Connect to make an announcement ..135 Using Centrex/Exchange Line Switchhook Flash . -
Page 10
Contents Using Maid Identification ……171 Displaying Room Status ……172 Accessing External Server Applications . -
Page 11: About The Avaya 1120E Ip Deskphone
About the Avaya 1120E IP Deskphone The Avaya 1120E IP Deskphone brings voice and data to the desktop by connecting directly to a Local Area Network (LAN) through an Ethernet connection. In this guide, self-labeled line/programmable feature key labels appear beside the keys, and context-sensitive soft key labels appear directly above the keys.
-
Page 12
About the Avaya 1120E IP Deskphone Note: Some Avaya 1120E IP Deskphone phones are not configured to support soft key functionality. Consult your system administrator. • graphical, high-resolution LCD display, backlit, with adjustable contrast • high-quality speaker phone • volume control keys for adjusting ringer, speaker, handset, and headset volume •… -
Page 13
• Accessory Expansion Module port to connect the Avaya 1100 Series IP Deskphones. For information about using the Expansion Module, see the Avaya 1100 Series IP Deskphones User Guide (NN43130-101). Figure 2 shows the Avaya 1120E IP Deskphone. -
Page 14: Telephone Controls
About the Avaya 1120E IP Deskphone Telephone controls This section describes the controls on the Avaya 1120E IP Deskphone. In some geographic regions, the Avaya 1120E IP Deskphone is offered with key caps that have English text labels. In this document, text in parentheses indicates the labels that appear on the key caps, for example, (Services).
-
Page 15
Press the handsfree. (Handsfree) The Handsfree LED indicator, located on the Handsfree handsfree is active. About the Avaya 1120E IP Deskphone Volume control buttons to adjust Mute key functionality is enabled or Mute key is enabled. Mute… -
Page 16
About the Avaya 1120E IP Deskphone (Hold) (Expand) (Headset) Use the Navigation keys to scroll through menus and lists appearing on the LCD display screen. The outer part of this key cluster rocks for up, down, left, and right movements. -
Page 17
WaitingIncoming Call Indicator the top center of the IP Deskphone flashes. The flash cadence for each alert is different. When your Avaya 1120E IP Deskphone firmware is being updated, the blue Status Lamp To find out if additional features are supported, contact your administrator. -
Page 18
About the Avaya 1120E IP Deskphone (Msg/Inbox) (Directory) Press the Message/Inbox your voice mailbox. Note: This function is not available on all phones; consult your administrator. Press the Directory key to access directory services. key to access… -
Page 19
Press the menu, and use the navigation keys to access (Services) the following items: • Caller ID display order About the Avaya 1120E IP Deskphone Services key to open the Services Telephone Options: — Volume adjustment — Contrast adjustment — Language —… -
Page 20
• Password Admin: — Station Control Password Password Admin menu is not available on all Avaya 1120E IP Deskphone sets. • Display Network Diagnostics Utilities Only your system administrator or service provider can use Display Network Diagnostics Utilities to perform Internet diagnostics. -
Page 21: Telephone Display
Call Timer, feature prompt string, user-entered digits, date and time information, and phone information. Because the Avaya 1120E IP Deskphone only has a single-line information display area, you are prompted to scroll through any additional lines of information. For example, during an incoming call, only the Directory Number (DN) appears if the caller name is greater than 10 characters.
-
Page 22: License Notification
IP Deskphone. Audio and text message broadcast The Avaya 1120 IP Deskphone can display special messages in the display area of your telephone, and can play special audio messages through the speaker. Your administrator broadcasts these messages, which can be used to inform you of events like company news and weather bulletins.
-
Page 23: Security Features
Managing your Station Control Password (SCPW) Using Encrypted Calling Your Avaya 1120E IP Deskphone supports secure communication using SRTP media encryption. If the feature is enabled, a security icon (q) is displayed on the screen when your call is secured using SRTP media encryption.
-
Page 24
8. Press the Enter key to accept the new password. If you are locked out of your Avaya 1120E IP Deskphone, or if you forget your SCPW, contact your system administrator. key. navigation keys to Admin. navigation keys to… -
Page 25
Note: The default configuration for Password Protection is off. To turn Password Protection on or off: Enter Done About the Avaya 1120E IP Deskphone 1. Press the Directory 2. Press the Up/Down scroll and highlight Change Protection Mode. 3. Use the dialpad to enter your password (if Password Protection is enabled). -
Page 26: Entering And Editing Text
Entering and editing text Entering and editing text You can enter and edit text on your Avaya 1120E IP Deskphone using the following methods: • “Entering text using the dialpad” on page 26 • “Editing text using the soft keys” on page 27 •…
-
Page 27: Editing Text Using The Soft Keys
Choose 6. Press the Next soft key to submit your changes. Table 3 describes the soft key editing functions on your Avaya 1120E IP Deskphone. Table 3: Editing soft key description (Part 1 of 2) Cancel Choose Clear Entering and editing text navigation keys to move through the text.
-
Page 28: Entering Text Using The Usb Keyboard
Entering and editing text Table 3: Editing soft key description (Part 2 of 2) Case Delete Done/Select/Enter Entering text using the USB keyboard You can use the USB keyboard, when connected, to enter text in the tools and graphical applications. For number entry in phone applications (for example, when dialing), you can use the keyboard to enter digits (0–9), as well as * and #.
-
Page 29: Connecting The Components
Connecting the components Figure 4 shows connections on the Avaya 1120E IP Deskphone. Figure 4: Avaya 1120E IP Deskphone connections WARNING Ensure that the protective rubber cap on the Accessory Expansion Module port is in place when the port is not in use.
-
Page 30: Before You Begin
IP Deskphone. Consult your system administrator to ensure that you plug your phone into a 10/100/ 1000BaseT Ethernet jack. CAUTION Your Avaya 1120E IP Deskphone is designed for use in an indoor environment only. Connecting the components of the phone WARNING Your Avaya 1120E IP Deskphone is shipped with the base locked in position.
-
Page 31
Connecting the components Figure 5: Release the Avaya 1120E IP Deskphone from the stand Use the following steps to connect the components of your phone. -
Page 32
Use your Avaya 1120E IP Deskphone with the approved Avaya AC Adapter (model NTYS17BAE6). Note 1: The Avaya 1120E IP Deskphone supports both AC power and Power over LAN options, including IEEE 802.3af Power Classification 3. To use Power over Ethernet, where power is… -
Page 33
6. If you are connecting your PC through the phone, you require a second CAT5e cable. Only one cable is included with the Avaya 1120E IP Deskphone package. Install the Ethernet cable connecting the PC to the phone (optional). Connect one end of the PC Ethernet cable to your phone using the RJ-45 connector and thread it through the channel. -
Page 34
Connecting the components Figure 7: Cable routing tracks and mounting holes 8. Wall-mount your phone (optional). Your Avaya 1120E IP Deskphone can be mounted either by: (Method A) using the mounting holes on the bottom of the phone stand, or (Method B) using a traditional-style wall-mount box with an RJ-45 connector and a 15-cm (6-inch) RJ-45 cord (not provided). -
Page 35: Replacing Your Narrowband Handset With A Wideband Handset
Method B: Attach the 15-cm (6-inch) CAT5e cable, position the stand over the mounting rivets, and slide the phone down the wall so that the rivets fit into the slots on the stand, indicated in page 34 (Method B). 9. Replace the stand cover. Ensure that all cables are neatly routed and press the stand cover into place until you hear a click.
-
Page 36
Connecting the components In order to use your headset, you must configure your deskphone to recognize the headset. For information on how to configure your deskphone to use the wideband headset, see “Changing 3. Headsets” on page… -
Page 37: Virtual Private Network
Deskphone (if required) and configure the VPN on your IP Deskphone. An installation wizard helps you perform the necessary steps. Note: The Avaya Phone VPN Configuration Wizard uses the default language of the operating system of your PC. If the language is not supported by the wizard, the default wizard language is English.
-
Page 38: Connecting Your Ip Deskphone
— UDP Port 69 (TFTP) — TCP Port 80 (HTTP) — UDP Port 49000 Note: The Avaya Phone VPN Configuration Wizard.jar file creates a log.txt file during execution. This file is helpful to troubleshoot problems you experience using the Avaya Phone VPN Configuration Wizard.jar.
-
Page 39
Virtual Private Network Figure 8: IP Deskphone connected to the modem Figure 9: IP Deskphone connected to the router… -
Page 40: Qos Configuration Recommendations
PC to the IP Deskphone to run the initial Avaya Phone VPN Configuration Wizard. See Figure 8. QoS configuration recommendations Avaya recommends that you connect the PC to the IP Deskphones PC Ethernet Port as the IP Deskphone provides Quality of Service (QoS) on outbound traffic automatically.
-
Page 41: Installing And Configuring Vpn
1. Follow the instructions provided by your system administrator to obtain the required files. 2. Power-down the IP Deskphone. 3. Run the Avaya Phone VPN Configuration Wizard.jar file. The Welcome & language selection window of the Wizard appears, as shown in Figure 11.
-
Page 42
Virtual Private Network Select your language preference. The following languages are supported: • Arabic • Chinese — simplified • Chinese — traditional • Czech • Danish • Dutch • English • Finnish • French • German • Greek • Hebrew •… -
Page 43
The Equipment Setup and VPN window appears, as shown in Figure 12. Figure 12: Equipment Setup and VPN window 6. Verify that the modem, IP Deskphone, and PC are connected properly. 7. Disconnect any VPN connection currently running on your PC. See figure 4 to confirm that your LAN Ethernet Port and PC Ethernet Port on the IP Deskphone are connected correctly. -
Page 44
Virtual Private Network Figure 13: Locate Data Files window 9. Click Browse to locate the provisioning files provided by your system administrator if the wizard was not able to locate the files. 10. Click Next. The Prepare Phone for Configuration window appears as shown in Figure 14. -
Page 45
Deskphone “Listening Mode” may not be detected. If your phone does not enter “Listening Mode”, follow the steps below. 12. After you hear the chimes tune and the text Avaya appears on the IP Deskphone display screen, quickly press the following keys in order. -
Page 46
Figure 15: Prepare Phone for Configuration (Try again) window a. Power off your IP Deskphone and power it back on again.. 14. After you hear the chimes tune and the text Avaya appears on the IP Deskphone display screen, quickly press the following keys in order.. Mute Note: The IP Deskphone can take up to 60 seconds for “Listening… -
Page 47
Click No to proceed to a software steps to perform a software upgrade on your phone The Prepare Phone for Configuration window appears as shown in Figure 16. Figure 16: Prepare Phone for Configuration window c. Double-press the Select the Network Configuration Move the cursor to locate Provision: or (TFTP IP:) in the Network Configuration menu, and then write down the existing… -
Page 48
Virtual Private Network Server IP address) window appears, as shown in Figure 17. If you are not able to navigate and edit the address in Provision: or (TFTP IP:) in the Network Configuration menu or you were not able to edit this field, click No. The Prepare Phone for Configuration (Alternate Provisioning Server) window appears. -
Page 49
Note: To enter a dot (period) when entering an IP address using the IP Deskphone keypad, press the 1 key repeatedly or you can double- press the asterisk (*) key. Figure 18: Prepare Phone for Configuration (Input Provisioning Server IP address) window If you cannot locate the Provisioning Server address, contact your network administrator to obtain the IP address and follow the administrator instructions. -
Page 50
The text “Searching for connected phones” displays while the connected IP Deskphones are located. The text “Autodiscovery complete” displays in the Avaya Phone VPN Configuration Wizard tool when the search is finished. If the search is successful, “Listening Mode: Connected” appears in the IP Deskphone display area. -
Page 51
Figure 19: Autodiscover Phone window 16. Click Next. If more than one connected IP Deskphone was discovered, the Autodiscover Phone (More than one phone was discovered) window appears. See Figure 20. Virtual Private Network… -
Page 52
Virtual Private Network Figure 20: Autodiscover Phone (more than one phone was discovered) window a. Obtain the MAC address of the IP Deskphone for which you are configuring the VPN. The MAC address is printed on a label located on the back of the IP Deskphone. b. -
Page 53
Figure 21: Configure phone window The progress bar displays the percent complete of the provisioning file transfer. Configuring phone is displayed during the file transfer. 18. When Phone configuration complete is displayed, click Next. The Confirmation & Finish window appears. See Figure 22. Virtual Private Network… -
Page 54
Virtual Private Network Figure 22: Confirmation & Finish window 19. Verify that the IP Deskphone is successfully configured. Note: You may be prompted to enter a User ID and Password before the IP Deskphone registers with the system. This information is provided by your system administrator. -
Page 55
Lift the IP Deskphone handset and listen for a dial tone. If the IP Deskphone is not configured successfully, ensure that the basic requirements are met; repeat the steps in the Avaya Phone VPN Configuration Wizard or contact your system administrator. For more… -
Page 56: Configuring Telephone Options
Station Control Password (SCPW). • Virtual Office Login menus are listed when an Avaya 1120E IP Deskphone Class of Service is configured for Virtual Office and Branch Office. For more information, see page 154. Note: The…
-
Page 57: Using The Telephone Options Menu
Using the Telephone Options menu Use the Telephone Options • “Adjusting the volume” on page 59 • “Adjusting the display screen contrast” on page 60 • “Selecting a language” on page 60 • “Selecting date and time format” on page 61 •…
-
Page 58
Configuring Telephone Options Select Cancel 3. Press the Enter key. 4. Use the Up/Down navigation keys to scroll and highlight an option (for example, Language…). 5. Press the Enter key. The display provides information required to adjust your selection. 6. Choose one of the following: —… -
Page 59: Adjusting The Volume
Adjusting the volume To adjust the volume, press the Options, and select Volume adjustment… To adjust the volume: Down Select Cancel Configuring Telephone Options Services key, select 1. Press the Up/Down scroll and highlight one of the following: — Ringer —…
-
Page 60: Adjusting The Display Screen Contrast
To adjust the LCD display screen contrast, press the Telephone Options, and select Note 1: If you have an Avaya 1100 Series Expansion Module attached to your IP Deskphone, adjusting the telephone’s LCD screen contrast also adjusts the display screen contrast configuration for the Avaya 1100 Series Expansion Module.
-
Page 61: Selecting Date And Time Format
If the Language setting is password-protected, you must enter a password (SCPW) to change the language. If you enter an incorrect password, an error message is displayed. If you enter an incorrect password more than three times, the password functionality is locked. Contact your system administrator to unlock the password.
-
Page 62: Accessing Display Diagnostics
Configuring Telephone Options To select a date and time format: Select Cancel Accessing display diagnostics The Display diagnostics option tests the IP Deskphone display screen and indicator lights. To access display diagnostics, press the key, select Telephone Options, and select To select Display diagnostics: Cancel Choosing local dialpad tone…
-
Page 63: Viewing Telephone Information
dialpad. To choose a local dialpad tone, press the Telephone Options, and select To choose a local dialpad tone: Select Cancel Viewing telephone information The Set Info option displays the following phone-specific information: • General Info • Set IP Info •…
-
Page 64: Diagnostics
Configuring Telephone Options To view IP Deskphone information: Cancel Diagnostics The Diagnostics option displays the following phone-specific information: • Diag Tools (Ping, do Route Traces) • EtherStats (Speed, Auto Neg, CRC Errors, Collision) • IP Stats (Packet Info) • RUDP Stats (Msg receive/trans) •…
-
Page 65: Configuring Call Log Options
Configuring call log options Use the call log option to configure the following preferences: • “Configuring the Callers List log” on page 65 • “Configuring New Call Indication” on page 66 • “Configuring Preferred Name Match” on page 67 • “Configuring Area Code Setup”…
-
Page 66
Configuring New Call Indication You can configure your Avaya 1120E IP Deskphone to display a message to indicate that a new incoming call was received. The default configuration is On. To configure new call indication, press the… -
Page 67
Select Cancel Configuring Preferred Name Match You can configure your Avaya 1120E IP Deskphone to display the name of the caller as defined in your Personal Directory. The default configuration is Off. To configure Preferred Name Match, press the Services… -
Page 68
Configuring Telephone Options Select Cancel Configuring Area Code Setup Use the Area Code Setup an incoming call arrives with an area code that matches one of the three stored area codes, the incoming call number is reordered to display the phone number followed by the area code (as opposed to the area code followed by the phone number). -
Page 69
Select Cancel To edit area code display: Configuring Telephone Options 3. Press the Up/Down scroll and highlight one of the following: — Area Code # 1 — Area Code # 2 — Area Code # 3 4. Press the Enter key. -
Page 70: Choosing A Ring Type
Configuring Telephone Options Select Cancel Choosing a ring type The Ring type… option configures the phone’s ring tone. To choose a ring type, press the Services Ring type… To choose a ring type: 3. Press the Up/Down scroll and highlight one of the following: —…
-
Page 71: Enabling Or Disabling Call Timer
Play Select Stop Cancel Enabling or disabling Call Timer The call timer measures how long you are on each call. To enable Call Timer, press the Services Call Timer. To enable or disable Call Timer: Configuring Telephone Options 2. Press the Play soft key to sample the ring tone.
-
Page 72: Enabling Onhook Default Path
Configuring Telephone Options Select Cancel Enabling OnHook Default Path The OnHook Default Path option allows control whether a headset or the Handsfree feature is used to operate your IP Deskphone while it is on- hook. To enable OnHook Default Path, press the Telephone Options, and select To enable OnHook Default Path:…
-
Page 73
If the feature key label setting is password-protected, you must enter a password (SCPW) to change the feature key label. If you enter an incorrect password, an error message is displayed. If you enter an incorrect password more than three times, the password functionality is locked. -
Page 74: Configuring The Name Display Format
To restore default labels, press the Options, and select Change feature key Configuring the name display format You can configure your Avaya 1120E IP Deskphone to display the name of the incoming calling party in the following formats: • first name, last name •…
-
Page 75: Configuring Live Dialpad
To configure name display format: Select Cancel Configuring Live Dialpad The Live Dialpad option activates the Primary DN key when you make a call by dialing a directory number on the dialpad without picking up the handset or pressing the handsfree key. To configure Live Dialpad, press the Options, and select Live Dialpad.
-
Page 76: Configuring Caller Id Display Order
Configuring Telephone Options To configure Live Dialpad: Select Cancel Configuring Caller ID display order Caller ID display order appears in 2 formats: • Number, name (default) • Name, Number Use the following procedure to configure Caller ID display order. 1. Press the Services display order.
-
Page 77: Configuring Normal Mode Indication
— Name, number 3. Press the Select soft key to save the configuration, else press the Cancel key to cancel the modifications. Configuring Normal mode indication Normal mode display indication can be On or Off when the IP Deskphone is in normal mode. Use the following procedure to configure Normal mode indication.
-
Page 78: Configuring Local Menu Options
Local Tools menu. When the password is enabled, a password prompt dialog box appears when you attempt to access this menu. If this happens, contact your system administrator. Your Avaya 1120E IP Deskphone has both local and server-based options. Press the Services which is organized into the following submenus: •…
-
Page 79
Table 5: Navigation key functions in menus (Part 2 of 2) Function Enter digits on the Select the associated menu item dialpad Stop Close the menu The key functions in dialog boxes are described in Table 6. Table 6: Navigation key functions in dialog boxes Function Down arrow keys… -
Page 80: Preferences Submenu
Note: Contrast can also be adjusted in the Telephone Options menu; Avaya recommends that you use the control in the Telephone Options menu whenever possible. To configure the Contrast or Sleep tools, press the…
-
Page 81
To configure Contrast or Sleep tools: Exit Configuring Local Menu options 1. Press the Up/Down and highlight one of the following: — Contrast — Sleep Note: Sleep is displayed in the format xxx, where xxx is a time in minutes or hours. -
Page 82: Changing 2. Language
Configuring Local Menu options Changing 2. Language Use the Language menu item to configure local preferences. Use the Language tool to select the language used on your phone. Note: This language setting controls the language used in the local menus on your phone only. To select the language used by features on your phone, press the and select Language……
-
Page 83: Changing 3. Headsets
Changing 3. Headsets Headset Configuration Each headset has its own tuning parameters, and your deskphone must be configured to use the proper parameters. If you do not configure the deskphone for the proper tuning parameters, you may not be taking full advantage of the audio qualities of the headset.
-
Page 84
Select Cancel Exit Avaya Mobile Headset Adapter properties You can use the Avaya Mobile Headset Adapter to answer calls whenever the Avaya 1120E IP Deskphone is running. To access the Avaya Mobile Headset Adapter (MHA) properties, press Services key twice to open the Local Tools menu, press the 1 key on… -
Page 85
Table 8 describes the features of the Avaya Mobile Headset Adapter. Table 8: Avaya Mobile Headset Adaptor elements and functions Answer key Release/Goodbye key Mute key Volume key Backlight Configuring Local Menu options Function Press to answer an incoming call. -
Page 86: Local Diagnostics Submenu
Configuring Local Menu options 2. Local Diagnostics submenu Use the Local Tools menu following: • “1. IP Set Information” on page 86 • “2. Network Diagnostic Tools” on page 86 • “3. Ethernet Statistics” on page 86 • “4. IP Network Statistics” on page 87 •…
-
Page 87: Ip Network Statistics
5. USB Devices. To check USB device information: Return 6. Advanced Diag Tools The Advanced Diag Tools are available to the Avaya support organization to configure the auto recovery function and remote access. 7. License Information The system administrator can use the license information.
-
Page 88: Certificate Information
Configuring Local Menu options 9. Certificate Information The system administrator can use the view certificate information. 10. DHCP Information The system administrator can use the license information. 3. Network Configuration menu The Network Configuration tool displays information that was configured when the IP Deskphone was installed.
-
Page 89: Lock Menu
Configuring Local Menu options 5. Press Apply. The phone reboots. 4. Lock Menu Your system administrator can use the lock menu tool to protect the Local Tools menu items from accidental or unwanted changes. This tool is for administrator use only…
-
Page 90: Making A Call
Making a call Making a call This section describes features associated with making a call. You can make a call from your Avaya 1120E IP Deskphone using any of the following methods: • “Using Off-hook dialing” on page 91 •…
-
Page 91: Using Off-Hook Dialing
Using Off-hook dialing (Goodbye) Using On-hook dialing 2498 1. Lift the handset. 2. Dial the number. 3. To terminate the call, choose one of the following: — Replace the handset into the cradle. — Press the Goodbye 1. Leave the handset in the cradle. 2.
-
Page 92: Using Handsfree Dialing
Making a call (Goodbye) Using handsfree dialing Use handsfree dialing to use a built-in microphone and speaker, or a headset, instead of the handset. While on an active call, you can switch between Handset and Handsfree mode. To use handsfree dialing: (Handsfree) (Headset) To discontinue a handsfree call:…
-
Page 93
To mute a handsfree call: (Mute) (Mute) To switch from handsfree to handset: To switch from handset to handsfree: (Handsfree) To use a headset: (Headset) 1. Press the Mute key. The LED indicator flashes. 2. Press the Mute key again to return to a two-way handsfree conversation. -
Page 94: Using The Directory Applications
To switch from handsfree to headset: (Headset) Using the Directory applications You can make calls using the following Directory applications available on your Avaya 1120E IP Deskphone: • “Making a call using Corporate Directory” on page 94 • “Making a call using the Personal Directory” on page 95 •…
-
Page 95: Making A Call Using The Personal Directory
Search Dial Cancel To scroll to a specific number: Dial Cancel Making a call using the Personal Directory The Personal Directory feature allows you to store a maximum of 100 entries consisting of names and numbers. To use the Personal Directory, press the Directory key and select…
-
Page 96: Making A Call Using The Callers List
Making a call on how to configure and use the Personal Directory, refer to Personal Directory” on page To make a call using the Personal Directory: Dial Cancel Making a call using the Callers List The Callers List feature automatically stores up to a maximum of 100 callers.
-
Page 97: Making A Call Using The Redial List
Dial Cancel Making a call using the Redial List The Redial List feature automatically stores a maximum of 20 previously dialed phone numbers. To use the Redial List, press the select Redial List. For information on how to configure and use the Redial List, refer to “Using the Redial List”…
-
Page 98: Using Predial
Making a call To view date and time of a call: Using Predial Use the Predial feature to enter, preview, and edit numbers before dialing. To use Predial: 1. Press the Up/Down scroll and highlight a name in the List Caller List.
-
Page 99: Using Autodial
2498 To edit a Predial number: Clear Delete 2498 Using AutoDial Use the AutoDial feature to display, store, and automatically dial phone numbers. 2. Press a line key to dial the number. 3. Lift the handset when the called party answers or, if in handsfree mode, begin to speak.
-
Page 100
Making a call To store an AutoDial number: AutoDial AutoDial To display an AutoDial number: Display AutoDial 1. Without lifting the handset, press the appropriate AutoDial Note: The display screen displays the word Autodial next to the appropriate key. 2. Using the dialpad, dial the phone number (including access code) to be stored on the selected 3. -
Page 101: Using Ring Again
To use AutoDial: AutoDial Using Ring Again Use the Ring Again feature if you receive a busy tone or if there is no answer. Your IP Deskphone rings when the person you called becomes available. Ring Again automatically redials the number. To activate Ring Again: RngAgn To call a Ring Again party when you receive notification:…
-
Page 102: Using Last Number Redial
Making a call RngAgn To deactivate Ring Again before notification: RngAgn Using Last Number Redial Use the Last Number Redial feature to automatically redial the last dialed number. To use Last Number Redial: 2498 2. Press the Ring Again automatically dial the number. Choose one of the following: —…
-
Page 103: Using Speed Call
Using Speed Call Use the Speed Call feature to place internal and external calls by dialing a one-, two-, or three-digit code to store, edit, and automatically dial frequently called phone numbers. To store a Speed Call number: SpcCtl SpcCtl To make a Speed Call: SpcCtl 1.
-
Page 104: Using System Speed Call
Making a call Using System Speed Call Use the System Speed Call feature to dial Speed Call codes that override dialing restrictions placed on your IP Deskphone. To make a System Speed Call: SScUsr SScCtl Using HotLine Use the HotLine feature to automatically dial a specific number. To use HotLine: HotLine 3.
-
Page 105: Using Intercom Calling
Using intercom calling Use the Intercom feature to call a member of your intercom group by pressing the code assigned to each member. To make an intercom call: Intrcm To answer an intercom call while on a line other than your intercom group line: (Hold) (Goodbye)
-
Page 106: Answering A Call
Answering a call Answering a call Each incoming call causes the phone to ring, the LCD indicator ( beside the Line (DN) key to flash, and the Message Indicator lamp to flash. To answer a call: (Handsfree) (Headset) Choose one of the following four options: •…
-
Page 107: While On An Active Call
While on an active call This section describes the following features, available during an active call: • “Placing a call on hold” on page 107 • “Transferring a call” on page 108 • “Using Timed Reminder Recall” on page 109 •…
-
Page 108: Transferring A Call
While on an active call Transferring a call Use the Transfer feature to redirect a call to the appropriate person. To transfer a call to a third party: Trans Trans To return to the original call, if the transfer is incomplete: 1.
-
Page 109: Using Timed Reminder Recall
Using Timed Reminder Recall Use the Timed Reminder Recall feature to receive a reminder tone when a transferred call is not answered. To use Timed Reminder Recall: Trans Trans While on an active call 1. Press the Transfer put on hold. 2.
-
Page 110: Using Attendant Recall
While on an active call If the transferred call is not answered, your IP Deskphone rings: Trans (Goodbye) Using Attendant Recall Use the Attendant Recall feature to contact an attendant during a call and to connect the caller to the attendant. To contact the attendant while on a call: AttRcl (Goodbye)
-
Page 111: Using Call Park
Using Call Park Use the Call Park feature to hold temporarily (park) and retrieve a call from any IP Deskphone. Using Call Park does not tie up a line. When configured network-wide, Call Park can be used across networks. A System Park extension can be configured to automatically park most calls.
-
Page 112
While on an active call To park a call using the SPRE code or FFC: Trans Conf Trans Conf To retrieve a parked call: Park 1. Choose one of the following: — Press the Transfer — Press the Conference 2. Dial the Call Park FFC. -
Page 113: Recording A Calling Party Number
Recording a Calling Party Number Use the Calling Party Number feature to record a caller’s number, or to charge a call to an account number, during an established call. To record a caller’s number for accounting purposes: CParty CParty Displaying incoming call information Use the Display feature to display a second incoming caller’s number and name (if available) during an active call, without interfering with the call in progress.
-
Page 114: Tracing A Malicious Call
While on an active call Tracing a malicious call Use the Call Trace feature to trace nuisance calls within your system. Note: This is not a default feature. Contact your system administrator to configure this feature on your IP Deskphone. To use Call Trace while on a call: CallTrace To use Call Trace without a Call Trace key:…
-
Page 115: Incoming Calls
Incoming calls You can use the following features when you have an incoming call: • “Using Automatic Answerback” on page 115 • “Using Call Pickup” on page 115 • “Using Call Waiting” on page 117 Using Automatic Answerback When the Automatic Answerback feature is active, your IP Deskphone automatically answers in Handsfree mode after one ring;…
-
Page 116
Incoming calls Pickup To answer an incoming call in another call pickup group: GrpPkp To answer a call at a specific extension in any pickup group: Pickup 2. Choose one of the following: — Press the Pickup — Enter the Pickup Ringing Number FFC. -
Page 117: Using Call Waiting
Using Call Waiting The Call Waiting feature alerts you to an incoming call by producing a tone. It also puts the current call on hold while you answer the new call. To answer an incoming call while on another call: (Hold) CallWait To return to the first IP Deskphone call:…
-
Page 118
Incoming calls If you do not have a Call Waiting key: (Goodbye) 2. Press the line (DN) key associated with the first call. 1. Press the Goodbye current call. 2. Press the line (DN) key beside the flashing status icon to answer the incoming call. -
Page 119: While Away From Your Desk
While away from your desk You can use the following features when you are away from your desk: • “Using Call Forward” on page 119 • “Using Internal Call Forward” on page 120 • “Using Remote Call Forward” on page 121 •…
-
Page 120: Using Internal Call Forward
While away from your desk To deactivate Call Forward: To reinstate Call Forward to the same number: Using Internal Call Forward Use Internal Call Forward to accept only calls originating at internal DNs to ring at another DN. Calls originating outside your IP Deskphone system still ring at your IP Deskphone.
-
Page 121: Using Remote Call Forward
IntForward To deactivate Internal Call Forward: IntForward To reinstate Call Forward to the same number: IntForward IntForward Using Remote Call Forward Use the Remote Call Forward feature (from any phone other than your own) to forward calls to any IP Deskphone. To activate Remote Call Forward: While away from your desk 2.
-
Page 122
While away from your desk To deactivate Remote Call Forward: 2. If you are calling from an IP Deskphone outside the system, dial your direct system access number and wait for the dial tone. 3. Dial the Remote Call Forward Activate FFC to activate the feature. -
Page 123: Securing Your Ip Deskphone
Securing your IP Deskphone Use the Electronic Lock feature to prevent others from making calls from your IP Deskphone. The Electronic Lock feature is controlled using your Station Control Password (SCPW). To change your Station Control Password, please refer to To lock your IP Deskphone: While away from your desk 2.
-
Page 124
While away from your desk (Goodbye) To unlock your IP Deskphone: (Goodbye) 3. Dial your Station Control 4. Choose one of the following: — If you are dialing locally, press the Goodbye key. — If you are dialing the FFC remotely, dial your DN. -
Page 125: Talking With More Than One Person
Talking with more than one person Use the following features to enable conversations between more than two people: • “Using the Call Join feature” on page 125 • “Setting up a conference call” on page 126 • “Using Conferee Selectable Display” on page 127 •…
-
Page 126: Setting Up A Conference Call
Talking with more than one person Setting up a conference call Use the Conference feature to set up a conference call for a maximum of three or six people including yourself. The maximum number of people the conference feature supports depends on the configuration of your IP Deskphone.
-
Page 127: Using Conferee Selectable Display
Using Conferee Selectable Display Use the Conferee Selectable Display and Disconnect feature to list active conferees and disconnect a conferee from the conference call. To view active conferees: ConfDsp (Goodbye) To disconnect a conferee: ConfDsp Talking with more than one person 2.
-
Page 128: Using Group Call
Talking with more than one person (Goodbye) Using Group Call Use the Group Call feature to automatically call members of a predefined group, one at a time, until all members answer. To call group members: 2. Press the line (DN) key on which the conference call is established.
-
Page 129
GrpCl To answer a group call: Talking with more than one person 2. Press the Group Call Group Call FFC. — The feature automatically calls all group members. The icon flashes until all members answer. — The phone numbers of the group members appear on the display as they answer. -
Page 130
Talking with more than one person To end a group call: (Goodbye) Press the Goodbye key. Note: When the person who made the group call disconnects, the call terminates for all members of the group. However, the members of the group call can disconnect from the call and not affect other members on the call. -
Page 131: Working Without Interruption
Working without interruption This section describes the Activating Make Set Busy feature, which provides uninterrupted work time. Activating Make Set Busy Use the Make Set Busy feature to make your IP Deskphone appear busy to all callers. To activate Make Set Busy: MakeSetBsy To deactivate Make Set Busy: MakeSetBsy…
-
Page 132: Using Record On Demand Key
Working without interruption configuration. Contact your system administrator to learn which treatment is configured for your IP Deskphone. Figure 24: Call Deflect Key If you press the Deflect configured, your caller receives a busy signal. Using Record On Demand key If your call recording server does not support wideband call recording, you cannot use the call recording feature.
-
Page 133: Using Save Key
• Bulk Recording — For an active call or unregistered DN/Position ID, call recording is initiated even though the Using SAVE key Use the SAVE feature key to save the recording of an active call. This key is associated with the active user ID and is operational only if a call is active.
-
Page 134: Additional Call Features
Additional call features Additional call features Contact your system administrator to determine if the following call features are available on your IP Deskphone. • “Using AutoDial Transfer” on page 134 • “Using the Buzz feature” on page 135 • “Using Call Page Connect to make an announcement” on page 135 •…
-
Page 135: Using The Buzz Feature
AutoDial (Goodbye) Using the Buzz feature Use the Buzz feature to notify another person of a call, a visitor, or a request. Two IP Deskphones that are linked together enable one person to signal the other. The person signaled hears a buzz. To buzz the IP Deskphone linked to your IP Deskphone: Buzz Using Call Page Connect to make an…
-
Page 136: Using Centrex/Exchange Line Switchhook Flash
Additional call features (Goodbye) Using Centrex/Exchange Line Switchhook Flash Use the Centrex/Exchange Line Switchhook Flash feature during an established call to use a Centrex service, such as Call Transfer or Three- Way Calling. To use Centrex/Exchange Line Switchhook Flash: CentrexSHF (Goodbye) 2.
-
Page 137: Charging A Call Or Charging A Forced Call
Charging a call or charging a forced call Use the Call Charge feature to charge a call to a specific account. The Forced Charge feature charges long-distance calls from an IP Deskphone restricted to local calls. To charge a local or long-distance call to an account before you dial: Charge To charge a call in progress: Trans…
-
Page 138
Additional call features Conf 2493 To charge a call to an account when you transfer a call: Trans Trans 2. Choose one of the following: — Press the Charge — Dial the Call Detail Recording 3. Dial the charge account number. 4. -
Page 139
Trans To charge a call to an account when you add someone to a conference call: Conf Conf Conf Additional call features 5. Press the Transfer hear the IP Deskphone ring. Note: You can talk privately to the person at the transfer number before you press the Transfer 1. -
Page 140: Using Enhanced Override
Additional call features Using Enhanced Override Use the Enhanced Override feature to override an active call after you attempt a Forced Camp-on. Use Enhanced Override to make a call or a consultation call, such as placing a call on hold and calling another party. To use Enhanced Override: EnhOvr EnhOvr…
-
Page 141: Using Forced Camp-On
Using Forced Camp-on Use the Forced Camp-on feature to automatically ring another IP Deskphone (internal or external) immediately after that IP Deskphone disconnects from its current call. To use Forced Camp-on: EnhOvr Answering a call camped-on to your extension: Additional call features You receive a busy signal after dialing a phone number.
-
Page 142: Overriding A Busy Signal
Additional call features Overriding a busy signal Use the Override feature to override a busy signal and interrupt another call. To override a busy signal: EnhOvr (Goodbye) Using Privacy Release Use the Privacy Release feature to enable one or more people who share your DN to join a call.
-
Page 143: Using Radio Page
To use Privacy Release in an established state: PrvRls Using Radio Page Use the Radio Page feature to page a person and stay on the line until they answer. The paged person answers the call after entering a special Page Meet-me code from any IP Deskphone. To use Automatic Preselection (Meet-me page): Additional call features Press the…
-
Page 144
Additional call features (Goodbye) To use Automatic Post-selection: The called party is either busy on the IP Deskphone or away from their desk. To page the called party, you do not need to redial the number of the called party. RadPag (Goodbye) To answer a Radio Page:… -
Page 145: Using Voice Call
If you carry a Radio Pager, a page indicates that someone dialed your DN. If the Radio Page system is configured to function in Meet-me mode, you can answer the page call from any IP Deskphone. Using Voice Call Use the Voice Call feature to make an announcement through someone else’s IP Deskphone speaker.
-
Page 146
Additional call features To respond to a voice call: Your IP Deskphone rings once and the caller’s voice transmits through your speaker. Lift the handset. -
Page 147: Additional Phone Features
Additional phone features The following features are described in this section: • “Using the Personal Directory” on page 147 • “Using the Callers List” on page 150 • “Using the Redial List” on page 152 • “Using Virtual Office” on page 154 •…
-
Page 148
Additional phone features Next Done Cancel To edit an entry: Edit 2. Use the dialpad to enter the name. 3. Press the Next soft key. 4. Use the dialpad to enter the phone number. 5. Choose one of the following: —… -
Page 149
Done Cancel To delete an entry: Delete Confirm Cancel To search for an entry: Additional phone features 3. Choose one of the following: — Press the Done changes. — Press the Cancel to the Personal Directory without saving your changes. 1. -
Page 150: Using The Callers List
Additional phone features Dial Cancel Using the Callers List The Callers List feature logs all incoming calls. The Callers List can store up to 100 entries. When the list is full, the system overwrites the oldest entry. Use the Callers List feature to review missed calls and to dial calls. The Callers List contains: •…
-
Page 151
To dial an entry: Dial To delete an entry: Delete Confirm Cancel To delete the entire Callers List: Delete Additional phone features 1. Press the Up/Down scroll and highlight the desired entry. 2. Press the Dial soft key. 1. Press the Up/Down scroll and highlight the desired entry. -
Page 152: Using The Redial List
Additional phone features Using the Redial List The Redial List feature logs all outgoing calls. The Redial List can store up to 20 entries. When the list is full, the system overwrites the oldest entry. Use the Redial List feature to review calls made and to redial previously dialed calls.
-
Page 153
Dial To delete an entry: Delete To delete the entire Redial List:. Delete Additional phone features 2. Press the Dial soft key. 1. Press the Up/Down scroll and highlight the desired entry. 2. Press the Delete soft key. 3. Choose one of the following soft keys: —… -
Page 154: Using Virtual Office
You can use an IP Deskphone as a Remote phone to connect to your Avaya 1120E IP Deskphone even if it is a different IP Deskphone model. Table 9 shows the IP Deskphones on which you can use Virtual Office to connect to your Avaya 1120E IP Deskphone.
-
Page 155: Logging In To Virtual Office
Shift key, are not available to the Avaya 1120E IP Deskphone. Note 2: A Virtual Office login to an Avaya 1120E IP Deskphone from an Avaya 1110 IP Deskphone, IP Phone 2001, Avaya 2033 IP Conference Phone, or Avaya 2050 IP Softphone is blocked in certain situations.
-
Page 156
Additional phone features Vrtual A successful login transfers all the features, time, date, and tones to your Remote IP Deskphone from your Office IP Deskphone. Press the Virtual soft key. 2. At the prompt, enter your user ID. 3. Press the Enter key. -
Page 157: Using Virtual Office On Your Remote Ip Deskphone
Remote phone. Figure 26 shows an Avaya 1120E IP Deskphone logged in as a Remote phone to an Avaya 1120E IP Deskphone Office phone. All the features appear as they do on your Office Avaya 1120E IP Deskphone.
-
Page 158
Figure 28 shows an IP Softphone 2050 logged in as a Remote phone to an Avaya 1120E IP Deskphone Office phone. In this case, the information display is arranged in a different fashion, but all the information is visible at one time. -
Page 159: Using Virtual Office On Your Office Ip Deskphone
Additional phone features Using Virtual Office on your Office IP Deskphone Figure 29 shows the Avaya 1120E IP Deskphone display when the phone is logged out due to remote access. Figure 29: Office phone displays the message Logged Out When activated for Virtual Office by a Remote IP Deskphone, your Office IP Deskphone is logged out and no longer operational.
-
Page 160: Logging Out Of Virtual Office
Additional phone features To regain operation of an IP Deskphone being used for Virtual Office: Home Vrtual Logging out of Virtual Office To log out of Virtual Office, press the Virtual soft key. Automatic log out from Virtual Office Your remote Virtual Office IP Deskphone may be configured to automatically log out of Virtual Office after a predetermined period of inactivity.
-
Page 161: Troubleshooting Virtual Office
Note: Some IP Deskphones are configured as Virtual Office-only telephones and have no assigned DN. However, these IP Deskphones can still be used to make emergency calls. “Emergency Calls only “ is displayed on the IP Deskphone display when not logged in to Virtual Office.
-
Page 162
Deskphone has no Station Control Password. Incorrect User ID entered. Attempt to log in to a remote IP Phone 2004 or Avaya 2050 IP Softphone from an Avaya 1120E IP Deskphone (some restrictions apply). Actions Enter correct User ID. Notify system administrator. -
Page 163: Using Media Gateway 1000B
Using Media Gateway 1000B The Media Gateway 1000B (MG 1000B) provides a means of extending Avaya Communication Server 1000 Release 4.5 features to one or more remotely located branch offices using the Branch Office feature. A branch office is a remote location in the network where IP Deskphones, PSTN access, and TDM IP Deskphones are located.
-
Page 164: Using Test Local Mode
Additional phone features can return to Normal Mode (see page 164) or by waiting for 10 minutes. Local Mode If the WAN connection fails, the IP Deskphone loses communication with the Main Office Telephone Preference Service (TPS). It then registers with the MG 1000B and receives IP Deskphone services from the MG 1000B.
-
Page 165: Troubleshooting Mg 1000B
Note: If you do not use the Resume Normal Mode command after testing, the IP Deskphone automatically returns to Normal Mode in 10 minutes. (Services) Troubleshooting MG 1000B The MG 1000B can display error messages on-screen. Table 11 lists error messages and describes actions to correct the causes. Table 11: Troubleshooting MG 1000B (Part 1 of 2) Display Message Local Mode…
-
Page 166
Additional phone features Table 11: Troubleshooting MG 1000B (Part 2 of 2) Display Message Local Mode Invalid ID (2) Probable Cause Branch User ID not found in any equipped TN. Actions Notify system administrator. -
Page 167: Using Hospitality Features
Using Hospitality features Hospitality features are intended for hotel operations. The following features are discussed in this section: • “Configuring Automatic Wake-Up” on page 167 • “Activating Message Registration” on page 169 • “Using Maid Identification” on page 171 • “Displaying Room Status”…
-
Page 168
Using Hospitality features (Goodbye) To cancel an Automatic Wake-Up call: (Goodbye) To verify the time for the Automatic Wake-Up call: 4. Press the Goodbye 1. Lift the handset. 2. Dial the Automatic Wake-Up Quit 3. Press the Goodbye 1. Lift the handset. 2. -
Page 169: Activating Message Registration
(Goodbye) Activating Message Registration Use the Message Registration feature to read, change, or reset meters that log your hotel IP Deskphone calls. To read meters: To change a meter: Using Hospitality features 4. Press the Goodbye 1. Press the Message Registration 2.
-
Page 170
Using Hospitality features To reset a meter to zero: 4. Press the key. 5. Press the Message Registration 1. Press the Message Registration 2. Dial the room DN. 3. Press the key. 4. Press the Message Registration key. key. key. -
Page 171: Using Maid Identification
Using Maid Identification Use the Maid Identification feature to track the cleaning status of rooms. The maid enters the information from the IP Deskphone in each room. To enter cleaning status: Using Hospitality features 1. Press the Room Status 2. Dial the DN for the room. 3.
-
Page 172: Displaying Room Status
Using Hospitality features Displaying Room Status Use the Room Status feature to display the status of a room using the Display Module. To read the status of a room: Changing the status of a room: 1. Press the Room Status 2.
-
Page 173
2. Dial the DN for the room. The DN 3. Dial the status code for the room. A 4. Press the Using Hospitality features displays followed by a two-digit code.The first digit indicates the occupancy status: = Room vacant = Room occupied The second digit indicates the cleaning status of the room: = Cleaning requested… -
Page 174: Accessing External Server Applications
Applications Use External Server Applications to access a variety of applications directly from your Avaya 1120E IP Deskphone. To find out what features and services are available, contact your system administrator. Depending on what is available on your system, your phone can provide information;…
-
Page 175: Flexible Feature Codes (Ffc)
Flexible Feature Codes (FFC) Use Table 12 to keep track of the FFCs assigned by your system administrator. Table 12: Flexible Feature Codes (Part 1 of 2) Feature Automatic Wake-Up Activate Automatic Wake-Up Deactivate Automatic Wake-Up Verify Call Detail Recording Charge Account Call Forward All Calls Activate…
-
Page 176
Flexible Feature Codes (FFC) Table 12: Flexible Feature Codes (Part 2 of 2) Feature RingAgain Deactivate Station Control Password Change Feature Virtual Office Terminal Log Off Virtual Office Terminal Log On… -
Page 177: Quick Reference Card
Quick Reference Card This chapter is the Quick Reference Card for the Avaya 1120E IP Deskphone. Print this chapter as a reference guide. Feature operation AutoDial Store Display Call Forward Activate Deactivate Reinstate View number Call Pickup Call Waiting Answer…
-
Page 178: Legend
Note: The Services menu contains the Admin, Virtual Office, and MG 1000B on all Avaya 1120E IP Deskphones. Consult your system administrator. The following are the most commonly used options: Telephone Options menu Volume adjustment RngAgn RngAgn Trans (Volume +)
-
Page 179
Pick one of: Ringer Handset Listen Handsfree Listen Headset Listen Buzzer Contrast adjustment Language Note: This language setting controls the language used by features on your phone only. To set the language used elsewhere on your phone, press Services twice, select 1. Preferences, and select 2. Language. Date/Time format Local DialPad Tone Ring type… -
Page 180
Quick Reference Card… -
Page 181: Regulatory And Safety Information
Consult the dealer or an experienced radio/ TV technician for help. Note: The user should not make changes or modifications not expressly approved by Avaya. Any such changes could void the user’s authority to operate the equipment This Class B digital apparatus complies with Canadian ICES-003. Cet appareil numérique de la classe B est conforme à…
-
Page 182
Regulatory and safety information この装置は、情報処理装置等電波障害自主規制協議会(VCCI)の基準に基づくクラス B 情報技術装置です。この装置は、家庭環境で使用することを目的としていますが、この 装置がラジオやテレビジョン受信機に近接して使用されると、受信障害を引き起こすこと があります。 取扱説明書に従って正しい取り扱いをして下さい。 Table 13 lists EMC compliance for various jurisdictions. Table 13: EMC compliance Jurisdiction Standard United States FCC CFR 47 Part 15 Canada ICES-003 Australia/New CISPR 22 Zealand European EN 55022 Community EN 55024 EN 61000-3-2… -
Page 183: Other
EU Countries: This device complies with the essential requirements and other relevant provisions of Directive 1999/5/EC. A copy of the Declaration may be obtained from http://support.avaya.com/css/ appmanager/public/support or Avaya Inc., 211 Mt. Airy Road, Basking Ridge, NJ 07920 USA. Australia: AS/ACIF S004: Voice Frequency Performance Requirements for Customer Equipment…
-
Page 184: Denan Regulatory Notice For Japan
Regulatory and safety information DenAn regulatory notice for Japan…
-
Page 185: Third Party Terms
Avaya to make the source code for such Open Source Components available in source code format to its licensees, or that require Avaya to disclose the license terms for such Open Source Components. For a period of three years from your date of purchase of a product containing any of the software listed below from Avaya Inc., any Avaya affiliate or an authorized Avaya reseller, we…
-
Page 186: Gnu
Third party terms * This software/database is a «United States Government Work» under the terms of the United States Copyright Act. It was written as part of the author’s official duties as a United States Government employee and thus cannot be copyrighted. This software/database is freely available to the public for use.
-
Page 187
Third party terms away your freedom to share and change it. By contrast, the GNU General Public License is intended to guarantee your freedom to share and change free software—to make sure the software is free for all its users. This General Public License applies to most of the Free Software Foundation’s software and to any other program whose authors commit to using it. -
Page 188
Third party terms another language. (Hereinafter, translation is included without limitation in the term «modification».) Each licensee is addressed as «you». Activities other than copying, distribution and modification are not covered by this License; they are outside its scope. The act of running the Program is not restricted, and the output from the Program is covered only if its contents constitute a work based on the Program (independent of having been made by running the Program). -
Page 189
Third party terms to work written entirely by you; rather, the intent is to exercise the right to control the distribution of derivative or collective works based on the Program. In addition, mere aggregation of another work not based on the Program with the Program (or with a work based on the Program) on a volume of a storage or distribution medium does not bring the other work under the scope of this License. -
Page 190
Third party terms or distribute the Program or its derivative works. These actions are prohibited by law if you do not accept this License. Therefore, by modifying or distributing the Program (or any work based on the Program), you indicate your acceptance of this License to do so, and all its terms and conditions for copying, distributing or modifying the Program or works based on it. -
Page 191
Third party terms Free Software Foundation may publish revised and/or new versions of the General Public License from time to time. Such new versions will be similar in spirit to the present version, but may differ in detail to address new problems or concerns. -
Page 192
Third party terms want it to be of the greatest possible use to the public, the best way to achieve this is to make it free software which everyone can redistribute and change under these terms. To do so, attach the following notices to the program. -
Page 193: Openssl
OpenSSL The following component is licensed under OpenSSL license: OpenSSL 0.9.7b OpenSSL License /* ===================================================== * Copyright (c) 1998-2008 The OpenSSL Project. All rights reserved. * Redistribution and use in source and binary forms, with or without modification, are permitted provided that the following conditions are met: * 1.
-
Page 194
Third party terms * 6. Redistributions of any form whatsoever must retain the following acknowledgment: «This product includes software developed by the OpenSSL Project for use in the OpenSSL Toolkit (http://www.openssl.org/)» * THIS SOFTWARE IS PROVIDED BY THE OpenSSL PROJECT «AS IS» AND ANY EXPRESSED OR IMPLIED WARRANTIES, INCLUDING, BUT NOT LIMITED TO, THE IMPLIED WARRANTIES OF MERCHANTABILITY AND FITNESS FOR A PARTICULAR PURPOSE… -
Page 195
* This library is free for commercial and non-commercial use as long as the following conditions are aheared to. The following conditions apply to all code found in this distribution, be it the RC4, RSA, lhash, DES, etc., code; not just the SSL code. The SSL documentation included with this distribution is covered by the same copyright terms except that the holder is Tim Hudson (tjh@cryptsoft.com). -
Page 196: Zlib
Third party terms * THIS SOFTWARE IS PROVIDED BY ERIC YOUNG «AS IS» AND ANY EXPRESS OR IMPLIED WARRANTIES, INCLUDING, BUT NOT LIMITED TO, THE IMPLIED WARRANTIES OF MERCHANTABILITY AND FITNESS FOR A PARTICULAR PURPOSE ARE DISCLAIMED. IN NO EVENT SHALL THE AUTHOR OR CONTRIBUTORS BE LIABLE FOR ANY DIRECT, INDIRECT, INCIDENTAL, SPECIAL, EXEMPLARY, OR CONSEQUENTIAL DAMAGES (INCLUDING, BUT NOT LIMITED TO, PROCUREMENT OF SUBSTITUTE GOODS OR SERVICES;…
-
Page 197: Curl
1. The origin of this software must not be misrepresented; you must not claim that you wrote the original software. If you use this software in a product, an acknowledgment in the product documentation would be appreciated but is not required. 2.
-
Page 198: Libpng
Third party terms dealings in this Software without prior written authorization of the copyright holder. END OF TERMS AND CONDITIONS Libpng The following component is licensed under libpng license: Libpng 1.2.37 — June 4, 2009 Libpng License This copy of the libpng notices is provided for your convenience. In case of any discrepancy between this copy and the notices in the file png.h that is included in the libpng distribution, the latter shall prevail.
-
Page 199
libpng versions 0.97, January 1998, through 1.0.6, March 20, 2000, are Copyright (c) 1998, 1999 Glenn Randers-Pehrson, and are distributed according to the same disclaimer and license as libpng-0.96, with the following individuals added to the list of Contributing Authors: Tom Lane Glenn Randers-Pehrson Willem van Schaik… -
Page 200: Kern_Random
Third party terms consequential damages, which may result from the use of the PNG Reference Library, even if advised of the possibility of such damage. Permission is hereby granted to use, copy, modify, and distribute this source code, or portions hereof, for any purpose, without fee, subject to the following restrictions: 1.
-
Page 201: Convertutf
Third party terms .» This code is derived from software contributed to Berkeley by Chris Torek. Redistribution and use in source and binary forms, with or without modification, are permitted provided that the following conditions are met: .» 1. Redistributions of source code must retain the above copyright notice, this list of conditions and the following disclaimer.
-
Page 202: Wchar Functions
Third party terms Convert UTF ConvertUTF License Copyright 2001-2004 Unicode, Inc. Disclaimer This source code is provided as is by Unicode, Inc. No claims are made as to fitness for any particular purpose. No warranties of any kind are expressed or implied. The recipient agrees to determine applicability of information provided.
-
Page 203: Libjpeg
Third party terms Redistributions in binary form must reproduce the above copyright notice, this list of conditions and the following disclaimer in the documentation and/or other materials provided with the distribution. Neither the name of the <ORGANIZATION> nor the names of its contributors may be used to endorse or promote products derived from this software without specific prior written permission.
-
Page 204
Third party terms (2) If only executable code is distributed, then the accompanying documentation must state that «this software is based in part on the work of the Independent JPEG Group». (3) Permission for use of this software is granted only if the user accepts full responsibility for any undesirable consequences;… -
Page 205: Terms You Should Know
Terms you should know Avaya Communication Server 1000 Your office communication system. Calling Party Name Display Information appearing on the LCD display screen, such as the caller’s name and telephone number. The system must have CPND enabled. Category 5 (Cat5)
-
Page 206
Information display Any display of call activity, lists, prompts, and status of calls. On your Avaya 1120E IP Deskphone, this information area is one line of text and symbols. If a text message exceeds this area, a scroll arrow icon indicates that you must use the scroll keys to… -
Page 207
A broken or pulsed dial tone that sounds when you access some features on your telephone. Message/Inbox A fixed key on your Avaya 1120E IP Deskphone that connects to your voice messaging system when the key is pressed. Navigation keys Keys used to scroll through menus and lists appearing on the LCD display screen. -
Page 208
Terms you should know Shared Directory Number A DN (extension) that is shared by two or more persons. Special Prefix code (SPRE) Special codes entered using the dialpad, followed by a two-digit access code, that enable features (for example, Call Forward All Calls requires entry of SPRE code + 74). -
Page 209
User interface Screen displays that interact with the end user as a result of an action or event. Visual Alerter/Message Waiting indicator An LCD or an LED that flashes to indicate that a message is waiting or when the ringer is on. Terms you should know… -
Page 210
Terms you should know… -
Page 211: Index
Index Adjusting the display screen con- trast 60 Adjusting the volume 59 Area Code Setup 68 Attendant Recall 110 AutoDial 99 AutoDial Transfer 134 Automatic Wake-Up 167 Buzz feature 135 Call features and Flexible Feature Codes 21 Call Forward 119 Call Join 125 Call log options 78 Call Page 135…
-
Page 212
Index ties 20 Display Settings 80 Display settings 80 DN 206 Electronic Lock 123 Enabling OnHook Default Path 72 Enabling/disabling Call Timer 72 Enhanced Override 140 Enter key 16 Entering and editing text 26 Editing text using the soft keys Entering text using the USB keyboard 28 Expand key 16… -
Page 213
Navigation keys 16, 207 New Call indication 66 Normal mode 163 Off-hook 207 Off-hook dialing 91 Onhook Default Path 72 On-hook dialing 91 Override a busy signal 142 Paging tone 207 Personal Directory 95 Place a call on hold 107 Predial feature 98 Preferred Name Match 67 Privacy Release 142… -
Page 214
Index function keys 28 User Interface 209 Viewing telephone information 78 Virtual Office 154 Virtual Office login 155 Virtual Office logout 160 Virtual Office on your Remote tele- phone 157 Voice Call 145 Volume adjustment 59 Volume control 15 Volume control bar 15…
Руководстве по эксплуатации Avaya 1120E — вам приходилось его терять? Поскольку вы попали сюда, наверняка с вами это случилось. Но вы не единственный человек, сталкивающийся с проблемами с хранением руководства по эксплуатации всех домашних устройств. Ниже несколько советов, касающихся того, зачем собирать руководства по эксплуатации.
Руководстве по эксплуатации Avaya 1120E это определенный вид технической документации, являющейся неразлучным элементом каждого устройства, которое мы приобретаем. Они отличаются между собой количеством информации, которую можно найти на тему данного устройства: напр. Avaya 1120E. Конечно же, если производитель считает что необходимо передать нам большее количество информации, касающейся устройства Avaya 1120E, то стоит ее хоть раз прочитать — в начале, сразу же после покупки данной вещи. Однако мы считаем, что инструкции должны заключать самую важную, наиболее необходимую информацию о Avaya 1120E, так, чтобы не отнимать желания пользователя прочесть ее уже в самом начале. Несомненно, если устройство Avaya 1120E имеет много продвинутых функций, неизбежно большое количество информации в содержании этого документа.
Które из информации в инструкции Avaya 1120E необходимо обязательно прочитать?
- Информацию, касающуюся правильного использования и ухода за устройством Avaya 1120E — нам необходимо ознакомиться с основными правилами, чтобы в случае проблем с устройством сервисный центр не отказал нам в гарантийном обслуживании, из-за неправильного использования
- Информация, касающаяся самых частых проблем с Avaya 1120E и способы их решения
- Информация, касающаяся гарантии устройства Avaya 1120E и ближайших сервисных центров, способных починить устройство в соответствии с рекомендациям производителя Avaya
Как хранить инструкции дома?
Хорошей идеей является предназначение одного ящика, в котором бы хранилась инструкция Avaya 1120E а также всех других домашних устройств которыми мы пользуемся. Тогда значительно легче вам будет ее найти, чем искать в родных коробках, которые наверняка уже выбросили вы, или другие домочадцы. Раз в год достаточно просмотреть ящик и выбросить инструкции, которые касаются устройств, которыми вы уже не пользуетесь. Таким образом вы избежите хранения ненужных документов, а останутся только актуальные. Вы можете также скачать и распечатать инструкцию Avaya 1120E чтобы разместить ее в своем ящике.