
Модератор: Administrator
-
Aleksandr48
- Новый участник форума
- Сообщения: 6
- Зарегистрирован: Пт 10 фев 2017, 08:58
Выгрузка из Contact Recorder
При сохранении записей разговоров из Avaya Contact Recorder за указанный промежуток времени, не выгружается за один раз более 10 вкладок. За каждый день поступает примерно 2000 звонков и приходится выбирать промежутки по полчаса, чтобы сохранить все записи через программу. Есть ли способ упростить создание бэкапов записей? Например скрипт, стороннее приложение или хотя бы увеличить количество вкладок.
-
koltras
- Участник форума
- Сообщения: 126
- Зарегистрирован: Ср 05 дек 2012, 15:24
Re: Выгрузка из Contact Recorder
Сообщение
koltras »
Задавал этот вопрос представителям AVAYA
Ответ: это фича.
Причем в последней версии все то же самое ![]()
Но я удивлен, что вы делаете бекапы вручную.
Их нужно настраивать на самом ACR на внешний носитель (DVD, флешку, сетевое хранилище)
Или можно забирать записи напрямую с сервера. Лежат они в директории Calls в корне диска. Только осторожно )
-
Aleksandr48
- Новый участник форума
- Сообщения: 6
- Зарегистрирован: Пт 10 фев 2017, 08:58
Re: Выгрузка из Contact Recorder
Сообщение
Aleksandr48 »
У нас на работе это делали вручную до меня. Когда я пришел сюда, очень сильно удивился. На выгрузку одного дня уходит 10-15 минут в день. И это в век автоматизации.) Однако мне все те, кто до меня сталкивался с этой программой, говорят, что иначе никак.
-
koltras
- Участник форума
- Сообщения: 126
- Зарегистрирован: Ср 05 дек 2012, 15:24
-
koltras
- Участник форума
- Сообщения: 126
- Зарегистрирован: Ср 05 дек 2012, 15:24
Re: Выгрузка из Contact Recorder
Сообщение
koltras »
Aleksandr48 писал(а):DVD-привод есть.
Значит нужно настроить один раз и жить спокойно ![]() Только диски менять не забывать
Только диски менять не забывать
Aleksandr48 писал(а):Повезло вам с версией.) Здесь стоит софт примерно восьмилетней давности.
Просто обновили недавно
bestrubed.netlify.com › Avaya Contact Recorder Инструкция ▄ ▄ ▄
Avaya Contact Recorder Инструкция Rating: 6,1/10 9158 votes

Avaya Contact Recorder – система для выборочной или полной записи разговоров. Под катом будем ее устанавливать.

Если интересно, прошу.


Обзор Avaya AuraTM Contact Center; Новые возможности Avaya AuraTM. Avaya Contact Recording, Screen Recording (Quality Monitoring), eLearning,. Jul 10, 2013 — Avaya Aura® Call Center Elite. Avaya Aura™ Contact Recorder. Инструкция по установке и настройке клиентского софта (PDF).
-
Avaya Contact RecorderRelease 10.0Planning, Installation and
Administration GuideIssue 4April, 2010
Confidential & ProprietaryInformation
-
2003 — 2010 Verint Systems Inc. All Rights Reserved. THIS AVAYA
PRODUCT (‘Product’) CONTAINS CONFIDENTIAL AND PROPRIETARY
INFORMATION OF VERINT SYSTEMS INC. USE OF THE PRODUCT INDICATES THE
END USER’S ACCEPTANCE OF THE TERMS SET FORTH HEREIN AND THE GENERAL
LICENSE TERMS AVAILABLE ON THE AVAYA WEBSITE AT
http://support.avaya.com/LicenseInfo/ (‘GENERAL LICENSE TERMS’). IN
THE EVENT OF ANY CONFLICT OR INCONSISTENCY BETWEEN THE TERMS SET
FORTH HEREIN AND ANY WRITTEN AGREEMENT WITH AVAYA AND/OR AVAYA
EULA, THE TERMS OF SUCH EITHER WRITTEN AGREEMENT WITH AVAYA AND/OR
AVAYA EULA SHALL GOVERN. IF YOU DO NOT WISH TO BE BOUND BY THESE
TERMS, YOU MUST RETURN THE PRODUCT(S) TO THE POINT OF PURCHASE
WITHIN TEN (10) DAYS OF DELIVERY FOR A REFUND OR CREDIT.Avaya
grants End User a license within the scope of the license types
described below. The applicable number of licenses and units of
capacity for which the license is granted will be one (1), unless a
different number of licenses or units of capacity is specified in
the Documentation or other materials available to End User.
‘Software’ means the computer programs in object code, originally
licensed by Avaya and ultimately utilized by End User, whether as
stand-alone Products or pre-installed on Hardware. ‘Hardware’ means
the standard hardware Products, originally sold by Avaya and
ultimately utilized by End User.License Type(s):»Channel» means a physical connection between or
logical address associated with a recording device and an audio
source.»Enterprise» means a license to use, without limitation on
the number of copies or users applicable to that End User, that
Software within that End User’s technical environment in
conjunction with other Software licensed.»Seat» means the number of
uniquely identified work-stations (i) on which the Software is
licensed to be installed, (ii) from or to which the Software will
send or receive data, or (iii) about which the Software generates
data. Any one or more of the foregoing, in the aggregate,
applicable to a work-station shall qualify that work-station as a
licensed Seat. Seat licenses are not concurrent, except that
licenses relating to a work-station may be transferred to another
work-station so long as such transfer is on a permanent
basis.»Server» means a license to install the Software on a single
central computer server. «Site» means a license to use the Software
at a physical End User location, without limitation on the number
of copies or users applicable to that physical End User
location.Copyright:Except where expressly stated otherwise, the Product
is protected by copyright and other laws respecting proprietary
rights. Unauthorized reproduction, transfer, and or use can be a
criminal, as well as a civil, offense under the applicable law.Third-party Components: This computer program is protected by
U.S. and international copyright laws, patent laws, and other
intellectual property laws and treaties. Unauthorized use,
duplication, publication and distribution of all or any portion of
this computer program are expressly prohibited and will be
prosecuted to the maximum extent provided by law. Your rights in
this computer program are limited to the license rights granted
under the license agreement executed by you in hardcopy form (or if
none, by acceptance of the clickwrap terms included with this
computer program). If needed, please contact your vendor for an
additional copy of those terms. All other rights, title and
interest are expressly restricted and retained by Verint Systems,
Inc. and its licensors. Certain open source applications («Open
Source») may be included with this computer program. For specific
ownership information and license rights relating to those open
source applications, please see the «Free and Open Source Licensing
Information» guide provided with your computer program, or contact
your vendor for a copy of that guide. A license in each Open Source
software application is provided to you in accordance with the
specific license terms specified in their respective license terms.
EXCEPT WITH REGARD TO ANY WARRANTIES OR OTHER RIGHTS AND
OBLIGATIONS EXPRESSLY PROVIDED DIRECTLY TO YOU FROM VERINT, ALL
OPEN SOURCE SOFTWARE IS PROVIDED «AS IS» AND ANY EXPRESSED OR
IMPLIED WARRANTIES, INCLUDING, BUT NOT LIMITED TO, THE IMPLIED
WARRANTIES OF MERCHANTABILITY AND FITNESS FOR A PARTICULAR PURPOSE
ARE DISCLAIMED. IN NO EVENT SHALL THE OWNERS OF THE OPEN SOURCE
SOFTWARE OR ITS CONTRIBUTORS BE LIABLE FOR ANY DIRECT, INDIRECT,
INCIDENTAL, SPECIAL, EXEMPLARY, OR CONSEQUENTIAL DAMAGES
(INCLUDING, BUT NOT LIMITED TO, PROCUREMENT OF SUBSTITUTE GOODS OR
SERVICES; LOSS OF USE, DATA, OR PROFITS; OR BUSINESS INTERRUPTION)
HOWEVER CAUSED AND ON ANY THEORY OF LIABILITY, WHETHER IN CONTRACT,
STRICT LIABILITY, OR TORT (INCLUDING NEGLIGENCE OR OTHERWISE)
ARISING IN ANY WAY OUT OF THE USE OF THE OPEN SOURCE SOFTWARE, EVEN
IF ADVISED OF THE POSSIBILITY OF SUCH DAMAGE.Certain other software programs or portions thereof included in
the Product may contain software distributed under third party
agreements (‘Third Party Components’), which may contain terms that
expand or limit rights to use certain portions of the Product
(‘Third Party Terms’). Information identifying Third Party
Components and the Third Party Terms that apply to them is
available on Avaya’s web site at:
http://support.avaya.com/ThirdPartyLicense/. In addition, this
product may contain the ReportNet application from Cognos
Corporation. If so, you are granted a limited for use: (i) by an
unlimited number of «Anonymous Users» to set personal preferences,
view, run, schedule and output reports, subscribe to scheduled
reports, create and manage personal folders, and personalize
standard reports, and (ii) by one «Named User» (unless otherwise
specified on this Order) to, in addition to the rights of an
Anonymous User, use the Query Studio module.Avaya fraud intervention: If you suspect that you are being
victimized by toll fraud and you need technical assistance or
support, call Technical Service Center Toll Fraud Intervention
Hotline at +1-800-643-2353 for the United States and Canada.
Suspected security vulnerabilities with Avaya Products should be
reported to Avaya by sending mail to: [email protected] -
Issue 4 April, 2010 3
Confidential and Proprietary Information
Avaya Contact RecorderRelease 10.0
Planning, Installation and Administration Guide
About This Guide . . . . . . . . . . . . . . . . . . . . . . . .
. . . . . . . . . . . . . 11Intended audience . . . . . . . . . . .
. . . . . . . . . . . . . . . . . . . . . . . . 12Summary of
information included in this guide . . . . . . . . . . . . . . . .
. . . . . . 12Conventions used in this guide . . . . . . . . . . .
. . . . . . . . . . . . . . . . . . 13Additional references . . . .
. . . . . . . . . . . . . . . . . . . . . . . . . . . . . .
14Introduction . . . . . . . . . . . . . . . . . . . . . . . . . .
. . . . . . . . . . . . 16Whats New. . . . . . . . . . . . . . . . . . . . . . . . . . . .
. . . . . . . . . . 17Server components. . . . . . . . . . . . . .
. . . . . . . . . . . . . . . . . . . . . 19Avaya Contact Recorder Server . . . . . . . . . . . . . . . . .
. . . . . . . . . . . 19Optional Server Applications . . . . . . .
. . . . . . . . . . . . . . . . . . . . . . . 20End-User tools . . . . . . . . . . . . . . . . . . . . . . . . .
. . . . . . . . . . . . 23Quality Monitoring. . . . . . . . . . . .
. . . . . . . . . . . . . . . . . . . . . . . 23Bulk Search and
Replay . . . . . . . . . . . . . . . . . . . . . . . . . . . . . .
. . 23Administration Tools . . . . . . . . . . . . . . . . . . . .
. . . . . . . . . . . . . . 24Recording Functionality . . . . . . . . . . . . . . . . . . . .
. . . . . . . . . . . . . 25Sampled Recording for Quality
Assessment . . . . . . . . . . . . . . . . . . . . . . 25Bulk
Recording Modes . . . . . . . . . . . . . . . . . . . . . . . . . .
. . . . . . 26Ad-hoc or Occasional Recording Modes . . . . . . . .
. . . . . . . . . . . . . . . . 27Replay Options . . . . . . . . .
. . . . . . . . . . . . . . . . . . . . . . . . . . . 29Live
Monitoring . . . . . . . . . . . . . . . . . . . . . . . . . . . .
. . . . . . . . 30Recording Methods. . . . . . . . . . . . . . . . . . . . . . . .
. . . . . . . . . . . 31Service Observe . . . . . . . . . . . . . .
. . . . . . . . . . . . . . . . . . . . . 31Single-step Conference
. . . . . . . . . . . . . . . . . . . . . . . . . . . . . . . .
35Conference . . . . . . . . . . . . . . . . . . . . . . . . . . .
. . . . . . . . . . . 35Miscellaneous . . . . . . . . . . . . . . . . . . . . . . . . .
. . . . . . . . . . . . 37Beep Tone . . . . . . . . . . . . . . . .
. . . . . . . . . . . . . . . . . . . . . . 37International support
. . . . . . . . . . . . . . . . . . . . . . . . . . . . . . . . .
37Liability . . . . . . . . . . . . . . . . . . . . . . . . . . . .
. . . . . . . . . . . . 37Introduction . . . . . . . . . . . . . . . . . . . . . . . . . .
. . . . . . . . . . . . 40Audio Format . . . . . . . . . . . . . .
. . . . . . . . . . . . . . . . . . . . . . . 41G.711 . . . . . . . . . . . . . . . . . . . . . . . . . . . . .
. . . . . . . . . . . . 41 -
Contents
4 Avaya Contact Recorder Planning, Installation and
Administration GuideConfidential and Proprietary Information
G.729A . . . . . . . . . . . . . . . . . . . . . . . . . . . . .
. . . . . . . . . . . 42Storage Requirements . . . . . . . . . . .
. . . . . . . . . . . . . . . . . . . . . . 43Storage at Each Recorder . . . . . . . . . . . . . . . . . . . .
. . . . . . . . . . . 43Quality Monitoring. . . . . . . . . . . . .
. . . . . . . . . . . . . . . . . . . . . . 44Central Database
Storage . . . . . . . . . . . . . . . . . . . . . . . . . . . . . .
. 45Archive Call Storage . . . . . . . . . . . . . . . . . . . . .
. . . . . . . . . . . . 45Backup Storage . . . . . . . . . . . . .
. . . . . . . . . . . . . . . . . . . . . . . 45Server Platform . . . . . . . . . . . . . . . . . . . . . . . .
. . . . . . . . . . . . 46Sizing . . . . . . . . . . . . . . . . .
. . . . . . . . . . . . . . . . . . . . . . . 46DVD+RW / Blu-ray
Drive . . . . . . . . . . . . . . . . . . . . . . . . . . . . . . .
49Network Issues. . . . . . . . . . . . . . . . . . . . . . . . .
. . . . . . . . . . . . 51Load . . . . . . . . . . . . . . . . . .
. . . . . . . . . . . . . . . . . . . . . . . 51Ports Used . . . .
. . . . . . . . . . . . . . . . . . . . . . . . . . . . . . . . . .
51Network Address Translation Routing . . . . . . . . . . . . . . .
. . . . . . . . . . 51Licensing . . . . . . . . . . . . . . . . . . . . . . . . . . .
. . . . . . . . . . . . 52Concurrent Bulk Recording Limit . . . . .
. . . . . . . . . . . . . . . . . . . . . . . 52Quality Monitoring
Seat Limit . . . . . . . . . . . . . . . . . . . . . . . . . . . .
. 52Telephone Replay Channel Count . . . . . . . . . . . . . . . .
. . . . . . . . . . . 52Dialer Integration . . . . . . . . . . . .
. . . . . . . . . . . . . . . . . . . . . . . 52Timed Trials . . .
. . . . . . . . . . . . . . . . . . . . . . . . . . . . . . . . . .
53Avaya system prerequisites . . . . . . . . . . . . . . . . . . .
. . . . . . . . . . . . 54Communication Manager . . . . . . . . . .
. . . . . . . . . . . . . . . . . . . . . 54Gateway Resources . . .
. . . . . . . . . . . . . . . . . . . . . . . . . . . . . . 54AE
Services . . . . . . . . . . . . . . . . . . . . . . . . . . . . .
. . . . . . . . 55Expansion Interface Boards (TN570) . . . . . . .
. . . . . . . . . . . . . . . . . . . 56C-LAN . . . . . . . . . . .
. . . . . . . . . . . . . . . . . . . . . . . . . . . . . 56VoIP
Resources . . . . . . . . . . . . . . . . . . . . . . . . . . . . .
. . . . . . 57Multi-Connect Capacity . . . . . . . . . . . . . . .
. . . . . . . . . . . . . . . . . 60DMCC (IP_API_A) Licenses . . .
. . . . . . . . . . . . . . . . . . . . . . . . . . . 60TSAPI
Licenses. . . . . . . . . . . . . . . . . . . . . . . . . . . . . .
. . . . . . 60VoIP Network Design . . . . . . . . . . . . . . . . .
. . . . . . . . . . . . . . . . 61Topologies . . . . . . . . . . . . . . . . . . . . . . . . . . .
. . . . . . . . . . . . 62Bulk Recording System . . . . . . . . . .
. . . . . . . . . . . . . . . . . . . . . . 62Quality Monitoring
(only) System. . . . . . . . . . . . . . . . . . . . . . . . . . .
. 62Bulk Recording + Quality Monitoring System . . . . . . . . . .
. . . . . . . . . . . . 63Large Bulk Recording Systems . . . . . .
. . . . . . . . . . . . . . . . . . . . . . 63Integrating with other systems . . . . . . . . . . . . . . . . .
. . . . . . . . . . . . 67Standardized Dialer Integrations . . . .
. . . . . . . . . . . . . . . . . . . . . . . . 67Supplementary
Tagging of Bulk Recordings . . . . . . . . . . . . . . . . . . . .
. . 67Explicit External Control of Bulk Recording . . . . . . . . .
. . . . . . . . . . . . . . 68Enhanced Quality Monitoring . . . . .
. . . . . . . . . . . . . . . . . . . . . . . . 68Overview . . . . . . . . . . . . . . . . . . . . . . . . . . . .
. . . . . . . . . . . 72Avaya System Configuration . . . . . . . .
. . . . . . . . . . . . . . . . . . . . . . 73Prerequisites . . . . . . . . . . . . . . . . . . . . . . . . .
. . . . . . . . . . . . 73Communication Manager Configuration . . .
. . . . . . . . . . . . . . . . . . . . . 73AE Server
Configuration. . . . . . . . . . . . . . . . . . . . . . . . . . .
. . . . . 80Test Phonesets . . . . . . . . . . . . . . . . . . . .
. . . . . . . . . . . . . . . . 81 -
Contents
Issue 4 April, 2010 5
Confidential and Proprietary Information
Order in which to Install Applications . . . . . . . . . . . . .
. . . . . . . . . . . . . 82Platform Prerequisites . . . . . . . .
. . . . . . . . . . . . . . . . . . . . . . . . . 83Operating System . . . . . . . . . . . . . . . . . . . . . . . .
. . . . . . . . . . . 83DVD/Blu-ray Drive . . . . . . . . . . . . .
. . . . . . . . . . . . . . . . . . . . . 86Network Connectivity .
. . . . . . . . . . . . . . . . . . . . . . . . . . . . . . . .
86Installing Avaya Contact Recorder. . . . . . . . . . . . . . . .
. . . . . . . . . . . . 88Installing Quality Monitoring . . . . . .
. . . . . . . . . . . . . . . . . . . . . . . . . 89Installing a
Central Replay Server . . . . . . . . . . . . . . . . . . . . . . .
. . . . . 90Installing Multiple Central Replay Servers . . . . . .
. . . . . . . . . . . . . . . . . . 91Installing Viewer . . . . . .
. . . . . . . . . . . . . . . . . . . . . . . . . . . . . . 92Prerequisites . . . . . . . . . . . . . . . . . . . . . . . . .
. . . . . . . . . . . . 92Installing Viewer . . . . . . . . . . . .
. . . . . . . . . . . . . . . . . . . . . . . 92Create an MMC
Console . . . . . . . . . . . . . . . . . . . . . . . . . . . . . .
. 93Configuring Viewer . . . . . . . . . . . . . . . . . . . . . .
. . . . . . . . . . . . 93Configuring Avaya Contact Recorder . . .
. . . . . . . . . . . . . . . . . . . . . . . 95Configuring
Multiple Viewer Servers . . . . . . . . . . . . . . . . . . . . . .
. . . . 95Installing Archive . . . . . . . . . . . . . . . . . . . . . . .
. . . . . . . . . . . . . 96Overview . . . . . . . . . . . . . . .
. . . . . . . . . . . . . . . . . . . . . . . . 98Accessing the
System . . . . . . . . . . . . . . . . . . . . . . . . . . . . . .
. . . 99URL . . . . . . . . . . . . . . . . . . . . . . . . . . . . . .
. . . . . . . . . . . 99Initial User Account . . . . . . . . . . .
. . . . . . . . . . . . . . . . . . . . . . . 99Key Points . . . .
. . . . . . . . . . . . . . . . . . . . . . . . . . . . . . . . . .
99Licensing . . . . . . . . . . . . . . . . . . . . . . . . . . .
. . . . . . . . . . . . 101Terminology. . . . . . . . . . . . . . .
. . . . . . . . . . . . . . . . . . . . . . . 101Obtaining a
License Activation Key. . . . . . . . . . . . . . . . . . . . . . .
. . . . 102Standby and Slave Servers . . . . . . . . . . . . . . .
. . . . . . . . . . . . . . . 103Adding additional licenses . . . .
. . . . . . . . . . . . . . . . . . . . . . . . . . .
103Reinstalling on the same PC . . . . . . . . . . . . . . . . . .
. . . . . . . . . . . . 103Reinstalling the Recorder on a new PC .
. . . . . . . . . . . . . . . . . . . . . . . . 103Security . . . . . . . . . . . . . . . . . . . . . . . . . . . .
. . . . . . . . . . . . 105Securing the System . . . . . . . . . .
. . . . . . . . . . . . . . . . . . . . . . . 105Windows
Authentication . . . . . . . . . . . . . . . . . . . . . . . . . .
. . . . . . 105General Setup . . . . . . . . . . . . . . . . . . . . . . . . .
. . . . . . . . . . . . 107Recorder . . . . . . . . . . . . . . . .
. . . . . . . . . . . . . . . . . . . . . . . 107Communication
Manager Interface . . . . . . . . . . . . . . . . . . . . . . . . .
. . 109System Monitoring . . . . . . . . . . . . . . . . . . . . . . .
. . . . . . . . . . . . 114Email Notification . . . . . . . . . . .
. . . . . . . . . . . . . . . . . . . . . . . . 114SNMP . . . . . .
. . . . . . . . . . . . . . . . . . . . . . . . . . . . . . . . . .
115Operations . . . . . . . . . . . . . . . . . . . . . . . . . . .
. . . . . . . . . . . . 117Common Settings . . . . . . . . . . . .
. . . . . . . . . . . . . . . . . . . . . . . 117Assigning Ports .
. . . . . . . . . . . . . . . . . . . . . . . . . . . . . . . . . .
. 119Conferenced Recording . . . . . . . . . . . . . . . . . . . .
. . . . . . . . . . . . 122Quality Monitoring. . . . . . . . . . .
. . . . . . . . . . . . . . . . . . . . . . . . 126Station Bulk
Recording . . . . . . . . . . . . . . . . . . . . . . . . . . . . .
. . . 128Station Executive Recording . . . . . . . . . . . . . . .
. . . . . . . . . . . . . . . 129On Demand Recording . . . . . . .
. . . . . . . . . . . . . . . . . . . . . . . . . 132 -
Contents
6 Avaya Contact Recorder Planning, Installation and
Administration GuideConfidential and Proprietary Information
Meeting Recording . . . . . . . . . . . . . . . . . . . . . . .
. . . . . . . . . . . 133(Telephone) Replay Ports . . . . . . . . .
. . . . . . . . . . . . . . . . . . . . . . 134Archive . . . . . .
. . . . . . . . . . . . . . . . . . . . . . . . . . . . . . . . . .
135Hard Disk Archiving . . . . . . . . . . . . . . . . . . . . . .
. . . . . . . . . . . . 139DVD+RW/Blu-ray Archiving . . . . . . . .
. . . . . . . . . . . . . . . . . . . . . . 139Search and Replay . . . . . . . . . . . . . . . . . . . . . . .
. . . . . . . . . . . . 144Search and Replay Access Rights . . . .
. . . . . . . . . . . . . . . . . . . . . . . 144ActiveX Control
Download . . . . . . . . . . . . . . . . . . . . . . . . . . . . .
. . 146Installing the ActiveX Controls Manually . . . . . . . . . .
. . . . . . . . . . . . . . 147Modify Default Behavior . . . . . .
. . . . . . . . . . . . . . . . . . . . . . . . . . 148Backup/Restore . . . . . . . . . . . . . . . . . . . . . . . . .
. . . . . . . . . . . 150Application . . . . . . . . . . . . . . .
. . . . . . . . . . . . . . . . . . . . . . . 150Backing up the
Database . . . . . . . . . . . . . . . . . . . . . . . . . . . . .
. . 150Restoring data to a new PostgreSQL database . . . . . . . .
. . . . . . . . . . . . . 151Backing up Voice Recordings . . . . .
. . . . . . . . . . . . . . . . . . . . . . . . 151Distributing User Instructions . . . . . . . . . . . . . . . . .
. . . . . . . . . . . . . 153Those Using Recording . . . . . . . .
. . . . . . . . . . . . . . . . . . . . . . . . 153Those entitled
to replay calls . . . . . . . . . . . . . . . . . . . . . . . . . .
. . . 154Configuring Avaya Support Remote Access . . . . . . . . . . . .
. . . . . . . . . . . 155Introduction . . . . . . . . . . . . . . .
. . . . . . . . . . . . . . . . . . . . . . . 158Status Monitoring.
. . . . . . . . . . . . . . . . . . . . . . . . . . . . . . . . . .
. 159System . . . . . . . . . . . . . . . . . . . . . . . . . . . . .
. . . . . . . . . . . 159Server . . . . . . . . . . . . . . . . . .
. . . . . . . . . . . . . . . . . . . . . . 160CTI Monitors . . . .
. . . . . . . . . . . . . . . . . . . . . . . . . . . . . . . . .
161Ports . . . . . . . . . . . . . . . . . . . . . . . . . . . . .
. . . . . . . . . . . . 163Alarms . . . . . . . . . . . . . . . . .
. . . . . . . . . . . . . . . . . . . . . . . 165Audit Trail . . .
. . . . . . . . . . . . . . . . . . . . . . . . . . . . . . . . . .
. 166Preventative Maintenance . . . . . . . . . . . . . . . . . . . .
. . . . . . . . . . . 168Daily . . . . . . . . . . . . . . . . . .
. . . . . . . . . . . . . . . . . . . . . . . 168Weekly . . . . . .
. . . . . . . . . . . . . . . . . . . . . . . . . . . . . . . . . .
169Monthly . . . . . . . . . . . . . . . . . . . . . . . . . . . .
. . . . . . . . . . . 170Every Six Months . . . . . . . . . . . . .
. . . . . . . . . . . . . . . . . . . . . . 170Use of SSL . . . . . . . . . . . . . . . . . . . . . . . . . . .
. . . . . . . . . . . 172Windows Domain Authentication . . . . . .
. . . . . . . . . . . . . . . . . . . . . . 173Blocking Replay from
a Recorder . . . . . . . . . . . . . . . . . . . . . . . . . . . .
174Changing Passwords . . . . . . . . . . . . . . . . . . . . . . .
. . . . . . . . . . . 175Linux User Accounts . . . . . . . . . . . . . . . . . . . . . .
. . . . . . . . . . . 175Postgres Database Owner. . . . . . . . . .
. . . . . . . . . . . . . . . . . . . . . 175Recorder Account on
eWare/Viewer SQL Server . . . . . . . . . . . . . . . . . . . .
176Encrypted File Storage . . . . . . . . . . . . . . . . . . . . .
. . . . . . . . . . . . 177PCI Compliance . . . . . . . . . . . . .
. . . . . . . . . . . . . . . . . . . . . . . 178Properties File .
. . . . . . . . . . . . . . . . . . . . . . . . . . . . . . . . . .
. . 182Standby Server. . . . . . . . . . . . . . . . . . . . . . .
. . . . . . . . . . . . . . 189Central Replay Server . . . . . . .
. . . . . . . . . . . . . . . . . . . . . . . . . . 190Installation . . . . . . . . . . . . . . . . . . . . . . . . . .
. . . . . . . . . . . . 190Configuration . . . . . . . . . . . . .
. . . . . . . . . . . . . . . . . . . . . . . . 190 -
Contents
Issue 4 April, 2010 7
Confidential and Proprietary Information
User Defined Fields . . . . . . . . . . . . . . . . . . . . . .
. . . . . . . . . . . . 191Storing UDFs . . . . . . . . . . . . . .
. . . . . . . . . . . . . . . . . . . . . . . 191Search and Display
UDFs . . . . . . . . . . . . . . . . . . . . . . . . . . . . . . .
191UDF Support in Viewer . . . . . . . . . . . . . . . . . . . . .
. . . . . . . . . . . 191Viewer Compatibility. . . . . . . . . . .
. . . . . . . . . . . . . . . . . . . . . . . 192Customizing Search and Replay . . . . . . . . . . . . . . . . .
. . . . . . . . . . . 193Default Configuration Files. . . . . . . .
. . . . . . . . . . . . . . . . . . . . . . . 193Custom Layout
Files . . . . . . . . . . . . . . . . . . . . . . . . . . . . . . .
. . 193Internationalization . . . . . . . . . . . . . . . . . . . .
. . . . . . . . . . . . . . 195Usage Report . . . . . . . . . . . . . . . . . . . . . . . . . .
. . . . . . . . . . . 198Enabling the Report . . . . . . . . . . .
. . . . . . . . . . . . . . . . . . . . . . . 198Content. . . . . .
. . . . . . . . . . . . . . . . . . . . . . . . . . . . . . . . . .
198Accessing through URL: . . . . . . . . . . . . . . . . . . . . .
. . . . . . . . . . . 198Accessing the Usage report in a log file .
. . . . . . . . . . . . . . . . . . . . . . . 199Selective Record Barring . . . . . . . . . . . . . . . . . . . .
. . . . . . . . . . . . 200Configuration . . . . . . . . . . . . .
. . . . . . . . . . . . . . . . . . . . . . . . 200Example . . . .
. . . . . . . . . . . . . . . . . . . . . . . . . . . . . . . . . .
. 200Limitations . . . . . . . . . . . . . . . . . . . . . . . . .
. . . . . . . . . . . . . 200Recording files . . . . . . . . . . . . . . . . . . . . . . . .
. . . . . . . . . . . . . 204WAV files . . . . . . . . . . . . . .
. . . . . . . . . . . . . . . . . . . . . . . . . 204XML files . .
. . . . . . . . . . . . . . . . . . . . . . . . . . . . . . . . . .
. . . 204Internal Database . . . . . . . . . . . . . . . . . . . . . . .
. . . . . . . . . . . . 205Recording details . . . . . . . . . . .
. . . . . . . . . . . . . . . . . . . . . . . . 205Configuration
details . . . . . . . . . . . . . . . . . . . . . . . . . . . . . .
. . . 206Recorder Interfaces . . . . . . . . . . . . . . . . . . . . . .
. . . . . . . . . . . . 207HTTP/HTTPS Interfaces Offered . . . . .
. . . . . . . . . . . . . . . . . . . . . . . 207Communication
Manager . . . . . . . . . . . . . . . . . . . . . . . . . . . . . .
. 208Quality Monitoring. . . . . . . . . . . . . . . . . . . . . .
. . . . . . . . . . . . . 209Other Recorders . . . . . . . . . . .
. . . . . . . . . . . . . . . . . . . . . . . . 210External Control
Interface . . . . . . . . . . . . . . . . . . . . . . . . . . . . .
. . 210Database Upload Interface . . . . . . . . . . . . . . . . .
. . . . . . . . . . . . . 210Summary . . . . . . . . . . . . . . .
. . . . . . . . . . . . . . . . . . . . . . . . 211Hints and Tips . . . . . . . . . . . . . . . . . . . . . . . . .
. . . . . . . . . . . . 214Where to Look for Clues . . . . . . . .
. . . . . . . . . . . . . . . . . . . . . . . . 214Determining
Current Version . . . . . . . . . . . . . . . . . . . . . . . . . .
. . . . 214Application Logs . . . . . . . . . . . . . . . . . . . .
. . . . . . . . . . . . . . . 214Tomcat Logs . . . . . . . . . . .
. . . . . . . . . . . . . . . . . . . . . . . . . . 215Remote
Access . . . . . . . . . . . . . . . . . . . . . . . . . . . . . .
. . . . . . 215Specific Problems . . . . . . . . . . . . . . . . . . . . . . .
. . . . . . . . . . . . 216System Administration page problems . .
. . . . . . . . . . . . . . . . . . . . . . . 216Connectivity . . .
. . . . . . . . . . . . . . . . . . . . . . . . . . . . . . . . . .
217Search and Replay problems . . . . . . . . . . . . . . . . . . .
. . . . . . . . . . 218Recording Problems . . . . . . . . . . . . .
. . . . . . . . . . . . . . . . . . . . 222Alarms . . . . . . . . . . . . . . . . . . . . . . . . . . . . .
. . . . . . . . . . . . 226Alarms Table . . . . . . . . . . . . . .
. . . . . . . . . . . . . . . . . . . . . . . . 227Introduction . .
. . . . . . . . . . . . . . . . . . . . . . . . . . . . . . . . . .
. . 244 -
Contents
8 Avaya Contact Recorder Planning, Installation and
Administration GuideConfidential and Proprietary Information
When to Use External Control . . . . . . . . . . . . . . . . . .
. . . . . . . . . . . 244This Appendix . . . . . . . . . . . . . .
. . . . . . . . . . . . . . . . . . . . . . 244Port Allocations . .
. . . . . . . . . . . . . . . . . . . . . . . . . . . . . . . . . .
245Master + Slave Systems. . . . . . . . . . . . . . . . . . . . .
. . . . . . . . . . . 245Java API Toolkit . . . . . . . . . . . . . . . . . . . . . . . .
. . . . . . . . . . . . 246TCP/IP Protocol Overview . . . . . . . .
. . . . . . . . . . . . . . . . . . . . . . . 247Connection Method . . . . . . . . . . . . . . . . . . . . . . .
. . . . . . . . . . . 247General Protocol Specification . . . . . .
. . . . . . . . . . . . . . . . . . . . . . . 247Channel
Identification . . . . . . . . . . . . . . . . . . . . . . . . . .
. . . . . . . 248XML Tagging . . . . . . . . . . . . . . . . . . .
. . . . . . . . . . . . . . . . . . 248Basic Call Tagging . . . . .
. . . . . . . . . . . . . . . . . . . . . . . . . . . . .
249Fallback Mode . . . . . . . . . . . . . . . . . . . . . . . . .
. . . . . . . . . . . 249Examples . . . . . . . . . . . . . . . . . . . . . . . . . . . .
. . . . . . . . . . . 251Third-party CTI Control . . . . . . . . .
. . . . . . . . . . . . . . . . . . . . . . . 251Additional Call
Tagging . . . . . . . . . . . . . . . . . . . . . . . . . . . . . .
. . 252TCP/IP Message Sequences . . . . . . . . . . . . . . . . . . . .
. . . . . . . . . . 254Redundant SAN . . . . . . . . . . . . . . .
. . . . . . . . . . . . . . . . . . . . . 262Duplicated recording .
. . . . . . . . . . . . . . . . . . . . . . . . . . . . . . . . .
263Standby Recorder Options . . . . . . . . . . . . . . . . . . . .
. . . . . . . . . . . 264Prerequisites for high availability . . . . . . . . . . . . . .
. . . . . . . . . . . . . . 264Standby recorder licensing . . . . .
. . . . . . . . . . . . . . . . . . . . . . . . . 266Automated
Configuration Shadowing. . . . . . . . . . . . . . . . . . . . . .
. . . . 266Manual Configuration of Standby . . . . . . . . . . . .
. . . . . . . . . . . . . . . 266Known limitations . . . . . . . .
. . . . . . . . . . . . . . . . . . . . . . . . . . .
266Distributed Systems . . . . . . . . . . . . . . . . . . . . . .
. . . . . . . . . . . . 267Supported failure modes . . . . . . . .
. . . . . . . . . . . . . . . . . . . . . . . 268Standby recorders
and Unify/External Control . . . . . . . . . . . . . . . . . . . .
. 269Supported Master/Standby Topologies . . . . . . . . . . . . .
. . . . . . . . . . . . 269Mode of operation . . . . . . . . . . . . . . . . . . . . . . .
. . . . . . . . . . . . 286Standby configuration (automatic) . . .
. . . . . . . . . . . . . . . . . . . . . . . . 286Standby
configuration (manual) . . . . . . . . . . . . . . . . . . . . . .
. . . . . . 286Power-On . . . . . . . . . . . . . . . . . . . . . .
. . . . . . . . . . . . . . . . 286Standby mode . . . . . . . . . .
. . . . . . . . . . . . . . . . . . . . . . . . . . 286Failure
Detection . . . . . . . . . . . . . . . . . . . . . . . . . . . . .
. . . . . . 287Disk Space Monitoring . . . . . . . . . . . . . . .
. . . . . . . . . . . . . . . . . 287Active mode . . . . . . . . .
. . . . . . . . . . . . . . . . . . . . . . . . . . . . 288Return
to Standby mode. . . . . . . . . . . . . . . . . . . . . . . . . .
. . . . . . 288Switchover Implications . . . . . . . . . . . . . .
. . . . . . . . . . . . . . . . . . 288Restoring the Master . . . .
. . . . . . . . . . . . . . . . . . . . . . . . . . . . .
289Comparison with hardware switch-over units . . . . . . . . . . .
. . . . . . . . . . . 290Standby Recorder Configuration . . . . . . . . . . . . . . . . .
. . . . . . . . . . . 291Configuration Differences . . . . . . . .
. . . . . . . . . . . . . . . . . . . . . . . 291Upgrade Process for Multiple Recorder Topologies . . . . . . . .
. . . . . . . . . . . . 293Upgrading Slave Recorders to Version 10
. . . . . . . . . . . . . . . . . . . . . . . 293Overview . . . . . . . . . . . . . . . . . . . . . . . . . . . .
. . . . . . . . . . . 296Modes of Operation . . . . . . . . . . . .
. . . . . . . . . . . . . . . . . . . . . . 296Principles of
Operation . . . . . . . . . . . . . . . . . . . . . . . . . . . . .
. . . 297 -
Contents
Issue 4 April, 2010 9
Confidential and Proprietary Information
High Availability . . . . . . . . . . . . . . . . . . . . . . .
. . . . . . . . . . . . . 297Installation . . . . . . . . . . . . .
. . . . . . . . . . . . . . . . . . . . . . . . . . 299Configuration . . . . . . . . . . . . . . . . . . . . . . . . .
. . . . . . . . . . . . 299Programmers Guide . . . . . . . . . . .
. . . . . . . . . . . . . . . . . . . . . . . 300Enable(in string station, in SeqCouple tags) . . . . . . . . . .
. . . . . . . . . . . . 300Disable(in string station) . . . . . . .
. . . . . . . . . . . . . . . . . . . . . . . . . 301Start(in
string station) . . . . . . . . . . . . . . . . . . . . . . . . . .
. . . . . . . 301Stop(in string station) . . . . . . . . . . . . .
. . . . . . . . . . . . . . . . . . . . 301Tag(in string station,
in string inum, SeqCouple tags) . . . . . . . . . . . . . . . . . .
301Assign() . . . . . . . . . . . . . . . . . . . . . . . . . . . .
. . . . . . . . . . . 301Introduction . . . . . . . . . . . . . . . . . . . . . . . . . .
. . . . . . . . . . . . 304Functionality . . . . . . . . . . . . .
. . . . . . . . . . . . . . . . . . . . . . . . 304How it Works . .
. . . . . . . . . . . . . . . . . . . . . . . . . . . . . . . . . .
. 305Status Monitoring . . . . . . . . . . . . . . . . . . . . . .
. . . . . . . . . . . . . 305Configuration. . . . . . . . . . . . . . . . . . . . . . . . . .
. . . . . . . . . . . . 306Licensing . . . . . . . . . . . . . . .
. . . . . . . . . . . . . . . . . . . . . . . . 306Dialer List. . .
. . . . . . . . . . . . . . . . . . . . . . . . . . . . . . . . . .
. . 306Generic Dialer Configuration . . . . . . . . . . . . . . . .
. . . . . . . . . . . . . . 306Tagging of Calls . . . . . . . . . .
. . . . . . . . . . . . . . . . . . . . . . . . . . 307Configuring
Quality Monitoring . . . . . . . . . . . . . . . . . . . . . . . .
. . . . . 308Avaya PCS/PDS Dialer . . . . . . . . . . . . . . . . . . . . . .
. . . . . . . . . . . 310Versions Supported . . . . . . . . . . . .
. . . . . . . . . . . . . . . . . . . . . . 310Limitations . . . .
. . . . . . . . . . . . . . . . . . . . . . . . . . . . . . . . . .
310Configuration . . . . . . . . . . . . . . . . . . . . . . . . .
. . . . . . . . . . . . 310PCS/PDS Settings Summary . . . . . . . . . . . . . . . . . . . .
. . . . . . . . . . 313Overview . . . . . . . . . . . . . . . . . .
. . . . . . . . . . . . . . . . . . . . . 316Disks . . . . . . . . . . . . . . . . . . . . . . . . . . . . .
. . . . . . . . . . . . 316NICS . . . . . . . . . . . . . . . . . .
. . . . . . . . . . . . . . . . . . . . . . . 316DVD . . . . . . .
. . . . . . . . . . . . . . . . . . . . . . . . . . . . . . . . . .
316Soundcard . . . . . . . . . . . . . . . . . . . . . . . . . . .
. . . . . . . . . . . 317Kickstart . . . . . . . . . . . . . . . .
. . . . . . . . . . . . . . . . . . . . . . . 317Installing Unlimited Strength Encryption . . . . . . . . . . . .
. . . . . . . . . . . . . 320Installing a Signed SSL Certificate. .
. . . . . . . . . . . . . . . . . . . . . . . . . . 321Selecting a Certificate Authority (CA) . . . . . . . . . . . . .
. . . . . . . . . . . . . 321Backing up the Keystore file . . . . .
. . . . . . . . . . . . . . . . . . . . . . . . . 321Creating the
new Certificate . . . . . . . . . . . . . . . . . . . . . . . . . .
. . . . 321Generating a Certificate Signing Request. . . . . . . .
. . . . . . . . . . . . . . . . 323Importing the CA’s certificates
. . . . . . . . . . . . . . . . . . . . . . . . . . . . .
323Backing up the keystore file . . . . . . . . . . . . . . . . . .
. . . . . . . . . . . . 324Changing Tomcat Port Numbers. . . . . . . . . . . . . . . . . .
. . . . . . . . . . . 325Encrypting Properties File entries . . . .
. . . . . . . . . . . . . . . . . . . . . . . . 326Configuring
Viewer and Archive to use HTTPS . . . . . . . . . . . . . . . . . .
. . . . 327Importing the public certificates into Viewer and Archive . . .
. . . . . . . . . . . . . . 327Configure Viewer to use https and a
secure port . . . . . . . . . . . . . . . . . . . . 328Configure
Archive to use https . . . . . . . . . . . . . . . . . . . . . . .
. . . . . . 329Configuring Archive for a Key Management Server . . . . . . . .
. . . . . . . . . . . . 331 -
Contents
10 Avaya Contact Recorder Planning, Installation and
Administration GuideConfidential and Proprietary Information
Configuring Archive . . . . . . . . . . . . . . . . . . . . . .
. . . . . . . . . . . . 331Signing and Delivering the certificate .
. . . . . . . . . . . . . . . . . . . . . . . . . 331Installing the
Certificate . . . . . . . . . . . . . . . . . . . . . . . . . . . .
. . . . 332 -
Issue 4 April, 2010 11
Confidential and Proprietary Information
About This Guide
The Avaya Contact Recorder Planning, Installation and
Administration Guide provides details of the Avaya Contact Recorder
system, as well as recommended and required components. -
About This Guide
12 Avaya Contact Recorder Planning, Installation and
Administration GuideConfidential and Proprietary Information
Intended audienceThis guide is designed for use by:
I.T. managers
Installers
System Administrators
Summary of information included in this guideThe following table
provides information about this guide.Chapter Title Description
Chapter 1: System Overview
This chapter provides an overview of the design options for
Avaya Contact Recorder.Chapter 2: Planning and Prerequisites
This chapter gives details of the prerequisites for Avaya
Contact Recorder.Chapter 3:Installation
This chapter gives details of the steps to install Avaya Contact
Recorder.Chapter 4:Configuration
This chapter gives details of the steps to configure Avaya
Contact Recorder.Chapter 5: Operation, Administration and Maintenance
This chapter provides detais of regular maintenance required by
Avaya Contact Recorder.Chapter 6:System Security
This chapter sets out the available and recommended steps you
can take to secure the system.Chapter 7:Advanced Configuration
This chapter details the rarely used advanced settings of Avaya
Contact Recorder.Appendix A: Technical Reference
This appendix provides technical details about Avaya Contact
Recorder.Appendix B: The appendix provides troubleshooting
instructionsGlossary The glossary defines the terms you need to understand
Avaya Contact Recorder. -
Conventions used in this guide
Issue 4 April, 2010 13
Confidential and Proprietary Information
Conventions used in this guideThe following table shows how user
input, output and instructions are highlighted in this guide, as
well as special notations that you will see as you use this
guide.To show… This style is used For example…
Information shown on screen
Fixed width You should see the prompt below:login:
Characters that you should type exactly as shown
Fixed width, bold Enter the following command:mount
/mnt/cdromCharacters that you should replace with appropriate
informationFixed width, bold italic
Browse to the new server by enteringhttp://servername:8080
Menu selections, buttons and tabs
Sans Serif, Bold Click on the Install button.
Helpful hints that can improve the efficiency or effectiveness
of your workTip: Tip:If no part-time licenses are available, a full time
license may be usedinstead.Important details that we want to make sure that you do not
overlookNote: Note:Media Encryption may or may not show up on this
form.Advice that can help you avoid undesirable results
If the network does not meet the three conditions listed, there
will be no media resources.! Important: ! Important:
-
About This Guide
14 Avaya Contact Recorder Planning, Installation and
Administration GuideConfidential and Proprietary Information
Additional referencesThe following guides contain additional
information you may find helpful.Avaya Communication Manager Call Recording: A Design Approach
for Device Media and Call Control (DMCC, previously called CMAPI)
(Compas ID 128862)Avaya Contact Recorder User Guide
Viewer for Communication Manager Installation Guide
Viewer for Communication Manager Quick Reference Guide
Contact Archive for Communication Manager Installation Guide
Contact Archive for Communication Manager System Administration
GuideUnify for Communication Manager Installation Guide
Witness Enterprise Deployment Guides Impact 360, Full-time
Recorder, Enterprise Security Administration Guide Release 7.8Avaya Communication Manager Guide to ACD Contact Centers
Administrators Guide for Avaya Communication Manager
Administration for Network Connectivity for Avaya Communication
ManagerNote:Note: Avaya Communication Manager documentation is
available through theAvaya online support Web site, http://www.avaya.com.
Situations that can result in: Harm to software Loss of data An
interruption inservice
Perform this procedure only after normal business hours. This
procedure restarts all links on the interface, and can cause a
temporary loss of service.Situations that can result in harm to hardware or equipment Make
sure that the disks are theUpdate you require. RedHat and othervendors still sometimes
supply Update 0 disks.To show… This style is used For example…
! CAUTION: ! CAUTION:
! WARNING: ! WARNING:
-
Issue 4 April, 2010 15
Confidential and Proprietary Information
Chapter 1: System Overview
This chapter provides an overview of the design options for an
Avaya Contact Recorder system. -
System Overview
16 Avaya Contact Recorder Planning, Installation and
Administration GuideConfidential and Proprietary Information
IntroductionAvaya Contact Recorder provides an extremely
efficient and scalable, software only, voice recording platform,
running on standard PC Hardware. It uses Avaya’s Device, Media and
Call Control (DMCC) features to provide a wide range of recording
modes with all the benefits of VoIP-based recording but without the
limitations of passive tap IP recording systems.This new approach to recording offers the following
benefits:The recorder can record potentially any call on the switch.
Traditional trunk and extension modes cannot record internal and
tandem calls respectively.There is no cabling to maintain as new trunks or extensions are
added to the switch.Uses standard PC servers with no proprietary cards.
This chapter describes the major components of the Avaya Contact
Recorder system. It describes the Avaya Contact Recorder (which is
a mandatory component) and the optional components -
Introduction
Issue 4 April, 2010 17
Confidential and Proprietary Information
Whats New
In Version 7.8
Provides a range of enhanced security options as described in
Chapter 6Supports Redhat Enterprise Linux (RHEL) Versions 4 and 5.
(Existing installations on RHEL 3 can be upgraded to CSCM 7.8 but
this version is no longer supported for new installations).Supports Avaya Communication Manager Version 4
Supports numbering plans up to 16 digits
Supports No-talk Service Observe — which does not require a
time-slot on your port network.Allows you to update call tagging details after recordings have
completed(from Service Pack 1) supports a new Search and Replay API (full
details on request).(from Service Pack 1) provides a new user role: «Restricted
Administrator». Such users can see the system status and alarms;
eject DVDs and administer Replay Only user accounts but cannot
change system configuration.(from Service Pack 2) Conferenced mode recording no longer uses
JTAPI but instead uses TSAPI directly.(from Service Pack 2) Live Monitor capability has been removed
as this is no longer required now that Communication Manager itself
can support multiple service observation of a call.(from Service Pack 2) Unify/External control mode was deprecated
in 7.7 and has now been removed as ports in other modes can be
controlled and/or tagged by external controllers.In Version 10.0
Supports Avaya Communication Manager (CM) Version 5 and
Application Enablement Services (AES) Version 5Supports Redhat Enterprise Linux (RHEL) Versions 4 and 5.
(Existing installations on RHEL 3 or 4 can be upgraded to ACR 10.0
but this version is no longer supported for new installations).The user interface has been refreshed and brought in line with
that of the rest of the workforce optimization suite.One or more Avaya Contact Recorder servers may be used as a
central replay server for other IP recorders, removing the need for
a separate Viewer server in all but the largest systems. -
System Overview
18 Avaya Contact Recorder Planning, Installation and
Administration GuideConfidential and Proprietary Information
The «archive» feature has been extensively enhanced, removing
the need for a separate Archive Manager. Blu-ray drives and media
are also supported.A status screen on Master and Standby recorders now shows the
status of all recorder servers in the system, simplifying day to
day operation.Quality Monitoring has been simplified as the Avaya Contact
Recorder now provides CTI information to the Quality Monitoring
server in place of the additional TSAPI link previously
required.Avaya Contact Recorder may no longer require the separate
purchase and installation of IP_API_A or TSAPI licenses when
connected to CM 5.1 or later. See DMCC (IP_API_A) Licenses on page
60As an alternative to specifying which stations are to be
recorded, one or more Classes of Restriction (CoR) can be targeted
for recording, reducing the administration effort needed to keep
the recording rules in line with the switch.Integration to auto-dialers such as Avaya Proactive Contact has
been simplified and brought within the recorder itself. Dialer
integration is controlled by a license key setting.Licensing rules have been simplified.
-
Server components
Issue 4 April, 2010 19
Confidential and Proprietary Information
Server componentsThe Avaya Contact Recorder system can be
installed as a single server solution providing recording and
replay of calls. Large systems can be built from several
independent recorders or in a master/slave topology. The former
approach works well for station-side recording while the latter
provides many of the benefits of traditional trunk-side approaches
— without most of the disadvantages. Internal calls can still be
recorded, for example.You can extend the scope of the system by adding additional
optional server applications to create a comprehensive Workforce
Optimization system.These optional server applications require their own physical
server. All of the other applications in the suite require Windows
servers.Note:Note: This Guide is the detailed reference for the Avaya
Contact Recorder (ACR)only. This component can record voice calls over IP using Avaya
DMCC softphones. It can also act as the Master — controlling other
recorders that provide additional capacity.Each of the other components has a corresponding guide (as
detailed in Additional references on page 14), which you should
refer to for more detail.Avaya Contact Recorder Server In most small to medium-sized (up
to several hundred channels) Bulk Recording systems, one of these
applications provides the entire recording and replay system (as
shown in Introduction on page 16).In larger systems (where a single physical server is not
powerful enough), you should install multiple instances of this
application on different physical servers, each providing a subset
of the system’s overall functionality. The Avaya Contact Recorder
can:connect to the Avaya Communication Manager Server via
Application Enablement Services (AES) and control all voice
recordingsrecord and store telephone calls via IP
archive the recordings it makes to one or more local DVD+RW or
Blu-ray drives and/or network filesharesprovide search and replay services to users connecting via their
browser or via their telephoneprovide voice recording services to the Quality Monitoring
applicationcontrol other Avaya Contact Recorders — known as Slaves
-
System Overview
20 Avaya Contact Recorder Planning, Installation and
Administration GuideConfidential and Proprietary Information
be controlled by another Avaya Contact Recorder — i.e. act as a
Slaveact as a warm Standby to an Avaya Contact Recorder Master
act as a centralized replay server, holding details of
recordings made by other Avaya Contact RecordersOptional Server Applications
Quality Monitoring Application
This application provides the features needed to automate your
agent quality assessment process, including:Design of evaluation forms
Various call selection methods
Screen content recording and storage
Performance recording and reporting
See Quality Monitoring Administration, Evaluations, Graphic and
Reporting, Server Infrastructure, Troubleshooting and Installation
Guides for full details of this component and Installing Quality
Monitoring on page 89 for how to integrate it into the overall
system.Quality Monitoring,
a. Receives CTI events via Avaya Contact Recorder. These let it
determine which calls it needs to record without having its own
connection to Communication Manager.b. Controls a pool of recording ports on the Avaya Contact
Recorder. It instructs the Contact Recorder to record the calls it
requires. These recordings are copied to the Quality Monitoring
server as they are completed. It can also use some of these ports
to replay audio to the supervisor’s telephone or to monitor
recordings as they occur.Centralized Replay Server(s)
In any system with more than one Avaya Contact Recorder, details
of recordings are (by default) uploaded to the Master (and Standby
if present). This allows users to search for and replay calls
recorded on any of the servers in a single query. On large (>500
channel) systems, or where other types of Verint recorders are
included, you should dedicate a server to this search and replay
task. This should be another installation of the Avaya Contact
Recorder application unless your system is very large (>1000
channels), includes other types of recorders or you are using
speech analytics. In these cases, you must install Viewer and may
also require an Archive Manager.Note that the recording system is designed to continue recording
regardless of the state of these central servers. This means that
the availability of the central applications cannot affect the
reliability of the recorders themselves. However, should you wish
to deploy -
Server components
Issue 4 April, 2010 21
Confidential and Proprietary Information
independent and hence fault tolerant central search and replay
servers and/or Archive Managers, this is also supported..
External Control
In addition to the data provided by the AES links, you may wish
to control and/or tag your recordings with details from other CTI
feeds or application interfaces. These may include third party
systems and/or your own in-house applications. The recorder
supports a wide range of systems and allows them to be connected to
your recording system. These include:Avaya Interaction Center (AIC)
Avaya Proactive Contact (formerly Predictive Dialing System,
PDS)Additional Verint Systems applications
As an integral part of Verint Systems’ range of recording and
analysis products, the following applications can be layered on top
of the recording system:eQuality Now (agent training tools)
-
System Overview
22 Avaya Contact Recorder Planning, Installation and
Administration GuideConfidential and Proprietary Information
Contact Visualizer (advanced recording visualization)
Speech Analytics Enterprise (requires Viewer and Archive
Manager) -
End-User tools
Issue 4 April, 2010 23
Confidential and Proprietary Information
End-User toolsTo access the recordings held in the system, users
have a variety of options.Quality MonitoringSupervisors and quality assessors use a
browser to evaluate recordings — using both voice and screen
content where available. They can assess and review calls with
their staff as well as analyze and report on the results of
assessments.Audio is replayed via the desktop PC’s soundcard or via the
telephone.Live monitoring of audio and screen content is also
supported.Quality Monitoring Evaluations Guide provides full details of
the Quality Monitoring application.Bulk Search and Replay
Integral Search and Replay
The Avaya Contact Recorder includes a search and replay
application within it. This replay mechanism is a very simple and
intuitive browser-based interface, requiring the user to access it
via Internet Explorer Version 6.0 or higher.The Search and Replay application is hosted on a web server
running on the recorder itself. It uses a local database of
recordings to allow users to search for bulk and ad hoc recordings
by:Call start date/time
The name(s) and number(s) where provided of any party on the
call (including ANI and/or DID where provided by the switch)Agent ID and name
Call duration
Universal Call Identifier (UCID)
Service Name and Number (also known as Vector Directory Number,
VDN)User defined fields supplied by external controllers
-
System Overview
24 Avaya Contact Recorder Planning, Installation and
Administration GuideConfidential and Proprietary Information
! Important:! Important:Important: Avaya Contact Recorder does
not retain those calls recorded for QualityMonitoring; these use that product’s own replay mechanism.
Access restrictions determine which calls individual users are
able to replay. Each recording is assigned one or more «owners» at
recording time (see Search and Replay Access Rights on page 144 for
further details).The user can play and view details of any call that matches
their search criteria and access rights. When a call is played, a
graphical representation of the audio level of the call, the audio
wave form, is displayed. The audio wave form shows silence and
tones, so the user can click beyond irrelevant sections and
pinpoint parts of the call that are of interest. See the
accompanying User Guide for further details of this
application.Central Search and Replay
Where multiple Avaya Contact Recorders are deployed, an
additional server can be nominated as a Central Replay Server. This
server is not used for recording but can provide telephony replay
ports.The other recorders upload details of the recordings they have
made into this server’s database allowing users to search for and
replay recordings made on any recorder without having to know which
one recorded a particular call.External Search and Replay
The recorder also supports replay from other applications
including Quality Monitoring, Viewer and Contact Visualizer.Administration ToolsAs the suite is designed specifically for
Avaya systems, much of the complexity associated with generic
recording systems has been removed resulting in a system that is
easy to configure and maintain. The recorders are administered via
a web interface. The detailed use of this interface is the subject
of later Sections in this guide. -
Recording Functionality
Issue 4 April, 2010 25
Confidential and Proprietary Information
Recording FunctionalityThe Avaya Contact Recorder system records
telephone calls made on Avaya Communication Manager release 4.0 and
above — using analog, digital or IP-based stations. The recorder
hosts a bank of IP softphones — each of which provides a recording
or replay port. These record calls by conferencing into a live call
using either the Service Observe or single-step conferencing
features of the switch.This manual only considers audio recording load. For Screen
Content recording, please refer to the Quality Monitoring Server
Infrastructure Guide.The first task in designing any recording system is to define
what is to be recorded. This in turn is often driven by the reason
for wanting the recordings. As the recorder’s ports can also be
used for replay, it is important to consider these together before
specifying a system. This section introduces the various ways in
which recorders’ ports can be used but you should refer to
Operations on page 117 for detailed functionality and limitations
of each mode.Sampled Recording for Quality AssessmentIf the end goal is to
record only a sample of calls in order to assess the quality of
your interactions with customers, Quality Monitoring can be used
alongside the Avaya Contact Recorder. See this product’s
Administration, Evaluations, Graphic and Reporting, Server
Infrastructure, Troubleshooting and Installation Guides to
determine how you will use the Quality Monitoring system to control
recording.Quality Recording Channels
From the above manuals, you must determine the number of
concurrent audio recording «channels» that will be required on the
Avaya Contact Recorder to support your Quality Monitoring
requirements.Quality Replay Channels
Note that you will also need to consider how the Quality
Application is to replay calls for supervisors to review and coach
their staff. If you choose to replay via their telephones, then you
must provide sufficient ports for this. This is in addition to the
recording channels. The overall port count required for selective
quality recording is therefore the sum of recording and replay
requirements. -
System Overview
26 Avaya Contact Recorder Planning, Installation and
Administration GuideConfidential and Proprietary Information
Licensing
The Avaya Contact Recorder must be provided with a license key
that specifies how many different telephone stations can be
recorded by the Quality Monitoring application.Bulk Recording ModesIf you need to record all of the calls taken
by specific stations, agents, skill groups or Vector Directory
Numbers (VDNs) then you require Bulk Recording — of which there are
three variants.Conferenced Recording
Rather than dedicating ports to specific stations, a pool of
ports can be used in conjunction with an AES TSAPI link to record
calls on specific stations, agents, skill groups, VDNs or CoRs.
Advanced configuration options let you filter the calls by VDN or
Skill Group rather than have to record every call on the nominated
addresses.In this mode, the recorder uses single-step conferencing to
connect into the calls to be recorded.Refer to Conferenced Recording on page 122 for a full
description of this mode and how to configure it.Station Bulk Recording
This recording mode can be used to record all calls occurring at
specific stations. Advanced configuration options let you filter
the calls by VDN or Skill Group rather than have to record every
call on the nominated stations.This mode uses the switchs service observe feature and therefore
requires a dedicated port per station that is recorded. It is also
subject to a number of other limitations and is not recommended for
new systems.Refer to Station Bulk Recording on page 128 for a full
description of this mode and how to configure it.Externally Controlled Recording
More complex recording requirements may be met by customized or
specialist applications that interface to other CTI feeds or
customers’ own applications. Such an application can control ports
on the Avaya Contact Recorder, allowing it to record exactly what
and when it requires. The application may also «tag» the recordings
with additional details such as customer number or account
number.Refer to Integrating with other systems on page 67 for more
detail.. -
Recording Functionality
Issue 4 April, 2010 27
Confidential and Proprietary Information
Which to use?
Conferenced recording is normally the preferred option as it
provides most flexibility and most comprehensive tagging of
recordings. Externally controlled recording is normally only
considered when complex recording rules or additional CTI control
is needed.It is imperative that you review the detailed functionality,
limitations and caveats in Station Bulk Recording on page 128 and
Conferenced Recording on page 122.Licensing
The number of concurrent recordings across the whole system is
restricted according to the license key entered. (This encompasses
all recordings being made except those controlled by Quality
Monitoring which are separately licensed).Ad-hoc or Occasional Recording ModesThree recording modes are
provided for those requiring occasional recording:On Demand Recording
This mode lets users of any phone on your system dial into or
conference in a recording port as and when they want to start
recording a call.One or more «pools» of ports on the recorder can be assigned to
this recording mode and accessed via Hunt Group numbers so that
callers automatically reach an available port. The recorder
automatically answers the incoming call on its port and starts
recording.Refer to On Demand Recording on page 132 for a full description
of this mode and how to configure it.Meeting Recording
A novel use for recording is in taking a detailed log of a
meeting, either as an audio record for those attending, or as a way
to include non-attendees later. You can use any meeting room or
office with a telephone that has a speakerphone or, ideally,
conference phone capabilities to record the meeting. -
System Overview
28 Avaya Contact Recorder Planning, Installation and
Administration GuideConfidential and Proprietary Information
! Important:! Important:Important: The audio recorded with
Meeting Recording is the same as someone dialingin would hear it on the phone used to record it. Place the phone
so it picks up the speech of all participants. They should speak
loudly and clearly. Experiment with this recording mode before
relying on it to provide full and complete records of your
meetings. Avaya cannot be held responsible for the failure to pick
up all of the audio intelligibly. Use this recording mode as an aid
to note taking, not a replacement for it.One or more «pools» of ports on the recorder can be assigned to
this recording mode and accessed via Hunt Group numbers so that
callers automatically reach an available port. The user follows the
spoken instructions to start the recording and specify which
user(s) can access it.Refer to Meeting Recording on page 133 for a full description of
this mode and how to configure it.Station Executive Recording
This option lets users of specific phones choose which of their
calls are recorded. Unlike the previous two modes, this method
records the call from the beginning. Unless the user chooses to
keep the recording it is deleted as the call ends (or shortly
afterwards according to how the system is configured).This recording mode is particularly suited to users who
occasionally need to record a call, and who might only recognize
the need to record after the call is in progress or after it has
ended. The classic example of this is in «bomb-threat» or «abusive
call» recording. In such cases, it is only once the nature of the
call becomes apparent that the agent realizes that he should record
the call. The advantage of this recording mode over other recording
techniques is that the entire call is being recorded all the time.
The whole call can be retained even if the nature of the call and
the need to retain it is not recognized until the end of the call
or, if the delayed deletion option is enabled, after the call
ends.Refer to Station Executive Recording on page 129 for a full
description of this mode and how to configure it.Scope
Ports assigned to On Demand or Meeting recording
can be assigned to one or more hunt groups making them easily
shared across one or more user populationscan be used not only by stations on the switch but also from
outside the switch if they are made accessible via a DID
number.Station Executive recording ports on the other hand are
dedicated to specific stations and can only be used to record those
stations that can be service observed. -
Recording Functionality
Issue 4 April, 2010 29
Confidential and Proprietary Information
Licensing
Each active recording is counted as part of the overall
concurrent bulk recording load. The overall concurrent load is
restricted according to the license key entered. Note that a call
active on a Station Executive port counts as active even if the
recording is subsequently deleted rather than retained.Replay Options
Soundcard Replay
Many users choose to replay recordings via their browser and the
soundcard on their PC. This does not use any ports on the recorder
and does not require any additional licensing. See the Quality
Monitoring manuals for details of how to use this replay mechanism
in conjunction with this application.Telephone Replay
However, the recorder also supports replay via the user’s
telephone and this does use a port on the recorder.Quality Monitoring replay ports form part of the overall pool of
ports assigned to Quality Recording.All other replay applications make use of telephony Replay ports
on an Avaya Contact Recorder. Ports configured in this way are
compatible with Verint «AudioServer» ports.Refer to (Telephone) Replay Ports on page 134 for a full
description of this mode and how to configure it.Licensing
Replay channels that form part of the Quality Monitoring port
pool are not restricted by a license key.Telephony replay ports used by all other applications require a
replay channel license. -
System Overview
30 Avaya Contact Recorder Planning, Installation and
Administration GuideConfidential and Proprietary Information
Live Monitoring
Via Quality Monitoring
Users of Quality Monitoring can listen in to calls in real-time
using their telephone. This uses one of the replay ports within the
Quality pool. See the Quality Monitoring manuals for details of
this live monitoring mechanism.Manual Service Observe
From Communication Manager 4.0 onwards, it has been possible for
two stations to service observe a call. If the Avaya Contact
Recorder is recording a call using Service Observe you will still
be able to use service observe manually. The exception to this is
when an internal call is being recorded at both ends (hence two
service observes). You can configure Communication Manager to give
priority to the recorder or to manual service observe. -
Recording Methods
Issue 4 April, 2010 31
Confidential and Proprietary Information
Recording MethodsThe recorder uses three different methods to
record calls. The table below shows which mode is used by each
mode.The recording mechanisms differ in several respects as described
below. Refer to Operations on page 117 onwards for details of the
pros and cons of these modes as these must be considered alongside
the issues listed here.Note:Note: Regardless of which recording method is used, each
recorder port that joinsa call to record it counts as an additional party on that call.
Hence your normal limit of 6 parties on a call includes all of the
recordings being made. Every recording made reduces the number of
«real» participants you can have on the call.Service ObserveStation Bulk, Station Executive and Quality
recording modes use the Communication Manager’s Service Observe
feature. This has the following characteristics.Recording Mode Uses
On Demand RecordingConference
Meeting Recording
Station Bulk Recording
Service ObserveStation Executive Recording
Quality Monitoring
Externally Controlled (Service Observe mode)
Conferenced RecordingSingle-step Conference
On Demand with External Controller
-
System Overview
32 Avaya Contact Recorder Planning, Installation and
Administration GuideConfidential and Proprietary Information
Limited Number of Service Observers per Station
In Avaya Communication Manager 3.x, only one other station can
service observe a station at any one time. Therefore:a supervisor cannot use Service Observe to monitor stations or
calls that are being recorded. They will either fail to observe the
call or will block the recorder from recording it. To listen in to
calls (in real time) on stations that are being recorded, users
must use Quality Monitorings Live Monitor feature.Quality Monitoring («selective» mode) uses service observe. If a
station is being recorded in another mode using service observe,
then Quality Monitoring can only work if the quality and other port
recording it are on the same recorder. If you need to perform bulk
and quality recording, use a single recorder or, if the load is too
much for a single server, you must use a single-step conference
mode for the bulk recording.In Avaya Communication Manager 4.x and above, up to two stations
can service observe a given station. However, it is still a good
idea to record a station on a single recorder where possible — due
to the per call limitations described below.When a call is service observed more than once, the call
direction information provided by DMCC is the same for both
observations and is therefore incorrect for one of these.Limited Number of Service Observers per Call
In Avaya Communication Manager 3.x, if more than one party on a
call is being service observed, then only one of the observers will
actually receive the audio from the call. The other will be
completely unaware that a call is in progress. Therefore:A call between a Station Bulk recorded station and a Station
Executive recorded station can only be visible to one or other of
the two recording ports. Which one depends on which station made
the call. If the station executive port initiated the call, it will
be deleted unless the user deliberately retained it.An attempt to Quality Monitor a station on an internal call will
fail if the other station on the call is the one receiving the
audio. If you need to quality monitor agents who solely or
predominantly take internal calls and are using bulk recording as
well, you should use a single-step conference mode in
preference.If a user service observes a VDN, they will stop any call they
hear from being recorded. Use Class of Restriction (COR) settings
to prohibit users from observing VDNs that include calls that you
are trying to bulk record.In Avaya Communication Manager 4.x and above, each call can be
service observed up to twice. Normal, two-way internal calls can
therefore be recorded twice and it is only with three (or more) way
calls that the above limitations apply. It is still important to
avoid service observing VDNs related to calls that you need to
record.Note that Communication Manager can be configured to give
priority to a recorder or to a manual service observe should a
third attempt be made to service observe a call. -
Recording Methods
Issue 4 April, 2010 33
Confidential and Proprietary Information
When a call is service observed more than once, the call
direction information provided by DMCC is the same for both
observations and is therefore incorrect for one of these. Also,
only one of the agents on the call is reported and hence
tagged.Assign Ports to Stations only (i.e. not Agents, VDNs or Hot-desk
stations)Although Communication Manager can service observe VDNs, agents
and hot-desk stations, the recorder only supports service observe
of physical station numbers for the following reasons:Service observing a VDN only results in one call at a time on
that VDN being observed. This is not appropriate for a bulk
recording mode.Service observing an agent id or hot desk results in failure if
that agent is not logged in or the hot-desk is not active. The
recorder cannot distinguish between failure due to this reason and
other failure modes. It would therefore raise alarms
continuously.Call segmentation
As the recorder port sees the same activity as a real user would
do when service observing a station, audio ceases to flow when the
station being observed places a call on hold. Placing a call on
hold (automatically as part of a transfer/conference setup or
deliberately) therefore stops recording. A new recording is started
when the call is retrieved from hold. The segments of the call are
stored as separate recordings (.wav files) and can be searched and
played as two calls.! Important:! Important:Important: If the call is retrieved from
hold by another station, either by means of atransfer or a «park» operation, the subsequent segment of the
call is only recorded if the other station is also being
recorded.The recorder’s Search and Replay mechanism treats these segments
as two separate calls. However, if you find one call segment, you
can easily find the other segments by clicking on the link in the
UCID column. Viewer, a separate server replay application, on the
other hand, «merges» these call records into one and shows the hold
period as silence.If an external controller is used, it may segment calls at
points it chooses.Bulk Recording requires dedicated port
Any attempt to service observe a station will — on perhaps one
in a thousand attempts — fail. While this is not a significant
issue for a sampling quality recording system, it is unacceptable
for bulk recording. This is why the recorder must dedicate a port
to each phone that it bulk records via service observe. By doing
so, it can establish service observe as the recorder starts — and
retry on the rare occasion that this fails — and then hold the
service observe permanently. This provides reliable recording. -
System Overview
34 Avaya Contact Recorder Planning, Installation and
Administration GuideConfidential and Proprietary Information
Personal Station Access (PSA)
PSA is not supported for the same reasons that agents cannot be
targeted. As the address is not always present, the recorder cannot
maintain a service observe on it at all times as is required for
bulk recording.Internal Calls via a VDN do not show who answered — CM 3.1 and
earlierIf an agent handling a call dials a VDN to transfer, conference
or simply consult on it, the details of the party that answers the
call are not visible to a station service observing that call. The
call will be tagged with the VDN number dialled but not the agent
or station that answered the call. This is corrected in CM3.1 load
632. If using an earlier version than this, consider updating with
Patch #11855.Transfer via Coverage
Calls transferred to a group with coverage (e.g. Coverage Answer
Group) and not picked up by the original destination address cannot
be observed. To overcome this limitation, use a phantom extension
and transfer the call to that rather than directly to a group with
coverage.Bridged Lines
Where bridged line appearances are used on stations being
recorded, calls made on the secondary line appearance will be
recorded but the details about the call will be limited to the
identification of the station being recorded. Only calls made on
the primary line appearance will include full call details.Exclusion
If any party on the call invokes the Exclusion feature, the call
cannot be recorded. (Check with Avaya for changes to this from CM
3.1 onwards).Beep Tone
If you do not need to inject beep tone while recording, use «No
Talk» service observe. This option, available from CM 3.1 onwards,
does not use up a time-slot. Otherwise you must design for an
additional time-slot being used to carry each call that is actually
being recorded. If you need to inject beep tone you must use
«Talk/Listen» service observe. «Listen Only» service observe should
not be used with ACR. -
Recording Methods
Issue 4 April, 2010 35
Confidential and Proprietary Information
Single-step ConferenceSingle-step conferencing as used by
Conferenced mode recording and Externally controlled (single-step
conference option) has the following issues:CTI Requirement
When recording in this mode, the recorder uses the AES TSAPI
service which must therefore be available and configured.Timeslots
Single-step conferences do not require an additional timeslot on
the switch if beep tone is NOT used.Call Segmentation
Recordings are broken into separate segments whenever the
parties on the call change. The recorder continues to record only
so long as the real parties on the call are connected. If the call
is on hold, recording stops.If an external controller is used, it may segment calls at
points it chooses.Bridged Lines not Supported
Because of an inherent limitation in the underlying
call/connection model, conferenced recording does not support
bridged line appearances. You must not attempt to record bridged
lines in this mode.Beep Tone
If you choose to inject beep tone on a single-step conferenced
recording, the recorder becomes a full member of the call rather
than a listen-only member and therefore:Becomes visible to the agent, who can see that the call is
conferencedUses an extra timeslot on the switch
ConferenceIn some modes a user or an external application will
dial a port on the recorder. When this happens, the recorder
answers the call and is therefore a normal party on the call. -
System Overview
36 Avaya Contact Recorder Planning, Installation and
Administration GuideConfidential and Proprietary Information
Timeslots
As «just another party» on the call, the recorder port will use
the single additional timeslot that any other phone would use when
added to a call.Call Segmentation
As the recorder port is a normal party on the call, it is still
connected even if one or more other parties on the call places the
call on hold. It will receive the same audio that the parties
remaining on the call receive. This may include music on hold or
silence.If an external controller is used, it may segment calls at
points it chooses. -
Miscellaneous
Issue 4 April, 2010 37
Confidential and Proprietary Information
IP Office Contact Center Recorder Configuration

Avaya IP Office now seeing in every Business premises. Since Avaya has released IP Office Server edition I’ve witnessed myself companies have replaced their Enterprise level Voice systems with single IP Office server. A system which is capable if handling 100 to 2000 users and can even expandable without even any hasle.
This doesn’t stops here, Integrating IP Office with IP Office Contact Center or IPOCC makes more powerful and attractive to business. So when it comes to Contact Center how could you forget the Recording part. Yes ! this article is all about configuring and Integrating your all 3 elements step by step
We will configure our IP Office + IPOCC + Contact Recorder. This document is very well prepared by Avaya, and im taking the opportunity to share with friends here
So lets begin
IPOCC Contact Recorder Configuration
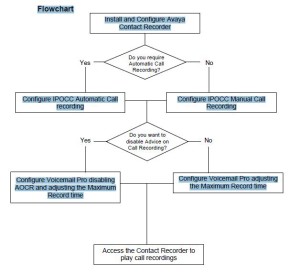
IPOCC Contact Recorder Configuration
Overview
IP Office has the ability of recording calls to a Voicemail box, when using Preferred Edition and Voicemail Pro. To further enhance this, Contact Recorder for IP Office can be used as a centralised call recording facility, which stores all recordings in a separate archive.
Contact Recorder uses a database that stores the call details associated with each recording stored. Call recordings are then accessed using a web browser interface, where recordings can be searched, displayed and the archived recording played.
Voicemail Pro is still used to record the actual calls, and once the recording is complete, it then passes the recording and associated details to the Contact Recorder Server.
By default, Contact Recorder is not installed on the Standard Application Server, as a separate drive or partition is required and cannot be shared with Voicemail Pro.
The following guide will demonstrate how to install and configure Contact Recorder on a Standard Application Server (Linux). Also how to configure the IP Office Contact Centre (IPOCC) to use Call Recorder, including the recording of calls automatically that relate to a Topic, and to record calls manually using the IPOCC User Interface.
Installing the Avaya Contact Recorder
1. Using a Web browser interface, access the SAS Linux server using port: 7070, which will display the IP Office Web Manager Login screen. Login using User Name Administrator and Password Administrator.
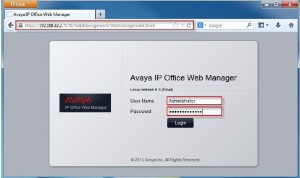
2. From within the Web Manager interface, select Platform.
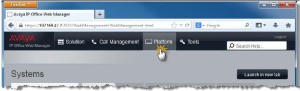
3. The screen will display the System tab, displaying Services. Click on the Updates tab.
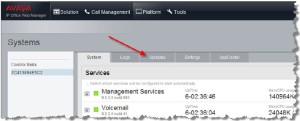
4. Under the list of available Services, you should see Contact Recorder. This will display the Status as not installed. Click on the option Install.
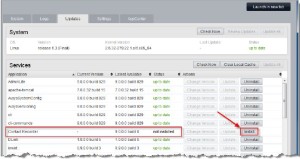
5. A message saying Updating will be displayed, while the Contact Recorder is being installed.

6. Once completed, the Status for the Call Recorder service will change to Up to date. Now click on
the System tab.
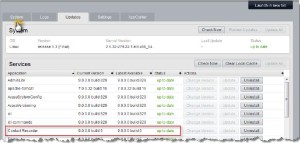
7. Contact Recorder will now be seen in the list of Services. Check the tick box, which will ensure that the service automatically starts after a reboot. Then click on the Start button.
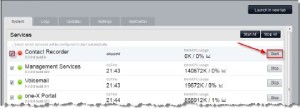
8. The Contact Recorder service will now start, and can be configured.
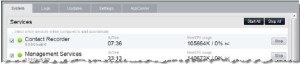
9. Using a Web Browser interface, browse to the IP address of the Server using port 9888, e.g. http://ipaddressofserver:9888. This will present the Login screen.
Login with the default Username: Administrator and Password: Administrator, then click OK.
10. You will now be prompted to change the default Password. Enter Administrator in the Old Password field and enter the new password in the New Password and Verify New Password fields, then click OK.

11. Once logged in to the Contact Recorder interface, click on the General Setup tab.

12. You can see that the Call storage path has not been defined. Choose the edit button.
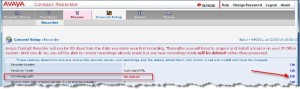
13. Enter the Call storage path (the default path created when installing Contact Recorder is /CSIPORec). Please note that this should be on the second drive installed on the Standard Applications Server, as it must not be a shared drive with VM Pro. Next click on the Enter button.
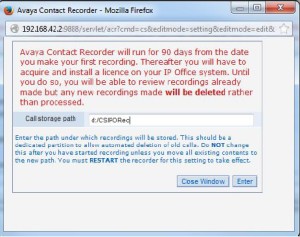
14. The new Call storage path is now seen.
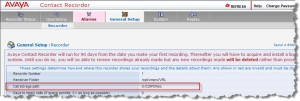
15. Next click on the System tab.
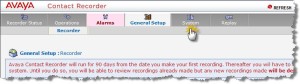
16. You will be presented with the Manage Users screen, where it is possible to create Users with administrative rights, or who will have the ability of searching for and playing recordings, etc. Click Add User.
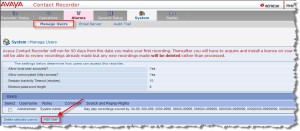
17. A new dialogue box will be presented. Add the User settings as follows:
a. Username: the Login name for the new User
b. Password: Enter a password for the User to Login.
c. Comment. This is optional only, and not a requirement.
d. Roles: Select either System Admin or Restricted Admin. You can also select to give the User the ability to export recordings as files.
e. For the section on which extensions the recorded calls can be replayed from, these can either be added in the form of a range, e.g. 2000-2500, or individually being separated by a comma, e.g. 2000,2001,2002.
Click Enter when all the settings are completed.
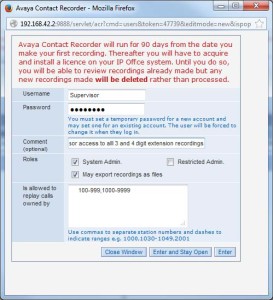
18. The New User is now added to the list. Click Logout to exit the application.
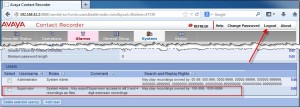
Configuring IPOCC with Contact Recorder
Now that the Contact Recorder has been installed and configured, a process can be created in IP Office Contact Centre (IPOCC) to enable the Call recording.
Automatic Call Recording
1. Launch the IPOCC User Interface and log in with a User account that has access to configuration.
2. Click on the Go to command and select Configuration from the drop down menu.
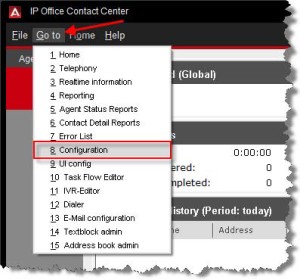
3. Then Click on the heading System, and select Tag list… from the drop menu.
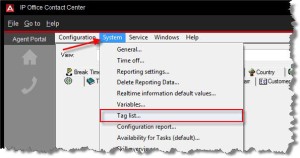
4. The Defined tags dialogue box is presented. Click on the Add button.
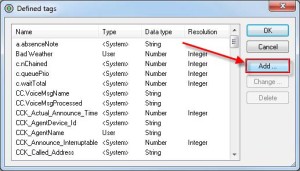
5. In the Tag – Create screen, enter the Name “VMProRec” (it’s important to ensure this is exactly as shown). Change the Data type to Number and then click OK to create the Tag.
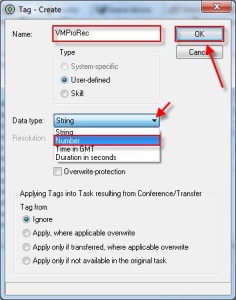
6. Then click OK on the Defined tags dialogue box to close it.
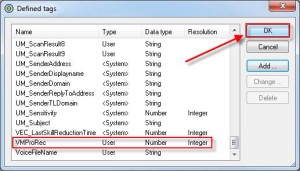
7. Now click on the Topic tab rom within the Configuration screen.

8. Select and double click on a Topic to be used or select and click Edit.
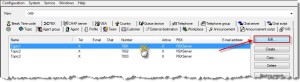
9. Choose the Variable button
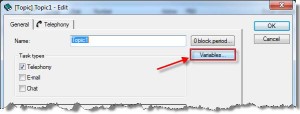
10. Choose the Add button
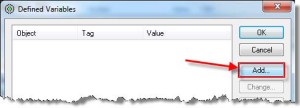
11. Click on the builder button next to the Tag field.
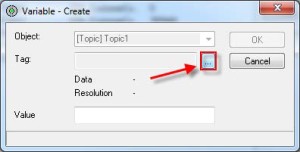
12. This will present the Select Tag dialogue box, showing the list of Tags available. Scroll down to find the VMProRec Tag, click to select this and then click on the OK button.
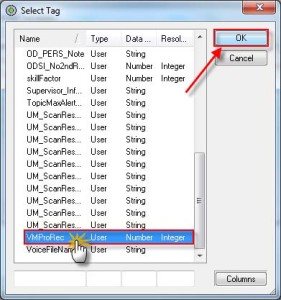
13. Now in the Value field, enter 1. This relates to using the Voice Recording Library, where the call recording will be sent. The options available for the Value field are:
1 = Voice Recording Library (VRL)
2 = Voice Recording Library Authenticated (VRLA)
0 = Mailbox
Another option is to enter a specific Extension number, which will then pass call recordings to the mailbox for that extension.
Once value has been selected, click on the OK button. Then click OK on the Defined Variables screen, and also for the Topic to close them.
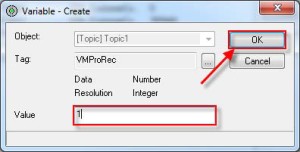
Any Calls that are now sent to the Topic will automatically be recorded.
Manual Call Recording Using the IPOCC User Interface
Calls can also be recorded manually by an Agent, instead of being set to record all calls to a Topic. This will allow calls being made by an Agent also to be recorded.
1. How to Manually Record calls for an Agents GUI. Using the Go to menu choose 8 Configuration.

2. Choose Configuration and choose External destination
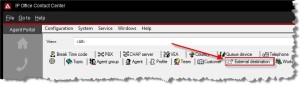
3. Choose the Create Button
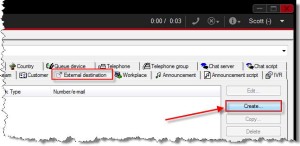
4. A new dialogue box will appear to create an External Destination. Enter the same name used in the Call Record Tag, “VMProRec” as part of the name. For example, VMProRecVRL, differentiating the tag name with VRL. Then add 1 in the Number field, and then click on the OK button.
1 = Voice Recording Library (VRL)
2 = Voice Recording Library Authenticated (VRLA)
0 = Mailbox
Another option is to enter a specific Extension number, which will then pass call recordings to the mailbox for that extension.
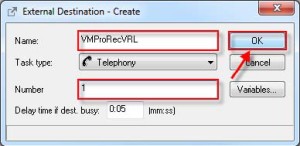
5. Next click on the Go to command and select UI config from the drop down menu.
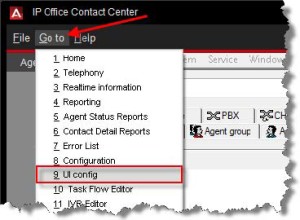
6. Then select either a Profile or a Single Agent, and double click to open.
7. On the UI configuration screen, uncheck the Default tick box.
8. Scroll down the list of Available elements and select Recording, then click on the Add button.

9. Then click on the middle button next to the Call recording on field, which will present the available External destinations created.
10. From the next dialogue box select the VMProRecVRL external destination earlier created, and on the OK button.
11. The External destination will now be added to the Call recording on field. Click on the OK button to continue.
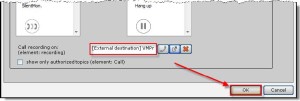
12. When anyone matching the Profile or a specific Agent logs in to the IPOCC User Interface, they will now see on their Contact Bar the Recording button, giving them the ability to manually turn on Call Recording during an active call.
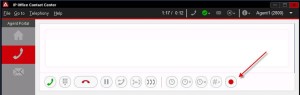
13. The User can activate Call recording by simply clicking on the button to commence recordong (button then shown with a green outline), and to pause or cancel the recording by clicking on the button again.
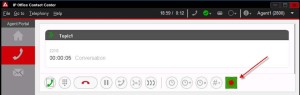
Voicemail Pro Configuration
By default, Call Recording plays a system announcement from Voicemail Pro to warn callers that their call is being recorded. This Advice on Call Recording (AOCR) can be disabled from within Voicemail Pro, so that silent recording is implemented. Please ensure that you comply with legal requirements regarding Call Recording if AOCR is to be disabled.
1. Using Voicemail Pro Client, connect to your VM Pro Server and login using the Administrator account (Username: Administrator Password: Administrator (default)). Then click on the Login button.
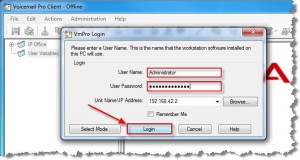
2. Then select Administration and the choose Preferences and the General.
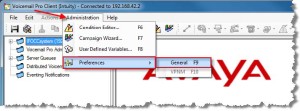
3. The System Preferences dialogue box will be displayed. Under the General tab, uncheck the tick box Play Advice on Call Recording.
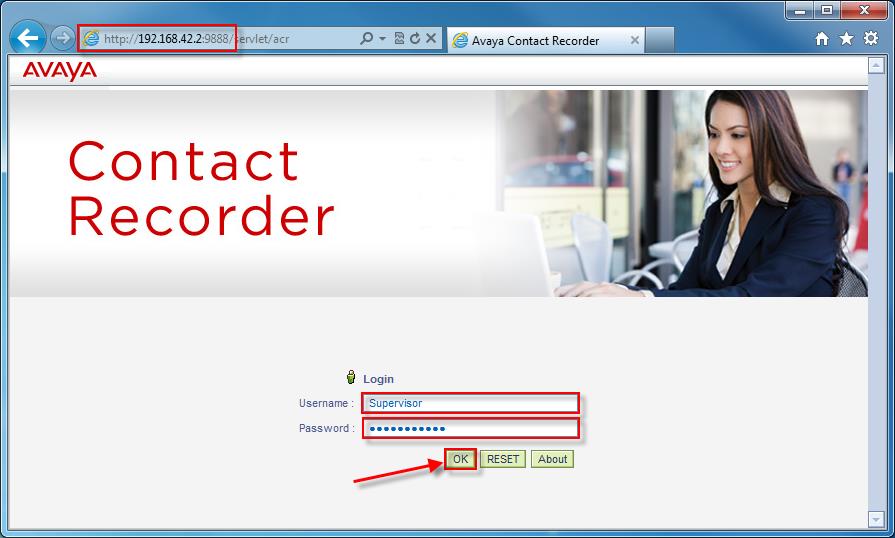
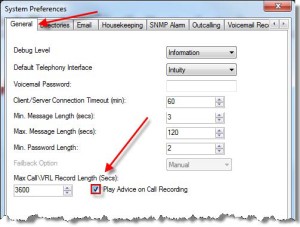
4. As soon as the tick box is unchecked, a warning message will be displayed regarding legal requirements to inform callers of call recording. Simply click Yes to close this screen.

5. You may also want to increase the Max CallVRL Record Length (Secs), as the default may be too short. The maximum record length is 18000 seconds (5 hours). Once set, click OK
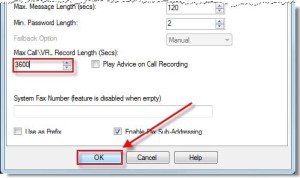
6. Then choose Save and make Live
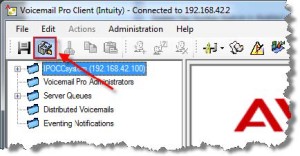
7. The Confirm screen will appear stating that changes made are permanent. Click Yes to continue.
This completes the configuration of Voicemail Pro with regard to Call Recording
Using Contact Recorder
The use of Contact Recorder for play back functionality requires Internet Explorer 7 or higher. A number of Active X Controls are also needed and for the ability to Replay recordings.
1. Using a supported version of Internet Explorer, browse to the IP address of the Call Recording server followed by port 9888, e.g. http://<IP Address>:9888
The Contact Recorder login screen will then be displayed, so enter the Username and Password of a User with access to play call recordings, and click OK.

2. The first time you log in as a User, you are prompted to update your password. Enter a new password and click on the OK button.
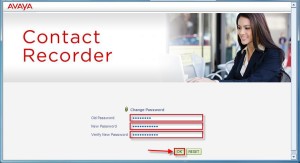
3. The Contact Recorder software uses an ActiveX Plug-ins which will need to be loaded the first time. Click on the caution message displayed to install the ‘csreplay ActiveX Control Module’.
4. You will then be prompted with an options menu. Select Run Add-on to install the Module.
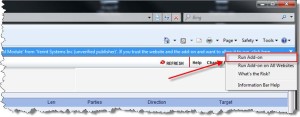
5. When the Security Warning is displayed, click on the Run button.
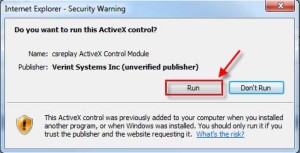
6. The next stage is to search for calls based on either a selected date (Start and End) using the calendar entries, or by choosing the links for the current day, last 7 days or 31 days. If you wish to specify a date then click on the calendar icon
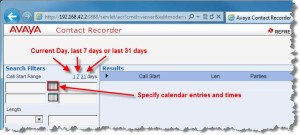
7. Once the calendar icon has been clicked on, select a start date from the calendar screen displayed. Also ensure you add a start time.
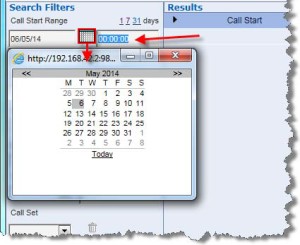
8. Follow the same process to assign an End date and time. Additional filters are available to isolate call recordings that match the criteria entered, but these are optional only. Once the details are entered, click on the Search button.

9. Any recorded calls that match the criteria will be displayed on the right. Select the call recording that you wish to listen to, by checking the radio button next to the call detail. You will then see a call graphic image at the top of the screen, and when you move your cursor to this area, a series of buttons available.
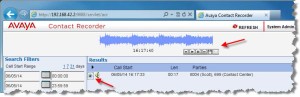
10. If you move the mouse cursor over the graphic the playing options for that recording are displayed.

11. Click on the Play button to play the recording.
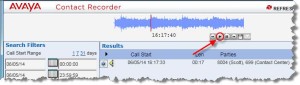
Alright Folks im sure you nw you have just learned that “How to do Avaya IPOCC Contact Recorder Configuration – Step by Step”
Please Like Share and Comment

1 Avaya Contact Recorder Release Planning, Installation and Administration Guide Issue February 2016 Confidential & Proprietary Information of Verint Systems Inc. 2016 Avaya Inc. All Rights Reserved. Notice While reasonable efforts have been made to ensure that the information in this document is complete and accurate at the time of printing, Avaya assumes no liability for any errors. Avaya reserves the right to make changes and corrections to the information in this document without the obligation to notify any person or organization of such changes.
2 Documentation disclaimer «Documentation» means information published by Avaya in varying mediums which may include product information, operating instructions and performance specifications that Avaya may generally make available to users of its products and Hosted Services. Documentation does not include marketing materials. Avaya shall not be responsible for any modifications, additions, or deletions to the original published version of documentation unless such modifications, additions, or deletions were performed by Avaya .
3 End User agrees to indemnify and hold harmless Avaya , Avaya ‘s agents, servants and employees against all claims, lawsuits, demands and judgments arising out of, or in connection with, subsequent modifications, additions or deletions to this documentation, to the extent made by End User. Link disclaimer Avaya is not responsible for the contents or reliability of any linked websites referenced within this site or documentation provided by Avaya . Avaya is not responsible for the accuracy of any information, statement or content provided on these sites and does not necessarily endorse the products, services, or information described or offered within them.
4 Avaya does not guarantee that these links will work all the time and has no control over the availability of the linked pages. Warranty Avaya provides a limited warranty on Avaya hardware and software. Refer to your sales agreement to establish the terms of the limited warranty. In addition, Avaya ‘s standard warranty language, as well as information regarding support for this product while under warranty is available to Avaya customers and other parties through the Avaya Support website: or such successor site as designated by Avaya .
5 Please note that if you acquired the product(s) from an authorized Avaya Channel Partner outside of the United States and Canada, the warranty is provided to you by said Avaya Channel Partner and not by Avaya . Licenses THE SOFTWARE LICENSE TERMS AVAILABLE ON THE Avaya WEBSITE, , OR SUCH SUCCESSOR SITE AS DESIGNATED BY Avaya , ARE APPLICABLE TO ANYONE WHO DOWNLOADS, USES AND/OR INSTALLS Avaya SOFTWARE, PURCHASED FROM Avaya INC., ANY Avaya AFFILIATE, OR AN Avaya CHANNEL PARTNER (AS APPLICABLE) UNDER A COMMERCIAL AGREEMENT WITH Avaya OR AN Avaya CHANNEL PARTNER.
6 UNLESS OTHERWISE AGREED TO BY Avaya IN WRITING, Avaya DOES NOT EXTEND THIS LICENSE IF THE SOFTWARE WAS OBTAINED FROM ANYONE OTHER THAN Avaya , AN Avaya AFFILIATE OR AN Avaya CHANNEL PARTNER; Avaya RESERVES THE RIGHT TO TAKE LEGAL ACTION AGAINST YOU AND ANYONE ELSE USING OR SELLING THE SOFTWARE WITHOUT A LICENSE. BY INSTALLING, DOWNLOADING OR USING THE SOFTWARE, OR AUTHORIZING OTHERS TO DO SO, YOU, ON BEHALF OF YOURSELF AND THE ENTITY FOR WHOM YOU ARE INSTALLING, DOWNLOADING OR USING THE SOFTWARE (HEREINAFTER REFERRED TO INTERCHANGEABLY AS «YOU» AND «END USER»), AGREE TO THESE TERMS AND CONDITIONS AND CREATE A BINDING CONTRACT BETWEEN YOU AND Avaya INC.
7 OR THE APPLICABLE Avaya AFFILIATE (» Avaya «). Avaya grants you a license within the scope of the license types described below, with the exception of Heritage Nortel Software, for which the scope of the license is detailed below. Where the order documentation does not expressly identify a license type, the applicable license will be a Designated System License. The applicable number of licenses and units of capacity for which the license is granted will be one (1), unless a different number of licenses or units of capacity is specified in the documentation or other materials available to you.
8 Software» means Avaya ‘s computer programs in object code, provided by Avaya or an Avaya Channel Partner, whether as stand-alone products, pre-installed, or remotely accessed on hardware products, and any upgrades, updates, bug fixes, or modified versions thereto. «Designated Processor» means a single stand-alone computing device. «Server» means a Designated Processor that hosts a software application to be accessed by multiple users. «Instance» means a single copy of the Software executing at a particular time: (i) on one physical machine; or (ii) on one deployed software virtual machine («VM») or similar deployment.
9 License types Shrinkwrap License (SR). You may install and use the Software in accordance with the terms and conditions of the applicable license agreements, such as shrinkwrap or clickthrough license accompanying or applicable to the Software ( Shrinkwrap License ). Copyright Except where expressly stated otherwise, no use should be made of materials on this site, the Documentation, Software, Hosted Service, or hardware provided by Avaya . All content on this site, the documentation, Hosted Service, and the Product provided by Avaya including the selection, arrangement and design of the content is owned either by Avaya or its licensors and is protected by copyright and other intellectual property laws including the sui generis rights relating to the protection of databases.
10 You may not modify, copy, reproduce, republish, upload, post, transmit or distribute in any way any content, in whole or in part, including any code and software unless expressly authorized by Avaya . Unauthorized reproduction, transmission, dissemination, storage, and oruse without the express written consent of Avaya can be a criminal, as well as a civil offense under the applicable law. Virtualization Each product has its own ordering code and license types. Note that each Instance of a product must be separately licensed and ordered.
Through the process of innovation, organisations create technological growth. Successful innovation creates customer value through new products and services, and it could give rise to new markets. Successful innovations contribute to better quality, higher productivity, lower costs and increased profits. One of the ultimate goals for implementing innovation is to achieve a competitive advantage that leads to outperforming competitors. Through the understanding of the innovation processes, organisations can bring predictability into their innovation efforts. This comes from understanding and managing the forces that influence the decisions made by managers. Because of globalisation and fierce competition Spescom DataVoice, a South African technology company, is finding it increasingly difficult to compete in an international market. It is against the background of Spescom DataVoice‟s need to increase its innovation productivity that this research was spawn. The ambitious goal of this study was to investigate what Spescom DataVoice can do to become sustainable, innovative and competitive in its market space. This research firstly captured the important themes and theories around the subject of innovation and how it relates to strategy. The literature study will try to look into all the important work, especially well-known research and its significance. Lastly, the research will apply the knowledge gained by discussing the research questions relating to Spescom DataVoice‟s particular situation. The research will discuss the innovation capabilities and perspectives that Spescom DataVoice should focus on; the environment that is needed for sustainable continuous innovation; and innovation strategies that Spescom DataVoice could employ to improve its innovation productivity.