
Instructions – Parts List
WATERBASE COMPATIBLE
Ultra–lite
t
Pistol Grip
Flo–Gun
Model 235627, Series B
4000 psi (280 bar) Maximum Working Pressure
Tapered Valve Needle
Model 235628, Series D
6000 psi (415 bar) Maximum Working Pressure
Ball End Valve Needle, Abrasive Material Compatible
Model 243775, Series B
6000 psi (415 bar) Maximum Working Pressure
Tapered Valve Needle
Model 237607, Series A
4000 psi (280 bar) Maximum Working Pressure
Tapered Valve Needle, Abrasive Material Compatible
Model 237649, Series A
4000 psi (280 bar) Maximum Working Pressure
Tapered Valve Needle, Abrasive Material Compatible,
Swivel Fitting Fluid Inlet
U.S. Patent No. Des. 342,654
Symbols
2
. . . . . . . . . . . . . . . . . . . . . . . . . . . . . . . . . . . . . .
Warning
2
. . . . . . . . . . . . . . . . . . . . . . . . . . . . . . . . . . . . . . .
Technical Data
4
. . . . . . . . . . . . . . . . . . . . . . . . . . . . . . . . .
Installation
5
. . . . . . . . . . . . . . . . . . . . . . . . . . . . . . . . . . . . .
Operation
6
. . . . . . . . . . . . . . . . . . . . . . . . . . . . . . . . . . . . .
Service
8
. . . . . . . . . . . . . . . . . . . . . . . . . . . . . . . . . . . . . . .
Parts
14
. . . . . . . . . . . . . . . . . . . . . . . . . . . . . . . . . . . . . . . .
Graco Warranty and Limitation of Liability
22
. . . . . . . . .
Graco Phone Number
22
. . . . . . . . . . . . . . . . . . . . . . . . . .
308253N
EN
Important Safety Instructions
Read all warnings and instructions in this manual.
Save these instructions.
01609A
23 августа 2023 /
0 комментариев
/
53 просмотра
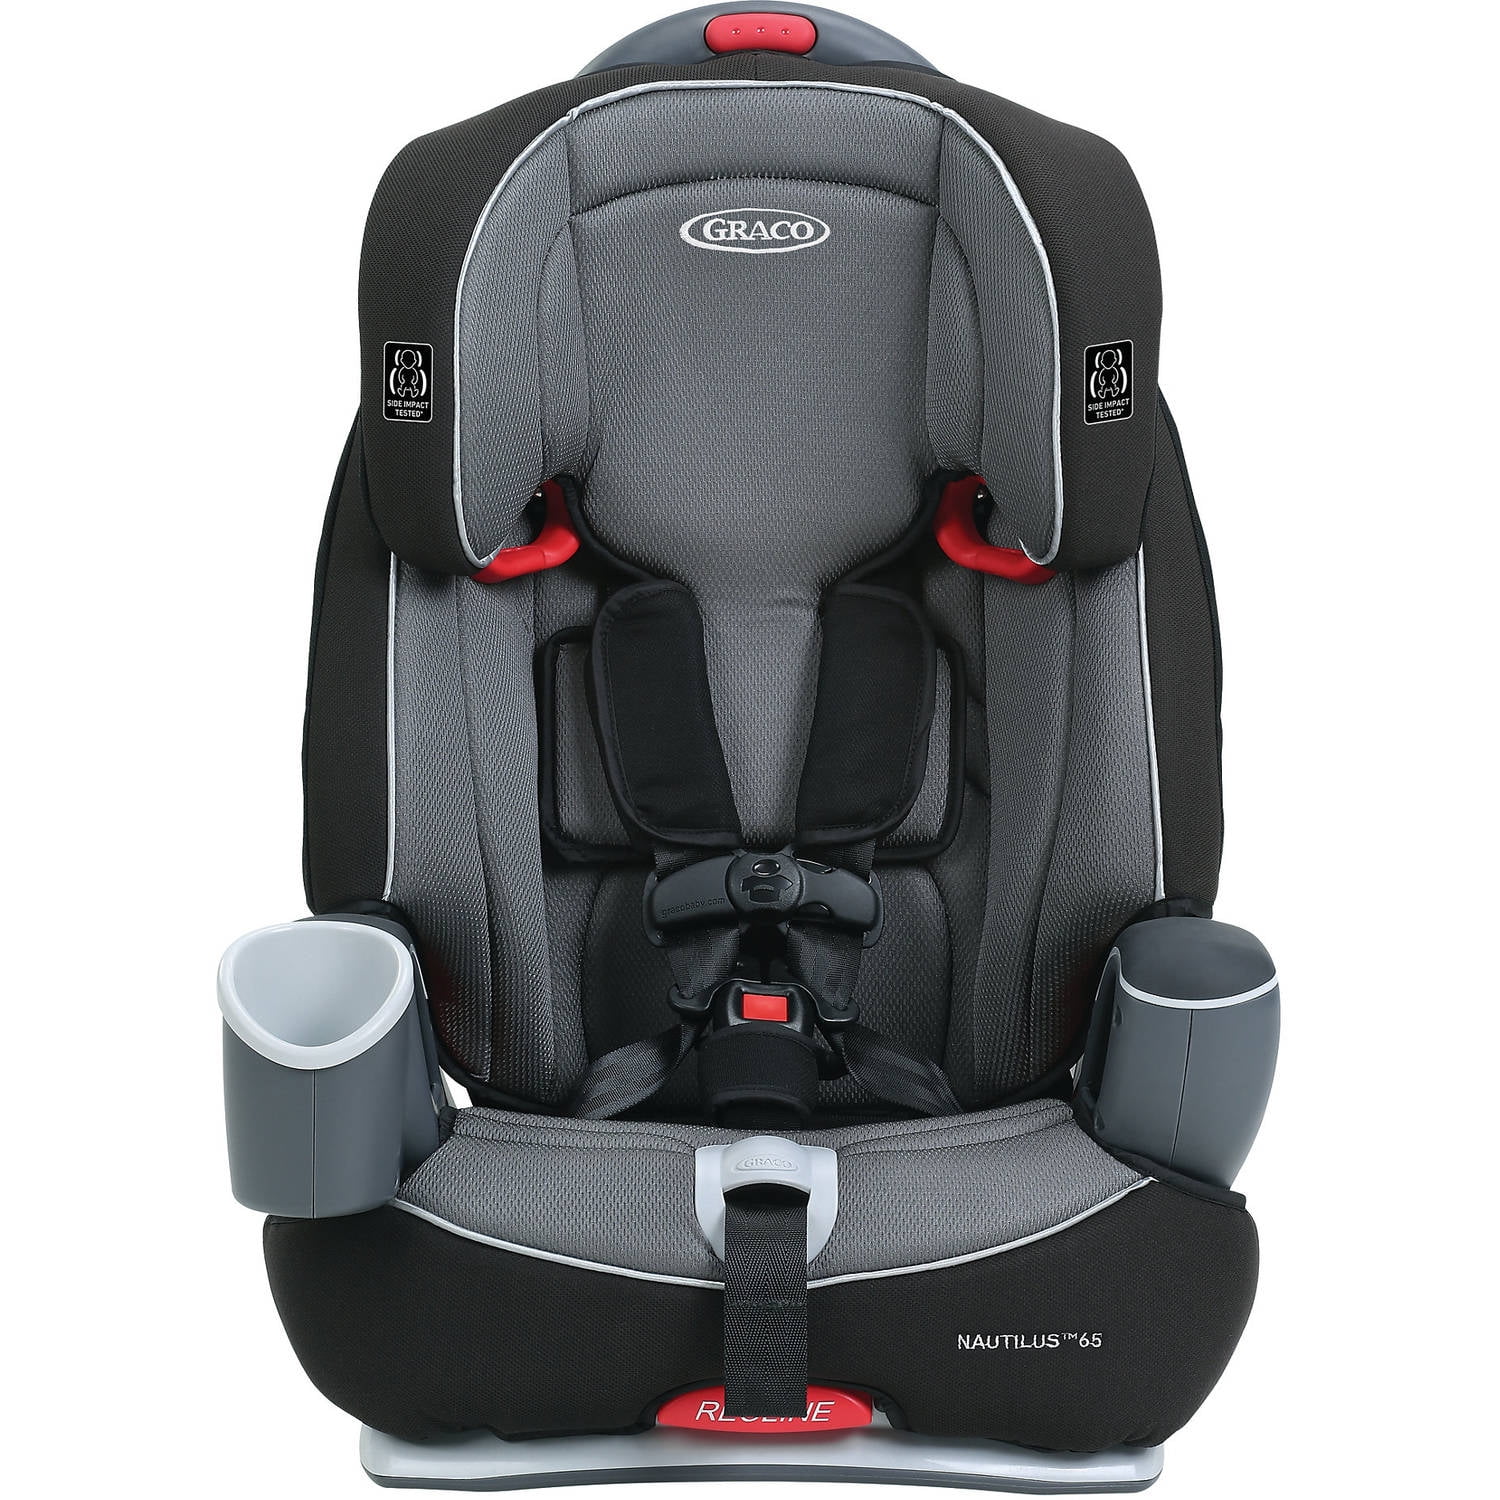
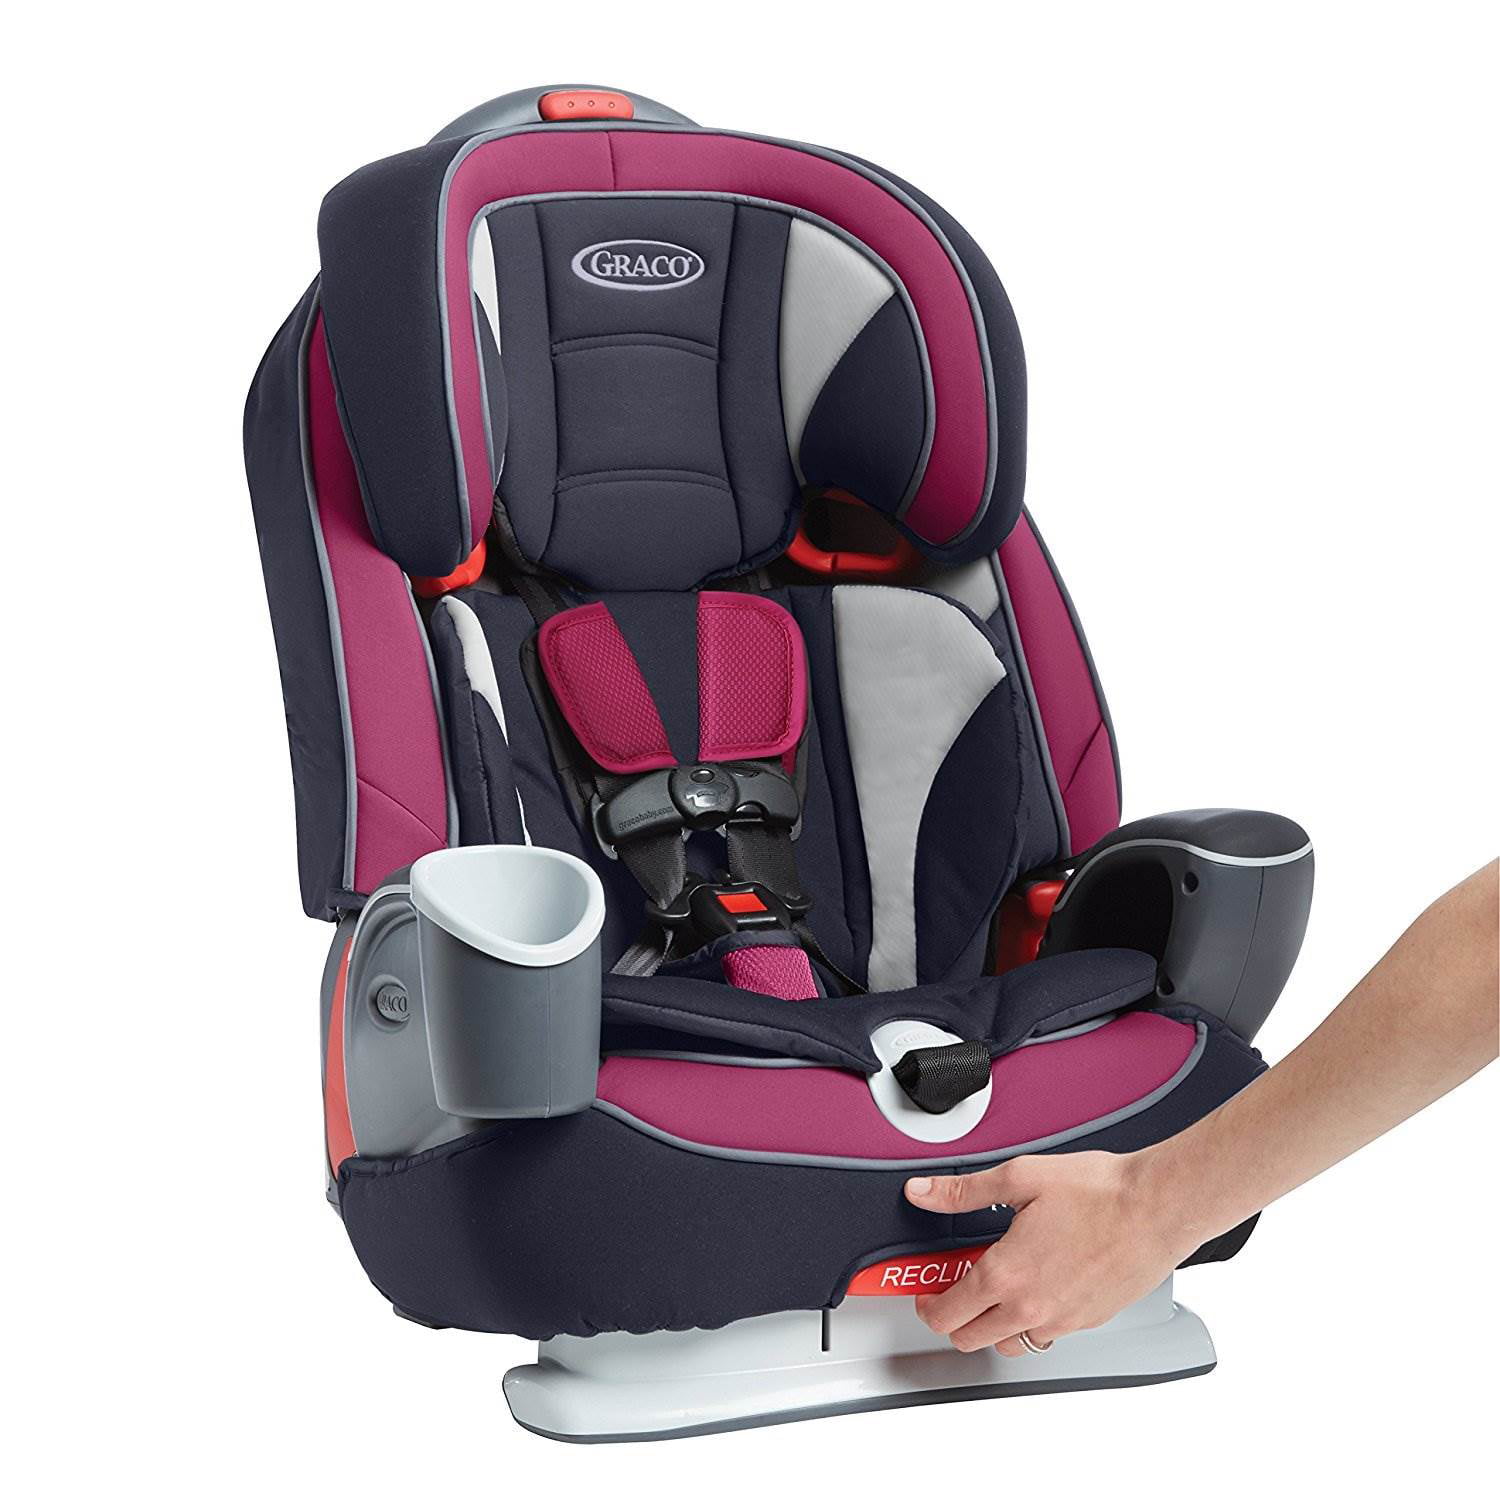
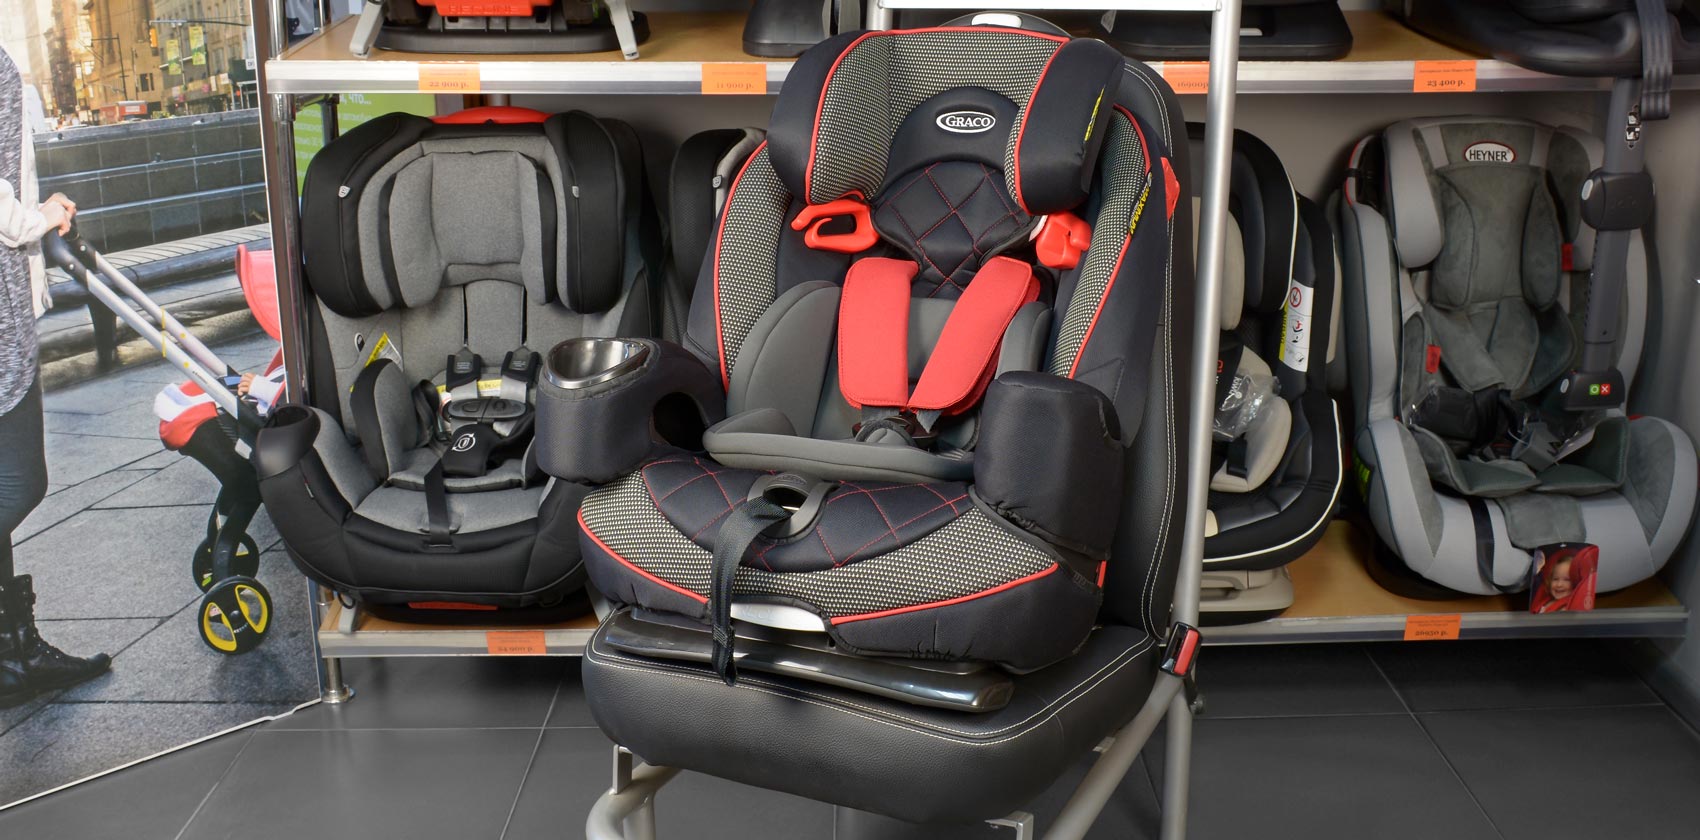
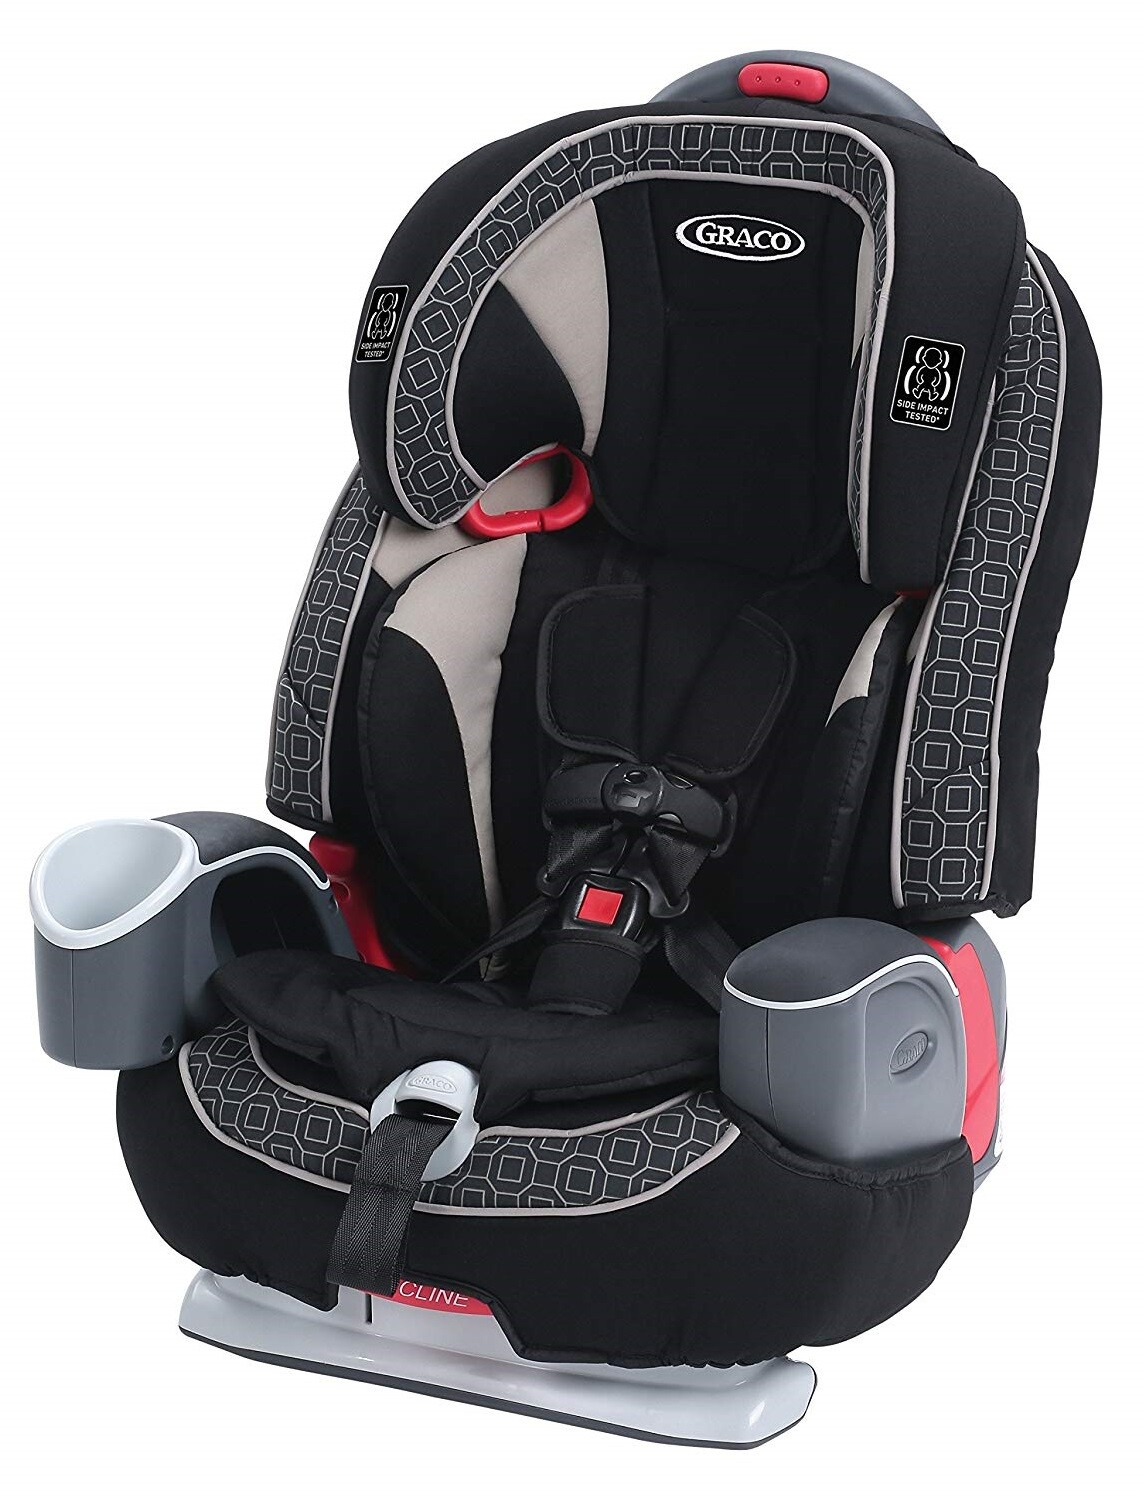
Кресло Graco Nautilus — это инновационное детское автокресло, которое обеспечивает безопасность и комфорт вашему ребенку во время поездок. В этой статье мы рассмотрим, как правильно установить и использовать кресло Graco Nautilus, чтобы обеспечить максимальную защиту вашего малыша.
1
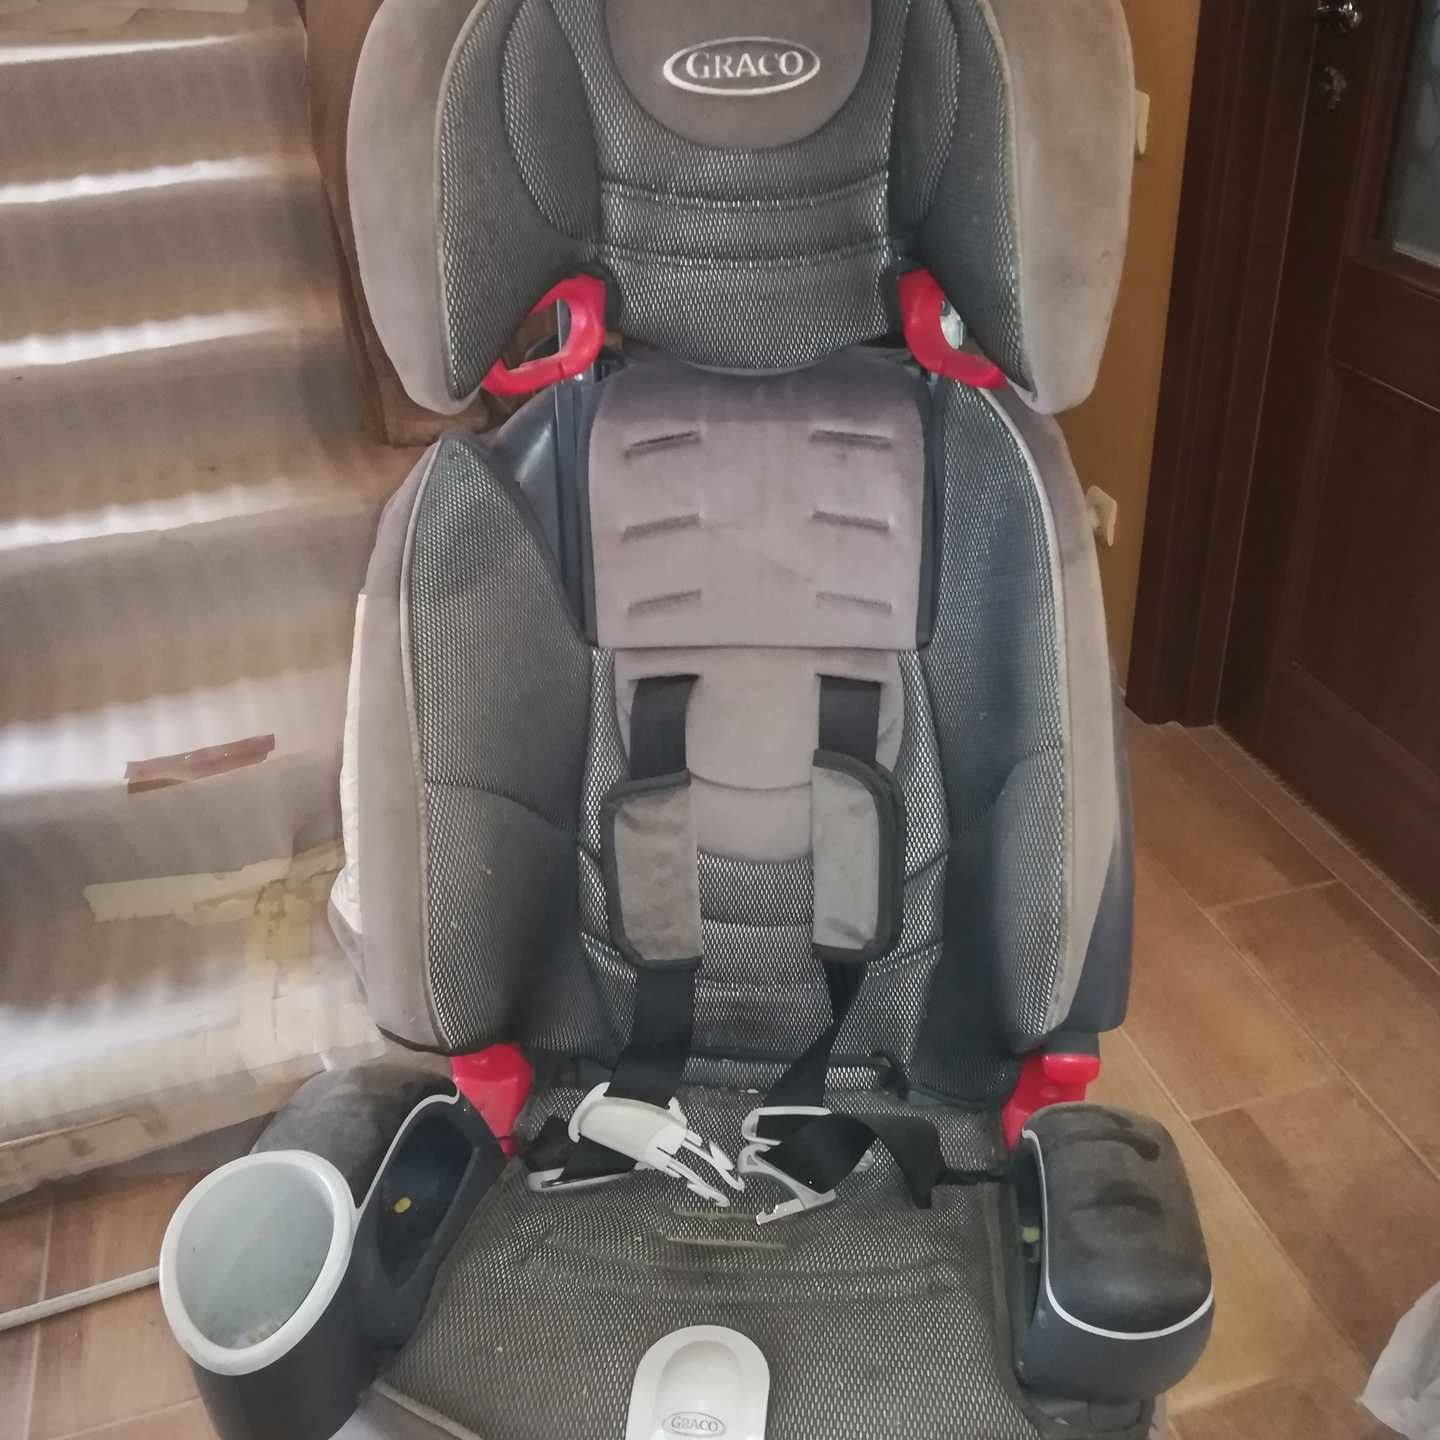
Детское автокресло Graco Nautilus Elite Saturn группа 1-2-3 от 9 до 36 кг

2
3
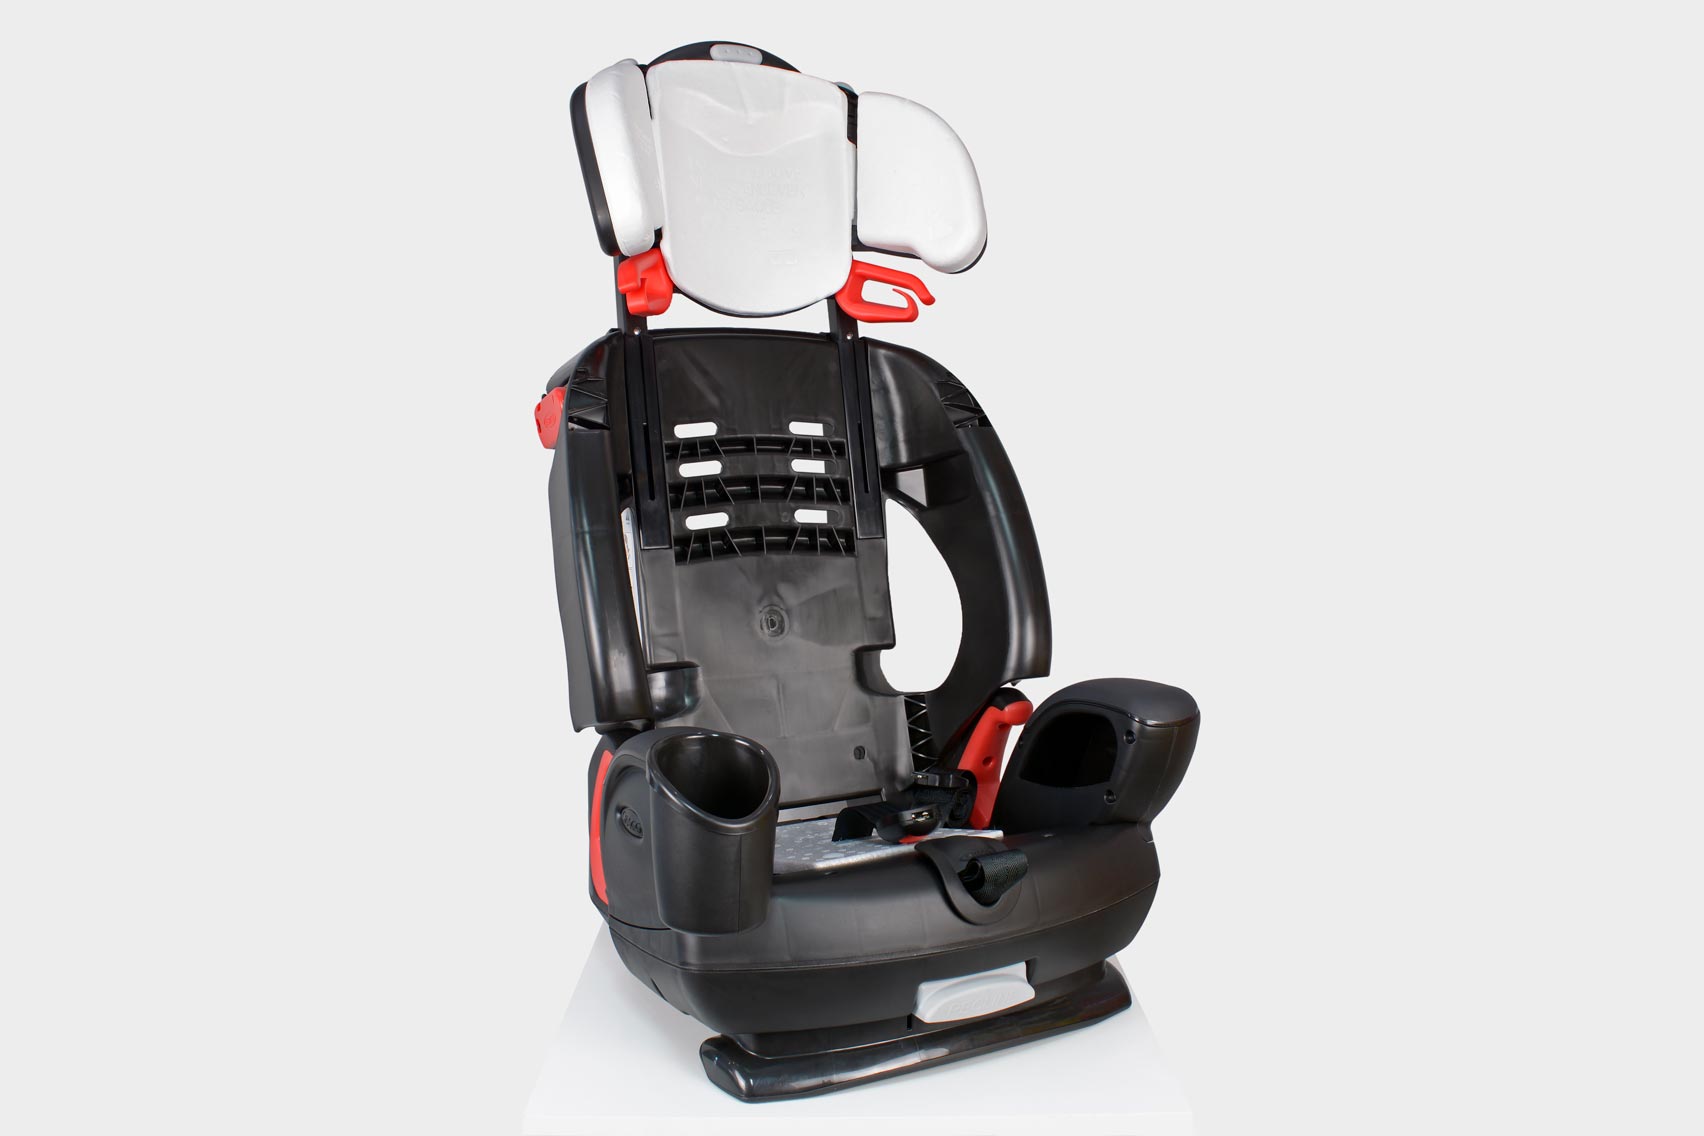
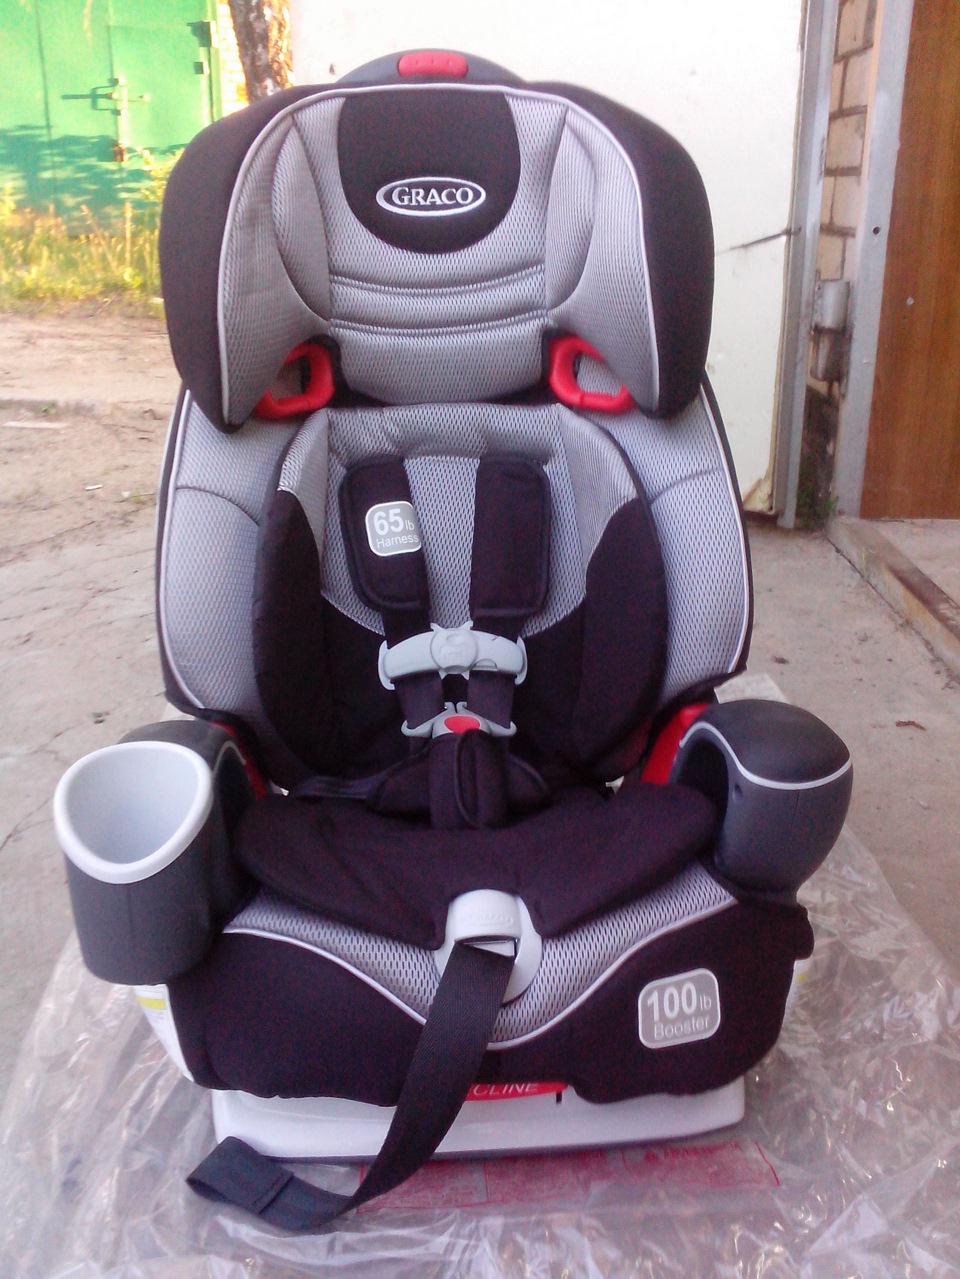
Автокресло Graco 100ib Booster
4
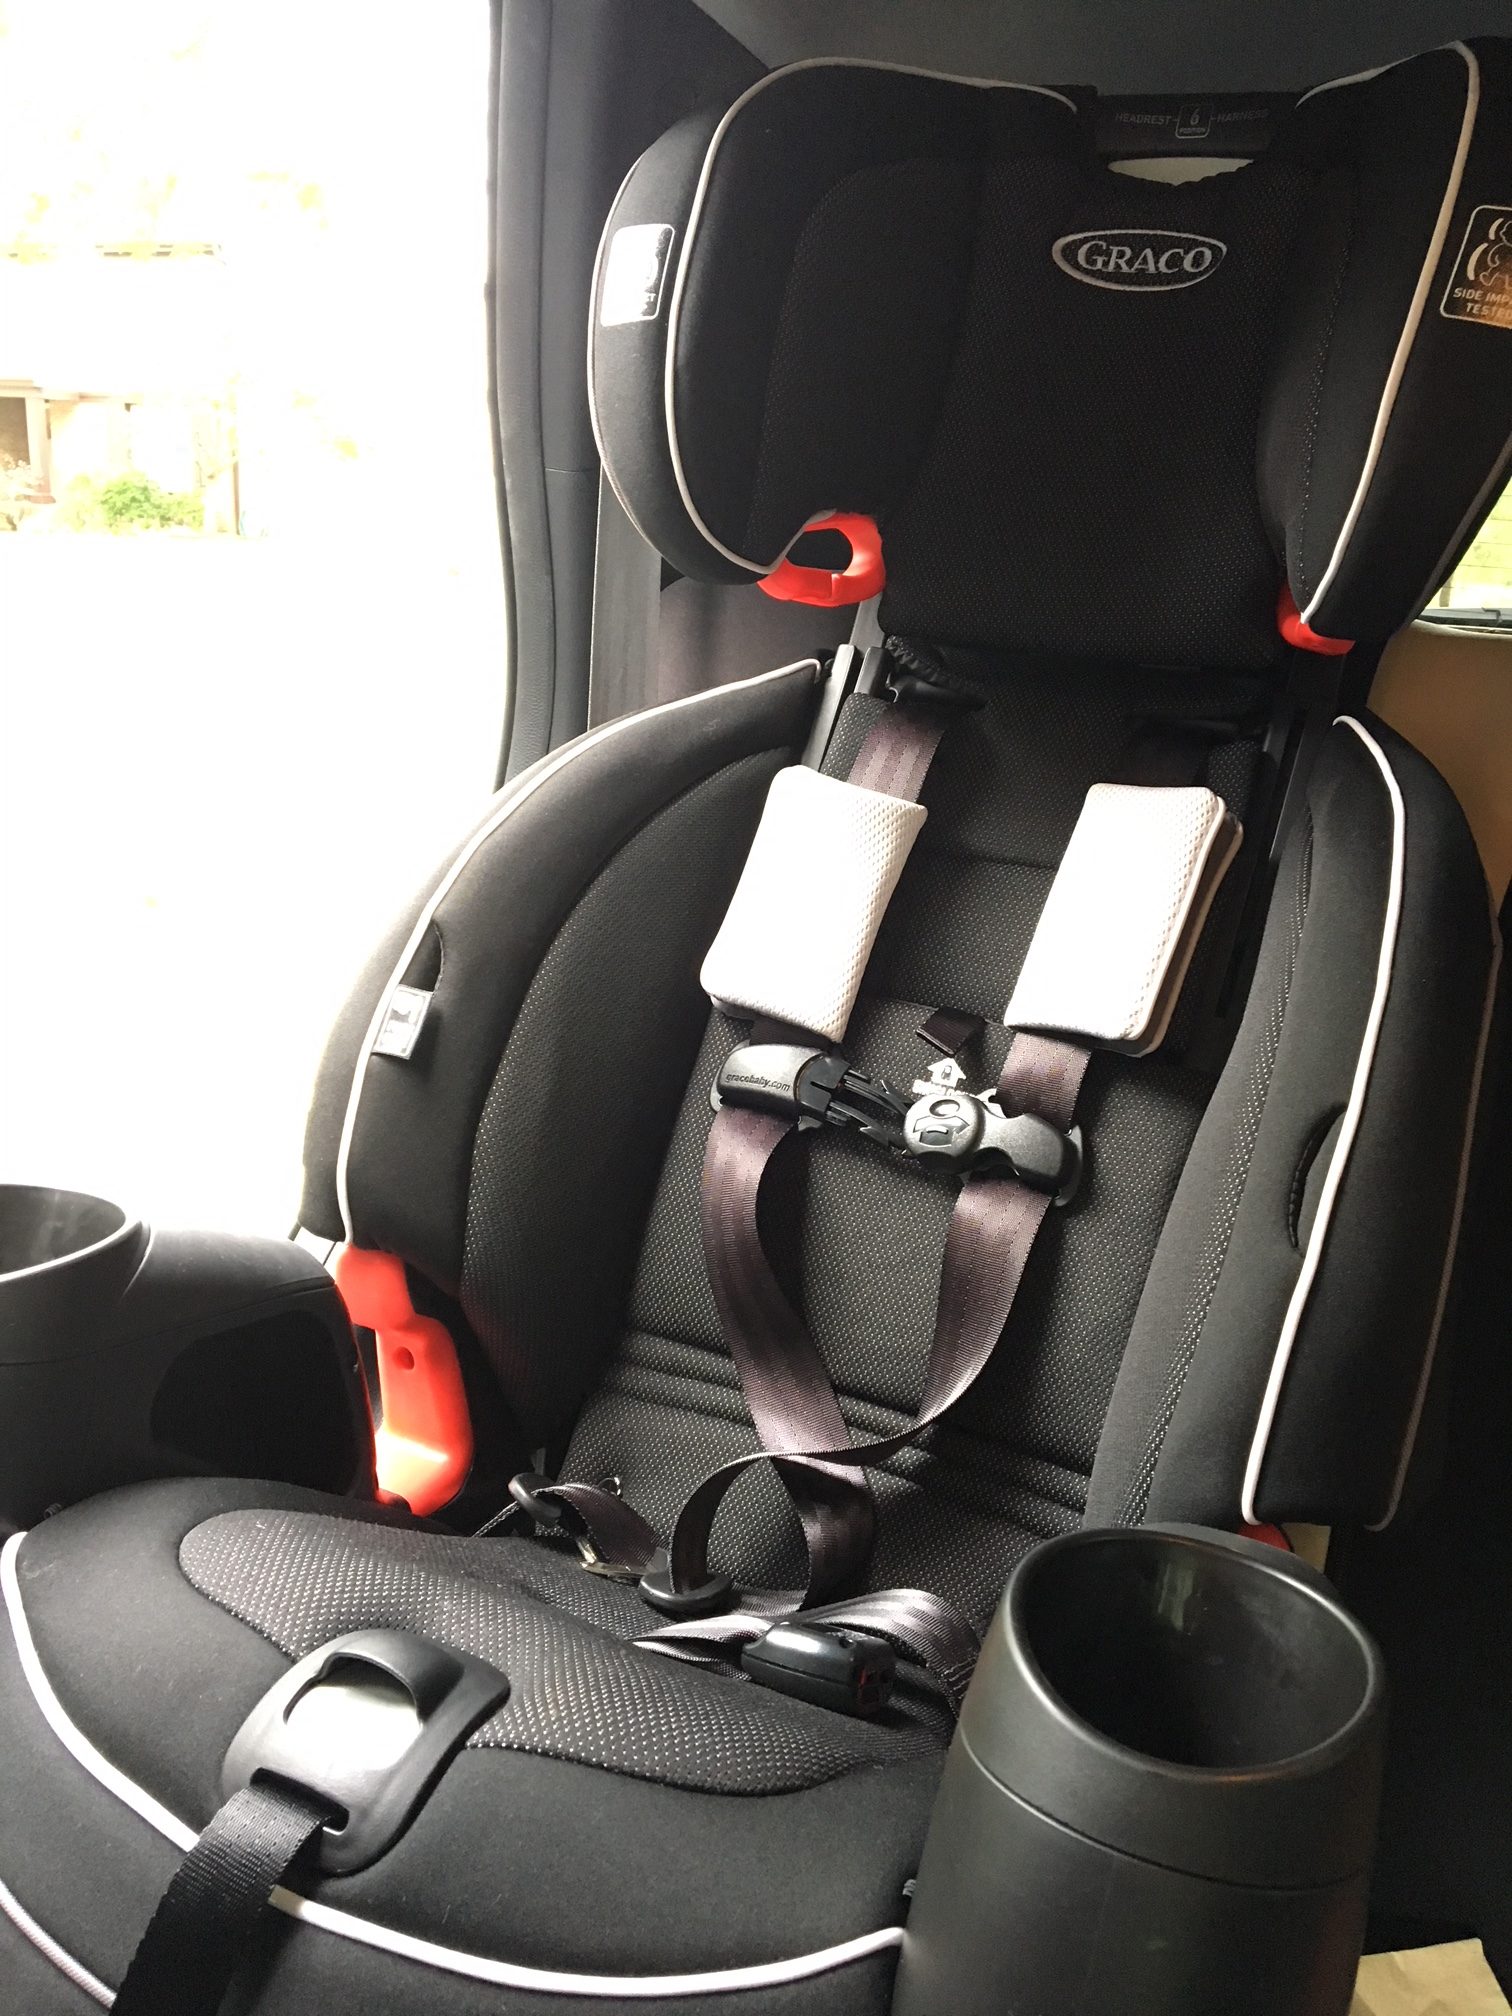
Автокресло Graco Nautilus
5
6
Graco Nautilus 3-in-1 car

7
Автокресло Грако Наутилус

8
Graco Nautilus 3-in-1 car
9
10

11
Автокресло Graco 100 lb Booster
12
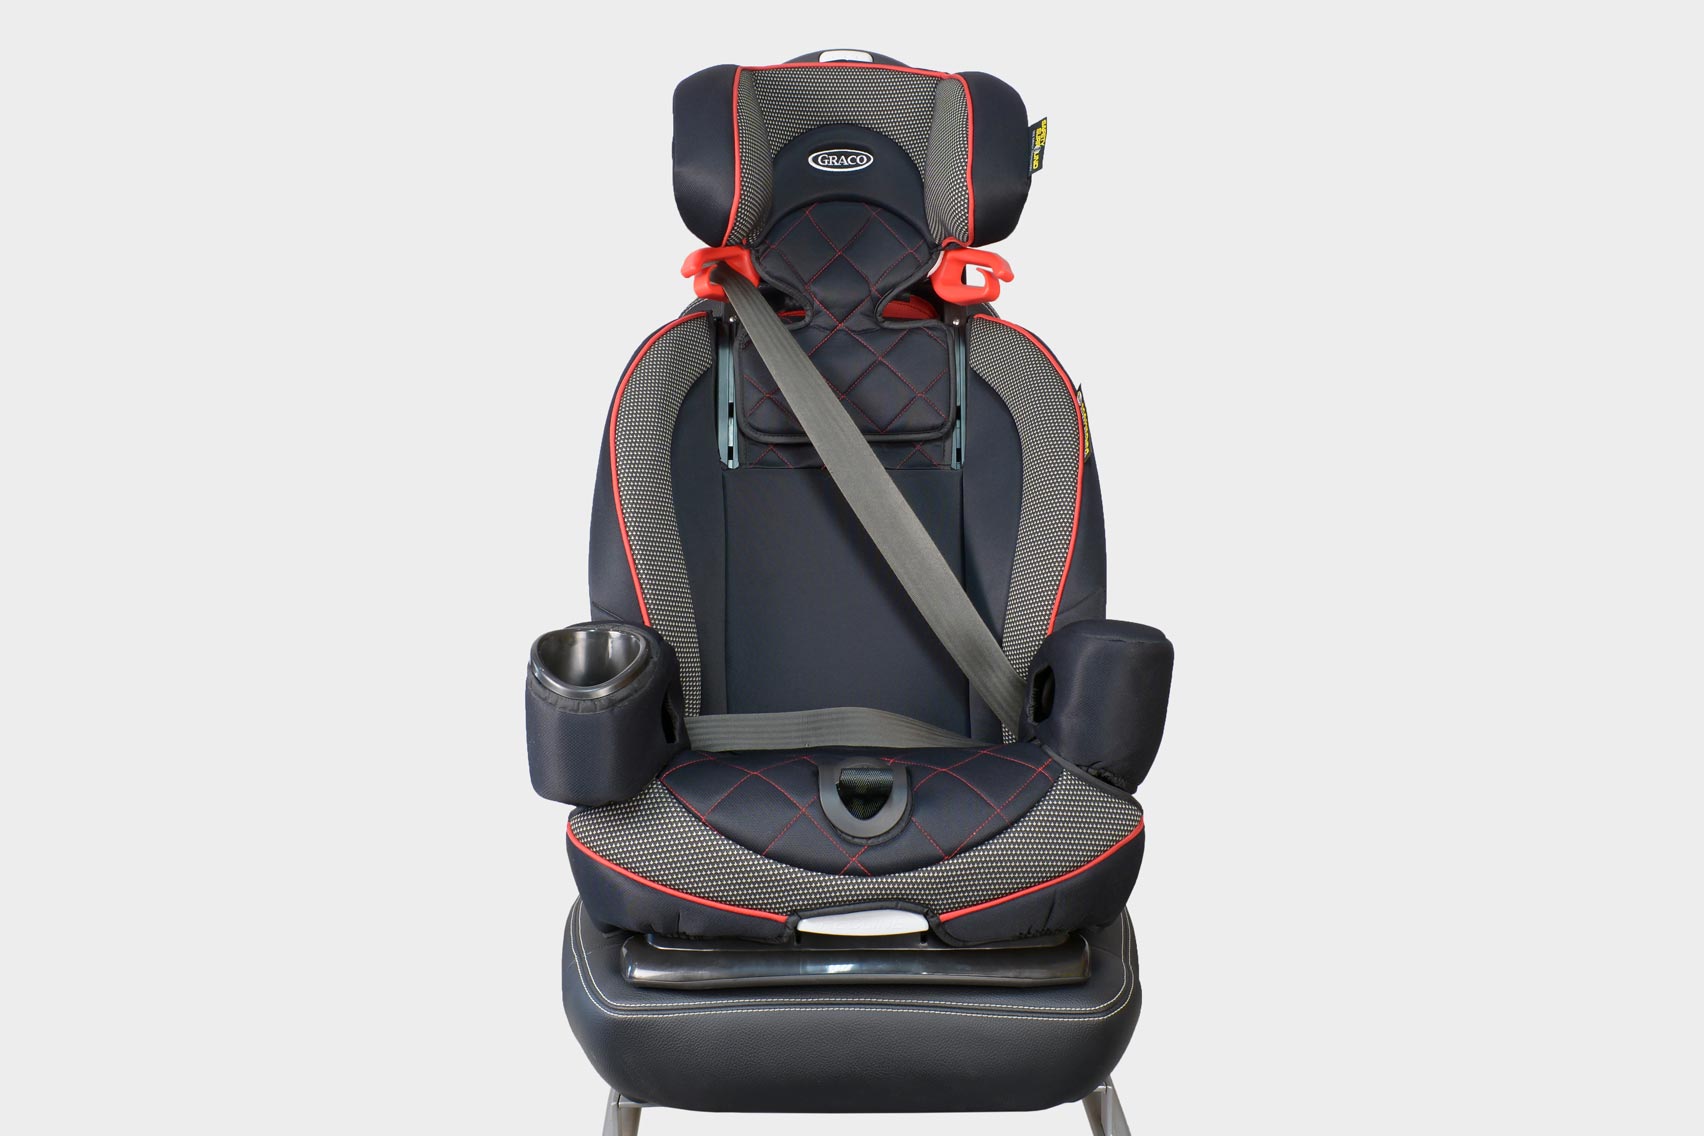
Автокресло Graco Argos Sapphire
13
Автокресло Graco Nautilus
14
Шаг 1: Подготовка к установке
Перед установкой кресла Graco Nautilus в автомобиле, убедитесь, что автомобильный сиденье достаточно просторное и безопасное для установки кресла. Проверьте, что задние ремни автомобиля плотно закреплены и не имеют повреждений.
15
Chicco fit4
16
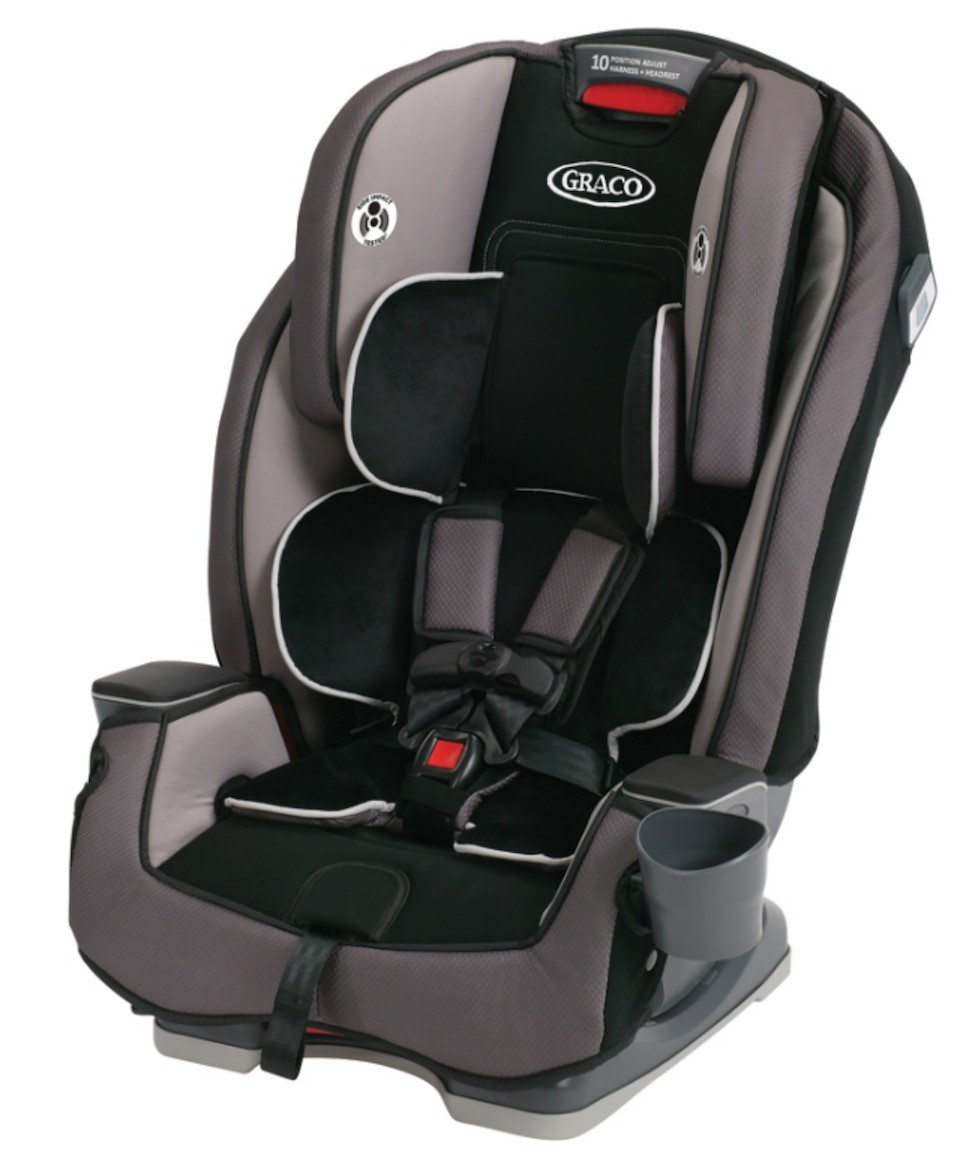
Graco Slimfit LX
17
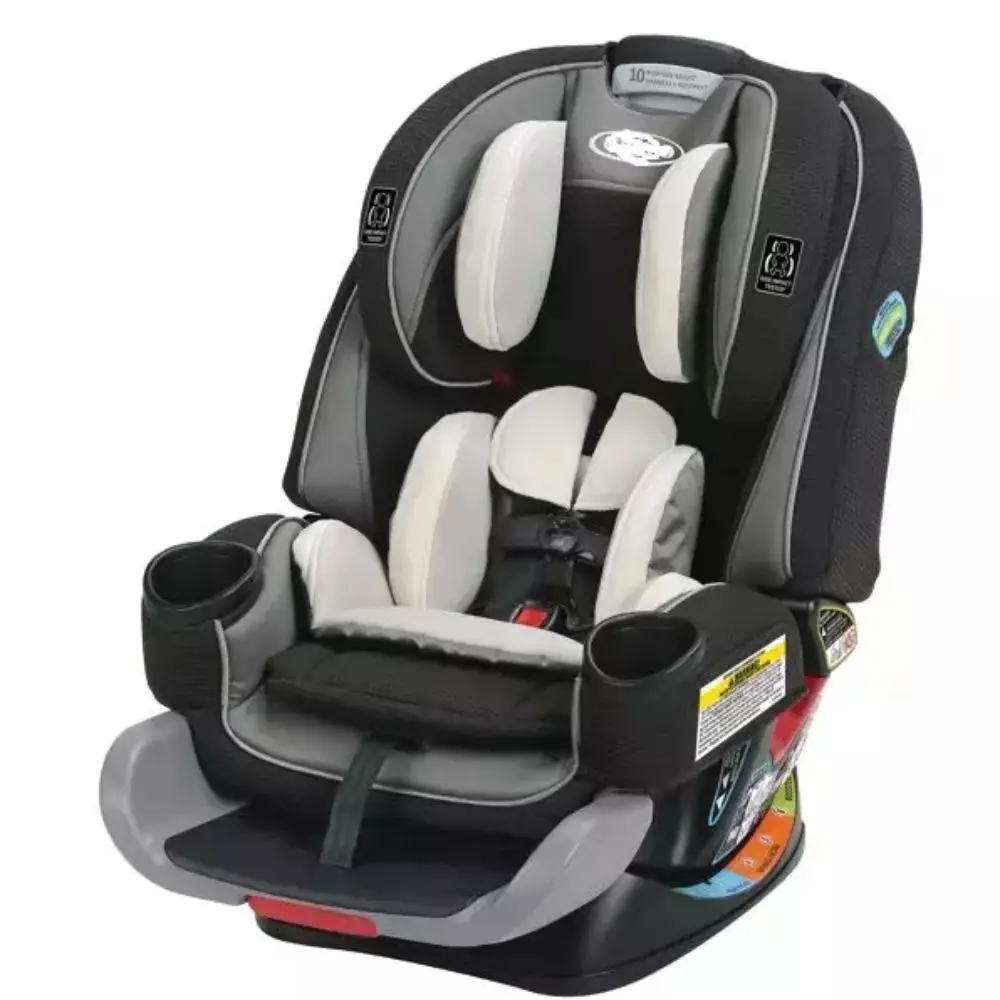
Автокресло Graco 4ever

18
Автокресло Грако Наутилус

19
Автокресло Graco Nautilus 9-36
20
Graco Slimfit LX
21
Graco автокресло схема сборки

22
Автокресло Graco

23
24
25
26

27
Детское автокресло Грако с подстаканником
28
Автокресло Грако Наутилус 3 в 1
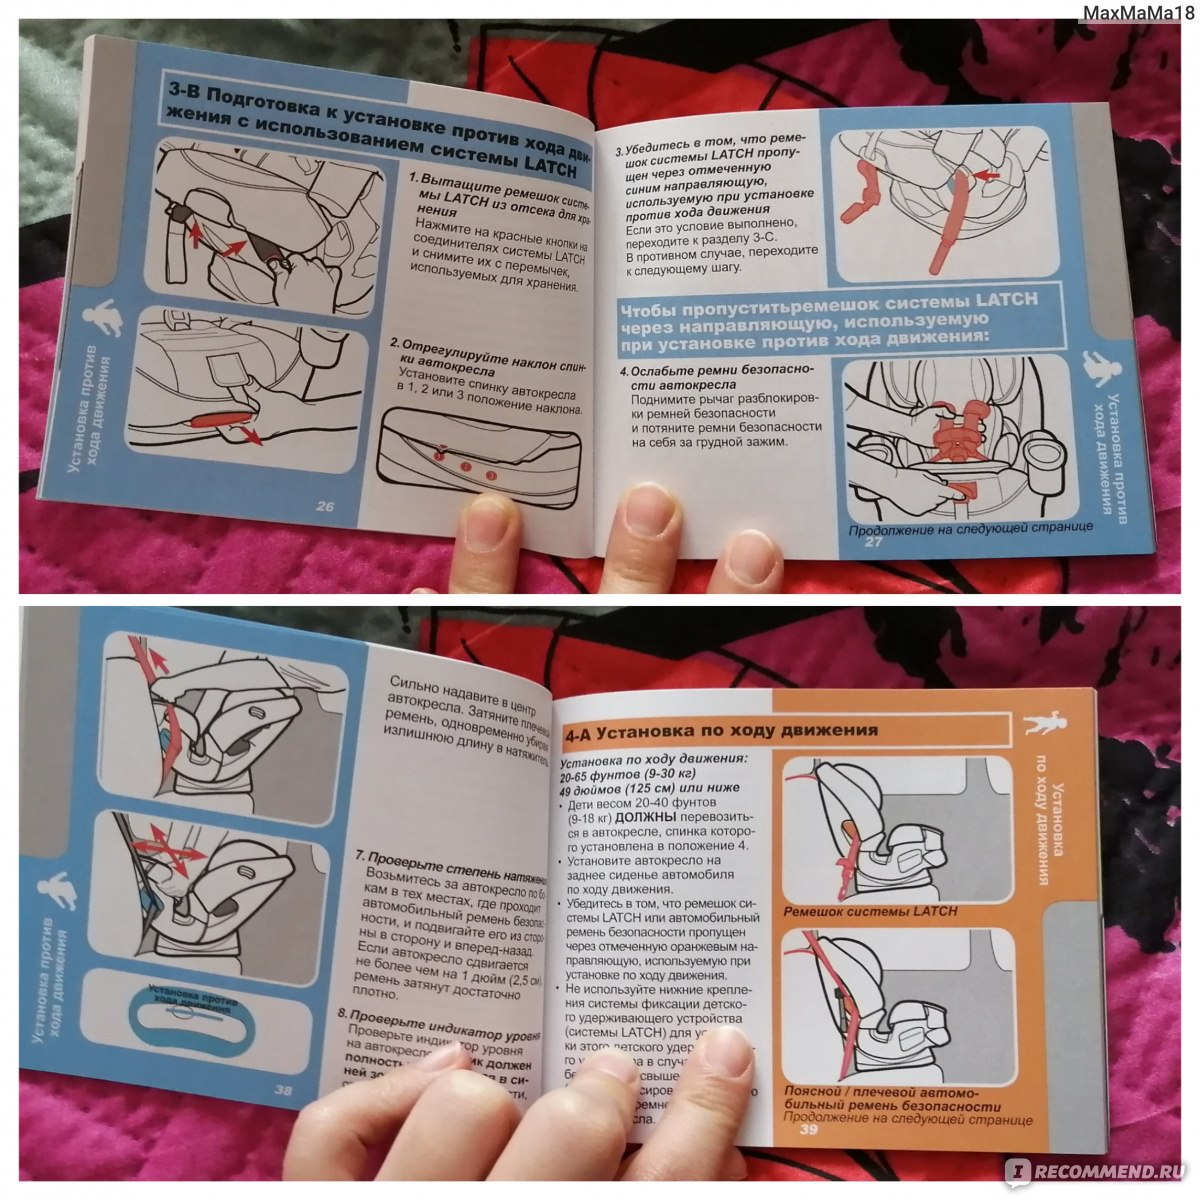
Шаг 2: Установка кресла Graco Nautilus
Следуйте инструкции, предоставленной производителем, по установке кресла Graco Nautilus. Обычно кресло крепится с помощью автомобильных ремней или системы крепления Isofix. Убедитесь, что кресло установлено надежно и не имеет никаких люфтов.

29

30
Автокресло Graco Nautilus (9-36кг)
31

32
Graco Nautilus 3-in-1 car

33
Автокресло Грако Наутилус
34
35
Booster car Seat (with harness System) этикетка

36
37
Автокресло Graco milestone fiery Red
38
39
40
Автокресло Graco Nautilus чехлы
41
Детское автокресло Graco Nautilus
42
Шаг 3: Регулировка кресла
После установки кресла Graco Nautilus, регулируйте его, чтобы обеспечить комфорт и безопасность вашему ребенку. Регулируйте высоту подголовника и ремней, чтобы они соответствовали росту вашего ребенка. Убедитесь, что ремни плотно прилегают к телу ребенка и не оставляют свободного пространства.

43
44
45
Детское автокресло Graco Nautilus
46

47
Автокресло Graco Argos 65

48

49
Graco contender-65
50
51

52
Graco extend2fit

53
Автокресло группа 1 (9-18 кг) Graco 4ever all-in-1

54

55

56
Автокресло группа 0/1/2/3 (до 36 кг) Graco Slimfit
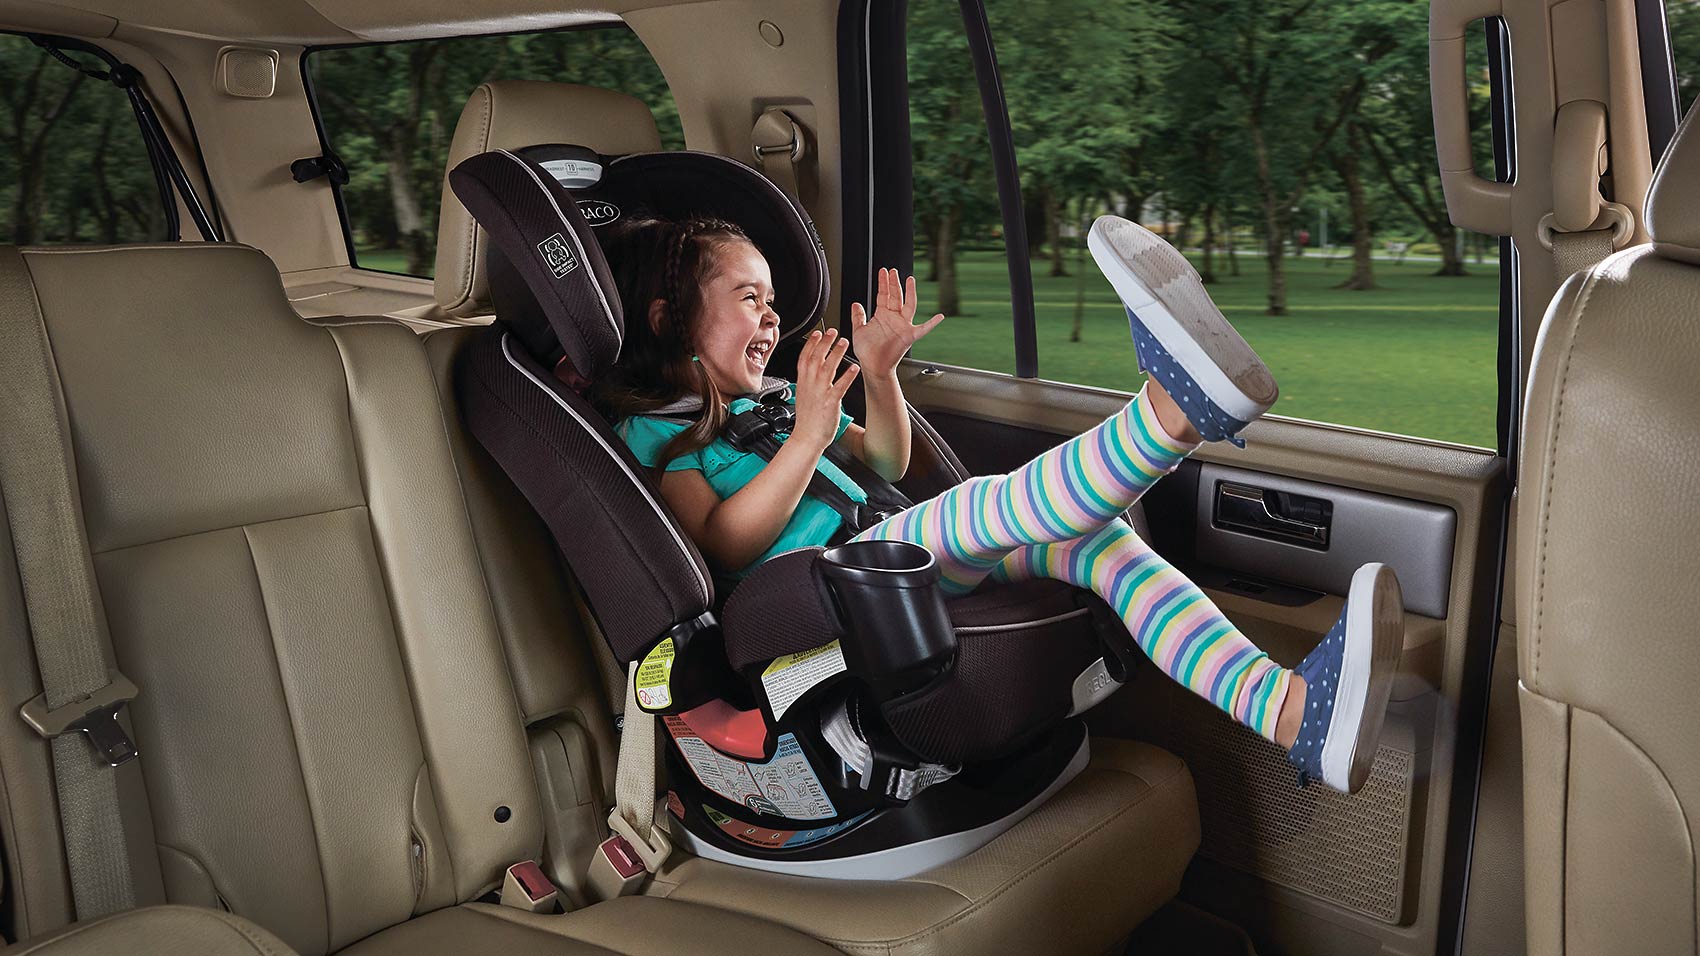
Шаг 4: Правильное использование кресла
При использовании кресла Graco Nautilus, следуйте правилам безопасности и рекомендациям производителя. Не разрешайте ребенку высовывать руки или ноги из кресла во время движения. Регулярно проверяйте крепление кресла и ремней, чтобы убедиться в их надежности.
Следуя этой инструкции, вы сможете правильно установить и использовать кресло Graco Nautilus, обеспечивая безопасность и комфорт вашему ребенку во время поездок.

Содержание
1 Обзорный чертёж
2 Предупреждения для родителей
3 Сборка детского автокресла
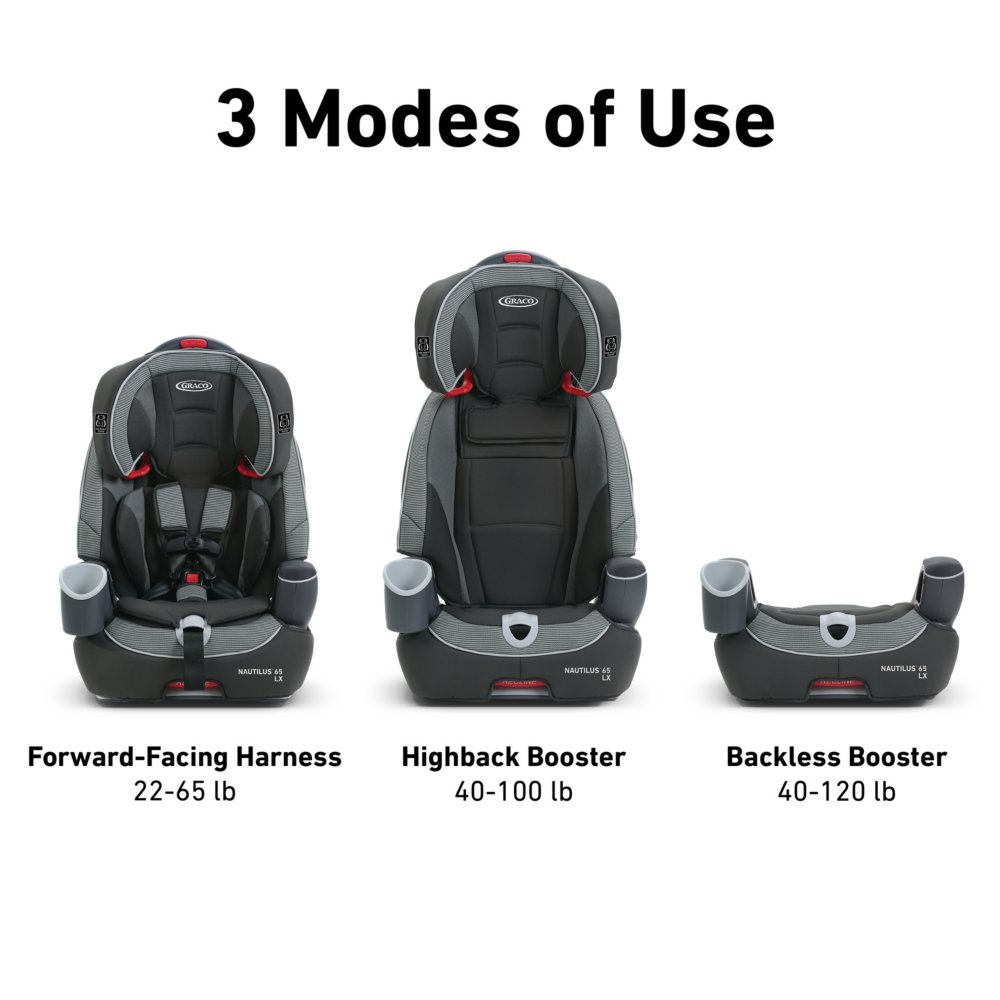
4 Использование со встроенными ремнями
5 Использование без встроенных ремней
6 Небезопасные системы ремней безопасности
7 Использование со встроенными ремнями
8 Закрепление детского автокресла
9 Проверка безопасности
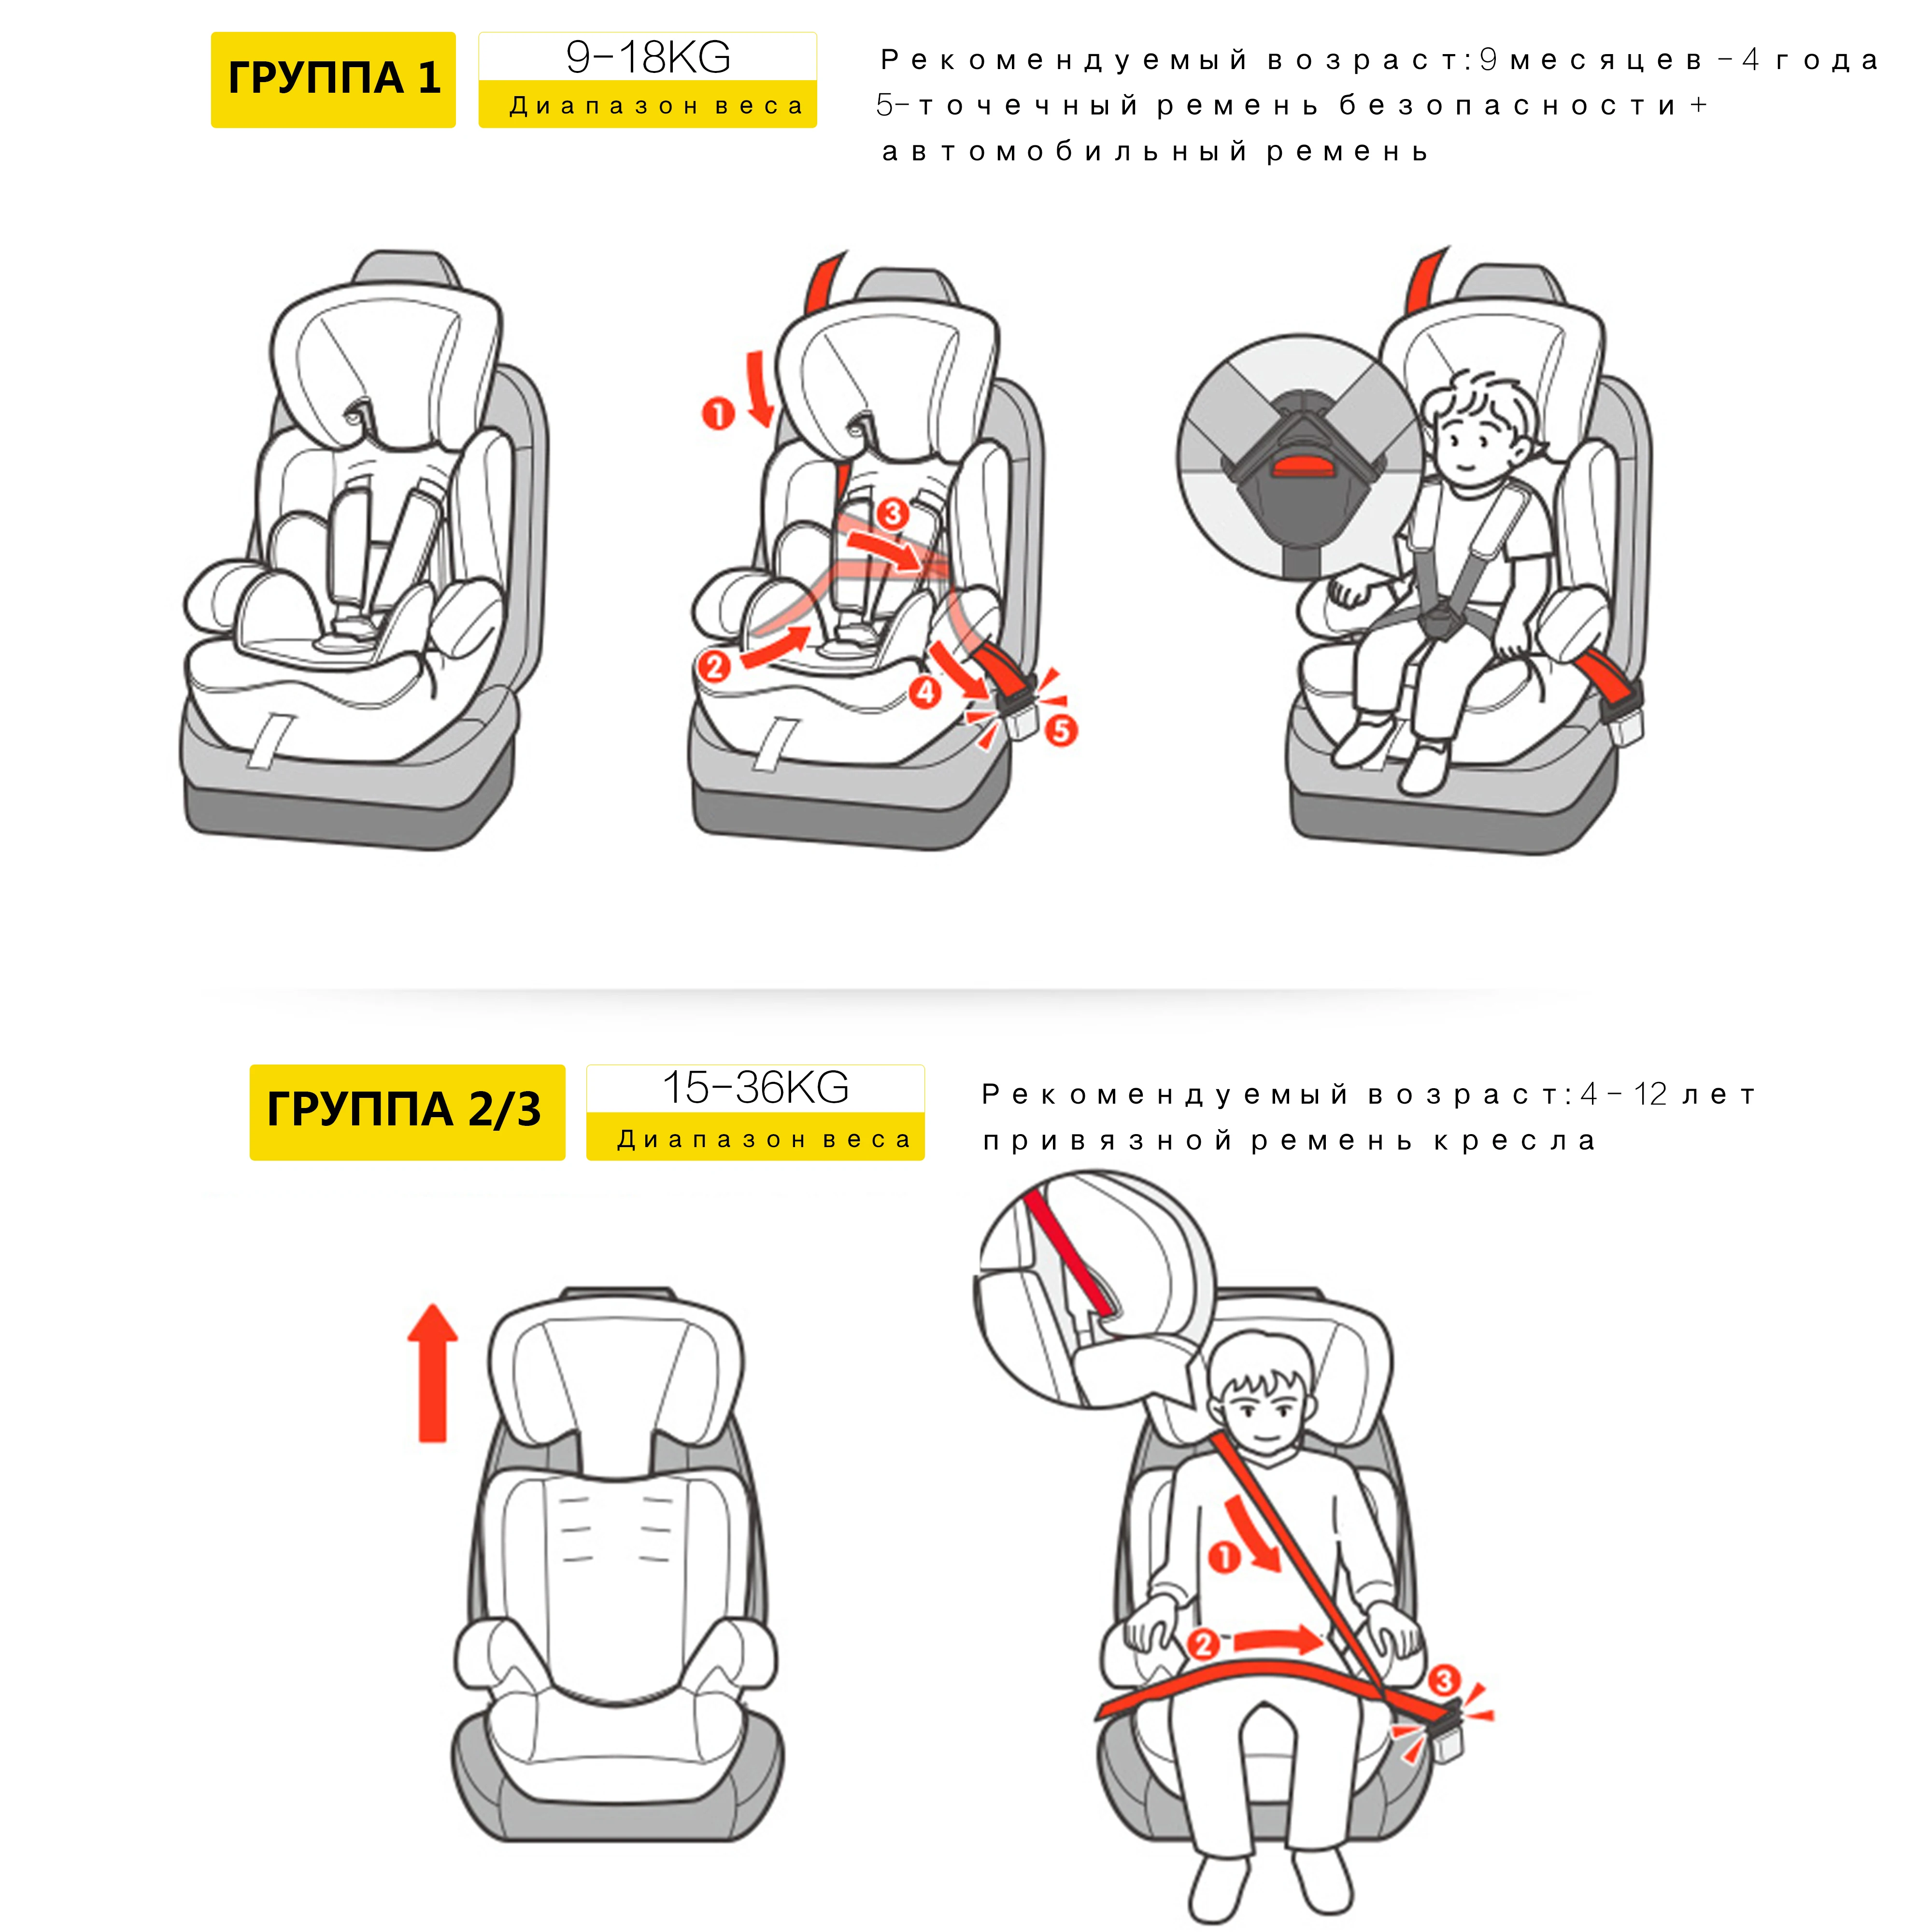
10 Фиксация ребёнка 9-18 кг
11 Удаление ремней
12 Использование без встроенных ремней
13 Фиксация ребёнка 15-36 кг
14 Регулировка подголовника
15 Аксессуары
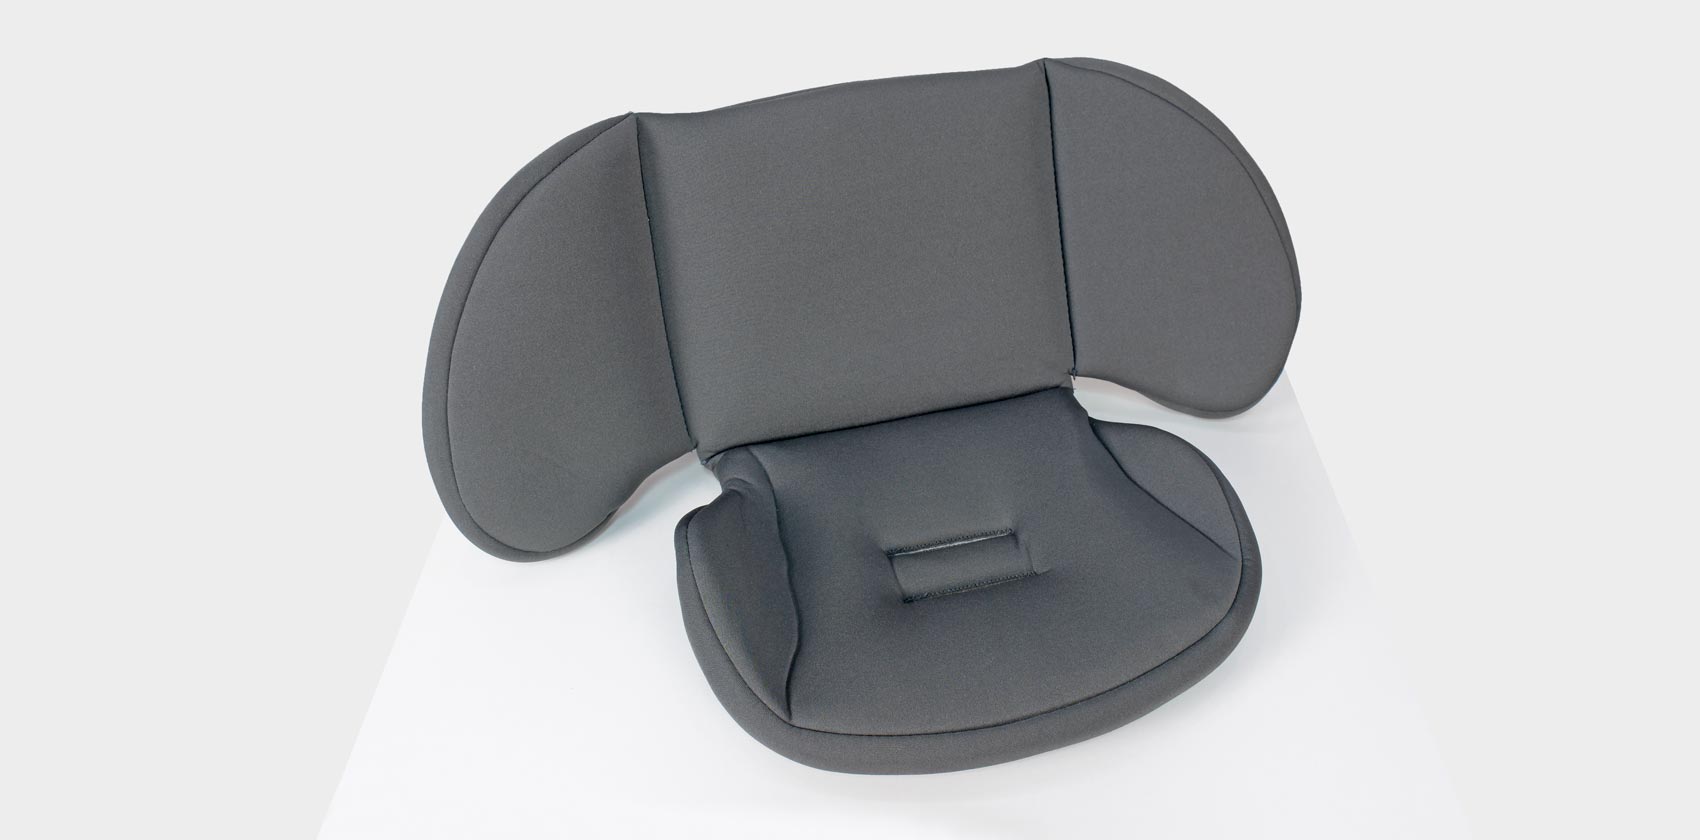
16 Опора для наклонного положения
17 Снятие чехла сиденья
18 Хранение руководства
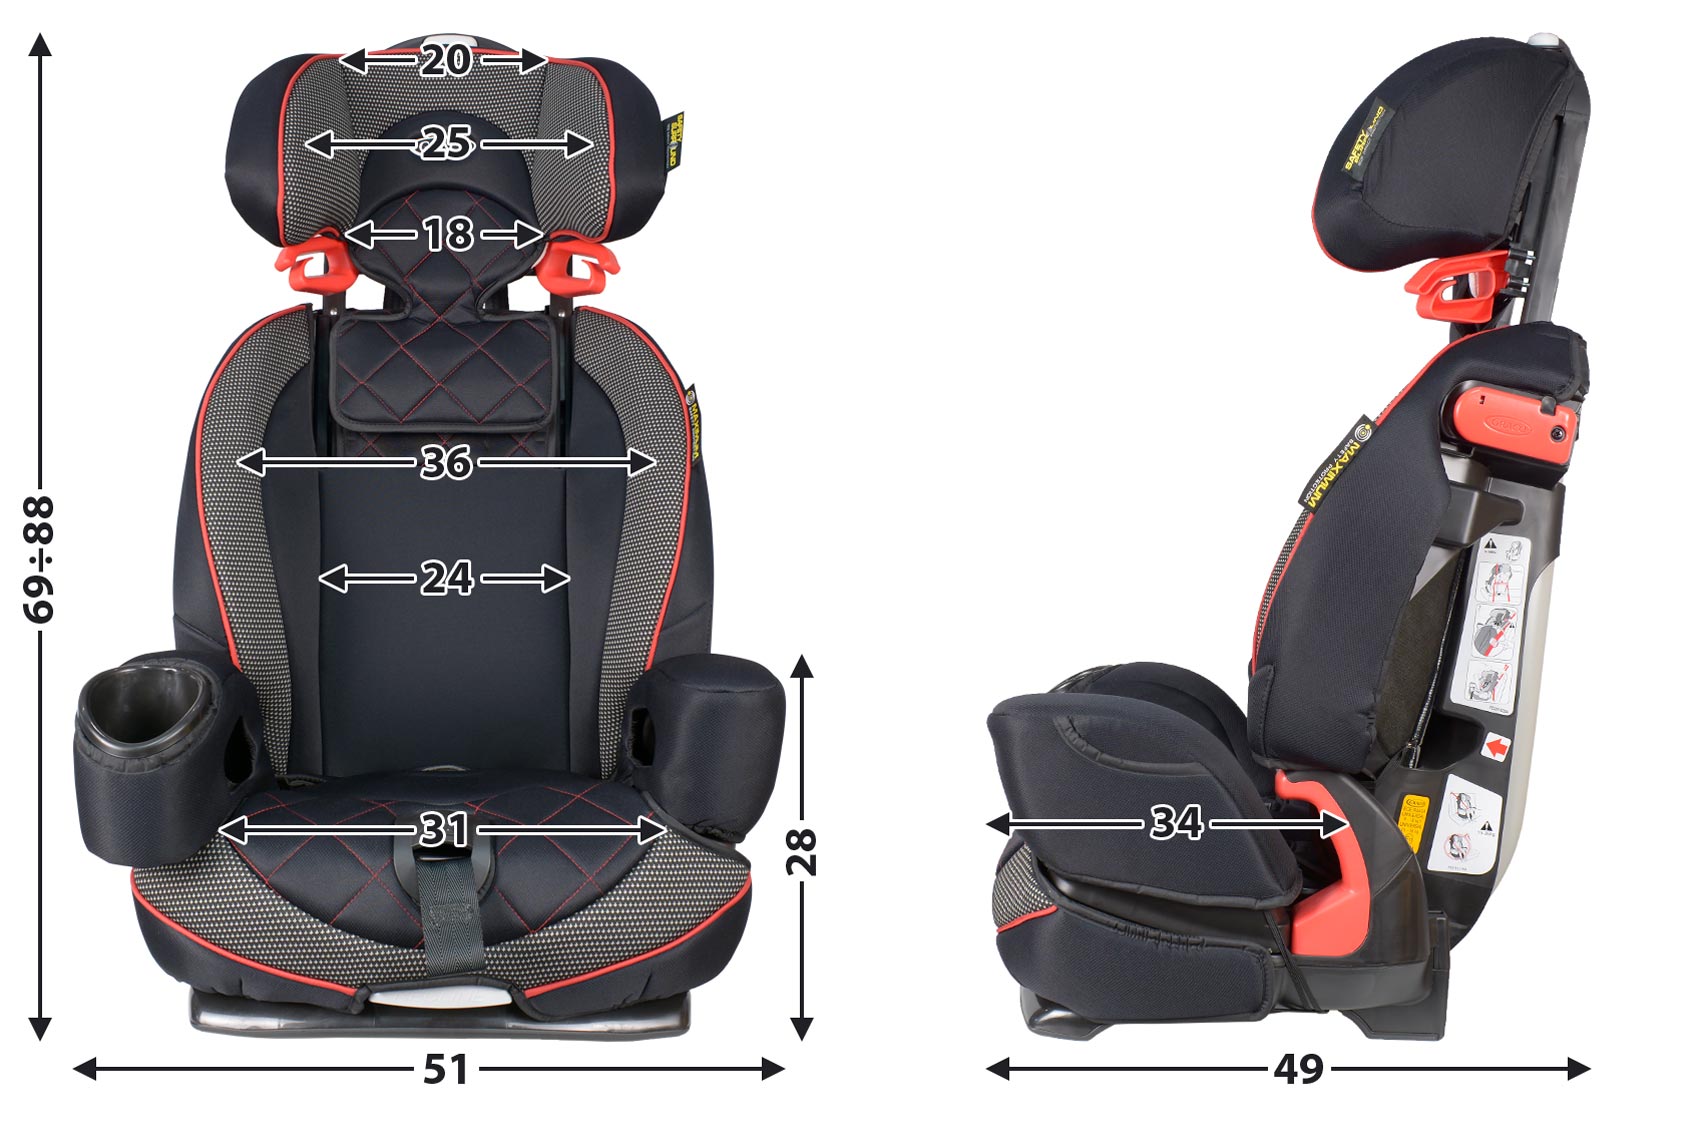
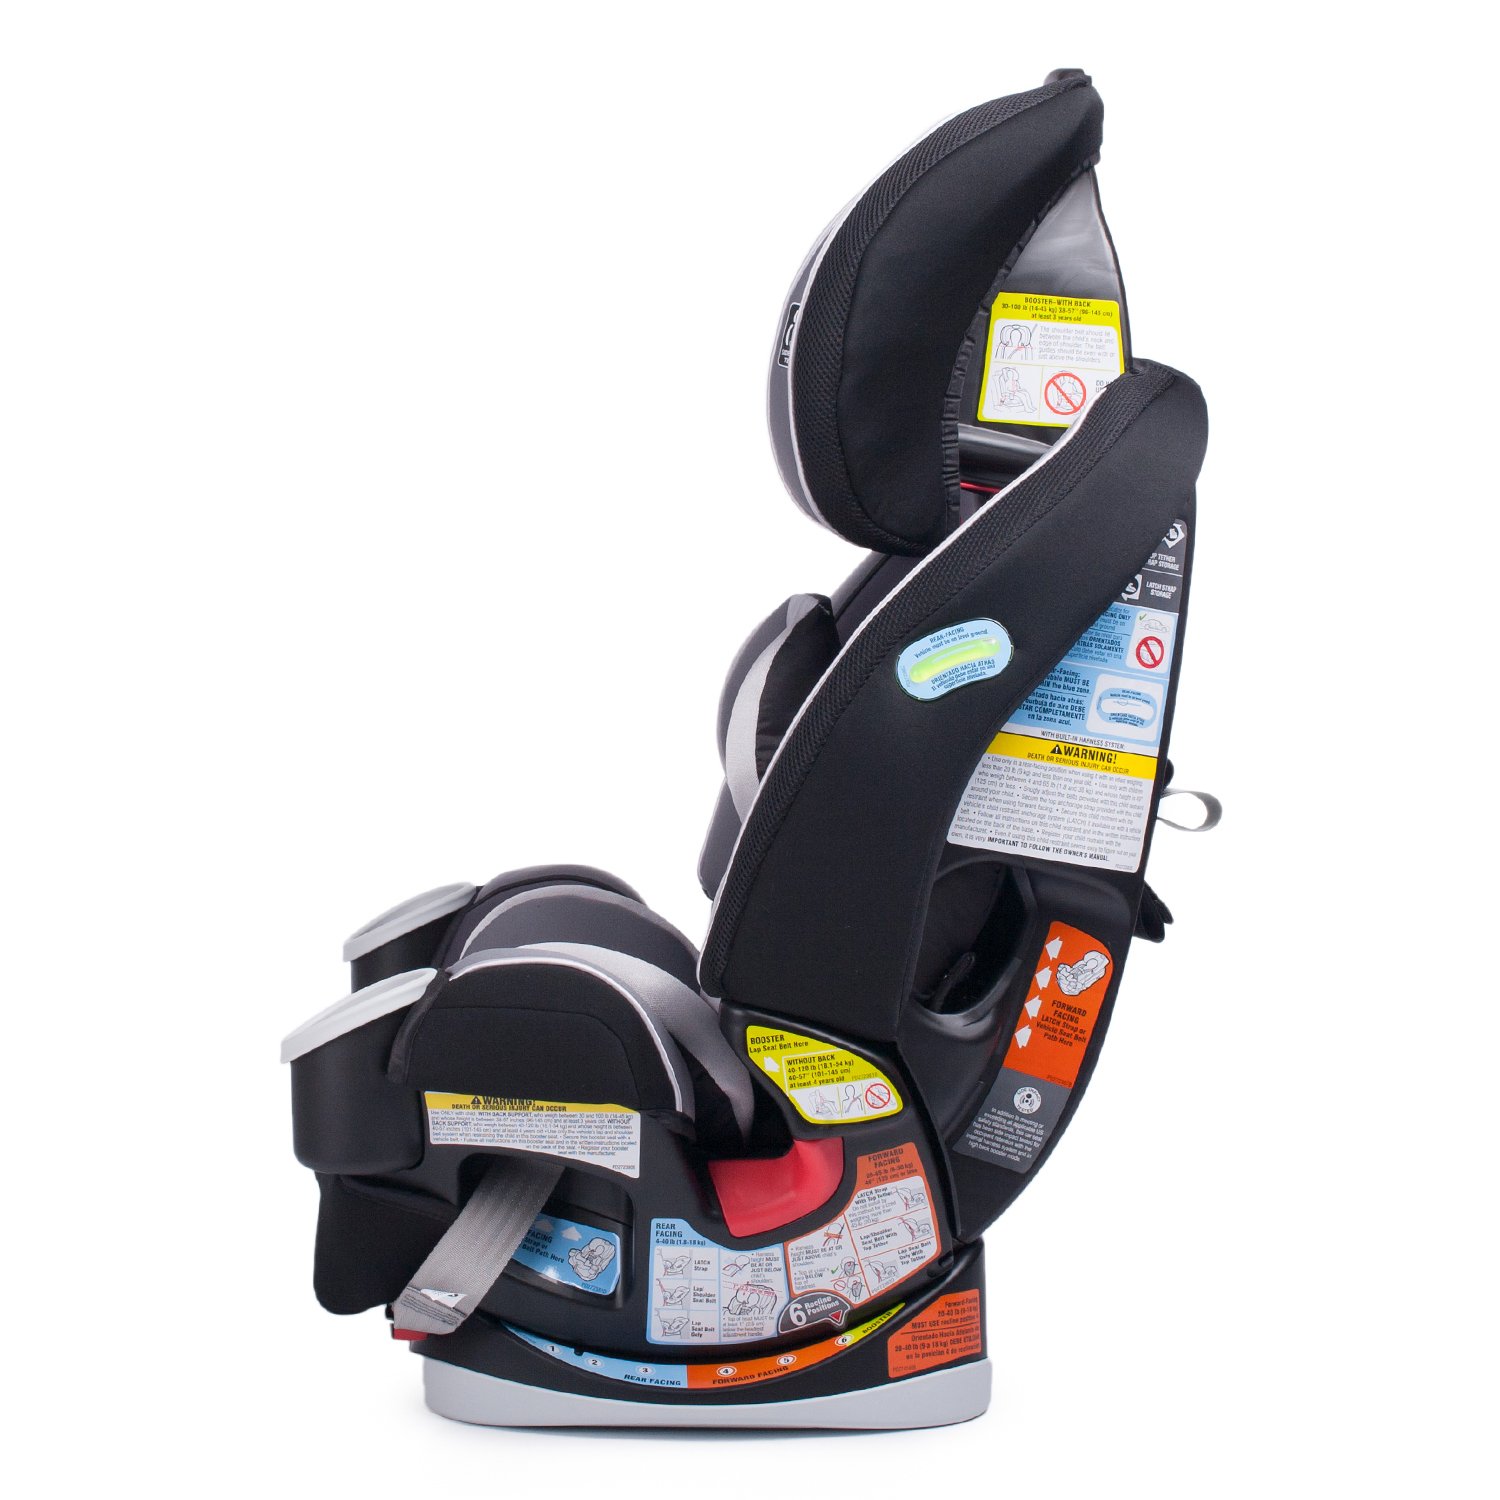
Обзорный чертёж

1 Спинка
2 Плечевые накладки
3 Направляющие ремня безопасности автомобиля
4 Подстаканник
5 Регулировка ремней автокресла (над ремнем)
6 Рычаг регулировки наклона автокресла
7 Регулировочный ремень
8 Опора наклонного положения
9 Отсек для хранения (по одному на каждой стороне)
10 Паховый ремень
11 Пряжка
12 Дополнительный вкладыш
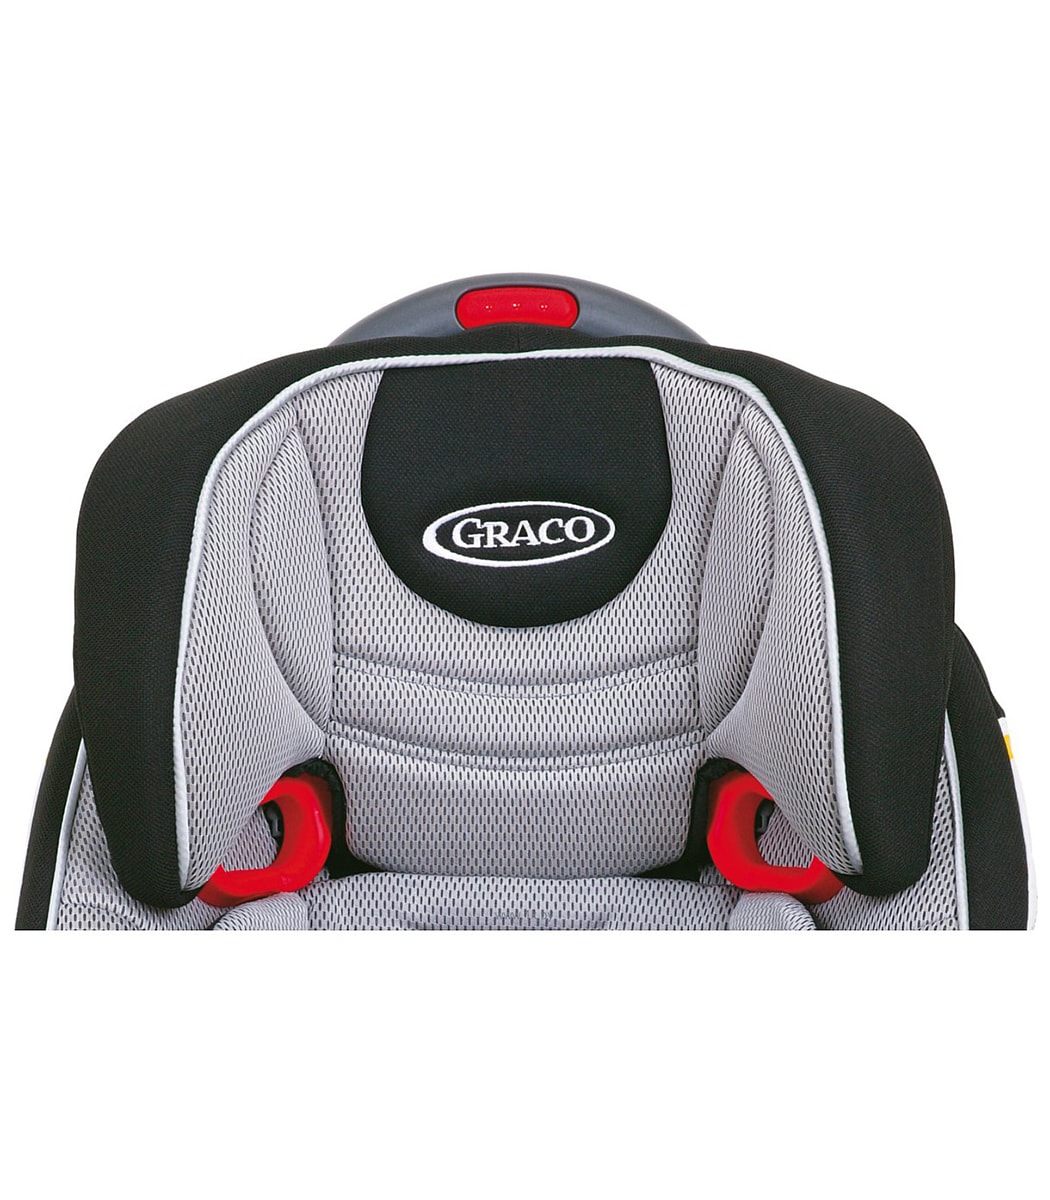
13 Направляющая плечевого ремня
14 Прорези для ремней автокресла
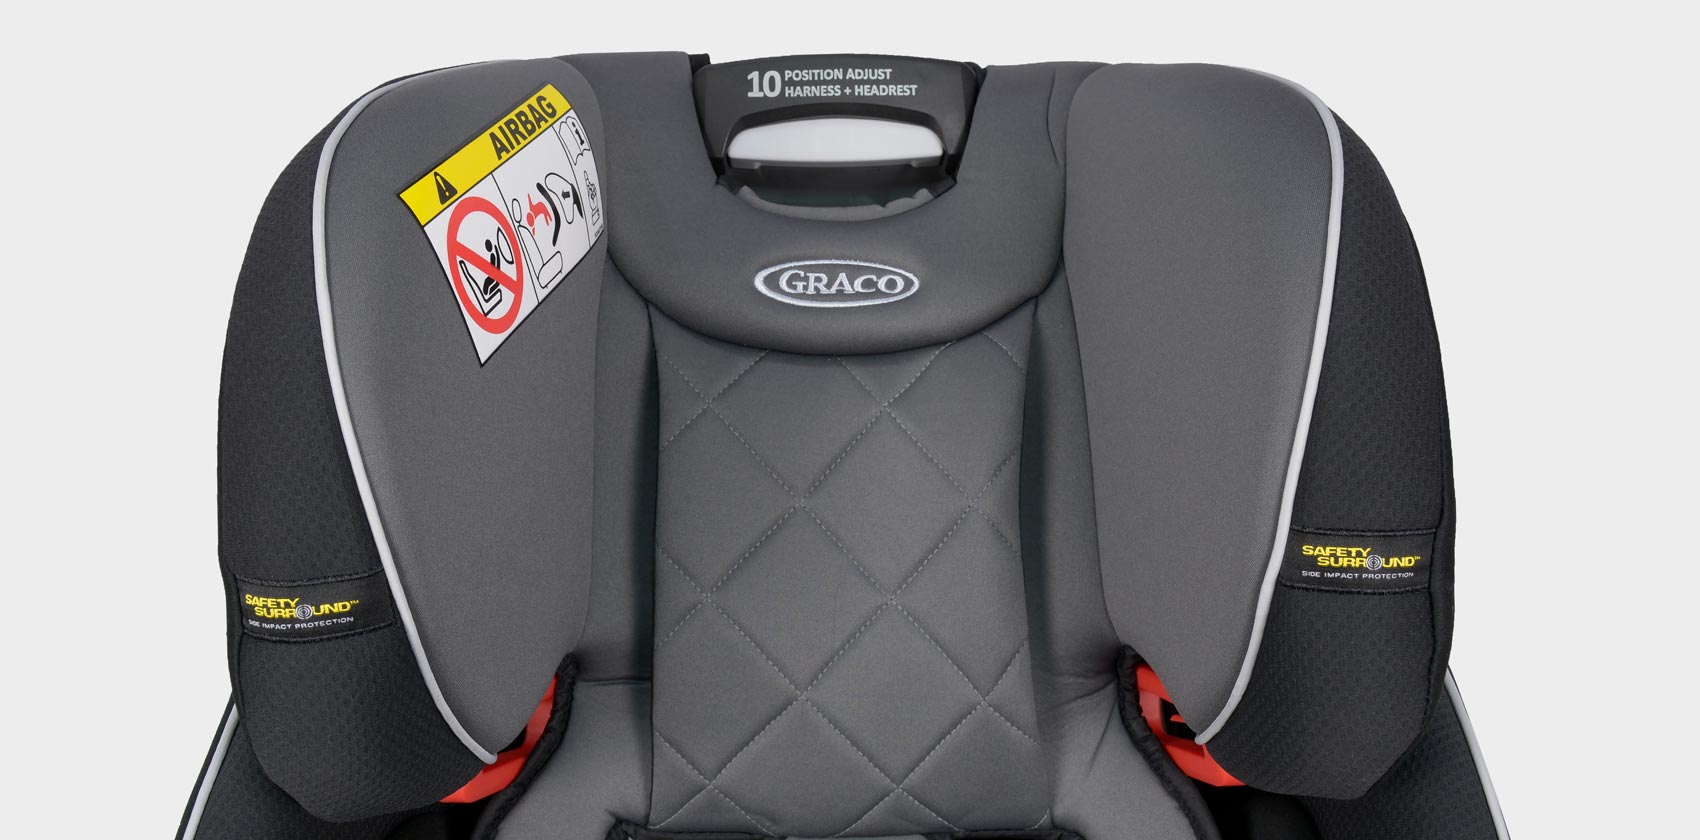
15 Поддержка головы (подголовник)
16 Кнопка регулировки высоты подголовника
17 Направляющая плечевого ремня

18 Отверстия для ремней автокресла
19 Кнопка разблокировки ремней безопасности
20 Ремни безопасности
Предупреждения для родителей и других пользователей.
Не устанавливайте и не используйте данное детское автокресло, не прочитав внимательно инструкции в настоящем руководстве и в руководстве по эксплуатации своего автомобиля.
Инструкция для автокресла Graco Nautilus
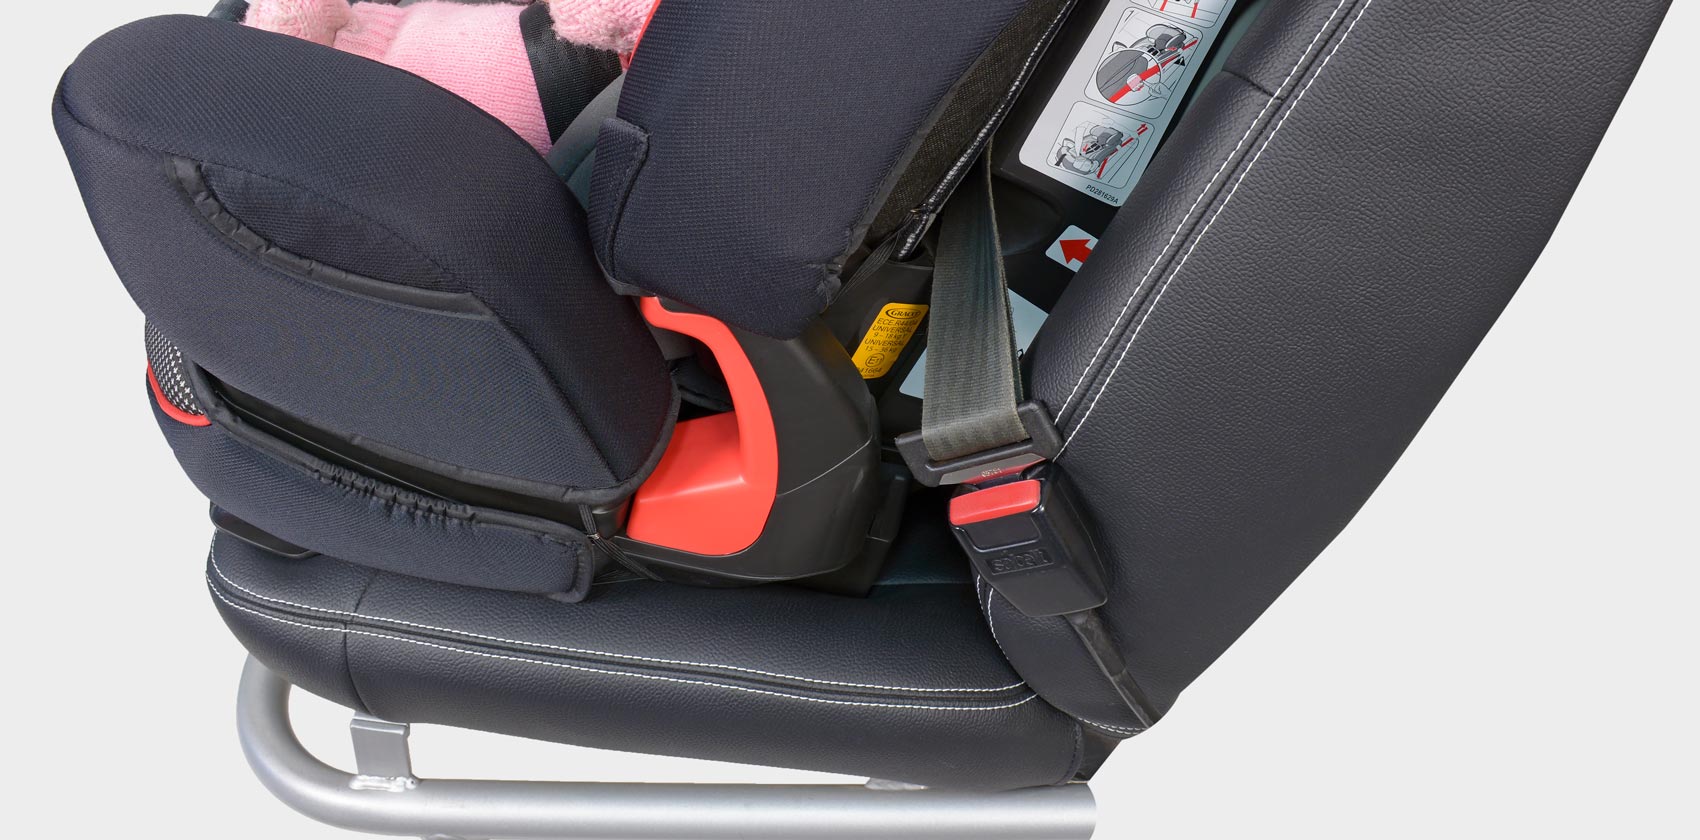
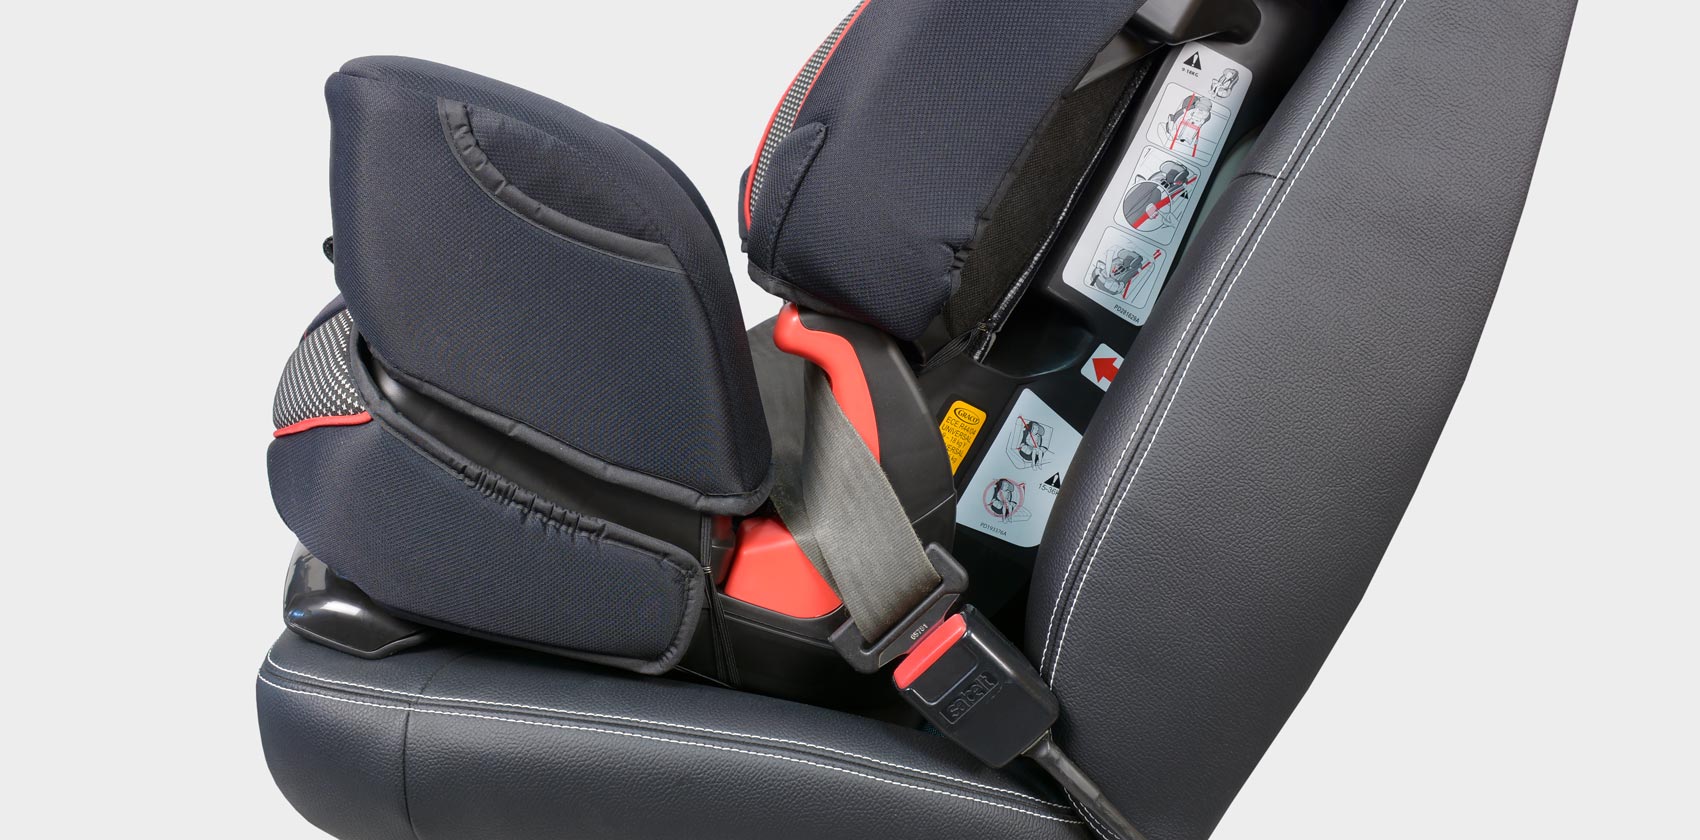
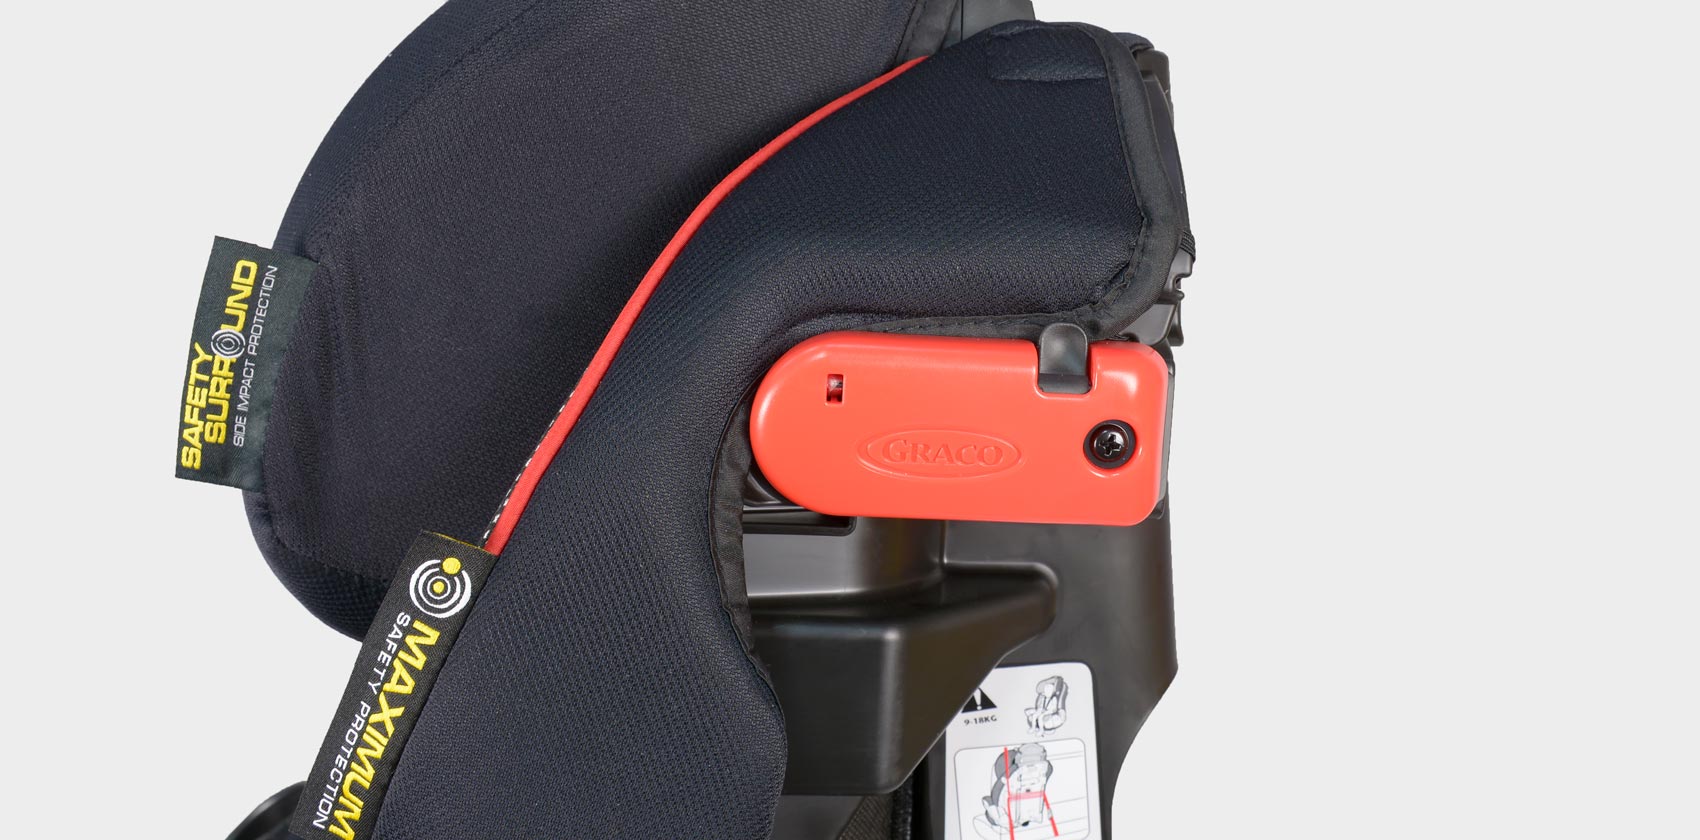
Чрезвычайно важно правильно установить детское сиденье, протянув ремень безопасности автомобиля через красные направляющие под подлокотниками. Необходимо постоянно проверять, чтобы ремни безопасности не перекручивались.
Обязательно располагайте и устанавливайте детское автокресло так, чтобы исключить риск его зажатия подвижным сиденьем или дверью автомобиля.
Неправильное использование данного детского удерживающего устройства увеличивает риск серьезной травмы или смерти при резком повороте, внезапной остановке или столкновении. Ваш ребенок может пострадать в автомобиле даже без столкновения. Внезапное торможение и резкие повороты могут привести к возникновению травм у вашего ребенка в том случае, если детское удерживающее устройство неправильно установлено или ваш ребенок не закреплен в нем надлежащим образом. Безопасность вашего ребенка зависит от правильной установки и использования данного детского удерживающего устройства.
Располагайте данное детское автокресло только по ходу движения. Даже если вам кажется, что вы сможете легко самостоятельно разобраться, как правильно использовать данное детское автокресло, очень важно Прочитать, понять и неукоснительно соблюдать инструкции.
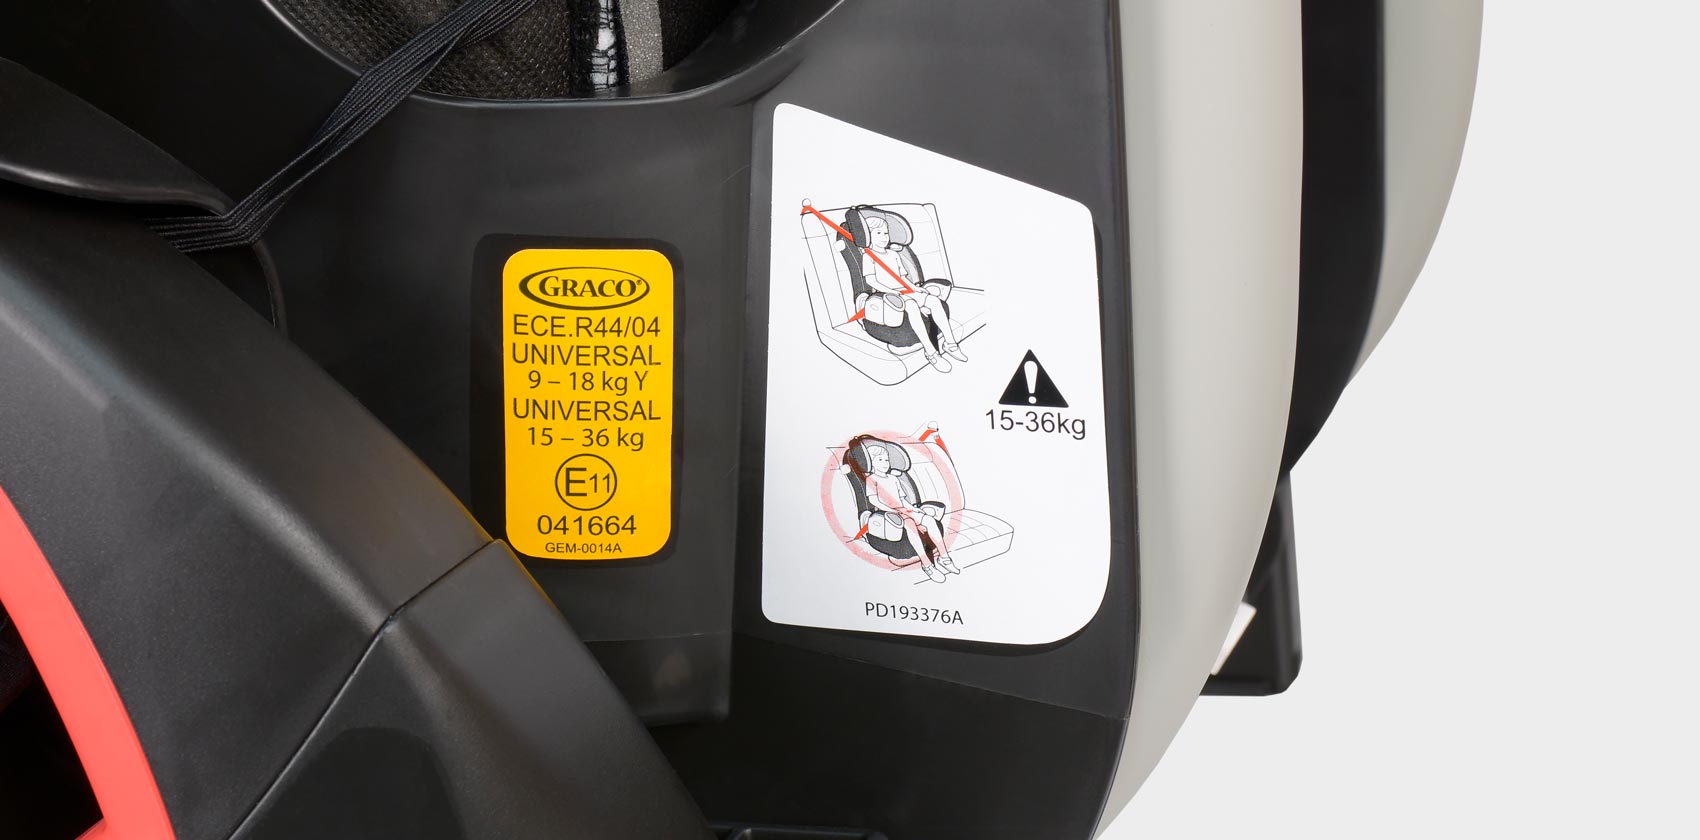
Если вам требуется помощь, обращайтесь в наш Отдел обслуживания клиентов с любыми вопросами относительно деталей, использования или обслуживания автокресла. При обращении в нашу компанию потребуется указать номер модели и дату производства автокресла, чтобы мы могли эффективно оказать вам помощь. Эти номера указаны на наклейке, расположенной на нижней части детского автокресла. Руководство следует хранить в специальном отсеке детского автокресла под рычагом регулировки наклона. Кроме того, вам необходимо прочесть руководство по эксплуатации.
Безопасность вашего ребёнка зависит от следующих факторов:
- Правильного расположения ремней безопасности по направляющим и через соответствующие отверстия.
- Правильного закрепления вашего ребенка в детском удерживающем устройстве.
- Выбора подходящего места для детского удерживающего устройства в вашем транспортном средстве.
- Правильной прокладки и закрепления ремня безопасности транспортного средства.его автомобиля.
Важная информация:
- Кресло является «универсальным» детским удерживающим устройством. Оно получило утверждение согласно ряду поправок к Правилам № 44.04 по общему применению в транспортных средствах и подходит для большинства (но не для всех) автомобильных кресел.
- Правильная установка возможна в том случае, если производитель транспортного средства указал в инструкции, что в транспортном средстве допускается установка «универсального» детского удерживающего устройства для данной возрастной группы.
- Данное детское автокресло классифицировано как универсальное по более строгим критериям, чем критерии, применявшиеся для оценки более ранних конструкций, не сопровождающихся данным уведомлением.
- В случае сомнений проконсультируйтесь с производителем или продавцом детского автокресла.
- Данное детское автокресло допускается использовать только в утвержденных автомобилях, оснащенных 3-точечными (статическими, оснащенными механизмами втягивания) ремнями безопасности, соответствующими директиве ЕЭК ООН № 16 или другим эквивалентным стандартам.
Не используйте с данным удерживающим устройством чехол сиденья от другого производителя. Для замены частей «Graco» обращайтесь только к вашему дистрибьютору.
Не используйте данное удерживающее устройство в конфигурациях, не указанных в инструкциях.
Не используйте точки нагрузки, не указанные в настоящем руководстве.
Категорически запрещается помещать данное детское автокресло на сиденье, оснащенное фронтальной подушкой безопасности.
В случае срабатывания подушки безопасности она может с большой силой ударить ребенка и детское автокресло, что может повлечь причинение тяжкого вреда здоровью или смерть ребенка. Информацию о боковых подушках безопасности и установке детских автокресел см. в руководстве по эксплуатации автомобиля. По статистике несчастных случаев дети, будучи правильно пристегнутыми на заднем сиденье автомобиля находятся в большей безопасности, чем на переднем. При установке детского автокресла в автомобиль с фронтальной подушкой безопасности для пассажира ознакомьтесь с руководством по эксплуатации автомобиля, а также с настоящим руководством пользователя детского автокресла.
Никогда не оставляйте своего ребенка без присмотра.
Никогда не оставляйте детское автокресло незакрепленным в автомобиле. Незакрепленное детское автокресло может свободно перемещаться по салону автомобиля и причинить вред здоровью пассажиров и водителя при резком повороте, внезапном торможении или столкновении. Удалите или надежно закрепите детское автокресло в автомобиле ремнем безопасности.
Не оставляйте багаж и другие предметы незакрепленными в автомобиле. При неожиданной остановке автомобиля эти предметы будут продолжать двигаться и могут причинить серьезные травмы.
После любой аварии детское автокресло необходимо заменить, так как в нем могут образоваться скрытые повреждения. Запрещается модифицировать детское автокресло, а также использовать какие-либо принадлежности или детали других производителей.
Категорически запрещается использовать детское автокресло, если отсутствуют какие-либо детали. Запрещается использовать ремни детского автокресла и ремень безопасности автомобиля с признаками порезов, износа или повреждений.
Жесткие и пластиковые детали данного детского автокресла необходимо располагать и устанавливать так, чтобы при повседневной эксплуатации автомобиля исключить риск их зажатия подвижным сиденьем или дверью автомобиля.
Детское автокресло может сильно нагреться на солнце. Контакт с нагревшимися деталями может привести к возникновению ожогов на коже ребенка. Перед тем, как посадить ребенка в детское удерживающее устройство, всегда проверяйте на ощупь температуру поверхности металлических и пластиковых деталей.
Запрещается передавать детское автокресло другим лицам без руководства по эксплуатации.
Запрещается использовать бывшие в употреблении детские автокресла и автокресла, о прошлом которых ничего не известно.
Запрещается использовать детское автокресло без закрепленных на основании подлокотников.
Детское универсальное удерживающее устройство соответствует Европейскому Стандарту R44-04 для Групп 1, 2, 3 (9-36 кг).
Уход и обслуживание:
- Продолжительное использование детского автокресла может вызвать повреждение сиденья автомобиля. Используйте полотенце или тонкое одеяло, чтобы защитить обивку.
- Металлические и пластиковые детали следует очищать слабым мыльным раствором и прохладной водой. Не допускается использование отбеливателя или моющих средств.
- Время от времени проверяйте детское автокресло на предмет износа деталей, повреждения материалов и швов. При обнаружении повреждений не пытайтесь модифицировать детское автокресло. Замените его.
- Не используйте детское автокресло без чехла.
Сборка детского автокресла.
Сборку должны производить взрослые.
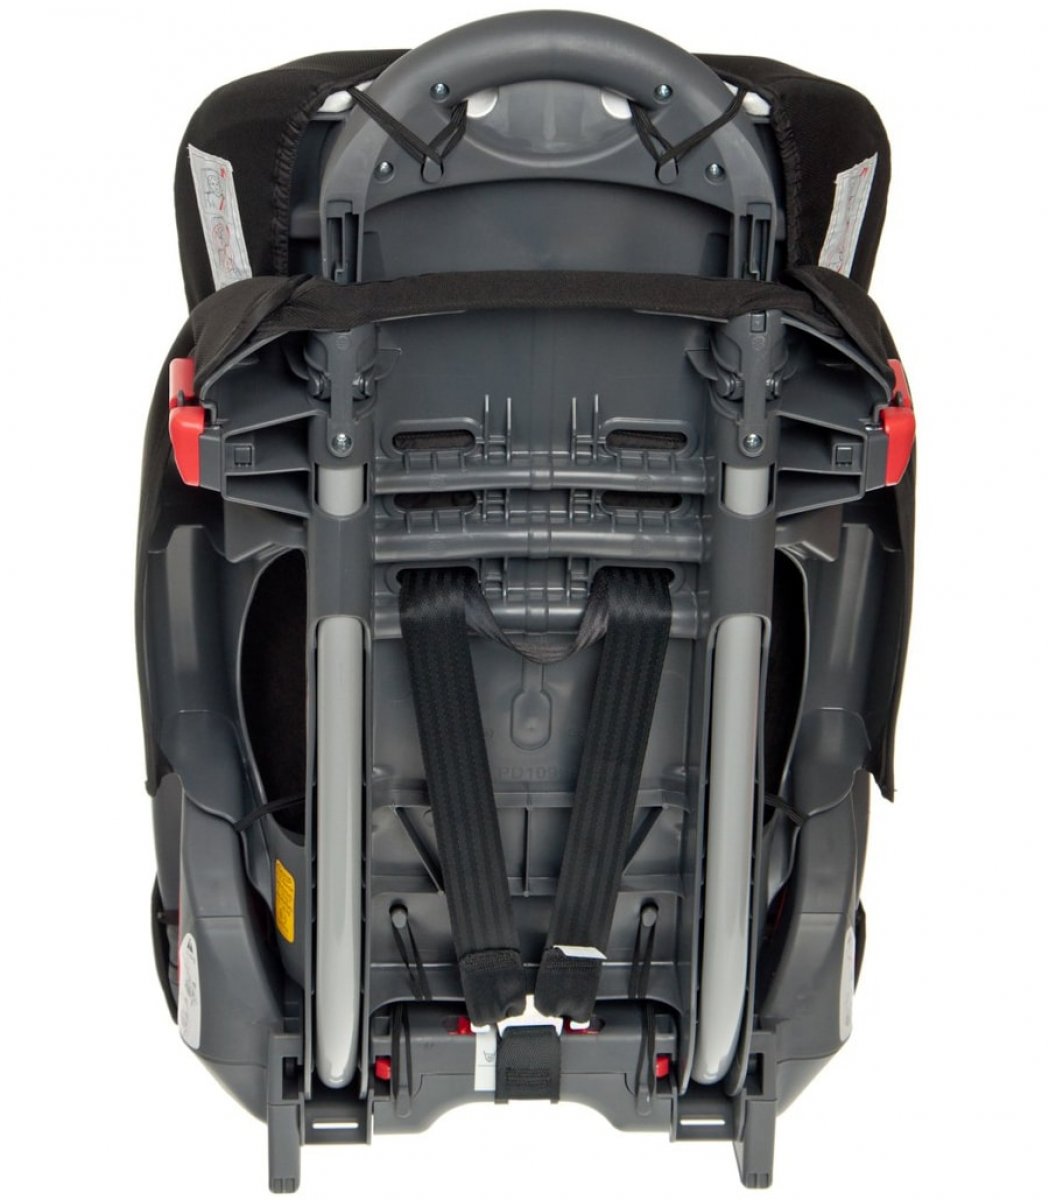
1 Положите детское автокресло на спинку. Сдвиньте ткань подкладки сиденья, чтобы открыть пазы. Удостоверьтесь, что в область пазов не попали руки, пальцы или какие-либо посторонние предметы.

2 Удостоверьтесь, что ремни автокресла надежно закреплены через Т-образные прорези фиксаторов, как это показано на иллюстрации.

3 Свободной рукой поднимите спинку сиденья так, чтобы оба фиксатора ремней зафиксировались в пазах.

4 Фиксаторы должны защелкнуться в пазах. Собранное кресло должно выглядеть как показано на иллюстрации.

5 Закрепите 4 эластичных петли подушки сиденья под сиденьем так, как это показано на иллюстрации.

6 Протяните эластичную петлю на подкладке сиденья через направляющую для ремня безопасности автомобиля на боковой стороне сиденья и закрепите петлю на крючке, как показано на иллюстрации. Повторите эту операцию с другой стороны автокресла.

7 Нажмите кнопку регулировки высоты подголовника и вставьте подголовник в прорези, как показано на иллюстрации. Подголовник защелкнется на спинке. Для облегчения доступа к прорезям может потребоваться отсоединить ленту «липучку» с обоих сторон в верхней части спинки. Используйте детское автокресло только с установленным и правильно отрегулированным подголовником.

8 На этом сборка автокресла закончена.

Использование автокресла со встроенными ремнями
9 Ваш ребёнок должен соответствовать следующим условиям:
- вес ребенка: 9–18 кг
- плечи ребенка должны быть ниже верхних прорезей для ремней автокресла. Если плечи ребенка выше, значит он уже слишком большой для встроенных ремней автокресла.

Использование автокресла без встроенных ремней
10 Ваш ребёнок должен соответствовать следующим условиям:
- вес ребенка: 15–36 кг
- плечевая часть ремня безопасности автомобиля должна облегать плечо ребенка, как показано на рисунке, а поясная часть ремня безопасности должна располагаться внизу на бедрах ребенка
- уши ребенка должны находиться ниже верхнего края детского автокресла. Если верхние края ушей ребенка находятся выше верхней части сиденья

Выбор подходящего сиденья в автомобиле для установки детского автокресла. Требования к автомобильному сиденью.
11 Дети находятся в большей безопасности, оставаясь в детском автокресле на задних сиденьях автомобиля. По возможности закрепляйте детское удерживающее устройство на центральном сиденье непосредственно за передними сиденьями. Однако это место иногда оснащено только поясным ремнем безопасности и не может использоваться, если детское автокресло используется без встроенных ремней.

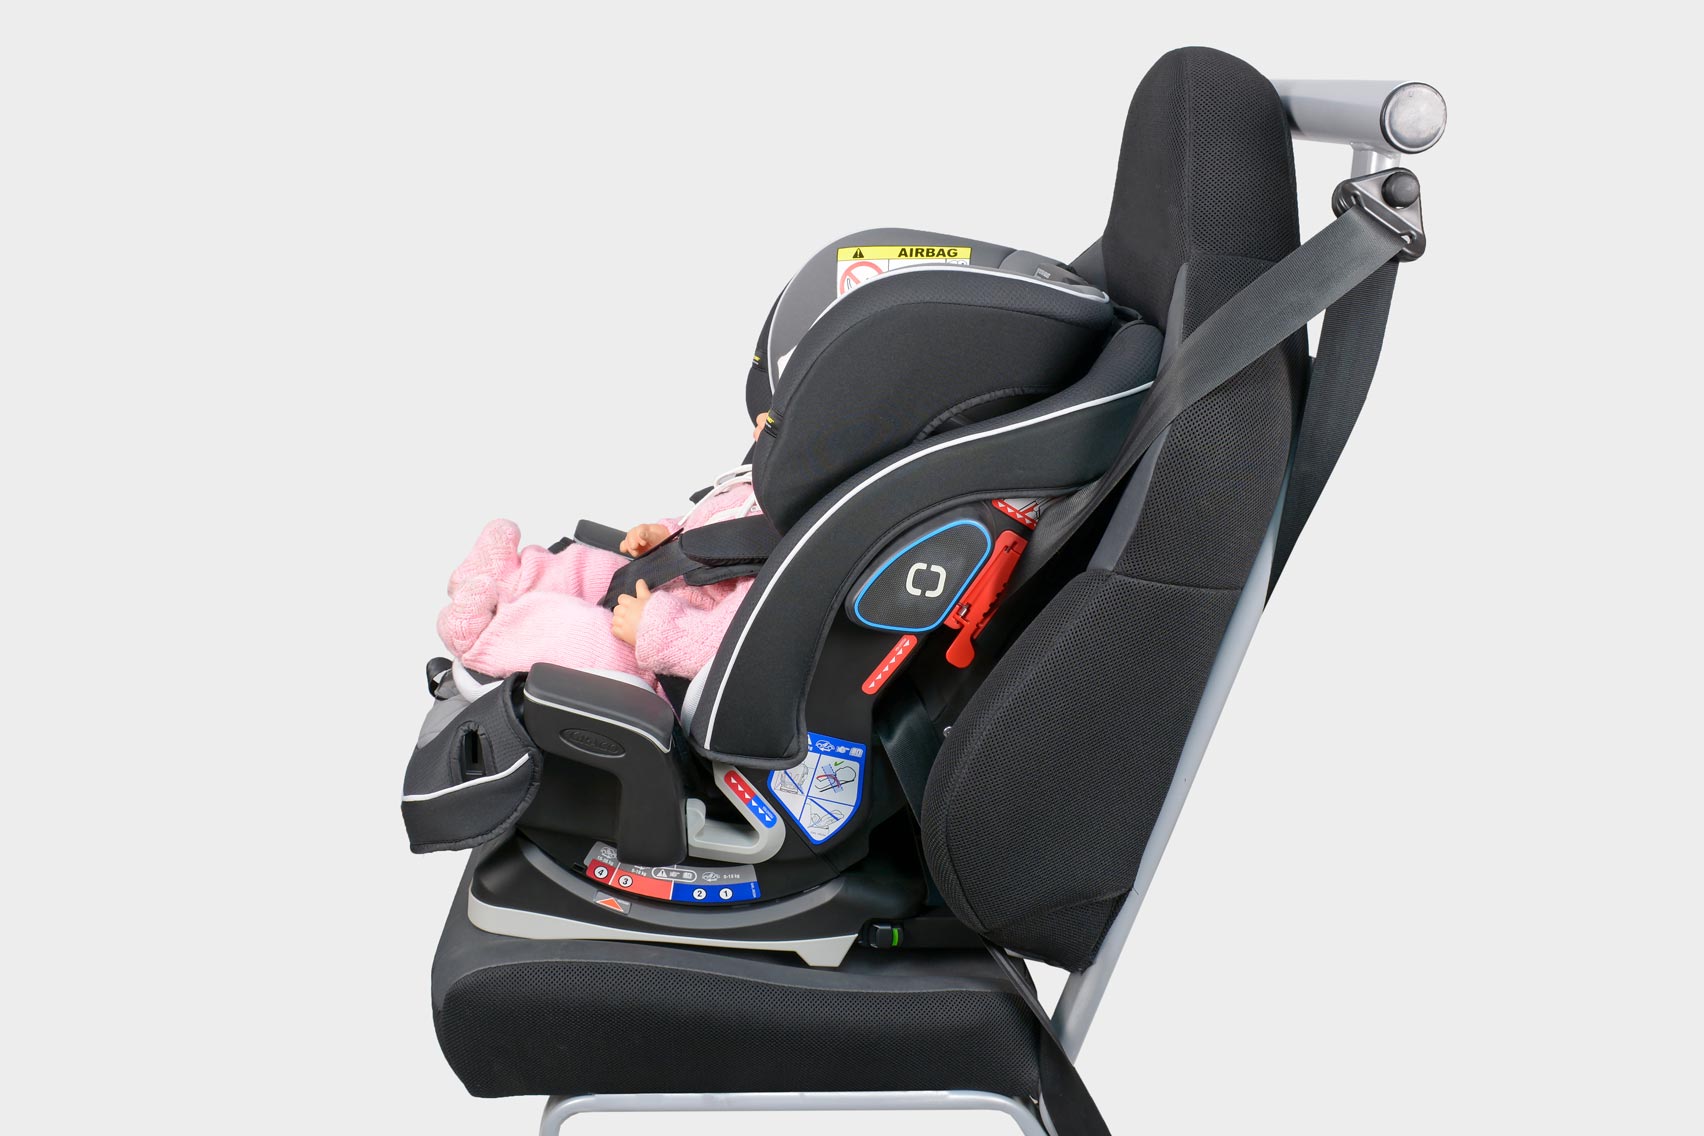
12 Используемое сиденье автомобиля должно располагаться по ходу движения.

13 Передняя часть детского автокресла не должна выступать за край сиденья автомобиля.

Передняя часть детского автокресла не должна выступать за край сиденья автомобиля.
Небезопасные системы автомобильных ремней безопасности.
Запрещается использовать какие-либо из перечисленных ниже систем для закрепления детского автокресла. Категорически запрещается использовать небезопасные системы автомобильных ремней безопасности.
14 Поясной ремень безопасности с фиксирующимся аварийным механизмом втягивания (ELR). Такой ремень не натягивается и может перемещаться — он фиксируется только в момент аварии или резкого торможения.

15 Комбинированный наплечно-поясной ремень безопасности с механизмом втягивания. Каждый ремень оснащен механизмом втягивания на одном конце и пряжкой на другом.

16 Пассивный поясной или плечевой ремень безопасности, закрепленный на двери.

17 Пассивный поясной ремень с моторизованным плечевым ремнем.

Запрещается использовать автомобильные ремни безопасности, закрепленные на двери каким -либо образом или перемещающиеся по направляющей для автоматической фиксации пассажира при закрытии двери.
18 Двухточечный поясной ремень безопасности.

Использование детского автокресла со встроенными ремнями
19 Ослабьте ремни автокресла, подняв рычаг регулировки ремней в передней части сиденья рядом с регулировочным ремнём и потянув ремни на себя.

20 Расстегните пряжку ремней автокресла.

21 Проверьте паховый ремень: установите его в позицию, расположенную как можно ближе к ребенку, но не под ним. Чтобы изменить позицию пахового ремня, продавите его через нижнюю часть детского автокресла и вытяните сверху.

22 Вставьте паховый ремень через прорезь в требуемой позиции. Во время продевания ремня через прорезь не допускайте его перекручивания. Потяните паховый ремень вверх, чтобы убедиться в его надежной фиксации.

23 Наплечные ремни автокресла должны проходить через прорези на уровне или чуть выше плеч ребёнка. Если ремни расположены правильно, переходите к пункту 26.

24 Чтобы отрегулировать ремни безопасности:
а) Поверните автокресло задней частью к себе
б) Выньте ремни из металлической соединительной пластины

25 Вытяните наплечные ремни спереди сиденья и вставьте их заново в нужные прорези.

26 Убедитесь, что ремни не перекрутились. Убедитесь, что ремни безопасности вставлены в прорези, расположенные на одном уровне. Уберите дополнительный вкладыш, если вставляете ремни безопасности не в нижние прорези.

27 Закрепите ремни металлической соединительной пластиной как показано на рисунке. Проверьте, чтобы ремни попали в пазы и не перекрутились.

28 Подтяните ремни безопасности через пазы в спинке сиденья. Убедитесь, что они не перекрутились.

- Вставьте лямки плечевых накладок в те же прорези, в которые продеты ремни безопасности
- Закрепите ремни металлической соединительной пластиной как показано на рисунке
- Закрепите плечевые накладки вокруг ремней как показано на иллюстрации
- Проверьте, чтобы лямки плечевых накладок и ремни безопасности были продеты через прорези на одном уровне
- Потяните за ремень, чтобы убедиться, что это безопасно. Не забывайте проверять положение плечевых и пахового ремня и регулировать их положение по мере роста ребёнка. Плечевые ремни должны располагаться на уровне плеч ребёнка или чуть выше
Закрепление детского автокресла
Закрепление детского автокресла в автомобиле при помощи поясного или наплечно-поясного ремня безопасности автомобиля:
29 Расположите детское автокресло вплотную к спинке автомобильного сиденья, расположенного по ходу движения.

Подголовник сиденья автомобиля не должен создавать зазор между сиденьем автомобиля и детским автокреслом.
30 Передняя часть детского автокресла не должна выступать за край сиденья автомобиля.

31 Проденьте ремень безопасности через отверстия прорезей для ремня: Для наплечно-поясного ремня Для только поясного ремня.

32 Застегните автомобильный ремень на пряжку. Проверьте, чтобы он не был перекручен. Нажми те на лапку фиксатора плечевой части ремня безопасности, как показано на иллюстрации. Вставьте ремень безопасности автомобиля в фиксатор плечевой части ремня безопасности сбоку детского автокресла.

33 Затяните ремень безопасности автомобиля. Плотно прижми те детское автокресло по центру коленом или свободной рукой. Затем потяните и затяните ремень безопасности автомобиля.

Дополнительную информацию о затягивании ремня безопасности автомобиля см. в разделе «Выбор подходящего сиденья в автомобиле для установки детского автокресла» на стр. 32 или в руководстве по эксплуатации автомобиля.
Проверка безопасности и надежности установки детского автокресла.
34 Выполняйте эту проверку каждый раз при перевозке ребенка. Поверните и потяните детское автокресло вперед и в обе стороны, чтобы удостовериться в том, что ремень безопасности автомобиля не перемещается с легкостью. Детское автокресло не должно двигаться из стороны в сторону или вперед более чем на 2,5 см (1 дюйм). Если детское автокресло закреплено слабо или ненадежно, повторите процедуру установки или выберите другое место для его установки, См. раздел «Выбор подходящего сиденья в автомобиле для установки детского автокресла» на стр. 32 или в руководстве по эксплуатации автомобиля.

35 Чтобы отсоединить ремень безопасности автомобиля от фиксатора плечевой части ремня безопасности, нажмите на кнопку фиксатора и извлеките ремень безопасности.

Фиксация ребёнка в детском автокресле.
36 Регулируйте ремни безопасности каждый раз, когда вы сажаете своего ребенка в автокресло. Избегайте громоздкой одежды, так как лишний объём мешает правильно зафиксировать ребёнка, что негативно сказывается на его безопасности.

- Посадите ребёнка в автокресло так, чтобы его спина прилегала к спинке
- Наденьте ремни на плечи ребенка и вставьте язычки в пряжку до щелчка
Проверьте, чтобы ремни не перекрутились. Убедитесь, что замки пряжки надёжно защёлкнулись, потянув за ремни вверх. Не используйте детское удерживающее устройство, если ремни не застёгиваются. Убедитесь, что плечевые накладки расположены на плечах и вниз по груди ребёнка. Не позволяйте им собираться у прорезей для ремней в спинке автокресла.
37 Затяните ремни, потянув регулировочный ремень в передней части сиденья автокресла. Убедитесь, что плечевые накладки ремней автокресла расположены прорезиненной стороной к груди ребёнка.

38 Убедитесь, что ремни лежат ровно и плотно прилегают к груди и бёдрам ребёнка. Ремни автокресла не должны быть ослаблены. Ремень должен плотно прилегать, чтобы его нельзя было оттянуть, и располагаться ровно, без провисания. Ремень не должен врезаться в тело ребенка или заставлять его принимать неестественную позу.

Удаление ремней автокресла (трансформация в группу 2-3)
39 Уберите ремни автокресла, расстегнув пряжку.

40 Поверните автокресло задней частью к себе и снимите ремни с металлической соединительной пластины, как показано на иллюстрации.

41 Удалите паховый ремень, протолкнув фиксатор ремня вверх через прорезь в нижней части сиденья.

42 Возьмитесь за пряжку пахового ремня и полностью вытащите его.

43 Потяните регулировочный ремень в передней части сиденья, чтобы зафиксировать металлическую соединительную пластину на месте . Возьмитесь за плечевые ремни и вытяните их из прорезей в подкладке сиденья.

44 Уберите вкладыш и паховую подкладку. Вытяните ремни для плечевых накладок через спинку сиденья.

45 На задней части сиденья снимите с крючков 2 эластичных петли нижней подкладки сиденья, как показано на иллюстрации.

46 Также отсоедините эластичные петли, продетые через направляющие для ремня безопасности автомобиля по бокам сиденья, как показано на иллюстрации.

47 Повторите эту операцию с другой стороны автокресла. Отведите подкладку сиденья в сторону, чтобы открыть красные кнопки в области сиденья, как показано на иллюстрации. Сдвиньте кнопки, чтобы отсоединить спинку от основания автокресла, и опустите ее в разложенное положение. Придерживайте спинку, чтобы она не упала назад и не ударилась о какие-либо предметы.

48 Снимите чехлы подлокотников, как показано на иллюстрации. Храните вкладыш, плечевые накладки на ремни, паховую подкладку и ремни автокресла в надежном месте для использования в будущем.


49 Отведите в сторону ткань подкладки сиденья, затем поднимите спинку так, чтобы оба кронштейна зафиксировались в пазах. При фиксации кронштейнов должен раздаться щелчок. проверьте, чтобы пазы не были закрыты какими-либо предметами или деталями.

50 Подоткните подкладку сиденья в зазор между спинкой и сиденьем автокресла, чтобы показались 2 эластичных петли на задней части сиденья. Закрепите 2 эластичных петли подкладки сиденья на крючках в задней части детского автокресла, как показано на иллюстрации.

51 Протяните эластичный ремешок на подкладке сиденья через направляющую дляремня безопасности автомобиля на боковой стороне сиденья и закрепите петлю на крючке, как показано на иллюстрации.

52 Повторите эту операцию с другой стороны автокресла. Для установки ремней автокресла выполните вышеприведенную процедуру в обратном порядке. Смотрите стр. 22-25.

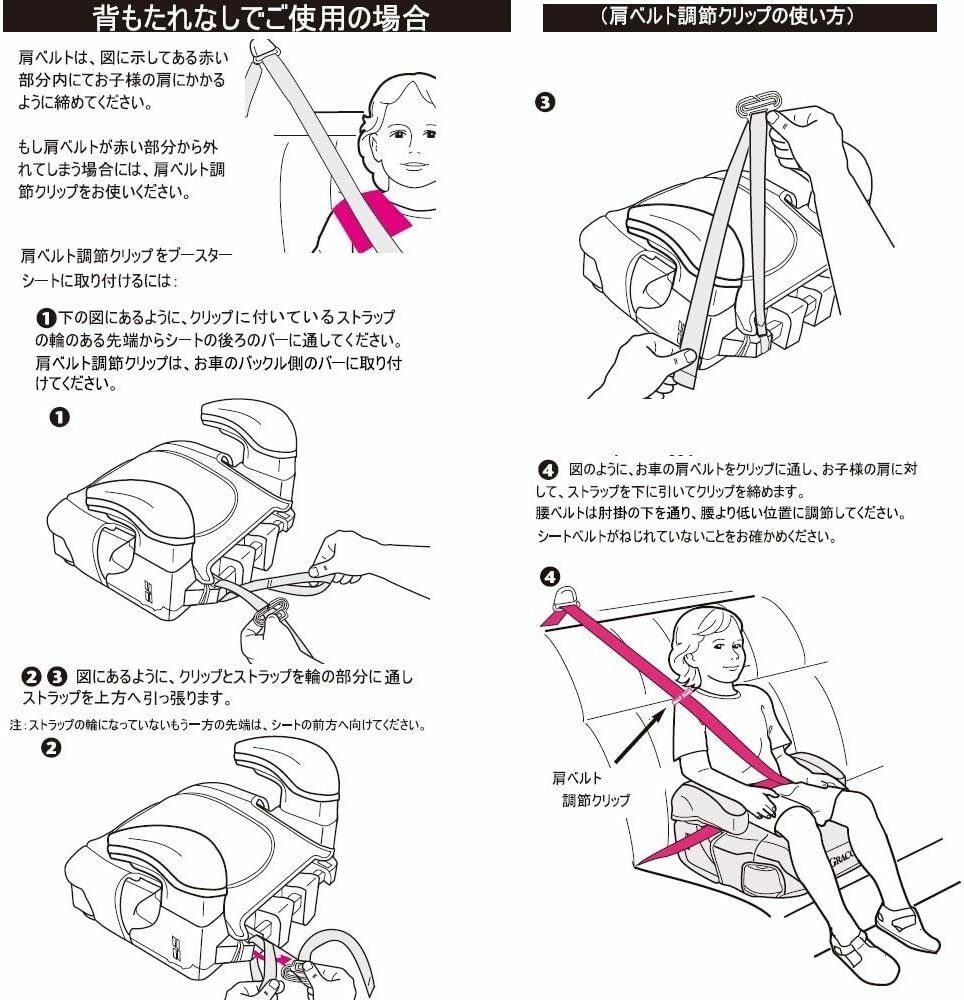
Использование детского автокресла без встроенных ремней
Предупреждение!
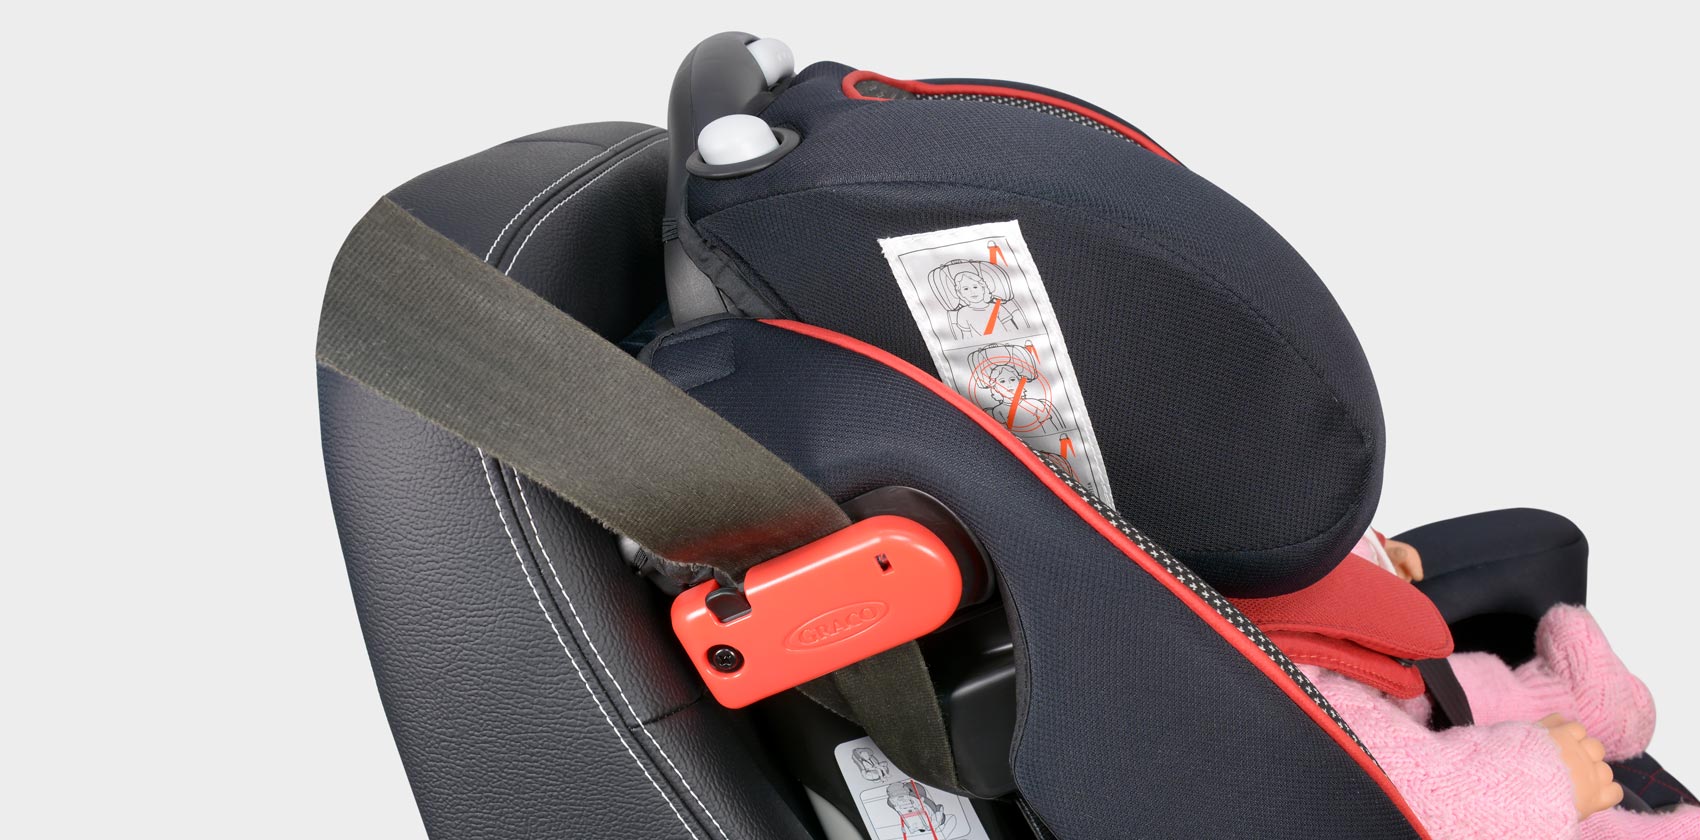
53 Для фиксации ребенка в автокресле используйте только наплечно-поясной ремень безопасности автомобиля. Ремень безопасности автомобиля должен ровно лежать на груди ребёнка и не должен быть перекручен.

54 Детское автокресло не может использоваться, если штатный ремень безопасности слишком длинный, так как он не может надёжно закрепить автокресло на автомобильном сиденье. Категорически запрещается использовать только поясной ремень, фиксирующий только бедра ребенка.

55 Плечевая часть ремня не должна быть ослаблена.

56 Не располагайте её под мышкой ребёнка. Запрещается располагать плечевую часть ремня за спиной ребёнка.

57 Поясная часть наплечно-поясного ремня безопасности должна располагаться внизу, плотно облегая тазобедренный сустав ребенка на границе с бедрами. Не допускайте, чтобы ребёнок сползал в автокресле вниз. Если не удаётся правильно зафиксировать ребёнка в автокресле ремнями безопасности, не пользуйтесь им.

58 Используйте другое детское удерживающее устройство. Не располагайте ремни безопасности поверх подлокотников автокресла.

59 Из-за подголовника сиденья автомобиля не должен образовываться зазор между автомобилем и детским автокреслом.

60 Передняя часть детского автокресла не должна выступать за край сиденья автомобиля.

Фиксация ребёнка и детского автокресла в автомобиле
Устанавливайте детское автокресло вплотную к спинке автомобильного сиденья, расположенного по ходу движения и оснащённого наплечно-поясным ремнём безопасности.
61 Ребёнок должен сидеть в детском автокресле так, чтобы спина прилегала к спинке. Пропустите наплечно-поясной ремень безопасности автомобиля через направляющую для плечевой части ремня безопасности. Застегните пряжку и подтяните плечевую часть ремня. Если ремень проходит через шею, голову или лицо ребенка, отрегулируйте подголовник, чтобы ремень был расположен на плече, отрегулировав подголовник. См. раздел «Регулировка положения подголовника».

62 Ремни автокресла не должны быть ослаблены. Ремень должен плотно прилегать, чтобы его нельзя было оттянуть, и располагаться ровно, без провисания. Ремень не должен врезаться в тело ребенка или заставлять его принимать неестественную позу.

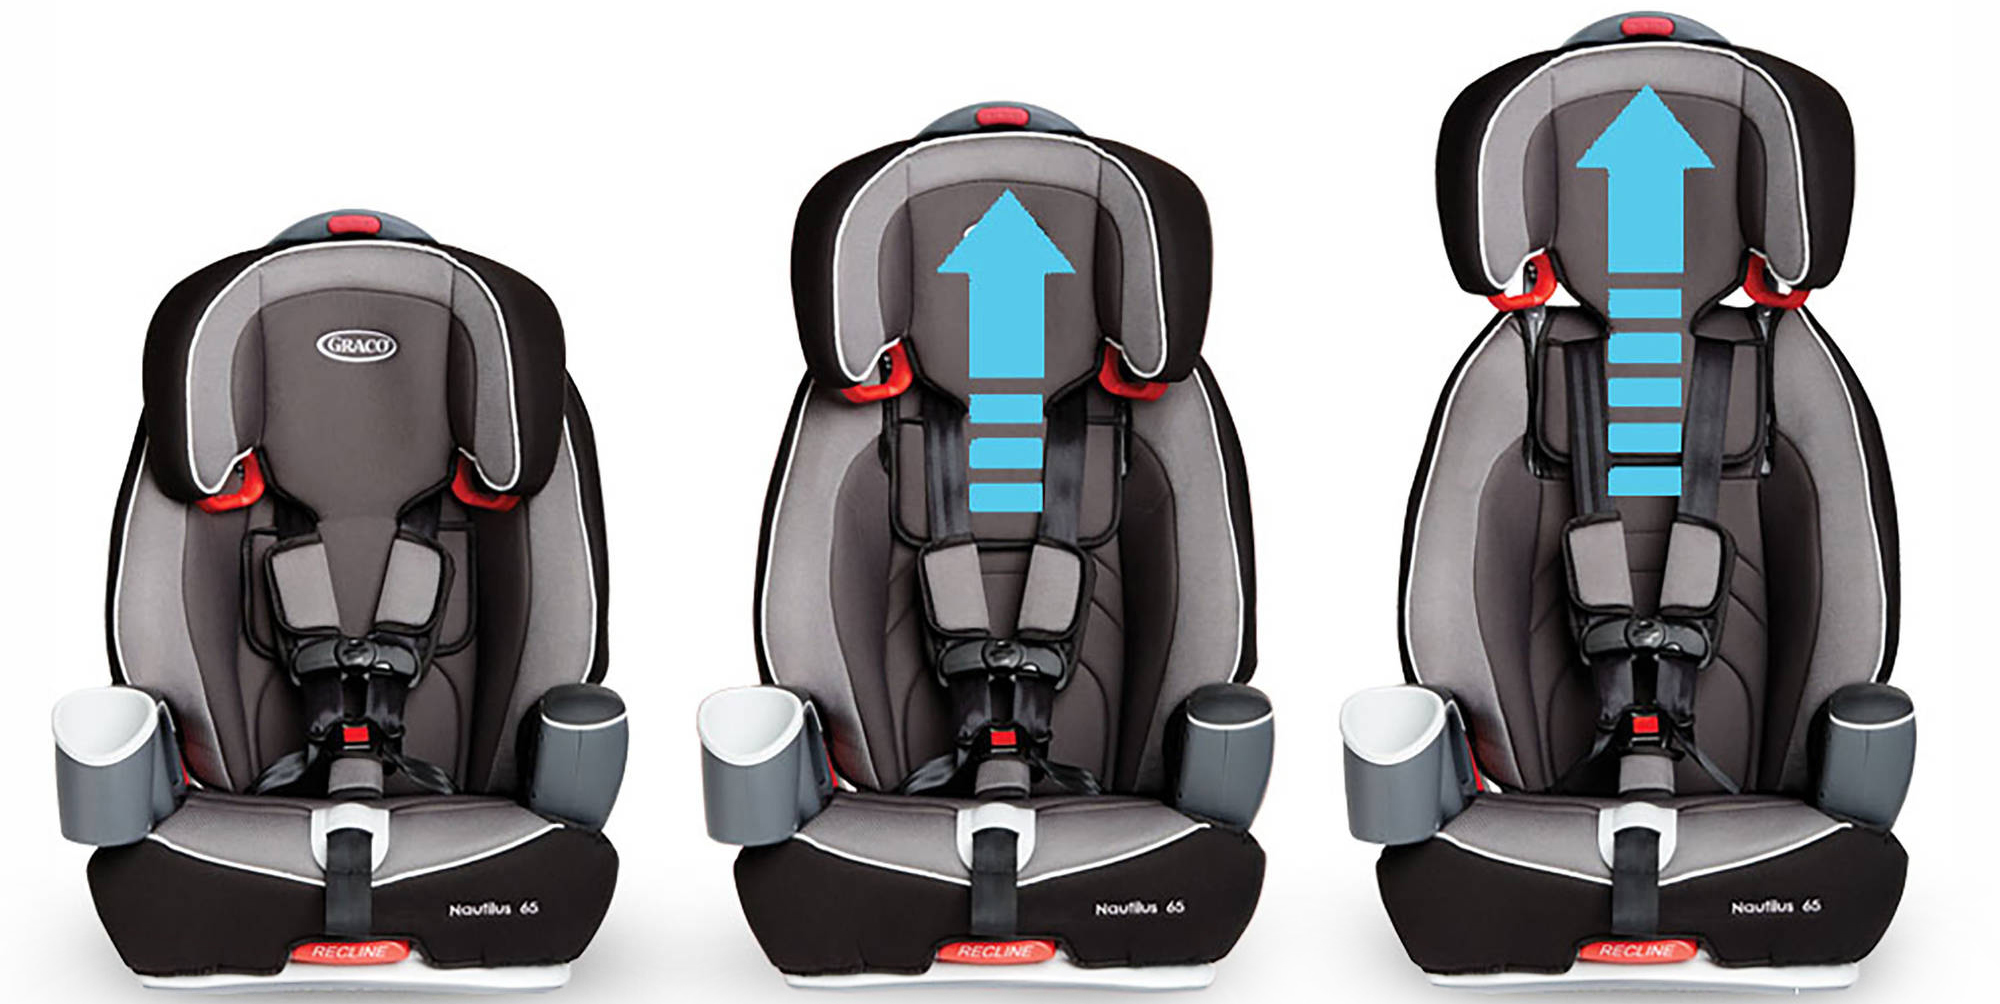
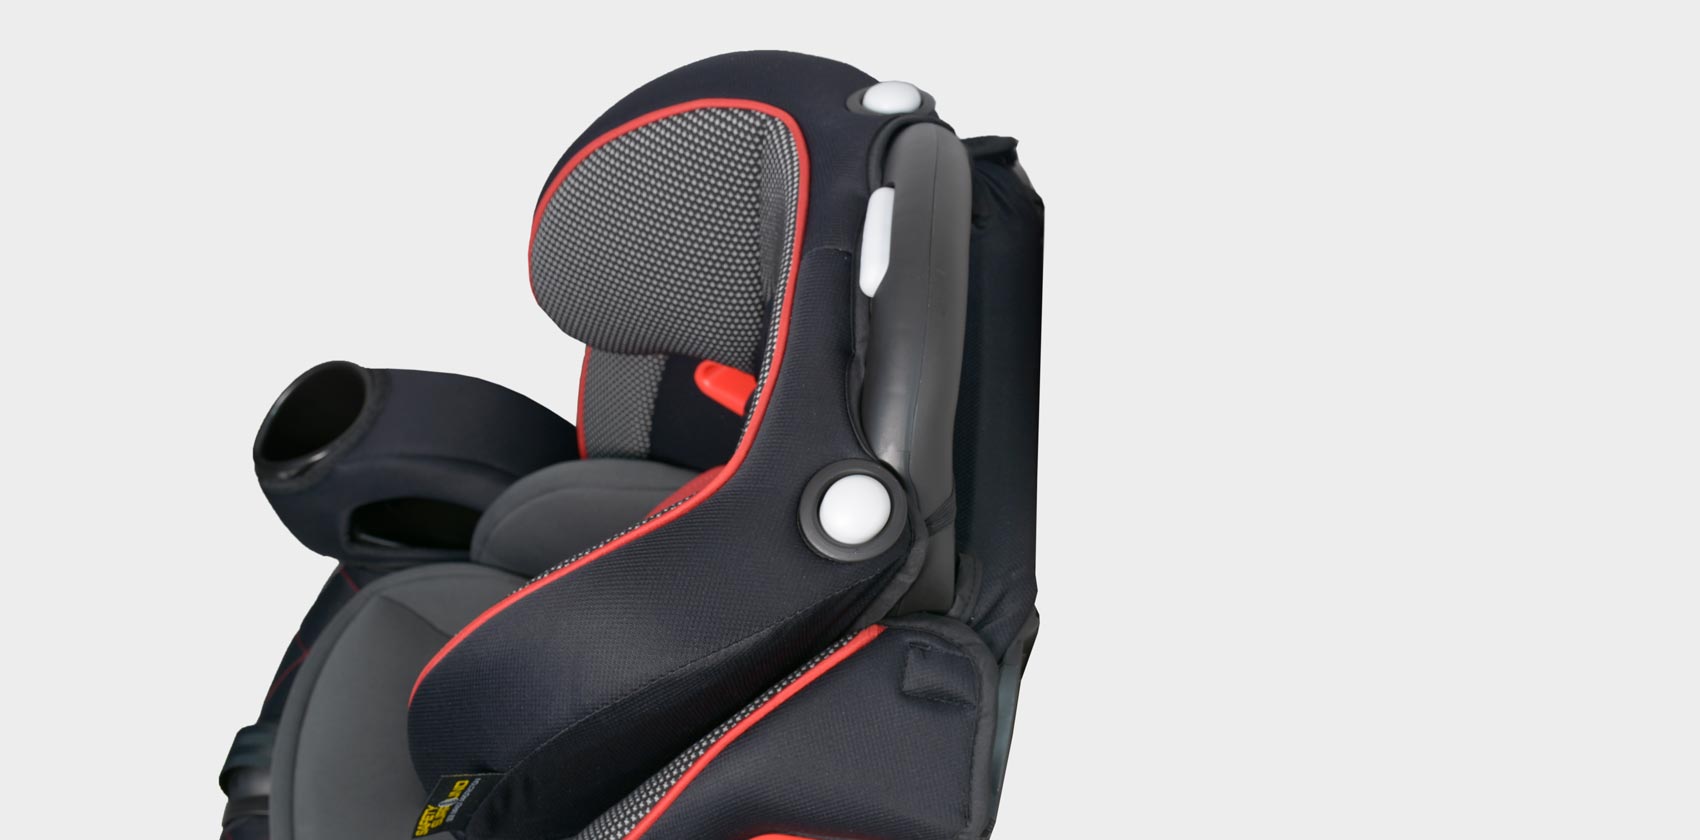
Регулировка положения подголовника
При использовании со встроенным ремнём безопасности и без.
63 Перед регулировкой высоты подголовника слегка наклоните ребёнка вперёд. Зажмите красную регулировочную кнопку в верхней части автокресла и потяните спинку вверх так, чтобы она защелкнулась в одной из 5 позиций по высоте. Чтобы опустить подголовник, зажмите красную регулировочную кнопку и опустите подголовник.

64 Убедитесь, что подголовник надежно зафиксирован в одной из 5 позиций по высоте, потянув его вверх. Направляющие для плечевой части ремня безопасности должны располагаться вровень или чуть выше плеч ребёнка, как показано пунктирной линией.

Аксессуары (для некоторых моделей)

Вкладыш и чехлы для подлокотников
1 Плечевые накладки
2 Вкладыш
3 Чехлы для подлокотников
Меры предосторожности во избежание выброса ребенка из автокресла в случае резкого торможения или аварии:
- никогда не допускайте, чтобы вкладыш сминался или комкался за спиной ребёнка;
- используйте вкладыш только до тех пор, пока встроенные ремни автокресла продеты в нижние прорези спинки.
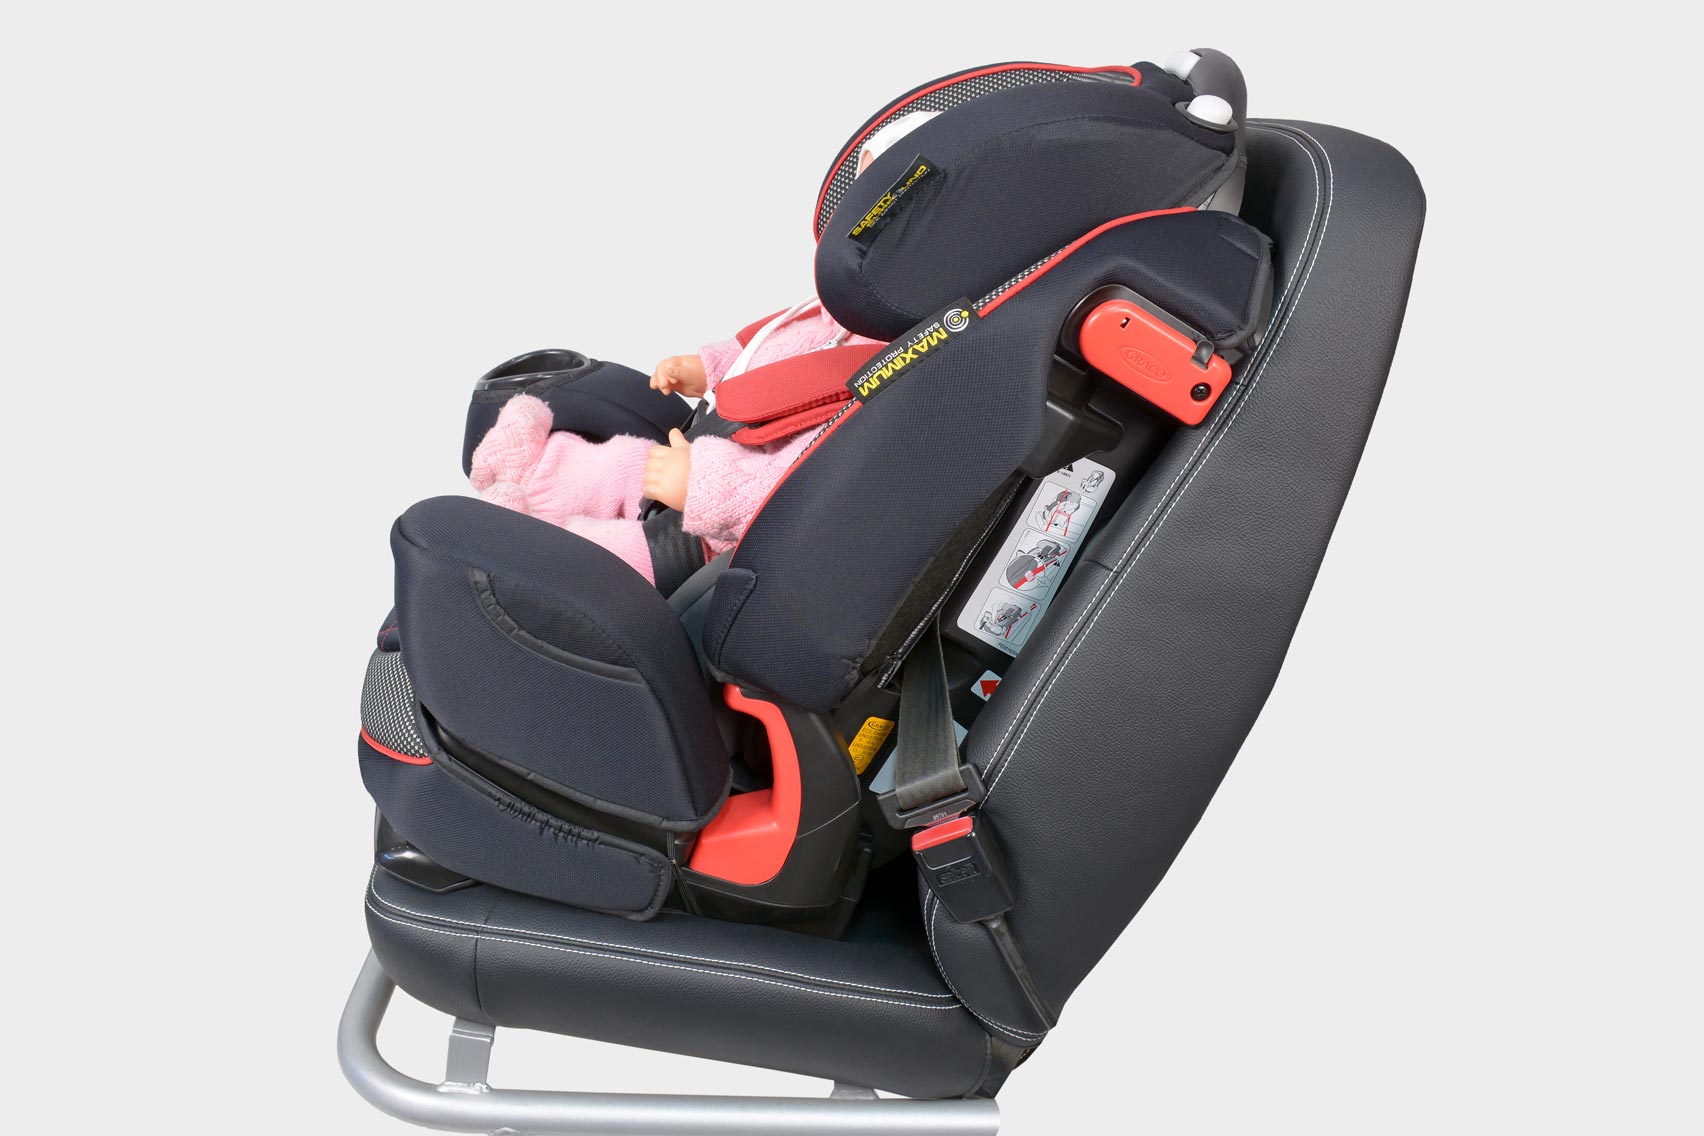
Опора для наклонного положения
Данное детское автокресло имеет 3 положения наклона.
Отрегулируйте положение опоры для наклонного положения перед установкой атокресла в автомобиль.
1 Чтобы откинуть сиденье, потяните рычаг регулировки наклона.

2 Наклоните спинку автокресла назад.

3 Выдвиньте опору как показано на иллюстрации.

4 Чтобы установить спинку автокресла в вертикальное положение, потяните рычаг регулировки наклона.

5 Наклоните спинку автокресла вперёд.

6 Задвиньте опору.

Внимание: Изменив положение уровня наклона детского автокресла, всегда проверяйте, чтобы плечевая часть ремня безопасности автомобиля была продета через направляющую и хорошо зафиксирована.
Удостоверьтесь, что детское автокресло плотно прижато к спинке сиденья автомобиля. Инструкции по затягиванию ремня безопасности автомобиля в фиксаторе плечевой части ремня см. в разделе «Закрепление детского автокресла в автомобиле».
Снятие чехла сиденья
Чехол сиденья можно очищать влажной губкой с использованием слабого мыльного раствора и холодной воды. При необходимости, чехол снимается для стирки.
Снимите ремни детского автокресла с металлической соединительной пластины (см. рис. 40). Снимите эластичные петли, как показано на иллюстрации. Машинная стирка чехла в холодной воде на деликатном режиме без отжимания. Не использовать отбеливатель.


Чтобы надеть чехол на сиденье, выполните вышеприведённые инструкции в обратном порядке.
Хранение руководства пользователя

Инструкцию по эксплуатации можно хранить в нижней части автокресла в отсеке подножки, как показано на иллюстрации.
-
Страница 1
READ THIS MANUAL Do not install or use this child restraint until you read and understand the instructions in this manual. F AILURE T O PROPERL Y USE THIS CHILD RESTRAINT INCREASES THE RISK OF SERIOUS INJURY OR DEA TH IN A SUDDEN STOP OR CRASH. Child Restraint / Booster Seat Owner ’s Manual featuring © 2014 Graco PD265372C 7/14 US[…]
-
Страница 2
2 1.0 W arnings to Parents and O t h e r U s e r s ……………….. 4 — 5 2.0 Registration Information ………….6 2.1 Register Y our Child Restraint …..6 2.2 For Recall Information ………. 6 2.3 If Y ou Need Help …………..7 3 . 0 U s e f u l I n f o r m a t i o n ……………..7 3 . 1 C e r t i f i c a t i o n………………[…]
-
Страница 3
3 T able of Contents (cont.) 1 1.0 Securing the Child Restraint in Y our V ehicle ………………… 3 3 1 1.1 Using a Child Restraint WITH a B u i l t — i n H a r n e s s ………. 3 3 1 1.2 With a V ehicle Lap or Lap/shoulder belt ……3 3 — 3 4 1 1 . 3 W i t h L A T C H ……….3 5 — 3 6 12.0 Securing Y our Child in the Child Restraint ..[…]
-
Страница 4
4 1.0 War nings to Parents and Other User s NEVER PLACE THIS CHILD RESTRAINT IN A VEHICLE SEA TING LOCA TION THA T HAS AN ACTIVE FRONT AIR BAG. ,IDQDLUEDJLQÀDWHVLWFDQKLWWKHFKLOGDQGFKLOGUHVWUDLQW ZLWK great force and cause serious injury or death to your child. Refer to your vehicle owner ’s manual for[…]
-
Страница 5
5 Failure to properly use this child restraint increases the risk of serious injury or death in a sharp WXUQVXGGHQVWRSRUFUDVK< RXUFKLOG¶VVDIHWGHSHQGVRQRXLQVWDOOLQJDQGXVLQJWKLVFKLOG restraint correctly . (YHQLIXVLQJWKLVFKLOGUHVWUDLQWVHHPVHDVWR¿JXUHRXWRQ[…]
-
Страница 6
6 2.0 Registration Infor mation 3OHDVH¿OOLQWKHDERYHLQIRUPDWLRQ7KHPRGHOQXPEHUDQGGDWHRIPDQXIDFWXUHFDQEHIRXQGRQD label on the child restraint. Fill out the prepaid registration postcard attached to the harness and mail it today . Child restraints could be recalled for safety reasons. Y ou must […]
-
Страница 7
7 3.2 Child Restraint Useful Life Please contact our Customer Service Department with any questions you may have concerning SDUWVXVHRUPDLQWHQDQFH:KHQRXFRQWDFWXVSOHDVHKDYHRXUSURGXFW¶VPRGHODQG GDWHRIPDQXIDFWXUHUHDGVRWKDWZHPDKHOSRXHI¿FLHQWO 7KHVHQXPEHU[…]
-
Страница 8
8 4.0 F eatures[…]
-
Страница 9
9 The locking clip is stored on the back of the child restraint. Y ou will need to use it with certain types of vehicle seat belts. United States Federal Motor V ehicle Safety 6WDQGDUGVKDYHGH¿QHGD system for installing child restraints in vehicles. The system is called LA TCH (Lower Anchorage and T ether for CHildren). LA TCH may ONL Y[…]
-
Страница 10
10 5.0 Assembling the Head Suppor t Adult assembly required. 1. Squeeze height adjust button and push head support into slots on the back support as shown. Head support will click into the back support. Y ou may need to unfasten the hook and loop attachment tape on both sides at the top of the back support to allow for easier access to the […]
-
Страница 11
11 2. The assembly is now complete.[…]
-
Страница 12
12 6.0 WARNINGS • DO NOT use locking clip in booster mode. $FFRUGLQJWRDFFLGHQWVWDWLVWLFV CHILDREN ARE SAFER WHEN PROPERL Y RESTRAINED IN REAR VEHICLE SEA TING POSITIONS, RA THER THAN FRONT SEA TING POSITIONS. For a YHKLFOHZLWKDIURQWSDVVHQJHUDLUEDJUHIHUWR your vehicle owner ’s manual as well[…]
-
Страница 13
13 • NEVER LEA VE A CHILD RESTRAINT UNSECURED IN YOUR VEHICLE. An unsecured child restraint can be thrown around DQGPDLQMXUHRFFXSDQWVLQDVKDUSWXUQ sudden stop or crash. Remove it or make sure that it is securely belted in the vehicle. If not using LA TCH and tether , make sure LA TCH and tether connectors are properly s[…]
-
Страница 14
14 F AILURE TO USE CHILD RESTRAINT IN A MANNER APPROPRIA TE FOR YOUR CHILD’S SIZE MA Y INCREASE THE RISK OF SERIOUS INJUR Y OR DEA TH. Instructions for the use of this child restraint differ greatly depending on the size of your child. Be sure you are using the child restraint in the correct mode and with the correct features for your child. 7.0 […]
-
Страница 15
15 7.2 WITHOUT Built-in Har ness Y our child must meet all requirements: • Weight: 30 to 100 lb (14 to 45 kg) • Height: 38 to 57 in. (96 and 145 cm) in height • approximately 3-10 years of age • the shoulder belt MUST lie across child’s shoulder as shown and the lap portion of the belt is positionned low on the child’s hips. • Child?[…]
-
Страница 16
16 7.3 WITHOUT Back Suppor t Y our child must meet all requirements: • weigh between 40 and 100 lb DQGNJ • and are between 40 and 57 in. DQGFPLQKHLJKW • approximately 4-10 years of age • the shoulder belt MUST lie across child’s shoulder as shown and[…]
-
Страница 17
17 8.0 Choosing an Appr opriate V ehicle Sea t Location 8.1 V ehic le Seat Location R equirements Some seating positions in your vehicle may not be safe for this child restraint. Some vehicles do not have any seating positions that can be used safely with the child restraint. If you are not sure ZKHUHWRSODFHWKHFKLOGUHVWUDLQWLQ[…]
-
Страница 18
18 8.2 V ehicle Sea t Belt Requirements 8.3 SAFE V ehicle Sea t Belt Systems MANY SEA T BEL T SYSTEMS ARE NOT SAFE T O USE WITH THE CHILD RESTRAINT . THE VEHICLE SEA T BEL T MUST BE DESIGNED TO HOLD THE CHILD RESTRAINT TIGHTL Y A T ALL TIMES. Pay careful attention to these systems; some of the seat belts that DUHQRW VDIH WRXVH ORRN?[…]
-
Страница 19
19 8.4 F or Built-in Har ness Onl y • Lap Belts — Manually Adjusted :KHQEXFNOHG WKH EHOWLV WLJKWHQHG manually by pulling on the excess belt. • Lap Belts with Automatic Locking Retractor (ALR) The automatic locking retractor will not permit the lap belt to lengthen once it is buckled. T ighten the belt by feeding the bel[…]
-
Страница 20
20 8.5 W ith OR W ithout Built-in Har ness • Combination Lap/Shoulder Belt with Locking Latch Plate 2QFHLW LV EXFNOHGWKLV WSHRI EHOWKDV D latchplate that will not allow the lap portion of the belt to loosen. Belt is tightened by pulling hard on the shoulder portion of the vehicle belt while pushing down hard on t[…]
-
Страница 21
21 8.6 T o Install Locking Clip 1. T ighten the buckled belt by pushing down hard on the child restraint and pulling hard on the shoulder belt. :KLOH SXVKLQJ GRZQRQ VHDWSLQFK WKHWZR VWUDSV WRJHWKHUEHKLQG WKHEXFNOH WRQJXH 8QEXFNOH the belt without allowing it to slip. 3. Attach locking clip[…]
-
Страница 22
22 8.7 UNSAFE V ehicle Belt Systems • Lap Belts with Emergency Locking Retractor (ELR) This lap belt stays loose and can move until it locks in a crash or sudden stop. DO NOT USE ANY OF THE FOLLOWING SYSTEMS TO SECURE THE CHILD RESTRAINT . LA TCH can be used IN PLACE OF the following unsafe belt systems if your vehicle is equipped with LA TCH anc[…]
-
Страница 23
23 • Passive Restraint — Lap Belt with Motorized Shoulder Belt DO NOT use vehicle belts that are attached to the door in any way or that move along a track to automatically surround the passenger when the door is closed. • Lap Belts Forward of Seat Crease Vehicle seat belts located forward of seat crease may not securely hold child restraint. C[…]
-
Страница 24
24 United States Federal Motor V ehicle Safety Standards have defined a system for installing child restraints in vehicles. The system is called LA TCH . LA TCH stands for: L ower A nchors and T ethers for CH ildren. LA TCH in the vehicle consists of a top tether anchor point and two lower anchor points. Some vehicle owner manuals use the term ISOF[…]
-
Страница 25
25 V ehicle T op T ether Anchor Points V ehicle Seat Crease T ypical seat in a passenger vehicle. Other vehicle types may have different LA TCH locations. V ehicle Lower Anchor Points See your vehicle owner ’s manual for exact locations, anchor identification, and requirements for use with a child restraint.[…]
-
Страница 26
26 9.2 LA TCH System LA TCH consists of a permanently attached lower anchor belt and a top tether strap. ONL Y use LA TCH in a seating position recommended by vehicle manufacturer . LA TCH lower vehicle anchor points are defined as 1 1 in. (28 cm) from the center of one LA TCH anchor to the center of another LA TCH anchor . If allowed by your V ehi[…]
-
Страница 27
27 10.0 Using Child R estr aint WITH Built-in Har ness F AILURE TO PROPERL Y ADJUST THE HARNESS STRAPS FOR YOUR CHILD INCREASES THE RISK OF SERIOUS INJUR Y OR DEA TH IN THE EVENT OF A SHARP TURN, SUDDEN STOP OR CRASH. Snugly adjust the belts provided with this child restraint around your child. A snug strap should not allow any slack. It lies in a […]
-
Страница 28
28 3. Unbuckle harness straps . 4. Check the crotch strap: Choose the position that is closest to but not under your child. 7 R FKDQJHFURWFK VWUDSSRVLWLRQ SXVK FURWFK belt up through the bottom of the child restraint and grab it from the top to pull out . Reinsert crotch strap in the desired position. Make sure c[…]
-
Страница 29
29 5. The harness straps must go into the slots even with or just above the shoulders . If straps are in proper slots go to page 33. 6 . T o adjust harness straps: D7XUQVHDW DURXQGVR RXZLOO KDYHDFFHVV WR the rear of the seat. b) From the rear of the seat remove straps from metal junction plate . […]
-
Страница 30
30 7. Pull strap ends through slots at front of seat ¡ and reinsert them in the desired slots ¢ . Check that the straps are not twisted. MAKE SURE harness straps are inserted into the same slots on each side of the seat. Remove body support when not using harness in the lowest slot position. ¢ ¡[…]
-
Страница 31
31 8. Use plastic strap guides as a guide to feed the harness up over the red rollers. Make sure to feed straps OVER red rollers and plastic strap guides . Make sure that the tether strap does not interfere when changing the harness strap height positions. 9. If the straps are not fed OVER WKHUHG UROOHUV WKHDVVHPEO LV incorrec[…]
-
Страница 32
32 11 . Check that the straps are inserted at the same level. Pull on harness to make sure it is se cu r e . REMEMBER to check the shoulder straps and crotch strap position as your child grows and move them to the next position when necessary . The harness straps must go in the slots even with or just above the shoulders. 13 13[…]
-
Страница 33
33 11.0 Securing the Child R estr aint in Y our V ehicle 11.1 Using a Child R estr aint WITH a Built-in Har ness Lower anchors must be stored when using vehicle belt. See Section 19.1, Storing LA TCH, page 57 . 1. Place the child restraint firmly against the back of a forward-facing vehicle seat. 2. Thread the seat belt through the belt slot openin[…]
-
Страница 34
34 4. Tighten vehicle seat belt Push down hard with your knee or free hand in the middle of the child restraint . Then pull and tighten the vehicle belt. For more information on how to tighten the belt for your seat belt system VHH Section 8.0 &KRRVLQJDQ$SSURSULDWH9HKLFOH6HDW /RFDWLRQ SRU RXU[…]
-
Страница 35
35 11.3 W ith LA TCH NOTE: Some vehicle manufacturers have lower maximum weight ratings for LA TCH DQFKRUV VRRX must consult your vehicle owner’s manual or call the vehicle manufacturer to confirm the limits on your vehicle’s LA TCH anchors. 1. Unhook LA TCH from storage bars on the sides of WKHVHDW )RU HDVHRI[…]
-
Страница 36
36 6. NEVER put two LA TCH connectors on one vehicle LA TCH anchor unless specifically allowed by the vehicle manufacturer . 7. All LA TCH seating positions have tether anchors. Secure the top of the seat using the tether strap. See Section 19.0 Using WKH7 HWKHU SDJH 8. Safety Check for Secure Installation Perform this te[…]
-
Страница 37
37 12.0 Securing Y our Child in the Child R estr aint • ADJUST THE HARNESS SYSTEM SNUGL Y EVER Y TIME you place your child in the child restraint. • Avoid bulky clothing. 1. Place child in child restraint with child’s back flat against back of car seat. 2. Place harness straps over child’s shoulders and insert tongues into buckle until they[…]
-
Страница 38
38 3. Fasten chest clip . Position chest clip at PLGGOHRI FKLOG¶VFKHVW OHYHOZLWK armpits. 4. T ighten the harness straps by pulling the adjustment strap on the front of the seat . 5. Make sure straps are flat and snug against child’ s shoulders and thighs. Y ou should not be able to pinch the harness straps. A sn[…]
-
Страница 39
39 13.0 Har ness Remo val or Re-a ttaching Har ness 1. Remove harness straps. Open chest clip and harness buckle . 2. Face the rear of the seat and remove the belt straps from metal junction plate as shown . 3. Remove crotch strap by pushing the strap retainer RQ ERWWRPRI VHDW XSWKURXJK VORW […]
-
Страница 40
40 4. Grab the crotch strap buckle and pull it completely out . 5. Pull on the adjustment strap on the front of the seat to lock the metal junction plate into place. 6. Grab hold of the shoulder straps and pull them out of their respective slots on the seat pad. Remove body support and crotch pad. […]
-
Страница 41
41 2Q WKH UHDURI WKHVHDW GHWDFK ORZHU VHDW pad elastic straps from hooks as shown in . 8. Also detach the elastic straps that are threaded through the vehicle belt guides on the sides of the seat as shown in . Repeat on other side. 9. Pull the seat pad out of the way to reveal the red buttons as […]
-
Страница 42
42 10. Remove harness straps from arms as shown in ¢ . 6WRUHWKH ERG VXSSRUWKDUQHVV FRYHUVFURWFK pad cover and harness straps in safe place for future use. 1 1. Move seat pad fabric out of the way then raise seat back so that both arms LOCK into the gutters . Y ou should hear a CLICK when the arms lock into the gutters. […]
-
Страница 43
43 12. T uck seat pad in between the gap of the back support and seat area of the booster seat to allow 2 elastic straps to show at the rear of the seat . 13. Attach 2 seat pad elastic straps onto the hooks on the rear of the child restraint as shown in . 14. Pull elastic strap on the seat pad through the vehicle belt guide on side of seat and atta[…]
-
Страница 44
44 14.0 Using Y our Child Restraint WITHOUT Built-in Har ness W ARNING! Use only the vehicle lap and shoulder belt system when restraining the child in the booster seat. LA TCH will not secure your child in the booster seat . V ehicle belts MUST lie flat against child and MUST not be twisted. NEVER use a vehicle lap-only belt across front of ch[…]
-
Страница 45
45 DO NOT use shoulder belt loose or positioned under arm . DO NOT place shoulder belt behind child’s back . Lap portion of lap/shoulder belt MUST be low DQGVQXJ RQ KLSVMXVW WRXFKLQJWKLJKV DO NOT allow child to slide down in booster seat . If child will not keep vehicle belt properly SRVLWLRQHG DO NOT use[…]
-
Страница 46
46 INCORRECT INCORRECT V ehicle seat headrest should not create a gap between vehicle seat and booster seat . The front of booster seat MUST NOT hang over front of vehicle seat . […]
-
Страница 47
47 3. Position lap/shoulder belt through shoulder belt guide not underneath shoulder belt guide . Belt should pass over vehicle belt guide . Fasten buckle and pull up on the shoulder belt to tighten. 4. If EHOW OLHV DFURVVFKLOG¶VQHFN KHDG RUIDFH redirect belt over shoulder by adjusting the head VXSSRUW?[…]
-
Страница 48
48 16.0 Adjusting Head Suppor t When using with or without the built-in harness. BEFORE DGMXVWLQJ WKH KHDGVXSSRUW KHLJKW have your child lean forward slightly . Squeeze the red adjustment handle on top of seat and pull back support up until it snaps into one of the 5 height positions. 7 RORZHU VTXHH]HUHGDGMXV[…]
-
Страница 49
49 T o use booster seat WITHOUT back VXSSRUWUHPRYH KDUQHVV VWUDSVLI DWWDFKHG ( see section 13.0 Harness Removal, p.39-43 ) then continue with the following steps: 1. Detach 2 lower elastic straps from rear of seat as shown . 2. Detach elastic strap from the hooks on the seat pad as shown. Repeat on other side . 17.0 R e[…]
-
Страница 50
50 3. Pull the seat pad out of the way to reveal red buttons as shown in . Slide the buttons to release the back support from the base and lower it into a flat position. :KHQUHPRYLQJ EDFN VXSSRUWRX PXVW support the back support when sliding the red buttons that disengage the back support from WKHEDVH 0DNH VXUH?[…]
-
Страница 51
51 5. Once back support is separated VWRUH EDFNVXSSRUW ZLWK DOOWKH KDUQHVVVWUDSV KHDG VXSSRUWERG VXSSRUW DQGFURWFK SDGFRYHU LQ safe place. 6. Reattach the elastic straps at the back of the seat and through the vehicle belt guide on the sides of seat as shown. 7. Seat is re[…]
-
Страница 52
52 18.0 Securing Child in V ehicle with Shoulder Belt P ositioning Clip The shoulder belt MUST lie across child’s shoulders in red zone as shown . ,IVKRXOGHU EHOW OLHVRXWVLGH WKLV]RQH WKH shoulder belt positioning clip MUST be used. T o attach clip to booster seat: 1. Insert the loop end of strap through the slo[…]
-
Страница 53
53 2. Pass the clip and the strap through the loop end as shown and pull strap up. 3. NOTE: Free end of strap should face front of seat. […]
-
Страница 54
54 Shoulder belt positioning clip 4. Slide the vehicle shoulder belt onto the clip as shown and pull free end of strap down to tighten clip against the child’s shoulder . The lap portion MUST pass through the vehicle belt guide and be positionned low on the hips. The belt MUST NOT be twisted. Shoulder belt positioning clip REAR VIEW OF CH[…]
-
Страница 55
55 5. Lap portion of lap/shoulder belt MUST be low and VQXJRQ KLSV MXVWWRXFKLQJ WKLJKV DO NOT allow child to slide down in booster seat . CORRECT […]
-
Страница 56
56 19.0 Using the T ether All LA TCH seating positions have tether anchors. Always use tether if a vehicle tether anchor is DYDLODEOHFKHFN RXU YHKLFOHRZQHU ¶VPDQXDO IRUWKH WHWKHUDQF KRUORFDWLRQV ,IRXU YHKLFOH LV QRWHTXLSSHG ZLWK DWHWKHU DQFKRU LW PDEH SRVVLEO[…]
-
Страница 57
57 19.1 Storing Low er Anchors and T ether (LA T CH) )RU HDVH RIVWRULQJ H[WHQG LA TCH to its maximum length. 2. Locate the storage bars on back of child restraint . 3. Fasten ends of tether and lower anchors onto their respective storage bars as shown . 4. T ether and lower anchors storage should look like this wh[…]
-
Страница 58
58 This restraint is certified for use in Motor V ehicles. It is certified for use in Aircraft ONL Y when used with the built-in harness. When used as a booster WITHOUT WKH KDUQHVV WKLVUHVWUDLQW LV127 &(5 7,),(‘ IRU DLUFUDIWXVH because aircraft seats do not have a shoulder belt. Important points to remem[…]
-
Страница 59
59 21.0 Accessories (on cer tain models ONL Y) T o prev ent ejection in sud den stop or crash: • Always make sure shoulder straps are threaded through slots and properly positioned on shoulders. • Never allow body support to bunch or fold behind child. • Use body support with bottom harness slots only . • Make sure that harness covers do no[…]
-
Страница 60
60 Y our child restraint has 3 recline positions: adjust recline foot before installing child restraint. 7 R UHFOLQH VHDWSXOO UHFOLQHKDQGOH RXW and tilt seat back to extend foot as shown . 7 R VHW VHDWWR XSULJKWSRVLWLRQ SXOOUHFOLQH handle out and tilt seat fowar[…]
-
Страница 61
61 &RQWLQXRXV XVH RIFKLOG UHVWUDLQWPD FDXVH GDPDJHWR YHKLFOHVHDW 8VH DFKLOG UHVWUDLQWPDW towel or thin blanket to protect upholstery . • Metal and plastic parts: clean with mild soap and cool water . No bleach or detergents. • Harness straps and LA TCH straps: spot clean or replac[…]
-
Страница 62
62 7 XUQUHVWUDLQWRYHU SXVKUHWDLQHUWKURXJKFURWFKVWUDSVORW . 2. T o clean buckle — place in a cup of warm water and gently agitate WKHEXFNOHSUHVVWKHUHGEXWWRQVHYHUDOWLPHVZKLOHLQWKHZDWHU . DO NOT SUBMERGE THE HARNESS WEBBING. DO NOT USE SOAPS or LUBRICANTS. DO NOT us[…]
-
Страница 63
63 Seat Cover: clean with a damp sponge using PLOGVRDS DQG FRROZDWHU ,IQHFHVVDU FRYHU may be removed for cleaning. 1. Remove harness and crotch straps (see 6HFWLRQ +DUQHVV 5HPRYDOS 2. Remove elastic loops from seat as indicated in and . 3. Machine wash cover in[…]
-
Страница 64
64 26.0 R eplacement Par ts and War r anty T o purchase parts or accessories or for warranty information in the United States, please contact us at the following: www .g racoba by .com or 1-800-345-4109 25.0 Owner s Manual Stora ge Y our Owner ’s Manual can be stored on the bottom of the seat inside the slot in the footrest as shown.[…]
-
Страница 65
LEA ESTE MANUAL No instale ni use este sistema de seguridad para niños hasta que haya leído y entendido las instrucciones en este manual. NO USAR DEBIDAMENTE ESTE SISTEMA DE SEGURIDAD P ARA NIÑOS AUMENT A EL RIESGO DE LESIONES SERIAS O F A T ALES EN UN ACCIDENTE O AL DETENERSE DE REPENTE. Sistema de seguridad / Asiento para niños Manual del due[…]
-
Страница 66
2 Índice de materias 1.0 Advertencias a padres y otros usuarios ……………………….. 4 — 5 2.0 Información sobre el registro ………..6 2.1 Registro de su sistema de seguridad para niños ………….6 2.2 Para obtener información sobre el retiro de productos del mercado ………6 2 . 3 S i n e c e s i t a a y u d a …………….[…]
-
Страница 67
3 Índice de materias (cont.) 1 1.0 Asegurar el sistema de seguridad para niños en su vehículo ……….. 3 3 1 1.1 Uso de un sistema de seguridad CON el arnés incorporado . . 33 1 1.2 Con un cinturón para la falda o falda/hombro del vehículo …..33-34 1 1 . 3 C o n L A T C H ………..3 5 — 3 6 12.0 Asegurar a su niño al sistema de seguri[…]
-
Страница 68
4 1.0 Adv er tencias a padres y otr os usuarios NUNCA PONGA ESTE SISTEMA DE SEGURIDAD P ARA NIÑOS EN UN ASIENTO DEL VEHÍCULO EQUIP ADO CON UNA BOLSA DE AIRE DELANTERA. 6LODEROVDGHDLUHVHLQÀDSXHGH golpear al niño y al sistema de seguridad para niños con mucha fuerza y causar lesiones serias o la muerte de su niño. Con[…]
-
Страница 69
5 ADVERTENCIA No usar debidamente este sistema de seguridad para niños aumenta el riesgo de lesiones serias RODPXHUWHHQXQDFXUYDFHUUDGDSDUDGDUHSHQWLQDRDFFLGHQWH/DVHJXULGDGGHVXQLxRGHSHQGH de que usted instale y use este sistema de seguridad para niños correctamente. $ SHVDUGHTXHHO[…]
-
Страница 70
6 Número de modelo: Fecha de fabricación: Fecha de compra : 2.0 Infor mación sobre el r egistr o 2.1 Registro de su sistema de se guridad para niños Llame a la Línea telefónica de seguridad del vehículo del gobierno de EE.UU. al:1-888-327-4236 (TTY : 1-800-424-9153), o visite http://www .NHTSA.gov o llame a Graco al: 1-800-345-4109 o www .gr[…]
-
Страница 71
7 3.2 Vida útil del sistema de se guridad para niños 3RUIDYRU FRPXQtTXHVHFRQHO’HSDUWDPHQWRGH6HUYLFLRDO&OLHQWHFRQFXDOTXLHUSUHJXQWDTXH SXGLHUDWHQHUVREUHSLH]DVXVRRPDQWHQLPLHQWR&XDQGRVHSRQJDHQFRQWDFWRFRQQRVRWURVSRU favor tenga listo el núm[…]
-
Страница 72
8 4.0 Características[…]
-
Страница 73
9 La traba de seguridad se guarda en la parte trasera del sistema de seguridad para niños. Necesitará usarlo con ciertos tipos de cinturones de seguridad de automóviles. Las Normas Federales para Seguridad de Automóviles de Estados Unidos han GH¿QLGRXQVLVWHPDGH instalación de los sistemas de seguridad para niños en los vehículos[…]
-
Страница 74
10 5.0 Ar mado del sopor te de la cabeza Se requiere el montaje por un adulto. 1. Apriete el botón de ajuste de la altura y empuje el soporte de la cabeza en las ranuras en el soporte de la espalda como se indica. El soporte de la cabeza se trabará en el soporte de la espalda. Podría necesitar desenganchar la cinta del accesorio con nudo[…]
-
Страница 75
11 2. El ensamblaje está completo.[…]
-
Страница 76
12 6.0 AD VERTENCIA • NO use la traba de seguridad en el modo asiento. 6HJ~QODVHVWDGtVWLFDVGHDFFLGHQWHV LOS NIÑOS ESTÁN MÁS SEGUROS CUANDO ESTÁN DEBIDAMENTE SUJET ADOS EN LOS ASIENTOS TRASEROS DEL VEHÍCULO EN LUGAR DE A LOS ASIENTOS DELANTEROS. En el caso de un vehículo con una bolsa de aire para el SDVDMHURGHODQW[…]
-
Страница 77
13 • NUNCA DEJE UN SISTEMA DE SEGURIDAD P ARA NIÑOS SIN SUJET AR EN SU VEHÍCULO. Un sistema sin sujetar puede ser arrojado y podría lesionar a los ocupantes HQXQDFXUYDFHUUDGDSDUDGDUHSHQWLQDR accidente. Sáquelo o asegúrese de que esté debidamente sujetado en el vehículo. Si no usa el LA TCH DQFODMHDVHJ~U[…]
-
Страница 78
14 NO USAR EL SISTEMA DE SEGURIDAD P ARA NIÑOS DE MANERA APROPIADA SEGÚN EL T AMAÑO DE SU NIÑO PODRÍA AUMENT AR EL RIESGO DE LESIONES SERIAS O LA MUERTE. /DVLQVWUXFFLRQHVSDUDHOXVRGHHVWHVLVWHPDGHVHJXULGDGSDUD QLxRVGL¿HUHQPXFKR según el tamaño de su niño. Asegúrese de que usa el sistema de seguridad[…]
-
Страница 79
15 7.2 SIN el ar nés incor por ado Su niño debe cumplir todos los requisitos: • Peso: 30 a 100 libras (masa entre 14 y 45 kg) • Altura: 38 a 57 pulgadas (96 a 145 cm) de altura • aproximadamente de 3 a 10 años de edad • el cinturón del hombro DEBE cruzar los hombros del niño como se indica y la parte de la falda del cinturón debe esta[…]
-
Страница 80
16 7.3 SIN el sopor te de la espalda Su niño debe cumplir todos los requisitos: • pesar entre 40 y 100 libras NJ • y tener entre 40 y 57 pulgadas FPGHDOWXUD • aproximadamente de 4 a 10 años de edad • el cinturón del hombro DEBE cruzar los hombros del niño como […]
-
Страница 81
17 8.0 Cómo ele gir un lugar apropiado par a el asiento del v ehículo 8.1 Requisitos del lugar del asiento del v ehículo Algunas posiciones del asiento en su vehículo podrían no ser seguras para este sistema de seguri- dad para niños. Algunos vehículos no tienen posiciones del asiento que puedan usarse sin peligro con el sistema de seguridad[…]
-
Страница 82
18 8.2 R equisitos del cinturón de se guridad del vehículo 8.3 Sistemas SEGUROS del cinturón de seguridad del v ehículo ADVERTENCIA MUCHOS SISTEMAS DE CINTURONES DE SEGURIDAD NO SON SEGUROS P ARA USAR CON ESTE SISTEMA DE SEGURIDAD P ARA NIÑOS. EL CINTURÓN DE SEGURIDAD DEL VEHÍCULO DEBE HABER SIDO DISEÑADO P ARA RETENER AL SISTEMA DE SEGURID[…]
-
Страница 83
19 8.4 Para el ar nés incor por ado solamente • Cinturón para la falda — ajustado manualmente &XDQGR VH DFWLYDOD KHELOODHO FLQWXUyQVH ajusta manualmente tirando del exceso del cinturón. • Cinturón para la falda con retractor de seguridad automático (ALR por sus siglas en inglés) El retractor de seguridad aut[…]
-
Страница 84
20 8.5 Con O sin el ar nés incor por ado • Combinación cinturón para la falda y el hombro con placa de seguridad con traba 8QDYH] TXH HVWpWUDEDGR HQOD KHELOODHVWH WLSR de cinturón tiene una placa de seguridad que no permitirá que la parte del cinturón para la falda se afloje. El cinturón se ajusta tirando c[…]
-
Страница 85
21 8.6 Para instalar la tra ba de seguridad 1. Ajuste el cinturón trabado empujando con fuerza el sistema de seguridad para niños hacia abajo y tirando con fuerza el cinturón para el hombro. 0LHQWUDV HPSXMD HODVLHQWR KDFLDDEDMR DSULHWHODV GRV FRUUHDVMXQWDV GHWUiV GHOD OHQJXDGH la hebill[…]
-
Страница 86
22 8.7 Sistemas PELIGROSOS de cinturones de v ehículos • Cinturón para la falda con retractor de traba de emergencia (ELR por sus siglas en inglés) Este cinturón de seguridad para la falda se mantiene flojo y puede moverse hasta que se trabe en un accidente o parada repentina. NO USE NINGUNO DE LOS SIGUIENTES SISTEMAS P ARA SUJET AR EL SISTEM[…]
-
Страница 87
23 • Cinturón pasivo — Cinturón para la falda con cinturón para el hombro motorizado NO use los cinturones del vehículo que estén conectados a la puerta de manera alguna o que se muevan a través de un carril para rodear automáticamente al pasajero cuando se cierra la puerta • Cinturón para la falda que está más adelante del pliegue de[…]
-
Страница 88
24 9.1 ¿Qué es el LA TCH? 9.0 LA TCH Las Normas Federales de Seguridad para V ehículos Automotor de Estados Unidos han definido un sistema de instalación de los sistemas de seguridad para niños en los vehículos. El sistema se denomina LA TCH . LA TCH quiere decir: Anclaje inferior y superior para niños ( L ower A nchors and T ethers for CH i[…]
-
Страница 89
25 Puntos de anclaje superiores del vehículo Pliegue del asiento del vehículo Un asiento típico de un vehículo de pasajeros. Otros tipos de vehículos podría tener el sistema LA TCH en otros lugares. Puntos de anclaje inferiores del vehí- culo V ea el manual del propietario de su vehículo para informarse sobre las ubicaciones exactas, la ide[…]
-
Страница 90
26 9.2 Sistema LA TCH El sistema LA TCH consiste en un cinturón deanclaje inferior permanente y una correa deanclaje superior . Utilice el sistema LA TCH ÚNICAMENTE en la posición del asiento recomendado por el fabricante del vehículo. Los puntos de anclaje LA TCH inferiores del vehículo se definen como a 1 1 pulgadas (28 cm) desde el centro d[…]
-
Страница 91
27 10.0 Uso del sistema de se guridad CON el ar nés incor por ado 1. Afloje las correas del arnés levantando la palanca de ajuste del arnés en la parte de adelante del asiento cerca de la correa de ajuste y tirando las correas hacia usted . 2. Abra la presilla del pecho . ADVERTENCIA NO AJUST AR DEBIDAMENTE LAS CORREAS DEL ARNÉS DEL[…]
-
Страница 92
28 3. Destrabe las correas del arnés . 4. Verifique la correa para la entrepierna: Elija la posición que esté más cercana pero no debajo de su niño. Para cambiar la posición de la correa para ODHQWUHSLHUQD HPSXMH ODFRUUHD SDUDOD entrepierna por la parte de abajo del sistema de seguridad para niños y agárrela […]
-
Страница 93
29 5. Las correas del arnés deben pasar por las ranuras a la altura o apenas por encima de los hombros . 6LODV FRUUHDV HVWiQHQ ODVUDQXUDV FRUUHFWDV pase a la página 33. 6. Para ajustar las correas del arnés: a) De vuelta el asiento para poder acceder a la parte trasera del asiento. b) Desde atrás del asiento saque[…]
-
Страница 94
30 7. Pase las puntas de la correa por las ranuras al frente del asiento ¡ y vuelva a insertarlas en las ranuras deseadas ¢ . Verifique que las correas no estén dobladas. ASEGÚRESE de que las correas del arnés estén insertadas en las mismas ranuras en cada costado del asiento. Saque el apoyo del cuerpo cuando no usa el arnés en la posici?[…]
-
Страница 95
31 8.Use las guías de plástico de las correas como guía para pasar el arnés por encima de los rodillos rojos. Asegúrese de pasar las correas SOBRE los rodillos rojos y las guías de plástico de las co rr e as . Asegúrese que la correa del anclaje no interfiera cuando cambia la posición de la altura de la correa del arnés. 9. Si no se pasan[…]
-
Страница 96
32 11 . V erifique que las correas estén insertadas al mismo nivel. T ire del arnés para asegurarse que esté asegurado . RECUERDE verificar la posición de las correas para la entrepierna y del hombro a medida que su niño crece y muévalas a la posición siguiente cuando sea necesario. Las correas del arnés deben pasar por las ranuras a la alt[…]
-
Страница 97
33 11.0 Ase gurar el sistema de se guridad para niños en su v ehículo 11.1 Uso del sistema de se guridad CON el ar nés incor por ado 1. Coloque el sistema de seguridad para niños firmemente contra el respaldo del asiento del vehículo que mire hacia adelante. 2. Pase el cinturón del asiento a través de las aberturas de la ranura del cinturón[…]
-
Страница 98
34 4. Ajuste el cinturón de seguridad del vehículo Empuje con fuerza hacia abajo con la rodilla o la mano libre en el medio del asiento para automóvil . Luego tire y ajuste el cinturón del vehículo. Para obtener más información sobre cómo ajustar el cinturón de su sistema del cinturón de seguridad YHDOD 6HFFLyQ ?[…]
-
Страница 99
35 11.3 Con LA T CH NOT A: Algunos fabricantes de vehículos usan calificaciones más bajas del peso para los conectores LA TCH GHPDQHUD TXH GHEH consultar el manual del dueño del vehículo o llamar al fabricante del vehículo para confirmar los límites de los conectores LA TCH de su vehículo. 1. Desenganche el LA TCH de las b[…]
-
Страница 100
36 6. NUNCA sujete dos conectores LA TCH en un solo punto de anclaje LA TCH del vehículo a menos que el fabricante lo haya permitido específicamente . 7. T odas las posiciones del asiento LA TCH tienen puntos de anclaje. Asegure la parte de arriba del asiento usando la correa de anclaje. V ea la Sección 8VR GHO DQFODMH?[…]
-
Страница 101
37 12.0 Ase gurar a su niño al sistema de se guridad • AJUSTE EL SISTEMA DE ARNÉS APRET ADAMENTE CADA VEZ que coloca a su niño en el sistema de seguridad para niños. • Evite usar ropas abultadas. 1. Coloque al niño en el sistema de seguridad para niños con la espalda del niño plana contra el respaldo del asiento para automóvil. 2. Coloq[…]
-
Страница 102
38 3. Asegure la presilla del pecho . Coloque la presilla del pecho en el medio del pecho del QLxRQLYHODGR FRQ ODVD[LODV 4. T ense las correas del arnés tirando de la correa de ajuste adelante del asiento . 5. Asegúrese que las correas estén planas y ajustadas contra los hombros y muslos del niño. No debería poder apr[…]
-
Страница 103
39 1. Saque las correas del arnés. Abra la traba del pecho y la hebilla del arnés . 2. Mire hacia la parte trasera del asiento y saque las correas del cinturón de la placa de unión de metal como se indica. 3. Saque la correa para la entrepierna empujando el retén de la correa de la SDUWHGH DEDMR GHODVLHQWR K[…]
-
Страница 104
40 4. Agarre la hebilla de la correa para la entrepierna y tírela completamente hacia afuera . 5. T ire de la correa de ajuste del frente del asiento para trabar la placa de unión de metal en su lugar . 6. Agarre las correas para el hombro y tírelas hacia afuera de sus ranuras respectivas del almohadón del asiento. Saque el sopor[…]
-
Страница 105
41 (Q OD SDUWHGH DWUiVGHO DVLHQWRGHVFRQHFWH correas de elástico del almohadón del asiento de abajo de los ganchos como se indica en . 8. T ambién desconecte las correas elásticas que pasan por las guías del cinturón del vehículo en los costados del asiento como se indica en . Repita el proce[…]
-
Страница 106
42 ¢ 11 10. Saque las correas del arnés de los brazos como se indica en ¢ . *XDUGHHO VRSRUWH GHOFXHUSR IXQGDVGHO DUQpVIXQGD GH ODDOPRKDGLOOD SDUDOD entrepierna y correas del arnés en un lugar seguro para uso futuro. 1 1. Saque la tela del almohadón del asiento y luego levante el respaldo del asie[…]
-
Страница 107
43 12. Ponga el almohadón del asiento entre el espacio del soporte de la espalda y el lugar del asiento para permitir 2 correas elásticas salgan por la parte trasera del asiento. 13. Sujete 2 correas elásticas del almohadón del asiento a los ganchos en la parte trasera del sistema de seguridad para niños como se indica en . 14. Pase la correa […]
-
Страница 108
44 14.0 Uso del sistema de se guridad SIN el ar nés incor porado ADVERTENCIA! Use solamente el sistema de cinturón del vehículo para el hombro y la falda cuando sujeta a su niño en el asiento. El LA TCH no asegurará su niño al asiento. Use solamente el sistema de cinturón del vehículo para el hombro y la falda cuando sujeta a su niño en el[…]
-
Страница 109
45 NO use el cinturón del hombro flojo o puesto debajo del brazo . NO ponga el cinturón de seguridad para el hombro detrás de la espalda del niño . La parte de la falda del cinturón para la falda y el hombro DEBE estar bajo y apretado en la FDGHUDDSHQDV WRFDQGR ORVPXVORV NO deje que su niño salga por abajo del asient[…]
-
Страница 110
46 INCORRECTO INCORRECTO El apoyacabeza del asiento del vehículo no debe crear un espacio entre el asiento del vehículo y el asiento de seguridad . El frente del asiento de seguridad NO DEBE quedar suspendido del frente del asiento del vehículo . […]
-
Страница 111
47 15.0 Asegur ar al niño y al asiento de seguridad en el v ehículo 1. Coloque el asiento para automóvil firmemente contra el respaldo de un asiento del vehículo que mira hacia adelante. El asiento del vehículo debe estar equipado con un cinturón para la falda y el hombro. 2. Coloque al niño en el asiento de seguridad para automóvil con[…]
-
Страница 112
48 16.0 Ajuste del sopor te de la ca beza Cuando se usa con o sin el arnés incorporado. ANTES de ajustar la altura del soporte de la FDEH]DSLGD D VXQLxR TXHVH PXHYDXQ SRFR hacia adelante. Apriete la manija roja de ajuste de arriba del asiento y tire el soporte de la espalda hacia arriba hasta que se trabe en un[…]
-
Страница 113
49 Para usar el asiento SIN el soporte de la HVSDOGDVDTXH ODV FRUUHDVGHO DUQpVVL HVWiQ colocadas ( vea la sección 13.0 Cómo sacar el arnés, pág. 39 a 43) y luego continúe con los pasos siguientes: 1. Desenganche 2 correas elásticas inferiores de la parte de atrás del asiento como se indica . 2. Desenganche la c[…]
-
Страница 114
50 3. T ire el almohadón del asiento para que muestre los botones rojos como se indica en . Deslice los botones para liberar el soporte de la espalda de la base y bájelo a una posición plana. &XDQGRVDFD HO VRSRUWHGH ODHVSDOGD GHEH apoyarlo cuando desliza los botones rojos para desenganchar el soporte de la espa[…]
-
Страница 115
51 5. Una vez que ha separado el soporte de la espalda JXDUGH HO VRSRUWHGH ODHVSDOGD FRQWRGDV ODV FRUUHDVGHO DUQpVVRSRUWH GHOD FDEH]DVRSRUWH GHO FXHUSR IXQGDGH OD almohadilla para la entrepierna en un lugar seguro. 6. V uelva a conectar las correas elásticas de a[…]
-
Страница 116
52 18.0 Asegur ar al niño con el cinturón del v ehículo con tr aba de posicionamiento para el cinturón del hombr o El cinturón del hombro DEBE pasar a través de los hombros del niño en la zona roja como se indica . Si el cinturón del hombro está fuera de HVWD]RQD VH DEBE usar la traba de posicionamiento del cinturón de[…]
-
Страница 117
53 2. Pase la traba y la correa a través del extre- mo del nudo como se indica y tire la correa hacia arriba. 3. NOT A: El extremo liberado de la correa deberá mirar al frente del asiento. […]
-
Страница 118
54 4. Deslice el cinturón del hombro del vehículo por la traba como se indica y tire el extremo libre de la correa hacia abajo para ajustar la traba contra el hombro del niño. La parte de la falda DEBE pasar a través de la guía del cinturón del vehículo y estar posicionada baja en las caderas. El cinturón NO DEBE estar doblado. T ra[…]
-
Страница 119
55 5. La parte de la falda del cinturón para la falda y el hombro DEBE HVWDU EDMR DSUHWDGRHQ ODFDGHUD apenas tocando los muslos. NO deje que su niño salga por abajo del asiento . CORRECTO […]
-
Страница 120
56 19.0 Uso del anc laje T odas las posiciones del asiento LA TCH tienen puntos de anclaje. Use siempre el anclaje si hay XQVXMHWDGRU GHO DQFODMHHQ HOYHKtFXOR FRQVXOWHHO PDQXDO GHOGXHxR GHOYHKtFXOR SDUD GHWHUPLQDU los lugares de los sujetadores de anclaje. Si su vehículo no está equipado con un s[…]
-
Страница 121
57 19.1 Cómo guar dar los anc lajes inferiores y anc laje (LA TCH) 3DUD IDFLOLWDU HODOPDFHQDPLHQWR H[WLHQGDHO LA TCH hasta el máximo. 2. Ubique las barras de almacenamiento en el respaldo del sistema de seguridad para niños . 3. Sujete los extremos del anclaje y los anclajes inferiores en sus barras de almacenam[…]
-
Страница 122
58 Este sistema de seguridad ha sido certificado para ser usado en vehículos automotor . Ha sido certificado para uso en aeronaves SOLAMENTE cuando se lo usa con el arnés incorporado. Cuando se lo usa como asiento SIN HO DUQpV HVWHVLVWHPD GHVHJXULGDG 12 +$ 6,’2 CERTIFICADO para ser usado en aeronaves porque […]
-
Страница 123
59 21.0 Accesorios (SOLAMENTE en cier tos modelos) Para prev enir la eyección en un accidente o parada r epentina: • Asegúrese siempre que las correas del hombro pasan por las ranuras y están debidamente instaladas en los hombros. • Nunca deje que el soporte del cuerpo se apile o pliegue detrás del niño. • Use el soporte del cuerpo solam[…]
-
Страница 124
60 Su sistema de seguridad para niños tiene 3 posiciones de reclinación: ajuste el pie reclinatorio antes de instalar el sistema de seguridad para niños. 3DUD UHFOLQDU HODVLHQWR WLUHOD PDQLMD GH reclinación hacia afuera e incline el respaldo del asiento para extender el pie como se indica . […]
-
Страница 125
61 • El uso continuo del sistema de seguridad para niños podría causar daño al asiento del vehículo. 8VHXQD HVWHUD WRDOODR IUD]DGDILQD FRQHO VLVWHPD GHVHJXULGDG SDUD QLxRVSDUD SURWHJHUHO tapizado. • Piezas de metal y de plástico: limpiar con un jabón suave y agua fresca. No use blanque[…]
-
Страница 126
62 ’HYXHOWDHOVLVWHPDGHVHJXULGDGSDVHHOUHWpQSRUODUDQXUDGH la correa de la entrepierna . 3DUDOLPSLDUODKHELOODSyQJDOHHQXQDWD]DGHDJXDWLELDDJLWH VXDYHPHQWHODKHELOODRSULPDHOERWyQURMRYDULDVYHFHVPLHQWU DV esté sum[…]
-
Страница 127
63 Funda del asiento: limpiar con una esponja húmeda usando un jabón suave y agua fresca. ‘HVHU QHFHVDULR VHSXHGH VDFDUOD IXQGD para limpiarla. 1. Saque las correas del arnés y para la HQWUHSLHUQDYHD OD 6HFFLyQ &yPRVDFDU el arnés. pág. 39). 2. Saque los nudos de plásti[…]
-
Page 1: Graco Nautilus
READ THIS MANUAL Do not install or use this child restraint until you read and understand the instructions in this manual. F AILURE T O PROPERL Y USE THIS CHILD RESTRAINT INCREASES THE RISK OF SERIOUS INJURY OR DEA TH IN A SUDDEN STOP OR CRASH. Child Restraint / Booster Seat Owner ’s Manual featuring © 2014 Graco PD265372C 7/14 US[…]
-
Page 2: Graco Nautilus
2 1.0 W arnings to Parents and O t h e r U s e r s ……………….. 4 — 5 2.0 Registration Information ………….6 2.1 Register Y our Child Restraint …..6 2.2 For Recall Information ………. 6 2.3 If Y ou Need Help …………..7 3 . 0 U s e f u l I n f o r m a t i o n ……………..7 3 . 1 C e r t i f i c a t i o n………………[…]
-
Page 3: Graco Nautilus
3 T able of Contents (cont.) 1 1.0 Securing the Child Restraint in Y our V ehicle ………………… 3 3 1 1.1 Using a Child Restraint WITH a B u i l t — i n H a r n e s s ………. 3 3 1 1.2 With a V ehicle Lap or Lap/shoulder belt ……3 3 — 3 4 1 1 . 3 W i t h L A T C H ……….3 5 — 3 6 12.0 Securing Y our Child in the Child Restraint ..[…]
-
Page 4: Graco Nautilus
4 1.0 War nings to Parents and Other User s NEVER PLACE THIS CHILD RESTRAINT IN A VEHICLE SEA TING LOCA TION THA T HAS AN ACTIVE FRONT AIR BAG. ,IDQDLUEDJLQÀDWHVLWFDQKLWWKHFKLOGDQGFKLOGUHVWUDLQW ZLWK great force and cause serious injury or death to your child. Refer to your vehicle owner ’s manual for[…]
-
Page 5: Graco Nautilus
5 Failure to properly use this child restraint increases the risk of serious injury or death in a sharp WXUQVXGGHQVWRSRUFUDVK< RXUFKLOG¶VVDIHWGHSHQGVRQRXLQVWDOOLQJDQGXVLQJWKLVFKLOG restraint correctly . (YHQLIXVLQJWKLVFKLOGUHVWUDLQWVHHPVHDVWR¿JXUHRXWRQ[…]
-
Page 6: Graco Nautilus
6 2.0 Registration Infor mation 3OHDVH¿OOLQWKHDERYHLQIRUPDWLRQ7KHPRGHOQXPEHUDQGGDWHRIPDQXIDFWXUHFDQEHIRXQGRQD label on the child restraint. Fill out the prepaid registration postcard attached to the harness and mail it today . Child restraints could be recalled for safety reasons. Y ou must […]
-
Page 7: Graco Nautilus
7 3.2 Child Restraint Useful Life Please contact our Customer Service Department with any questions you may have concerning SDUWVXVHRUPDLQWHQDQFH:KHQRXFRQWDFWXVSOHDVHKDYHRXUSURGXFW¶VPRGHODQG GDWHRIPDQXIDFWXUHUHDGVRWKDWZHPDKHOSRXHI¿FLHQWO 7KHVHQXPEHU[…]
-
Page 8: Graco Nautilus
8 4.0 F eatures[…]
-
Page 9: Graco Nautilus
9 The locking clip is stored on the back of the child restraint. Y ou will need to use it with certain types of vehicle seat belts. United States Federal Motor V ehicle Safety 6WDQGDUGVKDYHGH¿QHGD system for installing child restraints in vehicles. The system is called LA TCH (Lower Anchorage and T ether for CHildren). LA TCH may ONL Y[…]
-
Page 10: Graco Nautilus
10 5.0 Assembling the Head Suppor t Adult assembly required. 1. Squeeze height adjust button and push head support into slots on the back support as shown. Head support will click into the back support. Y ou may need to unfasten the hook and loop attachment tape on both sides at the top of the back support to allow for easier access to the […]
-
Page 11: Graco Nautilus
11 2. The assembly is now complete.[…]
-
Page 12: Graco Nautilus
12 6.0 WARNINGS • DO NOT use locking clip in booster mode. $FFRUGLQJWRDFFLGHQWVWDWLVWLFV CHILDREN ARE SAFER WHEN PROPERL Y RESTRAINED IN REAR VEHICLE SEA TING POSITIONS, RA THER THAN FRONT SEA TING POSITIONS. For a YHKLFOHZLWKDIURQWSDVVHQJHUDLUEDJUHIHUWR your vehicle owner ’s manual as well[…]
-
Page 13: Graco Nautilus
13 • NEVER LEA VE A CHILD RESTRAINT UNSECURED IN YOUR VEHICLE. An unsecured child restraint can be thrown around DQGPDLQMXUHRFFXSDQWVLQDVKDUSWXUQ sudden stop or crash. Remove it or make sure that it is securely belted in the vehicle. If not using LA TCH and tether , make sure LA TCH and tether connectors are properly s[…]
-
Page 14: Graco Nautilus
14 F AILURE TO USE CHILD RESTRAINT IN A MANNER APPROPRIA TE FOR YOUR CHILD’S SIZE MA Y INCREASE THE RISK OF SERIOUS INJUR Y OR DEA TH. Instructions for the use of this child restraint differ greatly depending on the size of your child. Be sure you are using the child restraint in the correct mode and with the correct features for your child. 7.0 […]
-
Page 15: Graco Nautilus
15 7.2 WITHOUT Built-in Har ness Y our child must meet all requirements: • Weight: 30 to 100 lb (14 to 45 kg) • Height: 38 to 57 in. (96 and 145 cm) in height • approximately 3-10 years of age • the shoulder belt MUST lie across child’s shoulder as shown and the lap portion of the belt is positionned low on the child’s hips. • Child?[…]
-
Page 16: Graco Nautilus
16 7.3 WITHOUT Back Suppor t Y our child must meet all requirements: • weigh between 40 and 100 lb DQGNJ • and are between 40 and 57 in. DQGFPLQKHLJKW • approximately 4-10 years of age • the shoulder belt MUST lie across child’s shoulder as shown and[…]
-
Page 17: Graco Nautilus
17 8.0 Choosing an Appr opriate V ehicle Sea t Location 8.1 V ehic le Seat Location R equirements Some seating positions in your vehicle may not be safe for this child restraint. Some vehicles do not have any seating positions that can be used safely with the child restraint. If you are not sure ZKHUHWRSODFHWKHFKLOGUHVWUDLQWLQ[…]
-
Page 18: Graco Nautilus
18 8.2 V ehicle Sea t Belt Requirements 8.3 SAFE V ehicle Sea t Belt Systems MANY SEA T BEL T SYSTEMS ARE NOT SAFE T O USE WITH THE CHILD RESTRAINT . THE VEHICLE SEA T BEL T MUST BE DESIGNED TO HOLD THE CHILD RESTRAINT TIGHTL Y A T ALL TIMES. Pay careful attention to these systems; some of the seat belts that DUHQRW VDIH WRXVH ORRN?[…]
-
Page 19: Graco Nautilus
19 8.4 F or Built-in Har ness Onl y • Lap Belts — Manually Adjusted :KHQEXFNOHG WKH EHOWLV WLJKWHQHG manually by pulling on the excess belt. • Lap Belts with Automatic Locking Retractor (ALR) The automatic locking retractor will not permit the lap belt to lengthen once it is buckled. T ighten the belt by feeding the bel[…]
-
Page 20: Graco Nautilus
20 8.5 W ith OR W ithout Built-in Har ness • Combination Lap/Shoulder Belt with Locking Latch Plate 2QFHLW LV EXFNOHGWKLV WSHRI EHOWKDV D latchplate that will not allow the lap portion of the belt to loosen. Belt is tightened by pulling hard on the shoulder portion of the vehicle belt while pushing down hard on t[…]
-
Page 21: Graco Nautilus
21 8.6 T o Install Locking Clip 1. T ighten the buckled belt by pushing down hard on the child restraint and pulling hard on the shoulder belt. :KLOH SXVKLQJ GRZQRQ VHDWSLQFK WKHWZR VWUDSV WRJHWKHUEHKLQG WKHEXFNOH WRQJXH 8QEXFNOH the belt without allowing it to slip. 3. Attach locking clip[…]
-
Page 22: Graco Nautilus
22 8.7 UNSAFE V ehicle Belt Systems • Lap Belts with Emergency Locking Retractor (ELR) This lap belt stays loose and can move until it locks in a crash or sudden stop. DO NOT USE ANY OF THE FOLLOWING SYSTEMS TO SECURE THE CHILD RESTRAINT . LA TCH can be used IN PLACE OF the following unsafe belt systems if your vehicle is equipped with LA TCH anc[…]
-
Page 23: Graco Nautilus
23 • Passive Restraint — Lap Belt with Motorized Shoulder Belt DO NOT use vehicle belts that are attached to the door in any way or that move along a track to automatically surround the passenger when the door is closed. • Lap Belts Forward of Seat Crease Vehicle seat belts located forward of seat crease may not securely hold child restraint. C[…]
-
Page 24: Graco Nautilus
24 United States Federal Motor V ehicle Safety Standards have defined a system for installing child restraints in vehicles. The system is called LA TCH . LA TCH stands for: L ower A nchors and T ethers for CH ildren. LA TCH in the vehicle consists of a top tether anchor point and two lower anchor points. Some vehicle owner manuals use the term ISOF[…]
-
Page 25: Graco Nautilus
25 V ehicle T op T ether Anchor Points V ehicle Seat Crease T ypical seat in a passenger vehicle. Other vehicle types may have different LA TCH locations. V ehicle Lower Anchor Points See your vehicle owner ’s manual for exact locations, anchor identification, and requirements for use with a child restraint.[…]
-
Page 26: Graco Nautilus
26 9.2 LA TCH System LA TCH consists of a permanently attached lower anchor belt and a top tether strap. ONL Y use LA TCH in a seating position recommended by vehicle manufacturer . LA TCH lower vehicle anchor points are defined as 1 1 in. (28 cm) from the center of one LA TCH anchor to the center of another LA TCH anchor . If allowed by your V ehi[…]
-
Page 27: Graco Nautilus
27 10.0 Using Child R estr aint WITH Built-in Har ness F AILURE TO PROPERL Y ADJUST THE HARNESS STRAPS FOR YOUR CHILD INCREASES THE RISK OF SERIOUS INJUR Y OR DEA TH IN THE EVENT OF A SHARP TURN, SUDDEN STOP OR CRASH. Snugly adjust the belts provided with this child restraint around your child. A snug strap should not allow any slack. It lies in a […]
-
Page 28: Graco Nautilus
28 3. Unbuckle harness straps . 4. Check the crotch strap: Choose the position that is closest to but not under your child. 7 R FKDQJHFURWFK VWUDSSRVLWLRQ SXVK FURWFK belt up through the bottom of the child restraint and grab it from the top to pull out . Reinsert crotch strap in the desired position. Make sure c[…]
-
Page 29: Graco Nautilus
29 5. The harness straps must go into the slots even with or just above the shoulders . If straps are in proper slots go to page 33. 6 . T o adjust harness straps: D7XUQVHDW DURXQGVR RXZLOO KDYHDFFHVV WR the rear of the seat. b) From the rear of the seat remove straps from metal junction plate . […]
-
Page 30: Graco Nautilus
30 7. Pull strap ends through slots at front of seat ¡ and reinsert them in the desired slots ¢ . Check that the straps are not twisted. MAKE SURE harness straps are inserted into the same slots on each side of the seat. Remove body support when not using harness in the lowest slot position. ¢ ¡[…]
-
Page 31: Graco Nautilus
31 8. Use plastic strap guides as a guide to feed the harness up over the red rollers. Make sure to feed straps OVER red rollers and plastic strap guides . Make sure that the tether strap does not interfere when changing the harness strap height positions. 9. If the straps are not fed OVER WKHUHG UROOHUV WKHDVVHPEO LV incorrec[…]
-
Page 32: Graco Nautilus
32 11 . Check that the straps are inserted at the same level. Pull on harness to make sure it is se cu r e . REMEMBER to check the shoulder straps and crotch strap position as your child grows and move them to the next position when necessary . The harness straps must go in the slots even with or just above the shoulders. 13 13[…]
-
Page 33: Graco Nautilus
33 11.0 Securing the Child R estr aint in Y our V ehicle 11.1 Using a Child R estr aint WITH a Built-in Har ness Lower anchors must be stored when using vehicle belt. See Section 19.1, Storing LA TCH, page 57 . 1. Place the child restraint firmly against the back of a forward-facing vehicle seat. 2. Thread the seat belt through the belt slot openin[…]
-
Page 34: Graco Nautilus
34 4. Tighten vehicle seat belt Push down hard with your knee or free hand in the middle of the child restraint . Then pull and tighten the vehicle belt. For more information on how to tighten the belt for your seat belt system VHH Section 8.0 &KRRVLQJDQ$SSURSULDWH9HKLFOH6HDW /RFDWLRQ SRU RXU[…]
-
Page 35: Graco Nautilus
35 11.3 W ith LA TCH NOTE: Some vehicle manufacturers have lower maximum weight ratings for LA TCH DQFKRUV VRRX must consult your vehicle owner’s manual or call the vehicle manufacturer to confirm the limits on your vehicle’s LA TCH anchors. 1. Unhook LA TCH from storage bars on the sides of WKHVHDW )RU HDVHRI[…]
-
Page 36: Graco Nautilus
36 6. NEVER put two LA TCH connectors on one vehicle LA TCH anchor unless specifically allowed by the vehicle manufacturer . 7. All LA TCH seating positions have tether anchors. Secure the top of the seat using the tether strap. See Section 19.0 Using WKH7 HWKHU SDJH 8. Safety Check for Secure Installation Perform this te[…]
-
Page 37: Graco Nautilus
37 12.0 Securing Y our Child in the Child R estr aint • ADJUST THE HARNESS SYSTEM SNUGL Y EVER Y TIME you place your child in the child restraint. • Avoid bulky clothing. 1. Place child in child restraint with child’s back flat against back of car seat. 2. Place harness straps over child’s shoulders and insert tongues into buckle until they[…]
-
Page 38: Graco Nautilus
38 3. Fasten chest clip . Position chest clip at PLGGOHRI FKLOG¶VFKHVW OHYHOZLWK armpits. 4. T ighten the harness straps by pulling the adjustment strap on the front of the seat . 5. Make sure straps are flat and snug against child’ s shoulders and thighs. Y ou should not be able to pinch the harness straps. A sn[…]
-
Page 39: Graco Nautilus
39 13.0 Har ness Remo val or Re-a ttaching Har ness 1. Remove harness straps. Open chest clip and harness buckle . 2. Face the rear of the seat and remove the belt straps from metal junction plate as shown . 3. Remove crotch strap by pushing the strap retainer RQ ERWWRPRI VHDW XSWKURXJK VORW […]
-
Page 40: Graco Nautilus
40 4. Grab the crotch strap buckle and pull it completely out . 5. Pull on the adjustment strap on the front of the seat to lock the metal junction plate into place. 6. Grab hold of the shoulder straps and pull them out of their respective slots on the seat pad. Remove body support and crotch pad. […]
-
Page 41: Graco Nautilus
41 2Q WKH UHDURI WKHVHDW GHWDFK ORZHU VHDW pad elastic straps from hooks as shown in . 8. Also detach the elastic straps that are threaded through the vehicle belt guides on the sides of the seat as shown in . Repeat on other side. 9. Pull the seat pad out of the way to reveal the red buttons as […]
-
Page 42: Graco Nautilus
42 10. Remove harness straps from arms as shown in ¢ . 6WRUHWKH ERG VXSSRUWKDUQHVV FRYHUVFURWFK pad cover and harness straps in safe place for future use. 1 1. Move seat pad fabric out of the way then raise seat back so that both arms LOCK into the gutters . Y ou should hear a CLICK when the arms lock into the gutters. […]
-
Page 43: Graco Nautilus
43 12. T uck seat pad in between the gap of the back support and seat area of the booster seat to allow 2 elastic straps to show at the rear of the seat . 13. Attach 2 seat pad elastic straps onto the hooks on the rear of the child restraint as shown in . 14. Pull elastic strap on the seat pad through the vehicle belt guide on side of seat and atta[…]
-
Page 44: Graco Nautilus
44 14.0 Using Y our Child Restraint WITHOUT Built-in Har ness W ARNING! Use only the vehicle lap and shoulder belt system when restraining the child in the booster seat. LA TCH will not secure your child in the booster seat . V ehicle belts MUST lie flat against child and MUST not be twisted. NEVER use a vehicle lap-only belt across front of ch[…]
-
Page 45: Graco Nautilus
45 DO NOT use shoulder belt loose or positioned under arm . DO NOT place shoulder belt behind child’s back . Lap portion of lap/shoulder belt MUST be low DQGVQXJ RQ KLSVMXVW WRXFKLQJWKLJKV DO NOT allow child to slide down in booster seat . If child will not keep vehicle belt properly SRVLWLRQHG DO NOT use[…]
-
Page 46: Graco Nautilus
46 INCORRECT INCORRECT V ehicle seat headrest should not create a gap between vehicle seat and booster seat . The front of booster seat MUST NOT hang over front of vehicle seat . […]
-
Page 47: Graco Nautilus
47 3. Position lap/shoulder belt through shoulder belt guide not underneath shoulder belt guide . Belt should pass over vehicle belt guide . Fasten buckle and pull up on the shoulder belt to tighten. 4. If EHOW OLHV DFURVVFKLOG¶VQHFN KHDG RUIDFH redirect belt over shoulder by adjusting the head VXSSRUW?[…]
-
Page 48: Graco Nautilus
48 16.0 Adjusting Head Suppor t When using with or without the built-in harness. BEFORE DGMXVWLQJ WKH KHDGVXSSRUW KHLJKW have your child lean forward slightly . Squeeze the red adjustment handle on top of seat and pull back support up until it snaps into one of the 5 height positions. 7 RORZHU VTXHH]HUHGDGMXV[…]
-
Page 49: Graco Nautilus
49 T o use booster seat WITHOUT back VXSSRUWUHPRYH KDUQHVV VWUDSVLI DWWDFKHG ( see section 13.0 Harness Removal, p.39-43 ) then continue with the following steps: 1. Detach 2 lower elastic straps from rear of seat as shown . 2. Detach elastic strap from the hooks on the seat pad as shown. Repeat on other side . 17.0 R e[…]
-
Page 50: Graco Nautilus
50 3. Pull the seat pad out of the way to reveal red buttons as shown in . Slide the buttons to release the back support from the base and lower it into a flat position. :KHQUHPRYLQJ EDFN VXSSRUWRX PXVW support the back support when sliding the red buttons that disengage the back support from WKHEDVH 0DNH VXUH?[…]
-
Page 51: Graco Nautilus
51 5. Once back support is separated VWRUH EDFNVXSSRUW ZLWK DOOWKH KDUQHVVVWUDSV KHDG VXSSRUWERG VXSSRUW DQGFURWFK SDGFRYHU LQ safe place. 6. Reattach the elastic straps at the back of the seat and through the vehicle belt guide on the sides of seat as shown. 7. Seat is re[…]
-
Page 52: Graco Nautilus
52 18.0 Securing Child in V ehicle with Shoulder Belt P ositioning Clip The shoulder belt MUST lie across child’s shoulders in red zone as shown . ,IVKRXOGHU EHOW OLHVRXWVLGH WKLV]RQH WKH shoulder belt positioning clip MUST be used. T o attach clip to booster seat: 1. Insert the loop end of strap through the slo[…]
-
Page 53: Graco Nautilus
53 2. Pass the clip and the strap through the loop end as shown and pull strap up. 3. NOTE: Free end of strap should face front of seat. […]
-
Page 54: Graco Nautilus
54 Shoulder belt positioning clip 4. Slide the vehicle shoulder belt onto the clip as shown and pull free end of strap down to tighten clip against the child’s shoulder . The lap portion MUST pass through the vehicle belt guide and be positionned low on the hips. The belt MUST NOT be twisted. Shoulder belt positioning clip REAR VIEW OF CH[…]
-
Page 55: Graco Nautilus
55 5. Lap portion of lap/shoulder belt MUST be low and VQXJRQ KLSV MXVWWRXFKLQJ WKLJKV DO NOT allow child to slide down in booster seat . CORRECT […]
-
Page 56: Graco Nautilus
56 19.0 Using the T ether All LA TCH seating positions have tether anchors. Always use tether if a vehicle tether anchor is DYDLODEOHFKHFN RXU YHKLFOHRZQHU ¶VPDQXDO IRUWKH WHWKHUDQF KRUORFDWLRQV ,IRXU YHKLFOH LV QRWHTXLSSHG ZLWK DWHWKHU DQFKRU LW PDEH SRVVLEO[…]
-
Page 57: Graco Nautilus
57 19.1 Storing Low er Anchors and T ether (LA T CH) )RU HDVH RIVWRULQJ H[WHQG LA TCH to its maximum length. 2. Locate the storage bars on back of child restraint . 3. Fasten ends of tether and lower anchors onto their respective storage bars as shown . 4. T ether and lower anchors storage should look like this wh[…]
-
Page 58: Graco Nautilus
58 This restraint is certified for use in Motor V ehicles. It is certified for use in Aircraft ONL Y when used with the built-in harness. When used as a booster WITHOUT WKH KDUQHVV WKLVUHVWUDLQW LV127 &(5 7,),(‘ IRU DLUFUDIWXVH because aircraft seats do not have a shoulder belt. Important points to remem[…]
-
Page 59: Graco Nautilus
59 21.0 Accessories (on cer tain models ONL Y) T o prev ent ejection in sud den stop or crash: • Always make sure shoulder straps are threaded through slots and properly positioned on shoulders. • Never allow body support to bunch or fold behind child. • Use body support with bottom harness slots only . • Make sure that harness covers do no[…]
-
Page 60: Graco Nautilus
60 Y our child restraint has 3 recline positions: adjust recline foot before installing child restraint. 7 R UHFOLQH VHDWSXOO UHFOLQHKDQGOH RXW and tilt seat back to extend foot as shown . 7 R VHW VHDWWR XSULJKWSRVLWLRQ SXOOUHFOLQH handle out and tilt seat fowar[…]
-
Page 61: Graco Nautilus
61 &RQWLQXRXV XVH RIFKLOG UHVWUDLQWPD FDXVH GDPDJHWR YHKLFOHVHDW 8VH DFKLOG UHVWUDLQWPDW towel or thin blanket to protect upholstery . • Metal and plastic parts: clean with mild soap and cool water . No bleach or detergents. • Harness straps and LA TCH straps: spot clean or replac[…]
-
Page 62: Graco Nautilus
62 7 XUQUHVWUDLQWRYHU SXVKUHWDLQHUWKURXJKFURWFKVWUDSVORW . 2. T o clean buckle — place in a cup of warm water and gently agitate WKHEXFNOHSUHVVWKHUHGEXWWRQVHYHUDOWLPHVZKLOHLQWKHZDWHU . DO NOT SUBMERGE THE HARNESS WEBBING. DO NOT USE SOAPS or LUBRICANTS. DO NOT us[…]
-
Page 63: Graco Nautilus
63 Seat Cover: clean with a damp sponge using PLOGVRDS DQG FRROZDWHU ,IQHFHVVDU FRYHU may be removed for cleaning. 1. Remove harness and crotch straps (see 6HFWLRQ +DUQHVV 5HPRYDOS 2. Remove elastic loops from seat as indicated in and . 3. Machine wash cover in[…]
-
Page 64: Graco Nautilus
64 26.0 R eplacement Par ts and War r anty T o purchase parts or accessories or for warranty information in the United States, please contact us at the following: www .g racoba by .com or 1-800-345-4109 25.0 Owner s Manual Stora ge Y our Owner ’s Manual can be stored on the bottom of the seat inside the slot in the footrest as shown.[…]
-
Page 65: Graco Nautilus
LEA ESTE MANUAL No instale ni use este sistema de seguridad para niños hasta que haya leído y entendido las instrucciones en este manual. NO USAR DEBIDAMENTE ESTE SISTEMA DE SEGURIDAD P ARA NIÑOS AUMENT A EL RIESGO DE LESIONES SERIAS O F A T ALES EN UN ACCIDENTE O AL DETENERSE DE REPENTE. Sistema de seguridad / Asiento para niños Manual del due[…]
-
Page 66: Graco Nautilus
2 Índice de materias 1.0 Advertencias a padres y otros usuarios ……………………….. 4 — 5 2.0 Información sobre el registro ………..6 2.1 Registro de su sistema de seguridad para niños ………….6 2.2 Para obtener información sobre el retiro de productos del mercado ………6 2 . 3 S i n e c e s i t a a y u d a …………….[…]
-
Page 67: Graco Nautilus
3 Índice de materias (cont.) 1 1.0 Asegurar el sistema de seguridad para niños en su vehículo ……….. 3 3 1 1.1 Uso de un sistema de seguridad CON el arnés incorporado . . 33 1 1.2 Con un cinturón para la falda o falda/hombro del vehículo …..33-34 1 1 . 3 C o n L A T C H ………..3 5 — 3 6 12.0 Asegurar a su niño al sistema de seguri[…]
-
Page 68: Graco Nautilus
4 1.0 Adv er tencias a padres y otr os usuarios NUNCA PONGA ESTE SISTEMA DE SEGURIDAD P ARA NIÑOS EN UN ASIENTO DEL VEHÍCULO EQUIP ADO CON UNA BOLSA DE AIRE DELANTERA. 6LODEROVDGHDLUHVHLQÀDSXHGH golpear al niño y al sistema de seguridad para niños con mucha fuerza y causar lesiones serias o la muerte de su niño. Con[…]
-
Page 69: Graco Nautilus
5 ADVERTENCIA No usar debidamente este sistema de seguridad para niños aumenta el riesgo de lesiones serias RODPXHUWHHQXQDFXUYDFHUUDGDSDUDGDUHSHQWLQDRDFFLGHQWH/DVHJXULGDGGHVXQLxRGHSHQGH de que usted instale y use este sistema de seguridad para niños correctamente. $ SHVDUGHTXHHO[…]
-
Page 70: Graco Nautilus
6 Número de modelo: Fecha de fabricación: Fecha de compra : 2.0 Infor mación sobre el r egistr o 2.1 Registro de su sistema de se guridad para niños Llame a la Línea telefónica de seguridad del vehículo del gobierno de EE.UU. al:1-888-327-4236 (TTY : 1-800-424-9153), o visite http://www .NHTSA.gov o llame a Graco al: 1-800-345-4109 o www .gr[…]
-
Page 71: Graco Nautilus
7 3.2 Vida útil del sistema de se guridad para niños 3RUIDYRU FRPXQtTXHVHFRQHO’HSDUWDPHQWRGH6HUYLFLRDO&OLHQWHFRQFXDOTXLHUSUHJXQWDTXH SXGLHUDWHQHUVREUHSLH]DVXVRRPDQWHQLPLHQWR&XDQGRVHSRQJDHQFRQWDFWRFRQQRVRWURVSRU favor tenga listo el núm[…]
-
Page 72: Graco Nautilus
8 4.0 Características[…]
-
Page 73: Graco Nautilus
9 La traba de seguridad se guarda en la parte trasera del sistema de seguridad para niños. Necesitará usarlo con ciertos tipos de cinturones de seguridad de automóviles. Las Normas Federales para Seguridad de Automóviles de Estados Unidos han GH¿QLGRXQVLVWHPDGH instalación de los sistemas de seguridad para niños en los vehículos[…]
-
Page 74: Graco Nautilus
10 5.0 Ar mado del sopor te de la cabeza Se requiere el montaje por un adulto. 1. Apriete el botón de ajuste de la altura y empuje el soporte de la cabeza en las ranuras en el soporte de la espalda como se indica. El soporte de la cabeza se trabará en el soporte de la espalda. Podría necesitar desenganchar la cinta del accesorio con nudo[…]
-
Page 75: Graco Nautilus
11 2. El ensamblaje está completo.[…]
-
Page 76: Graco Nautilus
12 6.0 AD VERTENCIA • NO use la traba de seguridad en el modo asiento. 6HJ~QODVHVWDGtVWLFDVGHDFFLGHQWHV LOS NIÑOS ESTÁN MÁS SEGUROS CUANDO ESTÁN DEBIDAMENTE SUJET ADOS EN LOS ASIENTOS TRASEROS DEL VEHÍCULO EN LUGAR DE A LOS ASIENTOS DELANTEROS. En el caso de un vehículo con una bolsa de aire para el SDVDMHURGHODQW[…]
-
Page 77: Graco Nautilus
13 • NUNCA DEJE UN SISTEMA DE SEGURIDAD P ARA NIÑOS SIN SUJET AR EN SU VEHÍCULO. Un sistema sin sujetar puede ser arrojado y podría lesionar a los ocupantes HQXQDFXUYDFHUUDGDSDUDGDUHSHQWLQDR accidente. Sáquelo o asegúrese de que esté debidamente sujetado en el vehículo. Si no usa el LA TCH DQFODMHDVHJ~U[…]
-
Page 78: Graco Nautilus
14 NO USAR EL SISTEMA DE SEGURIDAD P ARA NIÑOS DE MANERA APROPIADA SEGÚN EL T AMAÑO DE SU NIÑO PODRÍA AUMENT AR EL RIESGO DE LESIONES SERIAS O LA MUERTE. /DVLQVWUXFFLRQHVSDUDHOXVRGHHVWHVLVWHPDGHVHJXULGDGSDUD QLxRVGL¿HUHQPXFKR según el tamaño de su niño. Asegúrese de que usa el sistema de seguridad[…]
-
Page 79: Graco Nautilus
15 7.2 SIN el ar nés incor por ado Su niño debe cumplir todos los requisitos: • Peso: 30 a 100 libras (masa entre 14 y 45 kg) • Altura: 38 a 57 pulgadas (96 a 145 cm) de altura • aproximadamente de 3 a 10 años de edad • el cinturón del hombro DEBE cruzar los hombros del niño como se indica y la parte de la falda del cinturón debe esta[…]
-
Page 80: Graco Nautilus
16 7.3 SIN el sopor te de la espalda Su niño debe cumplir todos los requisitos: • pesar entre 40 y 100 libras NJ • y tener entre 40 y 57 pulgadas FPGHDOWXUD • aproximadamente de 4 a 10 años de edad • el cinturón del hombro DEBE cruzar los hombros del niño como […]
-
Page 81: Graco Nautilus
17 8.0 Cómo ele gir un lugar apropiado par a el asiento del v ehículo 8.1 Requisitos del lugar del asiento del v ehículo Algunas posiciones del asiento en su vehículo podrían no ser seguras para este sistema de seguri- dad para niños. Algunos vehículos no tienen posiciones del asiento que puedan usarse sin peligro con el sistema de seguridad[…]
-
Page 82: Graco Nautilus
18 8.2 R equisitos del cinturón de se guridad del vehículo 8.3 Sistemas SEGUROS del cinturón de seguridad del v ehículo ADVERTENCIA MUCHOS SISTEMAS DE CINTURONES DE SEGURIDAD NO SON SEGUROS P ARA USAR CON ESTE SISTEMA DE SEGURIDAD P ARA NIÑOS. EL CINTURÓN DE SEGURIDAD DEL VEHÍCULO DEBE HABER SIDO DISEÑADO P ARA RETENER AL SISTEMA DE SEGURID[…]
-
Page 83: Graco Nautilus
19 8.4 Para el ar nés incor por ado solamente • Cinturón para la falda — ajustado manualmente &XDQGR VH DFWLYDOD KHELOODHO FLQWXUyQVH ajusta manualmente tirando del exceso del cinturón. • Cinturón para la falda con retractor de seguridad automático (ALR por sus siglas en inglés) El retractor de seguridad aut[…]
-
Page 84: Graco Nautilus
20 8.5 Con O sin el ar nés incor por ado • Combinación cinturón para la falda y el hombro con placa de seguridad con traba 8QDYH] TXH HVWpWUDEDGR HQOD KHELOODHVWH WLSR de cinturón tiene una placa de seguridad que no permitirá que la parte del cinturón para la falda se afloje. El cinturón se ajusta tirando c[…]
-
Page 85: Graco Nautilus
21 8.6 Para instalar la tra ba de seguridad 1. Ajuste el cinturón trabado empujando con fuerza el sistema de seguridad para niños hacia abajo y tirando con fuerza el cinturón para el hombro. 0LHQWUDV HPSXMD HODVLHQWR KDFLDDEDMR DSULHWHODV GRV FRUUHDVMXQWDV GHWUiV GHOD OHQJXDGH la hebill[…]
-
Page 86: Graco Nautilus
22 8.7 Sistemas PELIGROSOS de cinturones de v ehículos • Cinturón para la falda con retractor de traba de emergencia (ELR por sus siglas en inglés) Este cinturón de seguridad para la falda se mantiene flojo y puede moverse hasta que se trabe en un accidente o parada repentina. NO USE NINGUNO DE LOS SIGUIENTES SISTEMAS P ARA SUJET AR EL SISTEM[…]
-
Page 87: Graco Nautilus
23 • Cinturón pasivo — Cinturón para la falda con cinturón para el hombro motorizado NO use los cinturones del vehículo que estén conectados a la puerta de manera alguna o que se muevan a través de un carril para rodear automáticamente al pasajero cuando se cierra la puerta • Cinturón para la falda que está más adelante del pliegue de[…]
-
Page 88: Graco Nautilus
24 9.1 ¿Qué es el LA TCH? 9.0 LA TCH Las Normas Federales de Seguridad para V ehículos Automotor de Estados Unidos han definido un sistema de instalación de los sistemas de seguridad para niños en los vehículos. El sistema se denomina LA TCH . LA TCH quiere decir: Anclaje inferior y superior para niños ( L ower A nchors and T ethers for CH i[…]
-
Page 89: Graco Nautilus
25 Puntos de anclaje superiores del vehículo Pliegue del asiento del vehículo Un asiento típico de un vehículo de pasajeros. Otros tipos de vehículos podría tener el sistema LA TCH en otros lugares. Puntos de anclaje inferiores del vehí- culo V ea el manual del propietario de su vehículo para informarse sobre las ubicaciones exactas, la ide[…]
-
Page 90: Graco Nautilus
26 9.2 Sistema LA TCH El sistema LA TCH consiste en un cinturón deanclaje inferior permanente y una correa deanclaje superior . Utilice el sistema LA TCH ÚNICAMENTE en la posición del asiento recomendado por el fabricante del vehículo. Los puntos de anclaje LA TCH inferiores del vehículo se definen como a 1 1 pulgadas (28 cm) desde el centro d[…]
-
Page 91: Graco Nautilus
27 10.0 Uso del sistema de se guridad CON el ar nés incor por ado 1. Afloje las correas del arnés levantando la palanca de ajuste del arnés en la parte de adelante del asiento cerca de la correa de ajuste y tirando las correas hacia usted . 2. Abra la presilla del pecho . ADVERTENCIA NO AJUST AR DEBIDAMENTE LAS CORREAS DEL ARNÉS DEL[…]
-
Page 92: Graco Nautilus
28 3. Destrabe las correas del arnés . 4. Verifique la correa para la entrepierna: Elija la posición que esté más cercana pero no debajo de su niño. Para cambiar la posición de la correa para ODHQWUHSLHUQD HPSXMH ODFRUUHD SDUDOD entrepierna por la parte de abajo del sistema de seguridad para niños y agárrela […]
-
Page 93: Graco Nautilus
29 5. Las correas del arnés deben pasar por las ranuras a la altura o apenas por encima de los hombros . 6LODV FRUUHDV HVWiQHQ ODVUDQXUDV FRUUHFWDV pase a la página 33. 6. Para ajustar las correas del arnés: a) De vuelta el asiento para poder acceder a la parte trasera del asiento. b) Desde atrás del asiento saque[…]
-
Page 94: Graco Nautilus
30 7. Pase las puntas de la correa por las ranuras al frente del asiento ¡ y vuelva a insertarlas en las ranuras deseadas ¢ . Verifique que las correas no estén dobladas. ASEGÚRESE de que las correas del arnés estén insertadas en las mismas ranuras en cada costado del asiento. Saque el apoyo del cuerpo cuando no usa el arnés en la posici?[…]
-
Page 95: Graco Nautilus
31 8.Use las guías de plástico de las correas como guía para pasar el arnés por encima de los rodillos rojos. Asegúrese de pasar las correas SOBRE los rodillos rojos y las guías de plástico de las co rr e as . Asegúrese que la correa del anclaje no interfiera cuando cambia la posición de la altura de la correa del arnés. 9. Si no se pasan[…]
-
Page 96: Graco Nautilus
32 11 . V erifique que las correas estén insertadas al mismo nivel. T ire del arnés para asegurarse que esté asegurado . RECUERDE verificar la posición de las correas para la entrepierna y del hombro a medida que su niño crece y muévalas a la posición siguiente cuando sea necesario. Las correas del arnés deben pasar por las ranuras a la alt[…]
-
Page 97: Graco Nautilus
33 11.0 Ase gurar el sistema de se guridad para niños en su v ehículo 11.1 Uso del sistema de se guridad CON el ar nés incor por ado 1. Coloque el sistema de seguridad para niños firmemente contra el respaldo del asiento del vehículo que mire hacia adelante. 2. Pase el cinturón del asiento a través de las aberturas de la ranura del cinturón[…]
-
Page 98: Graco Nautilus
34 4. Ajuste el cinturón de seguridad del vehículo Empuje con fuerza hacia abajo con la rodilla o la mano libre en el medio del asiento para automóvil . Luego tire y ajuste el cinturón del vehículo. Para obtener más información sobre cómo ajustar el cinturón de su sistema del cinturón de seguridad YHDOD 6HFFLyQ ?[…]
-
Page 99: Graco Nautilus
35 11.3 Con LA T CH NOT A: Algunos fabricantes de vehículos usan calificaciones más bajas del peso para los conectores LA TCH GHPDQHUD TXH GHEH consultar el manual del dueño del vehículo o llamar al fabricante del vehículo para confirmar los límites de los conectores LA TCH de su vehículo. 1. Desenganche el LA TCH de las b[…]
-
Page 100: Graco Nautilus
36 6. NUNCA sujete dos conectores LA TCH en un solo punto de anclaje LA TCH del vehículo a menos que el fabricante lo haya permitido específicamente . 7. T odas las posiciones del asiento LA TCH tienen puntos de anclaje. Asegure la parte de arriba del asiento usando la correa de anclaje. V ea la Sección 8VR GHO DQFODMH?[…]
-
Page 101: Graco Nautilus
37 12.0 Ase gurar a su niño al sistema de se guridad • AJUSTE EL SISTEMA DE ARNÉS APRET ADAMENTE CADA VEZ que coloca a su niño en el sistema de seguridad para niños. • Evite usar ropas abultadas. 1. Coloque al niño en el sistema de seguridad para niños con la espalda del niño plana contra el respaldo del asiento para automóvil. 2. Coloq[…]
-
Page 102: Graco Nautilus
38 3. Asegure la presilla del pecho . Coloque la presilla del pecho en el medio del pecho del QLxRQLYHODGR FRQ ODVD[LODV 4. T ense las correas del arnés tirando de la correa de ajuste adelante del asiento . 5. Asegúrese que las correas estén planas y ajustadas contra los hombros y muslos del niño. No debería poder apr[…]
-
Page 103: Graco Nautilus
39 1. Saque las correas del arnés. Abra la traba del pecho y la hebilla del arnés . 2. Mire hacia la parte trasera del asiento y saque las correas del cinturón de la placa de unión de metal como se indica. 3. Saque la correa para la entrepierna empujando el retén de la correa de la SDUWHGH DEDMR GHODVLHQWR K[…]
-
Page 104: Graco Nautilus
40 4. Agarre la hebilla de la correa para la entrepierna y tírela completamente hacia afuera . 5. T ire de la correa de ajuste del frente del asiento para trabar la placa de unión de metal en su lugar . 6. Agarre las correas para el hombro y tírelas hacia afuera de sus ranuras respectivas del almohadón del asiento. Saque el sopor[…]
-
Page 105: Graco Nautilus
41 (Q OD SDUWHGH DWUiVGHO DVLHQWRGHVFRQHFWH correas de elástico del almohadón del asiento de abajo de los ganchos como se indica en . 8. T ambién desconecte las correas elásticas que pasan por las guías del cinturón del vehículo en los costados del asiento como se indica en . Repita el proce[…]
-
Page 106: Graco Nautilus
42 ¢ 11 10. Saque las correas del arnés de los brazos como se indica en ¢ . *XDUGHHO VRSRUWH GHOFXHUSR IXQGDVGHO DUQpVIXQGD GH ODDOPRKDGLOOD SDUDOD entrepierna y correas del arnés en un lugar seguro para uso futuro. 1 1. Saque la tela del almohadón del asiento y luego levante el respaldo del asie[…]
-
Page 107: Graco Nautilus
43 12. Ponga el almohadón del asiento entre el espacio del soporte de la espalda y el lugar del asiento para permitir 2 correas elásticas salgan por la parte trasera del asiento. 13. Sujete 2 correas elásticas del almohadón del asiento a los ganchos en la parte trasera del sistema de seguridad para niños como se indica en . 14. Pase la correa […]
-
Page 108: Graco Nautilus
44 14.0 Uso del sistema de se guridad SIN el ar nés incor porado ADVERTENCIA! Use solamente el sistema de cinturón del vehículo para el hombro y la falda cuando sujeta a su niño en el asiento. El LA TCH no asegurará su niño al asiento. Use solamente el sistema de cinturón del vehículo para el hombro y la falda cuando sujeta a su niño en el[…]
-
Page 109: Graco Nautilus
45 NO use el cinturón del hombro flojo o puesto debajo del brazo . NO ponga el cinturón de seguridad para el hombro detrás de la espalda del niño . La parte de la falda del cinturón para la falda y el hombro DEBE estar bajo y apretado en la FDGHUDDSHQDV WRFDQGR ORVPXVORV NO deje que su niño salga por abajo del asient[…]
-
Page 110: Graco Nautilus
46 INCORRECTO INCORRECTO El apoyacabeza del asiento del vehículo no debe crear un espacio entre el asiento del vehículo y el asiento de seguridad . El frente del asiento de seguridad NO DEBE quedar suspendido del frente del asiento del vehículo . […]
-
Page 111: Graco Nautilus
47 15.0 Asegur ar al niño y al asiento de seguridad en el v ehículo 1. Coloque el asiento para automóvil firmemente contra el respaldo de un asiento del vehículo que mira hacia adelante. El asiento del vehículo debe estar equipado con un cinturón para la falda y el hombro. 2. Coloque al niño en el asiento de seguridad para automóvil con[…]
-
Page 112: Graco Nautilus
48 16.0 Ajuste del sopor te de la ca beza Cuando se usa con o sin el arnés incorporado. ANTES de ajustar la altura del soporte de la FDEH]DSLGD D VXQLxR TXHVH PXHYDXQ SRFR hacia adelante. Apriete la manija roja de ajuste de arriba del asiento y tire el soporte de la espalda hacia arriba hasta que se trabe en un[…]
-
Page 113: Graco Nautilus
49 Para usar el asiento SIN el soporte de la HVSDOGDVDTXH ODV FRUUHDVGHO DUQpVVL HVWiQ colocadas ( vea la sección 13.0 Cómo sacar el arnés, pág. 39 a 43) y luego continúe con los pasos siguientes: 1. Desenganche 2 correas elásticas inferiores de la parte de atrás del asiento como se indica . 2. Desenganche la c[…]
-
Page 114: Graco Nautilus
50 3. T ire el almohadón del asiento para que muestre los botones rojos como se indica en . Deslice los botones para liberar el soporte de la espalda de la base y bájelo a una posición plana. &XDQGRVDFD HO VRSRUWHGH ODHVSDOGD GHEH apoyarlo cuando desliza los botones rojos para desenganchar el soporte de la espa[…]
-
Page 115: Graco Nautilus
51 5. Una vez que ha separado el soporte de la espalda JXDUGH HO VRSRUWHGH ODHVSDOGD FRQWRGDV ODV FRUUHDVGHO DUQpVVRSRUWH GHOD FDEH]DVRSRUWH GHO FXHUSR IXQGDGH OD almohadilla para la entrepierna en un lugar seguro. 6. V uelva a conectar las correas elásticas de a[…]
-
Page 116: Graco Nautilus
52 18.0 Asegur ar al niño con el cinturón del v ehículo con tr aba de posicionamiento para el cinturón del hombr o El cinturón del hombro DEBE pasar a través de los hombros del niño en la zona roja como se indica . Si el cinturón del hombro está fuera de HVWD]RQD VH DEBE usar la traba de posicionamiento del cinturón de[…]
-
Page 117: Graco Nautilus
53 2. Pase la traba y la correa a través del extre- mo del nudo como se indica y tire la correa hacia arriba. 3. NOT A: El extremo liberado de la correa deberá mirar al frente del asiento. […]
-
Page 118: Graco Nautilus
54 4. Deslice el cinturón del hombro del vehículo por la traba como se indica y tire el extremo libre de la correa hacia abajo para ajustar la traba contra el hombro del niño. La parte de la falda DEBE pasar a través de la guía del cinturón del vehículo y estar posicionada baja en las caderas. El cinturón NO DEBE estar doblado. T ra[…]
-
Page 119: Graco Nautilus
55 5. La parte de la falda del cinturón para la falda y el hombro DEBE HVWDU EDMR DSUHWDGRHQ ODFDGHUD apenas tocando los muslos. NO deje que su niño salga por abajo del asiento . CORRECTO […]
-
Page 120: Graco Nautilus
56 19.0 Uso del anc laje T odas las posiciones del asiento LA TCH tienen puntos de anclaje. Use siempre el anclaje si hay XQVXMHWDGRU GHO DQFODMHHQ HOYHKtFXOR FRQVXOWHHO PDQXDO GHOGXHxR GHOYHKtFXOR SDUD GHWHUPLQDU los lugares de los sujetadores de anclaje. Si su vehículo no está equipado con un s[…]
-
Page 121: Graco Nautilus
57 19.1 Cómo guar dar los anc lajes inferiores y anc laje (LA TCH) 3DUD IDFLOLWDU HODOPDFHQDPLHQWR H[WLHQGDHO LA TCH hasta el máximo. 2. Ubique las barras de almacenamiento en el respaldo del sistema de seguridad para niños . 3. Sujete los extremos del anclaje y los anclajes inferiores en sus barras de almacenam[…]
-
Page 122: Graco Nautilus
58 Este sistema de seguridad ha sido certificado para ser usado en vehículos automotor . Ha sido certificado para uso en aeronaves SOLAMENTE cuando se lo usa con el arnés incorporado. Cuando se lo usa como asiento SIN HO DUQpV HVWHVLVWHPD GHVHJXULGDG 12 +$ 6,’2 CERTIFICADO para ser usado en aeronaves porque […]
-
Page 123: Graco Nautilus
59 21.0 Accesorios (SOLAMENTE en cier tos modelos) Para prev enir la eyección en un accidente o parada r epentina: • Asegúrese siempre que las correas del hombro pasan por las ranuras y están debidamente instaladas en los hombros. • Nunca deje que el soporte del cuerpo se apile o pliegue detrás del niño. • Use el soporte del cuerpo solam[…]
-
Page 124: Graco Nautilus
60 Su sistema de seguridad para niños tiene 3 posiciones de reclinación: ajuste el pie reclinatorio antes de instalar el sistema de seguridad para niños. 3DUD UHFOLQDU HODVLHQWR WLUHOD PDQLMD GH reclinación hacia afuera e incline el respaldo del asiento para extender el pie como se indica . […]
-
Page 125: Graco Nautilus
61 • El uso continuo del sistema de seguridad para niños podría causar daño al asiento del vehículo. 8VHXQD HVWHUD WRDOODR IUD]DGDILQD FRQHO VLVWHPD GHVHJXULGDG SDUD QLxRVSDUD SURWHJHUHO tapizado. • Piezas de metal y de plástico: limpiar con un jabón suave y agua fresca. No use blanque[…]
-
Page 126: Graco Nautilus
62 ’HYXHOWDHOVLVWHPDGHVHJXULGDGSDVHHOUHWpQSRUODUDQXUDGH la correa de la entrepierna . 3DUDOLPSLDUODKHELOODSyQJDOHHQXQDWD]DGHDJXDWLELDDJLWH VXDYHPHQWHODKHELOODRSULPDHOERWyQURMRYDULDVYHFHVPLHQWU DV esté sum[…]
-
Page 127: Graco Nautilus
63 Funda del asiento: limpiar con una esponja húmeda usando un jabón suave y agua fresca. ‘HVHU QHFHVDULR VHSXHGH VDFDUOD IXQGD para limpiarla. 1. Saque las correas del arnés y para la HQWUHSLHUQDYHD OD 6HFFLyQ &yPRVDFDU el arnés. pág. 39). 2. Saque los nudos de plásti[…]
инструкцияGraco 4Ever

Do not install or use
this child restraint until
you read and understand
the instructions in this
manual.
FAILURE TO PROPERLY
USE THIS CHILD
RESTRAINT INCREASES
THE RISK OF SERIOUS
INJURY OR DEATH IN A
SUDDEN STOP OR CRASH.
www.gracobaby.com
PD303535A 1/15
™
/4EVER
™
FEATURING
ALL-IN-ONE CAR SEAT
Посмотреть инструкция для Graco 4Ever бесплатно. Руководство относится к категории автокресла, 5 человек(а) дали ему среднюю оценку 9. Руководство доступно на следующих языках: английский. У вас есть вопрос о Graco 4Ever или вам нужна помощь? Задайте свой вопрос здесь
Graco 4Ever это автокресло, которое предназначено для безопасности и комфорта детей во время поездок на автомобиле. Оно обладает 4 режимами использования, которые подходят для различных возрастных групп: заднего автокресла для младенцев, переднего автокресла для детей старше года, бустера с подлокотниками и бустера без подлокотников для детей в возрасте от 4 до 12 лет.
Автокресло Graco 4Ever выполнено из высококачественных материалов, обеспечивающих надежность и долговечность. Оно имеет систему установки LATCH, которая обеспечивает простоту и безопасность при установке автокресла в автомобиле. Дизайн автокресла предусматривает использование боковой защиты при боковых столкновениях, а также защиту от ударов сзади.
Graco 4Ever также обладает регулируемым подголовником и ремнями безопасности, чтобы обеспечить правильное положение и комфорт растущего ребенка. Он также имеет съемный чехол, который легко моется, чтобы поддерживать надлежащую чистоту и гигиену.
Это автокресло соответствует стандартам безопасности, установленным производителями автомобилей и рекомендуемым организациями, такими как Американская академия педиатрии. Оно может быть использовано на всем протяжении детского возраста и является долговечным решением для транспортировки детей.
В целом, автокресло Graco 4Ever обеспечивает безопасность, комфорт и долговечность для детей во время путешествий на автомобиле. С его помощью родители могут быть уверены, что их дети находятся в надежных и качественных руках.
Главная
| Graco | |
| 4Ever | |
| автокресло | |
| 0047406134298, 0047406134304, 0047406134311, 0047406134908 | |
| английский | |
| Руководство пользователя (PDF) |
Не можете найти ответ на свой вопрос в руководстве? Вы можете найти ответ на свой вопрос ниже, в разделе часто задаваемых вопросов о Graco 4Ever.
Безопасно ли ребенку спать в автокресло?
Нет, ребенок может задохнуться. Если ребенок заснул в автокресло, его следует достать из автокресло и поместить в кроватку. Как можно скорее возьмите заснувшего ребенка и положите в кроватку.
Нужно ли двухлетнему ребенку автокресло в самолете?
Нет, ребенка в возрасте до 24 месяцев во время полета можно держать на коленях.
Какое место для автокресла самое безопасное?
Самое безопасное место для автокресла находится в центре заднего сиденья, на достаточном расстоянии от подушек безопасности.
Инструкция Graco 4Ever доступно в русский?
К сожалению, у нас нет руководства для Graco 4Ever, доступного в русский. Это руководство доступно в английский.
Не нашли свой вопрос? Задайте свой вопрос здесь