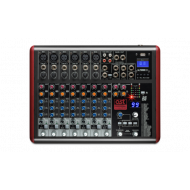
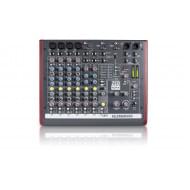
Если у вас отсутствует техническая возможность для скачивания Инструкция по эксплуатации для Dynacord POWER MIXER 1000
вы можете прочесть документ прямо на нашем сайте или
Скачать Dynacord POWER MIXER 1000 Инструкция по эксплуатации
- 1
- 2
- 3
- 4
- 5
- 6
- 7
- 8
- 9
- 10
- 11
- 12
- 13
- 14
- 15
- 16
- 17
- 18
- 19
- 20
- 21
- 22
- 23
- 24
- 25
- 26
- 27
- 28
- 29
- 30
- 31
- 32
- 33
Инструкции для прочих Dynacord Микшеры
Инструкции для прочих Dynacord
Руководства Dynacord POWERMATE 1000 Размер файлов: 1205 KB, Язык: English, Формат: pdf, Платформа: Windows/Linux, Дата: 2017-02-24
На данной странице вы можете скачать руководства Dynacord POWERMATE 1000. Мы предлагаем вам ознакомиться с руководством пользователя, инструкцией по сервисному обслуживанию и ремонту.
Также здесь вы найдете список заказных номеров на комплектующие Dynacord POWERMATE 1000.
Все файлы предоставляются исключительно в ознакомительных целях. И не являютя руководством по ремонту, а направлены лишь на то чтобы помочь вам более детально ознакомиться с принципом построения устройства.
Содержимое представленных здесь руководств требуют от вас знания технического английского языка.
Если вы собираетесь скачать руководство по сервисному обслуживанию Dynacord POWERMATE 1000, иными словами сервис мануал, вы дожны обладать хотя бы минимальными познаниями в области электроники и пониманием базовых принципов работы электромеханических устройств.
Для просмотра руководств вам понадобится Adobe Acrobat Reader версии 9 и выше либо другая программа для просмотра pdf файлов.
В связи с популярностью информации представленной на сайте и ее бесплатного предоставления конечному пользователю, убедительная просьба использовать специальные программные продукты для многопотокового скачивания файлов.
Руководства для Dynacord POWERMATE 1000
- Руководство пользователя (User manual)
- Руководство по сервисному обслуживанию (Service manual)
- Руководство по ремонту (Repair manual)
- Перечень комплектующих (PartList)
Код товара: 36640
Артикул: PowerMate 1000-3
Производитель:
Dynacord
Цена
239 225 р.
В наличии
- Описание PowerMate 1000-3
- Особенности
- Характеристики PowerMate 1000-3
- Инструкции
- Отзывы PowerMate 1000-3
- Похожие
Dynacord PowerMate 1000-3
PowerMate 1000-3 оснащен оптимизированной для живой работы профессиональной микшерной секцией на 6 мик./лин.каналов и 4 стерео мик./лин. канала
Особенности Dynacord PowerMate 1000-3
- 2 х 1000 Вт RMS (на 4 Ома)
- Специальный вокальный фильтр (Vocal Voicing Filter)
- 5 AUX-шин
- Высококачественные малошумные микрофонные предусилители
- НЧ-фильтры
- 11-полосный эквалайзер
- На 30% легче
- Потребление энергии в два раза меньше
- Возможность регулировки параметров прессетов
- USB-интерфейс
- MIDI
- Вес для доставки: 13 кг
Dynacord PowerMate 1000-3 инструкция на русском языке
На этот товар еще нет инструкций
Отзывы на Dynacord PowerMate 1000-3
- На этот товар еще нет отзывов.
OWNER‘S MANUAL
PowerMate 1000/1600 Power Mixer
30
CONTENTS
IMPORTANT SAFETY INSTRUCTIONS ………………….. 31IMPORTANT SERVICE INSTRUCTIONS ………………….. 31DESCRIPTION ………………….. 32 UNPACKING AND WARRANTY ………………….. 32 INSTALLATION ………………….. 32INPUT MONO ………………….. 33INPUT STEREO ………………….. 38 EFFECT 1/2 ………………….. 41 AUX 3/4 ………………….. 43 MASTER ………………….. 44 REAR PANEL ………………….. 49 SETTING UP A STANDARD PA-SYSTEM ………………….. 50 MASTER PATCHBAY ………………….. 54SPECIFICATIONS / TECHNISCHE DATEN ………………….. 56BLOCK DIAGRAM ………………….. 57DIMENSIONS / ABMESSUNGEN ………………….. 58
30 31
The lightning flash with arrowhead symbol, within an equilateral triangle is intended to alert the user to the presence of uninsulated „dangerous voltage“ within the product’s enclosure that may be of sufficient magnitude to constitute a risk of electric shock to persons.
The exclamation point within an equilateral triangle is intended to alert the user to the presence of important operating and maintance (servicing) instructions in the literature accompanying the appliance.
1. Read these instructions.2. Keep these instructions. 3. Heed all warnings.4. Follow all instructions.5. Do not use this apparatus near water. 6. Clean only with a dry cloth.7. Do not cover any ventilation openings. Install in accordance with the manufacture’s instructions.8. Do not install near heat sources such as radiators, heat registers, stoves, or other apparatus (including amplifiers) that produce heat.9. Do not defeat the safety purpose of the polarized or the grounding-type plug. A polarized plug has two blades with one wider than the other. A grounding type plug has two blades and a third grounding prong. The wide blade or the third prong are provided for your safety. If the provided plug does not fit into your outlet, consult an electrican for replacement of the obsolete outlet.10. Protect the power cord from being walked on or pinched particularly at plugs, convenience receptacles, and the point where they exit from the apparatus. 11. Only use attachments/accessories specified by the manufacturer.12. Unplug this apparatus during lightning storms or when unused for a long period of time.13. Refer all servicing to qualified service personnel. Servicing is required when the apparatus has been damaged in any way, such as power-supply cord or plug is damaged, liquid has been spilled or objects have fallen into the apparatus, the apparatus has been exposed to rain or moisture, does not operate normally, or has been dropped.14. Do not expose this equipment to dripping or splashing and ensure that no objects filled with liquids, such as vases, are placed on the equipment.15. To completely disconnect this equipment from the AC Mains, disconnect the power plug from the AC receptacle.16. The mains plug of the power supply cord shall remain readily operable.
CAUTION: These servicing instructions are for use by qualified personnel only. To reduce the risk of electric shock, do not perform any servicing other than that contained in the Operating Instructions unless you are qualified to do so. Refer all servicing to qualified service personnel.
1. Security regulations as stated in the EN 60065 (VDE 0860 / IEC 65) and the CSA E65 — 94 have to be obeyed when servicing the appliance.2. Use of a mains separator transformer is mandatory during maintenance while the appliance is opened, needs to be operated and is connected to the mains.3. Switch off the power before retrofitting any extensions, changing the mains voltage or the output voltage.4. The minimum distance between parts carrying mains voltage and any accessible metal piece (metal enclosure), respectively between the mains poles has to be 3 mm and needs to be minded at all times. The minimum distance between parts carrying mains voltage and any switches or breakers that are not connected to the mains (secondary parts) has to be 6 mm and needs to be minded at all times.5. Replacing special components that are marked in the circuit diagram using the security symbol (Note) is only permissible when using original parts.6. Altering the circuitry without prior consent or advice is not legitimate.7. Any work security regulations that are applicable at the location where the appliance is being serviced have to be strictly obeyed. This applies also to any regulations about the work place itself.8. All instructions concerning the handling of MOS — circuits have to be observed.
SAFETY COMPONENT ( MUST BE REPLACED BY ORIGINAL PART )NOTE:
IMPORTANT SERVICE INSTRUCTIONS
IMPORTANT SAFETY INSTRUCTIONS
32 33
DESCRIPTION
First of all, we would like to thank you and congratulate you to your purchase of a DYNACORD power mixer.
The PowerMate compact power mixers incorporate profound know-how, based on our research, development and inter-communication with our customers in the professional audio market, for decades. With a PowerMate you own a power mixer that offers a wide range of functionality in a very compact frame. Forget about the troubling experiences with cabling and matching mixers, amplifiers, FX units, and equalizers. You now own a device with optimally matched components. The mixer’s ergonomic console shape and clearly structured controls provide perfect overview for instant access at all times. A gooseneck litlight can be easily plugged into the provided socket to compensate for insufficient lighting conditions. Also during the transport you will quickly learn to appreciate the PowerMate’s superiority: recessed handles on the sides, compact dimensions and low weight, plus the sturdy cover that protects the controls from being damaged. However, if you would rather like to install your PowerMate 1000 in a 19” rack shelf, no problem. The only thing you have to do is to replace the plastic side panels by a pair of metal rack mount ears. Through its multiple functions, its high dynamic capacity, and extremely low-noise design in combination with its 24-bit Dual-Stereo effect unit and the high-performance power amplifier, the PowerMate is best equipped for universal use. No matter, whether on-stage, in a home recording environment or in a permanent installation, your PowerMate is the ideal partner to meet your expectations of a professional audio device – effective and reliable. Of course, you want to install and operate your new PowerMate as quickly as possible. Nevertheless, please take the time to do this by means of this user’s manual. Starting with input channels, effects and master areas up to the power amp, every section is explained systematically and in detail within this owner’s manual. Through the careful perception of the manual you will learn about all functions and find some useful and practical tips for the daily operation of the PowerMate. Even more important, you will find some adjustment guidelines that should be painstakingly carried out; plus the description of a typical sound reinforcement installation, a block diagram, specifications, connection guidelines, etc.… So, take your time and keep on reading.
Unpacking and WarrantyOpen the packaging and take out the PowerMate. Remove the FX unit displays’ protective foil. In addition to this owner’s manual you will find the mains supply cord and the warranty card. Please check, if the warranty registration form is filled out correctly. Only when this form is completed, you will be able to apply for warranty claims. DYNACORD grants 36 months of warranty, starting with the date when you received the appliance from your local dealer. Therefore, we would like to ask you to also keep the original certificate of purchase together with the warranty certificate.
Keeping all papers and the original packaging of the device is generally recommendable, since they come in handy re-selling an appliance.
Installation and Connections Do not cover the ventilation louvers in the bottom plate of the appliance. Always place the PowerMate on an even surface to allow for sufficient airflow during the operation. The device is equipped with electronically controlled ventilators to protect the power amplifier against thermal overload. The direction of the airflow is front-to-rear. Fresh, cold air enters the mixer at its lower front side and warm air leaves the device through the ventilation louvers in the rear panel. Do not cover the frontal or the rear ventilation louvers. Otherwise the PowerMate automatically enters protect mode to prevent thermal overload. While the protect mode prevents that the device is being damaged, regular operation is impossible during the period of time it is activated. In case the PowerMate is installed in a 19” rack system (vertically), you have to allow at least 2 HU of free space above and 1 HU below the mixer. Of course you can cover the empty space with special blind plates that also have ventilation louvers. Before establishing the mains supply connection, please make sure that the device matches the voltage and frequency of your local mains supply. Check the label next to the mains switch. When switching the power on, the internal fans will run for about 2 seconds at full speed to give you an acoustical signal that the PowerMate is ready to be operated. In addition dust particles that might have gotten into the device get blown out. For a secure connection the SPEAKER OUTPUTS on the rear panel of the PowerMate are provided through professional standard high-performance SPEAKON connectors. The pin assignment of these sockets is 1+ (hot) and 1- (cold).
32 33
INPUT MONO
1. MIC Electronically balanced XLR-type inputs for the connection of low impedance microphones like the ones featured in major studio and live mixing consoles. This type of input stage provides extraordinary low noise signal conversion at an extremely low distortion rate (typical <0.002%) even in the high frequency range. Generally, any type of microphone can be connected as long as its pin assignment is in accordance to the diagram shown below. When condenser microphones are connected, you have to press the PHANTOM POWER (MIC 1-6) button, which is located in the input section. The microphone gets its operating voltage (+48Vdc) through the mixer and you can forget about battery replacement times.
CAUTION: Always connect the microphones before turning on the phantom power or switching the PowerMate on with phantom power being activated. This is the only way to prevent your microphones from being damaged. Also make sure to engage the STANDBY button in the master section to prevent yourself and your environment from nasty power-on noise. Simultaneous connection of condenser type microphones and dynamic microphone models is generally possible with phantom power being activated. Before you do so, please consult the manual of the concerned microphone. The MIC input accepts levels between –60dBu … +21dBu – depending on the setting of the corresponding gain control. Because of their low impedance design and the phantom power these XLR-type inputs are not suitable for cascading other mixing consoles or the connection of FX units, keyboards or other electronic equipment. When connecting this kind of equipment, please use the LINE level inputs.
2. LINEElectronically balanced inputs for the connection of electronic instruments, such as keyboards, drum machines, E-guitars and E-basses with an active output, as well as all other high level signal sources, like additional mixers, FX units, CD players, etc. The LINE input accepts levels between –40dBu … +41dBu. The connection of balanced or unbalanced signal sources is established through monaural or stereo phone plugs, assigned according to the diagram below. If the device that you want to connect has a balanced output stage, the use of balanced cables with stereo phone plugs is preferable. This type of connection is greatly insensitive to the induction of external noise or HF interference.
Do not connect identical signal sources to LINE and MIC inputs at the same time, since the signals would interfere with each other, resulting in level reduction.
One more note: Please, do not connect E-guitars or E-basses with passive, high impedance outputs directly to a LINE input. The LINE inputs of the PowerMate – like the Line level inputs of mixers from other manufacturers – are designed for the connection of the relatively low source impedance of electronic instruments. The reproduction of the instrument’s original sound characteristics will be unsatisfactory. Connect those instruments using a special transformer or pre-amplifier with very high input impedance. Musical instruments with an active electronic output (battery-powered) can be connected without any problems.
34 35
INPUT MONOWhen connecting signal sources, please make sure to set the corresponding channel faders or at least the master faders to their minimum positions or engage the STANDBY button. This will save you, your audience, and the equipment from extensive wear from unpleasant pops.
3. INSERT Stereo phone jack with breaker function. The low impedance output is assigned to the tip (send) and the high impedance input (return) is assigned to the ring. This jack allows the connection of external compressors, limiters, EQs, de-noisers, etc. into the corresponding channel’s signal path. The insertion point is post gain controls, Lo-Cut filters, and voicing stage and pre sound shaping section and channel faders. You have to use a stereo phone plug – according to the diagram aside – in case you intend to use this jack as a true insert bus.
When using the insert socket as a DIRECT OUT (Pre EQ), the stereo phone plug’s tip and ring have to be short circuited, so that the audio signal is not interrupted. If you are using a monaural phone plug instead, you will get a DIRECT OUT with breaker function – the signal flow within the channel is interrupted.
4. GAIN Rotary control for adjusting a MIC/LINE input’s sensitivity. These controls let you optimally adjust the incoming signals to the mixer’s internal operation level. Cautious adjusting offers the benefits of an improved S/N-ratio and provides you with the full bandwidth of the PowerMate’s outstanding sound capabilities. On the XLR-type connectors an amplification of 0dB is achieved when the control is set all the way to the left and +60dB when the control is set all the way to the right. Especially when dealing with very low input levels – during vocal recordings or when the sound source is located in a distance – the high gain is extremely profitable. Using the LINE-input, the signal is generally attenuated by –20 dB while maintaining the total adjustment range of 60dB. The LINE-input’s unity gain – no amplification (0 dB) – is achieved at the 20dB mark. The following is meant as a short note for your assistance on how to determine the right input level:
Setting Instructions: 1. Set the gain control and the corresponding channel fader to their minimum values.2. Connect the desired sound source (microphone, musical instrument, etc.) to the desired
MIC or LINE input.3. Start the reproduction of the sound source at the highest volume level to be expected
– respectively sing or speak as loud as possible directly (short distance) into the microphone.
4. While playing the sound source or singing into the microphone, adjust the input level using the gain control, so that during the loudest passages the PEAK LED is just not lit, but the SIGNAL present LED lights constantly.
This is the basic channel setting, leaving you with at least 6 dB of headroom, i.e. you have at least a range of 6dB before signal clipping occurs. In case you intend to make further adjustments to the channel’s EQ setting, you should perform steps 3. and 4. again afterwards, since changes in the sound shaping section also have an influence on the channel’s overall level.
34 35
INPUT MONO
5. LO CUT 80 HzWhen the LO CUT switch is engaged, frequencies below 80 Hz are attenuated (18 dB octave slope). In most cases using the LO CUT filter with microphone channels is a good advice, since it efficiently suppresses popping sounds, rumbling noise and low-frequency feedback. The only exceptions are kick drum and acoustic bass. Sometimes it can be also very effective to combine the LO CUT filter with the voicing filter. For instance to provide vocals with more “body”, without getting additional low pitched noise. Activating the LO CUT and raising the bass level (LO EQ) provides you with a richer sound, without additional rumbling or popping noise. Another welcome side effect is, that the power amplifier and the connected loudspeakers do not get “polluted” with unnecessary low-pitched interference. Your audience will be thankful for the use of the LO CUT filter, too, since in this way they can enjoy a truly clear, natural, and powerful sound performance.
6. VOICING FILTERThis button activates an asymmetric microphone filter, which can be used in addition to the channel EQ. The voicing filter enhances the first harmonic oscillation and the treble of the human voice while slightly attenuating the mid frequency range. This voice shaping method provides powerful vocals that are clearly emphasized from the rest of the mix. This “pre-shaping” is not achievable using ordinary third or octave band equalizers. The use of this filter is not restricted to vocals only. Horns, woodwinds, and other acoustic instruments can profit from the voicing filter as well. We leave it entirely up to your creativity and imagination to try the VOICING filter with as many different sound sources, as you want. Normally, you do not have to fear any problems with the occurrence of feedback.
7. EQ SECTION The mixer’s EQ section allows very differentiated shaping of the incoming audio signal within miscellaneous frequency bands. Turning one of the EQ level controls to the right enhances/amplifies the corresponding frequency range while turning it to the left lowers/attenuates the signal of that specific frequency band. Before you begin to alter the sound, all EQ controls should be set to their neutral position, i.e. their marker points straight up (locked in place). Try not to set the EQ controls to extreme positions. Usually, minor changes are totally sufficient and produce the best results in the overall sound. You should use the natural reproduction as an orientation mark and rely on your musically trained ear. The moderate use of the MID control is the best remedy to avoid acoustical feedback. Especially in this frequency range you should try to avoid excessive enhancement. Lowering the level more or less in this band will provide you with high amplification rates without feedback. Use the LO control according to your pleasing, to add more “punch” to the sound of a kick drum or “body” to the vocals. Use the HI control in the same way to provide cymbals and the human voice with more treble and a more transparent sound. The MID EQ section offers parametric EQ-setting via separate rotary controls for the adjustment of level (MID) and frequency band (kHz) in the range between 100 Hz and 8 kHz.
-35
+5
-30
-25
-20
-15
-10
-5
+0
20 20k50 100 200 500 1k 2k 5k 10kHz
-20
+20
-15
-10
-5
+0
+5
+10
+15
20 20k50 100 200 500 1k 2k 5k 10kHz
36 37
INPUT MONO
Adjustments in the MID frequency range are certainly the most effective way to shape the sound. As a matter of fact, determining the correct center frequency is not always as easy as it seems. Here is one method – amongst others – how to quickly find the right setting of the parametric EQ for your application:Setting Instructions:1. Slightly lower the channel fader to avoid feedback.2. Turn the MID rotary control all the way to the right (+15dB).3. Play the desired sound source or talk into the microphone.4. While doing so turn the frequency rotary control (kHz) slowly from left to right.5. Surely and within no time, you will detect the frequency range that is not to your liking or
causing the feedback.6. Leave the frequency control in this position and turn the MID control to the left until the
sound is natural or to your liking.
8. AUX / FX 1/2The AUX/FX controls allow adjusting individual amounts of the input signals to be routed to the integrated FX1 or the FX2 effects units. The signal path is split post volume fader – POST FADER – so that the fader setting also influences the amount of the signal that is fed to the FX units. Using the AUX/FX controls lets you easily assign an effect for groups of musical instruments or vocals. For example, you can assign a short reverb effect of the FX1 unit to the lead vocals and a combined effects program – echo, hall, and chorus – via FX2 to the background vocals. To determine the desired intensity of each effect, you should start with the controls set at their center and make individual adjustments from there on. Please monitor the PEAK LEDs in the FX1/2 channels. The indicator should only light briefly at the occurrence of high program peaks. If the indicator is constantly lit, you should lower the send levels of those channels where the program peaks occur. For further information, please read the paragraphs about the FX1/2 units.(In case you are not using the internal FX units and/or you want to connect external signal processing units, the pre-mixed AUX/FX1/2 signals are outputted via the AUX1/2 send jacks.)
9. AUX 3/4AUX 3 and AUX 4 controls are primarily meant for establishing two independent monitor mixes. Using the master section’s AUX PRE/POST switches allows determining whether the signals are split pre or post fader.
PRE-FADER: The audio signal that is present at the AUX control is tapped pre volume fader and therefore not affected by the fader’s setting. This mode is mainly used for monitoring. Pre-Fader Monitoring is especially preferable when monitoring and main mix need to be completely different from each other, e.g. when the volume setting of particular musical instruments or vocals needs to be higher or lower than in the main mix. In most cases the mixing console is placed somewhere in the audience area (FOH) and is being operated by an experienced sound technician.
POST-FADER: The audio signal that is present at the AUX control is tapped post volume fader and therefore affected by the fader’s setting. This mode is mainly used for establishing FX- or special monitoring mixes. Using the POST-Fader method is recommended when the mixer is also located on the stage and you have to operate it yourself.
LOW-HI EQ MID EQ
-20
+20
-15
-10
-5
+0
+5
+10
+15
20 20k50 100 200 500 1k 2k 5k 10kHz
-20
+20
-15
-10
-5
+0
+5
+10
+15
20 20k50 100 200 500 1k 2k 5k 10kHz
36 37
Setting all AUX3 or AUX 4 controls to their center position, the main mix is also present on the monitor bus, giving you the opportunity to control the volume settings of each channel individually from the stage. The overall volume of the monitor mix is set using the AUX3/AUX4 faders in the master section. If you are using this option you should keep in mind that all volume changes made with the channel faders also apply to the monitor mix, leaving you with a higher risk of acoustic feedback.The Post-Fader Monitoring method provides the possibility of canceling channels of some instruments – like kick or snare drum, which are in fact already very loud on-stage – from the monitor mix by turning the corresponding controls all the way to the left.
10. PANThis control determines the position of the connected sound source within the stereo image. When this control is set at its center position, the audio signal is fed with equal levels to the L and R master busses. The PAN control section is designed to maintain the essential sound pressure level, no matter at what position within the stereo image the PAN control is set to.
11. MUTEThe MUTE button mutes the input signal post fader, including all AUX sends. PFL and Signal/Peak stay functional.
12. PFLEngaging the PFL button routes the audio signal to the headphones bus, so that it is present at the phones output connector. The meter instrument in the master section is simultaneously switched, so that the left LED-chain indicates the level of the actually chosen channel (in dBu), which allows optimally matching the level of the signal source. The phones output volume does not dependent on the setting of the corresponding channel fader (PRE FADER LISTEN), which provides the possibility to listen to or shape the sound of the selected audio signal, without need to include it in the main mix.
13. SIGNAL / PEAK IndicatorThe signal-peak indicator plays a key role when setting input levels. Unlike the mixers of many other manufacturers that either only provide a peak indicator or no channel indicator at all, the PK (peak) LED of the PowerMate provides optical indication of the risk of occurring overdrive before you would actually hear the distortion over the connected speaker systems. As outlined in the setting instructions, the Signal-LED should blink in the rhythm of the incoming signal. If this is not the case, you have to increase the gain. If the PEAK LED, on the other hand, blinks frequently or lights continuously, the corresponding channel is likely to enter clipping and you have to turn the gain control a bit to the left. The Signal-LED lights at levels –30dB below clipping while the peak LED lights at a level of –6dB below the occurrence of overdrive. Keeping an eye on the indicator during a performance is also a good idea, because some very dynamically performing members of a band or changing keyboard setups can easily lead to channel clipping, resulting in the degradation of the overall sound.
14. VOLUMEThe channel faders set the volume of the corresponding channels, establishing an accurately proportioned mix. The channel faders should be positioned within the range of –5dB to 0dB, leaving you with a degree of control that allows the precise matching of relative big differences in the channels’ level settings. The overall volume is set through the use of the master faders. Even though the channel faders offer an additional amplification of +10dB, we would like to advise you to exceed the +5dB mark only in very few exceptional cases. If the PowerMate’s summing bus gets “overloaded” with too many “high level” input channels, despite its special gain structure, the summing amplifier could be driven into clipping. Once you register, that some channel faders are set above the 0dB marking, lowering the setting of each channel fader by about –5dB and increasing the overall output level by elevating the master faders is the wiser solution. The proportion of the mix and the overall volume stay the same while the risk of clipping is banished.
INPUT MONO
38 39
INPUT STEREO
Since most features – AUX faders, controls and channel faders – of the STEREO INPUTS are virtually identical to the ones of the MONO INPUTS we will not discuss their functioning in detail again. Thus, in the following we only point out the differences and like to ask you to refer to the analogous paragraphs within this owner’s manual describing the MONO INPUTS.
15.MIC Different from the products of many other manufacturers, the stereo input channels of the PowerMate, like their monaural counterparts, incorporate extensive circuitry and electronically balanced XLR-type connectors for the connection of low impedance microphones. No matter if your setup is more microphone-oriented or you have more line level sound sources to connect, you can always use the full amount of input channels, provided by your PowerMate. Dependable on its setting, the high-quality MIC input in the stereo channel is capable of handling levels between -60dBu … +11dBu. Low-level circuitry architecture and phantom power (+48V) ability of this XLR-type input are mainly aimed at the connection of microphones, making it not necessarily suitable for connecting Line level appliances, like mixers, effects units, etc. Please use the provided LINE inputs to connect those sound sources. General functions and usage of MIC inputs were already discussed in detail for monaural channels.
16. STEREO INPUT L/MONO R Electronically balanced inputs for the connection of musical instruments with stereo output, like keyboards, drum machines, E-guitars and E-basses with an active output as well as all other equivalent sound sources with high level outputs, like additional mixing consoles, FX units, CD players, etc. The stereo LINE input is meant for balanced or unbalanced sound sources with levels between –20dBu …. +41dBu. For the connection of external devices you can use monaural or stereo phone plugs, which are in accordance to the diagram below. If the external appliance is equipped with a balanced output stage, using balanced cables and plugs is preferable, since this type of connection provides improved shielding against HF induction and external noise.
In case you want to connect a monaural sound source to a stereo input channel, you just have to plug it into the L/MONO input. The signal gets internally routed to both channels.
17. GAIN MICRotary controls for adjusting the MIC inputs’ sensitivity, providing the possibility to optimally match the incoming signals with the mixer’s internal operation level. The GAIN MIC control in the stereo channel is only active for the XLR-type input. For further information about setting and functioning of these controls, please refer to the chapter “GAIN” of the MONO INPUT description within this manual.CAUTION: The GAIN MIC control of an inactive microphone input should always be set to its minimum position. Otherwise the noise of the inactive input is added to the audio signal of the corresponding LINE input, which could lead to unnecessary extra noise at the main output, becoming clearly intelligible in program breaks.
38 39
INPUT STEREO
18. LINE TRIMThese rotary controls are for matching the incoming line level signals to the operating level of the PowerMate. The total adjustment range is 30dB. Unity gain – no amplification (0 dB) – is achieved at the 0dB mark. The control offers level reduction of –10dB and an amplification of +20dB. This range allows the connection of most professional, semi professional, and hi-fi sound sources. For further details on how to set the LINE TRIM control, please refer to the description of the GAIN control in monaural channels.
If you use a keyboard as sound source on one of the stereo inputs, make sure that no split zones or layers with channel separation are activated. The stereo channel mapping will otherwise appear like it is set on the keyboard – the lower layer in the left and the top layer in the right channel – and you will not have the opportunity to re-position the sound in the overall stereo image, unless you connect the keyboard output to two adjacent monaural input channels, leaving you the option to place the sound in the final mix via PAN controls.One more tip, in case you desperately need another input and all channels of the PowerMate are already in use: The microphone input and the phone plug-type inputs are electrically totally separated from each other. Each input is equipped with its own gain control – respectively trim control, providing you with the possibility to connect a LINE level sound source in addition to a microphone. Of course, the two sources share all other controls. Consequently, separate adjustments are not possible. Hence to that fact, this option is only meant as a subsidiary function and should only be used when there is absolutely no other alternative.
19. EQ SECTIONThe mixer’s EQ section allows very comprehensive and effective shaping of the incoming audio signal within miscellaneous frequency bands. Turning one of the EQ level controls to the right enhances/amplifies the corresponding frequency range while turning them to the left lowers/attenuates the signal of that specific frequency band. Before you begin to alter the sound, all EQ controls should be set to their neutral position, i.e. their marker points straight up (locked in place). Do not set the EQ controls to extreme positions. Usually, minor changes are totally sufficient and produce the best results in the overall sound. You should use the natural reproduction as an orientation mark and rely on your musically trained ear. The moderate use of the MID control is the best remedy to avoid acoustical feedback. Especially in this frequency range you should try to avoid excessive enhancement. Lowering the level more or less in this band will provide you with high amplification rates without feedback.
The EQ section of the STEREO channels is designed in a way that HI and LO controls provide a degree of control that is equally adequate for LINE level inputs and microphones. The MID control is active in a comparably wide frequency band around 2.4 kHz. With most microphones this is the critical range, where a slight attenuation offers excellent results.
-20
+20
-15
-10
-5
+0
+5
+10
+15
20 20k50 100 200 500 1k 2k 5k 10kHz
40 41
INPUT STEREO
20. AUX /FXThese controls determine the amount of the summed L and R signal that is sent POST-FADE to the AUX/FX summing bus. For more details on the functioning of these controls, please refer to the INPUT/MONO section of this owner’s manual.
21. AUX3/4These controls determine the amount of the summed L and R signal that is sent to the AUX3 or AUX4 summing bus. Depending on the setting of the AUX PRE/POST switch in the PowerMate’s master section you can choose if the signal gets split PRE or POST FADER. For more details on the functioning of these controls, please refer to the INPUT/MONO section of this owner’s manual.
22. BALThe function of the BAL control of the stereo channels is equivalent to the PAN control’s function of the monaural channels. If you turn the rotary control all the way to the right, the right signal is outputted to the right output while the signal of the left channel is muted. When the control is set to its center position, the L/R signals are present with their equal intensity on the corresponding outputs. Whenever stereo sound sources are connected to a stereo input, you should leave the BAL control at the center position or make only minor adjustments in either direction. In case a microphone or another monaural sound source is connected, the BAL controls function absolutely identical to the PAN controls of the monaural input section.
23. MUTEThe MUTE button mutes the input signal post fader, including all AUX sends. PFL and Signal/Peak stay operational.
24. PFLEngaging the PFL button sums the stereophonic audio signal of the corresponding input channel and routes the resulting monaural signal to the headphones bus. You are able to listen to the audio signal via the phones output. The meter instrument in the master section is simultaneously switched, so that the left LED-chain indicates the level of the actually chosen channel (in dBu), which allows optimally matching the level of the signal source.You can assign as many channels as you want to the phones summing bus at the same time. The volume levels of the individual signals are not affected by the setting of the corresponding channel faders (PRE FADER LISTEN). This gives you the opportunity to set the level and the EQ of a channel, without the need to include it in the main mix, i.e. you can leave the channel fader down or even engage the MUTE button.
25. SIGNAL/PEAK The stereo SIGNAL/PEAK indicator function provides independent analysis of left and right channel audio signals. The respective highest level reading is indicated, assuring that neither one is already driven into clipping. For further information on how to use this indicator most efficiently, please refer to the description of the monaural channel’s identical feature.
26. VOLUMEThe channel fader is used to simultaneously adjust both levels (volumes) of the stereo signal. Functioning and specifications are totally similar to the monaural channel fader, as previously described under INPUT/MONO.
40 41
EFFEKT 1/2
27/28. AUX1/2 SEND The audio signal of the mix that you have established for the corresponding AUX/FX bus – the identical mix that is fed to the internal FX1/2 units – is present at this socket, which makes it perfect for connecting external FX units, for example. Setting the level is possible by means of the corresponding AUX/FX SEND control. The external devices’ output signals can be sent back to the PowerMate via stereo channel input. The AUX1/2 sends are designed in Ground Sensing technology to prevent the induction of external noise, even with long cables.
FX1/FX2
1…….10 11…….20 21……30 31……40 41……50 51……60 61……99
REVERB
HALLS
REVERB
PLATES
ECHO
REVERB
CHORUS
REVERB
DELAY
STEREO
DELAY
MONO
SPECIAL
PROGRAMS
FX1/FX2The PowerMate offers two independently controllable, identically configured 24-bit stereo effect units – FX1 and FX2. Each unit provides 99 program presets, which are selected by the use of the UP/DOWN buttons. The 99 presets are divided into groups according to their different effect structure, as shown on a printed listing. The programs within each preset group are sorted in ascending order, where higher numbers provide the same FX type with increased intensity. Presets 1 — 20 offer high quality reverberation effect programs that are equally suitable for live performance, recording studio or home recording applications. Program numbers 21 — 40 provide mixed effect types of echo/reverb and chorus/reverb while the numbers 41 — 60 offer different delay effects. The last group from 61 — 99 provides different flanger, chorus, and doubling effects presets as well as special delay and reverb programs. During the initialization of the FX units (when switching on the power of the PowerMate), preset 05 (Large Hall 3 Bright) is selected for the FX1 while the FX2 unit is set to preset 55 (Delay Mono 250ms). These two effects are similarly suitable for live performances and recording applications. This is the factory-preset configuration that can be changed any time. For further information, please refer to the paragraph Changing FX Start Programs.The two effect programs are equally suitable for live performance or recording applications and can be used separately or together. For testing, evaluating and selecting effect programs, please also refer to the supplementary information form EFFECT PRESETS, which provides detailed description of all effect presets. This listing contains all preset names together with the corresponding effect structure, field of application, and frequency characteristics. Take your time to test all presets and select the ones that are best suited for your specific application. Program number “0” selects a Slap Back Echo, which is mainly for servicing and testing only, and therefore is not included in the effects listing on the front panel. Also provided is a FOOTSWITCH connector, which allows the connection of a footswitch pedal to remotely control the FX units’ EFFECT ON/OFF function. If your footswitch features a LED – like the optionally available DYNACORD FS 11 does – this indicator will light when the effect is activated (EFFECT ON).
Changing FX Start ProgramsIn the factory shipping state, the FX units start with the programs 5/55. If you prefer different programs, you can change and store the new settings in the programming mode. To assign new start programs, please proceed as follows:1. Hold down the two DOWN buttons of FX1 and FX2 simultaneously while
switching on the PowerMate. 2. “Prog” appears briefly on the display. Programming mode is now active. A
software-related side effect is that all buttons behave a bit slower than usual.3. Release the two DOWN buttons and select the desired start programs. 4. Press the two UP buttons to store the displayed effect numbers as your new start
programs. The FX unit acknowledges the save procedure by briefly indicating “Prog” on the display.
42 43
29. DISPLAY The display always indicates the actually selected program number of the corresponding FX unit. The display screen is covered with a protective foil to prevent it from being damaged during shipment. Please remove the foil.
30. UP/DOWN The UP/DOWN buttons are for selecting effect presets. Keeping a button pressed continuously lets you step quickly through the program numbers.
31/32. FX1/2 to AUX3/4These controls allow adding the output signal of FX1 or FX2 to the monitoring channel. Experience has revealed that the effect level in the monitor mix has to be lower than the level in the main mix, since the distance between monitor speakers and artists is much shorter.
33. FX ONThis switch switches an internal FX unit on and the green LED lights. Please keep in mind that you can also use an external footswitch for the switching of the FX unit. In this case, the LED also shows the actual operational status of the FX unit. If you want to use a footswitch, the FX ON switch has to be engaged first. The corresponding FX unit is activated and you can use the footswitch to switch the selected effect program on or off.
34. PFLEngaging the PFL button routes the audio signal to the headphones bus, so that it is present at the phones output connector. The phones output volume is independent of the corresponding channel fader’s setting (PRE FADER LISTEN), which provides the possibility to listen to the sound of the selected audio signal, without including it in the main mix.
35. PEAK LEDThese indicators signal if the internal FX units or the AUX 1/2 SEND signals are on the verge of clipping. To achieve an adequate S/N ratio, please adjust the FX units’ input level as follows:
Setting Instructions:1. Establish a “dry” mix – without effect settings – according to the previous
descriptions.2. Position the effect return fader of the corresponding effect channel at the –5dB mark.3. Use the UP/DOWN buttons to select the desired FX program preset.4. Press the FX ON switch.5. Play (start the reproduction of) the sound source connected to the desired input
channel and adjust the desired amount of the FX signal, using the AUX/FX controls of this input channel. Repeat this step for all input channels that you want to include in your effect mix.
6. Monitor the Peak LED so that it only lights frequently at highly dynamic signal peaks. When clipping occurs, reduce the AUX/FX controls in the channels.
7. Use the FX to AUX control to add the effect mix to the monitor mix. Use the FX return faders to add the desired amount of the FX signal to the main mix.
In case you are using a different effect setting for the second FX unit, you have to repeat steps 2 — 8, respectively. Pay some attention to the peak indicators when operating your PowerMate to be able to quickly interact when the signal levels exceed the normal range and enter clipping.
36. EFFEKT RETURN These stereo faders are used to determine the effect amount added to the main mix. In case you have to set these faders at a position above the +5dB mark, please check if the FX unit’s input signals are adjusted properly. Otherwise use the AUX/FX SEND controls to increase the input levels.
EFFEKT 1/2
42 43
Generally, the AUX3/4 channel is used for monitoring purposes. Depending on the setting of the AUX3/4 POST button, it is also possible to configure the bus for the connection of an additional, external FX unit.
37. AUX3/4 SENDThis output provides connection for an external FX unit or, when used for monitoring, a power amplifier or active stage monitor speaker systems. Using the AUX3/4 fader allows setting the output level in a wide range up to +20dBu. The AUX3/4 SEND is designed in Ground Sensing technology to prevent the induction of external noise, even with long cables. Use balanced cables for the connection of external components whenever it is possible.
38. AUX3/4 POSTAs already previously described, this switch allows determining whether Pre- or Post-Fader signals are present at the AUX3/4 channel. The corresponding yellow LED signals when the switch is engaged and all input channel AUX3/4 controls are assigned post fader.
39. FEEDBACK FILTERThe feedback filter is a very narrow banded notch filter, which is only active in a range that is extremely susceptible for acoustical feedback. The FEEDBACK filter rotary control sets the corresponding frequency range. Pressing the corresponding button activates the filter. Several circumstances and conditions have an influence on how sensitive or insensitive your system is for acoustical feedback. The following notes are meant to assist you in avoiding feedback and you should take them into consideration even before you activate the feedback filter:1. Do not position the main speaker systems behind the microphones.2. Switch off all microphones that are not in use.3. Consider the microphones’ different polar patterns and characteristics, when placing the
monitor speakers.4. Do not turn up the monitor system’s volume higher than actually necessary.5. Try to avoid extensive equalization on channels that you want to include in your monitor
mix.6. Keep in mind, that a microphone “behaves” different when somebody stands right in front of
it.7. Position the microphones as direct as possible to the sound source.If you still have the feeling that the monitor system’s acoustic output is not sufficient, after considering the above mentioned precautions, you can use the FEEDBACK filter to mute the frequency that tends to generate feedback the most. Therefore, you have to perform the following steps: Increase the AUX3/4 (monitor) level until the limit is reached where feedback starts. The slightly “hovering” sound that you hear is generated by the system itself. Switch on the feedback filter, turn the rotary control and set it at the mark where the “sound” disappears. Switching the filter on and off lets you easily check whether you tuned in the correct frequency. The feedback filter attenuates the level of the corresponding frequency band by about 9dB. Since the filtered band is extremely narrow, an alteration in the sound of your monitor system is hardly audible. Caution: Please be extremely careful in driving the system just below the feedback limit. Careless operation, resulting in feedback noise at high SPL, can cause severe damage to your speaker systems and – even more important – the human ear.
40. MUTEThe MUTE button mutes the Aux-Send output signal. PFL signals are not affected.
41. PFLThrough this button you can route the pre AUX3/4 fader signal to the headphones bus. The signal is outputted for listening via the headphones output. The setting of the AUX3/4 fader is not relevant for the signal’s volume (PRE FADER LISTEN). The meter instrument in the master section is simultaneously switched, so that the left LED-chain indicates the level of the actually chosen channel (in dBu), leaving you with the opportunity for adjusting the level without routing it to the AUX3/4 SEND bus.
AUX3/4
44 45
42. AUX3/4 VOLUMEThis fader controls the summed audio signal at the AUX3/4 SEND output. When used for monitoring, this fader lets you control the volume of the monitor system.
43. 7-BAND EQUALIZER Left and right master channels employ a 7-band equalizer, which gets activated through the use of the EQ ON button. The EQ’s insert point is post master fader and pre power amplifier. The EQ is bypassed when the EQ ON switch is not locked in its “ON” position. Seven frequency bands offering 10 dB amplification/attenuation and a quality of Q=2 allow shaping the overall sound to meet your personal preferences or to optimally match it to the acoustic conditions of different locations.
The frequency ranges as well as the characteristics of the EQ faders are very praxis-oriented. In case you want to have a clear and highly intelligible sound, which, as a side effect, provides the cymbals with more crisp, you should raise the levels of the 12kHz or 6kHz band a bit. If the MIDs are nasaling you should attenuate the mid range by some decibels. To provide the kick drum with more punch you have to boost the low frequency range, using the 63Hz or the 125Hz controls. In case the overall sound is undefined with too much bass, lowering the levels of these two frequency bands will solve the problem. However, especially with equalization you should be aware of the fact that in most cases less adjustments provide better results. Thus, your first choice should be to establish the mix using only the input channel controls and see if you get a satisfactory result. If so, you can use the graphic EQ for the AUX3/4 or the MONO bus, where in most cases, especially when used for the monitoring, it is more needed. You will find the description of how to include the graphic EQ in these buses in the following explanation of the MASTER PATCHBAY.
44. STATUS INDICATORS These indicators are to inform you about the actual operational state of the PowerMate’s internal power amplifier.The POWER ON indicator is always lit when the PowerMate is operational. If the LED does not light after switching the power on, please make sure that the PowerMate’s mains cable is correctly plugged in. If this is the case and the LED is still dimmed, please contact your dealer.The LIMIT indicator signals that you are operating the PowerMate at the internal power amp’s limit. Frequent blinking of the LED is acceptable, since the amplifier’s incorporated limiter prevents distortion. Continuous lighting indicates that you have to be aware of degradation in the outputted sound. In that case, the master level has to be reduced.
MASTER
-20
+20
-15
-10
-5
+0
+5
+10
+15
20 20k50 100 200 500 1k 2k 5k 10kHz
44 45
The PROTECT indicator lights when one of the PowerMate’s extensive protection circuits – against thermal overload, HF-induction, DC at the outputs, and SOAR-protection – is activated. When the PowerMate is in protect mode, the speaker outputs are muted and the amplifier inputs are short circuited to prevent the power amp from being damaged. In this case you should first check whether the ventilation louvers are blocked. Another cause could be, that you have connected more than three 8ohms speaker systems per power output. Please also disconnect the SPEAKON connectors and check the speaker cables for short circuits.During power-on operation the PROTECT LED always lights for about two seconds and the internal fans run at full speed, signalizing that the PowerMate’s protection circuitry is operational.
45. MASTER LED-DISPLAYThe PowerMate offers two 12-segment LED-chains for optical monitoring the output levels of the L/R master signals. The indication range of the LED-meter is 40dB, indicating the levels that are present at the main outputs in dBu. The meter’s 0dB mark is referenced to a 0dBu output signal at the mixer output. Further increasing the level leads to the power amplifier’s maximum input level of +6dB – equaling an output power of 700 watts into 4 ohms per channel. Although higher levels are being displayed, the power amp’s processor already limits the signal, which is indicated by the lit LIMIT LED in the status display.
46. STANDBYPressing the STANDBY button mutes the output signals at the main outputs, EQ outputs and MONO output.Caution: The monitor outputs AUX3/4 are still operational.Because the signal flow between MAIN INSERTS and MAIN OUTPUTS is interrupted, the signal feed to the internal power amplifier is also interrupted. The STANDBY LED lights indicating that stand-by mode is engaged and that input channel signals are not output via the speaker systems. However, audio signals connected via 2Track Return are still outputted, providing you with a very comfortable solution to play intermission music during performance breaks.
47. PFL MASTER Engaging the master PFL-button, the PRE FADER mono master signal is routed to the headphones bus, so that it can be monitored via headphones output. The volume of this signal is not affected by the setting of the MASTER fader. The meter instrument in the master section is simultaneously switched, so that the left LED-chain indicates the level of the summed pre-fader L/R master signal channel (in dBu), which basically is the master bus level, while the right LED indicates the level of the summed post-fader master output.
48. MASTER L + RLevel controls to adjust the output signals of the left and right main outputs (MASTER).Please, make sure to set the input channel faders or at least the master faders to their minimum position, or to engage the STANDBY switch, before connecting an external sound source to an input of the PowerMate. This will save you, your audience, and the equipment from unnecessary stress.
MASTER
46 47
MASTER
49. MONO OUTPUTAt the monaural output the summed L/R master audio signal is present that can be used for additional monitoring, side fill and “next door” applications, or for the connection of a delay-line or subwoofer.
50. MONO OUTWith subwoofer operation, “next-door”, monitoring or delay line applications a pre/post-switch able mono output often comes in handy.
PRE-FADER: The mono out’s signal is summed and outputted pre master faders, i.e. the level at the mono out is independent from the master faders’ settings.POST-FADER: The mono out’s signal is summed and outputted post master aders, i.e. the level at the mono out depends on the setting of the master faders.Of course, controlling the SUB’s level via master fader makes sense when using an active monaural subwoofer. For monitoring applications, e.g. side fill on the stage, using the pre-fader setting seems more reasonable.
51. PHONESStereo phone jack for the connection of headphones with an impedance of 32 – 600 ohms. The audio signals of the channels with PFL buttons engaged is outputted via this connector. The phones output presents the master L/R signal when there is no PFL button engaged.
52. PHONESThis control sets the volume of the headphones connected.CAUTION: Make sure to set the control to its minimum position before connecting headphones
53. RECORD SEND L/R These RCA-type connectors carry the PRE FADER master L/R signal. The signal is not affected by the setting of the master faders and therefore mostly used for the connection of cassette decks, open reel tape decks or DAT recorders for recording purposes. The nominal level of –10dBV of the outputs matches the professional industry standard as well as most home recording applications. Nevertheless, you should use the input gain control of your recording device — as far as it is provided. CAUTION: On most tape decks the input signal is directly carried through to the outputs. In case you have connected both, the REC. SENDS and the 2TRACK RETURNS, and the PowerMate’s 2TRACK to MASTER control is set to anything but its lowest setting, the recorded signal is included in the main mix again. The difference in delay of the two signals is responsible for dropouts and general degradation of the sound. In the worst case, activating the RECORD button on your tape deck could lead to very unpleasant feedback noise. To prevent this from happening make sure to set the 2TRACK to MASTER and the AUX3/4 controls to their lowest settings.
54. 2TRACK RETURN L/RHere you can connect a tape deck, a CD player, an open reel or an additional SUB-mixer. The signal is post master fader and post STANDBY switch, which allows playing intermission music during performance breaks or checking the mix during the rehearsal, using the headphones. You just have to engage the STANDBY switch to mute all channel signals at the main outputs. The 2TRACK RETURN signal however will pass unobstructed.
46 47
MASTER
55. 2TRACK to MASTER This control is used to mix the 2TRACK signal to the main mix; post fader of the master controls. Caution: When adjusting the level of the device that is connected to the 2TRACK RETURNS – CD player, tape deck, etc. – always begin with the 2TRACK to MASTER control set at its minimum setting. Otherwise, depending on the output quality of the connected sound source, the outputted level can instantly “hit the top”.
56. 2TRACK to AUX 3/4 The signal coming from the 2TRACK RETURNS is internally summed and can be added to the monitor bus using the 2TRACK to AUX3/4 control.
57. MAIN INSERTS Stereo phone jacks for left and right channels with breaker function. The low impedance output is assigned to the tip (send) and the high impedance input (return) is assigned to the ring of the connector. This jack allows incorporating external third octave band or octave band EQs, compressors, limiters, de-noisers, etc. into the master’s signal path. The insertion point is pre master faders. As well as with the inserts of the monaural input channels, different DIRECT OUT functions can be accomplished. Please, also refer to the corresponding section in the description of the MONO INPUTS.
58. MAIN OUTPUTS The signals at the MAIN OUTPUTS are post master fader and mainly meant to feed additional, external power amplifiers. Through these outputs it is also possible to establish two-way active system set-ups. In this case the active crossovers – respectively the active subwoofers – have to be connected to the MAIN OUTPUTS. If you want to use the internal power amplifier to drive the high frequency cabinets, the treble signal coming from the crossover has to be fed back into the PowerMate via the Power Amp In connectors.
59. EQ INPUTS / OUTPUTS The EQ INPUTS are provided through electronically balanced phone jacks with breaker function. Inserting a phone plug interrupts the signal path between master and internal power amplifier. You can then operate the internal power amps via EQ INPUTS. The signals at the EQ OUTPUTS are post master fader and post internal 7-band equalizer and can be used like the MAIN OUTPUTS for connecting external power amps.
60. POWER AMP INPUTS The POWER AMP INPUTS are also provided via electronically balanced phone jacks with breaker function. When inserting a phone plug, the signal path gets split up between the master and the internal power amplifier, which allows operating the internal power amps via POWER AMP INPUTS. For detailed information on the functioning and the operation of the “MASTER PATCHBAY”, consisting of MAIN INSERTS, MAIN OUTPUTS, EQ IN- and OUTPUTS, and POWER AMP INPUTS, please refer to the corresponding section; later in this owner’s manual.
48 49
MASTER
62. LAMP XLR This XLR-type socket provides a DC voltage of 12V/5 watts and is meant for the connection of a gooseneck lamp (litlite). Please make sure that the used lamp complies with the here mentioned specifications and pin assignment. Overload or short circuit can result in damaging this output. To prevent this from happening, we recommend the use of the gooseneck lamp (112700), available from the DYNACORD accessory assortment. For further information, please consult your local dealer.
61. FOOTSWITCHPhone jack for the connection of an optionally available DYNACORD FS11 (110 693) footswitch to switch the effect mode of the internal FX units on or off. To accomplish this function, the FX1 and FX2 ON switches have to be engaged.To remotely control the effects units using only a single footswitch, the FS11 has to be connected to the FX1/GLOBAL connector. Both FX units are simultaneously switched. This function is useful for example when switching from vocal performance to announcer.When remotely controlling the FX units using two footswitches, one FS11 needs to be connected to the FX1/GLOBAL and the other to the FX2 connector. Now, the two effects units can be switched independently, which is mostly used to switch between different effects settings during a performance.
STEREO POWER AMPLIFIERThe PROCESSED COMPACT PRECISION stereo power amplifier of the PowerMate has been designed in discreet bipolar technology to provide a nominal output power of 700 watts into 4 ohms per channel. The minimal load impedance of 2.7 ohms allows the operation with a maximum of three 8 ohms loudspeaker systems connected in parallel to each output channel. Their low distortion rate and inter-modulation provide the amplifiers of the PowerMate with outstanding transmission capabilities that do not have to fear the comparison with professional high-end, stand-alone audio power amplifiers. The transmission qualities of CL power amps are simply extraordinary. Optimised power supply units employing low-leakage toroidal transformers and the consistent use of Class-H technology provide extensive headroom far above the stated nominal output. At the same time this contributes to a reduction in weight and leakage power. Characteristic for the Class-H power amplifier design of the PowerMate is its extremely fast, signal-dependent operating voltage switching, which results in doubling the regular supply voltage when needed. In comparison to Class-AB power amps, Class-H power amps generate by far less leakage power at identical output. Consequently, reduced leakage power or dissipation is synonymous to less waste heat – energy is used more efficiently and the power consumption stays clearly below that of conventional Class-AB operation. As a result, installing Class-H power amps within rack shelf systems is possible with less space between appliances.The power amplifier of the PowerMate is designed to live through the hardwearing use in the touring business. It incorporates protection circuitry against thermal and capacitive overload and short circuit as well as against HF-interference and DC at the outputs. Further protection of the power output stage against back-feed of electrical energy (BACK-EMF) is provided through special circuitry. When the PowerMate is switched on, a relay controls the delayed switching of the power outputs. The internal fans run shortly at full speed, acoustically signaling that the PowerMate is operational. Limiter circuitry (soft start) controls the initial current inrush, preventing the mains fuse from being blown during power-on. Two 3-speed fans (off/slow/fast) guarantee absolute thermal stability at low running noise. The ventilation is directed front-to-rear allowing trouble-free operation even in very compact amp-racks.The extensive comparator circuitry constantly monitors the input and output signals of the PowerMate’s power amp and activates the internal limiters whenever a non-linear operational state is encountered. This provides reliable protection of the connected loudspeaker systems against overload and clipping. Distortion is not intelligible even when the maximum input level is overridden. The amplifier of the PowerMate additionally incorporates LPN-filters (DYNACORD patent). Together with the 12dB Hi-Pass filters, these Low Pass Notch filters eliminate faults in the transient response of typical sound reinforcement speaker systems and provide your setup with an extraordinarily precise and powerful reproduction of low frequencies.
48 49
SPEAKER OUTPUTS RIGHT / LEFT
The PowerMate is equipped with professional SPEAKON high-performance connectors, offering electrical and mechanical secure connection, which complies to all security regulations. It also allows the use of high quality speaker cables with diameters of 4 x 2.5mm2.
The DYNACORD accessory assortment includes all recommended cables and connectors.
Warning: The symbol “ “ representing the speaker connectors indicates the presence of touch-sensible voltages, which can cause harm to body and health.
Please, be sure to adhere to corresponding notes and instructions in this owner’s manual when establishing speaker connections.
POWERMains switch to turn the PowerMate on or off.
The PowerMate is operational when the POWER ON – LED lights and the power outputs are activated through automatic switching of the power relays.
Please make sure to set the master faders to their minimum position or engage the STANDBY switch before switching the power on. This will save you, your audience, and the equipment from unnecessary stress.
In case additional external equipment is connected to the PowerMate – e.g. power amps, FX units, EQs, etc. – please, proceed in the following order when switching your equipment on:1. switch on the FX units2. switch on the PowerMate3. switch on external power amps
When switching the power off, please proceed in the opposite order.
REAR PANEL
50 51
Cabling The mains supply cord comes with the PowerMate. The quality of all other cables lies in your responsibility. Carefully chosen high quality cables are the best precaution to prevent later problems during live operation. The following wiring alternatives are recommended to provide trouble free operation of your system.
Speaker Cables From our experience as a manufacturer of loudspeaker systems we know that flexible cables with a rubber jacket and a diameter of 2.5mm2 per conductor, used in combination with SPEAKON plugs and sockets, are the best choice to guarantee the optimal connection of loudspeaker systems. Connect the SPEAKON plugs according to the corresponding diagram on the PowerMate’s rear panel. We recommend using 4-wire cables where also the pins 2+ and 2- are connected through. This provides the possibility to use these cables in an active 2-way system configuration, as well. DYNACORD’s accessory assortment comprises different speaker cables with SPEAKON connectors and all other cables, plugs, and sockets, available at your local professional audio dealer.
LF-Cables – Balanced or Unbalanced?For LF-cabling – all the low current wiring – your best choice are balanced cables (2 signal conductors + ground shielding) with XLR-type connectors or stereo phone plugs. The cables should be step-on proof, shielded, and never longer than really needed. Too many too long cables mostly lead to confusion and generate unnecessary problems. Of course, connecting unbalanced cables with monaural phone plugs to the PowerMate’s in- and outputs is also possible and in most cases no interference will occur because of its superb grounding managing system. Generally spoken, if you have the choice, a balanced LF-cable is always the better solution. Today’s modern audio equipment – like amplifiers, equalizers, FX units, mixing consoles, and even some keyboards – offers balanced in- and outputs. In a balanced signal path the cable screen provides gapless connection of all metal parts, offering efficient shielding against the induction of external noise. The balanced cabling in conjunction with the common-mode rejection of the PowerMate’s input stage effectively eliminates even existing artifacts of interference. All inputs of the PowerMate provide balanced audio connections and high common-mode rejection. The mixing stage outputs – AUX, MAIN, EQ, etc. – are laid out in GND-SENSING technology – a special pin assignment of the output jacks, offering all advantages of the balanced signal transmission, but lets you also connect monaural phone plugs without a problem. Nevertheless – as mentioned above – when longer cables are involved, using stereo phone plugs and balanced cables are the better alternative. The diagrams below show the pin assignments of plugs and cables that are used with the PowerMate.
MIC INPUT
All phone jack in/outputs of the PowerMate
Channel InsertMain Insert
All phone jack in/outputs of the PowerMate
Channel InsertMain Insert
balanced connec-tion of microphones
unbalanced external equipment with XLR-type in/output jacks balanced
Direct OUT via INSERT, uninterrupted signal path
unbalanced external equipment with phone jack in/output jacks balanced
Y-type cable for the connection of ex-ternal FX units and signal processors with phone jacks
SETTING UP A STANDARD PA-SYSTEM
50 51
SETTING UP A STANDARD PA-SYSTEM
In the following we would like to explain how to install a typical sound reinforcement system in passive configuration. The necessary equipment is:
1 PowerMate 10001 Power amplifier, e.g. 2×250 watts2 HI cabinets, e.g. 3-way 12” speakers2 LO cabinets, e.g. 15” woofer2 Speaker pole-stands or 2 connection rods2 Stage monitor speakers4 SPEAKON cables 8m, 2 SPEAKON cables 2m1 LF-cable with a stereo phone plug on one side and an XLR-type connector on the other end
Setting Up
• Place the PowerMate and the external power amplifier in a way that allows their unobstructed operation and connect the mains cord.• Try to locate the best position where you want to place the loudspeaker systems. If possible, the woofers should be placed on the floor while the Hi cabinets’ most favorable position is above the Lo cabinets, on the same vertical axis. It is important that the lower edge of the Hi cabinets is approximately at the same height level or slightly higher as the heads of the audience. Either you use the interconnection rods to mount the Hi cabinets on top of the woofer cabinets or, in case this kind of installation is not possible or you are not using woofer systems, use the separate speaker pole-stands instead.• Do not place the left and the right speakers further apart than necessary. The less distance there is between the two speaker “clusters” – the more compact the sound.• Try to avoid the positioning of the main loudspeakers behind the imaginary line of microphones. Otherwise, if you have to drive the system at higher sound levels, the risk of feedback is very likely.• After you have installed all microphone stands and all artists found their place, the best spot to install the monitor speakers is up front facing the musicians and vocalists. Nevertheless, please check if a microphone is directly pointing in the direction of a monitor. In this case, change its position. You should also be aware of the individual characteristics of the employed microphones.• Establish connections according to the diagram. Use the different SPEAKON cables to connect the speaker systems to the PowerMate’s power outputs, respectively to the power outputs of an external amplifier. Make sure not to confuse the channels by accident. Using the short SPEAKON cables to connect Hi and Lo cabinets in parallel. The two monitor speakers are connected to the outputs of the monitor power amp.
52 53
• Connect the PowerMate‘s AUX3/4 SEND with the monitor amplifier‘s input, using an LF-cable with the stereo phone plug on one end and the XLR-type connector on the other.• Connect all microphones preferably to the monaural inputs of the PowerMate and keyboards and other comparable sound sources to the rest of the available inputs.• Pull all faders down and engage the PowerMate’s STANDBY button to prevent unwanted feedback noise.• First, switch the PowerMate on and then the external amplifier.• In case you have condenser microphones connected to the PowerMate, you can now turn on the phantom power by pressing the PHANTOM switch.• Activate the PowerMate’s operational mode through pressing the STANDBY button again.
Sound Check• First, adjust the input levels of the microphones that are connected to the PowerMate. Please proceed as follows: 1. Set the corresponding gain controls and the channel faders to their lowest position. 2. Speak or sing as loud as possible into the microphone. 3. Use the gain control to adjust the level, so that even at loud passages the red PEAK LED does not light but the green SIGNAL LED lights constantly.
• Adjust the EQ of the monaural input channels: 1. Slide the channel fader and the master faders up a bit, so that the sound coming from the main speakers is heard. 2. Turn the MID control carefully all the way to the right (+15dB). You should not hear any feedback. 3. Play the sound source or speak into the connected microphone 4. Turn the frequency control (kHz) slowly from left to right. 5. Surely and within no time, you will detect the frequency range that is not to your liking or causing feedback noise. 6. Leave the frequency control in this position and turn the MID control to the left until the sound is natural or to your liking. 7. If necessary, adjust the Hi and LOW controls, starting from their centered position, until the sound matches your personal taste. 8. Repeat steps 1 — 7 for all monaural input channels in use.
• In case you are also using the stereo input channels, you can adjust the levels in a similar way:. 1. Set the LINE TRIM controls, the MIC gain controls, and the channel fader to their lowest setting. 2. Play the corresponding sound source at the highest volume that is to be expected during the performance. 3. Use the LINE TRIM control to adjust the level, so that even at loud passages the red PEAK LED is not lit but the green SIGNAL present LED lights constantly.
• Adjust the EQ of the stereophonic input channels: 1. Slide the channel fader and the master faders a bit up, so that you can hear the sound through the main speakers. 2. Ser the EQ controls to their center position. 3. Play the corresponding sound source. 4. Starting from the center position, you can adjust the controls until the sound is to your liking. Please, keep in mind that major alteration of the EQ-setting does not ecessarily result in the improvement of the overall sound. Especially when sound shaping is concerned, less can be more. 5. Repeat steps 1 — 4 for all stereo input channels in use.
• If musical instruments are connected directly to the monaural inputs, follow the descriptions above describing the adjustment of the microphones
• Make sure, that all channel faders, gain and LINE TRIM controls of unused input channels are at their minimum setting. In this way you avoid unnecessary noise.
SETTING UP A STANDARD PA-SYSTEM
52 53
Main Mix
Position the master faders in the range between –30dB and –20dB.
• Establish a basic mix, using the channel faders, so that the individual sound levels relate to each other according to your personal taste.• The best range for the channel faders to be set to is in the area of –5dB to 0dB. In this way you are provided with enough tolerance for later adjustments.• Use the master faders to adjust the overall volume.• In case you are using the FX units, please proceed as follows: 1. Set the AUX1/FX1 send controls to their center position. 2. Set the effects return fader of the FX1 unit to the –5dB mark. 3. Use the UP/DOWN buttons to select the desired effect preset. 4. Press the FX ON button. 5. Play the sound source of the desired input channel and adjust the desired amount of the FX signal, using the FX controls of this input channel. Repeat this step for all input channels that you want to include in your effect mix. 6. Adjust the AUX1/FX1 SEND controls, so that the Peak LED only lights frequently at highly dynamic signal peaks.
If necessary, repeat steps 1 — 6 for the second internal FX unit (FX2).
Monitor Mix
For now, let’s presume, that you don’t use the Powermate as FOH-mixer in the audience area but on-stage. The following procedure is explained for AUX3. For setting AUX4, please perform the same steps analogous.
• Lower the setting of the AUX3 fader located in the master section.
• Engage the AUX3 POST button located in the master section.
• Set the AUX3 faders of all input channels in use to their center position. In this way the main mix and the monitor mix are completely identical.
• Push the AUX3 fader up until a slight feedback noise is heard.
• Activate the FEEDBACK FILTER and adjust its control, so that the feedback noise disappears.
• Use the AUX3 fader to reduce the AUX3 level by about –6dB. This will provide you with enough “headroom” before feedback during the performance, even then, when some microphone positions are changed disadvantageously.
• Use the FX to AUX3 controls to add the effect mix to the monitor mix, without influencing the main mix. Normally, the monitor mix needs less FX than the main mix.
Let the artists perform some and check the sound of the system from different angles and distances. If you come to the conclusion that some corrections in the overall sound image are necessary, activate the 7-band equalizer and match the sound to your liking. By doing so, you should keep in mind, that during the performance the sound is going to be altered because the audience is present, which has a major effect on the acoustical condition of the location, the degree of first reflections, and the absorption of low frequencies. If possible, you should check the “sound in the house” during the performance and – if necessary – adjust it to the changed conditions.
And for the rest, we like to wish you lots of fun and success with your new PowerMate mixer.
SETTING UP A STANDARD PA-SYSTEM
54 55
The patch field within the master section is referred to as MASTER PATCHBAYThe mixer’s Line output levels, return and insert connections are to be found here. To provide you with a wide range of connection possibilities, the MASTER INSERTS, MAIN OUTPUTS, EQ INPUTS and EQ OUTPUTS, POWER AMP INPUTS, and the AUX SENDS and AUX RETURNS can be independently connected with each other or routed to external devices. In the basic configuration – when no plugs are inserted into any of the MASTER INPUT connectors – signals are patched internally and fed to the internal power amplifier. Once you connect a plug to the INSERTS, EQ INPUTS, or POWER AMP INPUTS, the internal signal path is interrupted, providing you with the opportunity to include external signals. Following, we would like to show you some typical examples of how to use the MASTER PATCHBAY.
1. Connection of an external power amplifier:If you need to connect more loudspeaker systems than the PowerMate is capable of handling directly, you have to use an external power amplifier. Using LF-cables with phone plugs, you can patch the signal either at the MAIN OUTPUTS – pre EQ – or at the EQ OUTPUTS – post EQ. In this configuration the signal path to the internal power amplifier is not interrupted and the audio signal is outputted via the speaker systems connected to both
amplifiers.
MASTER PATCHBAY AND DIFFERENT SETUP ALTERNATIVES
2. Using the internal power amplifier for monitoring purposes:In case you want to use an external power amplifier to drive your main speaker systems, the internal power amps can be used for monitoring and side-fill purposes. Use short patch-cables to connect the AUX3 or AUX4 OUTPUT to the EQ inputs (see diagram). The monitoring signal is fed to the internal power amps, providing you with the possibility to connect passive monitor speaker systems.
54 55
3. Maximum amount of speakers in a passive configuration:The PowerMate allows the maximal connection of three loudspeaker cabinets with an impedance of 8 ohms per power amp output channel. In other words: the internal power amplifier is capable of driving a maximum of six 8 ohms speaker systems. The following diagram shows an example of how to set up your PowerMate for operation with the maximum amount of speakers connected.
4. Active 2-way stereo configuration:This example uses the internal power amplifier of the PowerMate to drive the Hi/Mid cabinets. The full-range signal is fed via MAIN OUTPUTS or EQ OUTPUTS to an active crossover. The Lo-signal outputs of the x-over are connected to an external power amplifier, driving the woofer cabinets. The signal of the x-over’s Hi-signal outputs is fed back to the PowerMate’s internal power amplifier via POWER AMP INPUTS. Compared to the passive configuration, the overall sound gains transparency and higher sound pressure levels are possible, since the Hi/Mid cabinets do not have to deal with the low frequency signals.
MASTER PATCHBAY AND DIFFERENT SETUP ALTERNATIVES
Usual power mixer applications do not include a monitor amps rack. Thus, active monitor systems, like the DYNACORD AM12 for example represent a convenient alternative.
56 57
SPECIFICATIONSTechnical Specifications PowerMate1000/PowerMate1600 Mixing desk in rated condition, Unity Gain ( MIC Gain 20 dB ), all faders position 0 dB, all pots in mid position, master fader + 6dB, amplifier rated output power into 8 ohms, dual channel, unless otherwise specified.
Maximum Midband Output Power, 1 kHz, THD=1%into 2.66 Ohms 2 x 870 Winto 4 Ohms 2 x 700 Winto 8 Ohms 2 x 430 WRated Output Power, THD=0.1%, Single Channelinto 4 Ohms 2 x 700 Winto 8 Ohms 2 x 350 WMaximum Output Voltage of power amplifier, no load 70 VrmsTHD at 1kHz, MBW=80kHzMIC input to Main L/R output, +16 dBu, typical < 0.005%Power amplifier input to Speaker L/R output < 0.01%DIM 30, power amplifier < 0.01%IMD-SMPTE, power amplifier, 60Hz, 7 kHz < 0.01%Frequency Response, -3dB ref. 1kHzAny input to any Mixer output 15Hz … 80kHzAny input to Speaker L/R output 20Hz … 70kHzCrosstalk, 1kHzFader and AUX-Send attenuation > 85 dBChannel to channel > 80 dBCMRR, MIC input, 1kHz > 80 dBInput Sensitivity, all level controls in max. position MIC input -74 dBu (155 µV)LINE Input (Mono) -54 dBu (1.55 mV)LINE Input (Stereo) -34 dBu (15.5 mV)Power Amplifier Input +6 dBu (1.55 V)Maximum Level, mixing deskMIC inputs + 21 dBuMono Line inputs + 41 dBuStereo Line inputs + 30 dBuAll other inputs + 22 dBuRecord Send output + 14 dBuAll other outputs + 22 dBu
Input ImpedancesMIC 2 k ohmsInsert Return 2.2 k ohmsEQ Input and 2 Track Return 8 k ohmsAll other inputs > 15 k ohms Output ImpedancesRecord Send 1 k ohmsPhones 47 ohmsAll other outputs 75 ohmsEquivalent Input Noise, MIC Input, A-weighted, 150 ohms -130 dBuNoise, Channel inputs to Main L/R outputs, A-weighted PM1000 PM1600Master fader down -95 dBu -95 dBuMaster fader 0 dB, Channel fader down -90 dBu -88 dBuMaster fader 0 dB, Channel fader 0 dB, Channel gain unity -83 dBu -82 dBuSignal/Noise-Ratio, power amplifier, A-weighted 105 dBEqualization LO Shelving ± 15 dB / 60 HzMID Peaking, mono inputs ± 15 dB / 100 Hz … 8 kHzMID Peaking, stereo inputs ± 12 dB / 2.4 kHzHI Shelving ± 15 dB / 12 kHzMaster EQ, 2×7-band, 63, 125, 400, 1k, 2k5, 6k, 12k Hz ± 10 dB / Q=2.0Power Consumption at 1/8 maximum output power, 4 ohms 640 WDimensions, (WxHxD), mmPowerMate1000 514.5 x 210.3 x 478.7PowerMate1600 673.5 x 210.3 x 478.7Weight, without lid / including lidPowerMate1000 20 kg / 21 kgPowerMate1600 23.5 kg / 25 kgOptionalRMK-1000 (Rack-Mount-Kit PowerMate1000-2) 112 698Gooseneck Lamp, 12V/2.4W, 12“, XLR 112 700FS11 (Footswitch) 110 693
56 57
BLOCK DIAGRAM
58 59
ABMESSUNGEN/DIMENSIONS
58 59
NOTES
60
USA Telex Communications Inc., 12000 Portland Ave. South, Burnsville, MN 55337, Phone: +1 952-884-4051, FAX: +1 952-884-0043
Germany EVI AUDIO GmbH, Hirschberger Ring 45, D 94315, Straubing, Germany Phone: 49 9421-706 0, FAX: 49 9421-706 265
Subject to change without prior notice. Printed in Germany 10/04/2004 / 363 488
www.dynacord.de
Производитель:
Наличие на складе:
уточняйте у менеджера
Тип: 10-канальный активный микшер, 2х1000 Вт.
Габариты В/Ш/Г:
51 x 16.5 x 57.2 см
Доставка по Москве: бесплатно от 5000 ₽, если меньше — 400 ₽
От МКАД до границ Московской обл.:
- до 10 км — 400 ₽
- 10-25 км — 1 000 ₽
- 25-40 км — 1 500 ₽
- от 40 км — 2 000 ₽
Самовывоз: бесплатно
Отправка через ТК: по расценкам ТК
Подробнее о доставке
Dynacord PowerMate 1000-3 Микшерный пульт со встроенным усилителем мощности, 6 мик./лин.+ 4 стерео мик./лин., 2 х 1000 Вт, 4 Ома, USB, MIDI
Dynacord PowerMate 1000-3 оснащен оптимизированной для живой работы профессиональной микшерной секцией на 6 мик./лин.каналов и 4 стерео мик./лин. канала
— Специальный вокальный фильтр (Vocal Voicing Filter)
— 5 AUX-шин
— Высококачественные малошумные микрофонные предусилители
— НЧ-фильтры
— 11-полосный эквалайзер
— На 30% легче
— Потребление энергии в два раза меньше
— Возможность регулировки параметров прессетов
— USB-интерфейс
— MIDI
Несмотря на высокую мощность, усилитель имеет высокую эффективность со значительно сниженным тепловыделением и потреблением энергии. Новая система распределения энергии позволяет согласовывать мощность усилителя и подключаемых акустических кабинетов, в том числе кабинеты с меньшей коммутируемой мощностью, без потери динамического диапазона усилителя. Кроме того, в PowerMate-3 применены все традиционные схемы защиты, которыми славятся усилители DYNACORD, что гарантирует высочайший уровень безопасности и надежности работы.
Все пульты серии PowerMate-3 оснащены блоком обработки звукового сигнала, который полностью соответствует требованяям современных музыкантов на сцене и в студии. Он состоит из двух независимых блоков эффектов по 100 оптимизированных для живых выступлений, а также 20 пользовательских пресетов с возможностью регулировки параметров, кроме того, имеется дистанционное управление по MIDI, тап-делей, USB-интерфейс и большой контрастный OLED дисплей.
Новый жесткий чехол для верхней панели со встроенной ручкой не только выглядит красиво, но и обеспечит простую, а главное удобную транспортировку пульта на концерт и после него.
В качестве опции предлагается удобный монтажный комплект для установки PowerMate 1000-3 в рэковый шкаф.
| Модель | PowerMate 1000-3 |
|
Каналы (моно + стерео) |
6+4 |
|
Макс. вых. мощность в СЧ диапазоне, 1 кГц, КНИ 1%, два канала на 4 Ом |
2 х 1350 Вт 2 х 600 Вт |
|
Номинальная вых. мощность, один канал 20 Гц … 20 кГц, КНИ 0,5%» |
2 х 900 Вт 2 х 450 Вт |
| Макс. вых. напряжение усилителя мощности, без нагрузки, RMS | 74 В |
| КНИ на 1 кГц, MBW=80 кГц Вход MIC на выход Main L/R, +16 dBu Вход усилителя мощности на выход Speaker L/R DIM 30, усилитель мощности IMD-SMPTE, усилитель мощности, 60 Гц, 7 кГц |
< 0,005% < 0,075% < 0,05% < 0,15% |
| КОСС, вход MIC, 1 кГц | > 80 дБ |
|
Эквивалентный входной шум, Вход MIC, A-взвешанное, 150 Ом |
-130 дБ |
| Соотношение сигнал/шум, усилитель мощности, A-взвешанное |
105 дБ |
| Топология выходного каскада усилителя мощности | Класс D |
|
Эквализация MID Peaking, стереовходы HI Shelving |
+/- 15 дБ / 60 Гц +/- 15 дБ/100 Гц — 8 кГц +/- 10 дБ / Q = 1,5 -2,5 |
|
Фильтры FEEDBACK FILTER, MON1/2 Speaker processing |
f = 80 Гц, 18 дБ / окт переключаемый |
| Экран | высококонтрасный OLED |
| Эффекты Тип процессора эффектов Пресеты ДУ |
Двойное стерео 24/48 бит 100 заводских + 20 пользовательских, tap-delay Ножной выключатель, MIDI |
| Цифровой аудиоинтерфейс Каналы (моно + стерео) АЦ/ЦА ковертер Частота выработки ПК |
4 входа / 4 выхода 24 бит 44,1 / 48 / 88,2 / 96 кГц USB 2.0, Type-B «мама» |
| MIDI интерфейс | 5-пиновый разъем DIN, вход/выход |
| Охлаждение | Непрерывные скоростные контролируемые вентиляторы |
| Фантомное питание | 48 В |
| Напряжение | 100 В … 240 В / 50-60 Гц |
| Потребляемая мощность при 1/8 от макс. вых. мощности, 4 Ом | 450 Вт |
| Класс безопасности | I |
|
Габариты, мм Вес, кг |
Ширина 483 (устан.в рэк) / 510,5 (с крышкой) Высота 135 (устан.в рэк) / 164,5 (с крышкой) ) 12,5 (без крышки) |
| Дополнительные аксессуары | RMK-1000-3 элементы крепления для монтирования в 19″ рэковый шкаф Лампа на «гусиной шее», 12 В / 5 Вт, длина 12″, разъем XLR 4 pol. FS11 ножной выключатель со световым индикатором |
Срок гарантийного обслуживания — 1 год.
Нет отзывов об этом товаре.
Написать отзыв
Ваше имя:
Ваш отзыв:
Примечание: HTML разметка не поддерживается! Используйте обычный текст.
Оценка: Плохо
Хорошо
Введите код, указанный на картинке:
Доставка
По Москве
в пределах МКАД
Заказ до 5 000 ₽ — 400 ₽
Заказ от 5 001 ₽ —
БЕСПЛАТНО
От МКАД до границ
Московской обл.
до 10 км — 400 ₽
10-25 км — 1000 ₽
25-40 км — 1 500 ₽
от 40 км — 2 000 ₽
По России и странам
Таможенного союза
По тарифам СДЭК
Или иной транспортной компании
Доставка товара до транспортной
БЕСПЛАТНО
Оплата
Безналичным способом
для физических лиц
Вам на электронную почту будет отправлен счет для оплаты, который Вы можете распечатать и оплатить в ближайшем отделении банка, работающего с физическими лицами.
Перед оплатой товара безналичным способом, подтвердите наличие товара у наших менеджеров по телефону 8(495)5178580
Безналичным способом
для юридических лиц
После оформления заказа и получения Нами реквизитов Вашей компании, на электронный адрес ответственного лица Вашей компании будет отправлен счет для оплаты. Доставка товара осуществляется после поступления денежных средств на расчетный счет компании. При получении товара у Вас обязательно должна быть печать организации либо доверенность. Все остальные документы для бухгалтерии (оригинал счета, счет-фактура и товарная накладная) выдаются вместе с заказом.
Срок зачисления денежных средств — 1-2 рабочих дня. Срок обработки заказа начинается с момента поступления платежа.
Оплатить с помощью
банковской карты
Оплачивайте любыми российскими банковскими картами
Наши реквизиты
Организация
ООО «МузЦентр»
Адрес юр. и фактический
121108, г.Москва, Рублевское шоссе, д.9, этаж 1, помещение I, комната 14а.
Расчётный счёт
40702810838000126836
Корр. Счёт
30101.810.4.00000000225
ОГРН/ОГРНИП
1217700025674
Наш магазин предоставляет все гарантии в соответствии с Гражданским Кодексом РФ и Законом РФ «О защите прав потребителей». Приобретая товар в нашем магазине, Вы получаете платежный документ, подтверждающий факт совершения покупки в нашем магазине, накладную и надлежащим образом заполненный Гарантийный талон.
На большинство товаров срок гарантии составляет 12 месяцев. Обслуживание производится в авторизованных сервис-центрах производителей. Адреса и условия приводятся в сопутствующих товару гарантийных талонах.
Уважаемые покупатели, обращаем Ваше внимание, что Постановлением Правительства РФ №55 от 19 января 1998 г. (в ред. Постановления Правительства РФ №1222 от 20 октября 1998 г.) утвержден перечень непродовольственных товаров надлежащего качества, не подлежащих возврату или обмену на аналогичный товар другого размера, формы, габарита, фасона, расцветки и комплектации. В пункте 11 этого перечня указаны технически сложные товары бытового назначения, на которые установлены гарантийные сроки, в том числе бытовая радиоэлектронная аппаратура и электромузыкальные инструменты.
Обращаем ваше внимание на то, что данный интернет-сайт носит исключительно информационный характер и ни при каких условиях не является публичной офертой, определяемой положениями Статьи 437 (2) Гражданского кодекса РФ.
Вокальные тренажеры
-
Вокальный тренажер
Roland VT-12 вокальный тренажер Компания Roland представляет вокальный тренажер VT-12 компактный инструмент для вокалистов. Благодаря визуальному отображению тональности встроенным упражнениям и бэк-трекам двуголосой поддержки и многому другому карманный VT-12 является комплект омучебных материалов и обязательным компаньоном для всех певцов. VT-12 отслеживает тональность певца и отображает его в режиме реального времени на подсвеченном опредеоителе который реагирует быстро и точно. Высотометр горит ярче чем точнее вы поете правильную ноту и темнеет при удалении от нее. Кроме того талонный тон (в диапазоне от 24 полутонов) можно проигрывать с помощью нажатия кнопки чтобы помочь певцам определить правильную тональность. Пользователи могут практиковать учитеем или друзьями и VT-12 будет обнаруживать два голоса одновременно и отображать названия нот. Высота определяется в трех режимах: высота одного голоса определяется в равномерно-темперированном строе два голоса определяются в равномерно-темперированном строе два голоса определяются в натуральном строе. VT-12 оснащен книгой Постановка современного вокала разработанной во всемирно известном музыкальном колледже Беркли. Этот полный вокальный метод содержит широкий спектр упражнений а VT-12 содержит встроенные пьесы-упражения с аккомпанементом во множестве жанров. Также в инструмент встроены пятьдесят уроков для среднего голоса в сопровождении фортепиано. В этих упражнений VT-12 отображает тональность примера и тональность пользователя одновременно. Метроном позволяет певцам развивать чувство ритма Темп можно выбрать вручную или задать его ритмичным постукиванием. Функция Review полезна для самооценки позволяя пользователю записывать свое пение и слушать его с помощью VT-12 встроенного динамика или через наушники. Десять пользовательских треков позволяют с легкостью записывать песни с внешнего проигрывателя музыки как iPod и сохранять их в VT-12 для вокальной практики. Каждый пользовательский трек обеспечивает 10 минут записи. Певцы могут использовать функцию обзора с пользовательскими треками чтобы записать свой голос вместе с музыкой а затем оценить свою производительность. VT-12 доступен в трех различных цветах: Black Aqua Blue и Metallic Orange.Удобное отверстие ремешка позволяет пользователям подключать шнур и носить VT-12 на шее. В устройство так же интегрирована наклонная подставка для настольной работы. Особенности Roland VT-12: Высота пения показывается на подсвеченном определителе высоты. Определяет высоту двух певцов одновременно в равномерно-темперированном или натуральном строе Содержит встроенные аудио-упражнения и запись аккомпанемента а также методику обучения вокалу Беркли в виде книги. Может использоваться для разогрева и базисных упражнений. VT-12 показывает высоту вокала по отношению к записи. 50 уроков классического голоса Concone Op. 9 Fifty Lessons ставшие общемировым стандартом. Эталонная мелодия под аккомпанемент фортепиано в записи; VT-12 определяет высоту мелодии вместе с высотой вашего вокала. Функция Review позволяет тут же воспроизвести запись вашего пения. Разъем (стереоминиджек) REC IN позволяет записывать аккомпанемент и другое аудио для обучения. Наклейки для обучения и занятий сольфеджио с транспонированным До . Метроном с возможностью задать темп ритмичным постукиванием. Наклонная стойка для удобства размещения на столе. Возможность питания от двух батарей АА (алкалиновых или аккумуляторов)
-
Вокальный тренажер
Roland VT-12 Компания Roland представляет вокальный тренажер VT-12 компактный инструмент для вокалистов. Благодаря визуальному отображению тональности встроенным упражнениям и бэк-трекам двуголосой поддержки и многому другому карманный VT-12 является комплект омучебных материалов и обязательным компаньоном для всех певцов. VT-12 отслеживает тональность певца и отображает его в режиме реального времени на подсвеченном опредеоителе который реагирует быстро и точно. Высотометр горит ярче чем точнее вы поете правильную ноту и темнеет при удалении от нее. Кроме того талонный тон (в диапазоне от 24 полутонов) можно проигрывать с помощью нажатия кнопки чтобы помочь певцам определить правильную тональность. Пользователи могут практиковать учитеем или друзьями и VT-12 будет обнаруживать два голоса одновременно и отображать названия нот. Высота определяется в трех режимах: высота одного голоса определяется в равномерно-темперированном строе два голоса определяются в равномерно-темперированном строе два голоса определяются в натуральном строе. VT-12 оснащен книгой Постановка современного вокала разработанной во всемирно известном музыкальном колледже Беркли. Этот полный вокальный метод содержит широкий спектр упражнений а VT-12 содержит встроенные пьесы-упражения с аккомпанементом во множестве жанров. Также в инструмент встроены пятьдесят уроков для среднего голоса в сопровождении фортепиано. В этих упражнений VT-12 отображает тональность примера и тональность пользователя одновременно. Метроном позволяет певцам развивать чувство ритма Темп можно выбрать вручную или задать его ритмичным постукиванием. Функция Review полезна для самооценки позволяя пользователю записывать свое пение и слушать его с помощью VT-12 встроенного динамика или через наушники. Десять пользовательских треков позволяют с легкостью записывать песни с внешнего проигрывателя музыки как iPod и сохранять их в VT-12 для вокальной практики. Каждый пользовательский трек обеспечивает 10 минут записи. Певцы могут использовать функцию обзора с пользовательскими треками чтобы записать свой голос вместе с музыкой а затем оценить свою производительность. VT-12 доступен в трех различных цветах: Black Aqua Blue и Metallic Orange.Удобное отверстие ремешка позволяет пользователям подключать шнур и носить VT-12 на шее. В устройство так же интегрирована наклонная подставка для настольной работы. Особенности Roland VT-12: Высота пения показывается на подсвеченном определителе высоты. Определяет высоту двух певцов одновременно в равномерно-темперированном или натуральном строе Содержит встроенные аудио-упражнения и запись аккомпанемента а также методику обучения вокалу Беркли в виде книги. Может использоваться для разогрева и базисных упражнений. VT-12 показывает высоту вокала по отношению к записи. 50 уроков классического голоса Concone Op. 9 Fifty Lessons ставшие общемировым стандартом. Эталонная мелодия под аккомпанемент фортепиано в записи; VT-12 определяет высоту мелодии вместе с высотой вашего вокала. Функция Review позволяет тут же воспроизвести запись вашего пения. Разъем (стереоминиджек) REC IN позволяет записывать аккомпанемент и другое аудио для обучения. Наклейки для обучения и занятий сольфеджио с транспонированным До . Метроном с возможностью задать темп ритмичным постукиванием. Наклонная стойка для удобства размещения на столе. Возможность питания от двух батарей АА (алкалиновых или аккумуляторов)
-
Вокальный тренажер
ROLAND VT-12-BU — Вокальный тренажер компактный инструмент для вокалистов. Цвет: голубой Благодаря визуальному отображению тональности встроенным упражнениям и бэк-трекам двуголосой поддержки и многому другому карманный VT-12 является комплект омучебных материалов и обязательным компаньоном для всех певцов. VT-12 отслеживает тональность певца и отображает его в режиме реального времени на подсвеченном опредеоителе который реагирует быстро и точно. Высотометр горит ярче чем точнее вы поете правильную ноту и темнеет при удалении от нее. Кроме того талонный тон (в диапазоне от 24 полутонов) можно проигрывать с помощью нажатия кнопки чтобы помочь певцам определить правильную тональность. Пользователи могут практиковать учитеем или друзьями и VT-12 будет обнаруживать два голоса одновременно и отображать названия нот. Высота определяется в трех режимах: высота одного голоса определяется в равномерно-темперированном строе два голоса определяются в равномерно-темперированном строе два голоса определяются в натуральном строе. VT-12 оснащен книгой Постановка современного вокала разработанной во всемирно известном музыкальном колледже Беркли. Этот полный вокальный метод содержит широкий спектр упражнений а VT-12 содержит встроенные пьесы-упражения с аккомпанементом во множестве жанров. Также в инструмент встроены пятьдесят уроков для среднего голоса в сопровождении фортепиано. В этих упражнений VT-12 отображает тональность примера и тональность пользователя одновременно. Метроном позволяет певцам развивать чувство ритма Темп можно выбрать вручную или задать его ритмичным постукиванием. Функция Review полезна для самооценки позволяя пользователю записывать свое пение и слушать его с помощью VT-12 встроенного динамика или через наушники. Десять пользовательских треков позволяют с легкостью записывать песни с внешнего проигрывателя музыки как iPod и сохранять их в VT-12 для вокальной практики. Каждый пользовательский трек обеспечивает 10 минут записи. Певцы могут использовать функцию обзора с пользовательскими треками чтобы записать свой голос вместе с музыкой а затем оценить свою производительность. VT-12 доступен в трех различных цветах: Black Aqua Blue и Metallic Orange.Удобное отверстие ремешка позволяет пользователям подключать шнур и носить VT-12 на шее. В устройство так же интегрирована наклонная подставка для настольной работы. Особенности Roland VT-12: Высота пения показывается на подсвеченном определителе высоты. Определяет высоту двух певцов одновременно в равномерно-темперированном или натуральном строе Содержит встроенные аудио-упражнения и запись аккомпанемента а также методику обучения вокалу Беркли в виде книги. Может использоваться для разогрева и базисных упражнений. VT-12 показывает высоту вокала по отношению к записи. 50 уроков классического голоса Concone Op. 9 Fifty Lessons ставшие общемировым стандартом. Эталонная мелодия под аккомпанемент фортепиано в записи; VT-12 определяет высоту мелодии вместе с высотой вашего вокала. Функция Review позволяет тут же воспроизвести запись вашего пения. Разъем (стереоминиджек) REC IN позволяет записывать аккомпанемент и другое аудио для обучения. Наклейки для обучения и занятий сольфеджио с транспонированным До . Метроном с возможностью задать темп ритмичным постукиванием. Наклонная стойка для удобства размещения на столе. Возможность питания от двух батарей АА (алкалиновых или аккумуляторов)
-
портативный CD репетитор для вокала
CD-VT2 это одна из последних разработок в уникальной линейке CD репетиторов Tascam. Как и в оригинальном репетиторе CD-GT1 пользователям предоставляется возможность замедлять скорость воспроизведения CD трека без изменения высоты тона. Это открывает новые возможности артистам и музыкантам студентам и преподавателям музыкальных дисциплин. Теперь разучивать гармонические обороты солирующие партии сложные мелодии и репетировать вместе со своими любимыми исполнителями становится чрезвычайно удобно. CD-VT2 – это новый сверхкомпактный дизайн большой экран возможность отображения исчерпывающей информации о текущем треке встроенный процессор эффектов тюнер 3-октавный осциллятор и эксклюзивная разработка Tascam – функция VSA (Variable Speed Audition) которая позволяет изменять темп музыкального произведения без изменения тональности. Все использованные нововведения а также функция подавления солирующих инструментов в фонограмме и поддержка популярных форматов дисков – CD-DA/CD-R/CD-RW – позволят вокалистам и музыкантам играющим на акустических инструментах открыть новые возможности совершенствования собственной игры и овладеть приемами игры своих кумиров. Описание Портативный CD репетитор для вокала (более компактный чем предыдущая версия – CD-GT1MKII) Поддержка CD-DA/CD-R/CD-RW носителей 10-секундный противоударный буфер памяти Отображение информации о названии альбома и трека (CD-Text) Отображение прошедшего или оставшегося времени воспроизведения Одновременное изменение темпа и высоты тона в диапазоне от +16 до –50% с шагом 1% VSA (Variable Speed Audition). Изменение темпа музыкального произведения без изменения тональности Функция Key control: Изменение высоты тона в диапазоне ±6 полутонов с шагом в полутон и ±50 центов для тонкой настройки Режимы воспроизведения Single (один трек) и Continuous (непрерывное воспроизведение всех треков) Режимы повтора Single Loop All Loop и In-Out Loop Функция Flash Back. Мгновенный повтор последних 5 секунд воспроизводимого фрагмента Функция подавления солирующих инструментов в фонограмме с выбираемой точкой в панораме и настраиваемым диапазоном частот Процессор эффектов 5 банков для сохранения пользовательских пресетов Эффект Voice Changer Хроматический тюнер с возможностью калибровки (435–445 Гц) 3-октавный осциллятор Метроном (BPM: от 40 до 220 Beat: от 2 до 6) Два микрофонных входа 6.3-мм jack c общим регулятором уровня Индикатор входного уровня на экране Элементы управления уровнем также отображаются на экране Линейный стерео выход 3.5-мм jack Стерео выход на наушники 3.5-мм jack Регулятор громкости наушников Встроенный моно громкоговоритель для прослушивания в режимах L+R L R Разделенный мониторинг (левый канал: CD правый канал: сигнал микрофонных входов 1/2) Экран 128 x 64 точки графический пользовательский интерфейс Питание от батареи Опциональный адаптер системы питания PS-P520 Спецификации CD player Compatible CD formats CD-DA (audio CD) CD-TEXT Compatible media types 12cm/8cm CD CD-R CD-RW A/D converter 24-bit D/A converter 24-bit Internal DSP calculations 32-bit Sampling frequency 44.1 kHz Quantization bit rate 16-bit linear Frequency response 20 Hz – 20 kHz +0 5/–5 dB S/N ratio 80 dB Dynamic range 90 dB Total harmonic distortion < 0.05 % (200 Hz – 20 kHz) Channel separation 80 dB Audio inputs and outputs Mic inputs 1 2 6.3-mm (1/4 ) mono phone jack Nominal input level –40 dBV Maximum input level –19 dBV Line output 3.5-mm (1/8 ) stereo minijack Nominal output level –10 dBV Maximum output level +6 dBV Headphones output 3.5-mm (1/8 ) stereo minijack Maximum output power 15 mW + 15 mW (into 32 Ohm) Other characteristics Power supply 4 AA batteries or DC-5V (requires PS-P520 AC adapter sold separately) Power consumption 2.5 W (during AC adapter use) Dimensions (W x H x D) 194 mm x 39 mm x 138 mm Weight 0.55 kg (excluding batteries) Supplied accessories Owner’s manual Warranty card Технические характеристики и внешний облик устройств могут быть изменены без предварительного уведомления.
Караоке
-
Двухканальная беспроводная микрофонная система
AST-922M — двухканальная беспроводная микрофонная система с двумя кардиоидными ручными передатчиками и одним двухканальным приёмником. Технические характеристики AST-922M: Частотный диапазон: 620-950 МГц Выходы: 2 балансных (XLRm) 1 небалансный микшированный (1/4 Jack) Количество каналов передачи сигнала: 200 Радиус действия: до 100 м Питание приёмника: 220 В 50 Гц Питание передатчика: 2 батареи АА Время работы от 1 комплекта батарей: до 10 ч Габариты приёмника (Ш х Г х В): 21 х 25 х 4.8 см Габариты передатчика: 27.5 х 5.2 см
-
Усилитель для караоке
CRCBOX K-9250 — Усилитель для караоке. 5 микрофонных входов сопротивление 4~8 Ом. Особенности: Эффекты Echo: Delay Echo Repeat Корректировка микрофона: Bass Treble Регулировка Balance Bass Treble Регулировка ECHO VOL MIC MASTER VOL MUSIC VOL Характеристики: Тип: усилитель для караоке Мощность: 350 Вт × 2 Чувствительность: 75 дБ Диапазон частот: 20–20 000 Гц Материал: металл Вес: 10 2 кг
-
Усилитель для караоке
CRCBOX K-7350 — Усилитель для караоке. 5 микрофонных входов сопротивление 4~8 Ом. Особенности: Эффекты Echo: Delay Echo Repeat Корректировка микрофона: Bass Treble Регулировка Balance Bass Treble Регулировка ECHO VOL MIC MASTER VOL MUSIC VOL Характеристики: Тип: усилитель для караоке Мощность: 350 Вт × 2 Соотношение сигнал/шум: ≥80 дБ THD:
-
Усилитель для караоке
CRCBOX K-7250 — Усилитель для караоке. 5 микрофонных входов сопротивление 4~8 Ом. Характеристики: Тип: усилитель для караоке Мощность: 250 Вт Чувствительность: 75 дБ Диапазон частот: 20–48 000 Гц Материал: металл Размер: 420×128×330 мм Вес: 9 73 кг
-
Караоке-система
Evolution EVOBOX PLUS — караоке-система для дома и небольших заведений. Алюминиевый корпус подключение 2-х радиомикрофонов профессиональные вокальные эффекты поддержка 4K. Предзагружено 41 000 популярных песен: 1800 отечественных и 200 зарубежных. Дополнительно можно загрузить бесплатно 100 песен на выбор из караоке-каталога Studio Evolution. Цвета: чёрный серебро графит океан золото и рубин. Интегрируется в системы «умный дом». Запись и копирование на USB-носитель. Управление при помощи Bluetooth-пульта с клавиатурой или с приложения EvoControl и EvoNet для планшета и смартфона. КОМПЛЕКТАЦИЯ Караоке-система Bluetooth-пульт Блок питания Аудиокабели RCA-RCA Кабель HDMI 2.0 Руково Гарантия 1 год Характеристики: Выходы: 1 x RCA стерео-аудио (Полоса частот: (+/- 0 5 дБ) 20 Гц – 20 кГц) / ЦАП – Cirrus Logic CS4345 1 x HDMI Входы: 2 х микрофонный (Jack 1/4 ) 2 x USB 2.0 1 x RJ45 (LAN) Видео: 4K UHD (3840 x 2160) Поддерживаемые форматы: Видео — MOV AVI MP4 MKV Звуковые — WAV OGG MP3 Графические — PNG JPG JPEG Караоке — EK2 Процессор: Quad Core Cortex-A53 Встроенная голосовая обработка: Lexicon Пульт ДУ: Bluetooth Объем SSD: 120 ГБ Wi-Fi: 802.11ac. Работа в двух диапазонах (2 4 ГГц и 5 ГГц) Bluetooth: 4.1 Low Energy Периодичность выхода обновлений: Ежемесячно Песен в базе: 2000 + 100 песен можно загрузить бесплатно Размеры (В x Ш x Г): 20 x 22 5 x 6 мм Питание: 220 В 50 Гц Потребляемая мощность: 25 Вт
-
Караоке-система
EVOBOX это караоке-система для дома и небольших заведений. Алюминиевый корпус подключение 2-х радиомикрофонов профессиональные вокальные эффекты поддержка 4K. Предзагружено 2000 популярных песен: 1800 отечественных и 200 зарубежных. Дополнительно можно загрузить бесплатно 100 песен на выбор из караоке-каталога Studio Evolution. Цвета: чёрный серебро графит океан золото и рубин. Интегрируется в системы «умный дом». Запись и копирование на USB-носитель. Управление при помощи Bluetooth-пульта с клавиатурой или с приложения EvoControl и EvoNet для планшета и смартфона. КОМПЛЕКТАЦИЯ Караоке-система Bluetooth-пульт Блок питания Аудиокабели RCA-RCA Кабель HDMI 2.0 Руководство пользователя Гарантия 1 год Характеристики: Выходы: 1 x RCA стерео-аудио (Полоса частот: (+/- 0 5 дБ) 20 Гц – 20 кГц) / ЦАП – Cirrus Logic CS4345 1 x HDMI Входы: 2 х микрофонный (Jack 1/4 ) 2 x USB 2.0 1 x RJ45 (LAN) Видео: 4K UHD (3840 x 2160) Поддерживаемые форматы: Видео — MOV AVI MP4 MKV Звуковые — WAV OGG MP3 Графические — PNG JPG JPEG Караоке — EK2 Процессор: Quad Core Cortex-A53 Встроенная голосовая обработка: Lexicon Пульт ДУ: Bluetooth Объем SSD: 120 ГБ Wi-Fi: 802.11ac. Работа в двух диапазонах (2 4 ГГц и 5 ГГц) Bluetooth: 4.1 Low Energy Периодичность выхода обновлений: Ежемесячно Песен в базе: 2000 + 100 песен можно загрузить бесплатно Размеры (В x Ш x Г): 20 x 22 5 x 6 мм Питание: 220 В 50 Гц Потребляемая мощность: 25 Вт
-
Караоке-система
Evolution Pro 2 это топовая караоке-система с базой на более чем 50 тыс. композиций и возможностью подключения двух микрофонов. Более 11 тыс. видео в базе. Модуляция без изменения тональности встроенный процессор эффектов запись выступления подключение к интернету с личным кабинетом на сайте. Опции «черного списка» функции «Плейлисты постоянных гостей» и интеллектуального поиска. Встроенный процессор эффектов с эквалайзером компрессором несколькими видами реверберации и дилэя. Подключения к интернету по Wi-Fi для обновления прошивки и расширения базы. Воспроизведение караоке-видео в том числе и в формате FullHD встроенная база видео из 11000+ композиций. Загрузку обновлений Evolution Pro2можно производить в онлайн-режиме с удалённого сервера. Возможна звукозапись воспроизведения. Встроенный процессор эффектов и для микрофонов доступны 3 варианта реверберации 3 варианта дилэя 3 вида VocalTune а также возможность подключения компрессора на каждый из микрофонов. Караоке-системой можно управлять при помощи приложения EvoControl для планшетов. В систему интегрирована поддержка сервиса EvoClub от Studio Evolution. При помощи EvoClub любой посетитель клуба может подключить свой планшет или смартфон по Wi-Fi к караоке-системе заказать в один клик песню или пообщаться во встроенном чате со звукорежиссером. Обновления ПО и каталога караоке-системы происходят онлайн. Для обновления каталога песен представлены два пакета — «Годовой» (12х100 песен в год обновления выходят в конце каждого месяца) и «Клубный» (12х100 песен в год обновления выходят постепенно по несколько раз в неделю). КОМПЛЕКТАЦИЯ Караоке-система Evolution Pro2 Предустановленная база композиций Пульт ДУ Сетевой кабель Кабель HDMI1.4 (2 м) Аудиокабели TRS 6.3-TRS 6.3 balanced stereo 2 шт. Гарантия 1 год Технические характеристики: Поддерживаемые форматы файлов: Видео: MOV AVI MPEG MP4 MKV. Звуковые: WAV OGG MP3. Графические: PNG JPG. Караоке: EK2. Аудио: Стандарты входного аудиосигнала: аналоговый 2 балансных или небалансных TRS 6.3 мм S/PDIF коаксиальный (IEC958). Стандарты выходного аудиосигнала: аналоговый: 2 балансных TRS 6.3 мм цифровой: HDMI S/PDIF коаксиальный (IEC958). Частота дискретизации цифрового сигнала: 32 – 192 кГц. Частота дискретизации аналогового сигнала: 8 – 192 кГц. Разрядность ЦАП/АЦП: 24 бита. Количество микрофонных входов: 2. Возможность регулировки уровня сигналов от микрофонов: есть. USB: Количество: 7. Тип разъёма: USB A. Версия: 2.0 3.0. Поддерживаемые USB-накопители: USB флеш память USB жёсткий диск USB кард-ридеры. Файловая система: FAT3213 NTFS. Входы: Количество микрофонных входов: 2. Возможность регулировки уровня сигнала от микрофонов. Максимальное усиление по микрофонному входу: 46 дБ. Максимальная входная амплитуда: +1.5 ДБВ (1 2 В действующего). Отношение сигнал/шум по входу: 113 дБ. Динамический диапазон: 113 дБ. Гармонические искажения + шум: 0.0006 %. Полоса частот (+/- 0.5 дБ): 80 Гц — 80 кГц. Взаимное проникновение каналов: -130 дБ. Входное сопротивление: 4 7 кОм. Аудио АЦП: AKM AK5385В. Выходы: Отношение сигнал/шум по входу: 108 дБ. Динамический диапазон: 109 дБ. Гармонические искажения + шум: 0.0023 %. Полоса частот (+/- 0.5 дБ): 20 Гц – 80 кГц. Взаимное проникновение каналов: –105 дБ. Выходное сопротивление: 4.7 кОм. Аудио ЦАП: АК4358. Видео: Стандарты выходного видеосигнала: HDMI DVI VGA Composite (5 шт.). Максимальное разрешение экрана: 1920 х 1080″ 60 Гц (1080 р). Система: Операционная система: Linux Evolution™. Общий объём жёстких дисков: 2 ТБ. Оптический привод: Blu-ray. Разъём LAN (Ethernet). Скорость Ethernet: 100 Мбит/с. Wi-Fi. SATA 3.0. Прочее: Питание: ~220 Вт ±10% 50 Гц ±1 Гц. Потребляемая мощность: 550 Вт. Габариты транспортной коробки (Ш x В x Г) мм: 507 x 258 x 462. Габариты устройства (Ш x В x Г) мм: 434 x 166 x 404. Вес: 17.5 кг. Рабочий диапазон температур: от +5 до +40 ºC. Допустимая влажность воздуха: 10 – 80%.
-
Караоке-система
Караоке-система Evolution Lite 2 предназначена для дома или караоке-клуба более 50 тыс. композиций и возможностью подключения двух микрофонов жесткий диск на 2 Гб загрузка ежемесячных обновлений бесплатно. 24-битный АЦП и удобный параметрический эквалайзер. Удобный домашний пульт а также приложения EvoControl и EvoNet (для смартфона и планшета). Операционная система «Linux Evolution». Открытое RESTful API позволяет с легкостью интегрировать караоке-систему Evolution Lite2 в любую систему «умный дом» (Savant и Crestron). КОМПЛЕКТАЦИЯ Караоке-система Evolution Lite2 Предустановленная база композиций Пульт ДУ Блок питания Wi-Fi антенны Кабель HDMI Аудио кабели 2 RCA- 2 RCA Гарантия 1 год Характеристики: 2 варианта комплектации. Звукозапись выступления в режиме реального времени. Подключение 2-х микрофонов. Профессиональная обработка голоса. Удобный интуитивно понятный интерфейс. Поддержка Full HD караоке. Информационный дисплей. Управление караоке-системой с пульта ДУ и планшета. Автоматическая оценка качества исполнения. Интеллектуальный поиск песен. Фоновая музыка между выступлениями. Удобное обновление. ОС «Linux Evolution».
-
Микшерные пульты для караоке
AST-8FX USB Профессиональный шести (AST-6FX) или восьмиканальный (AST-8FX) микшерный пульт со встроенным 24-битным процессором цифровых эффектов. Технические характеристики AST-6FX USB: Микрофонные/линейные входы: 4 (модель 6FX) 6 (модель 8FX) Стереовходы:1 Стереовыходы:1 Входные уровни: микрофонный вход: 30 дБн линейный вход: 21 дБн все остальные входы: 22 дБн Выходные уровни: главный выход: +4 дБн все остальные уровни: +4 дБн максимальный выходной уровень: 22 дБн Диапазон частот: по уровню +0 -1 дБ: < 10 Гц — 80 кГц по уровню +0 -3 дБ: < 10 Гц — 120 кГц Входное сопротивление: микрофонные входы: 2 кОм линейные входы: > 10 кОм Выходное сопротивление: > 100 кОм Трёхполосный эквалайзер: +/- 15 дБ высокие частоты: 12 кГц средние частоты: 2.5 кГц низкие частоты: 80 Гц Сверхнизкий уровень шума при максимальной чувствительности. Встроенный 24-битный процессор цифровых эффектов. Трёхполосный эквалайзер. USB-интерфейс. Микрофонные предусилители студийного качества с расширенным динамическим диапазоном. Раздельная регулировка выходных уровней. Балансные входы и выходы 1/4 дюйма. Герметичные поворотные регуляторы препятствующие попаданию пыли и грязи. Прочный стальной корпус.
-
МИКШЕРНЫЕ ПУЛЬТЫ ДЛЯ КАРАОКЕ
AST-6FX USB Профессиональный шести (AST-6FX) или восьмиканальный (AST-8FX) микшерный пульт со встроенным 24-битным процессором цифровых эффектов. Технические характеристики AST-6FX USB: Микрофонные/линейные входы: 4 (модель 6FX) 6 (модель 8FX) Стереовходы:1 Стереовыходы:1 Входные уровни: микрофонный вход: 30 дБн линейный вход: 21 дБн все остальные входы: 22 дБн Выходные уровни: главный выход: +4 дБн все остальные уровни: +4 дБн максимальный выходной уровень: 22 дБн Диапазон частот: по уровню +0 -1 дБ: < 10 Гц — 80 кГц по уровню +0 -3 дБ: < 10 Гц — 120 кГц Входное сопротивление: микрофонные входы: 2 кОм линейные входы: > 10 кОм Выходное сопротивление: > 100 кОм Трёхполосный эквалайзер: +/- 15 дБ высокие частоты: 12 кГц средние частоты: 2.5 кГц низкие частоты: 80 Гц
Микшерные пульты
-
цифровой микшер
TC HELICON GO XLR это 4-х канальная станция для подкастов. С помощью микшера можно с легкостью управлять громкостью всех аудиоисточников в режиме реального времени что позволяет сосредоточиться самом важном. GoXLR включает в себя потрясающий набор звуковых эффектов включая эквалайзеры компрессоры де-эссеры и гейт эффекты всё чтобы голос звучал потрясающе и без задержки — теперь не нужно быть звукоинженером чтобы добиться хорошего качества. Независимо от того является ли пользователь опытным звукоинженером или новичком приложение GoXLR оснащено простыми и удобными в использовании элементами управления которые помогут быстро приступить к работе также оно даст доступ к расширенным возможностям для тех кто хочет лучше контролировать свой звук. Особенности TC HELICON GO XLR: 4-х канальный микшер для быстро USB-микширования источников сигнала GoXLR использует высококачественные микрофонные предусилители Midas Микшер дает доступ к профессиональным эффектам обработки на которые профессионалы полагаются каждый день Функция «Caught» позволяет мгновенно отключить звук и избежать недоразумений С помощью настройки RGB-подсветки можно полностью персонализировать GO XLR в соответствии с освещением и дизайном другой аппаратуры
-
Блок питания (адаптер) для микшерных пультов
BEHRINGER PSU6-EU — Фирменный сетевой адаптер питания для микшеров Behringer. Блок питания предназначен для питания микшеров следующих моделей: UB1002FX UB1202FX XENYX (1002FX 1202FX) QX1002USB QX1202USB. Использование фирменного адаптера питания важно для избежания повреждения дорогостоящего оборудования. Использование адаптеров сомнительного производства и качества может привести к выходу из строя музыкального оборудования. Адаптер имеет компактный эргономичный дизайн. Блок питания для микшера BEHRINGER PSU6-EU предлагает высокое качество и надежную конструкцию на долгий срок службы. Срок гарантийного обслуживания — 1 год.
-
микшерный пульт, 8 каналов.
Allen & Heath ZED-10FX микшерный пульт Микшер для живой работы записи и продакшн студий 4 моно 2 стерео USB интерфейс 3-полосный эквалайзер с полупараметрической серединой на моно входах 2-полосный эквалайзер на стерео каналах Каналы 1 и 2 — универсальные микрофонно-линейные входы на разъемах Jack и XLR. Каналы 3 и 4 следует использовать как высокоомные гитарные входы что позволяет не пользоваться DI – боксом. Оба стереоканала имеют входы на стандартных Джеках но один из нмх еще имеет пару phono разъемов для CD проигрывателя. ZED10 также имеет дополнительный стереовход называемый PLAYBACK который приходит на каждый разъем Jack или USB порт и имеет свой регулятор уровня. Подавать сигнал с Playback на Aux очень удобно для создания сопровождающего трека для вокала. Порт USB работает на вход и на выход. Для выхода он может задействоваться с основного микса или микса записи что удобно для записи простых проектов или живых номеров непосредственно в компьютер. Как вход он очень удобен для использования сопровождающих треков или DJ софта с ноутбука. Если вы выполняете большой обьем записи то благодаря наличию USB порта ZED10 незаменим как мобильная цифровая/аналоговая студия а как выяснилось при использовании свободных драйверов asio4all он работает даже лучше. Процессор эффектов имеет 16 классических реверберационных эффектов. Размеры – 95х275х336 мм Срок гарантийного обслуживания — 1 год.
-
18-канальный цифровый микшер
Behringer XR18 рэковый цифровой микшер управление с iPad или Android-планшетов 18 входов 12 подгрупп Wi-Fi 18-канальный аудиоинтерфейс для шины USB. Характеристики: 18 канальный цифровой микшер для студии и живого применения 16 MIDAS полностью программируемых микрофонных предусилителей Встроенный Tri-Mode Wifi роутер для прямого управления Двунаправленный USB интерфейс 18 х 18 для прямой записи на iPad и т. д. Революционное Dugan стиля авто-микширование для автоматического управления разделением микрофонного усиления Премированные Х32 эффекты с 4 стерео FX слотами включая симуляцию Lexicon 480L PCM70 EMT250 Quantec QRS и др. 100-полосный Real Time Analyzer (RTA) на всех каналах и шине EQ ULTRANET подключение для BEHRINGER P-16 персональной системы мониторинга Крепления для установки в рэк и защитные бамперы 6 aux и LR шины с inserts полной динамической обработкой и 6-полосным параметрическим или 31-полосным графическим эквалайзером 6 выходов XLR и 2 основных выхода XLR плюс разъем phone 40-бит DSP с неограниченным динамическим диапазоном без внутреннего перегруза и почти нулевой задержкой Бесплатные приложения для PC/Mac/Linux iOS и Android обеспечивающие управление через LAN WiFi либо Ethernet соединения MIDI вход/выход позволяет контролировать микшер через MIDI оборудование (в т. ч. протокол Mackie Control) или для использования в качестве интерфейса USB MIDI (будущая прошивка) Будущие обновления прошивки вкл. новый FX «Plug Ins» загружаемый с сайта behringer.com бесплатно Внутренний режим переключения питания для бесшумного аудио и низкого энергопотребления 3-х летняя гарантийная программа Разработан и спроектирован в Германии Характеристики Каналы: 18 входных каналов 1 стерео USB 4 стерео FX 6 Aux шин основные LR Внутренние процессоры эффектов: 4 стерео Обработка сигнала: 40-бит А/Ц-Ц/А преобразование: 24-бит 44 1/48 кГц 114 дБ динамический диапазон А/Ц Аналоговая задержка Вход/выход: 0 8 мсек Разъемы Программируемые микрофонные предусилители: 16 XLR/TRS Линейные входы: 2 TRS балансные Основные выходы: 2 XLR балансные Aux выходы: 6 XLR балансные Phone выходы: 1 TRS MIDI вход/выход: 1/1 DIN Ethernet: 1 RJ45 USB порт: тип-B Микрофонные входы Разработчик: MIDAS THD + шум 20 дБ усиление: 0 005% Фантомное питание: 48В Эквивалентный уровень шума: -128 dBu CMRR XLR: 60 дБ Входы/выходы Частотный диапазон: 10 Гц – 22 кГц Динамический диапазон: 106 дБ Сопротивление микрофонного входа небаланс/баланс: 5 кОм/10кОм Максимальный входной уровень XLR: +23 dBu Сопротивление Hi-Z TRS небаланс/баланс: 1МОм/2МОм Сопротивление линейных входов небаланс/баланс: 5 кОм/10 кОм Максимальный входной уровень TRS: +16 dBu Сопротивление выходов XLR небаланс/баланс: 50 Ом/50 Ом Выходной уровень XLR обычно/максимум: +4 dBu/+16 dBu Сопротивление выходов TRS небаланс/баланс: 50 Ом/50 Ом Выходной уровень TRS обычно/максимум: +4 dBu/+16 dBu Сопротивление Phone: 40 Ом WLAN модуль Антенна: внешняя SMA разъем 50 Ом Точка доступа число клиентов: макс 4 Частотный диапазон: 2 412-2 462 МГц WLAN каналы: 1-11 Питание: 100-240 V (50/60 Гц) Размеры: 333 х 149 х 140 мм Вес: 3 2 кг
-
микшерный пульт, 10 каналов
Behringer XENYX QX1002USB – это малошумящий студийный 10-канальный аналоговый микшер с четырьмя микрофонными предусилителями XENYX что позволяет использовать как динамические так и конденсаторные микрофоны. Также на микрофонных входах находятся трехполосные «британские» эквалайзеры в виде ручек и обрезные НЧ-фильтры. У устройства две шины: можно собрать сигналы с одного или нескольких каналов на одну шину. Основная «фишка» микшера – встроенный двойной процессор эффектов KLARK TEKNIC FX который можно применить к любому каналу. Используются высокоточные 24-битные АЦП/ЦАП также есть двухсегментный ЖК-дисплей для отображения выбранной предустановки. Количество эффектов – 100 в это число входят различные виды реверберации хоруса дилэя флэнжера а также вариации мультиэффектов. Еще одна отличительная черта консоли – встроенный USB-аудиоинтерфейс посылающий на компьютер тот же сигнал который идет по основной шине. После покупки вы можете загрузить 150 инструментов и плагинов эффектов с сайта behringer.com и использовать их с аудиоинтерфейсом. На борту Behringer XENYX QX1002USB находится 2 микрофонных монофонических входа XLR 2 линейных моновхода 4 линейных двухканальных стереовхода и два RCA-входа. Выходы представлены разъемами 1/4 TRS Jack на наушники двумя линейными основными TS-выходами двумя контрольными TS-выходами а также двумя RCA-выходами: таким образом вы можете записывать свой сигнал как с RCA- так и с TS-выходов. Кроме того есть отдельный TRS-выход FX SEND: это посыл на внешние процессоры эффектов (например если вы хотите подключить эффекты которых нет у встроенного процессора). Выход регулируется отдельными ручками как на двух микрофонных моноканалах и на четырех стереофонических линейных. На линейных стереоканалах есть собственные регуляторы уровня (также есть и на моноканалах) баланса (по одному на каждую пару) и переключатели входной чувствительности +4/-10 дБ что позволяет подключать как бытовые так и профессиональные источники звука. Наконец в основной секции находится общая ручка посыла на эффекты в мастер-канал длинный мастер-фейдер 60 мм регулятор уровня звука в наушниках кнопка включения фантомного питания четырехсегментный общий двухканальный индикатор уровня со светодиодом клиппирования и кнопки посыла на запись. Behringer XENYX QX1002USB является превосходным микшером для студий среднего уровня обеспечивая достаточное количество каналов разнообразие функциональных возможностей и высокое качество звука. Особенности аналогового микшерного пульта Behringer XENYX QX1002USB Студийный аналоговый микшер 2 шины 2 дискретных микрофонных входа XLR 4 линейных стереовхода (8 физических входов) 2 линейных моновхода 2 RCA-входа Встроенный двойной процессор эффектов для всех каналов 100 эффектов Посыл на внешние процессоры эффектов с отдельными ручками регулировки на каждом канале Встроенный USB-аудиоинтерфейс АЦП/ЦАП – 24 бит/40 кГц Трехполосные эквалайзеры на микрофонных входах Гейн до +60 дБ на каждом микрофонном входе Ручки регулировки уровня выходного сигнала до +15 дБ на всех каналах Переключатели входной чувствительности +4/-10 дБ Четырехсегментный индикатор уровня с клиппированием Длинный мастер-фейдер 60 мм Характеристики аналогового микшерного пульта Behringer XENYX QX1002USB Частотный диапазон на микрофонных входах
-
Цифровой микшер
Behringer Flow 8 является компактным цифровым микшерным пультом. Он имеет 8 входов Bluetooth Audio и управление с помощью приложения Для управления каналов имеется шесть 60 милимметровых фейдеров есть 2 процессора эффектов и встроенный USB-интерфейс. Данный цифровой микшер предлагает обработку студийного качества возможность регулировки настроек и дистанционное управление. Это надежный и простой в эксплуатации микшер с большим динамическим диапазоном он применим для стриминга прямых трансляций выступлений и многоканальной записи. Приложение FLOW создано для удаленного управления через Bluetooth на мобильных устройствах iOS/Android. Приложение имеет вспомогательные настройки а именно неограниченное количество заготовок (снэпшотов) и интуитивный настраиваемый просмотр сцен (Stage-View). FLOW8 имеет встроенный помощник настройки. Если вы начинающий в сфере аудио приложение предоставит уникальные мастер-настройки которые подскажут куда подключать кабели предложит подходящие пресеты. Приложение располагает настраиваемыми заготовками и пресетами для быстрого доступа в любую секунду например под запись подкаста или инструмента или под запись разных голосов. Данные пресеты именуются снэпшотами и обеспечивают неограниченную мощность их можно сохранять редактировать и загружать через аппаратное обеспечение или приложение мгновенно. Можно быстро вызывать настройки FX Channel Main Monitor или Routing-Options по отдельности (требуется прошивка 11739 или выше). Аппаратное обеспечение предоставляет 15 внутренних слотов для хранения предустановленных пресетов приложение может хранить неограниченную библиотеку снэпшотов отсортированных по имени. Функция EZ-GAIN является автоматическим регулятором уровня если нужны чистые сигналы с низким уровнем шума и отсутствием гармонических искажений. Так же данная функция автоматически включает фантомное питание 48 В на первом и втором микрофонных входах если сигнал не обнаружен или вы забыли это сделать. Можно настроить 9-полосный эквалайзер для основных акустических систем установить компрессор на бас-гитаре или найти баланс в миксе в соответствии с талантами на сцене. Behringer Flow 8 обладает двумя микрофонными предусилителями Midas и внутренней обработкой 32 VFP. Пульт FLOW 8 дополняет серию цифровых микшерных консолей X32 X-AIR и WING и не уступает им по качеству звучания. Все каналы предлагают 4-полосный параметрический эквалайзер компрессию а также 2 посыла на эффекты и 2 посыла на монитор. Все мониторные и основные шины оснащены 9-полосным параметрическим эквалайзером и лимитером для предотвращения неожиданных пиков громкости. FLOW 8 оснащен двумя независимыми процессорами эффектов студийного уровня каждый из которых имеет 16 пресетов для обработки инструментов и вокала. Имеются 12 программ реверберации они варьируются от очень короткого но живого окружения до очень длинных и плавных симуляций храма или стадиона. Все они бывают двух видов и время их затухания можно регулировать непрерывно. В дополнение к этому можно получить различные эффекты задержки и модуляции для всех стилей и приложений. Внутренний интерфейс USB предлагает отдельные режимы для приложений потоковой передачи и записи обеспечивая до 10 дорожек записи и 2 канала воспроизведения. Основной микс либо все входные сигналы можно транслировать или записывать по отдельности. Это делает FLOW 8 идеальным партнером для записи в DAW с мониторингом с нулевой задержкой или для потоковой передачи. Также есть вход для футсвича с помощью которого можно управлять включением и отключением эффектов. На самом пульте есть 2 опоры для смартфона для удобства управления можно использовать экран смартфона как тач-дисплей микшера. Для питания микшера необходимо 5V/2A подключение через разъем Micro USB что означает что при необходимости пульт становится портативным и его можно взять с собой в дорогу а питание подавать от powerbank. Для пульта предусмотрен опциональный специальный зажим для крепления к стойке FLOW 8 CLAMP. Он состоит из металлического кронштейна который прикручивается к микшеру и запатентованной пластиковой детали которая крепится к микрофонной стойке без каких-либо винтов. Зажим рассчитан на стандартный диаметр микрофонных стоек 5/8 (не более 16 5 мм). Особенности цифрового микшерного пульта Behringer Flow 8 Цифровой микшер с большим динамическим диапазоном Приложение FLOW для удаленного управления Bluetooth Два микрофонных предусилителя Midas с фантомным питанием 48 В 9-полосный параметрический эквалайзер и лимитер Неограниченное количество заготовок (снэпшотов) в приложении Встроенный USB-интерфейс Функция EZ-GAIN для автоматического регулирования уровня Характеристики цифрового микшерного пульта Behringer Flow 8 Тип цифровой микшер Микрофонные входы 1/2 Тип разъема 2 x XLR балансный Шум -129 dBu (а-взвешенный) Искажения < 0.004% (а-взвешенный) Максимальный входной уровень +20 dBu Импеданс 10 кОм балансный 5 кОм небалансный Фантомное питание +48 В переключаемый (только для входов 1/2) Микрофонные входы 3/4 Тип разъема 2 x XLR/1/4 Jack TRS комбо балансный Шум -117 dBu (а-взвешенный) Искажения < 0.01% (а-взвешенный) Максимальный входной уровень XLR: +6 dBu TRS: +26 dBu Импеданс XLR: 2 кОм балансный 1 кОм небалансный TRS: 20 кОм балансный 10 кОм небалансный Диапазон усиления -20 дБ до +60 дБ Линейные входы Тип разъема 2 x 1/4 Jack TRS балансные (каналы 5L / 7L) Импеданс 20 кОм балансный 10 кОм небалансный Диапазон усиления -20 дБ до +60 дБ Искажения 0.005% (а-взвешенный) 0 дБ усиление 0 dBu выход Максимальный входной уровень +22 dBu Гитарные (Hi-Z) входы Тип разъема 2 x 1/4 Jack TRS балансные (каналы 6R / 8R) Импеданс 2 мОм балансный 1 мОм небалансный Искажения 0.005% (а-взвешенный) 0 дБ усиление 0 dBu выход Максимальный входной уровень +19 dBu Каналы эквалайзера НЧ ±15 дБ @ 20 Гц шельфовый НЧ СЧ ±15 дБ @ 300 Гц ВЧ СЧ ±15 дБ @ 1.5 кГц ВЧ ±15 дБ @ 20 кГц шельфовый Мониторные выходы Тип разъема 2 x 1/4 Jack TRS балансный Импеданс 75 Ом балансный Максимальный выходной уровень +14 dBu Главные (Main) выходы Тип разъема 2 x XLR балансный Импеданс 150 Ом балансный Максимальный выходной уровень +14 dBu Выход для наушников Тип разъема 1 x 1/4 Jack TRS стерео Максимальный выходной уровень +18 dBm / 40 Ом Вход для педали Тип разъема 1 x 1/4 Jack TRS (tip / ring normally open) Настраиваемые функции заглушение эффекта / выбор темпа загрузка следующего снэпшота / предыдущего Вход/выход и обработка Частотный диапазон 10 Гц — 22 кГц (+0/-1 дБ) Динамический диапазон аналоговый вход и выход Typ. 108 дБ Вх/Вых Задержка 0.6 мс Обработка сигналов 32-bit VFP (Vector Floating Point) A/D — D/A конверторы 24-бит / 48 кГц Динамический диапазон 114 дБ Количество каналов обработки ввода 10 входных каналов 4 fx возврат каналов USB Аудио Интерфейс Тип интерфейса USB 2.0 Коннектор Connector Type B Битность 24-бит / 48 кГц Каналы 10 выходов / 2 входа Bluetooth Частотный диапазон 2402 мГц ~ 2480 мГц Номер канала 79 Версия 4.0 Совместимость A2DP 1.2 profile Максимальный рабочий диапазон 12 м Максимальная выходная мощность 8 dBm Источник питания/напряжение Коннектор Micro-USB Источник питания 5 VDC 2A Потребляемая мощность Max. 10 W (typ. 5 W) Габариты Размер 48 x 229 x 172 мм Вес 1 4 кг
-
Микшерный пульт, 12 каналов
BEHRINGER X1204USB микшерный пульт 12 каналов. Тип: компактный малошумящий микшерный пульт премиум-класса (4 моновхода с независимыми процессорами 2 стереовхода 2 AUX-шины процессор эффектов интегрированный USB-интерфейс встроенный импульсный блок питания) Behringer XENYX X 1222USB — компактный малошумящий микшерный пульт премиум-класса имеет 4 моновхода с независимыми компрессорами 4 стереовхода 6 микрофонных предусилителей 2 шины Aux процессор эффектов выходной эквалайзер с детектором обратной связи функцию подавления вокала интегрированный USB интерфейс встроенный импульсный блок питания. ОПИСАНИЕ 8-канальный микшерный пульт с USB-интерфейсом 4 XENYX микрофонных предусилителя с фантомным питанием 4 Компрессора 3-полосный эквалайзер Процессор эффектов с 16 редактируемыми пресетами (включая реверберацию хорус фленджер задержка Pitch Shifter мульти-эффекты и длительное хранение параметров настроек пользователя) Интегрированный стерео-USB-аудиоинтефейс для прямого подключения к компьютеру 2 посыла AUX на каждый канал Индикатор пиков Mute / Alt 3-4 соло и PFL функции на всех каналах Отдельная комната управления выход для наушников и 2-Track выхода 2 подгруппы с отдельными выходами 2 многофункциональных стерео возврата AUX Planet Earth импульсный источник питания (100 — 240 В ~) низкое энергопотребление Фейдеры-60мм Высококачественные компоненты и исключительно надежная конструкция гарантируют долгий срок службы Концепт и дизайн BEHRINGER Германия Технические характеристики: Микрофонные входы Тип: XLR электронно-балансные с дискретными входными цепями Эквивалентный уровень входных шумов (Микрофонный вход 20Hz — 20kHz) При сопротивлении источника 0 Ohm: -134 dB / 135.7 dB A-weighted При сопротивлении источника 50 Ohm: -131 dB / 133.3 dB A-weighted При сопротивлении источника 150 Ohm: -129 dB / 130.5 dB A-weighted Частотный диапазон: < 10 Hz — 150 kHz (-1 dB) < 10 Hz — 200 kHz (-3 dB) Диапазон усиления входного сигнала: от +10 до +60 dB Макс. входной уровень: +12 dBu (+10 dB Gain) Входное сопротивление: 2.6 kOhm (балансное) Соотношение сигнал/шум: 110dB A-weighted Коэффициент искажений (THD + N): 0.005%/0.004% A-weighted Фантомное питание (отключаемое): +48 V Линейные входы Тип: 1/4 TRS электронно-балансные Входное сопротивление Балансное: 20 kOhm Небалансное: 10 kOhm Диапазон усиления входного сигнала: от -10 до +40 dB Макс. входной уровень: 30 dBu Перекрестные помехи При закрытом фейдере Main: 90 dB При закрытом канальном фейдере: 89 dB Частотный диапазон (микрофонный вход — основной выход) < 10 Hz — 90 kHz (+0dB/-1dB) < 10 Hz — 160 kHz (+0dB/-3dB) Стереовходы Тип: 1/4 TRS электронно-балансные Входное сопротивление Балансное: 20 kOhm Небалансное: 10 kOhm Диапазон усиления входного сигнала: от -20 до +20 dB Макс. входной уровень: +22 dBu Эквалайзеры моноканалов НЧ: +/-15 dB (80 Hz) СЧ: +/-15 dB (2.5 kHz) ВЧ: +/-15 dB (12 kHz) Эквалайзеры стереоканалов НЧ: +/-15 dB (80 Hz) СЧ: +/-15 dB (2.5 kHz) ВЧ: +/-15 dB (12 kHz) Входы CD/Tape In Тип: RCA небалансные Входное сопротивление: 10 kOhm Макс. входной уровень: +22 dBu Канальные инсерты Тип: 1/4 TRS небалансные Макс. выходной уровень: +22 dBu AUX-посылы Тип: 1/4 TS небалансные Выходное сопротивление: 120 Ohm Макс. выходной уровень: +22 dBu AUX-возвраты (стерео) Тип: 1/4 TRS балансные Входное сопротивление Балансное: 20 kOhm Небалансное: 10 kOhm Макс. выходной уровень: +22 dBu Основные выходы (Main) Тип: XLR электронно-балансные Выходное сопротивление Балансное: 240 Ohm Макс. выходной уровень: +28 dBu Выходы Control Room Тип: 1/4 TS небалансные Выходное сопротивление: 120 Ohm Макс. выходной уровень: +22 dBu Выходы для наушников Тип: 1/4 TRS стерео небалансные Макс. выходной уровень: +19 dBu / 150 Ohm (+25 dBm) Выходы CD/Tape Out Тип: RCA небалансные Выходное сопротивление: 1 kOhm Макс. выходной уровень: +22 dBu Сигнал-процессинг Преобразователи: 24-bit Sigma-Delta 64/128-кратное пересэмплирование Частота сэмплирования: 40 kHz Порт USB Аудио: стереовход/стереовыход Разъем: тип В Преобразователи: 16-bit Частота сэмплирования: 48 kHz Источник питания: 100 — 240 V~ 50/60 Hz Потребляемая мощность: 40 W Размеры (В х Ш х Г): 97 х 270 х 328 мм Вес: 2.8 кг Срок гарантийного обслуживания — 1 год.
-
Микшерный пульт, шесть каналов
BEHRINGER XENYX 802 — Микшерный пульт шесть каналов Известная компания BEHRINGER следуя своим лучшим традициям представляет Вашему вниманию достаточно недорогой но качественный микшерный пульт премиум класса BEHRINGER XENYX 802. В своей спецификации представленная модель микшера особенно хороша тем что являет собой невероятно компактное устройство сочетающее в себе самые важные функции аналоговых микшеров для активной музыкальной деятельности включая домашнюю или project студию звукозаписи. Основные функциональные особенности микшера Компактный микшерный пульт XENYX 802 от компании Behringer был создан с применением самых современных технологий одна из которых носит гордое имя XENYX. Эта запатентованная производителем технология объединяет в себе все лучшие и профессиональные устройства этого производителя в значительной степени поднимающее качество Вашей работы со звуком на принципиально новый и более высокий профессиональный уровень. Так компактный аналоговый микшер BEHRINGER 802 имеет в наличии шесть (6) входов оборудован каналом посыла (AUX) с регуляторами настройки уровня для каждого из канала. В дополнение к этому микшер имеет дополнительные регуляторы классического британского эквалайзера дополнительные входы и выходы для подключения источников внешнего сигнала (CDTAPE) и многое другое. Все эти компоненты позволяют использовать этот микшер в качестве устройства для достаточно гибкой маршрутизации звукового сигнала и как устройство благодаря которому Вы сможете комфортно управлять небольшими музыкальными инсталляциями звуковыми презентациями и многим другим. Уникальные и современные особенности аналогового микшера Компания Behringer представляет микшер XENYX 802 в серии полупрофессиональных малошумящих аналоговых микшеров отвечающих всем самым современным требованиям. Компактный микшер имеет широкий динамический диапазон премиум-класса для современного использования. В конструкцию микшера встроены два высококачественных микрофонных предусилителя которые созданы на основе запатентованной технологии XENYX от производителя. Высокотехнологичная работа встроенного микрофонного предусилителя сопоставима по своему качеству с дорогими моделями элитных микрофонных предусилителей. Микшер оборудован оригинальным «британским» эквалайзером имеющей систему трех-полосной эквализации которая обеспечивает конечному звучанию невероятно теплый и четкий музыкальный звук. Конструкция микшера оборудована удобными постфейдерными посылами для каждого из каналов которые предназначены для активной работы и взаимодействия с внешними устройствами и процессорами эффектов. Каждый из каналов микшера оборудован дополнительным стерео-возвратом функции AUX благодаря которому можно использовать внешние и дополнительные эффекты. Для снятия звучания основного выходного микса есть несколько выходных разъёмов коммутации работающих в стерео режиме. Конструкция микшера представляет различные вариации мониторинга в виде нескольких вариаций выхода звукового сигнала из микшера. Две пары стерео выходов и входов на разъёмах RCA для подключения к звуковой карте компьютера или источника воспроизведения медиа (CDTape). Дополнительные возможности назначения входов CDTAPE на выходные каналы основного звукового сигнала общего микса или же на выходы для мониторов и наушников. Основная спецификация Тип устройства: микшер (микшерный пульт). Модельный ряд : XENYX 802. Общее количество каналов : шесть каналов. Спецификация каналов : два микрофонныхлинейных канала два стерео канала. Встроенный процессор эффектов : нет. Материал корпуса : металлическая конструкция. Питание микшера : импульсный встроенный блок пиатния 110 — 230 В 50 Hz. Потребляемая мощность : 17 Ватт. Габаритные размеры микшера : Размеры пульта (В) 47/37 мм. х (Ш) 189 мм. х (Г) 220 миллиметров. Вес микшера : 1 кг. Спецификация электроники микшера Хар-ки работы каналов (сопр. — 0 Ohm) : — 134 dB — 135.7 dB (A-weighted); Хар-ки работы каналов (сопр. — 150 Ohm) : — 129 dB — 130.5 dB (A-weighted); Частотный диапазон каналов : < 10 Hz — 150 kHz (-1 dB) < 10 Hz — 200 kHz (-3 dB); Хар-ки работы каналов (сопр. — 50 Ohm) : — 131 dB — 133.3 dB (A-weighted); Макс. входн. уровни : + 12 dBu (+10 dB gain); Уровни коэффициента нел. искажения : 0.005 % 0.004 % (A-weighted); Диапазон входн. усиления каналов : + 10 (dBu) — +60 (dBu); Соотношение сигналшум : — 110 dB / — 112 dB (0 dBu in + 22 dB gain); Сопротивление (баланс.) : 2.6 (kOhm). Спецификация эквалайзера каналов Эквалайзер моноканалов НЧ : 80 Hz (+- 15 dB); СЧ : 2.5 kHz (+- 15 dB); ВЧ : 12 kHz (+- 15 dB). Эквалайзеры стереоканалов НЧ : 80 Hz (+- 15 dB); СЧ : 2.5 kHz (+- 15 dB); ВЧ : 12 kHz (+- 15 dB).
-
микшерный пульт, 4 канала
Mackie ProFX4v2 — компактный 4-канальный микшер с процессором эффектов младшая модель в линейке концертных микшеров ProFX. Отлично подойдет для проведения концертов публичных мероприятий торжеств презентаций и пр. Микшер имеет 4 входных канала два моно и 1стерео для подключения цифровых фортепиано и других инструментов в стерео режиме. Микшер оснащен фирменными микрофонными предусилителями Mackie Vita. Встроенный процессор ReadyFX имеет 16 эффектов студийного качества среди которых самые популярные пресеты эффектов реверберации (Reverb) дилей (Delay) хорус (Chorus) и другие. Для коррекции и настройки звучания кроме канальных эквалайзеров есть общий 5-полосный графический эквалайзер. Также есть встроенный USB интерфейс с помощью которого можно легко записать микс в компьютер или воспроизводить музыку из компьютера во время выступления. Характеристики: Тип: микшер Категория: аналоговые Количество каналов: 4 Моно каналы: 2 Стерео каналы: 1 AUX линия: 2 Фильтры HPF PAD: -26db. Фантомное питание: +48V есть REC in/out есть: RCA Мастер эквалайзер: графический 5-ми полосный Размеры: 220 x 73 x 256 мм Вес: 1 4 кг
-
микшерный пульт, 10 каналов
BEHRINGER 1002FX микшерный пульт 10 каналов. Сверхмалошумящий аналоговый микшер премиум-класса c широким динамическим диапазоном 2 высокотехнологичных микрофонных предусилителя XENYX сопоставимых по качеству с элитными внешними преампами Неоклассический британский 3-полосный эквалайзер обеспечивающий теплый музыкальный звук 24-битный стереофонический эффект-процессор студийного класса предлагающий 100 великолепных пресетов в т.ч. реверберация хорус фленджер задержка корректор высоты тона а также различные мультиэффекты Регулятор FX send в каждом канале направляющий сигнал на внутренний блок обработки и/или вешний процессор Технические характеристики: Микрофонные входы Tип: балансные XLR с дискретными входными цепями Mic E.I.N. (20 Hz — 20 kHz) При сопротивлении 0 Ohm: -132.7 dB / -137 dB (A-weighted) При сопротивлении 50 Ohm: -130 dB / -133.9 dB (A-weighted) При сопротивлении 150 Ohm: -127.1 dB / -130.9 dB (A-weighted) Частотный диапазон:
Похожие товары
-
микшер-усилит, 2×500 Вт на 8 Ом (2 x 1000 Вт на 4 Ом),14 каналов
Behringer EUROPOWER PMP2000D – активный 14-канальный микше…
-
микшер-усилитель 2 х 250Вт•4Ом 12 каналов
Когда Вам необходимо серьезное звуковое качество для конце…
-
Активный микшерный пульт, 500 Вт, 4 Ом
Behringer PMP500MP3 — активный микшерный пульт
Универсаль… -
микшер-усилитель, 2х800 Вт
BEHRINGER PMP6000 Компактный стерео-микшерный пульт с усил…
-
микшер-усилитель 2 х 600Вт•4 Ом
Behringer PMP1680S микшер-усилитель 2 х 600Вт•4 Ом (6 моно…


