
Оставить заявку на ремонт можно каждый день с 8.00 до 22.00 по телефонам:
+7 (495) 215 – 14 – 41
+7 (903) 722 – 17 – 03
либо в любое время можно заполнить онлайн-форму на сайте. В сообщении укажите, пожалуйста:
- Марку и модель вашей техники.
- Симптомы поломки. Например, стиральная машина подтекает или она сильно вибрирует и прыгает при отжиме.
- Удобное для вас время приезда мастера.
- Имя, адрес, телефон.
В день ремонт мастер позвонит вам, чтобы подтвердить время своего приезда.
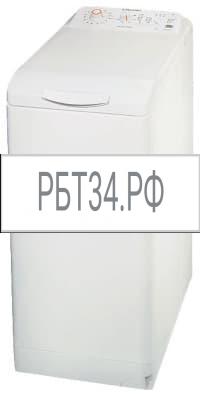
Если ваша стиральная машина Electrolux EWT 9125 W сломалась, не медлите с ее ремонтом! Чем скорее вы обратитесь к специалистам, тем выше шансы избежать более сложного и дорогого ремонта. В сервисном центре «РемБытТех» вашу заявку на ремонт примут и обработают уже в течение 24 часов после обращения. Наш мастер качественно отремонтирует стиральную машину любого года выпуска с гарантией до 2 лет на работы и новые установленные запчасти.
Manuals.eu
- Manuals.eu
- Electrolux
- Home & Kitchen
- Washing machines
- EWT9125W
- User Manual
×
1
2
3
4
5
6
7
8
9
10
11
12
13
14
15
16
17
18
19
20
21
22
23
24
25
26
27
28
29
30
31
32
33
34
35
36
37
38
39
40
41
42
43
44
45
46
47
48
49
50
51
52
53
54
55
56
57
58
59
60
61
62
63
64
65
66
67
68
69
70
71
72
⟨
⟩
Copyright © Manuals.eu
Agreement
Privacy Policy
Contact us
More products and manuals for Dishwashers Electrolux
| Models | Document Type |
|---|---|
|
ECM1303W |
User Manual
16 pages |
|
ESL5310LO |
User Manual
64 pages |
|
EDH3789GME |
Information Sheet
20 pages |
|
ESF5533LOX |
User Manual
68 pages |
|
ESL590 |
User Manual
32 pages |
|
ESF5541LOX |
User Manual
68 pages |
|
ESL8510RO |
User Manual
24 pages |
|
ECM1303W |
User Manual
16 pages |
|
EWT1567VDW |
User Manual
24 pages |
|
EWT1366HDW |
User Manual
52 pages |
|
EWT0862EDW |
User Manual
20 pages |
|
EWT1266EXW |
User Manual
52 pages |
|
EWT1264EDW |
User Manual
40 pages |
|
EWT0862TDW |
User Manual
24 pages |
|
EWT9120W |
User Manual
69 pages |
|
EWT10120W |
User Manual
69 pages |
|
EWT1366HDW |
User Manual
52 pages |
|
EWT1366HDW |
User Manual
24 pages |
|
EWT1262EDW |
User Manual
20 pages |
|
EWT1266ESW |
User Manual
28 pages |


Перейти к контенту
Оставить заявку на ремонт можно каждый день с 8.00 до 22.00 по телефонам:
+7 (495) 215 – 14 – 41
+7 (903) 722 – 17 – 03
либо в любое время можно заполнить онлайн-форму на сайте. В сообщении укажите, пожалуйста:
- Марку и модель вашей техники.
- Симптомы поломки. Например, стиральная машина подтекает или она сильно вибрирует и прыгает при отжиме.
- Удобное для вас время приезда мастера.
- Имя, адрес, телефон.
В день ремонт мастер позвонит вам, чтобы подтвердить время своего приезда.
Если ваша стиральная машина Electrolux EWT 9125 W сломалась, не медлите с ее ремонтом! Чем скорее вы обратитесь к специалистам, тем выше шансы избежать более сложного и дорогого ремонта. В сервисном центре «РемБытТех» вашу заявку на ремонт примут и обработают уже в течение 24 часов после обращения. Наш мастер качественно отремонтирует стиральную машину любого года выпуска с гарантией до 2 лет на работы и новые установленные запчасти.
Перед установкой и эксплуатацией внимательно ознакомьтесь с инструкцией для стиральной машины Electrolux EWT9125. Позаботьтесь о том, чтобы данное руководство было у Вас под рукой на протяжении всего срока службы прибора.
Обратите внимание: Для очистки прибора используйте только теплую воду с мылом. Насухо вытрите все поверхности.

Описание инструкции Electrolux EWT9125:
Тип устройства: Стиральные машины;
Фирма производитель: Electrolux;
Модель: Electrolux EWT9125;
Язык инструкции: русский;
Формат файла: pdf;
Количество страниц: 13;
Размер файла: 1 Мб.
Инструкция для Electrolux EWT9125:
В руководстве Electrolux EWT9125 содержатся важные сведения: сведения по технике безопасности, панель управления, программы, режимы, перед первым использованием, полезные советы, уход и чистка, поиск и устранение неисправностей, аварийное открывание дверцы, коды ошибок.
Инструкции для похожих моделей, которые помогают нашим пользователям:
| Характеристики модели | |
| Установка | отдельно стоящая |
| Тип загрузки | вертикальная |
| Габариты (ШxГxВ) | — |
| Максимальная загрузка белья | 5.5 кг |
| Управление | электронное (интеллектуальное) |
| Тип сушки | — |
| Дисплей | — |
| Цвет | белый |
| Вес | 60 кг |
| Пузырьковая стирка | — |
| Прямой привод | — |
| Класс энергопотребления | A+ |
| Защита от протечек воды | частичная (корпус) |
| Материал бака | пластик |
+7 (8442) 61-39-05

249 ₽
Инструкция (руководство пользователя) на Стиральная машина Electrolux EWT-9125W
Артикул: electrolux-ewt-9125w
Категория: Electrolux
-
Описание
-
Детали
Описание
Инструкцию по эксплуатации Electrolux EWT-9125W на русском языке можно будет скачать в личном кабинете после оформления и оплаты заказа.
Детали
| Формат файла |
|
|---|---|
| Размер инструкции в кб |
13581 |
Течет
Не Открывается Люк
Не Греет Воду
Не Сливает Воду
Не Отжимает
Сильно Шумит
Не Включается
Не Заливает Воду
Не Вращается Барабан
Посторонний Предмет
Не Работает Отжим
Не Работает Отжим
При Включение
При Включение На Маниторе Показывает D 1 7
Сгорел Модуль
Машинка Не Работает
Не Сливается Вода
Активатор Не Снимается
Где Находится Клапан Очистки
Выдает Комбинацию На Дисплее Е21
Перестает Работать …Приходится Выключать И Включать По Новой
Скрип
В Начале Вращения Барабана Скрип
Порошок Остался Вконтейнере
Самослив Воды
Тече
После 10 Минут От Начала Работы Появляется Запах Резины
Не Работает Таймер
Стирка Идет А Время На Месте Стоит
Vestel Esacus 1050Rl
Протекает Вода На Пол
Протекает Вода На Пол
Протекает Вода На Пол
Код Ошибки Е03
Ошибка На Табло F1
Стала Бить Током
Ошибка F05
Не Отключается Набор Воды
После 25 Минут Стирки Выбивает Ошибку Er16
Ошибка E01
Ошибка F2
Не Засасывается Из Дозатора Смягчитель Ткани
После 10Минут Останавливается На Пауза
По Очередно Загараються Все Лампочки, И Выбивает 6 На Табло.
Возможно Ребёнок Зажал Комбинации Кнопок. Сейчас Машинка Не Включается И Не Реагирует На Программы. По Очередно Загоняются Лампочки, И Конечном Результате Появляется Цифра 6.
Ошибка F04
Не Сливается Вода
Whirlpool Awt 2274
Не Переключается Переключатель Программ
Не Закачевает Воду
40С
Сразу Включается На 2 Часа 47 Минут Любая Стирка Так Работает Без Остановки
Be Ko Wdm76100
Невращаеться Активатор При Работе Двигателя
Во Время Роботы Двигателя Приподымаеться Шток Привода Активатора И Активатор Останавливаеться
Выдает Комбинацию На Дисплее Eho
Не Идёт Горячий Воздух При Сушке
При Сушке Идёт Холодный Воздух. Горячий Воздух Не Идёт.
Зависает На Одной И Той Же Операции
Неисправность Реверса
После Включения Машинки Для Стирки, Барабан Крутится 3 Секунды В Одну Сторону, 3 В Другую
D02
Останавливается Стирка
Код Ошибки H2O
H2U
Ошибка D23
Выдает Ошибку D23
F08
Горит Красный Ключ Не Работает
Ошибка D10
Выдает Ошибку D10
Wma-4505S3
Нет Подсветки Же Индикатора
Sud
Барабан Перестает Крутится, Через Час Приблизительно Снова Работает, Может За Одну Стирку Может 2-3 Раза Остановиться.
Viko Wmv-4065E
При Нажатии На Кнопку Пуск ( Кнопка Не Включаестя ) , А Одновременно Мигает Дополнительное Полоскание И Глажка
Dewoo803
При Включении Загорается Le
Не Работает Центрифуга
Не Включается
Не Закривается Кришка
Номер Ремня
Номер Ремня
На Табло Висвечивается U 14
На Табло Висвечивается U 14
На Табло Выдает Ошибку D07
Машинка Не Сливает Воду
Whirlpool 7727
Не Сбрасывается Ошибка F15 После Ремонта
E 17
Электронное Табло По Установке Режимов Горит Очень Тускло. Светящиеся Цифры Можно Увидеть Только В Полной Темноте.
Светящиеся Цифры Можно Увидеть Только В Полной Темноте. Очень Тускло.
Не Отжимает И Не Стирает
F06
После Запуска Выдаёт Ошибку End
Не Греет Воду
Горят Два Индекатора Пуск И Стирка Закончина
D07
Не Работает Машинка
Bosch Wof 1800
Механический Програматор Движется Не Останавливаясь На Программе.
Оптима Wma-50Ph
При Полном Баке С Бельем Остановилась Стирка . Звук Мотора С Неестественным Скрежетом , Но Ничего Не Стирает.
F7
Slim
Не Работает Программа Быстрой Стирки
E4
Не Отнимает,Не Работает Отжим
Ошибка Е2
Не Отжимает, Не Полоскает
Запах Сгоревшей Проводки
При Работе В Течение 5 Мин Появляется Характерный Запах Проводки. Сильно Греется Панель У Двигателя
Центрифуга Сильно Стучит
Когда Начинается Отжим Центрифуга Бьёт Как Будто Смещён Центр
Have a look at the manual Electrolux Ewt 9125 W Manual online for free. It’s possible to download the document as PDF or print. UserManuals.tech offer 208 Electrolux manuals and user’s guides for free. Share the user manual or guide on Facebook, Twitter or Google+.
![]()
							user manual
Washing Machine
EWT 9120 W
![]()
							1
3
2
1. The control panel
2. Lid handle
3. Adjustable levelling feet
Control panel
123456
1. Programme selector
2. Spin speed selector
3. Pushbuttons and their functions
4. Lights of cycle progress
5. “Start/Pause” pushbutton
6. “Delay start” pushbutton
Dispenser box
 Prewash Wash
 Softener (do not fill above the MAX symbol  M ) 2  electrolux
![]()
							Safety Information
Please read these points carefully before installing
and using your appliance. Keep this user manual
with your appliance.
General safety
• Do not modify or attempt to modify this appli-
ance. This would put yourself in danger.
• Ensure that all coins, safety pins, brooches,
screws etc have been removed before starting
a washing programme. If left in washing, they
can seriously damage the appliance.
• Use the recommended quantity of detergent.
• Put small items together (socks, belts etc.) in a
small linen bag or pillow case.
• Unplug and close inlet hose tap after using ap-
pliance.
• Always disconnect the power supply from the
appliance before cleaning or maintenance.
• Do not machine wash clothes with ribbing, un-
finished or torn material.
Installation
• Unpack or ask for the appliance to be unpacked
immediately upon delivery. Check the outside of
the appliance is not damaged in any way. Report
all transit damage to your retailer.
• Remove all transit bolts and packaging before
installing the appliance.
• Connection to the water supply must be carried
out by a qualified plumber.
• If your domestic electrical circuit needs adapting
to allow the appliance to be plugged in, use a
qualified electrician.
• Ensure that, after installation, the power cable is
not trapped under the appliance.
• If the appliance is installed on carpeted floor,
ensure that the carpet does not obstruct any
ventilation ducts located at the base of the ap-
pliance.
• The appliance must be equipped with an earth-
ed power plug which conforms to regulations.
• Before connecting your appliance to the power
supply, carefully read the instructions in the
chapter entitled “Electrical connection”.
• Replacing the power cable should only be car-
ried out by an authorised service engineer.• The manufacturer cannot be held responsible
for any damage resulting from incorrect installa-
tion.
Precautions to be taken against frost
If your appliance is exposed to temperatures below
0°C, the following precautions must be taken:
• Close the tap and disconnect the inlet hose.
• Place the end of this hose and the drain hose in
a basin on the floor.
• Select the Drain programme let it run until the
end of the cycle.
• Disconnect the appliance from the power supply
by turning the programme selector to “Stop”
 .
• Unplug the appliance.
• Replace the inlet hose and drain hose.
This way, the water remaining in the hoses will be
drained away, avoiding any ice formation which
would damage your appliance.
Before turning your appliance on again, ensure
that it is installed in an area where the temperature
will not fall below freezing.
Use
• Your appliance is intended for normal domestic
use. Do not use the appliance for commercial or
industrial purposes or for any other purpose.
• Refer to the instructions on the label of each item
before washing.
• Do not put items into the washing machine
which have had stains removed with petrol, al-
cohol, trichlorethylen etc. If such stain removers
have been used, wait until the product has
evaporated before putting these items into the
drum.
• This appliance is not intended for use by per-
sons (including children) with reduced physical,
sensory or mental capabilities, or lack of expe-
rience and knowledge, unless they have been
given supervision or instruction concerning use
of the appliance by a person responsible for their
safety.
Children should be supervised to ensure that
they do not play with the appliance.
How to run a wash cycle?
Using for the first time
• Ensure the electrical and water connec-
tions comply with the installation instruc-
tions.
• Remove the polystyrene insert and all other
items inside the drum.• Run an initial wash cycle at 90°C, without any
washing but with detergent to clean the water
tank.electrolux  3
![]()
							Daily use
Loading washing
• Open the lid of the
appliance.
• Open the drum by
depressing the
locking button A:
The two shutters
unlock automati-
cally.
• Load the washing,
close the drum and
the lid of your
washing machine.
Warning!  Before closing the lid of your
appliance, ensure that the drum is properly
closed :
• When the two shutters are closed,
• locking button A released.
Proportioning of detergents
Pour the amount of washing powder into the
washing
 and prewash  compartments if you
have selected the “prewash” option. Pour fabric
softener into the compartment
 if necessary.
Selection of desired programme
Turn the programme selector to the required pro-
gramme. The “Start/Pause” pushbutton flashes
green.
If you turn the programme selector to another pro-
gramme while a cycle is in progress, the appliance
will ignore the new selected programme. The
“Start/Pause” pushbutton flashes red for a few
seconds.
Selecting the temperature
Press the “Temperature”
 pushbutton repeatedly
to increase or decrease the temperature (see “Pro-
grammes table”). The
 symbol means a cold
wash.
Selecting the spin speed
Turn the spin speed selector on the desired posi-
tion.
The maximum spin speeds are :
for Cottons, Synthetics, Easy iron, Wool, Hand-
wash : 900 rpm, for Delicates, Silk, Mini pro-
gramme : 700 rpm.
At the end of the programme, if you have selected
“Rinse hold”
 or “Night silence plus”  , you
then need to select a “Spin” or “Drain” programme
to finish the cycle and empty the water.
Selecting options
You must select the different options after select-
ing the programme and before pressing the “Start/
A
Pause” pushbutton (see “Programmes table”).
Press the desired button(s) : the corresponding
lights come on. If pressed again, the lights go out.
If one of the options is not compatible with the se-
lected programme, the “Start/Pause” pushbutton
flashes red.
“Prewash” option
The appliance runs a prewash at 30°C max.
“Eco” option
This option allows you to choose a lower temper-
ature programme which is as effective as a higher
temperature wash programme.
“Super quick” option
The washing time will be reduced depending on
the programme selected.
“Rinse plus” option
The washing machine will add one or more rinses
during the cycle. This option is recommended for
people with sensitive skin and in soft water areas.
Temporary : Press the “Rinse plus”
 pushbut-
ton. The option is only active for the selected pro-
gramme.
Permanent : Hold down the “Temperature”
 and
“Options” pushbuttons for a few seconds. The op-
tion is permanently activated, even if the appliance
is switched off. To deactivate it, repeat the proc-
ess.
“Delay start”
This option allows you to delay the start of a wash
programme by 3, 6 or 9 hours by pressing the
“Delay start” pushbutton.
You can change or cancel the delayed start time
at any time before you press the “Start/Pause”
pushbutton by pressing the “Delay start” pushbut-
ton again (when all indicators are off, the wash
programme will start immediately).
If you have already pressed the “Start/Pause”
pushbutton and you want to change or cancel the
delayed start, proceed as follows :
• To cancel the delay start and start the cycle im-
mediately, press “Start/Pause” and then “Delay
start”. Press “Start/Pause” to start the cycle.
• To change the timer delay period, you must go
through the “Stop” position
 and reprog-
ramme your cycle.
The lid will be locked during the delayed start time.
If you need to open it, you must first pause the ap-
pliance by pressing the “Start/Pause” pushbutton.
After closing the lid again, press the “Start/Pause”
pushbutton. 4  electrolux
![]()
							Start of the programme
Press the “Start/Pause” pushbutton to start the
cycle. The corresponding light will come on green.
It is normal for the programme selector to remain
stationary during the cycle. The light correspond-
ing to the current cycle is illuminated.
 +  : Prewash + Wash +  : Rinses + Spin : End of cycle
Interrupting a programme
Adding washing during the first 10 minutes
Press the “Start/Pause” pushbutton : the corre-
sponding light will flash green while the appliance
is paused. The lid can only be opened around 2
minutes after the washing machine has come to a
stop. Press the “Start/Pause” pushbutton again to
continue the programme.
Modifying the programme in progress
Before making any changes to the current pro-
gramme, you need to pause the washing machine
by pressing the “Start/Pause” pushbutton. If the
modification is not possible, the “Start/Pause”pushbutton flashes red for a few seconds. If you
still decide to change the programme, you must
cancel the current programme (see below).
Cancelling the programme
If you want to cancel the programme, turn the pro-
gramme selector to the “Stop” position
 .
End of the programme
The washing machine stops automatically, the
“Start/Pause” pushbutton goes out and the light
“End of cycle”
 comes on. The lid can only be
opened around 2 minutes after the washing ma-
chine has come to a stop. Turn the programme
selector to the “Stop” position
 . Remove wash-
ing. Unplug and close water inlet tap.
Standby mode
If the appliance is on but no commands are selec-
ted for 10 min before or after a cycle, it goes into
standby mode. All the lights go out and “Start/
Pause” flashes slowly.
To exit standby mode, simply press any pushbut-
ton or turn the programme selector.
Programmes table
Programme / Type of washingLoad/TimePossible options
Cottons1) (cold - 90°) :  White or colour, e.g.
normally soiled work clothes, bed linen, table
linen, body linen, towels.5,5 kg
140-150
minNight silence plus, Rinse hold, Pre-
wash, Eco2), Super quick, Rinse plus,
Delay start
Synthetics (cold - 60°) : Synthetic fabrics,
body linen,fab, coloured farics, non-iron shirts,
blouses.2,5 kg
90-100 minNight silence plus, Rinse hold, Pre-
wash, Eco2), Super quick, Rinse plus,
Delay start
Easy iron (cold - 60°) : Reduces creasing and
makes ironing easier.1,0 kg
100-110
minRinse hold, Prewash, Rinse plus, Delay
start
Delicates (cold - 40°) : For all delicate mate-
rials, for example curtains.2,5 kg
60-70 minNight silence plus, Rinse hold, Pre-
wash, Super quick, Rinse plus, Delay
start
 Wool (cold - 40°) : Very delicate items
carrying the “wash by hand” label.1,0 kg
55-65 minNight silence plus, Rinse hold, Delay
start
 Handwash (cold - 40°) : Very delicate
items carrying the “wash by hand” label.1,0 kg
55-65 minNight silence plus, Rinse hold, Delay
start
Silk (30°) : Fabric machine washable at 30°C.1,0 kg
25-35 minNight silence plus, Rinse hold, Delay
start
Soak (30°) : Soaking for very dirty washing.
The drum stops full of water.5,5 kg
15-25 minDelay start
 Mini programme (30°) : For lightly
soiled fabrics except for wool.2,5 kg
25-35 minDelay start
Rinses : Hand washed items can be rinsed in
this programme.5,5 kg
50-60 minNight silence plus, Rinse hold, Rinse
plus, Delay start
electrolux  5
![]()
							Programme / Type of washingLoad/TimePossible options
Delicate rinse : Hand washed items can be
rinsed in this programme.2,5 kg
35-45 minNight silence plus, Rinse hold, Rinse
plus, Delay start
Drain : Runs an empty cycle after a Rinse hold
(or Night silence plus).5,5 kg
0-10 min
Spin : A spin cycle from 500 to 900 rpm after
a Rinse hold (or Night silence plus).5,5 kg
10-20 minDelay start
Delicate spin : A delicate spin cycle after a
Rinse hold (or Night silence plus).2,5 kg
5-15 minDelay start
1) Reference programme for test confirming to CEI 456 standard (Cottons 60° programme, Eco option):
49 L / 1,04 kWh / 170 min
2) Available with programmes with wash temperatures of 40°C and above.
Care and cleaning
Unplug the appliance before cleaning.
Descaling the appliance
To descale the appliance, use an appropriate non-
corrosive product designed for washing machines.
Read product label for recommended amounts
and how often descaling should be carried out.
The exterior
Use warm soapy water to clean the exterior of the
appliance. Never use alcohol, solvents or similar
products.
Dispenser box
To clean, proceed as follows :
1

2
Object trap
Regularly clean out the object trap which is located
at the bottom of the drum :
1

2
3
 Check if the filter being coupled well
before closing the trap to pull up and
down the central wall.
Water inlet filters
To clean, proceed as follows :
1

6  electrolux
![]()
							Operating Problems
Numerous checks were carried out on your appli-
ance before it left the factory. However, should younotice a malfunction, please refer to the sections
below before contacting the after-sales service.
ProblemsCauses
The washing machine
doesn’t start or doesn’t
fill:• the appliance isn’t plugged in correctly, the electrical installation isn’t
working, there is a power failure,
• the lid of your appliance and the drum shutters aren’t closed firmly,
• the programme start command hasn’t been properly selected,
• the water supply has been cut off, the water inlet tap is closed,
• the water inlet filters are dirty,
• a red tab appears on the water inlet hose.
The appliance fills but
empties straight away:• the drainage U-piece is fixed too low (see installation section).
The washing machine
doesn’t rinse or doesn’t
empty:• the drain hose is blocked or bent,
• the object trap is obstructed,
• the out of balance detector has been activated : washing is unevenly
distributed in the drum,
• the “Drain” programme or “Night Silence Plus” or “Rinse hold” option
have been selected,
• the height of the drainage U-piece is unsuitable.
You have found water
around the washing ma-
chine:• too much detergent has caused foam to overflow,
• the detergent is unsuitable for machine washing,
• the drainage U-piece isn’t attached correctly,
• the water inlet hose is leaking.
Wash is unsatisfactory:• the detergent is unsuitable for machine washing,
• there is too much washing in the drum,
• the wash cycle is unsuitable,
• there isn’t enough detergent.
The appliance vibrates, is
noisy:• all packaging have not been removed from the appliance (see installation
section),
• the appliance isn’t level and is unbalanced,
• the appliance is too close to the wall or furniture,
• washing is unevenly distributed in the drum, the load is too small,
• the appliance is in running in period.
The wash cycle is much
too long:• the water inlet filters are dirty,
• the power or water supply has been cut off,
• the motor overheating detector has been activated,
• the water inlet temperature is lower than usual,
• the foam detection security system has been activated (too much de-
tergent) and the washing machine has begun draining the foam,
• the out of balance detector has been activated: an extra phase has been
added to distribute washing more evenly in the drum.
The washing machine
stops during a wash cy-
cle:• the water or electricity supply is defective,
• a Rinse hold has been selected,
• the drum shutters are open.
The lid doesn’t open at
the end of the cycle:• the temperature inside the drum is too high,
• the lid unlocks 1 - 2 minutes after the end of the cycle.
Softener runs directly into
the drum when filling the
dispenser box:• you have gone past the MAX indicator.
electrolux  7
![]()
							ProblemsCauses
The “Start/Pause” push-
button 1) flashes red 2):
• the lid is not closed properly,
• the object trap is obstructed,
• the drain hose is blocked or bent,
• the drain hose is fixed to high (see Installation section),
• the drainage pump is blocked,
• the standpipes blocked,
• the water tap is closed, the water supply has been cut off.
1) On some models, the auditable signals can sound
2) After solving any problems, press Start/Pause pushbutton to restart the interrupted programme.
Detergents and Additives
Only use detergents and additives designed for
use in a washing machine. We do not recommend
mixing different types of detergents. This may spoil
the washing. There are no restrictions on the use
of powder detergents. Liquid detergents must notbe used when a prewash has been selected. For
cycles without prewash, they must be added via
means of a dosing ball. Detergent tablets or doses
must be placed in the detergent compartment of
your appliances dispenser box.
Technical Specifications
DIMENSIONSHeight
Width
Depth850 mm
400 mm
600 mm
LINE VOLTAGE /FREQUENCY
POWER CONSUMPTION 230 V / 50 Hz
2300 W
WATER PRESSUREMinimum
Maximum0,05 MPa (0,5 bar)
0,8 MPa (8 bar)
Connection to water supply Type 20/27
Installation
Remove all protective packaging for transit before
using for the first time. Keep in case needed for
future transit: Transporting a non-secured appli-
ance may damage internal components and cause
leakages and malfunctions. The appliance can al-
so be damaged through physical contact.
Unpacking
1

2
3

4
8  electrolux
![]()
							Untying
2 3
1ba
1a1b
2a

2b
3

4
To install your washing machine at the same level
as surrounding furniture, proceed as shown on
picture 4.
Water supply
Install the supplied water inlet hose at the rear of
your washing machine by proceeding as follows.
Do not reuse an old hose. The water inlet hose can
not be extended. If it is too short, please contact
the after-sales service.
1

2
Open the water inlet tap. Check there are no leaks.
Drainage
Fit the U-piece on the
drainage hose. Place
everything in a drainage
point (or in a sink) at a
height of between 70
and 100 cm. Ensure it is
positioned securely. Air
must be able to enter
the end of the hose, to
avoid any risk of siphon-
ing.
The drain hose must never be stretched. If it is too
short, contact an engineer.
Electrical connection
This washing machine must only be connected in
single-phased 230 V. Check the fuse size: 13 A for
230 V. The appliance must not be connected with
an extension lead or multi-plug adaptor. Ensure
that the plug is earthed and that it is in accordance
with current regulations.
Positioning
Position the appliance on a flat and hard surface in
a ventilated location. Ensure the appliance does
not come into contact with the wall or other furni-
ture. Accurate levelling avoids vibrations, noise
and prevents the appliance from moving when
running.

MINI 70 cm
MAXI 100 cm
Environment
Disposing of the appliance
All materials carrying the
 symbol are re-
cyclable. Dispose of them at a waste collec-
tion site (enquire at your local council) for collection
and recycling. When disposing of your appliance,
remove all parts which could be dangerous to oth-
ers: cut off the power supply cable at the base of
the appliance.
The symbol
 on the product or on its packaging
indicates that this product may not be treated as
household waste. Instead it should be taken to the
appropriate collection point for the recycling ofelectrolux  9
![]()
							electrical and electronic equipment. By ensuring
this product is disposed of correctly, you will help
prevent potential negative consequences for the
environment and human health, which could oth-
erwise be caused by inappropriate waste handling
of this product. For more detailed information
about recycling of this product, please contact
your local council, your household waste disposal
service or the shop where you purchased the
product.
Protecting the environment
To save water and energy and therefore help
protect the environment, we recommend the
following:
• Whenever possible, use the appliance at full ca-
pacity and avoid partial loads.
• Only use the prewash and soak programmes for
heavily soiled items.
• Use an appropriate amount of detergent for the
hardness of the water, the size of the load and
how soiled the washing is.
10  electrolux
All Electrolux manuals
Comments (1)
Related Manuals for Electrolux Ewt 9125 W Manual
Инструкцию для Electrolux EWT9125W на русском языке, в формате pdf можно скачать с нашего сайта. Наш каталог предоставляем Вам инструкцию производителя фирмы Electrolux, которая была взята из открытых источников. Ознакомившись с руководством по эксплуатации от Electrolux, Вы на все 100% и правильно сможете воспользоваться всеми функциями устройства.
Для сохранения инструкции «Стиральная машина Узкая Electrolux EWT9125W» на русском языке на вашем компьютере либо телефоне, нажмите кнопку «Скачать инструкцию». Если активна кнопка «Инструкция онлайн», то Вы можете просмотреть документ (manual), в своём браузере онлайн.
Если у Вас нет возможности скачать инструкцию по эксплуатации либо просмотреть её, Вы можете поделиться ссылкой на эту страницу в социальных сетях и при удобном моменте скачать инструкцию. Либо добавьте эту страницу в закладки Вашего браузера, нажав кнопку «Добавить страницу в закладки браузера».