
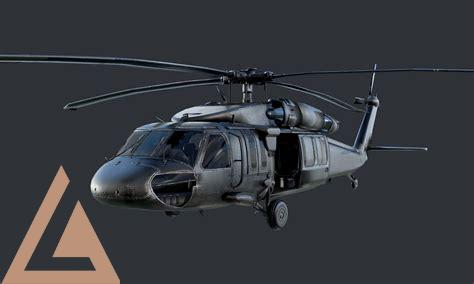
Здравствуйте, наши уважаемые читатели. Начинающие пилоты зачастую имеют слабое представление о том, как управлять радиоуправляемым вертолетом. Ошибки в пилотировании приводят к падениям, столкновениям и иным неприятным для летательного аппарата последствиям. Действительно, управлять вертолетом сложнее по сравнению с радиоуправляемым квадрокоптером. Необходимо иметь хотя бы общие теоретические знания, чтобы отдавать правильные команды.
Подготовка к полету и настройка вертолета
Хотя большинство моделей вертолетов на радиоуправлении продаются в комплектации RTF (то есть в собранном виде), не торопитесь с запуском. Как минимум необходимо зарядить аккумулятор, соединиться с пультом и выполнить калибровку сервопривода, чтобы дальше управлять вертолетом без проблем. Совершенно нелишней окажется и корректировка рысканья.

Подключение пульта к радиоуправляемой модели вертолета выполняется в следующей последовательности:
- включаем пульт управления;
- вставляем аккумулятор в вертолет;
- соединяем оба устройства.
Калибровка сервопривода радиоуправляемого аппарата проводится следующим образом:
- Вертолет ставим на горизонтальную поверхность и соединяем его с аппаратурой управления.
- Обращаем внимание на диск сервопривода. Он должен быть параллелен поверхности.
- Если диск не параллелен, производим его корректировку триммером тангажа.
Корректировку рысканья, чтобы управлять моделями без проблем, следует проводить так:
- Радиоуправляемый вертолет ставим на горизонтальную поверхность и соединяем его с пультом управления.
- Скорость вращения несущего винта плавно увеличиваем с помощью стика управления скоростью до начала смещения модели, но не допускаем ее взлета.
- При вращении фюзеляжа по часовой стрелке вращаем регулятор триммера корректировки против часовой стрелки до тех пор, пока вертолет не перестанет поворачиваться.
- При вращении фюзеляжа против часовой стрелки регулятор триммера корректировки поворачиваем по часовой стрелке до тех пор, пока радиоуправляемый беспилотник не перестанет вращаться.
Нелишним будет освоить, как управлять газом, заодно потренировавшись в посадке летательного аппарата.
Для этого:
- берем модель за шасси, плавно прибавляем и уменьшаем газ. Так вы получите представление о возникающей подъемной силе;
- устанавливаем радиоуправляемый беспилотник на горизонтальную поверхность и плавно отклоняем стик, добавляя газ. Набираем высоту, после чего так же плавно приземляемся.
Освоиться, как управлять моделями вертолетов, помогут симуляторы. Они очень точно моделируют основные ситуации.
Основы управления вертолетом
Хотя речь идет о моделях на радиоуправлении, к ним применимы принципы управления настоящими вертолетами.

Мы рассмотрим основные понятия, как управлять радиоуправляемым вертолетом, расскажем, какие силы оказывают влияние на летательный аппарат и как они распределяются в разных режимах полета. Теория поможет вам быстрее освоить управление, вы поймете, почему модель ведет себя так, а не иначе.
Эффект земли
Так называемый эффект земли можно наблюдать при зависании вертолета над поверхностью на высоте, несколько меньшей диаметра основного ротора.

Создаваемая лопастями ротора скорость воздушного потока не способна достигнуть максимальных значений из-за небольшого расстояния радиоуправляемой модели до поверхности. Летательный аппарат оказывается над своеобразным пузырем, созданным воздухом высокого давления.
Настоящие вертолеты при возникновении эффекта земли теряют устойчивость, управлять ими сложно. Поведение аппарата можно сравнить с поведением человека, оказавшегося на большом шаре. Радиоуправляемые модели также могут испытывать проблемы с устойчивостью, находясь на небольшом удалении от поверхности, однако однозначного мнения на этот счет нет. Некоторые моделисты утверждают, что ничего подобного не наблюдали либо эффект был слабо выражен.
Большое значение имеет ветер. Если он сильный, то воздух высокого давления выдувается из-под радиоуправляемого вертолета, влияние эффекта заметно уменьшается, управлять моделью проще.
Подъем и снижение
При зависании вертолета над землей подъемная сила, развиваемая лопастями ротора, равняется весу летательного аппарата. Чтобы радиоуправляемый беспилотник поднялся выше, необходимо увеличить подъемную силу, то есть она должна стать больше веса. Для снижения ее нужно уменьшить.

Скорость подъема вертолета зависит от разницы между подъемной силой, развиваемой несущим винтом на максимальной мощности, и силой тяжести. Чем значительнее разница, тем быстрее поднимается летательный аппарат.
Для взлета рекомендуется выбирать горизонтальную поверхность. Почему управлять на ней аппаратом легче? Все дело в том, что при подъеме с наклонной поверхности диск вращения ротора также наклоняется, а подъемная сила разделяется на две составляющие: горизонтальную и вертикальную. Соответственно, горизонтальная составляющая силы будет перемещать радиоуправляемую модель в сторону наклона поверхности сразу после взлета.
Чтобы избежать дрейфа, следует находить для взлета ровную поверхность. Если же такой возможности нет, тогда управлять так: диск ротора наклонить в обратную углу наклона сторону, чтобы все-таки обеспечить вертикальный взлет. При этом ручку, чтобы управлять автоматом перекоса, следует перед отрывом переместить вправо, сразу после отрыва от земли вернуть в нейтральное положение.
Висение
При зависании модели на радиоуправлении в воздухе подъемная сила основного винта равна силе веса вертолета. Беспилотник не опускается и не поднимается, оставаясь в одной горизонтальной плоскости. Так как изменить в полете вес радиоуправляемой модели мы не в силах, нам остается управлять силой тяги (подъемной силой).

Управлять подъемной силой возможно через:
- изменение общего шага (угла установки лопастей);
- изменение количества оборотов.
Соответственно, есть две модели. В первой вариант, как управлять тягой, реализован через изменение угла установки лопастей. Это модель с общим шагом. Вторая модель с фиксированным шагом предполагает, что угол остается неизменным, а управлять тягой винта, изменяя ее, можно через регулирование количества оборотов.
Перемещение по горизонту и разворот
Разложив общий вектор подъемной силы несущего винта на составляющие, мы увидим, что он определяется суммой векторов тяги задней и передней лопасти. Оба этих вектора могут изменяться в зависимости от того, где находятся лопасти относительно продольной оси. Это дает возможность управлять вертолетом в горизонтальной плоскости.

Подъемная сила, образуемая задней частью диска вращения, оказывается выше, чем сила передней части. В результате нос опускается, тогда как хвостовая балка поднимается. Радиоуправляемая модель двигается вперед.
При движении вперед подъемная сила (вернее, ее вертикальная составляющая) по-прежнему равняется весу радиоуправляемого аппарата. Что касается горизонтальной составляющей, то ее увеличение или уменьшение определяет величину тягу в горизонтальном направлении.
Управлять направлением полета в горизонтальной плоскости можно с помощью ручки перекоса:
- Ее можно передвинуть вперед, аппарат перекоса наклонится вперед (нос опустится).
- Для выравнивания автомата нужно вернуть ручку в нейтральное положение.
- Наклонив ручку назад, вы наклоняете аппарат назад (нос поднимается).
Для того чтобы выполнить разворот, радиоуправляемую модель необходимо накренить.
Предположим, что мы хотим развернуть летательный аппарат вправо. Как управлять вертолетом в этом случае? Вектор силы веса по-прежнему остается перпендикулярным земле, тогда как вектор подъемной силы перпендикулярен диску вращения и наклонен вправо по отношению к горизонтальной поверхности на некий угол. В результате вертикальная составляющая вектора подъемной силы все также противодействует силе веса, а горизонтальная составляющая начинает толкать модель вправо, тем самым разворачивая ее.
Так как беспилотник выполняет поворот, будучи наклоненным в одну из сторон, значение вертикальной составляющей вектора силы уменьшается и становится меньше веса, зато появляется горизонтальная составляющая. При этом вес радиоуправляемого аппарата остается неизменным. Если все оставить, как есть, то при каждом повороте вертолет будет снижаться, что нас вряд ли устраивает, если мы хотим оставаться в одной горизонтальной плоскости.
В этом случае управлять следует так: необходимо увеличить подъемную силу с помощью ручки управления тангажем. Нужно переместить нос вверх, чтобы сделать больше угол атаки несущего винта.
Крен и боковое перемещение

Изменением подъемной силы разных сторон ротора можно управлять креном вертолета влево или вправо. Для совершения крена необходимо переместить ручку управления аппаратом перекоса влево или вправо. Радиоуправляемый аппарат начнет наклоняться, вместе с ним будет совершать крен и модель.
Гироскопическая прецессия
Ротор радиоуправляемого вертолета по своему поведению похож на гироскоп, это означает, что ему присуща гироскопическая прецессия.
Из-за этого явления лопасть с уменьшенным шагом и лопасть с возросшим шагом окажутся на минимальном и максимальном отклонении от горизонтальной плоскости, сделав поворот на 90 градусов.
Когда лопасть оказывается перпендикулярно продольной оси летательного аппарата над хвостовой балкой, она демонстрирует максимальный взмах и тягу. В этот момент устанавливается максимальный шаг, что позволяет успешно управлять моделью, то есть выполнить ее наклон вперед.
Подъемная сила при косом обтекании
При горизонтальном полете подъемная сила становится больше благодаря увеличению скорости воздушного потока и увеличению количества воздуха, проходящего через пропеллеры.

При перемещении радиоуправляемого беспилотника в горизонтальной плоскости возникает дополнительная подъемная сила при так называемом косом обтекании. И она зависит от горизонтальной скорости модели. Чем быстрее летит радиоуправляемый вертолет, тем существеннее сила. Ее легко распознать, так как происходит заметное улучшение летных характеристик.
Сила от перемещения возникает и при зависании на одном месте при условии, что дует ветер. Можно уменьшить мощность двигателя, тем самым сэкономив заряд батареи. Впрочем, если ветер порывистый, управлять летательным аппаратом сложно, так как приходится постоянно компенсировать то возрастающую, то уменьшающуюся силу. По этой причине управлять висением в воздухе лучше либо в полный штиль, либо при устойчивом ветре.
Авторотация
Под авторотацией понимается полет с остановленным двигателем. Вращение ротора вертолета происходит по инерции и благодаря действию воздуха, дополнительно раскручивающего лопасти при снижении радиоуправляемой модели.

При включенном двигателе воздушный поток оказывается нисходящим. Если же движок выключается в полете, снижение происходит с авторотацией, а воздушный поток становится восходящим.
Воздух переводит лопасти на отрицательный шаг, ротор продолжает вращение, вертолет может совершить управляемое снижение и приземлиться.
Не все радиоуправляемые модели обладают способностью к авторотации. Для этого в системе ротора должна быть установлена обгонная муфта, позволяющая лопастям свободно вращаться после остановки мотора. Возможность авторотации не является обязательной для летательных аппаратов. Однако в случаях, когда главный двигатель внезапно отказывает, ротор без авторотации останавливается, приземление происходит жестко, зачастую с повреждениями. Стремительная потеря высоты и быстрое снижение могут привести к печальным последствиям.
Рысканье
Под рысканием понимаются угловые движения радиоуправляемой модели относительно вертикальной оси. Упрощенно говоря, это повороты корпуса влево или вправо в горизонтальной плоскости.

Одной из причин того, почему для вертолетов на радиоуправлении рекомендуются специальные пульты, как раз и является возможность быстро управлять рысканьем, компенсируя его. Можно использовать и стандартную аппаратуру от радиоуправляемых квадрокоптеров или самолетов, однако вам придется вручную управлять скоростью вращения лопастей хвостового ротора, чтобы удерживать нос летательного аппарата прямо.
В обычных пультах такой возможности нет, поэтому каждый раз, когда вы будете поднимать или опускать вертолет, придется вручную управлять тягой. То есть увеличивать или уменьшать тягу хвостового ротора, чтобы компенсировать увеличение или уменьшение реактивного момента. Это не очень удобно, хотя и несмертельно. В пультах для радиоуправляемых вертолетов все гораздо удобнее, так как есть:
- ручка, чтобы управлять тангажом;
- ручка, чтобы управлять дросселем;
- кнопки для снижения и для подъема.
Как избежать аварий: частые проблемы
У начинающих пилотов первые запуски обычно завершаются или падением, или не самым мягким приземлением. Как правило, летательные аппараты успешно переживают жесткую посадку благодаря прочному корпусу и раме, однако у любой радиоуправляемой техники есть предел.

Очередная авария вполне может завершиться походом за запчастями или даже за новым радиоуправляемым вертолетом. Именно поэтому так важно научиться правильно им управлять.
Не взлетает
Вертолет радиоуправляемый может не взлетать по нескольким причинам.
В первую очередь проверьте аккумулятор. Если он разряжен, у двигателя не хватит мощности, чтобы поднять летательный аппарат в воздух. Большие радиоуправляемые модели в этом отношении особенно чувствительны, так как их двигателям нужно много энергии для взлета.
Еще одной причиной того, почему модель не может взлететь, а вы ей управлять, являются изношенные шестерни в системе привода. Внимательно осмотрите систему: если такие шестерни обнаружатся, замените их.
Крутится на месте
Бывает и так, что лопасти вращаются с необходимой скоростью, но радиоуправляемый вертолет не взлетает, крутится на одном месте, заносится в сторону.
Скорее всего, с двигателем и регуляторами хода все нормально, а причина в неисправности главного вала. Обычно вал получает повреждения в результате падения или столкновения, управлять аппаратом далее невозможно.
На этом пока все, не забывайте подписываться на наши статьи и делитесь полезными материалами в социальных сетях. До новых встреч.
![]() Загрузка…
Загрузка…
So, you’ve made it through my 10 day RC helicopter flight school and can confidently fly your RC helicopter in all upright orientations including nose-in without even thinking. You’re having lots of fun, you rarely crash and are now ready to push the limits of where this hobby can take us — aerobatics & 3D flying of course.
 Looks easy, but it’s not!
Learning how to fly 3D helicopter aerobatic maneuvers is without doubt, the most difficult form of RC flying — period! The amount of practice to first learn and continual practice to stay sharp; along with the amount of mental processing required and maneuver understanding is monumental.
I don’t want to scare you off because advanced aerobatic RC helicopter flying (also known as 3D) is one of the most rewarding and exhilarating aspects of RC aviation. As I often say, nothing worthwhile is easy, but many will simply never be able fly a 3D RC helicopter like a gifted few are able to.
I fall into that camp myself.
Even though I have my MAAC (Model Aeronautics Association of Canada) advanced level RC helicopter pilot & instructor certification which includes flying in all upright orientations, transitioning through inverted orientations with loops, rolls, Immelmann turns, half cuban’s & other basic aerobatic maneuvers; I’ve never been able to crack & progress with full-on aggressive aerobatic RC helicopter flight.

It’s why I primarily focus on scale flying these days which admittedly still takes a good deal of skill to make an RC helicopter behave like a full size one; but no question, the pace is slower.

I’ve accepted that fact as I’ve practiced and practiced 3D on my heli simulator & with my birds until my thumbs are raw & the old meat servo between my ears is spinning.
I simply don’t have the quick orientation & control command reversal mental processing abilities coupled with the fast reaction skills it takes to be successful at 3D RC helicopter flying. I don’t have the right stuff as the saying goes, for 3D anyway.
You should be prepared for that possible reality as well; but you won’t know until you try.
And yes, progressing into advanced aerobatics & 3D is when a good RC helicopter simulator more or less becomes a necessity as you practice, practice and practice more.
So how can I possibly instruct you how to fly 3D helicopter aerobatics, when I don’t have the skills myself? I won’t even try; I’ll leave it up to Bert Kammerer & Bobby Watts. These are two well recognized names in our hobby because of their excellent aerobatic RC helicopter flying & instructing skills along with their proven 3D instruction methods.
I had to pay a small amount for their 10 part 3D Smack Talk RC video course a number of years ago, but they now offer the lessons for free (all 10 lesson videos shown on the bottom half of this page),
What you’ll soon realize is their 10 part 3D flying lesson plan is based on the same proven skill building lesson process you’ve already mastered in my 10 part RC helicopter flying school to get you to this point; slowly building & mastering your skills before moving on to the next lesson.
The primary difference is all those same lessons you’ve already mastered upright, you’ll now start doing inverted to first understand and learn the basic orientation reversals that occur while upside down and how they change between nose-in, tail-in, left side-on or right side-on.
Mastering your inverted orientation reversals is the foundation of advanced aerobatic RC helicopter flying.
If you found my upright nose-in lesson on day 10 difficult, where you were first introduced to an orientation that forced you to understand and learn how cyclic along with tail rotor controls were reversed, you’ll now have a new appreciation & respect of just how difficult this hobby gets once inverted orientations are introduced.
Inverted nose-in: Left/Right Cyclic reversed. Forward/Backward Cyclic Normal. Tail rotor & collective reversed.
Inverted command reversals are even stranger than upright nose-in ones are because depending on which way the heli is facing you, only half of your cyclic controls will be reversed.
Harder still is the fact these cyclic «half reversals» will be constantly changing as your helicopter transitions into different inverted orientations.
Tail rotor control will constantly be reversed, but the same approach to thinking of it as CW or CCW yaw like I showed in the day 10 nose-in will apply; only difference while inverted will be that a left tail rotor stick command will now yaw the heli CW and CCW with right stick.
Collective control will also be constantly reversed while upside down and this one can bite you hard when you panic. Your natural tendency up to this point is to give up collective stick to gain altitude if your bird is getting out of shape giving you some altitude to regain control; if you make that natural command movement while inverted, your heli will suck itself right into the ground.
Yep, you’ll be learning to fly all over again and you very well may learn some new colorful words along the way — I know I did! Change of underwear potential is high.
Just like my skill building lesson plans, you must follow Bert’s & Bobby’s 10 part lessons in order and not progress to the next lesson until you have mastered the one you are working on. Each progressive lesson requires and builds on the skills you learned in the previous lesson/s in other words.
So, let’s get started with the basic foundation steps of learning how to fly 3D helicopter aerobatics — inverted orientations.
Part 1: How To Fly 3D Helicopter Aerobatics Inverted Orientation & Command Reversals
Part 2: Flips, Hurricanes, and Funnels
Part 3: Rainbows and Tick Tocks
Part 4: Piro Flips
Part 5: Transitions
Part 6: Rolling Circles
Part 7: Advanced Tick Tocks
Part 8: Loops & Pirouetting Loops
Part 9: Piro Flipping Maneuvers
Part 10: Pirouetting Circles & Funnels
That’s all there is to learning how to fly 3D helicopter aerobatics — easy right — haha. I’ve barely progressed past part 1 after years and years of trying. I of course hope you’ll do much better 
If you like Bert’s videos above, be sure to check out Bert & Bobby’s SmackTalk RC YouTube Channel. It’s loaded with great technical heli videos.
As an Amazon Associate I earn from qualifying purchases.
Kind reader, have you ever dreamt of controlling a helicopter up in the sky? Imagine seeing magnificent views while manoeuvring your very own helicopter in 3D. With the new technology of helicopter 3D, it’s now possible to experience that thrill right from the comfort of your own home. The detailed graphics and controls of helicopter 3D allow you to feel like a real pilot as you fly through the air and take in breathtaking views. Are you ready to take on this adventure?
History of Helicopter 3D

A helicopter 3D model is a digital, three-dimensional representation of a helicopter that is created using specialized software. The first helicopter was designed in the late 1930s and was used primarily for military purposes. It wasn’t until the 1950s that helicopter technology began to evolve rapidly, leading to the development of the first 3D helicopter models in the 1960s. These early models were relatively primitive, with limited detail and accuracy compared to modern versions. As computer graphics technology improved over the decades, helicopter 3D models have become increasingly realistic and detailed.
Early Beginnings
The modern helicopter has its roots firmly planted in the early 20th century, with experimental designs being built and tested as early as 1907. However, it wasn’t until the 1930s that the first practical helicopters were developed. These early helicopters were primarily used for military purposes, such as reconnaissance missions and medical evacuations.
Advancements in Technology
In the 1950s, helicopter technology began to evolve rapidly, thanks in part to advancements in engine design and materials science. The introduction of turbine engines, which were more powerful and efficient than earlier piston engines, allowed helicopters to fly faster and carry heavier loads. In addition, advancements in materials science led to the development of stronger, lighter materials that could be used for helicopter frames and rotor blades.
Applications of Helicopter 3D

Helicopter 3D models are widely used for a variety of applications in numerous industries. They are used by military and law enforcement agencies for training simulations, by engineers and architects for designing and testing new helicopter designs, and by entertainment industries for creating realistic special effects in movies and video games.
Military and Law Enforcement
Helicopter 3D models are often used by military and law enforcement agencies for training simulations of various scenarios such as search and rescue, aerial combat, and tactical operations. These simulations provide a realistic setting for personnel to train in, without the associated risks of real-world missions.
Engineering and Architecture
Helicopter 3D models are also valuable tools for engineers and architects, who use them to simulate and test new helicopter designs. By creating digital prototypes, designers can test the aerodynamics, structural integrity, and other features of a helicopter before building a physical prototype.
Entertainment and Media
Helicopter 3D models are commonly used in the entertainment industry for creating realistic special effects in movies and video games. For example, a 3D helicopter model can be animated to fly through a cityscape, maneuver around obstacles, and perform complex aerial stunts, adding an extra layer of realism to the final product.
The Benefits of Helicopter 3D Modeling

Helicopter 3D modeling is a useful resource for a variety of industries. Whether you need to create a virtual model of a helicopter for use in a training simulation or you need to design a new helicopter part, 3D modeling can make the process faster, easier, and more efficient. Here are some of the top benefits of helicopter 3D modeling:
1. Accurate Visualization
Helicopter 3D modeling can provide a highly accurate and detailed visual representation of a helicopter. This can be useful for product design and marketing, training simulations, and even virtual tours of helicopters. With 3D models, you can easily explore the interiors and exteriors of a helicopter and understand how it functions.
2. Improved Communication
3D modeling can help bridge communication gaps between engineers, designers, and other stakeholders in the development process. With a shared 3D model, it’s easy to illustrate design decisions, suggest changes, and communicate ideas. This can help ensure that everyone is on the same page and working towards a shared vision.
3. Faster Prototyping
Traditional prototyping can be time-consuming and expensive. With 3D modeling, you can create virtual prototypes in a fraction of the time. This allows for faster iterations and testing of ideas, which can speed up the development process and ultimately lead to a better end product.
4. Cost Savings
3D modeling can also help save costs in several ways. By reducing the need for physical prototyping, you can save on materials, labor, and other associated costs. Additionally, 3D modeling can help identify and address design flaws early in the development process, which can prevent costly mistakes down the line.
| No | Important Information |
|---|---|
| 1 | Game Name |
| 2 | Developer/Publisher |
| 3 | Game Genre |
| 4 | Release Date |
| 5 | Platform(s) |
| 6 | Game Modes |
| 7 | Multiplayer Support |
| 8 | System Requirements |
| 9 | Price (as of publication date) |
Helicopter 3D Models for Video Games

Helicopter 3D models are essential in creating realistic environments for video games. These models are used to simulate different types of helicopters, from military to commercial, and are built with precision to ensure accurate representation in a game. Helicopter 3D models are often used in action-adventure games, simulation games, and even racing games.
Types of Helicopter 3D Models
There are several types of helicopter 3D models used in video games, including military helicopters such as Apache, Blackhawk, and Chinook. Commercial helicopters such as Bell 206 and Eurocopter EC135 are also popular in video games as they are commonly used in civilian life. Other types of helicopter 3D models include rescue helicopters for emergency missions and transport helicopters for cargo and troop transport.
Creating helicopter 3D models requires a lot of attention to detail and research. Game developers work with engineers and pilots to ensure accuracy in the design, including the movements, sounds, and response of the helicopter. These 3D models are built using specialized software and can take months to complete.
Popular Video Games Featuring Helicopter 3D Models
Helicopter 3D models have been used in many popular video games. Games such as Grand Theft Auto V, Battlefield 4, and Call of Duty: Ghosts feature various helicopter models that are crucial to the gameplay. Microsoft Flight Simulator X is another game that features a vast library of helicopter 3D models for players to choose from.
These games provide players with immersive, realistic experiences using helicopter 3D models. The models are used for both single and multiplayer gameplay, providing players with a chance to fly the helicopters and engage in various missions in the game.
Types of Helicopter 3D Models
Helicopter 3D models are not just limited to one type, but there are numerous types of helicopter 3D models, each with its unique specifications and features.
Military Helicopter 3D Models
The military helicopter 3D models are designed for army training purposes and help them to understand the anatomy of these helicopters. The 3D models are ideal for training exercises as they almost seem authentic with the same weight, form, shape, and size.
Commercial Helicopter 3D Models
The commercial helicopter 3D models are used for advertisement and marketing purposes by different companies. They use 3D models to present the best features and attributes of their helicopters, providing their customers with an experience of what they can expect if they purchase the same helicopter.
Helicopter 3D models have a range of applications, including army training and ad campaigns for commercial helicopters.
| No | LSI Keywords |
|---|---|
| 1 | military helicopter 3d model |
| 2 | commercial helicopter 3d model |
| 3 | army training |
| 4 | advertisement |
| 5 | marketing |
Best Free Helicopter 3D Games

If you love playing games that require strategy, helicopter 3D games are perfect for you. Many of these games have challenging obstacles to overcome and missions to complete. Here are some of the best free helicopter 3D games you can find:
1. Helicopter Rescue Simulator
This game allows you to control an entire rescue mission with your helicopter and get to places other vehicles can’t. You can fly over mountains and terrains, put out fires, and rescue stranded people. This game has excellent graphics that make the experience even more immersive.
2. Gunship Battle: Helicopter 3D
Gunship Battle: Helicopter 3D game is an exciting game where you play the role of a skilled pilot and navigate through treacherous terrain, engaging with enemy aircraft. The game’s thrill is enhanced by realistic 3D graphics, cutting-edge weapons, aircraft, and special effects.
| No | Name | Features |
|---|---|---|
| 1 | Helicopter Rescue Simulator | 1. Rescue missions 2. Excellent graphics |
| 2 | Gunship Battle: Helicopter 3D | 1. Skilled pilot roleplay 2. Realistic 3D graphics |
Using Helicopter 3D Models for Gaming

Helicopter 3D models have been used extensively in the gaming industry. The realistic look and feel of the models help in creating an immersive gaming experience. Helicopter games have been popular for decades, and with the advancement of technology, the graphics and animation of these games have improved vastly.
Simulation Games
Helicopter models are widely used in simulation games. These games simulate flying a helicopter, giving the player a chance to control and maneuver the helicopter. The realistic look and feel of the 3D models make the game more engaging and exciting. Simulation games also help in improving hand-eye coordination and focus.
Combat Games
Helicopter models are also used in combat games. These games have a storyline where the player has to fight enemies from a helicopter. The 3D models of the helicopter, the environment, and the enemies make the game more realistic. Combat games help in developing problem-solving abilities and strategic thinking.
Advancements in Helicopter 3D Technology

As technology continues to evolve, so does helicopter 3D technology. One of the latest advancements is mixed reality training. This technology uses virtual and augmented reality to allow pilots to train in any environment without endangering themselves or others. This technology has been implemented by the United States Army and has been proven to be more effective than traditional training methods.
Mixed Reality Training
Mixed reality training provides realistic and immersive simulations that allow pilots to train in various environments and practice emergency procedures without putting anyone at risk. This technology uses a combination of virtual and augmented reality to simulate real-life scenarios.
Helicopter 3D Printing
Another advancement in helicopter 3D technology is 3D printing. This technology has enabled manufacturers to create complex parts that would have been impossible or extremely difficult to create using traditional manufacturing methods. This has reduced costs and has also led to faster production times and improved quality.
One notable example of 3D printing in the aviation industry is Airbus 380, where 1,000 parts are 3D printed. This has resulted in reductions of 2600 lbs of weight, making the plane more fuel-efficient. It also has reduced the noise level of the aircraft.
Here are some frequently asked questions about helicopter 3D:
1. What is a helicopter 3D?
Helicopter 3D is a simulation of a helicopter in three-dimensional space. It allows users to experience flying a helicopter in a virtual environment.
2. What do I need to use helicopter 3D?
You will need a computer or mobile device that meets the minimum system requirements for the simulation, as well as internet access to download and play the game.
3. Is it difficult to control the helicopter in 3D?
It may take some practice to get the hang of the controls, but most simulations offer beginner levels that allow users to learn the basics before moving on to more challenging levels.
4. Can I use a joystick or gamepad to control the helicopter?
Yes, most helicopter 3D simulations are compatible with a wide range of input devices, including joysticks, gamepads, and even virtual reality headsets.
5. Will I get motion sickness while playing helicopter 3D?
It is possible, especially if you are new to the simulation. To avoid motion sickness, try playing in short sessions and take frequent breaks.
6. Can I fly different types of helicopters in the simulation?
Yes, most simulations offer a variety of helicopter models to choose from, each with its own unique characteristics and capabilities.
7. Can I modify the helicopter in the simulation?
Some simulations allow users to customize their helicopters by changing the color, adding decals, or upgrading parts for better performance.
8. Are there multiplayer options for helicopter 3D?
Yes, some simulations offer multiplayer modes where users can compete against each other or work together in team missions.
9. Do I need to know anything about helicopters to play helicopter 3D?
No, prior knowledge of helicopters is not necessary to enjoy the simulation. However, a basic understanding of flight principles may be helpful.
10. Will the simulation teach me how to fly a real helicopter?
While helicopter 3D can give users a basic understanding of how helicopters work, it is not a substitute for real-world flight training.
11. How realistic is the simulation?
The level of realism varies depending on the simulation. Some simulations strive for complete realism, while others prioritize gameplay features and accessibility.
12. Can I crash the helicopter in the simulation?
Yes, most simulations allow users to crash the helicopter, but it will result in a game over or mission failure.
13. Can I access helicopter 3D on my mobile device?
Yes, many helicopter 3D simulations are available for mobile devices. However, the controls may be more difficult to learn on a smaller screen.
14. Are there tutorials available for the simulation?
Most simulations offer tutorials that teach users how to control the helicopter and complete various missions or challenges.
15. How much does helicopter 3D cost?
The cost of the simulation varies depending on the platform and developer. Some simulations offer free or trial versions, while others require a one-time purchase or subscription.
If you’re looking to buy a remote control helicopter, consider checking out Fast Lane RC Helicopter. This website has a wide selection of helicopters to choose from.
See You Soon Kind Reader
Thanks for taking the time to read about the fascinating world of helicopter 3D. We hope you enjoyed learning about the technology that is involved in making these machines fly high in the sky. Don’t forget to visit us again soon as we share more amazing content that will take you deeper into the world of technology and its endless possibilities. Until next time, take care and stay safe!
Saran Video Seputar : Revolutionizing Aviation: The Ultimate Experience of Helicopter 3D!
Description
Add to wishlist
ANDROID DEMO LINK:
https://mega.nz/#!lZomgYDB!lMAU63d5PFYEhYJzIG__Lw2Fif77xIn0gQ79ECcsAuw
Are you ready to play one of the best Helicopter Simulation game ever? Play two exciting modes with multiple helicopters.
Mode 1: Parking Simulator
Mode 2: Checkpoint Based Drive
It’s the best of both worlds for players who like thrill and for those who like strategy. You can land that police helicopter like a pro and you can rescue people by collecting checkpoints like a hero. So, hop on that police helicopter and fly it like it’s your last day. Be careful! your army career is at stake! With twenty amazing levels of flight simulation, experience two different modes. Improve your parking skills in one mode where you get to follow the minimap to find the correct parking spot. Use the arrows on the screen to align the helicopter and land the helicopter as fast as you can. You gotta hurry up! If you fail to park before the time runs out, game is over.
Be prepared to be thrilled by another equally exciting mode. Fasten your seat belt as it’s a race against time. Complete the mission and rescue people in dangerous situations by collecting all the check points. Follow the arrows that will guide you to the nearest checkpoints but the battle against time will make this helicopter simulator game even more challenging. You have to take control of what’s yours. You’ve gotta be pro at flying the police helicopter by completing the two missions on time. Choose your helicopter and begin flying! Use your flying skills and experience ultimate flight simulation experience in this addictive helicopter game.
Features
• Twenty Exciting levels
• Different helicopters to choose from
• Spectacular 3D environment for flying
• Detailed world with trees, buildings, clouds
• Responsive and Realistic game play
• Smooth and easy controls
• Directions for Checkpoint
• Map for Parking
• Exciting soundtrack
• Time Attack
• Parking and Racing mode for max enjoyment
• Play without WIFI
• ALL of this, FREE!
In order to ask a question you need to log in or register as a user for free.
In order to ask a question you need to log in or register as a user for free.
2
![]()
Download Article
![]()
Download Article
Mastering the art of flying an RC helicopter takes practice, but you’ll certainly have fun along the way! We’ll show you how to set up your remote-control helicopter for the first time, teach you some helpful beginner exercises, and even get you started with impressive and challenging moves.
-

This is just as important as your helicopter itself, as this is what you will control the copter with. Ensure all of the sticks move the control surfaces in the correct direction. For example, if you give a forward cyclic command, make sure your swashplate tilts forwards, not sideways or backwards.[1]
- Tilt your sticks left and right, and see if the swashplate responds respectively to the commands.
- Increase the throttle stick. This should show an increase in both the engine speed and collective pitch on your swashplate.
- Give a right tail rotor command and see how your helicopter responds. The pitch of the tail rotor blades should change so that they are blowing air out the right, which in turn thrusts the tail boom to the left. Similarly, a left tail rotor command should blow air out the left side, thrusting the tail boom to the right.
-
Hold the helicopter by the middle of the rotor blades. Tile the blades so that one is pointing straight down, while the other is pointing straight up. If the CG is top heavy, the tail boom will rotate upwards. If the CG is bottom heavy, the nose will rotate upwards. A perfect CG is when the body of the helicopter sits perfectly perpendicular to that of the rotor blades.[2]
- Another method to use is to hold your helicopter by the fly bar (if equipped with one). The helicopter will begin to pivot back and forth. If it begins to tilt backwards or forwards permanently, the CG is off.
- If your CG is off, you will need to remove and position the battery pack in a more equidistant position. This could mean removing it with a screwdriver, or a pair of pliers, depending on how your battery pack is attached.
- If you are using a gas powered helicopter, it is even more important to consistently check the CG. Small changes in the amount of fuel can drastically change the center of gravity.
Advertisement
-
The single bolt and lock nut hold together the main and tail rotor blades. If you over or under tighten these blades, it could cause your helicopter to not function properly. A simple way to check the tightness is to hold your helicopter outright, perpendicular to the ground.[3]
- The bolts should be tight enough that the blades don’t pivot downwards by the pull of gravity, but loose enough so that they will move when you give the helicopter a minor shake.
- The larger your helicopter is, the more secure you will want to make the rotor blades. This is especially true when the blade size reaches over 750mm. Smaller helicopters will need looser blades.
- Use your wrench to tighten or loosen the secure bolt, depending on the size of your helicopter.


Advertisement
-
You will want to do this very slowly, as applying too much throttle right away can cause your copter to tilt, and fall over, which will cause damage. This initial surge of power is called a spool. When you spool properly, the blades will turn, and you should start to feel some vibrations.[4]
[5]
- Immediately stop spooling when the copter gets lift and wants to come off the ground. This is done by simply lowering the torque slowly.
- With your helicopter on, this is the perfect time to use your eyes. See if your helicopter is shifting left or right when it spools. Listen with your ears to the engine. It should be making a consistent running sound, not a sporadic pumping sound.
- When your helicopter is on the ground, do not add any cyclic trim. This will cause your swashplate to tilt in the direction of your command, and send your copter off against the ground.
-
Each of your rotor blades sits at an angle. Most helicopters will hover between 4.5 and 5.5 degrees of positive pitch. If the angles of each blade are off from another, one blade will lift higher and cause your helicopter to crash. In order to adjust this so that the blades have even angles, you should first mark each rotor blade’s tip with a different colored piece of tape.[6]
- Next, turn your helicopter on, just so that it gets an inch or two of lift. Put on your safety goggles, and make sure your partner (if you have one) is wearing goggles as well. Bend down so that you are level with the running copter. You will want to be at least 10-20 feet away from the copter when you do this.
- If the blade tracking is set correctly, both colors of tape will overlap with one another. However, if the tracking is off, you will be able to distinguish which color is higher and which is lower.
- If the blades are off kilter, stop the helicopter and turn it off. You will want to reduce the height of the higher blade, while also increasing the height of the lower blade. Adjust the ball link that shifts the pitch per helicopter instructions (ball links vary widely among types and brands of RC helicopters).
- Once this is done, turn your helicopter back on, get back on the ground, and see if the colors overlap. This may take two or three rounds before you get the height of the blades even.
-
Place your helicopter in the middle of the field over which you will fly it. If there is any wind, make sure that the front of the copter is facing towards it. Start your helicopter as you are standing about 10 feet behind it (always wear your goggles). Turn on your throttle until your helicopter is light on its skids. If it begins to drift, simply lower the throttle back down.[7]
- With a fly bared machine, depending on the way your helicopter begins to drift.
- For example, if you have clockwise spinning rotor blades, the helicopter will almost necessarily lean left. Apply some right cyclic trim with your fly bared machine.
- To access controls to your fly barred machine, you should either retrieve your independent controller, or the channel accessed through the swashplate.
-
Start your helicopter up again, and allow it to hover/skid on the starting position (reference point). Once the helicopter is stabilized at the reference point, you can slowly increase the throttle forward. Your helicopter should move forwards about 10 feet, before you slowly decrease the forward command.[8]
[9]
- Stabilize the helicopter at this position, as the helicopter skids gently against the ground. Then turn your throttle to the backwards position. Bring your helicopter back to the initial reference point.
- Do the same thing as before, except move your throttle to the left and/or right, thereby moving your helicopter to the left and/or right of the reference point. Each time, move your helicopter 10 feet, stabilize, then turn your throttle back in the opposite direction to bring the copter back to the initial reference point.
- As you move your helicopter, it should stay fairly close to the ground. The nose of your copter should always be facing forwards and towards the wind.
-
Turn your helicopter on, and stabilize it over the initial reference point. Your copter should be bouncing on its skids as you increase the throttle (collective) power slowly. First, increase the collective until your helicopter is about 3 inches above the ground. After you get it to this point, begin lowering the copter back down to the ground slowly by decreasing the collective.[10]
[11]
- Repeat this step through a series of increments. Start by going 3 inches in the air. Once you feel comfortable with this, go 6 inches or so, stabilize, and bring back down slowly to the reference point. Then go 9 inches, 12 inches, 15 inches, etc.
- Once you have mastered hovering at higher altitudes over the reference point, you can begin adding directional controls. Move your throttle forward as your helicopter hovers higher in the air. Do this slowly, and stabilize the copter after you have moved it forward 10 feet away from the reference point. Then slowly move the throttle back, thereby moving your helicopter backwards until it reaches the reference point again.
- You can do this with left, right, and diagonal controls as well. If at any time you feel uncomfortable, remember to first stabilize your helicopter in midair. Then bring the copter down slowly until it rests on its skids.


Advertisement
-
For this move, you will want to move to an open area, but with a softer surface, such as a grassy farm. Once more, turn your helicopter on, hover it gently, and get a feel for the basic controls. The first part of the move is to turn the collective power on so that your helicopter rises slowly in the air up three feet. Once your copter is stabilized in the air at the three feet position, you can continue on.[12]
[13]
- Start moving your helicopter at a diagonal angle forward and to the right. Do so by directional control with your throttle. Once the helicopter is about 6 feet away from the reference point start moving it only to the right and then on a backwards right diagonal, then backwards, then backwards left diagonal, then left, and then finally forward left diagonal.
- While these directions may seem complicated, they basically mean that you will start hovering at the reference point, then move your copter in a circle clockwise, and finally finishing back at the initial reference point.
- Inverse the previous directions when you move to the left side of your reference point. In essence, start hovering at your reference point, move in a leftward bound circle counterclockwise, and finish back at the initial reference point.
- Once you get a feel for both the left and the right circles separately, you can combine the move into one continuous motion, thereby making a figure eight.
-
So far, all of the precautionary steps, and basic maneuvers have assumed that your helicopter is facing directionally forward in relation to your reference point. This however needs to change, particularly when you will have to fly around tight spots, corners, and/or obstacles. Like normal, turn your helicopter on, lift your helicopter up three feet, and stabilize the the thrust power.[14]
[15]
- Begin from your reference point, making a clockwise rightward bound circle, ending back at the initial reference point. However, instead of constantly keeping your helicopter facing forwards, you will use your directional controls on your thruster to change the position of the nose of your helicopter.
- As your helicopter moves right, change the directional control of your thruster so that the nose is facing right. Allow your helicopter to hover rightward for 15-20 feet before you slow down the power and stabilize the copter. Then turn the direction of your thruster leftward bound so that the nose is facing leftward.
- Bring the helicopter back to the initial reference point and stabilize it in midair. You can now start out from the reference point going leftward, and making your way back rightward. As you become better with changing the nose direction, you will not have to stabilize each time you turn, and it will instead begin to flow naturally.
-
This involves both helicopter and physical movement. First, start your helicopter up, raise it at least 3 feet off of the ground, and stabilize it in the air. The helicopter should always start by facing the wind (nose pointed towards it) and you should be standing 10-15 feet away with the transmitter facing the copter. To perform the counterclockwise circle, begin by moving your helicopter to the left, with the nose of the helicopter also pointing left.[16]
- Continue leftward, with the helicopter’s nose facing in the direction it is headed. The goal is to make a counterclockwise circle around your body with the helicopter. This means that not only will you have to maintain the helicopter’s leftward diagonal motion, but also keep it the same distance from your body the entire distance around (10-15 feet).
- As you move your helicopter in a counterclockwise circle, you should also move your body in a counterclockwise circle, always keeping the transmitter facing the helicopter.
- After you have completed the circle all the way around your body position, and gotten the helicopter back to the initial reference point, you can then move on to a clockwise circle. It is basically the same theory, keeping your body positioned away from the helicopter, yet always facing it with your transmitter. The only difference is the direction (rightward diagonal rather than leftward) that you will maintain to complete the circle.
-
This is a product of basic physics. The extra lift produced by moving air is introduced to the rotor disk. This phenomenon can take a relatively pedestrian powered helicopter and transform it into a higher powered one. For example, if your rotor speed is going 20 mph, and your helicopter is facing a wind speed of 20 mph, the effective lift of your helicopter will be as high as if your helicopter’s rotor blades themselves were spinning at 40 mph.[17]
[18]
- To maximize translational lift, you will first have to do some research as to what direction and speed the wind is blowing at. Speeds between 15-35 mph can be translated into higher lifts, while speeds about 40 mph might actually cause you to lose control of your helicopter.
- Begin your normal steps of turning your copter on in an open field, raising it up, and stabilizing it. This time however, you are going to raise it even higher to about 10 feet off of the ground before you stabilize your copter.
- As you begin to perform your normal turns and directional shifts with your thruster, do so ever so slowly. For example, as you move your copter to the left, so so slowly without increasing the collective power, and allow the wind to carry your copter. Your copter will not only make a directional shift at your control, but will be driven to heights as high as 25-50 feet.
- When you bring your helicopter down from these types of high altitudes, proceed with caution. You want to go very slowly. The best way to bring your helicopter down the first time is to bring your helicopter down in a series of circles (as practiced before). Eventually you will be able to bring down the helicopter in a more straight line.


Advertisement
-
You need a wide open space, preferably a field, with no buildings or trees around. The number or people in the area should also be limited, as the functioning of an RC helicopter can be extremely dangerous. The size of the space you’ll need will differ depending on the size of your helicopter.[19]
- You can either go out by yourself, or go with one other person. Distractions such as pranks, games, or laughs can dampen your ability to focus on flying your copter.
- Dogs and other pets should also be left at home. There are many horror stories where pets are killed by falling aircraft. Do not let this happen to one of your pets.
- the area size should be at least 60X60 feet. The best ground material is clean, smooth pavement, or tightly packed snow.
-
If you are someone who is new to flying, you will need to attach this equipment onto the bottom of your helicopter. The training equipment is typically two wooden or carbon fiber sticks, crossed in a «T» shape, with little rubber balls on the ends. These can be purchased at helicopter specialty stores, both online and on site, for around 40-60 dollars.[20]
[21]
- For a good video on how to make your own training gear, visit: https://www.youtube.com/watch?v=CJtNIzZ9U_0.
-
You will need to make sure that your receiver batteries, helicopter, and radio are all charged up before you go out to fly your RC helicopter. You will also need to check the weather before you go out. If the weather is anything above 15 mph wind, and/or light rain, you should avoid flying your copter. [22]
- You should also bring safety goggles with you when you go out to fly.
- If you are going to be out in an open field, especially in the fall or winter months, make sure you are wearing warm clothes.


Advertisement
Ask a Question
200 characters left
Include your email address to get a message when this question is answered.
Submit
Advertisement
-
Start slow. It takes patience to learn to fly any RC aircraft, and a helicopter is no exception. Don’t attempt aerobatic maneuvers or precise landing challenges on your first flight. They will almost certainly end in failure.
-
Always fly your helicopter when looking at the nose or pod section, not the tail.
-
If you notice a dramatic change in the wind direction, feel free to change the reference point from which you start.
Thanks for submitting a tip for review!
Advertisement
-
This can be a costly hobby. Crashes can make you replace expensive parts.
-
Fly safely. An RC helicopter could cause serious injury and/or property damage. Never try to harm people or animals with your helicopter. Know the FAA regulations regarding RC helicopters and other model aircraft. These regulations are available at: http://knowbeforeyoufly.org.
-
Always make sure that people nearby know what you’re doing so that they aren’t surprised or worried by your helicopter.
-
Perform preflight checks before you begin flying your helicopter. This means making sure your batteries are charged up, there is no damage to your helicopter, and the weather is clear.
Advertisement
References
About This Article
Thanks to all authors for creating a page that has been read 83,404 times.
Did this article help you?
Get all the best how-tos!
Sign up for wikiHow’s weekly email newsletter
Subscribe
You’re all set!
—
—