
0
Network Bullet Camera
Quick Start Guide
Network Bullet CameraQuick Start Guide
1
Quick Start Guide
2020 Hangzhou Hikvision Digital Technology Co., Ltd. All rights
reserved.
This Manual is the property of Hangzhou Hikvision Digital Technology
Co., Ltd. or its affiliates (hereinafter referred to as «Hikvision»), and it
cannot be reproduced, changed, translated, or distributed, partially
or wholly, by any means, without the prior written permission of
Hikvision. Unless otherwise expressly stated herein, Hikvision does
not make any warranties, guarantees or representations, express or
implied, regarding to the Manual, any information contained herein.
About this Manual
The Manual includes instructions for using and managing the
Product. Pictures, charts, images and all other information
hereinafter are for description and explanation only. The information
contained in the Manual is subject to change, without notice, due to
firmware updates or other reasons. Please find the latest version of
this Manual at the Hikvision website (http://www.hikvision.com/).
Please use this Manual with the guidance and assistance of
professionals trained in supporting the Product.
Trademarks Acknowledgement
and other Hikvision’s trademarks and logos are
the properties of Hikvision in various jurisdictions.
Other trademarks and logos mentioned are the properties of
their respective owners.
LEGAL DISCLAIMER
Network Bullet CameraQuick Start Guide
2
TO THE MAXIMUM EXTENT PERMITTED BY APPLICABLE LAW, THIS
MANUAL AND THE PRODUCT DESCRIBED, WITH ITS HARDWARE,
SOFTWARE AND FIRMWARE, ARE PROVIDED AS IS AND WITH ALL
FAULTS AND ERRORS. HIKVISION MAKES NO WARRANTIES, EXPRESS
OR IMPLIED, INCLUDING WITHOUT LIMITATION, MERCHANTABILITY,
SATISFACTORY QUALITY, OR FITNESS FOR A PARTICULAR PURPOSE.
THE USE OF THE PRODUCT BY YOU IS AT YOUR OWN RISK. IN NO
EVENT WILL HIKVISION BE LIABLE TO YOU FOR ANY SPECIAL,
CONSEQUENTIAL, INCIDENTAL, OR INDIRECT DAMAGES, INCLUDING,
AMONG OTHERS, DAMAGES FOR LOSS OF BUSINESS PROFITS,
BUSINESS INTERRUPTION, OR LOSS OF DATA, CORRUPTION OF
SYSTEMS, OR LOSS OF DOCUMENTATION, WHETHER BASED ON
BREACH OF CONTRACT, TORT (INCLUDING NEGLIGENCE), PRODUCT
LIABILITY, OR OTHERWISE, IN CONNECTION WITH THE USE OF THE
PRODUCT, EVEN IF HIKVISION HAS BEEN ADVISED OF THE POSSIBILITY
OF SUCH DAMAGES OR LOSS.
YOU ACKNOWLEDGE THAT THE NATURE OF INTERNET PROVIDES FOR
INHERENT SECURITY RISKS, AND HIKVISION SHALL NOT TAKE ANY
RESPONSIBILITIES FOR ABNORMAL OPERATION, PRIVACY LEAKAGE OR
OTHER DAMAGES RESULTING FROM CYBER-ATTACK, HACKER ATTACK,
VIRUS INSPECTION, OR OTHER INTERNET SECURITY RISKS; HOWEVER,
HIKVISION WILL PROVIDE TIMELY TECHNICAL SUPPORT IF REQUIRED.
YOU AGREE TO USE THIS PRODUCT IN COMPLIANCE WITH ALL
APPLICABLE LAWS, AND YOU ARE SOLELY RESPONSIBLE FOR
ENSURING THAT YOUR USE CONFORMS TO THE APPLICABLE LAW.
ESPECIALLY, YOU ARE RESPONSIBLE, FOR USING THIS PRODUCT IN A
MANNER THAT DOES NOT INFRINGE ON THE RIGHTS OF THIRD
PARTIES, INCLUDING WITHOUT LIMITATION, RIGHTS OF PUBLICITY,
Network Bullet CameraQuick Start Guide
3
INTELLECTUAL PROPERTY RIGHTS, OR DATA PROTECTION AND OTHER
PRIVACY RIGHTS. YOU SHALL NOT USE THIS PRODUCT FOR ANY
PROHIBITED END-USES, INCLUDING THE DEVELOPMENT OR
PRODUCTION OF WEAPONS OF MASS DESTRUCTION, THE
DEVELOPMENT OR PRODUCTION OF CHEMICAL OR BIOLOGICAL
WEAPONS, ANY ACTIVITIES IN THE CONTEXT RELATED TO ANY
NUCLEAR EXPLOSIVE OR UNSAFE NUCLEAR FUEL-CYCLE, OR IN
SUPPORT OF HUMAN RIGHTS ABUSES.
IN THE EVENT OF ANY CONFLICTS BETWEEN THIS MANUAL AND THE
APPLICABLE LAW, THE LATER PREVAILS.
Regulatory Information
FCC Information
Please take attention that changes or modification not expressly
approved by the party responsible for compliance could void the
users authority to operate the equipment.
FCC compliance: This equipment has been tested and found to
comply with the limits for a Class B digital device, pursuant to part 15
of the FCC Rules. These limits are designed to provide reasonable
protection against harmful interference in a residential installation.
This equipment generates, uses and can radiate radio frequency
energy and, if not installed and used in accordance with the
instructions, may cause harmful interference to radio
communications. However, there is no guarantee that interference
will not occur in a particular installation. If this equipment does cause
harmful interference to radio or television reception, which can be
determined by turning the equipment off and on, the user is
Network Bullet CameraQuick Start Guide
4
encouraged to try to correct the interference by one or more of the
following measures:
Reorient or relocate the receiving antenna.
Increase the separation between the equipment and receiver.
Connect the equipment into an outlet on a circuit different from
that to which the receiver is connected.
Consult the dealer or an experienced radio/TV technician for help
FCC Conditions
This device complies with part 15 of the FCC Rules. Operation is
subject to the following two conditions:
1. This device may not cause harmful interference.
2. This device must accept any interference received, including
interference that may cause undesired operation.
EU Conformity Statement
This product and — if applicable — the supplied
accessories too are marked with «CE» and comply
therefore with the applicable harmonized European
standards listed under the EMC Directive 2014/30/EU, the RoHS
Directive 2011/65/EU
2012/19/EU (WEEE directive): Products marked with
this symbol cannot be disposed of as unsorted
municipal waste in the European Union. For proper
recycling, return this product to your local supplier
upon the purchase of equivalent new equipment, or dispose of it at
designated collection points. For more information, see:
www.recyclethis.info.
Network Bullet CameraQuick Start Guide
5
2006/66/EC (battery directive): This product contains
a battery that cannot be disposed of as unsorted
municipal waste in the European Union. See the
product documentation for specific battery
information. The battery is marked with this symbol,
which may include lettering to indicate cadmium (Cd), lead (Pb), or
mercury (Hg). For proper recycling, return the battery to your supplier
or to a designated collection point. For more information, see:
www.recyclethis.info.
Industry Canada ICES-003 Compliance
This device meets the CAN ICES-3 (B)/NMB-3(B) standards
requirements.
Safety Instruction
These instructions are intended to ensure that user can use the
product correctly to avoid danger or property loss.
The precaution measure is divided into Warnings and Cautions
Warnings: Serious injury or death may occur if any of the warnings
are neglected. Cautions: Injury or equipment damage may occur if any of the
cautions are neglected.
Network Bullet CameraQuick Start Guide
6
Warnings
Proper configuration of all passwords and other security settings
is the responsibility of the installer and/or end-user.
In the use of the product, you must be in strict compliance with
the electrical safety regulations of the nation and region. Please
refer to technical specifications for detailed information.
The power source should meet limited power source or PS2
requirements according to IEC 60950-1 or IEC 62368-1 standard.
Do not connect several devices to one power adapter as adapter
overload may cause over-heating or a fire hazard.
Please make sure that the plug is firmly connected to the power
socket. When the product is mounted on wall or ceiling, the
device shall be firmly fixed.
If smoke, odor or noise rise from the device, turn off the power
at once and unplug the power cable, and then please contact
the service center.
Warnings Cautions
Warnings Follow these
safeguards to prevent
serious injury or death.
Cautions Follow these
precautions to prevent
potential injury or material
damage.
Network Bullet CameraQuick Start Guide
7
Cautions CAUTION: Hot parts! Burned fingers when handling the parts.
Wait one-half hour after switching off
before handling parts. This sticker is to
indicate that the marked item can be hot
and should not be touched without taking care. For device with
this sticker, this device is intended for installation in a restricted
access location, access can only be gained by service persons or
by users who have been instructed about the reasons for the
restrictions applied to the location and about any precautions
that shall be taken.
Make sure the power supply voltage is correct before using the
camera.
Do not drop the camera or subject it to physical shock.
Do not touch sensor modules with fingers. If cleaning is
necessary, use clean cloth with a bit of ethanol and wipe it
gently. If the camera will not be used for an extended period,
please replace the lens cap to protect the sensor from dirt.
Do not aim the camera at the sun or extra bright places.
Blooming or smearing may occur otherwise (which is not a
malfunction), and affect the endurance of sensor at the same
time.
The sensor may be burned out by a laser beam, so when any
laser equipment is in using, make sure that the surface of sensor
will not be exposed to the laser beam.
Network Bullet CameraQuick Start Guide
8
Do not place the camera in extremely hot, cold (the operating
temperature shall be -30C to 60C, or -40C to 60C if the
camera model has an H in its suffix), dusty or damp locations,
and do not expose it to high electromagnetic radiation.
To avoid heat accumulation, good ventilation is required for
operating environment.
Keep the camera away from liquid while in use.
While in delivery, the camera shall be packed in its original
packing, or packing of the same texture.
Regular part replacement: a few parts (e.g. electrolytic
capacitor) of the equipment shall be replaced regularly
according to their average enduring time. The average time
varies because of differences between operating environment
and using history, so regular checking is recommended for all the
users. Please contact with your dealer for more details.
This equipment is not suitable for use in locations where
children are likely to be present.
CAUTION: Risk of explosion if the battery is replaced by an
incorrect type. Dispose of used batteries according to the
instructions
ATTENTION: IL Y A RISQUE D’EXPLOSION SI LA BATTERIE EST
REMPLACE PAR UNE BATTERIE DE TYPE INCORRECT. METTRE
AU REBUT LES BATTERIES USAGES CONFORMMENT AUX
INSTRUCTIONS
Improper replacement of the battery with an incorrect type may
defeat a safeguard (for example, in the case of some lithium
battery types).
Network Bullet CameraQuick Start Guide
9
Do not dispose of the battery into fire or a hot oven, or
mechanically crush or cut the battery, which may result in an
explosion.
Do not leave the battery in an extremely high temperature
surrounding environment, which may result in an explosion or
the leakage of flammable liquid or gas.
Do not subject the battery to extremely low air pressure, which
may result in an explosion or the leakage of flammable liquid or
gas.
If the product does not work properly, please contact your
dealer or the nearest service center. Never attempt to
disassemble the camera yourself. (We shall not assume any
responsibility for problems caused by unauthorized repair or
maintenance.)
Network Bullet CameraQuick Start Guide
10
Table of Contents Appearance Description ……………………………………………………… 11
Type I …………………………………………………………………. 11 Type II ………………………………………………………………… 13
Resetting the Camera ………………………………….. 14 Setting the WPS Protocol……………………………… 15
Type III ……………………………………………………………….. 17 2 Installation ………………………………………………………………………… 19
Installation of Memory Card ………………………………….. 20 Installation of Camera …………………………………………… 21 Waterproof Measures …………………………………………… 23
2.3.1 Install Network Cable Waterproof Jacket ………… 23 2.3.2 Waterproof Other Cables …………………………….. 24
3 Activate and Access Network Camera …………………………………… 25
Network Bullet CameraQuick Start Guide
11
Appearance Description
Type I
1
2
3
4
5
6
9
7
8
Type I Bullet Camera
Network Bullet CameraQuick Start Guide
12
Description
No. Description No. Description
1 Mounting Base 4 Lens
2 Back Case 5 Sun Shield
3 Front Case 6 Power Cable
7 Reset Button 8 GND Screw
9 10/100M Self-adaptive
Ethernet Interface
Note:
Type I camera does not support the function of Wi-Fi or memory
card.
Press Reset button about 10s when the camera is power on or
rebooting to restore the default settings, including the user name,
password, IP address, port No., etc.
Network Bullet CameraQuick Start Guide
13
Type II
1
2
4
3
5
6
7
9
8
10
11
Type II Bullet Camera
Network Bullet CameraQuick Start Guide
14
Description
No. Description No. Description
1 Mounting Base 7 Memory Card Slot
2 Back Case 8 Power Supply Interface
3 Sun Shield 9 10/100M Self-adaptive
Ethernet Interface
4 Lens 10 PoE Cable
5 Adjusting Nut 11 GND Screw
6 WPS/RESET Button
Note:
This type of bullet camera supports PoE power supply. You can
power the camera by connecting both DC 12V interface and the
Ethernet interface. Or you can connect the Ethernet interface only.
WPS/RESET Button
WPS function and Reset function share the same button. The
button works as a reset button only when you press it when the
camera is powered on.
Resetting the Camera
Press WPS/RESET button about 10s when the camera is power on or
rebooting to restore the default settings, including the user name,
password, IP address, port No., etc.
Network Bullet CameraQuick Start Guide
15
WPS/RESET
WPS/RESET Button
Setting the WPS Protocol
A wireless router with the WPS function is required to enable the
WPS function of the camera.
Steps:
1. Enable the WPS function of your router. Refer to the operation
guide of your router for detailed procedures.
2. Press the WPS/RESET button (about 2s) on the camera to join in
the wireless network.
Network Bullet CameraQuick Start Guide
16
WPS/RESET
WPS/RESET Button
Note:
You can also press the WPS button on the camera first and then
enable the WPS function on the router to establish the
connection. But the WPS function of the router must be turned
on within 120s right after pressing the WPS/RESET button on the
camera.
Network Bullet CameraQuick Start Guide
17
Type III
1 3
2 4
5
7
6
8
9
10
Type III Bullet Camera
Network Bullet CameraQuick Start Guide
18
Description
No. Description No. Description
1 Mounting Base 6 Grounding Screw
2 Back Case 7 10/100M Self-adaptive
Ethernet Interface (PoE)
3 Front Case 8 Power Supply (DC 12V)
4 Lens 9 Memory Card Slot
5 Sun Shield 10 Reset Button
Note:
This type of bullet camera supports PoE power supply. You can
power the camera by connecting both DC 12V interface and the
Ethernet interface. Or you can connect the Ethernet interface only.
Press and hold the reset button about 10s when the camera is
powering on or rebooting to restore the default settings, including
the user name, password, IP address, port No., etc.
Network Bullet CameraQuick Start Guide
19
2 Installation
Before you start:
Make sure the device in the package is in good condition and all
the assembly parts are included.
The standard power supply is 12 VDC or PoE. Please make sure
your power supply matches with your camera.
Make sure all the related equipment is power-off during the
installation.
Check the specification of the products for the installation
environment.
Make sure that the wall is strong enough to withstand four times
the weight of the camera and the bracket.
For the camera that supports IR, you are required to pay attention to
the following precautions to prevent IR reflection:
Dust or grease on the dome cover will cause IR reflection. Please
do not remove the dome cover film until the installation is
finished. If there is dust or grease on the dome cover, clean the
dome cover with clean soft cloth and isopropyl alcohol.
Make sure that there is no reflective surface too close to the
camera lens. The IR light from the camera may reflect back into
the lens causing reflection.
The foam ring around the lens must be seated flush against the
inner surface of the bubble to isolate the lens from the IR LEDS.
Fasten the dome cover to camera body so that the foam ring and
the dome cover are attached seamlessly.
Network Bullet CameraQuick Start Guide
20
Installation of Memory Card
Type II and Type III camera support memory card function. Follow the
steps to mount and unmount a memory card.
Steps:
1. Unscrew the cover on back case to expose memory card slot.
Cover
Unscrew the Cover
2. Insert the memory card into the memory card slot.
Memory Card Slot
Type II
Memory Card Slot
Type III
Insert Memory Card
Network Bullet CameraQuick Start Guide
21
3. (Optional)To unmount the memory card, push to get it ejected.
4. Screw the cover back to the camera.
Installation of Camera
Note:
Both wall mounting and ceiling mounting are suitable for the bullet
camera. Wall mounting will be taken as an example in this section.
You can take steps of wall mounting for reference if ceiling mounting
is adopted.
Steps:
1. Drill the screw holes in the wall according to the drill template.
Ceiling Mounting
Hole
Hole
Hole
Drill Template
Network Bullet CameraQuick Start Guide
22
2. Route the corresponding cables.
3. Secure the camera to the wall with the supplied Screws.
Secure the Camera to the Ceiling
4. Connect the cables and power on the camera to view live view
image.
5. Adjust the viewing angle.
Tilt: 0 to 90
Adjusting Nut
Pan: 0 to 360
Rotate: 0 to 360
3-axis Adjustment
Network Bullet CameraQuick Start Guide
23
1). Loosen the adjusting nut.
2). Adjust the pan direction [0 to 360].
3). Adjust the tilt direction [0 to 90].
4). Rotate the camera [0 to 360] to adjust the lens to the desired
viewing angle.
5). Tighten the adjusting nut to complete the installation.
Waterproof Measures
If the camera is installed outdoor, you should use the waterproof
accessory or tapes to waterproof the cables. Otherwise the cables
might get wet or a short circuit occurs.
2.3.1 Install Network Cable Waterproof Jacket
Align
Figure 2-6 Install Waterproof Jacket
Steps:
1. Feed the network cable through and in order.
Network Bullet CameraQuick Start Guide
24
2. Fix on the network cable between and .
3. Place onto the end of , and plug the RJ45 male connector
into RJ45 female connector.
4. Screw to clockwise.
5. Push into .
6. Secure with the in clockwise direction.
2.3.2 Waterproof Other Cables
After routing and connecting the cables, use the waterproof tapes to
wrap up the cables. Connected cables and spare cables both should
be wrapped up as the figures below.
Waterproof Cables

Summary of Content for Hikvision DS-2CD2043G0-I Camera Quick Start Guide PDF
0
Network Bullet Camera
Quick Start Guide
Network Bullet CameraQuick Start Guide
1
Quick Start Guide
2020 Hangzhou Hikvision Digital Technology Co., Ltd. All rights
reserved.
This Manual is the property of Hangzhou Hikvision Digital Technology
Co., Ltd. or its affiliates (hereinafter referred to as «Hikvision»), and it
cannot be reproduced, changed, translated, or distributed, partially
or wholly, by any means, without the prior written permission of
Hikvision. Unless otherwise expressly stated herein, Hikvision does
not make any warranties, guarantees or representations, express or
implied, regarding to the Manual, any information contained herein.
About this Manual
The Manual includes instructions for using and managing the
Product. Pictures, charts, images and all other information
hereinafter are for description and explanation only. The information
contained in the Manual is subject to change, without notice, due to
firmware updates or other reasons. Please find the latest version of
this Manual at the Hikvision website (http://www.hikvision.com/).
Please use this Manual with the guidance and assistance of
professionals trained in supporting the Product.
Trademarks Acknowledgement
and other Hikvision’s trademarks and logos are
the properties of Hikvision in various jurisdictions.
Other trademarks and logos mentioned are the properties of
their respective owners.
LEGAL DISCLAIMER
Network Bullet CameraQuick Start Guide
2
TO THE MAXIMUM EXTENT PERMITTED BY APPLICABLE LAW, THIS
MANUAL AND THE PRODUCT DESCRIBED, WITH ITS HARDWARE,
SOFTWARE AND FIRMWARE, ARE PROVIDED AS IS AND WITH ALL
FAULTS AND ERRORS. HIKVISION MAKES NO WARRANTIES, EXPRESS
OR IMPLIED, INCLUDING WITHOUT LIMITATION, MERCHANTABILITY,
SATISFACTORY QUALITY, OR FITNESS FOR A PARTICULAR PURPOSE.
THE USE OF THE PRODUCT BY YOU IS AT YOUR OWN RISK. IN NO
EVENT WILL HIKVISION BE LIABLE TO YOU FOR ANY SPECIAL,
CONSEQUENTIAL, INCIDENTAL, OR INDIRECT DAMAGES, INCLUDING,
AMONG OTHERS, DAMAGES FOR LOSS OF BUSINESS PROFITS,
BUSINESS INTERRUPTION, OR LOSS OF DATA, CORRUPTION OF
SYSTEMS, OR LOSS OF DOCUMENTATION, WHETHER BASED ON
BREACH OF CONTRACT, TORT (INCLUDING NEGLIGENCE), PRODUCT
LIABILITY, OR OTHERWISE, IN CONNECTION WITH THE USE OF THE
PRODUCT, EVEN IF HIKVISION HAS BEEN ADVISED OF THE POSSIBILITY
OF SUCH DAMAGES OR LOSS.
YOU ACKNOWLEDGE THAT THE NATURE OF INTERNET PROVIDES FOR
INHERENT SECURITY RISKS, AND HIKVISION SHALL NOT TAKE ANY
RESPONSIBILITIES FOR ABNORMAL OPERATION, PRIVACY LEAKAGE OR
OTHER DAMAGES RESULTING FROM CYBER-ATTACK, HACKER ATTACK,
VIRUS INSPECTION, OR OTHER INTERNET SECURITY RISKS; HOWEVER,
HIKVISION WILL PROVIDE TIMELY TECHNICAL SUPPORT IF REQUIRED.
YOU AGREE TO USE THIS PRODUCT IN COMPLIANCE WITH ALL
APPLICABLE LAWS, AND YOU ARE SOLELY RESPONSIBLE FOR
ENSURING THAT YOUR USE CONFORMS TO THE APPLICABLE LAW.
ESPECIALLY, YOU ARE RESPONSIBLE, FOR USING THIS PRODUCT IN A
MANNER THAT DOES NOT INFRINGE ON THE RIGHTS OF THIRD
PARTIES, INCLUDING WITHOUT LIMITATION, RIGHTS OF PUBLICITY,
Network Bullet CameraQuick Start Guide
3
INTELLECTUAL PROPERTY RIGHTS, OR DATA PROTECTION AND OTHER
PRIVACY RIGHTS. YOU SHALL NOT USE THIS PRODUCT FOR ANY
PROHIBITED END-USES, INCLUDING THE DEVELOPMENT OR
PRODUCTION OF WEAPONS OF MASS DESTRUCTION, THE
DEVELOPMENT OR PRODUCTION OF CHEMICAL OR BIOLOGICAL
WEAPONS, ANY ACTIVITIES IN THE CONTEXT RELATED TO ANY
NUCLEAR EXPLOSIVE OR UNSAFE NUCLEAR FUEL-CYCLE, OR IN
SUPPORT OF HUMAN RIGHTS ABUSES.
IN THE EVENT OF ANY CONFLICTS BETWEEN THIS MANUAL AND THE
APPLICABLE LAW, THE LATER PREVAILS.
Regulatory Information
FCC Information
Please take attention that changes or modification not expressly
approved by the party responsible for compliance could void the
users authority to operate the equipment.
FCC compliance: This equipment has been tested and found to
comply with the limits for a Class B digital device, pursuant to part 15
of the FCC Rules. These limits are designed to provide reasonable
protection against harmful interference in a residential installation.
This equipment generates, uses and can radiate radio frequency
energy and, if not installed and used in accordance with the
instructions, may cause harmful interference to radio
communications. However, there is no guarantee that interference
will not occur in a particular installation. If this equipment does cause
harmful interference to radio or television reception, which can be
determined by turning the equipment off and on, the user is
Network Bullet CameraQuick Start Guide
4
encouraged to try to correct the interference by one or more of the
following measures:
Reorient or relocate the receiving antenna.
Increase the separation between the equipment and receiver.
Connect the equipment into an outlet on a circuit different from
that to which the receiver is connected.
Consult the dealer or an experienced radio/TV technician for help
FCC Conditions
This device complies with part 15 of the FCC Rules. Operation is
subject to the following two conditions:
1. This device may not cause harmful interference.
2. This device must accept any interference received, including
interference that may cause undesired operation.
EU Conformity Statement
This product and — if applicable — the supplied
accessories too are marked with «CE» and comply
therefore with the applicable harmonized European
standards listed under the EMC Directive 2014/30/EU, the RoHS
Directive 2011/65/EU
2012/19/EU (WEEE directive): Products marked with
this symbol cannot be disposed of as unsorted
municipal waste in the European Union. For proper
recycling, return this product to your local supplier
upon the purchase of equivalent new equipment, or dispose of it at
designated collection points. For more information, see:
www.recyclethis.info.
Network Bullet CameraQuick Start Guide
5
2006/66/EC (battery directive): This product contains
a battery that cannot be disposed of as unsorted
municipal waste in the European Union. See the
product documentation for specific battery
information. The battery is marked with this symbol,
which may include lettering to indicate cadmium (Cd), lead (Pb), or
mercury (Hg). For proper recycling, return the battery to your supplier
or to a designated collection point. For more information, see:
www.recyclethis.info.
Industry Canada ICES-003 Compliance
This device meets the CAN ICES-3 (B)/NMB-3(B) standards
requirements.
Safety Instruction
These instructions are intended to ensure that user can use the
product correctly to avoid danger or property loss.
The precaution measure is divided into Warnings and Cautions
Warnings: Serious injury or death may occur if any of the warnings
are neglected. Cautions: Injury or equipment damage may occur if any of the
cautions are neglected.
Network Bullet CameraQuick Start Guide
6
Warnings
Proper configuration of all passwords and other security settings
is the responsibility of the installer and/or end-user.
In the use of the product, you must be in strict compliance with
the electrical safety regulations of the nation and region. Please
refer to technical specifications for detailed information.
The power source should meet limited power source or PS2
requirements according to IEC 60950-1 or IEC 62368-1 standard.
Do not connect several devices to one power adapter as adapter
overload may cause over-heating or a fire hazard.
Please make sure that the plug is firmly connected to the power
socket. When the product is mounted on wall or ceiling, the
device shall be firmly fixed.
If smoke, odor or noise rise from the device, turn off the power
at once and unplug the power cable, and then please contact
the service center.
Warnings Cautions
Warnings Follow these
safeguards to prevent
serious injury or death.
Cautions Follow these
precautions to prevent
potential injury or material
damage.
Network Bullet CameraQuick Start Guide
7
Cautions CAUTION: Hot parts! Burned fingers when handling the parts.
Wait one-half hour after switching off
before handling parts. This sticker is to
indicate that the marked item can be hot
and should not be touched without taking care. For device with
this sticker, this device is intended for installation in a restricted
access location, access can only be gained by service persons or
by users who have been instructed about the reasons for the
restrictions applied to the location and about any precautions
that shall be taken.
Make sure the power supply voltage is correct before using the
camera.
Do not drop the camera or subject it to physical shock.
Do not touch sensor modules with fingers. If cleaning is
necessary, use clean cloth with a bit of ethanol and wipe it
gently. If the camera will not be used for an extended period,
please replace the lens cap to protect the sensor from dirt.
Do not aim the camera at the sun or extra bright places.
Blooming or smearing may occur otherwise (which is not a
malfunction), and affect the endurance of sensor at the same
time.
The sensor may be burned out by a laser beam, so when any
laser equipment is in using, make sure that the surface of sensor
will not be exposed to the laser beam.
Network Bullet CameraQuick Start Guide
8
Do not place the camera in extremely hot, cold (the operating
temperature shall be -30C to 60C, or -40C to 60C if the
camera model has an H in its suffix), dusty or damp locations,
and do not expose it to high electromagnetic radiation.
To avoid heat accumulation, good ventilation is required for
operating environment.
Keep the camera away from liquid while in use.
While in delivery, the camera shall be packed in its original
packing, or packing of the same texture.
Regular part replacement: a few parts (e.g. electrolytic
capacitor) of the equipment shall be replaced regularly
according to their average enduring time. The average time
varies because of differences between operating environment
and using history, so regular checking is recommended for all the
users. Please contact with your dealer for more details.
This equipment is not suitable for use in locations where
children are likely to be present.
CAUTION: Risk of explosion if the battery is replaced by an
incorrect type. Dispose of used batteries according to the
instructions
ATTENTION: IL Y A RISQUE D’EXPLOSION SI LA BATTERIE EST
REMPLACE PAR UNE BATTERIE DE TYPE INCORRECT. METTRE
AU REBUT LES BATTERIES USAGES CONFORMMENT AUX
INSTRUCTIONS
Improper replacement of the battery with an incorrect type may
defeat a safeguard (for example, in the case of some lithium
battery types).
Network Bullet CameraQuick Start Guide
9
Do not dispose of the battery into fire or a hot oven, or
mechanically crush or cut the battery, which may result in an
explosion.
Do not leave the battery in an extremely high temperature
surrounding environment, which may result in an explosion or
the leakage of flammable liquid or gas.
Do not subject the battery to extremely low air pressure, which
may result in an explosion or the leakage of flammable liquid or
gas.
If the product does not work properly, please contact your
dealer or the nearest service center. Never attempt to
disassemble the camera yourself. (We shall not assume any
responsibility for problems caused by unauthorized repair or
maintenance.)
Network Bullet CameraQuick Start Guide
10
Table of Contents Appearance Description ……………………………………………………… 11
Type I …………………………………………………………………. 11 Type II ………………………………………………………………… 13
Resetting the Camera ………………………………….. 14 Setting the WPS Protocol……………………………… 15
Type III ……………………………………………………………….. 17 2 Installation ………………………………………………………………………… 19
Installation of Memory Card ………………………………….. 20 Installation of Camera …………………………………………… 21 Waterproof Measures …………………………………………… 23
2.3.1 Install Network Cable Waterproof Jacket ………… 23 2.3.2 Waterproof Other Cables …………………………….. 24
3 Activate and Access Network Camera …………………………………… 25
Network Bullet CameraQuick Start Guide
11
Appearance Description
Type I
1
2
3
4
5
6
9
7
8
Type I Bullet Camera
Network Bullet CameraQuick Start Guide
12
Description
No. Description No. Description
1 Mounting Base 4 Lens
2 Back Case 5 Sun Shield
3 Front Case 6 Power Cable
7 Reset Button 8 GND Screw
9 10/100M Self-adaptive
Ethernet Interface
Note:
Type I camera does not support the function of Wi-Fi or memory
card.
Press Reset button about 10s when the camera is power on or
rebooting to restore the default settings, including the user name,
password, IP address, port No., etc.
Network Bullet CameraQuick Start Guide
13
Type II
1
2
4
3
5
6
7
9
8
10
11
Type II Bullet Camera
Network Bullet CameraQuick Start Guide
14
Description
No. Description No. Description
1 Mounting Base 7 Memory Card Slot
2 Back Case 8 Power Supply Interface
3 Sun Shield 9 10/100M Self-adaptive
Ethernet Interface
4 Lens 10 PoE Cable
5 Adjusting Nut 11 GND Screw
6 WPS/RESET Button
Note:
This type of bullet camera supports PoE power supply. You can
power the camera by connecting both DC 12V interface and the
Ethernet interface. Or you can connect the Ethernet interface only.
WPS/RESET Button
WPS function and Reset function share the same button. The
button works as a reset button only when you press it when the
camera is powered on.
Resetting the Camera
Press WPS/RESET button about 10s when the camera is power on or
rebooting to restore the default settings, including the user name,
password, IP address, port No., etc.
Network Bullet CameraQuick Start Guide
15
WPS/RESET
WPS/RESET Button
Setting the WPS Protocol
A wireless router with the WPS function is required to enable the
WPS function of the camera.
Steps:
1. Enable the WPS function of your router. Refer to the operation
guide of your router for detailed procedures.
2. Press the WPS/RESET button (about 2s) on the camera to join in
the wireless network.
Network Bullet CameraQuick Start Guide
16
WPS/RESET
WPS/RESET Button
Note:
You can also press the WPS button on the camera first and then
enable the WPS function on the router to establish the
connection. But the WPS function of the router must be turned
on within 120s right after pressing the WPS/RESET button on the
camera.
Network Bullet CameraQuick Start Guide
17
Type III
1 3
2 4
5
7
6
8
9
10
Type III Bullet Camera
Network Bullet CameraQuick Start Guide
18
Description
No. Description No. Description
1 Mounting Base 6 Grounding Screw
2 Back Case 7 10/100M Self-adaptive
Ethernet Interface (PoE)
3 Front Case 8 Power Supply (DC 12V)
4 Lens 9 Memory Card Slot
5 Sun Shield 10 Reset Button
Note:
This type of bullet camera supports PoE power supply. You can
power the camera by connecting both DC 12V interface and the
Ethernet interface. Or you can connect the Ethernet interface only.
Press and hold the reset button about 10s when the camera is
powering on or rebooting to restore the default settings, including
the user name, password, IP address, port No., etc.
Network Bullet CameraQuick Start Guide
19
2 Installation
Before you start:
Make sure the device in the package is in good condition and all
the assembly parts are included.
The standard power supply is 12 VDC or PoE. Please make sure
your power supply matches with your camera.
Make sure all the related equipment is power-off during the
installation.
Check the specification of the products for the installation
environment.
Make sure that the wall is strong enough to withstand four times
the weight of the camera and the bracket.
For the camera that supports IR, you are required to pay attention to
the following precautions to prevent IR reflection:
Dust or grease on the dome cover will cause IR reflection. Please
do not remove the dome cover film until the installation is
finished. If there is dust or grease on the dome cover, clean the
dome cover with clean soft cloth and isopropyl alcohol.
Make sure that there is no reflective surface too close to the
camera lens. The IR light from the camera may reflect back into
the lens causing reflection.
The foam ring around the lens must be seated flush against the
inner surface of the bubble to isolate the lens from the IR LEDS.
Fasten the dome cover to camera body so that the foam ring and
the dome cover are attached seamlessly.
Network Bullet CameraQuick Start Guide
20
Installation of Memory Card
Type II and Type III camera support memory card function. Follow the
steps to mount and unmount a memory card.
Steps:
1. Unscrew the cover on back case to expose memory card slot.
Cover
Unscrew the Cover
2. Insert the memory card into the memory card slot.
Memory Card Slot
Type II
Memory Card Slot
Type III
Insert Memory Card
Network Bullet CameraQuick Start Guide
21
3. (Optional)To unmount the memory card, push to get it ejected.
4. Screw the cover back to the camera.
Installation of Camera
Note:
Both wall mounting and ceiling mounting are suitable for the bullet
camera. Wall mounting will be taken as an example in this section.
You can take steps of wall mounting for reference if ceiling mounting
is adopted.
Steps:
1. Drill the screw holes in the wall according to the drill template.
Ceiling Mounting
Hole
Hole
Hole
Drill Template
Network Bullet CameraQuick Start Guide
22
2. Route the corresponding cables.
3. Secure the camera to the wall with the supplied Screws.
Secure the Camera to the Ceiling
4. Connect the cables and power on the camera to view live view
image.
5. Adjust the viewing angle.
Tilt: 0 to 90
Adjusting Nut
Pan: 0 to 360
Rotate: 0 to 360
3-axis Adjustment
Network Bullet CameraQuick Start Guide
23
1). Loosen the adjusting nut.
2). Adjust the pan direction [0 to 360].
3). Adjust the tilt direction [0 to 90].
4). Rotate the camera [0 to 360] to adjust the lens to the desired
viewing angle.
5). Tighten the adjusting nut to complete the installation.
Waterproof Measures
If the camera is installed outdoor, you should use the waterproof
accessory or tapes to waterproof the cables. Otherwise the cables
might get wet or a short circuit occurs.
2.3.1 Install Network Cable Waterproof Jacket
Align
Figure 2-6 Install Waterproof Jacket
Steps:
1. Feed the network cable through and in order.
Network Bullet CameraQuick Start Guide
24
2. Fix on the network cable between and .
3. Place onto the end of , and plug the RJ45 male connector
into RJ45 female connector.
4. Screw to clockwise.
5. Push into .
6. Secure with the in clockwise direction.
2.3.2 Waterproof Other Cables
After routing and connecting the cables, use the waterproof tapes to
wrap up the cables. Connected cables and spare cables both should
be wrapped up as the figures below.
Waterproof Cables
Manualsnet FAQs
If you want to find out how the DS-2CD2043G0-I Hikvision works, you can view and download the Hikvision DS-2CD2043G0-I Camera Quick Start Guide on the Manualsnet website.
Yes, we have the Quick Start Guide for Hikvision DS-2CD2043G0-I as well as other Hikvision manuals. All you need to do is to use our search bar and find the user manual that you are looking for.
The Quick Start Guide should include all the details that are needed to use a Hikvision DS-2CD2043G0-I. Full manuals and user guide PDFs can be downloaded from Manualsnet.com.
The best way to navigate the Hikvision DS-2CD2043G0-I Camera Quick Start Guide is by checking the Table of Contents at the top of the page where available. This allows you to navigate a manual by jumping to the section you are looking for.
This Hikvision DS-2CD2043G0-I Camera Quick Start Guide consists of sections like Table of Contents, to name a few. For easier navigation, use the Table of Contents in the upper left corner.
You can download Hikvision DS-2CD2043G0-I Camera Quick Start Guide free of charge simply by clicking the “download” button in the upper right corner of any manuals page. This feature allows you to download any manual in a couple of seconds and is generally in PDF format. You can also save a manual for later by adding it to your saved documents in the user profile.
To be able to print Hikvision DS-2CD2043G0-I Camera Quick Start Guide, simply download the document to your computer. Once downloaded, open the PDF file and print the Hikvision DS-2CD2043G0-I Camera Quick Start Guide as you would any other document. This can usually be achieved by clicking on “File” and then “Print” from the menu bar.
|
Код: 127234 Извините, товара сейчас нет в наличии
Бесплатная доставка
Извините, товара сейчас нет в наличии Сравнить Новости интернет-магазина «Лаукар»:28.03.2023 22.02.2023 13.02.2023 Дополнительная информация в категории Камера видеонаблюдения:Таблица Авторизованных сервисных центров по брендам. Описание Инструкция Отзывы (0) В интернет-магазине бытовой техники «Лаукар» Вы можете скачать инструкцию к товару Камера видеонаблюдения Hikvision DS-2CD2043G0-I (4 мм) White совершенно бесплатно. Все инструкции, представленные на сайте интернет-магазина бытовой техники «Лаукар», предоставляются производителем товара. Для того чтобы скачать инструкцию, Вам необходимо нажать на ссылку «скачать инструкцию», расположенную ниже, а в случае, если ссылки нет, Скачать инструкцию Смотреть инструкцию
Фирма-производитель оставляет за собой право на внесение изменений в конструкцию, дизайн и комплектацию товара: Камера видеонаблюдения Hikvision DS-2CD2043G0-I (4 мм) White. Пожалуйста, сверяйте информацию о товаре с информацией на |


 |
Содержание:
- Как подать питание для ip камер видеонаблюдения
- Подключение айпи камеры Hikvision
- Активация ip камер Hikvision
- Настройка ip камер Hikvision
- Настройка ip камеры Hiwatch
- Подключение и настройка ip камер Hikvision к облачному сервису Hik-connect
- Как сбросить пароль с ip камер Hikvision
- Как установить ip камеру Hikvision
- Как извлечь видеоархив с камер видеонаблюдения Hikvision
- Как перепрошить ip камеру Hikvision / HiWatch
- Скачать программное обеспечение и прошивки
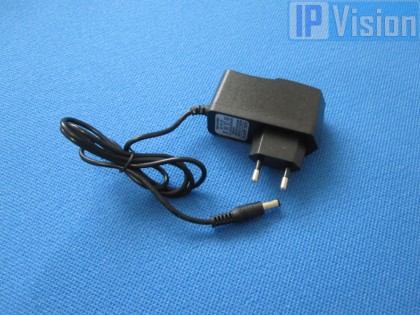
1.Как подать питание для ip камер видеонаблюдения
|
Большинство современных ip камер видеонаблюдения поддерживают два стандарта питания, а именно: 1. Стабилизированное напряжение (12 В DC ± 10%) Можно использовать блок питания для камер видеонаблюдения |
|
 |
 |
|
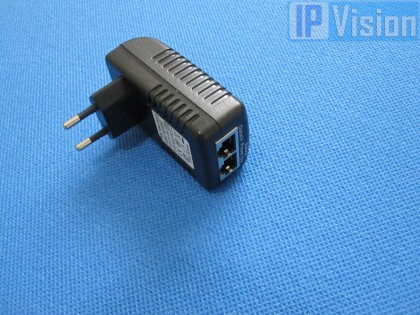
2. Технологию PoE (стандарт 802.3af) — питание и данные по сетевому кабелю витая пара. К примеру PoE инжектор |
|
 |
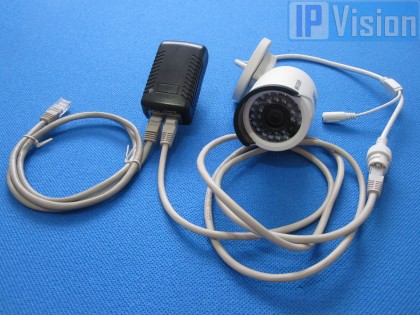 |
Примечание! Источник питания в комплект поставки с камерой не входит.
О том как еще можно подать питание подробно можно прочитать в статье — Как можно подать питание на ip- камеру видеонаблюдения
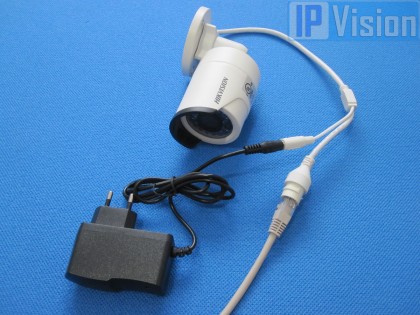
2. Подключение ip камеры Hikvision
Схема подключения ip камеры к Маршрутизатору (Роутеру)
3. Активация ip камер Hikvision
Все устройства HIKVISION из коробки идут не активированными. Так при использовании этих устройств в первый раз, пользователю необходимо активировать устройство путем принудительной установки пароля.
Это можно сделать 4-я способами:
— через утилиту SADP (скачать с оф. сайта здесь)
— через любой web браузер
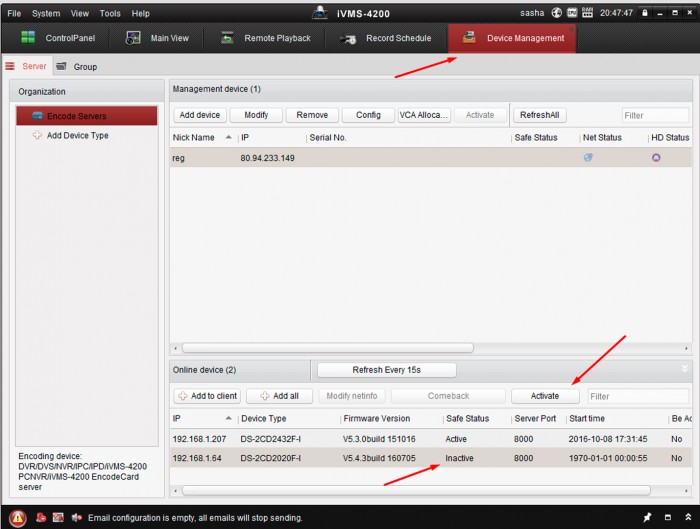
— через клиента iVMS-4200 (скачать с оф. сайта здесь)
— активировать камеры посредством видеорегистратора
Я советую использовать программу SADP
Если вы все правильно подключили, то в программе появиться список всех устройств Hikvision
Выбрать устройство, которое нужно активировать в списке »Онлайн устройств»;
— Установить новый пароль в поле »Device Activation»;
— Подтвердить новый пароль;
— Нажать на кнопку [OK], чтобы активировать устройство.
Вместе с тем, в этой утилите можно задать/изменить подходящий для вашей сети ip адрес, шлюз, маску подсети, сбросить пароль, если забыли, включить облачный сервис Hik-Connect
Активация через Веб браузер. набираем ip адрес камеры в адресную строку любого web браузера (ip-адрес по умолчанию 192.168.1.64). — Установите ваш пароль в первое поле; — Подтвердите пароль во втором поле; — Нажмите [OK], чтобы активировать устройство

Активация через клиента iVMS-4200. Во вкладке «Device Management» выбираем ip камеру, которую необходимо активировать, — нажимаем Activate, в открывшемся окне задаем пароль и подтверждаем его.
Активация камеры через видеорегистратор
Существует четыре способа:
— Добавление в одно касание: В интерфейсе устройства видерегистратора, пользователи могут использовать «добавление в одно касание», чтобы добавить все камеры в локальной сети. Все добавленные камеры будут автоматически активированы с паролем как на видеорегистраторе;
— Активация в одно касание: В интерфейсе устройства видерегистратора, пользователи могут активировать все камеры в локальной сети с использованием само-определенным паролем или с присваиванием пароля от видеорегистратора.
— Ручное добавление: Добавить вручную одну камеру с присваиванием пароля от видеорегистратора.
— Plug & Play: Подключить камеру к видеорегистратору через PoE интерфейс с присваиванием пароля от видеорегистратора.
4. Настройка ip камеры Hikvision
На видео настройка ip камеры Hikvision DS-2CD2043G2-I через web интерфейс браузера
5. Настройка ip камеры HiWatch
На видео настройка ip камеры Hiwatch HiWatch DS-I253M(C) через web интерфейс браузера
6. Подключение и настройка ip камер Hikvision к облачному сервису Hik-connect
Hik-Connect — фирменный бесплатный облачный Р2Р сервис для просмотра видеонаблюдения через интернет. Размещен в собственном магазине приложений Hikvision. в Play market нет его. Оставлю ссылку на приложение в нашем телеграм канале.
Приложение даёт возможность удаленно подключаться к вашим ip-камерам ip-домофонам, видеорегистраторам и охранной системе Ax Pro от Hikvision.
В приложении Hik-Connect так же можно подключаться к устройству Hikvision через интернет напрямую, с помощью статического ip адреса, а так же есть функционал подключения к устройствам Hikvision локально (т.е. будучи в одной локальной сети с вашим роутером, например дома, где и камеры и ваш телефон подключен к одному роутеру, можно мгновенно напрямую просматривать видео с камер обращаясь к устройству по его ip адресу.
7. Как сбросить пароль с ip камер Hikvision
Выключить питание камеры. Нажать и удерживать кнопку RESET. Подать питание на камеру. Через 20 секунд отпустить кнопку. Сброс произведен.
Или в web интерфейсе камеры в меню насройки — вкладка обслуживание — нажать по умолчанию. Камера будет сброшена до заводских настроек. Если нет кнопки сброса, то также есть возможность сбросить пароль с камеры через службу тех поддержки вашего региона. Как это сделать в Беларуси информация здесь
8. Как установить ip камеру Hikvision
Для монтажа камер были использованы следующие материалы:
— Коробка распределительная о/п 85х85х40, 6 вых., IP44
— Металлорукав герметичный в ПВХ изоляции Ø 16
— Коннектор TWT-PL45-8P8C RJ45, 8P8C, кат.5e
— Кабель UTP, 4 пары, категория 5e
|
|
|
9. Как извлечь видеоархив с камер видеонаблюдения Hikvision
10. Как прошить камеру видеонаблюдения Hikvision / Hiwatch
|
|
|
11. Скачать програмное обеспечение и прошивки
скачать ПО и прошивки для устройств Hikvision можно здесь
Вместе с тем, вы всегда можете заказать у нас настроенный и готовый к установке комплект видеонаблюдения
Здесь — Готовые комплекты видеонаблюдения
|
|
|
Если остались вопросы, задавайте в комментариях ниже. Не забывайте указывайть модель устройства в вопросе.