
Создавайте расширенное форматирование текста и кода в GitHub с помощью простого синтаксиса.
Headings
To create a heading, add one to six # symbols before your heading text. The number of # you use will determine the hierarchy level and typeface size of the heading.
# A first-level heading
## A second-level heading
### A third-level heading

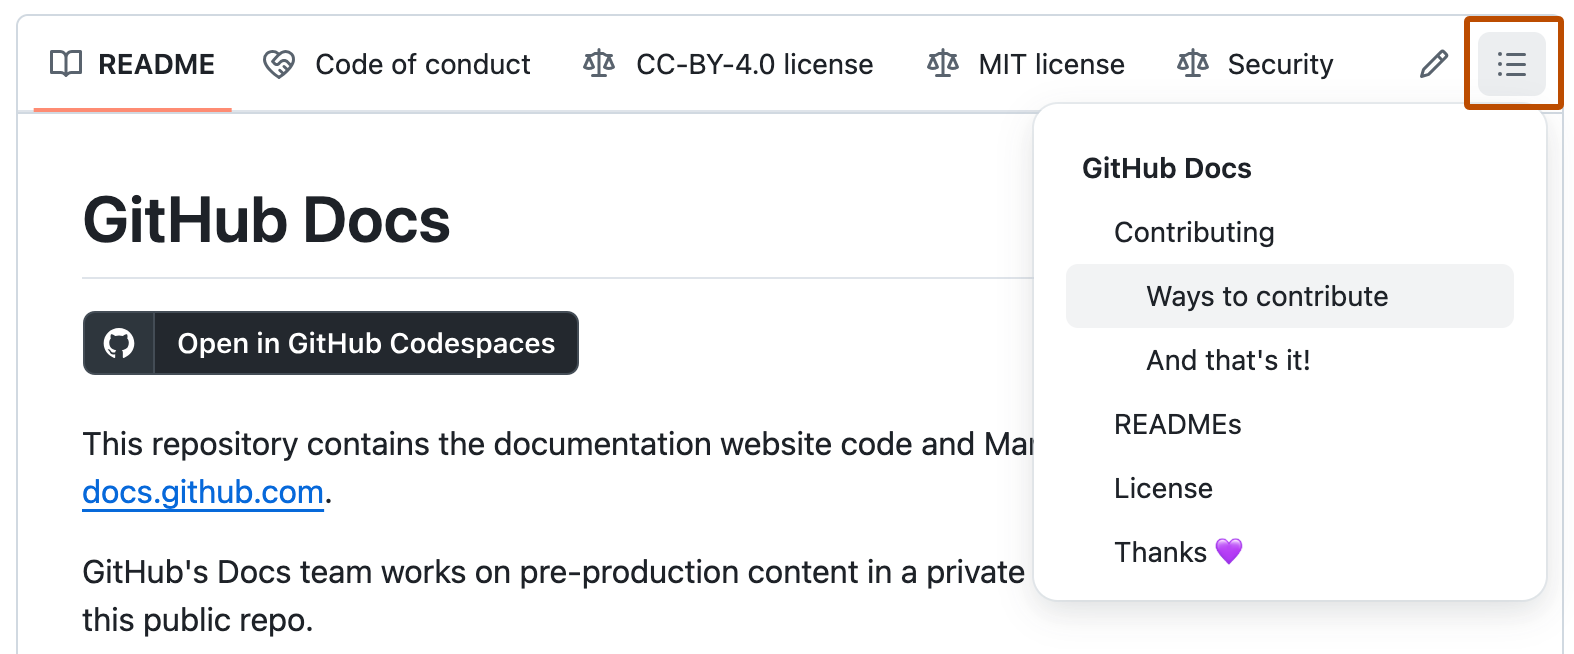
When you use two or more headings, GitHub automatically generates a table of contents that you can access by clicking within the file header. Each heading title is listed in the table of contents and you can click a title to navigate to the selected section.
Styling text
You can indicate emphasis with bold, italic, strikethrough, subscript, or superscript text in comment fields and .md files.
| Style | Syntax | Keyboard shortcut | Example | Output |
|---|---|---|---|---|
| Bold | ** ** or __ __ |
Command+B (Mac) or Ctrl+B (Windows/Linux) | **This is bold text** |
This is bold text |
| Italic | * * or _ _ |
Command+I (Mac) or Ctrl+I (Windows/Linux) | _This text is italicized_ |
This text is italicized |
| Strikethrough | ~~ ~~ |
None | ~~This was mistaken text~~ |
This was mistaken text |
| Bold and nested italic | ** ** and _ _ |
None | **This text is _extremely_ important** |
This text is extremely important |
| All bold and italic | *** *** |
None | ***All this text is important*** |
All this text is important |
| Subscript | <sub> </sub> |
None | This is a <sub>subscript</sub> text |
This is a subscript text |
| Superscript | <sup> </sup> |
None | This is a <sup>superscript</sup> text |
This is a superscript text |
Quoting text
You can quote text with a >.
Text that is not a quote

> Text that is a quote
Quoted text is indented, with a different type color.

Note: When viewing a conversation, you can automatically quote text in a comment by highlighting the text, then typing R. You can quote an entire comment by clicking , then Quote reply. For more information about keyboard shortcuts, see «Keyboard shortcuts.»
Quoting code
You can call out code or a command within a sentence with single backticks. The text within the backticks will not be formatted. You can also press the Command+E (Mac) or Ctrl+E (Windows/Linux) keyboard shortcut to insert the backticks for a code block within a line of Markdown.
Use `git status` to list all new or modified files that haven't yet been committed.

To format code or text into its own distinct block, use triple backticks.
Some basic Git commands are:
```
git status
git add
git commit
```
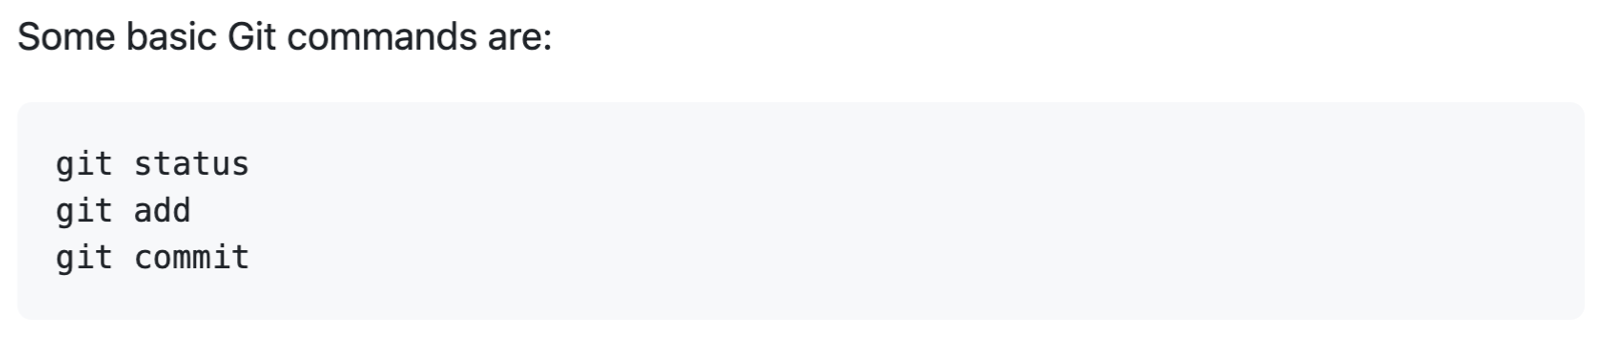
For more information, see «Creating and highlighting code blocks.»
If you are frequently editing code snippets and tables, you may benefit from enabling a fixed-width font in all comment fields on GitHub. For more information, see «About writing and formatting on GitHub.»
Supported color models
In issues, pull requests, and discussions, you can call out colors within a sentence by using backticks. A supported color model within backticks will display a visualization of the color.
The background color is `#ffffff` for light mode and `#000000` for dark mode.

Here are the currently supported color models.
| Color | Syntax | Example | Output |
|---|---|---|---|
| HEX | `#RRGGBB` |
`#0969DA` |
 |
| RGB | `rgb(R,G,B)` |
`rgb(9, 105, 218)` |
 |
| HSL | `hsl(H,S,L)` |
`hsl(212, 92%, 45%)` |
 |
Notes:
- A supported color model cannot have any leading or trailing spaces within the backticks.
- The visualization of the color is only supported in issues, pull requests, and discussions.
Links
You can create an inline link by wrapping link text in brackets [ ], and then wrapping the URL in parentheses ( ). You can also use the keyboard shortcut Command+K to create a link. When you have text selected, you can paste a URL from your clipboard to automatically create a link from the selection.
You can also create a Markdown hyperlink by highlighting the text and using the keyboard shortcut Command+V. If you’d like to replace the text with the link, use the keyboard shortcut Command+Shift+V.
This site was built using [GitHub Pages](https://pages.github.com/).

Note: GitHub automatically creates links when valid URLs are written in a comment. For more information, see «Autolinked references and URLs.»
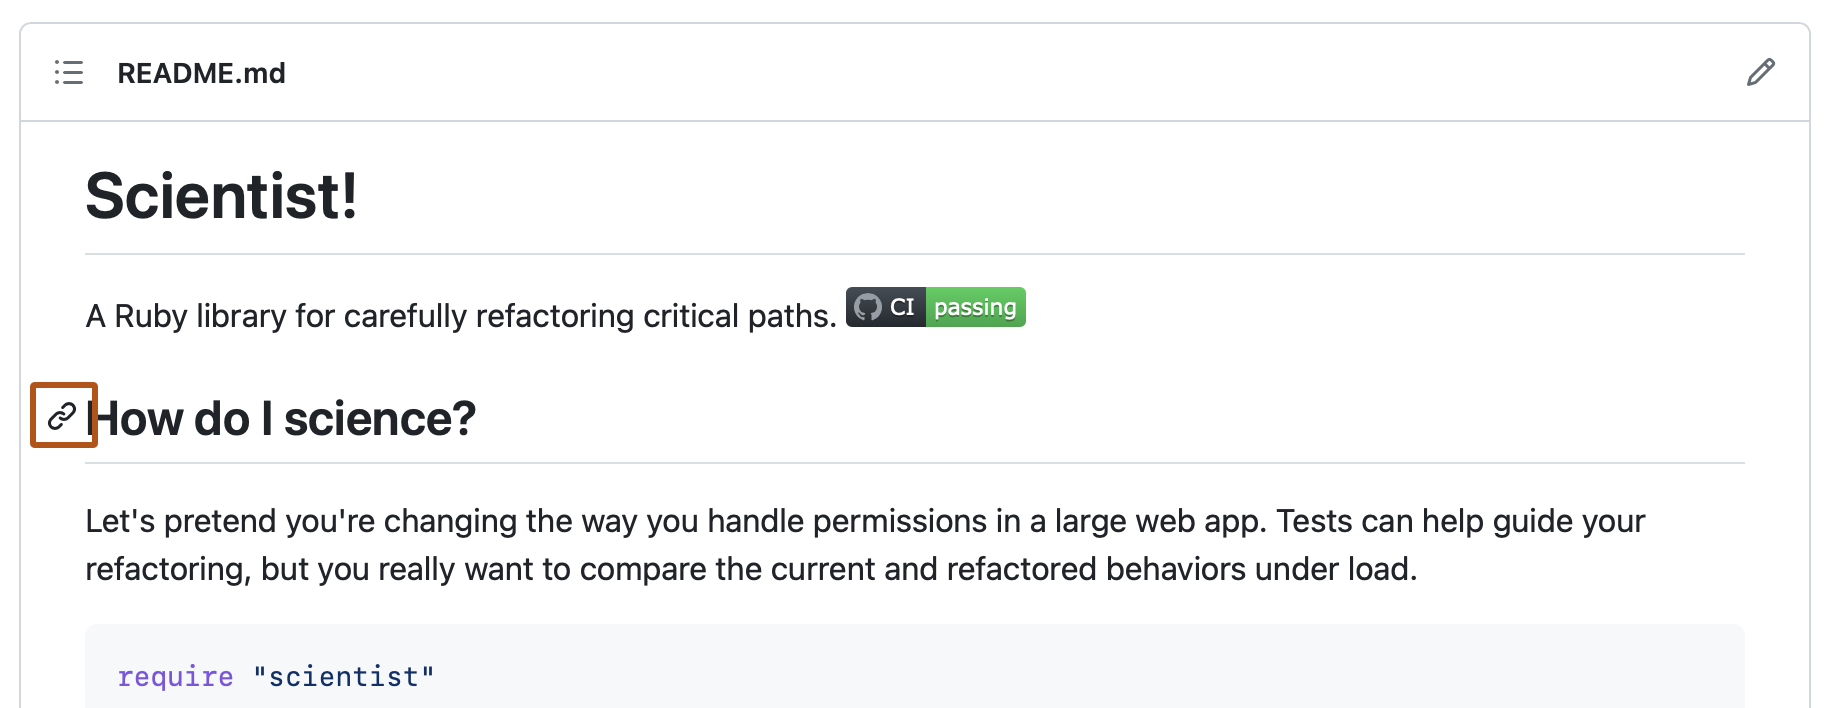
Section links
You can link directly to a section in a rendered file by hovering over the section heading to expose .
Relative links
You can define relative links and image paths in your rendered files to help readers navigate to other files in your repository.
A relative link is a link that is relative to the current file. For example, if you have a README file in root of your repository, and you have another file in docs/CONTRIBUTING.md, the relative link to CONTRIBUTING.md in your README might look like this:
[Contribution guidelines for this project](docs/CONTRIBUTING.md)
GitHub will automatically transform your relative link or image path based on whatever branch you’re currently on, so that the link or path always works. The path of the link will be relative to the current file. Links starting with / will be relative to the repository root. You can use all relative link operands, such as ./ and ../.
Relative links are easier for users who clone your repository. Absolute links may not work in clones of your repository — we recommend using relative links to refer to other files within your repository.
Images
You can display an image by adding ! and wrapping the alt text in [ ]. Alt text is a short text equivalent of the information in the image. Then, wrap the link for the image in parentheses ().

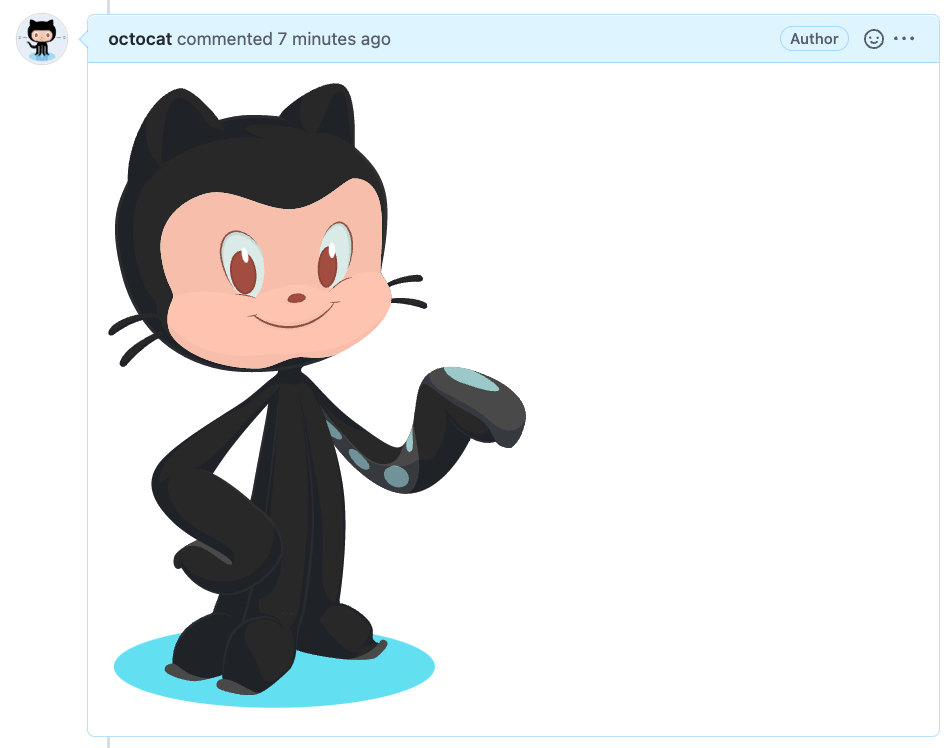
GitHub supports embedding images into your issues, pull requests, discussions, comments and .md files. You can display an image from your repository, add a link to an online image, or upload an image. For more information, see «Uploading assets.»
Note: When you want to display an image that is in your repository, use relative links instead of absolute links.
Here are some examples for using relative links to display an image.
| Context | Relative Link |
|---|---|
In a .md file on the same branch |
/assets/images/electrocat.png |
In a .md file on another branch |
/../main/assets/images/electrocat.png |
| In issues, pull requests and comments of the repository | ../blob/main/assets/images/electrocat.png?raw=true |
In a .md file in another repository |
/../../../../github/docs/blob/main/assets/images/electrocat.png |
| In issues, pull requests and comments of another repository | ../../../github/docs/blob/main/assets/images/electrocat.png?raw=true |
Note: The last two relative links in the table above will work for images in a private repository only if the viewer has at least read access to the private repository that contains these images.
For more information, see «Relative Links.»
Specifying the theme an image is shown to
You can specify the theme an image is displayed for in Markdown by using the HTML <picture> element in combination with the prefers-color-scheme media feature. We distinguish between light and dark color modes, so there are two options available. You can use these options to display images optimized for dark or light backgrounds. This is particularly helpful for transparent PNG images.
For example, the following code displays a sun image for light themes and a moon for dark themes:
<picture>
  <source media="(prefers-color-scheme: dark)" srcset="https://user-images.githubusercontent.com/25423296/163456776-7f95b81a-f1ed-45f7-b7ab-8fa810d529fa.png">
  <source media="(prefers-color-scheme: light)" srcset="https://user-images.githubusercontent.com/25423296/163456779-a8556205-d0a5-45e2-ac17-42d089e3c3f8.png">
  <img alt="Shows an illustrated sun in light mode and a moon with stars in dark mode." src="https://user-images.githubusercontent.com/25423296/163456779-a8556205-d0a5-45e2-ac17-42d089e3c3f8.png">
</picture>
The old method of specifying images based on the theme, by using a fragment appended to the URL (#gh-dark-mode-only or #gh-light-mode-only), is deprecated and will be removed in favor of the new method described above.
Lists
You can make an unordered list by preceding one or more lines of text with -, *, or +.
- George Washington
* John Adams
+ Thomas Jefferson

To order your list, precede each line with a number.
1. James Madison
1. James Monroe
1. John Quincy Adams

Nested Lists
You can create a nested list by indenting one or more list items below another item.
To create a nested list using the web editor on GitHub or a text editor that uses a monospaced font, like Visual Studio Code, you can align your list visually. Type space characters in front of your nested list item until the list marker character (- or *) lies directly below the first character of the text in the item above it.
1. First list item
   - First nested list item
     - Second nested list item
Note: In the web-based editor, you can indent or dedent one or more lines of text by first highlighting the desired lines and then using Tab or Shift+Tab respectively.


To create a nested list in the comment editor on GitHub, which doesn’t use a monospaced font, you can look at the list item immediately above the nested list and count the number of characters that appear before the content of the item. Then type that number of space characters in front of the nested list item.
In this example, you could add a nested list item under the list item 100. First list item by indenting the nested list item a minimum of five spaces, since there are five characters (100 .) before First list item.
100. First list item
     - First nested list item

You can create multiple levels of nested lists using the same method. For example, because the first nested list item has seven characters (␣␣␣␣␣-␣) before the nested list content First nested list item, you would need to indent the second nested list item by at least two more characters (nine spaces minimum).
100. First list item
       - First nested list item
         - Second nested list item

For more examples, see the GitHub Flavored Markdown Spec.
Task lists
To create a task list, preface list items with a hyphen and space followed by [ ]. To mark a task as complete, use [x].
- [x] #739
- [ ] https://github.com/octo-org/octo-repo/issues/740
- [ ] Add delight to the experience when all tasks are complete :tada:

If a task list item description begins with a parenthesis, you’ll need to escape it with \:
- [ ] \(Optional) Open a followup issue
For more information, see «About task lists.»
Mentioning people and teams
You can mention a person or team on GitHub by typing @ plus their username or team name. This will trigger a notification and bring their attention to the conversation. People will also receive a notification if you edit a comment to mention their username or team name. For more information about notifications, see «About notifications.»
Note: A person will only be notified about a mention if the person has read access to the repository and, if the repository is owned by an organization, the person is a member of the organization.
@github/support What do you think about these updates?

When you mention a parent team, members of its child teams also receive notifications, simplifying communication with multiple groups of people. For more information, see «About teams.»
Typing an @ symbol will bring up a list of people or teams on a project. The list filters as you type, so once you find the name of the person or team you are looking for, you can use the arrow keys to select it and press either tab or enter to complete the name. For teams, enter the @organization/team-name and all members of that team will get subscribed to the conversation.
The autocomplete results are restricted to repository collaborators and any other participants on the thread.
Referencing issues and pull requests
You can bring up a list of suggested issues and pull requests within the repository by typing #. Type the issue or pull request number or title to filter the list, and then press either tab or enter to complete the highlighted result.
For more information, see «Autolinked references and URLs.»
Referencing external resources
If custom autolink references are configured for a repository, then references to external resources, like a JIRA issue or Zendesk ticket, convert into shortened links. To know which autolinks are available in your repository, contact someone with admin permissions to the repository. For more information, see «Configuring autolinks to reference external resources.»
Uploading assets
You can upload assets like images by dragging and dropping, selecting from a file browser, or pasting. You can upload assets to issues, pull requests, comments, and .md files in your repository.
Using emoji
You can add emoji to your writing by typing :EMOJICODE:, a colon followed by the name of the emoji.
@octocat :+1: This PR looks great - it's ready to merge! :shipit:

Typing : will bring up a list of suggested emoji. The list will filter as you type, so once you find the emoji you’re looking for, press Tab or Enter to complete the highlighted result.
For a full list of available emoji and codes, see the Emoji-Cheat-Sheet.
Paragraphs
You can create a new paragraph by leaving a blank line between lines of text.
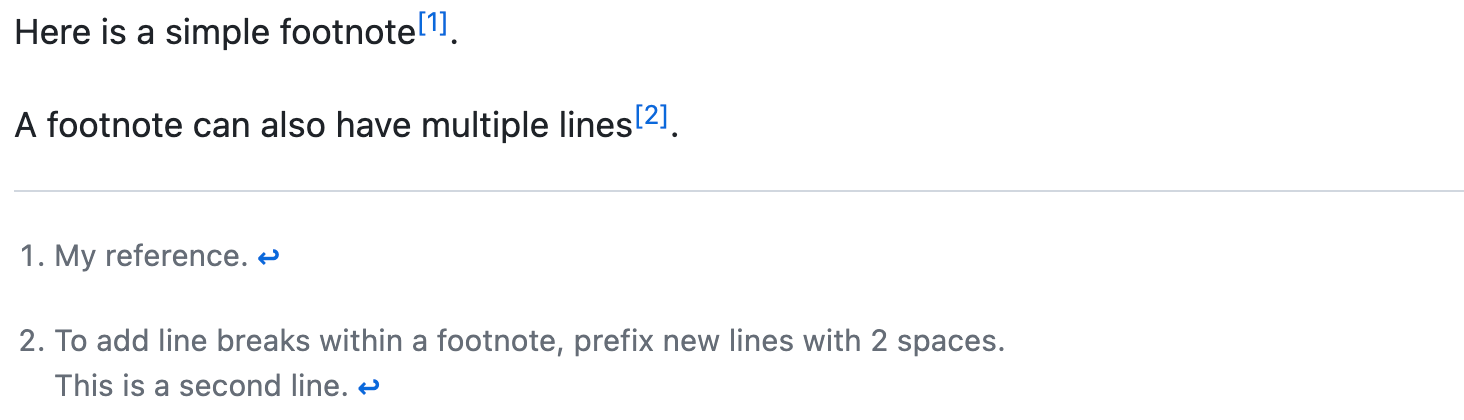
You can add footnotes to your content by using this bracket syntax:
Here is a simple footnote[^1].

A footnote can also have multiple lines[^2].

[^1]: My reference.
[^2]: To add line breaks within a footnote, prefix new lines with 2 spaces.
  This is a second line.
The footnote will render like this:
Note: The position of a footnote in your Markdown does not influence where the footnote will be rendered. You can write a footnote right after your reference to the footnote, and the footnote will still render at the bottom of the Markdown.
Footnotes are not supported in wikis.
Alerts
Alerts are an extension of the blockquote syntax that you can use to emphasize critical information. On GitHub, they are displayed with distinctive colors and icons to indicate the importance of the content. Alert syntax is supported in:
- Issues
- Pull requestes
- Markdown files
- Discussions
- Gists
- Wikis
- Releases
We recommend restricting the use of alerts to one or two per article to avoid overloading the reader. Consecutive alerts should be avoided.
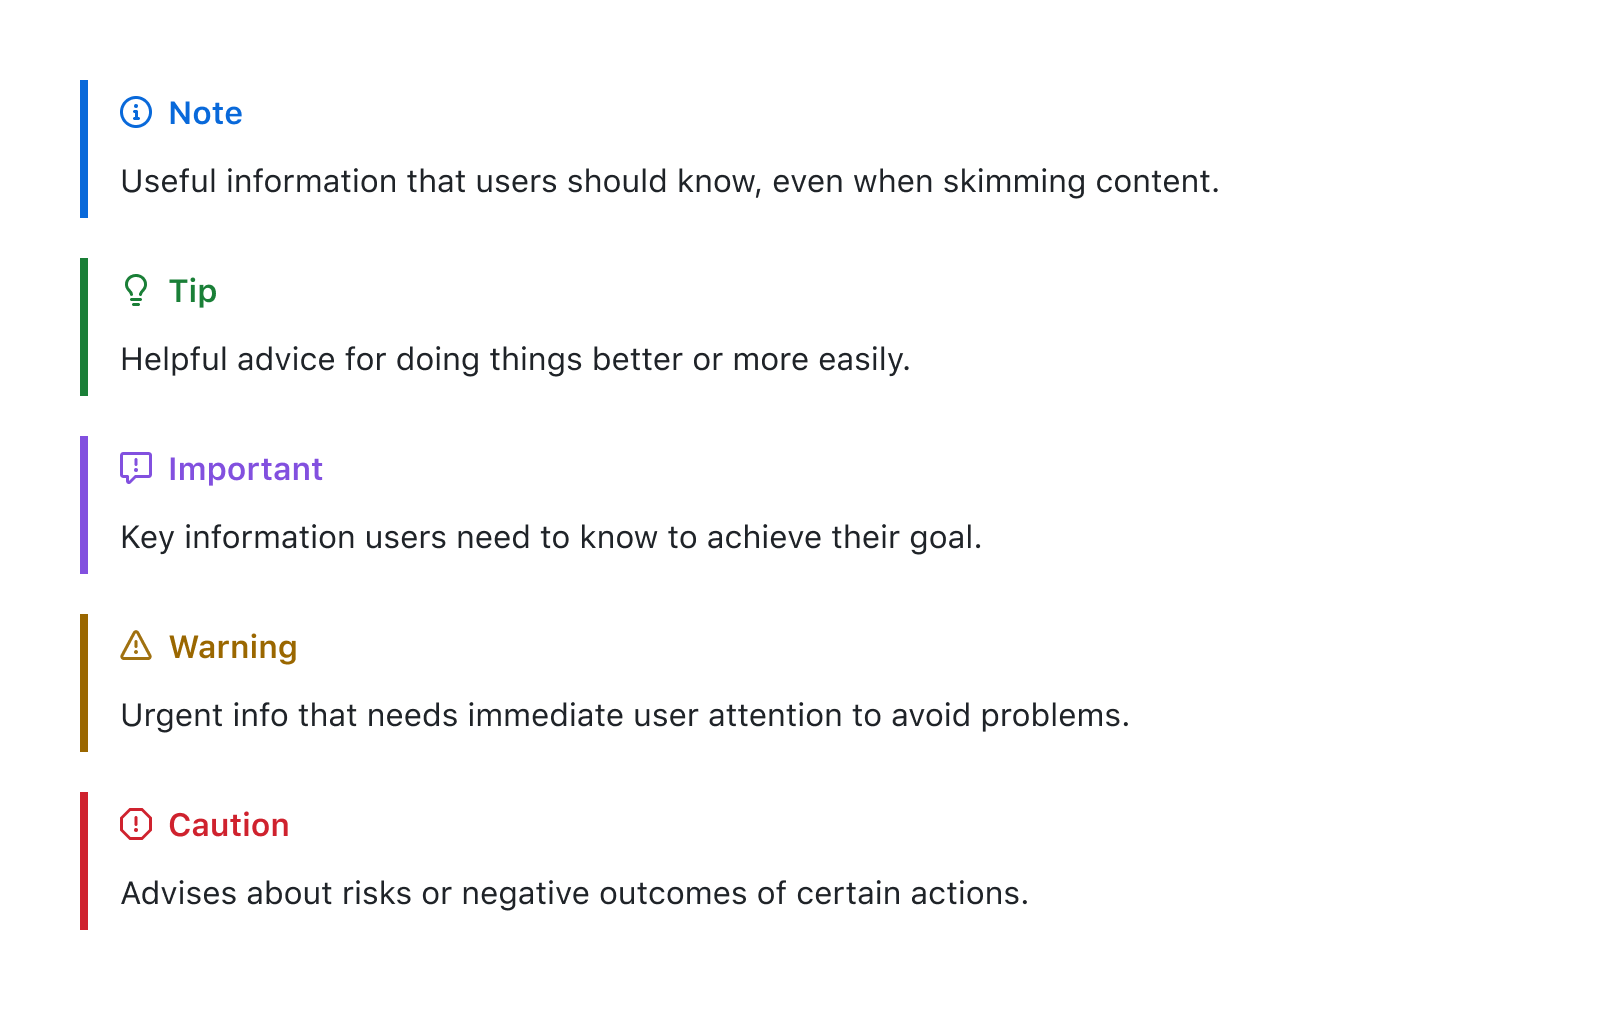
Multiple types of alerts are available. You can add an alert with a special blockquote line that specifies the alert type, and then add the alert information in a standard blockquote immediately after.
> [!NOTE]
> Highlights information that users should take into account, even when skimming.

> [!TIP]
> Optional information to help a user be more successful.

> [!IMPORTANT]
> Crucial information necessary for users to succeed.

> [!WARNING]
> Critical content demanding immediate user attention due to potential risks.

> [!CAUTION]
> Negative potential consequences of an action.
Here are the rendered alerts.
Hiding content with comments
You can tell GitHub to hide content from the rendered Markdown by placing the content in an HTML comment.
<!-- This content will not appear in the rendered Markdown -->
Ignoring Markdown formatting
You can tell GitHub to ignore (or escape) Markdown formatting by using \ before the Markdown character.
Let's rename \*our-new-project\* to \*our-old-project\*.

For more information on backslashes, see Daring Fireball’s «Markdown Syntax.»
Note: The Markdown formatting will not be ignored in the title of an issue or a pull request.
Disabling Markdown rendering
When viewing a Markdown file, you can click Code at the top of the file to disable Markdown rendering and view the file’s source instead.

Disabling Markdown rendering enables you to use source view features, such as line linking, which is not possible when viewing rendered Markdown files.
Further reading
- GitHub Flavored Markdown Spec
- «About writing and formatting on GitHub»
- «Working with advanced formatting»
- «Quickstart for writing on GitHub»
Время на прочтение
7 мин
Количество просмотров 31K
Иногда не только сама документация, но и процесс работы над ней может быть критичным. Например, в случае проектов львиная часть работы связана именно с подготовкой документации, и неправильный процесс может привести к ошибкам и даже к потере информации, а, следовательно, и к потере времени и выгоды. Но даже если эта тема и не является центральной в вашей работе и находится на периферии, то все равно правильный процесс может улучшить качество документа и сэкономить вам время.
Изложенный здесь подход, с примером конкретной реализации, имеет низкий порог вхождения. Технически, уже завтра вы можете начать работать по-новому.
Постановка задачи
Вам нужно создать некий документ или набор документов. Возможно, это проектная документация или протоколирование вашей сети, или что-то более простое, например, вы должны описать процессы в компании или в вашем отделе. В общем, речь идет о любом документе или наборе документов с текстом, картинками, табличками… Усложним задачу тем, что
- данная работа предполагает совместный труд, усилия группы или нескольких групп сотрудников
- на выходе вы хотите иметь документ в определенном формате, с атрибутами корпоративного стиля, созданный по определенному шаблону. Для определенности мы будем считать, что это MS Word (.docx)
10 лет назад подход был бы однозначным: мы бы создали MS Word документ или документы и каким-либо образом организовали бы работу по изменению.
И такой подход по-прежнему в силе. Им пользуются в том числе и крупные интеграторы при создании проектной документации. Но интуитивно понятно, что, если вы действительно интенсивно, со многими правками и обсуждениями, в течении продолжительного времени работаете над документом данный подход не очень удобен.
Пример
Я довольно остро ощутил эту проблему, работая в одном крупном интеграторе. Процесс изменения проектной документации был следующий:
- инженер скачивает последнюю версию MS Word (.docx) документа
- меняет название
- вносит правки в track моде
- отсылает документ с правками архитектору
- так же отсылает перечень всех исправлений с комментариями
- архитектор анализирует изменения
- если все хорошо, то копирует данные изменения в файл с последней версией, меняет версию, выкладывает на общий ресурс
- если есть замечания, то инициируется обсуждение (email или митинги)
- достигается консенсус
- далее пункты 3 — 9
Пока работа не была интенсивной, то это кое-как, но все же работало. Но в определенный момент этот процесс стал узким местом целого проекта и привел к проблемам. Дело в том, что все становится плохо, как только изменения производятся часто и одновременно несколькими командами.
Так, когда мы перешли на стадию предварительного тестирования, то начали проявляться разные проблемки и, хотя и по мелочам, но нужно было часто менять документацию — четыре разные команды, ежедневно, практически одновременно, с обсуждениями. Все эти изменения проходили через одного инженера — архитектора. Файл с дизайном проекта был огромный, и как следствие, архитектор был завален рутинной работой, связанной с большим количеством копирования, редактирования, делал много ошибок, приходилось все перепроверять, перепосылать, и в общем это было близко к хаосу.
В данном случае этот подход, подход работы над документом MS Word, работал с большим скрипом и создавал проблемы.
Git, Markdown
Столкнувшись с проблемой, описанной в примере выше, я стал исследовать этот вопрос.
Я увидел, что все более становится популярным использование Markdown совместно с Git при создании документов.
Git — это инструмент для разработки. Но почему бы его не использовать для процесса документирования? В этом случае вопрос многопользовательской работы становится решенным. Но для того, чтобы в полной мере использовать возможности Git нам нужен текстовый формат документа, нам нужно найти другой инструмент, не MS Word, и для этих целей отлично подходит Markdown.
Markdown — простой язык текстовой разметки. Он предназначен для создания красиво оформленных текстов в обычных файлах формата TXT. Если мы будем создавать наши документы в Markdown, то связка Markdown — Git выглядит естественной.
И все бы хорошо, и в этом месте можно было бы поставить точку, если бы не наше второе условие: «на выходе нам нужен документ в определенном формате, с атрибутами корпоративного стиля, созданный по определенному шаблону» (и мы договорились вначале, что для определенности это будет MS Word). То есть, если мы решили использовать Markdown, то нам нужно как-то преобразовать этот файл в .docx требуемого вида.
Существуют программы конвертации между различными форматами, например, Pandoc.
Вы можете конвертировать Markdown файл в .docx формат с этой программой.
Но все же, надо понимать, что, во-первых, не все, что есть в Markdown будет конвертировано в MS Word и, во-вторых, MS Word — это целая страна по сравнению со стройным, но все же городком, Markdown. Есть огромное количество всего, что есть в Word и ни в каком виде нет в Markdown. Нельзя просто так вот взять и с определенными ключами Pandoc конвертировать ваш Markdown формат в желанный вид MS Word. Так что обычно, после конвертации, приходится «дорабатывать» полученный .docx документ вручную, что опять-таки может быть затратным с точки зрения времени и приводить к ошибкам.
Если бы мы могли написать скрипт, который автоматически «доделывал» бы то, с чем не справился Pandoc — это было бы идеальное решение.
В силу не тождественности функционала MS Word и Markdown в общем виде решить эту задачу, думаю, невозможно, но можно ли это сделать применительно к конкретным ситуациям, конкретным требованиям? Мой опыт показал, что да, можно и скорее всего это возможно для многих, или может быть даже большинства ситуаций.
Решение частной задачи
Так, в моем случае, после конвертации файла с помощью Pandoc, мне приходилось вручную делать дополнительную обработку файлов, а именно
- добавлять в Word поля с автоматической нумерацией заголовков (caption) таблиц и картинок
- менять стиль для таблиц
Я не нашел, как это сделать стандартными (Pandoc) или известными средствами. Поэтому я применил python скрипт с pywin32 пакетом. В результате я получил полную автоматизацию. Теперь я могу конвертировать мой Markdown файл в нужную форму MS Word документа одной командой.
Смотрите детали здесь.
Замечание
В этом примере я, конечно же, преобразую некий абстрактный Markdown файл, но в точности тот же подход был применен к «боевому» документу, и на выходе я получил практически точно тот же MS Word документ, который до этого мы получали ручным форматированием.
В общем, c pywin32 мы получаем практически полный контроль над MS Word документом, что позволяет менять его, и приводить к виду, который требует ваш корпоративный стандарт. Конечно, этих же целей можно было добиться и с использование других инструментов, например, VBA макросов, но мне было удобней использовать python.
Краткая формула данного подхода:
Markdown + Git -- (нечто) --> MS WordНе так важно, чем является «нечто». В моем случае это был Pandoc и python с pywin32. Возможно, у вас другие предпочтения, но важно то, что это возможно. И это и есть главный посыл этой статьи.
Резюмируя, идея в том, что при таком подходе вы работаете только с Markdown файлом и пользуетесь Git для организации совместной работы и для контроля версий, и только при необходимости (например, чтобы предоставить документацию клиенту) автоматически создаете файл нужного формата (например, MS Word).
Процесс
Думаю, для многих формула, приведенная выше достаточна, чтобы понять, как теперь может быть организован процесс работы с документацией. Но все же я обычно ориентируюсь на сетевых инженеров, поэтому в общих чертах покажу, как теперь может выглядеть процесс работы, и чем это отличается от подхода с редактированием MS Word файлов.
Для определенности, в качестве платформы для работы с Git выберем GitHub. Тогда вы должны создать репозиторий и в master ветке поместить Markdown файл или файлы, с которыми планируете работать.
Мы рассмотрим простой процесс, основанный на «github flow». Его описание можно найти, как в интернете, так и на хабре.
Предположим, что над документацией работают четыре человека и вы — один из них. Тогда создаются четыре дополнительные ветки (branch), например, с именами этих людей. Каждый работает локально, в своей ветке и делает изменения со всеми необходимыми git командами.
Выполнив какой-то законченный кусок работы, вы формируете pull request, инициируя таким образом обсуждение ваших изменений. Возможно, в процессе обсуждения, выяснится, что вы должны добавить или изменить что-то еще. В этом случае, вы делаете необходимые изменения и создаете дополнительный pull request. В конце концов, ваши изменения принимаются и сливаются (merge) с master веткой (или отвергаются).
Конечно, это довольно общее описание. Предлагаю для создания детализированного процесса обратиться к вашим разработчикам или найти знающих людей. Но хочу заметить, что порог вхождения в Git довольно низкий. Это не говорит о том, что протокол простой, но вы можете начать с простого. Если вы совсем ничего не знаете, думаю, потратив несколько часов или может быть дней на изучение и установку, вы можете начать им пользоваться.
Какая же польза в данном подходе по сравнению, например, с процессом, описанном в примере выше?
На самом деле процессы довольно схожи, просто вы заменили
копирование файла -> создание ветки (branch)
копирование текста в конечный файл-> слияние (merge)
копирование последних изменений к себе -> git pull/fetch
обсуждение в переписке -> pull requests
track mode -> git diff
последняя утвержденная версия -> master ветка
бэкап (копирование на удаленный сервер) -> git push
…
Таким образом вы автоматизировали все то, что вам и так приходилось делать, но вручную.
На более высоком уровне это позволяет вам
- создать ясный, простой и контролируемый процесс изменений документации
- т.к. конечный документ (в нашем примере MS Word) вы создаете автоматически, то это уменьшает вероятность ошибок, связанных с форматированием
Замечание
В силу сказанного выше, думаю очевидно, что, даже если вы работаете над документацией один, то использование Git может существенно облегчить вашу работу
Все это повышает качество документации и уменьшает время на ее создание. И еще небольшой бонус — вы изучите Git, что поможет вам при автоматизации вашей сети 
Как перейти на новый процесс?
В начале статьи я написал, что уже завтра вы можете начать работать по-новому. Как перевести вашу работу в новое русло?
Вот последовательность шагов, которую вам скорее всего придется выполнить:
- если ваш документ очень большой, разбейте его на части
- конвертируйте каждую часть в Markdown (с помощью Pandoc, например)
- установите один из редакторов Markdown (я пользуюсь Typora)
- скорее всего вам придется подправить форматирование созданных Markdown документов
- начинайте применять процесс, описанный в предыдущей главе
- параллельно начинайте видоизменять скрипт конвертации под свою задачу (или создайте что-то свое)
Вам не обязательно ждать, когда вы создадите и отладите в совершенстве механизм конвертации Markdwon -> требуемый на выходе вид документа. Дело в том, что, даже если вам не удастся быстро полностью автоматизировать процедуру преобразования ваших Markdown файлов, вы все равно сможете это сделать в каком-либо виде с помощью Pandoc и далее довести до конечного вида вручную. Обычно вам не нужно это делать часто, а только в конце определенных этапов, и эта ручная работа, хоть и неудобна, но все же, на мой взгляд, вполне допустима на этапе отладки и не должна сильно «тормозить» процесс.
Все остальное (Markdown, Git, Pandoc, Typora) уже готово и не требует особых усилий или времени для того, чтобы начать работать с ними.
Getting started with writing and formatting on Github
You can use simple features to format your comments and interact with others in issues, pull requests, and wikis on GitHub.
About writing and formatting on Github
GitHub combines a syntax for formatting text called GitHub Flavored Markdown with a few unique writing features.
Markdown is an easy-to-read, easy-to-write syntax for formatting plain text.
We’ve added some custom functionality to create GitHub Flavored Markdown, used to format prose and code across our site.
You can also interact with other users in pull requests, issues, and wikis with features like @mentions, issue and PR references, and emoji.
Text formatting toobar
Every comment field on GitHub contains a text formatting toolbar, allowing you to format your text without learning Markdown syntax. In addition to Markdown formatting like bold and italic styles and creating headers, links, and lists, the toolbar includes GitHub-specific features such as @mentions, task lists, and links to issues and pull requests.

Further reading
- “Basic writing and formatting syntax”
- “Working with advanced formatting”
- “Mastering Markdown”
- “Markdown Tutorial”
Basic writing and formatting syntax
Create sophisticated formatting for your prose and code on GitHub with simple syntax.
Headings
To create a heading, add one to six # symbols before your heading text. The number of # you use will determine the size of the heading.
# The largest heading
## The second largest heading
###### The smallest heading

Styling text
You can indicate emphasis with bold, italic, or strikethrough text.
| Style | Syntax | Keyboard shortcut | Example | Output |
|---|---|---|---|---|
| Bold | ** ** or __ __ |
command/control + b | **This is bold text** |
This is bold text |
| Italic | * * or _ _ |
command/control + i | *This text is italicized* |
This text is italicized |
| Strikethrough | ~~ ~~ |
~~This was mistaken text~~ |
This was mistaken text | |
| Bold and italic | ** ** and _ _ |
**This text is _extremely_ important** |
This text is extremely important |
Quoting text
You can quote text with a >.
In the words of Abraham Lincoln:
> Pardon my French

Quoting code
You can call out code or a command within a sentence with single backticks. The text within the backticks will not be formatted.
Use `git status` to list all new or modified files that haven't yet been committed.

To format code or text into its own distinct block, use triple backticks.
	Some basic Git commands are:
	```
	git status
	git add
	git commit
	```

For more information, see “Creating and highlighting code blocks.”
Links
You can create an inline link by wrapping link text in brackets [ ], and then wrapping the URL in parentheses ( ). You can also use the keyboard shortcut command + k to create a link.
This site was built using [GitHub Pages](https://pages.github.com/).

Lists
You can make a list by preceding one or more lines of text with - or *.
- George Washington
- John Adams
- Thomas Jefferson

To order your list, precede each line with a number.
1. James Madison
2. James Monroe
3. John Quincy Adams
Rendered ordered list
You can create nested lists by indenting lines by two spaces.
1. Make my changes
  1. Fix bug
  2. Improve formatting
    * Make the headings bigger
2. Push my commits to GitHub
3. Open a pull request
  * Describe my changes
  * Mention all the members of my team
    * Ask for feedback

Task lists
You can create task lists by prefacing list items with [ ]. To mark a task as complete, use [x].
Task lists render with checkboxes in all comments and Markdown files. Select or unselect the checkboxes to mark them as complete or incomplete.
- [x] Finish my changes
- [ ] Push my commits to GitHub
- [ ] Open a pull request

You can reorder task lists by clicking to the left of a task’s checkbox, dragging it to a new location, and dropping it. If you have multiple lists within a comment, you can reorder tasks across them. You can’t add or reorder tasks in other comments.

Mentioning users and teams
You can mention a user or team on GitHub by typing @ plus their username or team name to bring their attention to an issue or pull request.
@github/support What do you think about these updates?

Typing an @ symbol will bring up a list of people or teams on a project. The list filters as you type, so once you find the name of the person or team you are looking for, you can use the arrow keys to select it and hit either tab or enter to complete the name. For teams, just enter the @organization/team-name and all members of that team will get subscribed to the issue.
The autocomplete results are restricted to repository collaborators and any other participants on the thread.
Referencing issues and pull requests
You can bring up a list of suggested Issues and Pull Requests within the repository by typing #. Type the issue or PR number or title to filter the list, then hit either tab or enter to complete the highlighted result.
For more information, see “Autolinked references and URLs.”
Using emoji
You can add emoji to your writing by typing :EMOJICODE:.
@octocat :+1: This PR looks great - it's ready to merge! :shipit:

Typing : will bring up a list of suggested emoji. The list will filter as you type, so once you find the emoji you’re looking for, press Tab or Enter to complete the highlighted result.
For a full list of available emoji and codes, check out emoji-cheat-sheet.com.
Paragraphs and line breaks
You can create a new paragraph by leaving a blank line between lines of text.
Ignoring Markdown formatting
You can tell GitHub to ignore (or escape) Markdown formatting by using \ before the Markdown character.
Let's rename \*our-new-project\* to \*our-old-project\*.

Further reading
- “About writing and formatting on GitHub”
- “Working with advanced formatting”
- “Mastering Markdown”
- “Markdown Tutorial”
Working with advanced formatting
Formatting like tables, syntax highlighting, and automatic linking allows you to arrange complex information clearly in your pull requests, issues, and comments.
Organizing information with tables
You can build tables to organize information in comments, issues, pull requests, and wikis.
Creating a table
You can create tables with pipes | and hyphens -. Hyphens are used to create each column’s header, while pipes separate each column.
| First Header  | Second Header |
| ------------- | ------------- |
| Content Cell  | Content Cell  |
| Content Cell  | Content Cell  |

The pipes on either end of the table are optional.
Cells can vary in width and do not need to be perfectly aligned within columns. There must be at least three hyphens in each column of the header row.
| Command | Description |
| --- | --- |
| git status | List all new or modified files |
| git diff | Show file differences that haven't been staged |

Formatting content within your table
You can use formatting such as links, inline code blocks, and text styling within your table:
| Command | Description |
| --- | --- |
| `git status` | List all *new or modified* files |
| `git diff` | Show file differences that **haven't been** staged |

You can align text to the left, right, or center of a column by including colons : to the left, right, or on both sides of the hyphens within the header row.
| Left-aligned | Center-aligned | Right-aligned |
| :---         |     :---:      |          ---: |
| git status   | git status     | git status    |
| git diff     | git diff       | git diff      |

To include a pipe | as content within your cell, use a \ before the pipe:
| Name     | Character |
| ---      | ---       |
| Backtick | `         |
| Pipe     | \|        |

Further reading
- “Basic writing and formatting syntax”
Creating and highlighting code blocks
Share samples of code with fenced code blocks and enabling syntax highlighting.
Fenced code blocks
You can create fenced code blocks by placing triple backticks «« before and after the code block. We recommend placing a blank line before and after code blocks to make the raw formatting easier to read.
	```
	function test() {
	  console.log("notice the blank line before this function?");
	}
	```

Syntax highlighting
You can add an optional language identifier to enable syntax highlighting in your fenced code block.
For example, to syntax highlight Ruby code:
	```ruby
	require 'redcarpet'
	markdown = Redcarpet.new("Hello World!")
	puts markdown.to_html
	```

We use Linguist to perform language detection and syntax highlighting. You can find out which keywords are valid in the languages YAML file.
Further reading
- “Basic writing and formatting syntax”
Autolinked references URLs
References to URLs, issues, pull requests, and commits are automatically shortened and converted into links.
URLs
GitHub automatically creates links from standard URLs.
For more information on creating links, see “Basic writing and formatting syntax.”
Issues and pull requests
Within repositories, references to issues and pull requests are automatically converted to shortened links to the issue or pull request.
| Reference type | Raw reference | Short link | |
|---|---|---|---|
| Issue or pull request URL | https://github.com/jlord/sheetsee.js/issues/26 | #26 | |
#and issue or pull request number |
#26 | #26 | |
GH-and issue or pull request number |
#26 | #26 | |
Username#and issue or pull request number |
jlord#26 | jlord#26 | |
Username/Repositoryand issue or pull request number |
jlord/sheetsee.js#26 | jlord/sheetsee.js#26 |
Commit SHAs
References to a commit’s SHA hash are automatically converted into shortened links to the commit on GitHub.
To save time and make sure you’re delivering a consistent message, you can add saved replies to issue and pull request comments.
Once you’ve added a saved reply, it can be used in both issues and pull requests. Saved replies are tied to your user account. Once they’re created, you’ll be able to use them across repositories and organizations.
Creating a saved reply
If you frequently add the same comment over and over, you can create a saved reply.
Changing a saved reply
If you have a saved reply that has an error or isn’t saying exactly what you’d like, you can make it more useful by changing it.
Deleting a saved reply
If you find that you’re no longer using a saved reply, you can delete it.
When commenting on an issue or pull request, you can add a saved reply that you’ve already set up. The saved reply can be the entire comment or if you want to customize it, you can add or delete content.
View the original page: https://help.github.com/categories/writing-on-github/
GitHub repositories usually contain a README.md file which contains information that is commonly required to understand what the project is about. Here the “.md” extension stands for ” Markdown.”
Markdown is a way to style text on the web. You control the display of the document; formatting words as bold or italic, adding images, and creating lists are just a few of the things you can do with Markdown.
README.md is the landing page of your code. A well structured and beautiful README is very important, especially for opensource projects. This is the first thing that visitors will see when they discover your project.
This article is a small and handy Cheat sheet for your next Markdown, use it as a reference while creating your next README file.
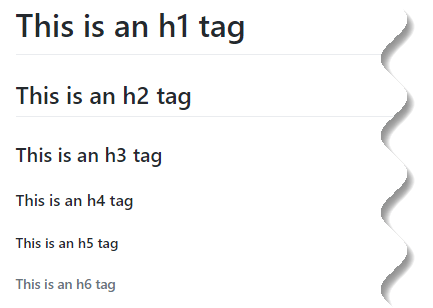
To create a heading, add one to six “#” symbols before your heading text. The number of “#” you use will determine the size of the heading.
# This is an h1 tag
## This is an h2 tag
### This is an h3 tag
#### This is an h4 tag
##### This is an h5 tag
###### This is an h6 tag
Output
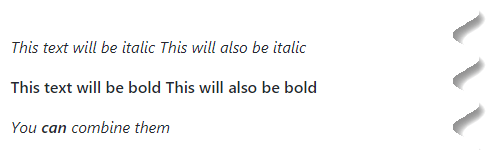
Emphasis
*This text will be italic*
_This will also be italic_

**This text will be bold**
__This will also be bold__

_You **can** combine them_
Output
Also Read: How to add color to Github’s README.md file
Links
You can create an inline link by wrapping link text in brackets “[ ]”, and then wrapping the URL in parentheses “( )”.
https://hello-sunil.in - It's me :)
[Hello Sunil](https://hello-sunil.in)
Output

Blockquotes
You can quote text with a “>” symbol.
As William James said:

> The greatest discovery of my generation is that
> human beings can alter their lives by altering
> their attitudes of mind.
Output

For nested blockquotes you need to add “>>” before your quote.
> Success is a state of mind. If you want sucess, start thinking of yourself as a success.
>> -DR. Joyce Brothers

Inline code
I think you should use an
`<addr>` element here instead.
Output
![]()
Images

Here my certification is “alt” tag and “/img/my-certification.png” is your image path.
Output

Note: If you want to showcase your code screenshots in README file then you should use Carbon.
Carbon is a very popular open source project that allows you to easily create aesthetically pleasing code screenshots, along with a plethora of customization options and community plugins.
Here is one example screenshot for you:
But have you ever thought, how can you center an image in a README.md file. Here is one example for you:

You can achieve this by using following Markdown:
<p align="center">
  <img width="500" height="208" src="https://github.com/Sunil-Pradhan/git-cheat-sheet/blob/master/img/Git-Cheat-Sheet-Logo.png">
</p>
Note: Do not forget to add width and height of the image.
For more image alignment tricks you can read – Guide to aligning images in GitHub README.md files.
Backslash escapes
GitHub allows you to use backslash escapes to generate literal characters which
would otherwise have special meaning in Markdown’s formatting syntax.
\\This is an example of backslash\\

\*This is an example of asterisk\*

\`This is an example of backtick\`

\_This is an example of underscore\_

\{This is an example of curly braces\}

\[This is an example of square brackets\]

\(This is an example of parentheses\)

\#This is an example of hash mark\#

\+This is an example of plus sign\+

\-This is an example of minus sign (hyphen)\-

\.This is an example of dot\.

\!This is an example of exclamation mark\!
Output

GitHub also uses its own version of the Markdown syntax known as “GitHub Flavored Markdown (GFM)“. It provides an additional set of useful
features which make it easier to work with content on GitHub.
Fenced code blocks
GitHub Flavored Markdown (GFM) can wrap your code with triple back-tick symbol to create a code block without the leading spaces.
```
Sample code goes here...
```
Output

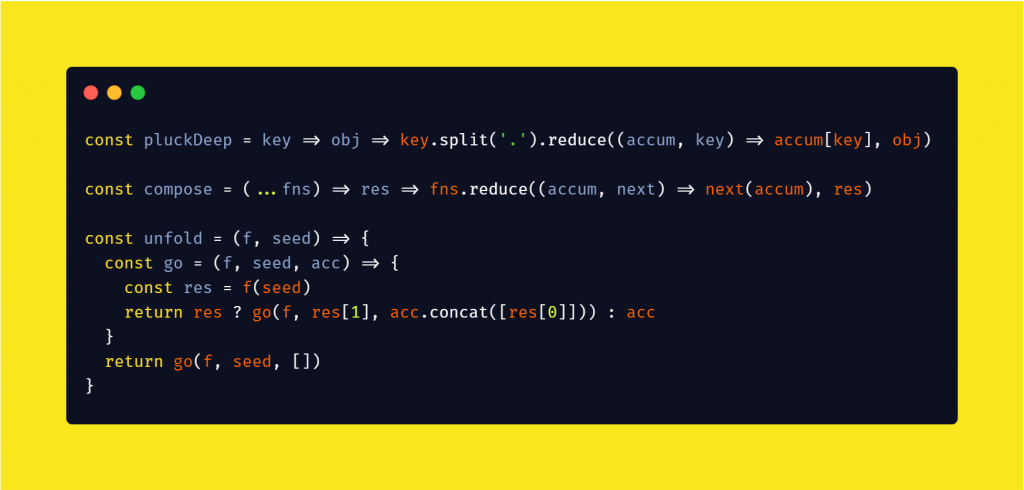
Add an optional language identifier and your code will get syntax highlighting.
```javascript
hello = () => {
  return "Hello Sunil!";
}
```
Output

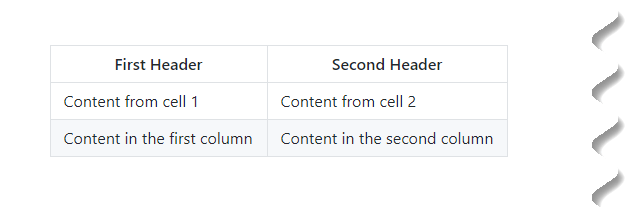
Tables
You can create tables by assembling a list of words and dividing them with hyphens (-) (for the first row), and then separating each column with a pipe (|):
First Header | Second Header
------------ | -------------
Content from cell 1 | Content from cell 2
Content in the first column | Content in the second column
Output
Automatic linking for URLs
Any URL (like https://hello-sunil.in/ ) will be automatically converted into a clickable link.
Kindly visit our site: https://hello-sunil.in/
Output

Strikethrough
Any word wrapped with two tildes (like ~~this~~) will appear crossed out.
React is better than ~~AngularJS~~
Output

Emoji
GitHub also supports Emoji, which you can use on your README file.
Output

To see the complete list of Emoji supported by GitHub, check out this link.
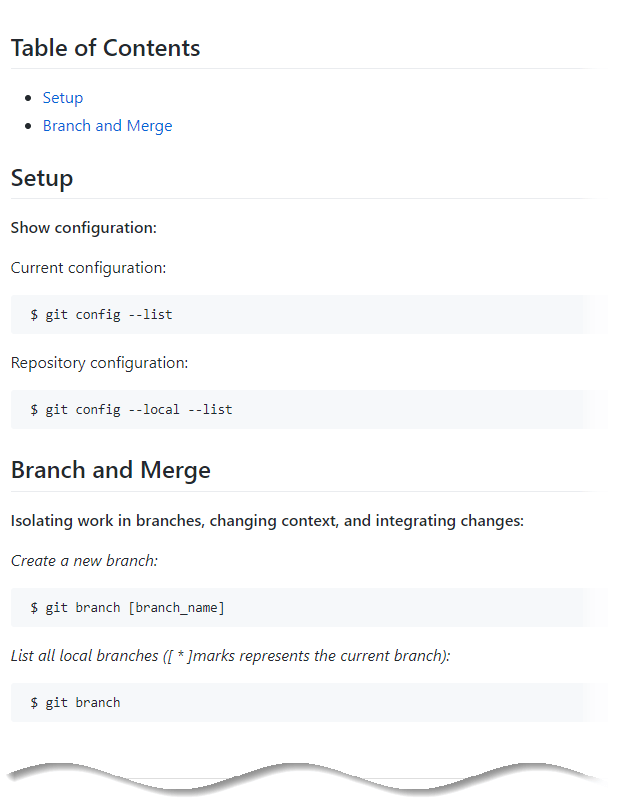
Table of contents
Table of contents comes in handy in case of extensive documentation for your project. It can work as a simple list with the links to the headings.
GitHub automatically adds “id” to headings according to the content inside a tag (spaces will become a sign “-“). Therefore, the links are constructed this way: https://github.com/user/repo-name#header-name.
It enables to create a simple table of contents, example.:
## Table of Contents
* [Setup](#setup)
* [Branch and Merge](#Branch-merge)

<a name="setup"></a>
## Setup

**Show configuration:**

Current configuration:

```
$ git config --list
```

Repository configuration:

```
$ git config --local --list
```

<a name="Branch-merge"></a>
## Branch and Merge

**Isolating work in branches, changing context, and integrating changes:**

*Create a new branch:*

```
$ git branch [branch_name]
```

*List all local branches ([ * ]marks represents the current branch):*

```
$ git branch
```
Output
Task lists
You can use task lists to create a list of items with checkboxes within Markdown files in your repository.
Task lists render as read-only checkboxes in Markdown files. People with write permissions in the repository can edit the file to select or unselect the checkboxes.
To create a task list, preface list items with a regular space character followed by [ ]. To mark a task as complete, use [x].
- [ ] An uncompleted task
- [x] A completed task

- [ ] An uncompleted task
  - [ ] A subtask

- [ ] \(Optional) Open a followup issue
Output
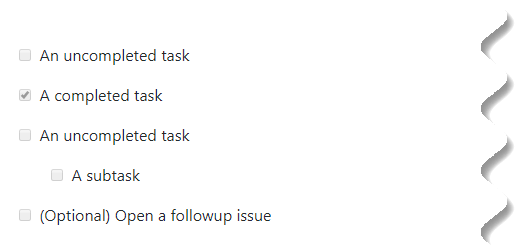
But remember, if a task list item description begins with a parenthesis, you will need to escape it with \.
Horizontal line
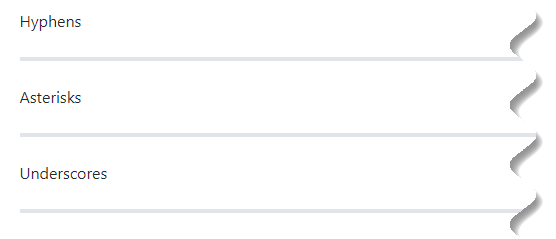
You can create a horizontal rule by placing three or more hyphens, asterisks, or underscores on a single line by themselves.
Hyphens

-----

Asterisks

*****

Underscores

_____
Output
Collapsible section
You can create collapsible section on your Markdown by using following method:
<details>
  <summary>Click to expand!</summary>

  #### Hey! I am collapsible section.

  Here is some more text that was hidden before.
</details>
Output
How to use keyboard icon in Markdown
Sometime while documenting your Markdown you need to use keyboard key combination. One small example would be:
![]()
You can achieve this by wrapping it with <kbd> tag. kbd is the abbreviation for keyboard.
To send the email: <kbd>CTRL</kbd> + <kbd>D</kbd>
Here are the few other hotkeys from your keyboard which you might need to use on your Markdown.
| Key | Symbol |
|---|---|
| Option | ⌥ |
| Control | ⌃ |
| Command | ⌘ |
| Shift | ⇧ |
| Caps Lock | ⇪ |
| Tab | ⇥ |
| Esc | ⎋ |
| Power | ⌽ |
| Return | ↩ |
| Delete | ⌫ |
| Up | ↑ |
| Down | ↓ |
| Left | ← |
| Right | → |
How to embed a YouTube video in GitHub Markdown
It’s not possible to embed YouTube video directly in your Markdown, but you can put an image which links to a YouTube video.
[](http://www.youtube.com/watch?v=YOUTUBE_VIDEO_ID_HERE)
Output

Remember you need to replace “YOUTUBE_VIDEO_ID_HERE” by the actual YouTube video id. Here is one example for you.
[](http://www.youtube.com/watch?v=GksehGJccqQ)
Output
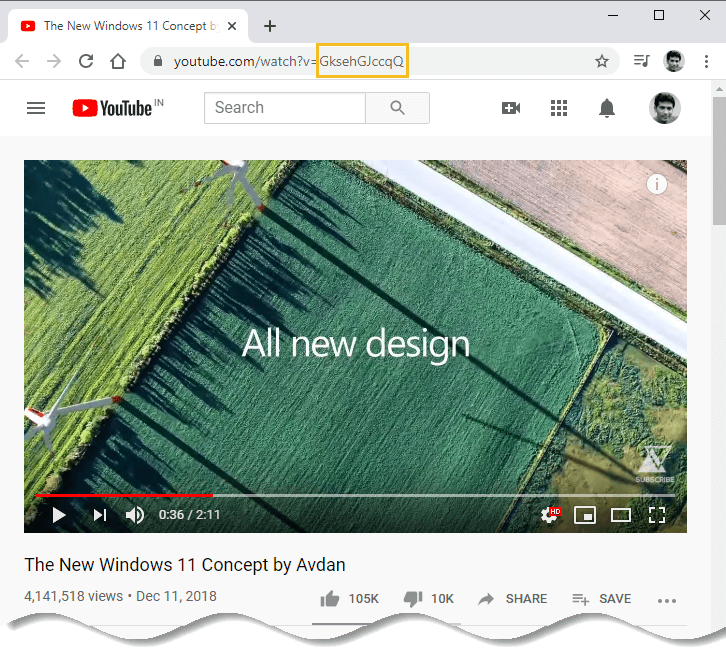
This image will be clickable, which leads you to the YouTube site. This is still not embedding a video but that’s a bit nicer and a much better incentive to click to watch the video.
For more customization you can read an article from Stackoverflow.
How to add animated GIFs to your GitHub README
Images and videos capture our attention more than static code on GitHub. Clearly it is a great tool for version control and collaborating on project. By adding animated GIFs in a README file can potentially increase visibility of your project on GitHub.
Here is one example project from GitHub which uses animated GIFs in its README file to demonstrate project usability: Farmers Market Finder
Unfortunately, animated GIFs can’t normally be as long as videos, but you can use them to quickly show off some core functionality of your project.
How to create an animated GIF?
Here are couple of apps you can use to create animated GIF screen recordings.
Windows:
- ScreenToGif
- Snagit (Screen capture, video and GIFs recording)
Mac:
- Kap
- Gifox
- Gifski
- GIPHY Capture
- Snagit (Screen capture, video and GIFs recording)
- Asciinema (Record your terminal sessions)
Linux:
- Asciinema (Record your terminal sessions)
Adding the animated GIF to your README
Once you have created the animated GIF, you can embed it in your README.md file like you would a regular image.
Create a directory in your GitHub repository and named is anything like “img or images” and upload the GIF there, then link to it in the README.

Remember, the alt text is what goes between the square brackets and then the URL to the GIF goes between the parentheses.
If the image is in your GitHub repository, you can also use a relative link:

Output
For more customization you can read an article from Stackoverflow.
But we all knows, GIFs are a horribly inefficient, lossy format in comparison to SVG.
There are some very popular open source projects on GitHub that have started using more efficient animated SVG for their demos, such as create-react-app.
Animated SVG has advantage of sharper and smaller file size output in comparison to GIF. So, lets learn how you can enhance your README with animated SVG.
How to enhance GitHub README with animated SVG
Here are couple of apps you can use to create animated SVG screen recordings.
Mac:
- Termtosvg (Record your terminal sessions)
- Asciinema (Record your terminal sessions)
Linux:
- Asciinema (Record your terminal sessions)
- Termtosvg (Record your terminal sessions)
How to create animated SVG by using Asciinema tool
For this demonstration we are going to use Ubuntu Linux. To create animated SVG from terminal follow these steps:
Step 1: Installing “asciinema” is super simple and it is available for almost all Linux distributions, to install on Ubuntu type the following command one after the other in terminal:
sudo apt-add-repository ppa:zanchey/asciinema
sudo apt-get update
sudo apt-get install asciinema

Step 2: Once installed, you can initiate recording by typing the following command in terminal:
The “rec” command will start recording your terminal session after which you will have an option to either discard your recording or upload it on asciinema.org website for a future reference.
Once you run the above command, you will be notified that your asciinema recording session has started, and that the recording can be stopped by entering “CTRL+D” key sequence or execution of “exit” command.
Now, asciinema will start to record the terminal activities and save them in a file called “demo” in the current working directory.

You can play the recorded terminal session with the following command:
Replace “demo” with your filename.
Another extremely useful asciinema feature is time trimming. If you happen to be a slow writer or perhaps you are doing multitasking, the time between entering and execution of your commands can stretch greatly.
Asciinema records your keystrokes real-time, meaning every pause you make will reflect on the length of your resulting video. Use “-w” option to shorten the time between your keystrokes.
For example, the following Linux command trims the time between your keystrokes to 0.2 seconds:
Now that you know how to record your Linux terminal, let’s throw some SVG into the mix.
Step 3: We are now moving onto svg-term-cli, which is a simple script for converting asciinema made recordings into fully animated SVG. But this script has two dependencies and they are Node.js and npm.
First install Node.js by using the following command in your terminal:
sudo apt-get install nodejs

Step 4: Then install npm by following command:

Step 5: Now install svg-term-cli, by using the following command:
sudo npm install -g svg-term-cli

Step 6: Now start recording of your terminal by using following command:
This command give the instruction to asciinema, start recording after 5 seconds and once user hit “CTRL +D” on keyboard then save it in “demo.json” file name.

Step 7: You can store the recording locally as an SVG file by typing the following command:
cat path-to-your-cast-file | svg-term --out demo.svg --window

Step 8: Now you can embed the animated SVG file in your README by using the following Markdown:
<p align="center">
  <img src="https://github.com/Sunil-Pradhan/demogist/blob/master/img/demo.svg?sanitize=true" width="572" alt="newsletter cli demo">
</p>
Output
How to add badges in a GitHub repository
Adding badges to the README file of GitHub repositories is a common task for almost every new GitHub repository. These badges help in increasing the readability of the README file because they provide some metrics about the GitHub repositories.
The badges that can be added to the repositories cover several topics and areas starting from the licence of the project to the open issues count for the project.
But how many times have you wondered how it works? And how to do it? Then, here are the step by step instructions to enhance the quality of the README file for your GitHub repositories by adding badges.
Step 1: Go to shields.io, which is a popular site to host concise, consistent, and legible badges in SVG and raster format.

Let’s create a custom badge for a GitHub repository by using the following link.
Now you will be brought down the page to a tool that lets you create your own badges. This is quite helpful if you want to make a static badge that either relies on human input or just does not change.

Step 2: Entering a value in “subject” will provide the text for the left, “status” the value for the right and “color” the color of the right part of the badge.
For example if you want to create a badge that says “Made with” and then “Bootstrap” with an orange background, you will mention as follows:
Now click on “Make Badge” button which will generate for you a custom badge which says – “Made with – Bootstrap”.

Step 3: Now enter the following Markdown in your README file.
<img src="https://img.shields.io/badge/Made%20with-Bootstrap-orange" alt="Made with Bootstrap">
Remember, you need to change “src” of your custom badge with “alt” attribute.
Output

But we know Bootstrap’s brand color is purple not orange. You can fix this by using hex color code in your Markdown as follows:
<img src="https://img.shields.io/badge/Made%20with-Bootstrap-7952B3" alt="Made with Bootstrap">

There are other badges also present according to your project needs so that we have compiled few more resources for you to try later:
- Code repository badges
- Markdown License badges
- List of badges, in Markdown
- Creating your own static badges
- Open Source & Licences Badges
- Add badges to a GitHub repository
- Earn a build passing badge on GitHub
- How to use GitHub badges to stop feeling like a noob
Also Read: 5 Must have badges to add in your README
How to display GitHub contributors in README
Sometimes you start a project alone but gradually its popularity grows enormously among users. You also start to attract other open source developer who are interested to join and start contributing in your project.
But how do you recognize those contributions? It’s easy!! just show their profile photo as contributors.
Follow these quick steps to generate contributors profile photos for your README file:
Step 1: Go to contributors-img.
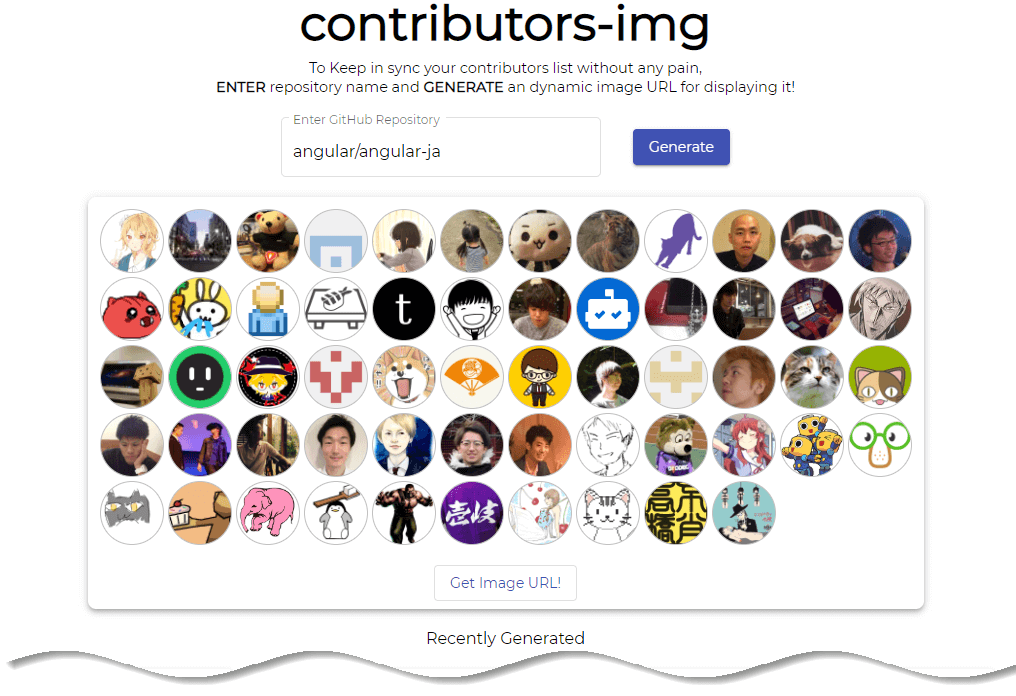
Step 2: Enter “GitHub username/repository name” as illustrated for “create-react-app” from Facebook. Then click on “Generate” button.

Step 3: Click “Get Image URL” to generate link for your README.

Step 4: Now copy the link and use it in your README file.
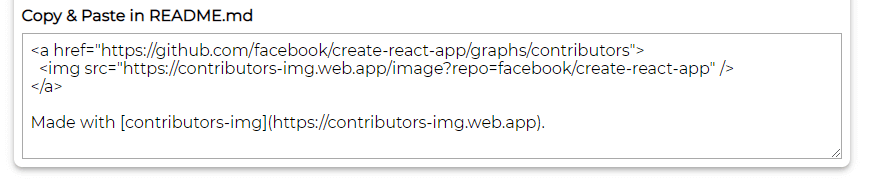
Once you paste the generated image’s URL in README.md, it will keep contributors list in sync without any effort.
There are few other solutions also available which you can try:
- Generate contributors profile image by Open Collective
- Generate contributors profile image by All contributors
Note: If you are using All Contributors to acknowledge contributions, you can use their emoji key to denote different contributions types.
How to Markdown using Visual Studio Code
GitHub website has a built-in simple editor for README.md file to edit but it has a few limitations and they are:
- If you accidentally refresh the page, you lose your changes
- You have to switch between the editor and the the preview every time you want to see the result.
You might ask then, what code editor can handle Markdown from the get-go? Well, the most practical one is obvious: Visual Studio Code!
By default, Visual Studio Code (VS Code) has been equipped to compile Markdown. So here is a quick step by step guide of creating Markdown file using VS Code.
Step 1: Open VS Code and go to “File” -> “Open Folder”.

Select a folder that you wish to store the Markdown file into.
Step 2: Create a new file using .md extension.

Step 3: Now start writing your Markdown in VS Code. Let suppose, you want to write one heading and few paragraph with bullet list of items, then your Markdown would be:
# India

India (Hindi: Bhārat), officially the Republic of India (Hindi: Bhārat Gaṇarājya),is a country in South Asia. It is the seventh-largest country by area, the second-most populous country, and the most populous democracy in the world. Bounded by the Indian Ocean on the south, the Arabian Sea on the southwest, and the Bay of Bengal on the southeast, it shares land borders with Pakistan to the west; China, Nepal, and Bhutan to the north; and Bangladesh and Myanmar to the east. In the Indian Ocean, India is in the vicinity of Sri Lanka and the Maldives; its Andaman and Nicobar Islands share a maritime border with Thailand and Indonesia.

## Contents

* History
* Geography
* Politics and government
  * Politics
  * Administrative divisions
Step 4: You can preview your Markdown by clicking on “Open preview to the side” magnifier button.

Step 5: Voila! You can now write in Markdown and see the results in real-time, all within VS code.

To get even more power from Markdown editing in VS code, you can also try these cool extensions:
- Markdownlint
- Markdown PDF
- Markdown TOC
- Markdown Image
- Markdown Emoji
- Markdown+Math
- Markdown Shortcuts
- Markdown All in One
- Markdown Extended
- Markdown Checkboxes
- Markdown Preview Enhanced
There are also few online editor available where you can edit your Markdown file and see real time preview. Here are few examples:
- Dillinger
- Stackedit
How to write a good README for your GitHub project
Arguably the single most important piece of documentation for any open source project is the README. A good README not only informs people what the project does and who it is for but also how they use and contribute to it.
A good README tells you everything you need to know to use the project and get involved. A project with nice README and screenshots will get the attention of users better since it’s a direct way to explain why this project matters, and why people should use and contribute to the project.
Here is what you should consider including to your README for maximum impact.
Name: Don’t forget to give your project a name.
An introduction or summary: Write a short two or three line introduction explaining what your project does and who it is for. Also leave out headings like ‘Introduction’, ‘Summary’ or ‘Overview’.
Prerequisites: Immediately after your introduction add a section titled listing any prerequisite knowledge or tools anyone who wants to use the project might need before they begin.
How to install: Provide installation steps and make sure to break the installation down into numbered steps if it requires multiple steps.
How to use: Add steps for how to use the project once the user has installed it. Make sure to include usage examples and a reference explaining command options or flags if you think they will be helpful. If you have more advanced documentation in a separate file or site, link to this from here.
How to contribute: Provide steps for contributing to the project. Alternatively you might want to create a contributor’s guide in a separate file and link to this from your README if you want people to read it before contributing pull requests to your project.
Add contributors: Credit any contributors who have helped with the project in an author section. It’s a nice way to make open source feel like a team effort and acknowledges everyone who has taken the time to contribute.
Add acknowledgements: Similarly, if you have used anyone else’s work (code, designs, images etc) that has a copyright that requires acknowledgement, you might want to add that here. You can also acknowledge any other developers or institutions who helped with the project.
Contact information: You might not want to do this because you are extremely private person but if someone has questions, wants to collaborate with you or is impressed enough with your project to offer you a job opportunity, it makes sense to have your contact details front and centre.
Add licence information: You definitely want to include licence information if applicable. Startups and other companies who rely on third-party software are unlikely to be able to use your project unless you provide this. Check out Choose a License or Opensource.org for a list of licences you may be able to use.
Resources
If you want more advice on READMEs, we would also recommend these resources:
- How to Write an Awesome GitHub README
- Add this to your project’s README for maximum impact
README template
Take a look at these amazing template for your next README file which will get you up and running in no time.
- README template by Malgorzata Rita
- README template by Billie Thompson
- README template by Kira Oakley
Some inspiring project on GitHub and their README documentation
We have given some guideline how you can make your README awesome as well as few templates. But it is not enough, sometime we need Inspiration which helps us to document our project right way to target specific audiences. So here are few projects from GitHub which has an awesome README documentation.
- Awesome README
- Bootstrap Icons
- Pomolectron
- Node.JS Chat
- GitPoint
- WebApp
- Gatsby
Conclusion
In the end, you don’t need to reinvent the wheel. Use templates. Follow the guidelines above. Engage your community and be awesome towards your fellow developers! That’s what it’s all about. Helping each other create amazing software to benefit humanity.
On top of mastering Markdown formatting you will also demonstrate your ability to go beyond coding and document your work which is also a desirable skill in software industry.
Do you add anything else to your project documentation or any other tricks you use while documenting your README? Share it in a comment below!
26 октября, 2019 12:22 пп
1 907 views
| Комментариев нет
Cloud Server, Linux
Контроль версий полезен не только в разработке кода – с его помощью вы сможете отслеживать версии любого контента. Например, с помощью Git вы можете управлять своими текстовыми работами: это дает возможность просматривать несколько черновиков одновременно, оценивать различия между ними и даже откатываться к предыдущей версии. При необходимости вы можете поделиться своей работой с другими пользователями на GitHub или в других репозиториях Git.
В этом мануале мы покажем, как использовать Git для управления небольшим документом Markdown. Вы научитесь сохранять исходные версии, отправлять коммиты, вносить изменения, просматривать разницу между версиями и возвращаться к предыдущей версии. Такой рабочий процесс вы сможете применить к своим проектам.
Требования
Базовая установка Git на локальном компьютере. Мануал Разработка проектов с открытым исходным кодом: начало работы с Git поможет вам установить Git и предоставит дополнительную информацию.
1: Создание рабочего пространства для проекта
Чтобы управлять изменениями в тексте, нужно создать локальный репозиторий Git. Git-репозиторий должен находиться внутри существующего каталога, поэтому сначала мы создадим отдельный каталог для вашего текста (предположим, вы пишете статью):
mkdir article
Перейдите в каталог article:
cd article
С помощью команды git init создайте в текущем каталоге новый пустой репозиторий Git:
git init
Вы увидите такой вывод, если все пройдет успешно:
Initialized empty Git repository in /Users/8host/article/.git/
Файл .gitignore позволяет задать файлы, которые Git следует игнорировать. Вы можете использовать этот файл, чтобы игнорировать временные файлы, которые создает текстовый редактор, или файлы операционной системы. Например, в macOS приложение Finder создает в каталогах файлы .DS_Store. Создайте файл .gitignore, который будет их игнорировать:
nano .gitignore
Добавьте следующие строки в этот файл:
# Ignore Finder files

.DS_store
Первая строка – это комментарий, который в будущем поможет вам определить, какие файлы нужно игнорировать. Вторая строка указывает сам файл.
Сохраните файл и выйдите из редактора.
Если вам нужно игнорировать больше файлов, просто откройте файл .gitignore и добавьте новую строку для каждого файла или каталога.
Теперь репозиторий настроен, и вы можете начать работу с текстом.
2: Сохранение черновика
Git знает только о тех файлах, о которых вы ему рассказали. То есть тот факт, что в каталоге, где находится репозиторий, существует файл, не означает, что Git будет отслеживать его изменения. Вы должны добавить файл в репозиторий и затем отправить коммит об изменениях.
Создайте новый файл Markdown article.md:
nano article.md
Добавьте в него такой текст:
# How To Use Git to Manage Your Writing Project

### Introduction

Version control isn't just for code. It's for anything you want to track, including content. Using Git to manage your next writing project gives you the ability to view multiple drafts at the same time,  see differences between those drafts, and even roll back to a previous version. And if you're comfortable doing so, you can then share your work with others on GitHub or other central git repositories.

In this tutorial you'll use Git to manage a small Markdown document. You'll store an initial version, commit it, make changes, view the difference between those changes, and review the previous version. When you're done, you'll have a workflow you can apply to your own writing projects.
Сохраните и закройте файл.
Команда git status покажет вам состояние вашего репозитория. С ее помощью можно узнать, какие файлы нужно добавить, чтобы Git мог их отслеживать. Запустите эту команду:
git status
Вы увидите такой вывод:
On branch master

No commits yet

Untracked files:

(use "git add <file>..." to include in what will be committed)

.gitignore

article.md

nothing added to commit but untracked files present (use "git add" to track)
В выводе секция Untracked files показывает файлы, которые Git не отслеживает. Эти файлы необходимо добавить в репозиторий, чтобы Git мог следить за изменениями в них. Используйте команду git add, чтобы сделать это:
git add .gitignore

git add article.md
Теперь запустите git status, чтобы убедиться, что эти файлы отслеживаются:
On branch master

No commits yet

Changes to be committed:

(use "git rm --cached <file>..." to unstage)

new file:   .gitignore

new file:   article.md
Оба файла теперь перечислены в разделе Changes to be committed. Git знает о них, но пока еще не создал снапшот. Для этого используется git commit.
Когда вы создаете новый коммит, вы должны предоставить сообщение о коммите. В таком сообщении указываются все изменения. Когда вы работаете над текстом с другими людьми, пишите подробные сообщения о коммитах – это сделает вашу работу эффективнее.
Используйте команду git commit для фиксации ваших изменений:
git commit -m "Add gitignore file and initial version of article"
Вывод команды показывает, что изменения зафиксированы:
[master (root-commit) 95fed84] Add gitignore file and initial version of article

2 files changed, 9 insertions(+)

create mode 100644 .gitignore

create mode 100644 article.md
Используйте команду git status, чтобы уточнить состояние репозитория:
git status
Вывод команды покажет, что никаких изменений, которые нужно добавить или зафиксировать, на данный момент нет.
On branch master

nothing to commit, working tree clean
3: Сохранение ревизии
Итак, вы добавили исходную версию статьи. Теперь пора добавить больше текста – вы увидите, как управлять изменениями с помощью Git.
Откройте статью в текстовом редакторе:
nano article.md
Добавьте новый текст в конец файла:
* Git installed on your local computer. The tutorial (https://www.8host.com/blog/razrabotka-proektov-s-otkrytym-isxodnym-kodom-nachalo-raboty-s-git/) walks you through installing Git and covers some background information you may find useful.
Используйте команду git status, чтобы узнать состояние вашего репозитория:
git status
Вы получите вывод:
On branch master

Changes not staged for commit:

(use "git add <file>..." to update what will be committed)

(use "git checkout -- <file>..." to discard changes in working directory)

modified:   article.md

no changes added to commit (use "git add" and/or "git commit -a")
Как и ожидалось, файл article.md изменился. С помощью git diff вы можете увидеть эти изменения:
git diff article.md
Вы получите такой вывод:
diff --git a/article.md b/article.md

index 77b081c..ef6c301 100644

--- a/article.md

+++ b/article.md

@@ -5,3 +5,7 @@

Version control isn't just for code. It's for anything you want to track, including content. Using Git to manage your next writing project gives you the ability to view multiple drafts at the same time,  see differences between those drafts, and even roll back to a previous version. And if you're comfortable doing so, you can then share your work with others on GitHub or other central git repositories.

In this tutorial you'll use Git to manage a small Markdown document. You'll store an initial version, commit it, make changes, view the difference between those changes, and review the previous version. When you're done, you'll have a workflow you can apply to your own writing projects.

+

+## Prerequisites

+

+* Git installed on your local computer. The tutorial (https://www.8host.com/blog/razrabotka-proektov-s-otkrytym-isxodnym-kodom-nachalo-raboty-s-git/) walks you through installing Git and covers some background information you may find useful.
В выводе есть строки, начинающиеся со знака плюс (+). Это добавленные вами строки. Удаленные строки будут отображаться со знаком минус (-). Строки, которые остались без изменений, будут без каких-либо символов.
Команды git diff и git status позволяют вам узнать, что вы изменили в тексте. Вы также можете сохранить разницу в файл, чтобы просмотреть его позже. Это делается с помощью следующей команды:
git diff article.md > article_diff.diff
Расширение .diff позволит текстовому редактору применить правильную подсветку синтаксиса.
Сохранение изменений в репозитории состоит из двух этапов. Сначала нужно добавить файл article.md еще раз, а затем отправить коммит. Git хочет, чтобы вы явно указывали, какие файлы входят в каждый коммит, поэтому, даже если вы добавили файл ранее, вам придется добавить его снова. Обратите внимание, что вывод команды git status напомнит вам об этом.
Добавьте файл и отправьте коммит с изменениями:
git add article.md

git commit -m "add prerequisites section"
Вы получите:
[master 1fbfc21] add prerequisites section

1 file changed, 4 insertions(+)
Используйте git status, чтобы узнать состояние вашего репозитория. Вы увидите, что делать больше ничего не нужно.
git status

On branch master

nothing to commit, working tree clean
Повторяйте этот процесс, пока будете просматривать свою статью. Внеся изменения, проверьте их, добавьте файл и отправьте коммит. Вносить изменения можно так часто, как вам удобно. Вы можете сделать коммит после того, как просмотрите весь черновик, или прямо перед тем, как внести серьезные изменения в структуру статьи.
Если вы отправляете черновик документа кому-то другому и он вносит в него изменения, возьмите новую копию и замените ею ваш файл. Затем используйте git diff, чтобы увидеть внесенные изменения. Git увидит изменения независимо от их источника: вы можете вносить изменения вручную или скачать файл из интернета или со своей почты.
Теперь давайте рассмотрим управление версиями текста.
4: Управление версиями и изменениями
Иногда бывает полезно взглянуть на предыдущую версию документа. Всякий раз, когда вы использовали git commit, вы отправляли полезное сообщение о коммите, в котором резюмировали все, что вы сделали.
Команда git log показывает историю изменений вашего репозитория. Каждое внесенное вами изменение имеет запись в журнале.
git log

commit 1fbfc2173f3cec0741e0a6b21803fbd0be511bc4

Author: 8host Blog <8host@blog>

Date:   Thu Sep 19 16:35:41 2019 -0500

add prerequisites section

commit 95fed849b0205c49eda994fff91ec03642d59c79

Author: 8host Blog <8host@blog>

Date:   Thu Sep 19 16:32:34 2019 -0500

Add gitignore file and initial version of article
Каждый коммит имеет определенный идентификатор. Этот номер используется для ссылки на данный коммит. Для ссылки вам нужны только первые несколько символов идентификатора. Команда git log –oneline выдает сокращенную версию лога с более короткими идентификаторами:
git log --oneline

1fbfc21 add prerequisites section

95fed84 Add gitignore file and initial version of article
Чтобы просмотреть исходную версию файла, используйте git show и идентификатор коммита. Идентификаторы в вашем репозитории будут отличаться от идентификаторов в наших примерах.
git show 95fed84 article.md
Выходные данные показывают детали коммита, а также изменения, которые внес этот коммит:
commit 95fed849b0205c49eda994fff91ec03642d59c79

Author: 8host Blog <8host@blog>

Date:   Thu Sep 19 16:32:34 2019 -0500

Add gitignore file and initial version of article

diff --git a/article.md b/article.md

new file mode 100644

index 0000000..77b081c

--- /dev/null

+++ b/article.md

@@ -0,0 +1,7 @@

+# How To Use Git to Manage Your Writing Project

+

+### Introduction

+

+Version control isn't just for code. It's for anything you want to track, including content. Using Git to manage your next writing project gives you the ability to view multiple drafts at the same time,  see differences between those drafts, and even roll back to a previous version. And if you're comfortable doing so, you can then share your work with others on GitHub or other central git repositories.

+

+In this tutorial you'll use Git to manage a small Markdown document. You'll store an initial version, commit it, make changes, view the difference between those changes, and review the previous version. When you're done, you'll have a workflow you can apply to your own writing projects.
Чтобы увидеть сам файл, слегка измените команду. Вместо пробела между идентификатором коммита и файлом вставьте символы :./. Вот так:
git show 95fed84:./article.md
Вы увидите содержимое этого файла в заданной редакции:
# How To Use Git to Manage Your Writing Project

### Introduction

Version control isn't just for code. It's for anything you want to track, including content. Using Git to manage your next writing project gives you the ability to view multiple drafts at the same time,  see differences between those drafts, and even roll back to a previous version. And if you're comfortable doing so, you can then share your work with others on GitHub or other central git repositories.

In this tutorial you'll use Git to manage a small Markdown document. You'll store an initial version, commit it, make changes, view the difference between those changes, and review the previous version. When you're done, you'll have a workflow you can apply to your own writing projects.
Вы можете сохранить этот вывод в файл, если он вам нужен:
git show 95fed84:./article.md > old_article.md
По мере того, как вы будете вносить изменения в текст, ваш лог будет расти. Позже вы сможете просматривать все изменения, внесенные в вашу статью с самого начала работы над ней.
Заключение
В этом мануале вы научились использовать локальный репозиторий Git для отслеживания изменений в текстах. Теперь вы можете использовать этот подход для управления вашими статьями, публикациями в блоге или даже текстом целой книги. Если вы отправите свой репозиторий на GitHub, вы можете привлечь других пользователей к работе над текстом.
Tags: Git
Markdown
Table of Contents
GitLab Flavored Markdown
- Newlines
- Multiple underscores in words
- URL auto-linking
- Code and Syntax Highlighting
- Emoji
- Special GitLab references
- Task lists
Standard Markdown
- Headers
- Emphasis
- Lists
- Links
- Images
- Blockquotes
- Inline HTML
- Horizontal Rule
- Line Breaks
- Tables
References
GitLab Flavored Markdown (GFM)
GitLab uses the Redcarpet Ruby library for Markdown processing.
GitLab uses «GitLab Flavored Markdown» (GFM). It extends the standard Markdown in a few significant ways to add some useful functionality. It was inspired by GitHub Flavored Markdown.
You can use GFM in
- comments
- issues
- merge requests
- milestones
- wiki pages
You can also use other rich text files in GitLab. You might have to install a dependency to do so. Please see the github-markup gem readme for more information.
Newlines
GFM honors the markdown specification in how paragraphs and line breaks are handled.
A paragraph is simply one or more consecutive lines of text, separated by one or more blank lines.
Line-breaks, or softreturns, are rendered if you end a line with two or more spaces
Roses are red [followed by two or more spaces]
Violets are blue

Sugar is sweet
Roses are red
Violets are blue
Sugar is sweet
Multiple underscores in words
It is not reasonable to italicize just part of a word, especially when you’re dealing with code and names that often appear with multiple underscores. Therefore, GFM ignores multiple underscores in words.
perform_complicated_task
do_this_and_do_that_and_another_thing
perform_complicated_task
do_this_and_do_that_and_another_thing
URL auto-linking
GFM will autolink almost any URL you copy and paste into your text.
* https://www.google.com
* https://google.com/
* ftp://ftp.us.debian.org/debian/
* smb://foo/bar/baz
* irc://irc.freenode.net/gitlab
* http://localhost:3000- https://www.google.com
- https://google.com/
- ftp://ftp.us.debian.org/debian/
- smb://foo/bar/baz
- irc://irc.freenode.net/gitlab
- http://localhost:3000
Code and Syntax Highlighting
GitLab uses the Rouge Ruby library for syntax highlighting. For a
list of supported languages visit the Rouge website.
Blocks of code are either fenced by lines with three back-ticks ```, or are indented with four spaces. Only the fenced code blocks support syntax highlighting.
Inline `code` has `back-ticks around` it.Inline code has back-ticks around it.
Example:
```javascript
var s = "JavaScript syntax highlighting";
alert(s);
```

```python
def function():
    #indenting works just fine in the fenced code block
    s = "Python syntax highlighting"
    print s
```

```ruby
require 'redcarpet'
markdown = Redcarpet.new("Hello World!")
puts markdown.to_html
```

```
No language indicated, so no syntax highlighting.
s = "There is no highlighting for this."
But let's throw in a <b>tag</b>.
```
becomes:
var s = "JavaScript syntax highlighting";
alert(s);
def function():
#indenting works just fine in the fenced code block
s = "Python syntax highlighting"
print srequire 'redcarpet'
markdown = Redcarpet.new("Hello World!")
puts markdown.to_htmlNo language indicated, so no syntax highlighting.
s = "There is no highlighting for this."
But let's throw in a <b>tag</b>.Emoji
Sometimes you want to :monkey: around a bit and add some :star2: to your :speech_balloon:. Well we have a gift for you:

:zap: You can use emoji anywhere GFM is supported. :v:

You can use it to point out a :bug: or warn about :speak_no_evil: patches. And if someone improves your really :snail: code, send them some :birthday:. People will :heart: you for that.

If you are new to this, don't be :fearful:. You can easily join the emoji :family:. All you need to do is to look up on the supported codes.

Consult the [Emoji Cheat Sheet](http://emoji.codes) for a list of all supported emoji codes. :thumbsup:
Sometimes you want to ![]() around a bit and add some
around a bit and add some ![]() to your
to your ![]() . Well we have a gift for you:
. Well we have a gift for you:
![]() You can use emoji anywhere GFM is supported.
You can use emoji anywhere GFM is supported. ![]()
You can use it to point out a ![]() or warn about
or warn about ![]() patches. And if someone improves your really
patches. And if someone improves your really ![]() code, send them some
code, send them some ![]() . People will
. People will ![]() you for that.
you for that.
If you are new to this, don’t be ![]() . You can easily join the emoji
. You can easily join the emoji ![]() . All you need to do is to look up on the supported codes.
. All you need to do is to look up on the supported codes.
Consult the Emoji Cheat Sheet for a list of all supported emoji codes. ![]()
Special GitLab References
GFM recognizes special references.
You can easily reference e.g. an issue, a commit, a team member or even the whole team within a project.
GFM will turn that reference into a link so you can navigate between them easily.
GFM will recognize the following:
| input | references |
|---|---|
@user_name |
specific user |
@group_name |
specific group |
@all |
entire team |
#123 |
issue |
!123 |
merge request |
$123 |
snippet |
~123 |
label by ID |
~bug |
one-word label by name |
~"feature request" |
multi-word label by name |
9ba12248 |
specific commit |
9ba12248...b19a04f5 |
commit range comparison |
[README](doc/README) |
repository file references |
GFM also recognizes certain cross-project references:
| input | references |
|---|---|
namespace/project#123 |
issue |
namespace/project!123 |
merge request |
namespace/project$123 |
snippet |
namespace/project@9ba12248 |
specific commit |
namespace/project@9ba12248...b19a04f5 |
commit range comparison |
namespace/project~"Some label" |
issues with given label |
Task Lists
You can add task lists to issues, merge requests and comments. To create a task list, add a specially-formatted Markdown list, like so:
- [x] Completed task
- [ ] Incomplete task
    - [ ] Sub-task 1
    - [x] Sub-task 2
- [ ] Sub-task 3- Completed task
-
Incomplete task
- Sub-task 1
- Sub-task 2
- Sub-task 3
Task lists can only be created in descriptions, not in titles. Task item state can be managed by editing the description’s Markdown or by toggling the rendered check boxes.
Standard Markdown
Headers
# H1
## H2
### H3
#### H4
##### H5
###### H6

Alternatively, for H1 and H2, an underline-ish style:

Alt-H1
======

Alt-H2
------
H1
H2
H3
H4
H5
H6
Alternatively, for H1 and H2, an underline-ish style:
Alt-H1
Alt-H2
Header IDs and links
All Markdown-rendered headers automatically get IDs, except in comments.
On hover a link to those IDs becomes visible to make it easier to copy the link to the header to give it to someone else.
The IDs are generated from the content of the header according to the following rules:
- All text is converted to lowercase
- All non-word text (e.g., punctuation, HTML) is removed
- All spaces are converted to hyphens
- Two or more hyphens in a row are converted to one
- If a header with the same ID has already been generated, a unique
incrementing number is appended, starting at 1.
For example:
# This header has spaces in it
## This header has a :thumbsup: in it
# This header has Unicode in it: 한글
## This header has spaces in it
### This header has spaces in it
Would generate the following link IDs:
this-header-has-spaces-in-itthis-header-has-a-in-itthis-header-has-unicode-in-it-한글this-header-has-spaces-in-itthis-header-has-spaces-in-it-1
Note that the Emoji processing happens before the header IDs are generated, so the Emoji is converted to an image which then gets removed from the ID.
Emphasis
Emphasis, aka italics, with *asterisks* or _underscores_.

Strong emphasis, aka bold, with **asterisks** or __underscores__.

Combined emphasis with **asterisks and _underscores_**.

Strikethrough uses two tildes. ~~Scratch this.~~
Emphasis, aka italics, with asterisks or underscores.
Strong emphasis, aka bold, with asterisks or underscores.
Combined emphasis with asterisks and underscores.
Strikethrough uses two tildes. Scratch this.
Lists
1. First ordered list item
2. Another item
  * Unordered sub-list.
1. Actual numbers don't matter, just that it's a number
  1. Ordered sub-list
4. And another item.

* Unordered list can use asterisks
- Or minuses
+ Or pluses- First ordered list item
- Another item
- Unordered sub-list.
- Actual numbers don’t matter, just that it’s a number
- Ordered sub-list
- And another item.
- Unordered list can use asterisks
- Or minuses
- Or pluses
If a list item contains multiple paragraphs,
each subsequent paragraph should be indented with four spaces.
1.  First ordered list item

    Second paragraph of first item.
2. Another item-
First ordered list item
Second paragraph of first item.
-
Another item
If the second paragraph isn’t indented with four spaces,
the second list item will be incorrectly labeled as 1.
1. First ordered list item

   Second paragraph of first item.
2. Another item- First ordered list item
Second paragraph of first item.
- Another item
Links
There are two ways to create links, inline-style and reference-style.
[I'm an inline-style link](https://www.google.com)

[I'm a reference-style link][Arbitrary case-insensitive reference text]

[I'm a relative reference to a repository file](LICENSE)

[You can use numbers for reference-style link definitions][1]

Or leave it empty and use the [link text itself][]

Some text to show that the reference links can follow later.

[arbitrary case-insensitive reference text]: https://www.mozilla.org
[1]: http://slashdot.org
[link text itself]: https://www.reddit.com
I’m an inline-style link
I’m a reference-style link
I’m a relative reference to a repository file
You can use numbers for reference-style link definitions
Or leave it empty and use the link text itself
Some text to show that the reference links can follow later.
Note
Relative links do not allow referencing project files in a wiki page or wiki page in a project file. The reason for this is that, in GitLab, wiki is always a separate git repository. For example:
[I'm a reference-style link](style)
will point the link to wikis/style when the link is inside of a wiki markdown file.
Images
Here's our logo (hover to see the title text):
Inline-style:

Reference-style:
![alt text1][logo]
[logo]: img/logo.pngHere’s our logo:
Inline-style:
![]()
Reference-style:
![]()
Blockquotes
> Blockquotes are very handy in email to emulate reply text.
> This line is part of the same quote.

Quote break.

> This is a very long line that will still be quoted properly when it wraps. Oh boy let's keep writing to make sure this is long enough to actually wrap for everyone. Oh, you can *put* **Markdown** into a blockquote.
Blockquotes are very handy in email to emulate reply text.
This line is part of the same quote.
Quote break.
This is a very long line that will still be quoted properly when it wraps. Oh boy let’s keep writing to make sure this is long enough to actually wrap for everyone. Oh, you can put Markdown into a blockquote.
Inline HTML
You can also use raw HTML in your Markdown, and it’ll mostly work pretty well.
See the documentation for HTML::Pipeline’s SanitizationFilter class for the list of allowed HTML tags and attributes. In addition to the default SanitizationFilter whitelist, GitLab allows span elements.
<dl>
  <dt>Definition list</dt>
  <dd>Is something people use sometimes.</dd>

  <dt>Markdown in HTML</dt>
  <dd>Does *not* work **very** well. Use HTML <em>tags</em>.</dd>
</dl>- Definition list
- Is something people use sometimes.
- Markdown in HTML
- Does *not* work **very** well. Use HTML tags.
Horizontal Rule
Three or more...

---

Hyphens

***

Asterisks

___

Underscores
Three or more…
Hyphens
Asterisks
Underscores
Line Breaks
My basic recommendation for learning how line breaks work is to experiment and discover — hit <Enter> once (i.e., insert one newline), then hit it twice (i.e., insert two newlines), see what happens. You’ll soon learn to get what you want. «Markdown Toggle» is your friend.
Here are some things to try out:
Here's a line for us to start with.

This line is separated from the one above by two newlines, so it will be a *separate paragraph*.

This line is also a separate paragraph, but...
This line is only separated by a single newline, so it's a separate line in the *same paragraph*.

This line is also a separate paragraph, and...
This line is on its own line, because the previous line ends with two
spaces.
Here’s a line for us to start with.
This line is separated from the one above by two newlines, so it will be a separate paragraph.
This line is also begins a separate paragraph, but…
This line is only separated by a single newline, so it’s a separate line in the same paragraph.
This line is also a separate paragraph, and…
This line is on its own line, because the previous line ends with two
spaces.
Tables
Tables aren’t part of the core Markdown spec, but they are part of GFM and Markdown Here supports them.
| header 1 | header 2 |
| -------- | -------- |
| cell 1   | cell 2   |
| cell 3   | cell 4   |
Code above produces next output:
| header 1 | header 2 |
|---|---|
| cell 1 | cell 2 |
| cell 3 | cell 4 |
Note
The row of dashes between the table header and body must have at least three dashes in each column.
By including colons in the header row, you can align the text within that column:
| Left Aligned | Centered | Right Aligned | Left Aligned | Centered | Right Aligned |
| :----------- | :------: | ------------: | :----------- | :------: | ------------: |
| Cell 1       | Cell 2   | Cell 3        | Cell 4       | Cell 5   | Cell 6        |
| Cell 7 | Cell 8 | Cell 9 | Cell 10 | Cell 11 | Cell 12 || Left Aligned | Centered | Right Aligned | Left Aligned | Centered | Right Aligned |
|---|---|---|---|---|---|
| Cell 1 | Cell 2 | Cell 3 | Cell 4 | Cell 5 | Cell 6 |
| Cell 7 | Cell 8 | Cell 9 | Cell 10 | Cell 11 | Cell 12 |
References
- This document leveraged heavily from the Markdown-Cheatsheet.
- The Markdown Syntax Guide at Daring Fireball is an excellent resource for a detailed explanation of standard markdown.
- Dillinger.io is a handy tool for testing standard markdown.