
Краткое содержание страницы № 1
DUAL DIN SIZED CD/CASSETTE RECEIVER
DPX-MP4100
INSTRUCTION MANUAL
© B64-3609-00/00 (MW)
Краткое содержание страницы № 2
Contents Safety precautions 3 CD/Audio file/External disc control features 16 Notes 4 Playing CD & Audio file Playing External Disc General features 6 Fast Forwarding and Reversing Power Track/File Search Selecting the Source Disc Search / Folder Search Volume Direct Music Search Attenuator Direct Disc Search System Q Track/File/Disc/Folder Repeat Audio Control Scan Play Adjusting the detail of Audio Control Random Play Audio Setup Magazine Random Play Speaker Setting Folder Select
Краткое содержание страницы № 3
Safety precautions About CD players/disc changers connected 2WARNING to this unit To prevent injury or fire, take the following Kenwood disc changers/ CD players released in 1998 precautions: or later can be connected to this unit. • To prevent a short circuit, never put or leave any Refer to the catalog or consult your Kenwood dealer metallic objects (such as coins or metal tools) inside for connectable models of disc changers/ CD players. the unit. Note that any Kenwood disc changers/ CD
Краткое содержание страницы № 4
Notes • If you experience problems during installation, About Cassette tape consult your Kenwood dealer. Cleaning the tape head • When you purchase optional accessories, check with When there’s noise or the sound quality is bad during your Kenwood dealer to make sure that they work tape play the tape head maybe dirty, clean the tape with your model and in your area. head. • Characters in the LCD may become difficult to read in temperatures below 5 ˚C (41 ˚F). About Cassette tape • The char
Краткое содержание страницы № 5
About Audio file Handling CDs • Playable Audio file • Do not touch the recording surface of the CD. AAC (.m4a), MP3 (.mp3), WMA (.wma) • Do not stick tape etc. on the CD, or use a CD with tape stuck on it. • Playable disc media • Do not use disc type accessories. CD-R/RW/ROM • Clean from the center of the disc and move • Playable disc file format outward. ISO 9660 Level 1/2, Joliet, Romeo, Long file name. • When removing CDs from this unit, pull them out Although the audio files are compl
Краткое содержание страницы № 6
General features DISP/S.A VOL Control knob ATT WOW Q/MENU SRC Auxiliary Input WOW indicator ATT indicator Power ⁄ • Use the mini-plug which is stereo type and does not Turning ON the Power have any resistance. Press the [SRC] button. Turning OFF the Power Press the [SRC] button for at least 1 second. Volume Increasing Volume Turn the [VOL] knob clockwise. Selecting the Source Decreasing Volume Press the [SRC] button. Turn the [VOL] knob counterclockwise. Source required Display ⁄ Tuner «TUNER»
Краткое содержание страницы № 7
When the Attenuator is ON, the «ATT» indicator Adjustment Item Display Range blinks. Rear Volume «R-VOL» 0 — 35 Subwoofer level «SubW» –15 — +15 Bass level «BasLV» –8 — +8 Middle level «MidLV» –8 — +8 System Q Treble level «TreLV» –8 — +8 Selecting the best sound setting preset for different Balance «BAL» Left 15 — Right 15 types of music. Fader «FAD» Rear 15 — Front 15 Exit Audio Control mode (Volume control mode) 1 Select the source to set Press the [SRC] button. 5 Exit Audio Control mode
Краткое содержание страницы № 8
General features 4 Adjust the Detail Audio item 4 Setup the Audio item Turn the [VOL] knob. Turn the [VOL] knob. Bass level Adjustment Item Display Range Adjustment Item Display Range Front High Pass Filter «HPF» Through/40/60/80/100/120/ 150/180/220 Hz Bass Center Frequency «BasF» 40/50/60/70/80/100/ 120/150 Hz Rear High Pass Filter «HPR» Through/40/60/80/100/120/ 150/180/220 Hz Bass Q Factor «BasQ» 1.00/1.25/1.50/2.00 Bass Extend «B EX» ON/OFF Low Pass Filter «LPF» 50/60/80/100/120/Through
Краткое содержание страницы № 9
Speaker Setting ⁄ • When operation stops for 3 seconds, the SRS WOW Fine-tuning so that the System Q value is optimal Select closes. when setting the speaker type. • WOW: TruBass, FOCUS and SRS 3D are all set to values shown below. 1 Enter Standby Press the [SRC] button. SRS WOW SRS FOCUS SRS TruBass SRS 3D Select the «STANDBY» display. High High On On Low Low On On 2 Enter Speaker Setting mode Off Off Off Off Press the [VOL] knob. 3 Select the Speaker type Turn the [VOL] knob. Each time you
Краткое содержание страницы № 10
General features In Auxiliary input source Subwoofer Output Information Turning the Subwoofer output ON or OFF. Auxiliary input name Push the Control knob toward down for at least Character 2 seconds. Clock Each time you push the knob, Subwoofer output switches ON and OFF. In Standby mode When it is ON, «SubW ON» is displayed. Information Character & Graphic Clock & Graphic Switching Display Clock Changing the information displayed. ⁄ Press the [DISP] button. • If the selected display item d
Краткое содержание страницы № 11
Station/Disc Naming (SNPS/DNPS) ⁄ • When operation stops for 10 seconds the name at that Attaching a title to a Station or CD. time is registered, and Name Set mode closes. • Memory numbers 1 Receive/play the station/disc you want to — Tuner: 30 stations attach a title to — Internal CD player: 10 discs ⁄ — External CD changer/ player: Varies according to the • A title cannot be attached to MD or Audio file media. CD changer/ player. Refer to the CD changer/ player manual. 2 Enter Menu mo
Краткое содержание страницы № 12
Tuner features MENU SRC Control knob 1—6 Preset station number ST indicator Band display Frequency display Function of remote control Tuning Direct Access Tuning Selecting the station. Entering the frequency and tuning. 1 Select tuner source Press the [SRC] button. 1 Select the band Select the «TUNER» display. Press the [FM] or [AM] button. 2 Select the band 2 Enter Direct Access Tuning mode Push the Control knob towards [FM] or [AM]. Press the [DIRECT] button on the remote Each time you push t
Краткое содержание страницы № 13
Preset Tuning ⁄ • You can enter the FM band frequency in steps of a Recalling the stations in the memory. minimum of 0.1 MHz. 1 Select the band Push the Control knob towards [FM] or [AM]. 2 Recall the station Station Preset Memory Press the desired [1] — [6] button. Putting a station in the memory. 1 Select the band Push the Control knob towards [FM] or [AM]. Frequency Step Setting 2 Select the frequency to put in the memory Changing the tuning frequency step. Push the Control knob towards [4]
Краткое содержание страницы № 14
Cassette player features SRC Control knob B NR SCAN B.S REP MTL CASS 0 B.S indicator B NR indicator REP indicator MTL indicator SCN indicator Tape counter display indicator Playing Cassette Tapes Fast Forwarding and Rewinding When the Cassette Tape is inserted Fast Forwarding Press the [SRC] button. Push the Control knob toward up. Select the «TAPE» display. When you press the Control knob, the fast forwarding stops. ⁄ • When there is a Cassette Tape inserted, the indicator Rewinding is ON. P
Краткое содержание страницы № 15
Selecting the Tape type ⁄ • Space between music and the first 5 seconds of the Press the [MTL] button. music are recognized as the previous music. Each time you press the button, the Tape type • As many as 9 music can be skipped. alternates between the tape types shown in the table below. Tape type Display Blank Skip CrO2 (Type II), FeCr (Type III), Metal (Type IV) «MTL ON» Normal (Type I) «MTL OFF» Fast forwarding automatically when an unrecorded portion continues for at least 10 seconds. P
Краткое содержание страницы № 16
CD/Audio file/External disc control features SRC Control knob CD 0 SCAN RDM/3 REP F.SEL M.RDM Disc number Changer number RDM indicator indicator Play time AAC/MP3/WMA indicator REP indicator SCN indicator Track number Playing CD & Audio file Playing External Disc Playing discs set in the optional accessory disc When a disc is inserted player connected to this unit. Press the [SRC] button. Press the [SRC] button. Select the «CD» display. Select the display for the disc player you want. ⁄ Display
Краткое содержание страницы № 17
Function of disc changers with remote control Fast Forwarding and Reversing Direct Disc Search Fast Forwarding Doing Disc Search by entering the disc number. Hold down toward [¢] with the Control knob. Release to resume the playback. 1 Enter the disc number Press the number buttons on the remote Reversing control. Hold down toward [4] with the Control knob. Release to resume the playback. 2 Do Disc Search ⁄ Press the [+] or [–] button. • There is no sound while the Audio file is being searched
Краткое содержание страницы № 18
CD/Audio file/External disc control features Function of Audio file Scan Play Folder Select Playing the first part of each music on the disc or Audio file folder you are listening to and searching Quickly selecting the folder you want to hear. for the music you want to hear. 1 Enter Folder Select mode 1 Start Scan Play Press the [F.SEL] button. Press the [SCAN] button. «FOLD SEL» is displayed. «TRAC SCN» (CD)/ «File SCN» (Audio file) is displayed. During Select mode the folder information is
Краткое содержание страницы № 19
Text/Title Scroll Scrolling the displayed CD text, Audio file text, or MD title. Push the Control knob toward up for at least 2 seconds. English | 19
Краткое содержание страницы № 20
Menu system Control knob MENU SRC AUTO indicator CRSC indicator Menu display Menu System 4 Exit Menu mode Press the [MENU] button. Setting beep sound during operation, etc. ⁄ functions. The Menu system basic operation method is • When other items those applicable to the basic operation method above are displayed, their setting explained here. The reference for the Menu items content chart is entered. (Normally the setting listed at and their setting content is after this operation the top
DUAL DIN SIZED CD/CASSETTE RECEIVER
DPX-MP4100
INSTRUCTION MANUAL
© B64-3609-00/00 (MW)
B64-3609-00_English_r5.indd Sec1:1
B64-3609-00_English_r5.indd Sec1:1
06.12.6 3:00:29 PM
06.12.6 3:00:29 PM
Хорошее руководство по эксплуатации
Законодательство обязывает продавца передать покупателю, вместе с товаром, руководство по эксплуатации Kenwood DPX-MP4100. Отсутствие инструкции либо неправильная информация, переданная потребителю, составляют основание для рекламации в связи с несоответствием устройства с договором. В законодательстве допускается предоставлении руководства в другой, чем бумажная форме, что, в последнее время, часто используется, предоставляя графическую или электронную форму инструкции Kenwood DPX-MP4100 или обучающее видео для пользователей. Условием остается четкая и понятная форма.
Что такое руководство?
Слово происходит от латинского «instructio», тоесть привести в порядок. Следовательно в инструкции Kenwood DPX-MP4100 можно найти описание этапов поведения. Цель инструкции заключается в облегчении запуска, использования оборудования либо выполнения определенной деятельности. Инструкция является набором информации о предмете/услуге, подсказкой.
К сожалению немного пользователей находит время для чтения инструкций Kenwood DPX-MP4100, и хорошая инструкция позволяет не только узнать ряд дополнительных функций приобретенного устройства, но и позволяет избежать возникновения большинства поломок.
Из чего должно состоять идеальное руководство по эксплуатации?
Прежде всего в инструкции Kenwood DPX-MP4100 должна находится:
— информация относительно технических данных устройства Kenwood DPX-MP4100
— название производителя и год производства оборудования Kenwood DPX-MP4100
— правила обслуживания, настройки и ухода за оборудованием Kenwood DPX-MP4100
— знаки безопасности и сертификаты, подтверждающие соответствие стандартам
Почему мы не читаем инструкций?
Как правило из-за нехватки времени и уверенности в отдельных функциональностях приобретенных устройств. К сожалению само подсоединение и запуск Kenwood DPX-MP4100 это слишком мало. Инструкция заключает ряд отдельных указаний, касающихся функциональности, принципов безопасности, способов ухода (даже то, какие средства стоит использовать), возможных поломок Kenwood DPX-MP4100 и способов решения проблем, возникающих во время использования. И наконец то, в инструкции можно найти адресные данные сайта Kenwood, в случае отсутствия эффективности предлагаемых решений. Сейчас очень большой популярностью пользуются инструкции в форме интересных анимаций или видео материалов, которое лучше, чем брошюра воспринимаются пользователем. Такой вид инструкции позволяет пользователю просмотреть весь фильм, не пропуская спецификацию и сложные технические описания Kenwood DPX-MP4100, как это часто бывает в случае бумажной версии.
Почему стоит читать инструкции?
Прежде всего здесь мы найдем ответы касательно конструкции, возможностей устройства Kenwood DPX-MP4100, использования отдельных аксессуаров и ряд информации, позволяющей вполне использовать все функции и упрощения.
После удачной покупки оборудования/устройства стоит посвятить несколько минут для ознакомления с каждой частью инструкции Kenwood DPX-MP4100. Сейчас их старательно готовят или переводят, чтобы они были не только понятными для пользователя, но и чтобы выполняли свою основную информационно-поддерживающую функцию.
Содержание руководства
2WARNING
To prevent injury or fire, take the following
precautions:
• To prevent a short circuit, never put or leave any
metallic objects (such as coins or metal tools) inside
the unit.
• Mounting and wiring this product requires skills and
experience. For safety’s sake, leave the mounting
and wiring work to professionals.
2CAUTION
To prevent damage to the machine, take
the following precautions:
• Make sure to ground the unit to a negative 12V DC
power supply.
• Do not install the unit in a spot exposed to direct
sunlight or excessive heat or humidity. Also avoid
places with too much dust or the possibility of
water splashing.
• When replacing a fuse, only use a new fuse with
the prescribed rating. Using a fuse with the wrong
rating may cause your unit to malfunction.
• Do not use your own screws. Use only the screws
provided. If you use the wrong screws, you could
damage the unit.
Do Not Load 8 cm (3 in.) CDs in the CD slot
If you try to load a 8 cm (3 in.) CD with its adapter into
the unit, the adapter might separate from the CD and
damage the unit.
About CD players/disc changers connected
to this unit
Kenwood disc changers/ CD players released in 1998
or later can be connected to this unit.
Refer to the catalog or consult your Kenwood dealer
for connectable models of disc changers/ CD players.
Note that any Kenwood disc changers/ CD players
released in 1997 or earlier and disc changers made by
other makers cannot be connected to this unit.
Connecting unsupported disc changers/CD players to
this unit may result in damage.
Set the «O-N» Switch to the «N» position for the
applicable Kenwood disc changers/ CD players.
The functions you can use and the information that
can be displayed may differ depending on the models
being connected.
¤
• You can damage both your unit and the CD changer if you
connect them incorrectly.
Lens Fogging
When you turn on the car heater in cold weather,
dew or condensation may form on the lens in the
CD player of the unit. Called lens fogging, this
condensation on the lens may not allow CDs to play.
In such a situation, remove the disc and wait for the
condensation to evaporate. If the unit still does not
operate normally after a while, consult your Kenwood
dealer.
WOW, SRS and
SRS Labs, Inc.
WOW technology is incorporated under license
from SRS Labs, Inc.
The «AAC» logo is trademark of Dolby
Laboratories.
symbol are trademarks of
English
|
3
Если у вас отсутствует техническая возможность для скачивания Инструкция по эксплуатации для Kenwood DPX-MP4100
вы можете прочесть документ прямо на нашем сайте или
Скачать Kenwood DPX-MP4100 Инструкция по эксплуатации

- 1
- 2
- 3
- 4
- 5
- 6
- 7
- 8
- 9
- 10
- 11
- 12
- 13
- 14
- 15
- 16
- 17
- 18
- 19
- 20
- 21
- 22
- 23
- 24
- 25
- 26
- 27
- 28
- 29
- 30
- 31
- 32
- 33
Инструкции для прочих Kenwood CD-плееры
Инструкции для прочих Kenwood
![]()
DUAL DIN SIZED CD/CASSETTE RECEIVER
DPX-MP4100
INSTRUCTION MANUAL
© B64-3609-00/00 (MW)

Contents
|
Safety precautions |
3 |
|
Notes |
4 |
|
General features |
6 |
Power
Selecting the Source
Volume
Attenuator
System Q
Audio Control
Adjusting the detail of Audio Control
Audio Setup
Speaker Setting
SRS WOW Select
SRS WOW Control
Subwoofer Output
Switching Display
Spectrum Analyzer Select
Station/Disc Naming (SNPS/DNPS)
TEL Mute
Tuning
Direct Access Tuning
Station Preset Memory
Auto Memory Entry
Preset Tuning
Frequency Step Setting
|
Cassette player features |
14 |
Playing Cassette Tapes
Fast Forwarding and Rewinding
Dolby B NR
Selecting the Tape type
DPSS (Direct Program Search System)
DPSS with the Remote control
Blank Skip
Music Repeat
Index Scan
|
CD/Audio file/External disc control |
|
|
features |
16 |
Playing CD & Audio file
Playing External Disc
Fast Forwarding and Reversing
Track/File Search
Disc Search / Folder Search
Direct Music Search
Direct Disc Search
Track/File/Disc/Folder Repeat
Scan Play
Random Play
Magazine Random Play
Folder Select
Text/Title Scroll
Menu System Activating Security Code
Deactivating Security Code Touch Sensor Tone Contrast Adjustment Manual Clock Adjustment Switching preout Opening Demonstration Built-in Amp Setting
Built-in Auxiliary input Setting CD Read Setting
DSI (Disabled System Indicator) Dual Zone System Setting
B.M.S. (Bass Management System) B.M.S. Frequency Offset
CRSC (Clean Reception System Circuit)
Auxiliary Input Display Setting & Station/Disc Naming
Text Scroll Tuning Mode
Auto Memory Entry Supreme Setting
|
Basic Operations of remote control |
25 |
|
Accessories/ Installation Procedure |
27 |
|
Connecting Wires to Terminals |
28 |
|
Installation |
29 |
|
Troubleshooting Guide |
30 |
|
Specifications |
32 |
2 | English

Safety precautions
2WARNING
To prevent injury or fire, take the following precautions:
•To prevent a short circuit, never put or leave any metallic objects (such as coins or metal tools) inside the unit.
•Mounting and wiring this product requires skills and experience. For safety’s sake, leave the mounting and wiring work to professionals.
2CAUTION
To prevent damage to the machine, take the following precautions:
•Make sure to ground the unit to a negative 12V DC power supply.
•Do not install the unit in a spot exposed to direct sunlight or excessive heat or humidity. Also avoid places with too much dust or the possibility of water splashing.
•When replacing a fuse, only use a new fuse with the prescribed rating. Using a fuse with the wrong rating may cause your unit to malfunction.
•Do not use your own screws. Use only the screws provided. If you use the wrong screws, you could damage the unit.
Do Not Load 8 cm (3 in.) CDs in the CD slot
If you try to load a 8 cm (3 in.) CD with its adapter into the unit, the adapter might separate from the CD and damage the unit.
About CD players/disc changers connected to this unit
Kenwood disc changers/ CD players released in 1998 or later can be connected to this unit.
Refer to the catalog or consult your Kenwood dealer for connectable models of disc changers/ CD players. Note that any Kenwood disc changers/ CD players released in 1997 or earlier and disc changers made by other makers cannot be connected to this unit. Connecting unsupported disc changers/CD players to this unit may result in damage.
Set the «O-N» Switch to the «N» position for the applicable Kenwood disc changers/ CD players. The functions you can use and the information that
can be displayed may differ depending on the models being connected.
¤
•You can damage both your unit and the CD changer if you connect them incorrectly.
Lens Fogging
When you turn on the car heater in cold weather, dew or condensation may form on the lens in the CD player of the unit. Called lens fogging, this condensation on the lens may not allow CDs to play. In such a situation, remove the disc and wait for the condensation to evaporate. If the unit still does not operate normally after a while, consult your Kenwood dealer.
WOW, SRS and  symbol are trademarks of SRS Labs, Inc.
WOW technology is incorporated under license from SRS Labs, Inc.
The «AAC» logo is trademark of Dolby
Laboratories.
English | 3
Notes
•If you experience problems during installation, consult your Kenwood dealer.
•When you purchase optional accessories, check with your Kenwood dealer to make sure that they work with your model and in your area.
•Characters in the LCD may become difficult to read in temperatures below 5 ˚C (41 ˚F).
•The characters conforming to ISO 8859-1 character set can be displayed.
•The illustrations of the display and the panel appearing in this manual are examples used to explain more clearly how the controls are used. Therefore, what appears on the display in the illustrations may differ from what appears on the display on the actual equipment, and some of the illustrations on the display may be inapplicable.
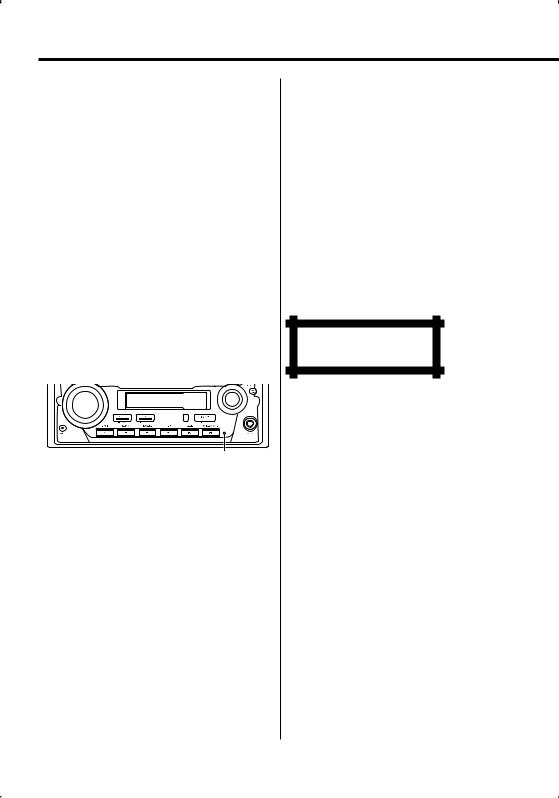
How to reset your unit
•If the unit fails to operate properly, press the Reset button. The unit returns to factory settings when the Reset button is pressed.
•Press the reset button if the disc auto changer fails to operate correctly. Normal operation should be restored.
Reset button
Cleaning the Unit
If the faceplate of this unit is stained, wipe it with a dry soft cloth such as a silicon cloth.
If the faceplate is stained badly, wipe the stain off with a cloth moistened with neutral cleaner, then wipe it again with a clean soft dry cloth.
¤
•Applying spray cleaner directly to the unit may affect its mechanical parts. Wiping the faceplate with a hard cloth or using a volatile liquid such as thinner or alcohol may scratch the surface or erases characters.
About Cassette tape
Cleaning the tape head
When there’s noise or the sound quality is bad during tape play the tape head maybe dirty, clean the tape head.
About Cassette tape
•If the tape is slack tighten it.
•If the cassette tape label is peeling off glue it on again.
•Don’t use deformed cassette tape.
•Don’t place cassette tape on the dashboard etc. where the temperature is high.
•Don’t use cassette tape that’s 100 minutes long or longer.
The marking of products using lasers (Except for some areas)
CLASS 1
LASER PRODUCT
The label is attached to the chassis/case and says that the component uses laser beams that have been classified as Class 1. This means that the unit is utilizing laser beams that are of a weaker class. There is no danger of hazardous radiation outside the unit
4 | English
About Audio file
•Playable Audio file
AAC (.m4a), MP3 (.mp3), WMA (.wma)
•Playable disc media
CD-R/RW/ROM
•Playable disc file format
ISO 9660 Level 1/2, Joliet, Romeo, Long file name.
Although the audio files are complied with the standards listed above, the play maybe impossible depending on the types or conditions of media or device.
• Playing order of the Audio file
In the example of folder/file tree shown below, the files are played in the order from to .
CD ( ) <<: Folderer v vv: Audiofile
 v
v
v
v
v
v.
An online manual about audio files is put on the site, www.kenwood.com/audiofile/. On this online
manual, detailed information and notes which are not written in this manual are provided. Make sure to read through the online manual as well.
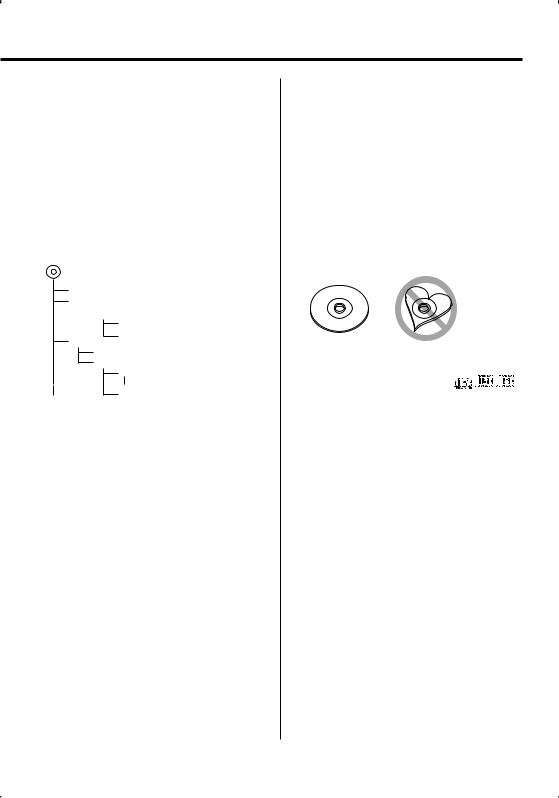
Handling CDs
•Do not touch the recording surface of the CD.
•Do not stick tape etc. on the CD, or use a CD with tape stuck on it.
•Do not use disc type accessories.
•Clean from the center of the disc and move outward.
•When removing CDs from this unit, pull them out horizontally.
•If the CD center hole or outside rim has burrs, use the CD only after removing the burrs with a ballpoint pen etc.
CDs that cannot be used
• CDs that are not round cannot be used.
• CDs with coloring on the recording surface or CDs that are dirty cannot be used.
• This unit can only play the CDs with

 . This unit may not correctly play discs which do not
have the mark.
•You cannot play a CD-R or CD-RW that has not been finalized. (For the finalization process refer to your CD-R/CD-RW writing software, and your CD-R/CD- RW recorder instruction manual.)
English | 5

General features
|
DISP/S.A |
VOL |
Control knob |
|
ATT |
WOW |
Q/MENU |
SRC |
Auxiliary Input |
WOW indicator
Power
Turning ON the Power
Press the [SRC] button.
Turning OFF the Power
Press the [SRC] button for at least 1 second.
Selecting the Source
Press the [SRC] button.
|
Source required |
Display |
|
Tuner |
«TUNER» |
|
Tape |
«TAPE» |
|
CD |
«CD» |
|
External disc (Optional accessory) |
«CD CH» |
|
Auxiliary input* |
«AUX» |
|
Auxiliary input (Optional accessory) |
«AUX EXT» |
|
Standby (Illumination only mode) |
«STANDBY» |
*An equipment such as a portable audio player can be connected to the auxiliary input terminal using a commercially available mini-plug (3.5ø).
6 | English
ATT indicator
⁄
•Use the mini-plug which is stereo type and does not have any resistance.
Volume
Increasing Volume
Turn the [VOL] knob clockwise.
Decreasing Volume
Turn the [VOL] knob counterclockwise.
⁄
•Volume adjustment range gets narrower when «V-OFF» is selected in <Audio Setup> (page 8).
Attenuator
Turning the volume down quickly.
Press the [ATT] button.
Each time you press the button, the Attenuator turns ON and OFF.

When the Attenuator is ON, the «ATT» indicator blinks.
System Q
Selecting the best sound setting preset for different types of music.
1Select the source to set
Press the [SRC] button.
2Select the Sound type
Press the [Q] button.
Each time you press the button, the sound setting alternates.
|
Sound setting |
Display |
|
Natural |
«NATURAL» |
|
User memory |
«USER» |
|
Rock |
«ROCK» |
|
Pops |
«POPS» |
|
Easy |
«EASY» |
|
Top 40 |
«TOP40» |
|
Jazz |
«JAZZ» |
⁄
• User memory: The values set on the <Audio Control> (page 7).
•Change each setting value with the <Speaker Setting> (page 9).
First, select the speaker type with the Speaker setting.
Audio Control
1Select the source to adjust
Press the [SRC] button.
2Enter Audio Control mode
Press the [VOL] knob.
«AUD mode» is displayed.
3Select the Audio item to adjust
Press the [VOL] knob.
Each time you press the knob, the item to be adjusted alternates between the items shown in the table below.
4Adjust the Audio item
Turn the [VOL] knob.
|
Adjustment Item |
Display |
Range |
|
Rear Volume |
«R-VOL» |
0 — 35 |
|
Subwoofer level |
«SubW» |
–15 — +15 |
|
Bass level |
«BasLV» |
–8 — +8 |
|
Middle level |
«MidLV» |
–8 — +8 |
|
Treble level |
«TreLV» |
–8 — +8 |
|
Balance |
«BAL» |
Left 15 — Right 15 |
|
Fader |
«FAD» |
Rear 15 — Front 15 |
Exit Audio Control mode (Volume control mode)
5Exit Audio Control mode
Press any button.
Press a button other than the [VOL] knob, [SRC], [0] and [ATT] button.
Adjusting the detail of Audio Control
Among the Basic Audio items, you can adjust the Bass level, Middle level, and Treble level in detail.
1Select the Basic Audio item
Select the desired item to be set in detail from followings;
•Bass level
•Middle level
•Treble level
For how to select Basic Audio items, see <Audio Control> (page 7).
2Enter Detail adjustment mode of Audio Control
Press the [VOL] knob for at least 1 second.
3Select the Detail Audio item to adjust
Press the [VOL] knob.
Each time you press the knob, the item to be adjusted alternates between the items shown in the table below.
Next page 3
English | 7

General features
4Adjust the Detail Audio item
Turn the [VOL] knob.
Bass level
|
Adjustment Item |
Display |
Range |
|
Bass Center Frequency |
«BasF» |
40/50/60/70/80/100/ |
|
120/150 Hz |
||
|
Bass Q Factor |
«BasQ» |
1.00/1.25/1.50/2.00 |
|
Bass Extend |
«B EX» |
ON/OFF |
|
Middle level |
||
|
Adjustment Item |
Display |
Range |
|
Middle Center Frequency |
«MidF» |
0.5/1.0/1.5/2.0 kHz |
|
Middle Q Factor |
«MidQ» |
1.0/2.0 |
|
Treble level |
||
|
Adjustment Item |
Display |
Range |
|
Treble Center Frequency |
«TreF» |
10.0/12.5/15.0/17.5 kHz |
5Exit the Detail Audio Control mode
Press the [VOL] knob for at least 1 second.
⁄
•When you set the Bass Extend to ON, low frequency response is extended by 20%.
•You can exit the Audio Control mode at anytime by pressing any button except for [VOL] and [ATT] buttons.
Audio Setup
Setting the Sound system, such as Cross over Network.
1Select the source to adjust
Press the [SRC] button.
2Enter Audio Setup mode
Press the [VOL] knob for at least 1 second.
3Select the Audio Setup item to adjust
Press the [VOL] knob.
Each time you press the knob, the item to be adjusted alternates between the items shown in the table below.
4Setup the Audio item
Turn the [VOL] knob.
|
Adjustment Item |
Display |
Range |
|
Front High Pass Filter |
«HPF» |
Through/40/60/80/100/120/ |
|
150/180/220 Hz |
||
|
Rear High Pass Filter |
«HPR» |
Through/40/60/80/100/120/ |
|
150/180/220 Hz |
||
|
Low Pass Filter |
«LPF» |
50/60/80/100/120/Through Hz |
|
Subwoofer Phase |
«PHAS» |
Normal (0°)/ Reverse (180°) |
|
Volume offset |
«V-OFF» |
–8 — ±0 (AUX: -8— +8) |
|
Loudness |
«LOUD» |
ON/OFF |
|
Dual Zone System |
«2ZON» |
ON/OFF |
⁄
• Volume offset: Sets each source’s volume as a difference from the basic volume.
• Loudness: Compensates for low and high tones during low volume. (Only the low tone is compensated for when the tuner is selected as a source.)
•Dual Zone System
Main source and sub source (Auxiliary input) output Front channel and Rear channel separately.
—Set up the channel of sub source by <Dual Zone System Setting> (page 23).
—Select Main source by [SRC] button.
—Adjust the volume of Front channel by [VOL] knob.
—Adjust the volume of Rear channel by <Audio Control> (page 7).
—The Audio Control has no effect on sub source.
•You can use the Dual Zone System with the internal auxiliary input.
5Exit Audio Setup mode
Press any button.
Press a button other than the [VOL] knob, [SRC], [0] and [ATT] button.
8 | English

Speaker Setting
Fine-tuning so that the System Q value is optimal when setting the speaker type.
1Enter Standby
Press the [SRC] button.
Select the «STANDBY» display.
2Enter Speaker Setting mode
Press the [VOL] knob.
3Select the Speaker type
Turn the [VOL] knob.
Each time you turn the knob, the setting alternates between the settings shown in the table below.
|
Speaker type |
Display |
|
|
OFF |
«SP OFF» |
|
|
For 5 |
& 4 in. speaker |
«SP 5/4» |
|
For 6 |
& 6×9 in. speaker |
«SP 6*9/6» |
|
For the OEM speaker |
«SP OEM» |
4Exit Speaker Setting mode
Press the [VOL] knob.
SRS WOW Select
You can play back adding gorgeous heavy bass to the sound and making a 3D sound field.
1Enter the WOW Select mode
Press the [WOW] button.
«WOW SEL» is displayed.
2Select the WOW item
Press the [WOW] button.
Each time the button is pressed, the SRS WOW Select switch as shown below:
|
SRS WOW |
Display |
|
Moves the sound image up a notch and adjusts bass |
«WOW Low» |
|
and the sound field. |
|
|
Moves the sound image up two notches and adjusts |
«WOW High» |
|
bass and the sound field. |
|
|
Changes to the value set in ‘SRS WOW Control’. |
«WOW User» |
|
Returns to the normal sound without SRS WOW. |
«WOW Off» |
When you set «WOW Low», «WOW High», or «WOW User», the SRS WOW function is ON.
When the SRS WOW is ON, the «WOW» indicator is ON.
⁄
•When operation stops for 3 seconds, the SRS WOW Select closes.
•WOW: TruBass, FOCUS and SRS 3D are all set to values shown below.
|
SRS WOW |
SRS FOCUS |
SRS TruBass |
SRS 3D |
|
High |
High |
On |
On |
|
Low |
Low |
On |
On |
|
Off |
Off |
Off |
Off |
SRS WOW Control
Adjusts each function of SRS WOW individually.
1Enter the WOW Control mode
Press the [WOW] button for at least 1 second.
«WOW CTRL» is displayed.
2Select the WOW item for adjustment
Push the Control knob towards up or down.
Each time the button is pressed, the items that can be adjusted switch as shown below.
3Adjust the WOW item
Push the Control knob towards right or left.
|
Adjustment Item |
Display |
Range |
|
SRS FOCUS setting |
«FOCUS» |
0(Off)/1(Low)/2(High) |
|
SRS TruBass setting |
«TB» |
OFF/ON |
|
SRS 3D setting |
«SRS» |
OFF/ON |
4Exit the WOW Control mode
Press the [WOW] button.
⁄
•TruBass: Assisting the playback for the super bass sound.
•FOCUS: Adjusts the sound image by changing the vertical position of the speakers virtually and increases or decreases the soundscape.
•SRS 3D: Making a natural 3D sound field.
•SRS 3D cannot be set in tuner source.
English | 9

General features
Subwoofer Output
Turning the Subwoofer output ON or OFF.
Push the Control knob toward down for at least 2 seconds.
Each time you push the knob, Subwoofer output switches ON and OFF.
When it is ON, «SubW ON» is displayed.
Switching Display
Changing the information displayed.
Press the [DISP] button.
Each time the button is pressed the display switches as shown below.
In Tuner source
|
Information |
Display |
|
|
Frequency |
||
|
Station name or Frequency |
«SNPS» |
|
|
Character |
||
|
Clock |
||
|
In CD & External disc source |
||
|
Information |
Display |
|
|
Play time |
||
|
Disc name |
«DNPS» |
|
|
Disc title |
«D-Title» |
|
|
Track title |
«T-Title» |
|
|
Character |
||
|
Clock |
||
|
In Audio file source |
||
|
Information |
Display |
|
|
Play time |
||
|
Folder name |
«Folder» |
|
|
File name |
«File» |
|
|
Music title |
«Title» |
|
|
Album name |
«Album» |
|
|
Character |
||
|
Clock |
||
|
In Tape source |
||
|
Information |
||
|
Play side & Tape counter |
||
|
Character |
||
|
Clock |
10 | English
In Auxiliary input source
Information
Auxiliary input name
Character
Clock
In Standby mode
Information
Character & Graphic
Clock & Graphic
Clock
⁄
•If the selected display item does not have any information, alternative information is displayed.
•Album name cannot be displayed in WMA file.
Spectrum Analyzer Select
Selecting the Spectrum Analyzer display.
1Enter the Spectrum Analyzer Select mode
Press the [S.A] button for at least 1 second.
«SPANA» is displayed.
2Select the Spectrum Analyzer
Press the [S.A] button.
Each time the button is pressed, the Spectrum Analyzers switch as shown below:
|
Spectrum Analyzer |
Display |
|
Scan of Spectrum Analyzer |
«S.A Scan» |
|
Peak Hold |
«PeakHold» |
|
Spectrum Analyzer 1 |
«SPANA 1» |
|
… |
… |
|
Spectrum Analyzer 7 |
«SPANA 7» |
|
Spectrum Analyzer off |
«S.A OFF» |
⁄
•Scan of Spectrum Analyzer:
The items from «PeakHold» to «SPANA 7» are displayed in sequence.
3Exit the Spectrum Analyzer Select mode
Press the [S.A] button for at least 1 second.
When operation stops for 10 seconds, Spectrum Analyzer at that time is registered and the Analyzer Select mode automatically closes.
 Loading…
Страницы и текст этой инструкции
 Инструкция — DPX-4010
 Информация отображена на картинке
 Информация отображена на картинке
 Информация отображена на картинке
 Информация отображена на картинке
Как использовать наш сайт инструкций OnlineManuals.ru
Наша цель состоит в том, чтобы предоставить вам быстрый доступ к содержанию инструкции для — DPX-4010.
С помощью онлайн просмотра, Вы можете быстро просмотреть содержимое инструкции и найти решение проблемы с — DPX-4010.
Для Вашего удобства
Если листать руководство пользователя — DPX-4010 прямо на сайте, не очень удобно для Вас, есть два возможных решения:
• Просмотр в полноэкранном режиме — легко просмотреть руководство пользователя (без загрузки его на свой компьютер), Вы можете использовать режим полноэкранного просмотра.
Для просмотра инструкции пользователя — DPX-4010 на полном экране, используйте кнопку «Открыть в Pdf-viewer».
• Загрузка на компьютер — Вы можете также скачать Инструкция — DPX-4010 на свой компьютер и сохранить его в файлах.
Многие люди предпочитают читать документы не на экране, а в печатной версии.
Возможность печати руководства пользователя также была предусмотрена на нашем сайте,
и вы можете использовать ее, нажав на иконку «печать» в Pdf-viewer.
Нет необходимости печатать все руководство — DPX-4010, можно выбрать только нужные страницы инструкции.

English
|
31
Cassette tape source
?
The sound quality is poor or distorted.
✔ The tape head is dirty.
☞ Clean the tape head.
?
The DPSS, Tape Advance and Music Repeat don’t
operate correctly.
✔ The space between the songs on the tape can’t be
recognized because it’s too short.
☞ Have at least 4 seconds between songs.
✔ The space between songs can’t be recognized
because there’s too much noise between songs.
☞ Reduce the noise between songs.
?
The blank skip doesn’t work.
✔ Because noise is too loud, the non-recorded part
can’t be recognized.
☞ Reduce the noise between songs.
?
Blank Skip functions at places that are recorded.
✔ Because the recording level is low, it’s recognized as
not recorded.
☞ Turn Blank Skip OFF.
The messages shown below display your
systems condition.
Eject:
No disc magazine has been loaded in the
changer. The disc magazine is not completely
loaded.
➪ Load the disc magazine properly.
No CD in the unit.
➪ Insert the CD.
No Disc:
No disc has been loaded in the disc
magazine.
➪ Load a disc into the disc magazine.
TOC Error:
No disc has been loaded in the disc
magazine.
➪ Load a disc into the disc magazine.
The CD is quite dirty. The CD is upside-down.
The CD is scratched a lot.
➪ Clean the CD and load it correctly.
Error 05:
The CD is upside-down.
➪ Load the CD correctly.
Blank:
Nothing has been recorded on the MD.
No Track:
No tracks are recorded on the MD, although it
has a title.
Error 15:
Media was played that doesn’t have data
recorded that the unit can play.
➪ Use media that has data recorded that the
unit can play.
Error 77:
The unit is malfunctioning for some reason.
➪ Press the reset button on the unit. If the
«E-77» code does not disappear, consult
your nearest service center.
Error 99:
The unit is malfunctioning for some reason.
➪ Press the reset button on the unit. If the
«E-99» code does not disappear, consult
your nearest service center.
Hold:
The protective circuit in the unit activates
when the temperature inside the automatic
disc changer exceeds 60°C (140°F), stopping
all operation.
➪ Cool down the unit by opening the
windows or turning on the air conditioner.
As the temperature falls below 60°C
(140°F), the disc will start playing again.
No Name:
Attempted to display DNPS during the CD
play having no disc names preset.
Load:
Discs are being exchanged in the Disc
changer.
Reading:
The unit is reading the data on the disc.
(Blink):
The CD player section is not operating
properly.
➪ Reinsert the CD. If the CD cannot be
ejected or the display continues to flash
even when the CD has been properly
reinserted, please switch off the power
and consult your nearest service center.
(Blink):
The tape player section is not operating
properly.
➪ Reinsert the Tape. If the tape cannot be
ejected or the display continues to flash
even when the tape has been properly
reinserted, please switch off the power
and consult your nearest service center.
PROTECT:
The speaker wire has a short-circuit or
touches the chassis of the vehicle, and then
the protection function is activated.
➪ Wire or insulate the speaker cable properly
and press the reset button.
N/A File:
An Audio file is played with a format that this
unit can’t support.
➪ —-
Copy PRO:
A copy-protected file is played.
➪ —-
Скачать
DUAL DIN SIZED CD/CASSETTE RECEIVER
DPX-MP4100
INSTRUCTION MANUAL
© B64-3609-00/00 (MW)
B64-3609-00_English_r5.indd Sec1:1
B64-3609-00_English_r5.indd Sec1:1
06.12.6 3:00:29 PM
06.12.6 3:00:29 PM