
Автомобильный мультимарочный сканер Konnwei KW808 для сканирования и диагностики автомобилей совместимых с протоколом OBDII и CAN шиной. С встроенной библиотекой ошибок.
Характеристики:
Модель: Konnwei KW808
Материал: пластик
Красный цвет
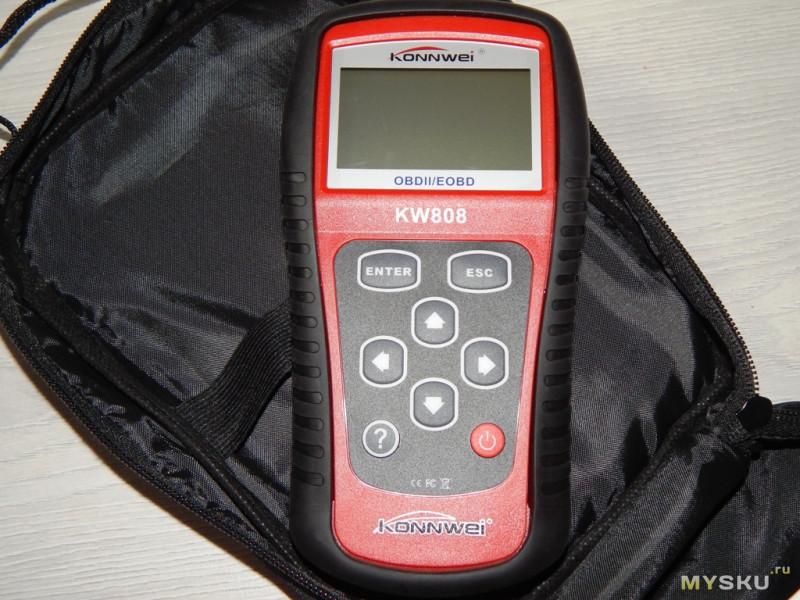
Дисплей: с подсветкой, 2,1 «LCD Экран, 128 x 64-пиксельный дисплей с регулировкой контрастности
Рабочая температура: 0 ~ 60 градусов Цельсия
Температура хранения: — 20 ~ 70 градусов Цельсия
Питание: 8 В ~ 18 В, обеспечиваемая через автомобильную батарею
Размеры: 178 мм * 95 мм * 35 мм
Комплектация:
1 — KW808 Сканер кодов
1 — кабель OBD II
1 — руководство на английском языке
1 — CD диск с инструкцией
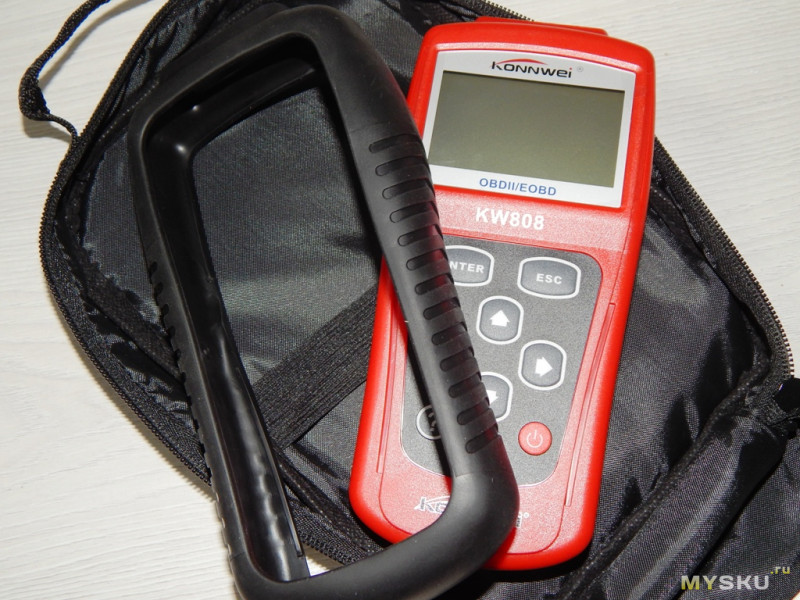
1 — Сумка
Так же продавец выделяет особенности данного сканера:
1. Типичные и специфичные для производителя диагностические коды неисправностей (DTC).
2. Функции встроенной библиотеки поиска DTC OBD-II и программное обеспечение можно обновлять через Интернет.
2. Большой легко читаемый экран с подсветкой LCD, многоязычное меню и стандартная 16-контактная OBD-II кабель.
3. Просмотр данных теста датчиков O2, данные графиков (автомобилей производства 1996 года и новее), резервное копирование памяти для анализа данных вне транспортных средств и анализа, а так же печати через USB.
4. Сканер работает со всеми совместимыми с OBD-II / EOBD автомобилями США, Европы и Азии (OBD-II является стандартным для всех автомобилей, проданных в США после 1996 года).
5. Поддерживает CAN (Controller Area Network) и все другие протоколы OBD-II.
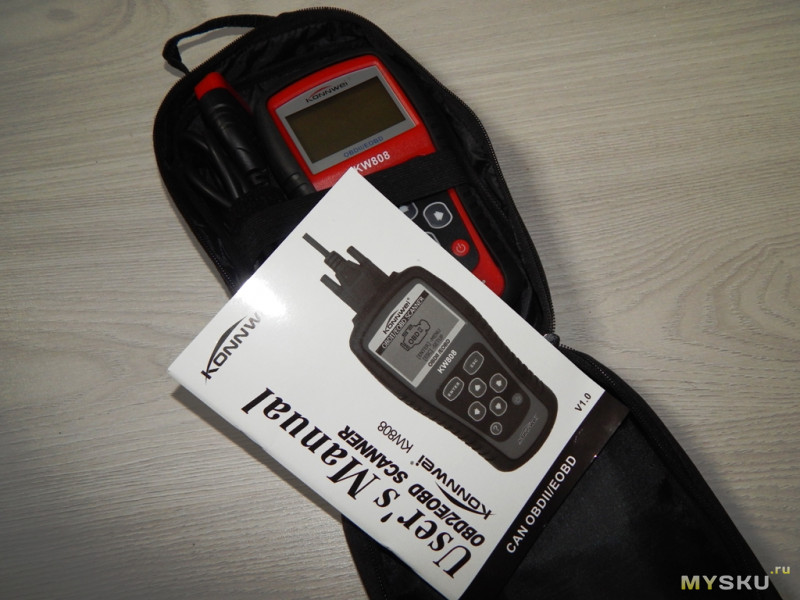
Сканер упакован в красивую картонную коробку с хорошей полиграфией.
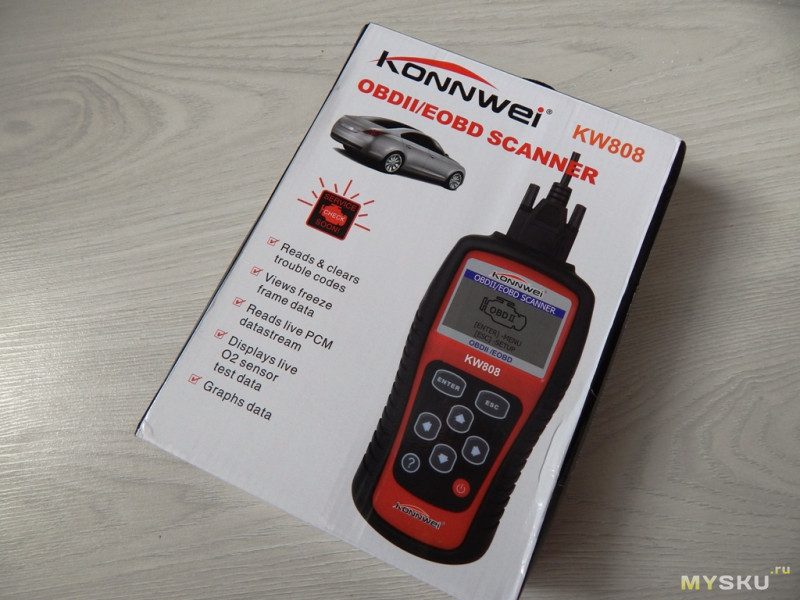
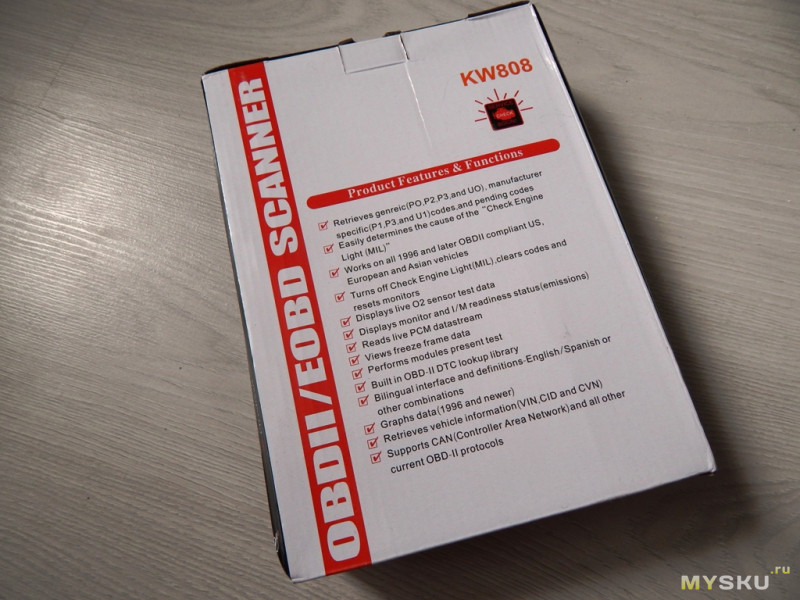
На задней части коробки и на боковых указаны основные характеристики и возможности сканера.
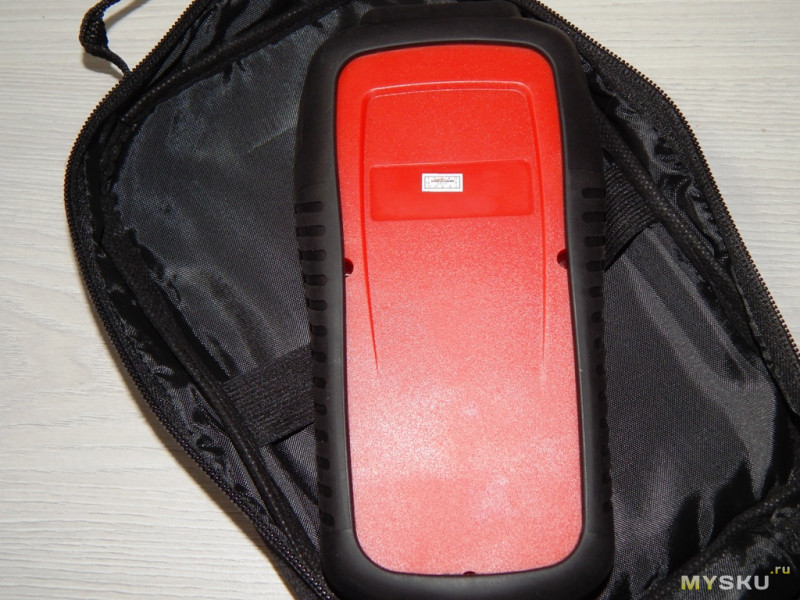
В картонной коробке находится сумка для хранения и переноски сканера. С лицевой стороне сумки, цветными нитками вышито название компании производителя. Что добавляет солидности сканеру.
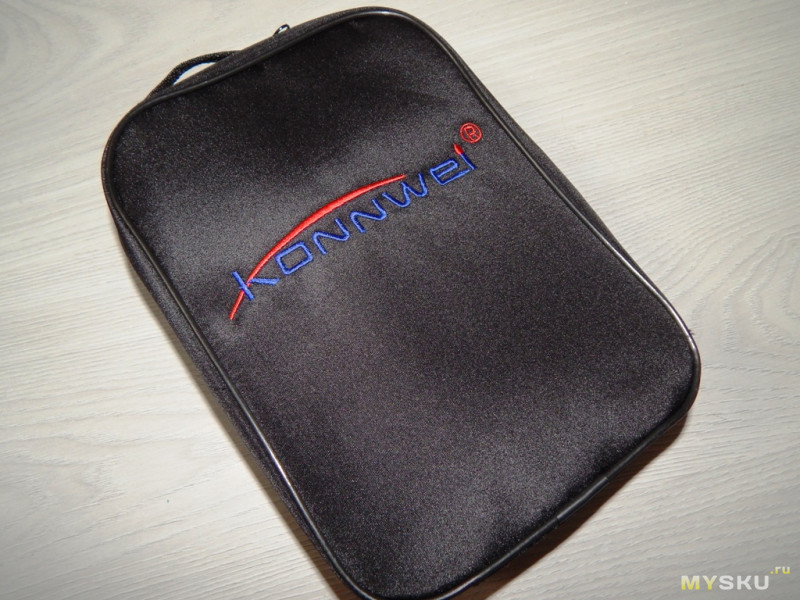
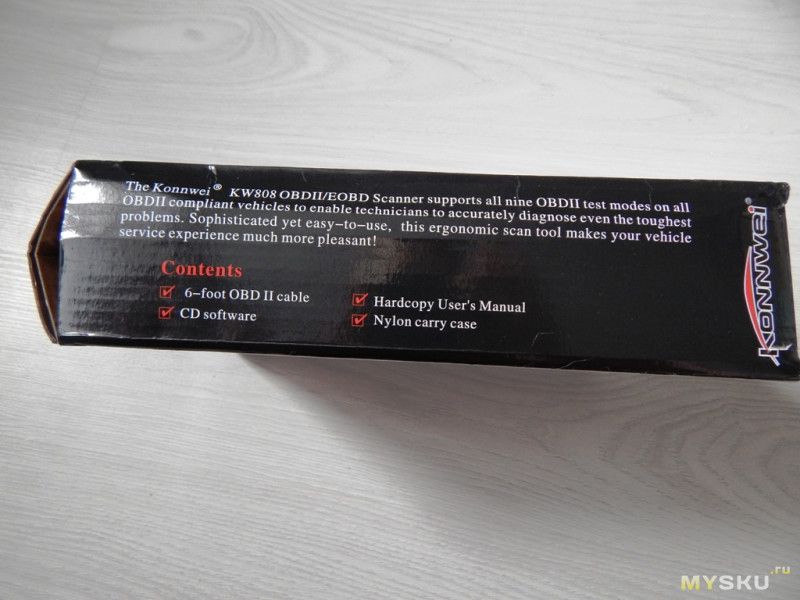
Внутри сумки расположены: инструкция, сканер и кабель для подключения к автомобилю.
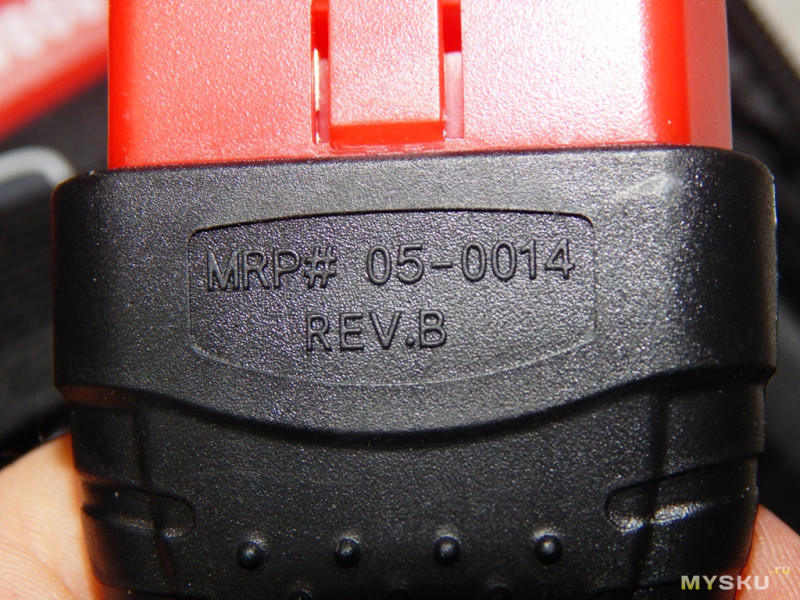
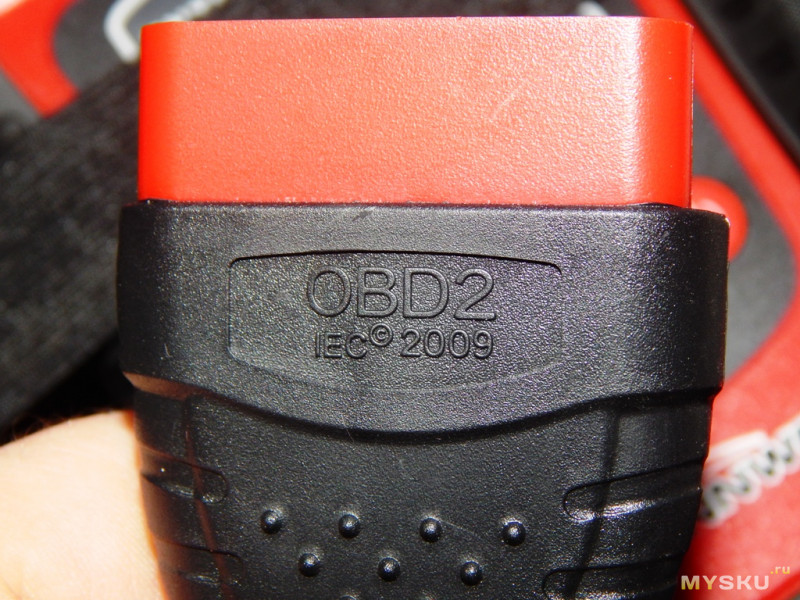
Сканер выполнен из красного пластика и обрамлен черной резиновой „калошей“. В верхней части сканера расположен разъем для подключения провода. На лицевой части экран 2,1» и 8 кнопок.
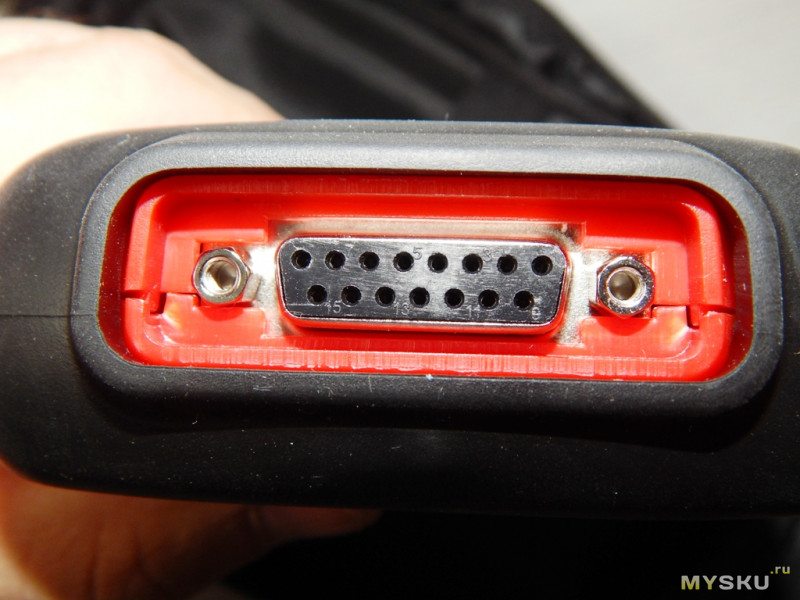
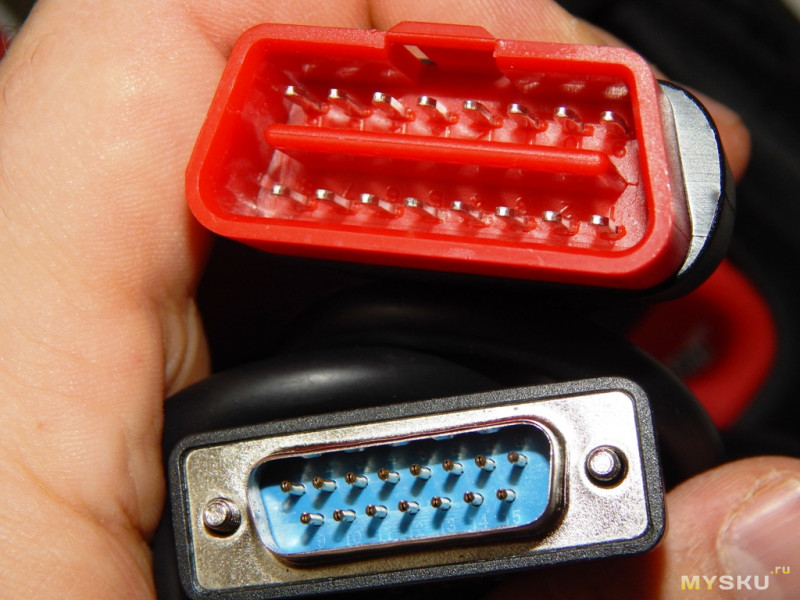
Кабель 16 пиновый разъем OBD2 «папа» с одной стороны и 16 пиновый «мама» с другой стороны. Длина кабеля ~1.5м.
Инструкция достаточно объемная на английском языке.
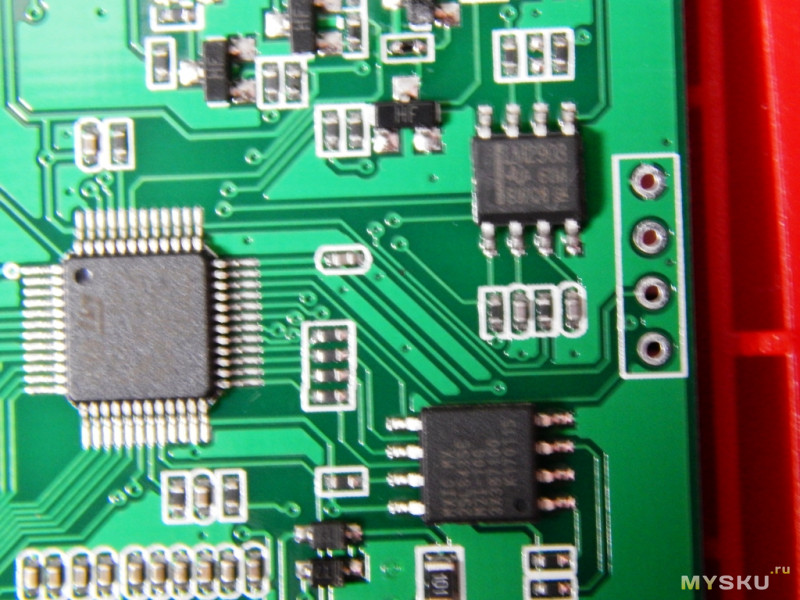
На плате было замечено место под распайку разъема USB, но в базовой комплектации его не было. Соответственно нет возможности поменять прошивку и распечатать отчеты.
Тестирование проводилось на бензиновых автомобилях mazda 5 (2008), лансер 10 (2008), мерседес а168, королла 2010. На всех получилось подключиться и считать ошибки, а так же посмотреть дополнительную информацию.
Более подробно можно посмотреть в видео на примере подключения к автомобилю
видео работы youtu.be/0R5Kay0AMSQ
видео распаковки youtu.be/KzMegOmyFf0
русская инструкция cloud.mail.ru/public/CbH6/y2NqrpV3f
В заключении можно отметить:
— нет связи по USB, ее в принципе нет совсем (нет возможности печати и обновления)
— не читаются все блоки автомобиля (но это 50/50-автомобиль/сканер)
— большие габариты сканера
+ длинный кабель для подключения
+ независимость от телефонов/планшетов/ноутбуков
+ встроенная библиотека ошибок
— не отключаемый экран (подсветка работает всегда)
ТЕХНИЧЕСКИЕ ХАРАКТЕРИСТИКИ Konnwei KW808
| Характеристики автомобильного сканера | |
| Разъем подключения | колодка OBDII |
| Протоколы связи | ISO 9141, KWP2000, SAE J1850, CAN, J1850 VPW, J1850 PWM |
| Напряжение питания | 8 — 18 В |
| Функция считывания диагностических кодов неисправностей (ДКН) | есть |
| Функция сброса и удаления ДКН | есть |
| Функция считывания потоковых данных ДКН в реальном времени | есть |
| Функция записи и воспроизведения данных Freeze frame (стоп-кадр) | есть |
| Функция считывания информации о транспортном средстве (VIN, CIN и CVN номера) | есть |
| Функция One-click I/M Readiness Key для быстрой диагностики | есть |
| Функция графического изображения данных | есть |
| Функция резервного копирования данных памяти ЭБУ для их анализа вне транспортного средства | есть |
| Функция проверки аккумуляторной батареи автомобиля | есть |
| Применение | используется со всеми автомобилями произведенными с 1996 года и поддерживающими протоколы диагностики (OBD II и CAN): VW, AUDI, SEAT, SKODA |
| Общие характеристики | |
| Дисплей | 2,8-дюймовый TFT дисплей, 128 х 64 |
| Интерфейс | английский, французский, немецкий, голландский и испанский, португальский, русский |
| Рабочая температура | от 0℃ до 60℃ |
| Температура хранения | от -20℃ до 70℃ |
| Габариты | 200 х 100 х 35 мм |
| Комплектация | автосканер Konnwei KW808 — 1 шт |
|
чехол для хранения — 1 шт инструкция по эксплуатации — 1 шт |

Технические характеристики, внешний вид и комплектация
товара
могут быть изменены
производителем без предварительного уведомления.
-
Page 3: Table Of Contents
Table of Contents Tabla de contenidos Safety Precautions and Warnings………………….1 Precauciones de seguridad y advertencias………………1 General Information………………………2 Información general………………………2 2.1. On-Board Diagnostics(OBD)II………………….2 Diagnóticos a bordo (OBD) II………………….2 Diagnostic Trouble Codes (DTCs)………………….2 Código de problema de diagnóstico (DTC)………………2 Location of the Data Link Connector (DLC)………………
-
Page 4
Review Data……………………….. 27 Revisar los datos……………………….. 27 OBDII Diagnostics……………………… 29 Diagnósticos OBDII……………………..29 Reading Codes………………………. 32 Códigos de lectura……………………..32 Erasing Codes……………………….35 Borrado de códigos……………………..35 Live Data………………………….38 Datos en vivo……………………….38 Viewing Freeze Frame Data………………….51 Visualización de datos de la imagen congelada…………….51 Retrieving I/M Readiness Status…………………. -
Page 5: Safety Precautions And Warnings
1. Safety Precautions and Warnings 1. Precauciones de seguridad y advertencias To prevent personal injury or damage to vehicles and/or the scan tool, read this instruction manual first and observe the following safety precautions at a minimum whenever working on a vehicle: Para evitar cualquier tipo de lesión personal o daño al vehículo y/o a la herramienta de escaneo, lea este manual de instrucciones primero y observe las siguientes precauciones de seguridad…
-
Page 6: General Information
2. General Information 2. Información general 2.1. On-Board Diagnostics(OBD)II 2.1 Diagnóticos a bordo (OBD) II The first generation of On—Board Diagnostics (called OBD I) was developed by the California Air Resources Board (ARB) and implemented in 1988 to monitor some of the emission control components on vehicles, As technology evolved and the desire to improve the On-Board Diagnostic system increased, a new generation of On—Board Diagnostic system was developed, This second generation of On-Board Diagnostic regulations is called…
-
Page 7
cuatro caracteres, todos números, brindan información adicional sobre dónde se originó el DTC y las condiciones operativas que la causaron. A continuación, se muestra un ejemplo para ilustrar la estructura de los dígitos:… -
Page 8: Location Of The Data Link Connector (Dlc)
2.3 Location of the Data Link Connector (DLC) 2.3 Ubicación del conector de enlace de datos (DLC) The DLC (Data Link Connector or Diagnostic Link Connector) is the standardized 16-cavity connector where diagnostic scan tools interface with the vehicle * s on-board computer. The DLC is usually located 12 inches from the center of the instrument panel (dash), under or around the driver * s side for most vehicles, IF Data Link Connector is not located under dashboard, a label should be there telling location, For some Asian and European vehicles, the DLC is located behind the ashtray and the ashtray must be…
-
Page 9: Obdii Readiness Monitors
2.4 OBDII Readiness Monitors 2.4 Monitores de preparación OBDII An important part of a vehicle’ s OBD II system is the Readiness Monitors, which are indicators used to find out if all of the emissions components have been evaluated by the OBD II system. They are running periodic tests on specific systems and components to ensure that they are performing within allowable limits.
-
Page 10
02 Sensors 02 sensores Catalyst Catalizador Evaporative System Sistema evaporativo… -
Page 11: Obdii Monitor Readiness Status
02 Sensor Heater 02 Sensor del calentador Secondary air Aire secundario Heated Catalyst Catalizador calentado A/C system Fuente eléctrica de abordo 2.5 OBDII Monitor Readiness Status 2.5 Estado de lectura del monitor OBDII OBDII systems must indicate whether or not the vehicle s PCM ’…
-
Page 12: Obd Ii Definitions
2.6 OBD II Definitions 2.6 Definiciones OBD II Powertrain Control Module (PCM) — 0 BD II terminology for the on-board computer that controls engine and drive train. Módulo de control del tren motriz (PCM): 0 terminología BD II para la computadora de a bordo que controla el motor y el tren de transmisión.
-
Page 13
DTC —Diagnostic Trouble Codes (DTC) that idenify which section of the emission control system has malfunctioned. DTC: códigos de diagnóstico de problemas (DTC) que identifican qué sección del sistema de control de emisiones ha funcionado mal. Enabling Criteria Also termed Enabling Conditions. They are the vehicle-specific events or conditions that must occur within the engine before the various monitors will set, or run. -
Page 14: Using The Scan Tool
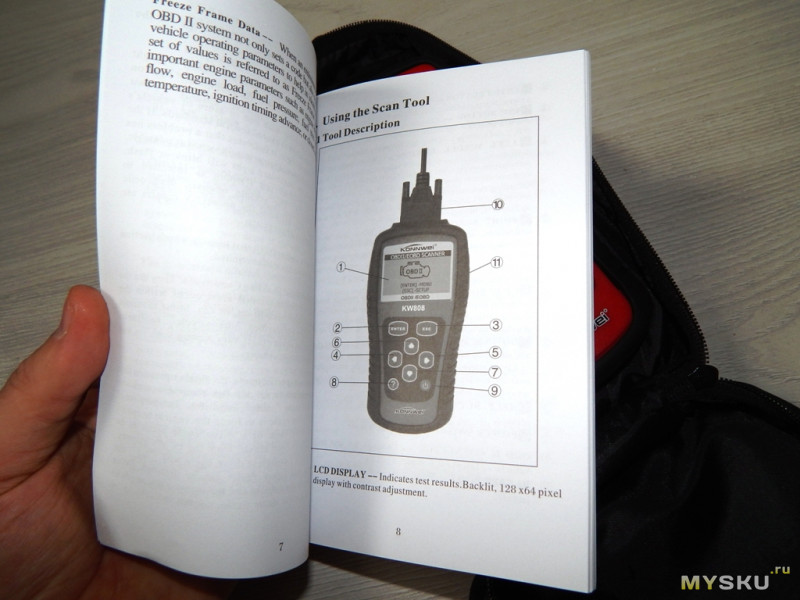
3. Using the Scan Tool 3. Utilización de la herramienta de escaneo 3.1 Tool Description 3.1 Descripción de la herramienta LCD DISPLAY — Indicates test results.Backlit, 128 x64 pixel display with contrast adjustment. ① PANTALLA LCD — Indica los resultados de la prueba. Iluminado, pantalla de 128 x 64 píxeles con ①…
-
Page 15
LEFT SCROLL BUTTON — When look up DTC definitions, moves to previous character and ④ views additional information on previous screens if DTC definition covers more than one screen; deselect all marked PID data when viewing or recording customized live data list; views previous frames of recorded data when playing back live data. -
Page 16: Specifications
RIGHT SCROLL BUTTON — When look up DTC definitions, moves to next character and view ⑤ additional information on next screens if DTC definition covers more than one screen; selects/deselects PID data when viewing or recording customized live data list, and views next frames of data when playing back live data.
-
Page 17: Accessories Included
Length Width Height Largo Ancho Alto 178 mm(7.00″) 95 mm(3.74″) 35mm(1.38″) 178 mm (7,00 «) 95 mm (3,74») 38 mm (1,38 «) NW:0.38kg(0.841b), GW:0.55Kg(1.211b) NW: 0.38kg (0,841b), GW: 0,55Kg (1.211b) 3.3. Accessories Included 3.3 Accesorios incluídos User’s Manual ——Instructions on tool operations Manual del usuario — Instrucciones sobre las operaciones de la herramienta OBD2 cable — Provides power to tool and communicates between tool and vehicle Cable OBD2: Proporciona energía a la herramienta y se comunica entre la herramienta y el…
-
Page 18
abrasivo y un paño suave de algodón. No empape el teclado ya que el teclado no es resistente al agua. -
Page 19: Extrnal Power
3.6 Extrnal Power 3.6 Potencia externa External power of the scan tool is provided via the vehicle Data Link Connector (DLC). Just follow the steps below to turn on the scan tool; La potencia externa de la herramienta de escaneo se proporciona a través del conector de enlace de datos (DLC) del vehículo.
-
Page 20
UP/DOWN button to change selected digit/character and press ENTER button to confirm. Desde el menú de búsqueda de DTC, use el botón IZQUIERDA / DERECHA para moverse al carácter deseado, use el botón ARRIBA / ABAJO para cambiar el dígito / carácter seleccionado y presione el botón ENTER para confirmar. -
Page 21: Product Setup
View the DTC definition on screen. When DTC definition covers more than one screen, use LEFT/RIHT button to view additional information on previous/next screens. Ver la definición de DTC en la pantalla. Cuando la definición del DTC cubre más de una pantalla, use el botón IZQUIERDA/DERECHA para ver información adicional en las pantallas anteriores/siguientes.
-
Page 22
From the Main Menu: press LEET/RIGHT button or Use the UP/ DOWN scroll button to select System Setup, and press ENTER button. Follow the instructions to make adjustments and settings as described in the following setup options. Desde el menú principal: presione el botón INZQUIERDA/DERECHA o utilice ARRIBA/ABAJO botón de desplazamiento para seleccionar la configuración del sistema, y presione el botón ENTER. -
Page 23
Langusge Setup Configuración del idioma English is the default langupge, Está configurado en inglés por defecto From Main Menu, press LEET/RIGHT button or use UP/DO WN scroll button to select Language, and press ENTER button. Desde el menú principal, presione el botón IZQUIERDA/DERECHA o use el botón ARRIBA/ABAJO para seleccionar el idioma, y presione el botón ENTER. -
Page 24
From Contrast menu, use UP/DOWN scroll button to increase or decrease contrast. Desde el menú Contraste, use el botón de desplazamiento ARRIBA/ABAJO para aumentar o disminuir el contraste. Press ENTER button to save your settings and return to previous menu. Presione el botón ENTER para guardar su configuración y regresar al menú… -
Page 25
Press ENTER button to save your selection and return to previous menu. Presione el botón ENTER para guardar su selección y regresar al menú anterior Beep Set Configuración del pitido The default setting is Beep On. El pitido está encendido por defecto From System Setup menu, use UP/DOWN scroll button to select Beep Set and press ENTER button. -
Page 26
From System Setup menu, use UP/DOWN scroll button to select Tool Self-test, and press ENTER button. En el menú de configuración del sistema, use el botón de desplazamiento ARRIBA/ABAJO para seleccionar la autocomprobación de la herramienta y presione el botón ENTER Select Display Test from Tool Self-test menu and press ENTER button. -
Page 27
Press any key to start test. When you press a key, the key name should be observed on the display. If the key name does not show up, then the key is not functioning properly. Presione cualquier tecla para comenzar la prueba. Cuando presiona una tecla, el nombre de la tecla debe observarse en la pantalla. -
Page 28
Press ESC button to return. Presione ESC para volver atrás. -
Page 29: Vehicle Coverage
3.9 Vehicle Coverage 3.9 Cobertura del vehículo The KONNWEI KW818 OBDII/EOBD Scanner is specially designed to work with all OBD II compliant vehicles, including those equipped with the next-generation protocol — Control Area Network (CAN). It is required by EPA that all 1996 and newer vehicles (cars and light trucks) sold in the United States must be OBD II compliant and this includes all Domestic, Asian and European vehicles.
-
Page 30
Operating Error Error de funcionamiento If the scan tool freezes,then an exception occurs or the vehicle’s ECU (Engine Control Unit) is too slow to respond to requests. You need to do the following to reset the tool: Si la herramienta de escaneo se congela, se produce una excepción o la ECU (Unidad de control del motor) del vehículo es demasiado lenta para responder a las solicitudes. -
Page 31: Review Data
Press and hold POWER button for at least 2 seconds to reset the scan tool. Mantenga presionado el botón POWER durante al menos 2 segundos para reiniciar la herramienta de escaneo. Turn the ignition off and wait for about 10 seconds. Turn the ignition back to on and continue the …
-
Page 33: Obdii Diagnostics
• If no data from previously tested vehicle is recorded, only Module Present data containing module ID and protocol type can be reviewed. • Si no se registran datos del vehículo previamente probado, solo se pueden revisar los datos del Módulo Presente que contienen la ID del módulo y el tipo de protocolo.
-
Page 34
button to select Diagnostics from the menu. Presione botón ENTER para ingresar menú principal, presione botón IZQUIERDA/DERECHA o use el botón de desplazamiento ARRIBA/ABAJO para seleccionar Diagnósticos en el menú. Press ENTER button to confirm A sequence of messages displaying the OBD2 protocols will be observed on the display until the vehicle protocol is detected. -
Page 35
If no data is stored in the scan tool, above prompt will not show up. • Si no se almacenan datos en la herramienta de escaneo, el mensaje anterior no se mostrará. •… -
Page 36: Reading Codes
If you wish to erase the data, press ENTER button; if you do not want to erase the data, press ESC or use LEFT/RIGHT button to select NO and press ENTER to continue. Si desea borrar los datos, presione el botón ENTER; si no desea borrar los datos, presione ESC o use el botón IZQUIERDA / DERECHA para seleccionar NO y presione ENTER para continuar.
-
Page 37
ciclo de conducción actual o el último, pero que aún no se consideran serios. Los códigos emergentes no encienden la luz indicadora de mal funcionamiento (MIL). Si el fallo no ocurre dentro de un cierto número de ciclos de calentamiento, el código se borra de la memoria… -
Page 38
Use UP/DOWN scroll button to select Read Codes from Diagnostic Menu and press ENTER button. Use el botón de desplazamiento ARRIBA / ABAJO para seleccionar Leer Códigos del Menú de Diagnóstico y presione el botón ENTER. Use UP/DOWN scroll button to select Stored Codes or Pending Codes form the Trouble Codes menu and press ENTER button. -
Page 39: Erasing Codes
If more than one DTC is found, use UP/DOWN scroll button, as necessary, until all the codes have been shown up. Si se encuentra más de un DTC, use el botón de desplazamiento ARRIBA / ABAJO, según sea necesario, hasta que se muestren todos los códigos. •…
-
Page 40
A warning message comes up asking for your confirmation. Aparecerá un mensaje de advertencia solicitando su confirmación. -
Page 41
• If you do not want to proceed with erasing codes, press ESC button or use LEFT/RIGHT scroll button to select NO to exit. A message of «Command Cancelled! show ups. Wait a few seconds or press any key to return to Diagnostic Menu. •… -
Page 42: Live Data
5.3 Live Data 5.3 Datos en vivo Viewing Data Visualización de datos The View Data function allows viewing of live or real time PID data of vehicle’s computer module(s). La función Ver datos permite ver los datos PID en tiempo real o los de los módulos del ordenador del vehículo To view live data, use UP/DOWN scroll button to select Live Data from Diagnostic Menu and press ENTER button.
-
Page 43
Viewing Complete Data Set Visualización del conjunto completo de datos To view complete set of data, use UP/DOWN scroll button to select Complete Data Set from View Data menu and press ENTER button. Para ver un conjunto completo de datos, use el botón de desplazamiento ARRIBA / ABAJO para seleccionar el conjunto de datos completo en el menú… -
Page 44
Press ESC button to return to previous menu. Presione el botón ESC para regresar al menú anterior. Viewing Custom Data Set Visualización de conjunto de datos personalizados To view customized PID data, use UP/DOWN scroll button to select Custom Data Set from View Data menu and press RNTER button. -
Page 45
• You are allowed to pick up a maximum of 18 PIDs, If the selected PIDs exceed 18, a «The selected data list is full!» message displays on the screen. • Puede recoger un máximo de 18 PID, si los PID seleccionados superan los 18, el mensaje «¡La lista de datos seleccionada está… -
Page 46
There are two trigger modes used to record data: Hay dos modos de activación utilizados para registrar datos: Manual Trigger — allows user to press ENTER button to start recording. Disparador manual: permite al usuario presionar el botón ENTER para iniciar la grabación. -
Page 47
Use UP/DOWN scroll button to select a trigger mode and press ENTER button. Use el botón de desplazamiento ARRIBA / ABAJO para seleccionar un modo de disparo y presione el botón ENTER. Use UP/DOWN scroll button to select a memory location and press ENTER button. Use el botón de desplazamiento ARRIBA / ABAJO para seleccionar una ubicación de memoria y presione el botón ENTER. -
Page 48
Observe on-screen instructions. Observe las instrucciones en pantalla. If Manual Trigger is selected, following screen shows: • • Si se selecciona el disparador manual, la siguiente pantalla muestra: • If DTC Trigger is selected, following screen shows: • Si se selecciona el disparador DTC, la siguiente pantalla muestra: Wait for DTC to trigger recording or press ENTER to start recording. -
Page 49
ESC button, or use LEFT/RIGHT button to select NO and press ENTER button to return to Record Data menu. • Si desea reproducir datos grabados, presione el botón ENTER; si no desea reproducir, presione el botón ESC, o utilice el botón IZQUIERDA / DERECHA para seleccionar NO y presione el botón ENTER para regresar al menú… -
Page 50
Observe on-screen instructions. Wait a few seconds or press any key to continue. Observe las instrucciones en pantalla. Espere unos segundos o presione cualquier tecla para continuar. 10) Use RIGHT button select/deselect data parameters, Selected parameters are marked with solid squares. -
Page 51
• If you decide to deselect these items, press ENTER; if you decide not to, press ESC button, or use UP/DOWN button to select NO and press ENTER to continue PID selections. • Si decide anular la selección de estos elementos, presione ENTER; si decide no hacerlo, presione el botón ESC o use el botón ARRIBA / ABAJO para seleccionar NO y presione ENTER para continuar las selecciones de PID. -
Page 52
• If you do not wish to proceed with overwriting old recording, press ENTER button; if you do not wish to overwrite it, press ESC button, or use LEFT/RIGHT button to select NO and press ENTER to pick another memory location. •… -
Page 53
15) The scan tool keep recording PID data until user presses ESC button, the selected memory location is full, or it completes recording, A message prompting to playback data shows on the screen. 15) La herramienta de escaneo continúa grabando los datos PID hasta que el usuario presiona el botón ESC, la ubicación de la memoria seleccionada está… -
Page 54
Playing Back Data Reproducción de datos The Playback Data function allows viewing of previously stored PID data. La función de reproducción de datos permite ver datos PID almacenados previamente. To playback recorded data, use UP/DOWN scroll button to select Playback Data from Live Data menu and press RNTER button. -
Page 55: Viewing Freeze Frame Data
• The number to the upper right corner of the screen indicates total number of recorded frames and sequence of frame being displayed. • El número x / x en la esquina superior derecha de la pantalla indica el número total de fotogramas grabados y la secuencia de fotogramas que se muestra.
-
Page 56
Wait a few seconds while the scan tool validates the PID MAP. Espere unos segundos mientras la herramienta de escaneo valida el PID MAP. If retrieved in formation covers more than oen screen, then a down arrow will appear. Use DOWN scroll button, as necessary, until all the data have been shown up. -
Page 57: Retrieving I/M Readiness Status
5.5 Retrieving I/M Readiness Status 5.5 Recuperación del estado de preparación de I/M I/M Readiness function is used to check the operations of the Emission System on OBD2 compliant vehicles. It is an excellent function to use prior to having a vehicle inspected for compliance to a state emissions program.
-
Page 58
Use UP/DOWN scroll button, as necessary, to view the status of the MIL light (”ON” or,,OFF ) and the following monitors: Use el botón de desplazamiento ARRIBA / ABAJO, según sea necesario, para ver el estado de la luz MIL («ON» u «OFF») y los siguientes monitores: Misfire monitor — Misfire monitor •… -
Page 59
Press ESC button to return to Diagnostic Menu. Pulse ESC para volver al menú de Diagnóstico… -
Page 60: Prueba De Monitor
5.6 O2 Monitor Test 5.6 02 Prueba de monitor OBD2 regulations set by SAE require that relevant vehicles monitor and test the oxygen (02) sensors to identify problems related to fuel efficiency and vehicle emissions. These tests are not on-demand tests and they are done automatically when engine operating conditions are within specified limits.
-
Page 61: O2 Monitor Test
Use UP/DOWN scroll button to select 02 sensor from 02 Monitor Test menu and press ENTER button. Use el botón de desplazamiento ARRIBA / ABAJO para seleccionar el sensor 02 del menú de prueba del monitor 02 y presione el botón ENTER. •…
-
Page 62
5.7 On-Board Monitor Test 5.7 Prueba de monitor de a bordo The On-Board Monitor Test is useful after servicing of after erasing a vehicle’s control module memory. The On-Board Monitor Test for non-CAN-equipped vehicles retrieves and displays test results for emission-related power train components and systems that are not continuously monitored. -
Page 63: On-Board Monitor Test
• If the vehicle under test does not support the mode, an advisory message will be displayed on the screen. • Si el vehículo bajo prueba no es compatible con el modo, se mostrará un mensaje de advertencia en la pantalla. •…
-
Page 64: Component Test
5.8 Component Test 5.8 Prueba de componentes The Component Test function allows initiating leak test for the vehicle’s EVAP system. The scan tool itself does not perform the leak test,but commands the vehicle’s on-board computer to start the test. Different vehicle manufacturers might have different criteria and methods for stopping the test once it has been started.
-
Page 65: Viewing Vehicle Information
• Some vehicles do not allow scan tools to control vehicle systems or components. If the vehicle under test does not support the EVAP Leak Test, an advisory message is displayed on the screen. • Algunos vehículos no permiten que las herramientas de escaneo controlen los sistemas o componentes del vehículo.
-
Page 66: Modules Present
Wait a few seconds while the scan tool reads vehicle information. Espere unos segundos mientras la herramienta de escaneo lee la información del vehículo. • If the vehicle does not support this mode, a message shows on the display warning that the mode is not supported.
-
Page 67: Appendix
View modules present with their IDs and communication protocols. Ver los módulos presentes con sus ID y protocolos de comunicación. 6. Appendix 6. Apéndice 6.1 APPendix 1-PID List 6.1 Apéndice Lista 1-PID PID Abbreviation Full Name PID Abreviatura Nombre complet DTC_CNT DTC Stored Number Número almacenado de DTC…
-
Page 68
Long Term Fuel Trim-Bank3 LONGFT3(%) Combustible de larga duración Trim-Bankl3 SHRTFT2(%) Short Term Fuel Trim-Bank2 Combustible de corto plazo Trim-Bank2 SHRTFT4(%) Short Term Fuel Trim-Bank4 Combustible de corto plazo Trim-Bank4 Long Term Fuel Trim-Bank2 LONGFT2(%) Combustible de larga duración Trim-Bankl2 LONGFT4(%) Long Term Fuel Trim-Bank4 Combustible de larga duración Trim-Bankl4… -
Page 69
Sensor de flujo de masa de aire TP(%) Absolut Throttle Position Posición del acelerador absoluta… -
Page 70
PID Abbreviation Full Name Abreviación PID Nombre complete Commanded Secondary Air Status AIR 一 STAT Estado del aire secundario ordenado 02SL0C Location of 02 Sensors Ubicación de los sensores 02 02 Sensor Output Voltage(BlSl) 02B1S1(V) 02 Voltaje de salida del sensor (BISI) Short Term Fuel Trim(BlSl) SHRTFTB1S1 (%) Ajuste de combustible a corto plazo (BISI) -
Page 71
Short Term Fuel Trim(B2S3) SHRTFTB2S3 (%) Ajuste de combustible a corto plazo (B2S3) 02 Sensor Output Voltage(B2S4) 02B2S4(V) 02 Voltaje de salida del sensor (B2S4) Short Term Fuel Trim(B2S4) SHRTFTB21S4 (%) Ajuste de combustible a corto plazo (B2S4) 02 Sensor Output Voltage(B2Sl) 02B1S1(V) 02 Voltaje de salida del sensor (B2Sl) Short Term Fuel Trim(B2Sl) -
Page 72
PID Abbreviation Full Name Abreviación PID Nombre completo Short Term Fuel Trim(B4Sl) SHRTFTB4S1(%) Combustible de corto plazo (B4Sl) 02 Sensor Output Voltage(B4S2) 02B4S2(V) 02 Sensor de voltaje de salida (B4S2) Short Term Fuel Trim(B4S2) SHRTFTB4S2(%) Ajuste de combustible a corto plazo (B4S2) OBD Require To Which Vehicle OBDSUP Designed OBD requerido para cada vehículo… -
Page 73
Equivalence Ratio(wide range 02S)(B2S3) EQ—RATB2S3 Relación de equivalencia (rango amplio 02S) (B2S3) 02 Sensor Voltage(wide range 02S)(B2S3) 02B2S3(V) 02 Voltaje del sensor (amplio rango 02S) (B2S3) Equivalence Ratio(wide range 02S)(B2S4) EQ—RATB2S4 Relación de equivalencia (rango amplio 02S) (B2S4) 02 Sensor Voltage(wide range 02S)(B2S4) 02B2S4(V) 02 Voltaje del sensor (amplio rango 02S) (B2S4) Equivalence Ratio(wide range 02S)(B2S1) -
Page 74
PID Abbreviation Full Name Abreviación PID Nombre completo Equivalence Ratio(wide range 02S)(B2S1) EQ—RATB2S1 Relación de equivalencia (rango amplio 02S) (B2S1) 02 Sensor Voltage(wide range 02S)(B2S 1) 02B2S1(V) 02 Voltaje del sensor (amplio rango 02S) (B2S 1) Equivalence Ratio(wide range 02 S)(B2S2) EQ—RATB2S2 Relación de equivalencia (amplio rango 02 S) (B2S2) 02 Sensor Voltage(wide range 02S)(B2S2) -
Page 75
Equivalence Ratio(wide range 02S)(B1S2) EQ—RAT12 Relación de equivalencia (amplio rango 02S) (B1S2) 02 Sensor Currents wide range 02S)(B IS 2) 02S12(mA) 02 Corriente del sensor (amplio rango 02S) (B1 SI) Equivalence Ratio (wide range 02 S)(B1 S3) EQ—RAT13 Relación de equivalencia (amplio rango 02S) (B1S2) 02 Sensor Current(wide range 02S)(BIS3) 02S13(mA) 02 corrientes de sensor amplia gama 02S) (BIS3) -
Page 76
PID Abbreviation Full Name Abreviación PID Nombre completo 02 Sensor Current(wide range 02S)(B2S1) 02S21(mA) 02 Corriente del sensor (amplio rango 02S) (B2S1) Equivalence Ratio(wide range 02S)(B2S2) EQ—RAT22 Relación de equivalencia (amplio rango 02S) (B2S2) 02 Sensor Current(wide range 02S)(B2S2) 02S22(mA) 02 Corriente del sensor (amplio rango 02S) (B2S2) Equivalence Ratio(wide range 02 S)(B 2 S3) EQ—RAT23… -
Page 77
Catalyst Temperature Bank 2 Sensorl CATEMP21(°F) Temperatura del catalizador Bank 2 Sensor 1 CATEMP21(t!) Catalyst Temperature Bank 2 Sensor 1 Temperatura del catalizador Bank 2 Sensor 1 Catalyst Temperature Bank 1 Sensor2 CATEMP12(°F) Temperatura del catalizador Bank 1 Sensor 2 Catalyst Temperature Bank 1 Sensor2 CATEMP12(t!) Temperatura del catalizador Bank 1 Sensor 2… -
Page 78
PID Abbreviation Full Name Abreviación PID Nombre completo Absolute Load Value LOAD 一 ABS(%) Valor de carga absoluta Commanded Equivalence Ratio EQ_RAT Proporción de equivalencia ordenada Relative Throttle Position TP_R(%) Posición relativa del acelerador Ambient Air Temperature AAT(°F) Temperatura ambiente Ambient Air Temperature AAT(t;) Temperatura ambiente… -
Page 79: Appendix 2 — In-Use Performance Tracking Data List
6.2 Appendix 2 — In-use Performance Tracking Data List 6.2 Apéndice 2 – Seguimiento del rendimiento en uso Lista de datos Abbreviation Full Name Definitions Abreviatura Nombre completo Definiciones OBD Monitoring OBD Monitoring Conditions Encountered OBDCOND Conditions Encountered Counts displays ESCumber of times that the Counts Condiciones de vehicle has been operated in the specified OBD monitoring conditions (genersl denominator).
-
Page 80
catalizador El banco 2 muestra ES Cumber de tiempo en el que se han encontrado todas las condiciones necesarias para detectar un mal funcionamiento del banco del sistema catalizador (numerador). Catalyst Monitor Catalyst Monitor Conditions Encountered CATCOND2 Conditions Encountered Counts Bank 2 displays ES Cumber of times Counts Bank 2 that the vehicle has been operated in the specified catalyst monitoring conditions… -
Page 81
02 Sensor Monitor 02 Sensor Monitor Completion Counts Bank 1 02SC0MP1 Completion Counts Bank displays ESCumber of time that all conditions necessary to detect an oxygen sensor bank 1 malfunction have been encountered 02 Sensor del monitor del (numerator). sensor Cuenta el banco 1 02 Cuenta de finalización del monitor de sensor El banco 1 muestra el tiempo de espera para detectar todas las condiciones necesarias… -
Page 82
EGR Monitor Conditions EGR Monitor Completion Encountered Counts EGRCOND Encountered Counts Las displays ESCumber of time that the vehicle has condiciones del monitor been operated in the specified EGR system monitoring conditions (denominator). Las condiciones del monitor EGR cuentan las La finalización del conteo del monitor de EGR cuentas encontradas muestra el número de veces que el vehículo ha… -
Page 83
AIR Monitor Completion AIR Monitor Completion Condition Counts AIRCOMP Condition Counts (Secondary Air) displays ESCumber of time (Secondary Air) that all conditions necessary to detect an AIR system malfunction have been encountered Condición de finalización (numerator). del monitor de aire cuenta (aire secundario) La cuenta de condición de finalización del monitor de aire (aire secundario) muestra el… -
Page 84: Warranty And Service
(1) año a partir de la fecha de la compra original, sujeto a los siguientes términos y condiciones: The sole responsibility of Konnwei under the Warranty is limited to either the repair or, at the option of Konnwei, replacement of the scan tool at no charge with Proof of Purchase. The sales receipt may be used for this purpose.
Konnwei KW808 – устройство для диагностики автомобиля подключается к разъему OBD2 и позволяет самостоятельно считывать и сбрасывать коды неисправностей, проверять работу различных систем. Автосканер оснащен крупным дисплеем с подсветкой, поддерживает построение графиков в реальном времени, меню переведено на русский язык. В прошивке автосканера встроена библиотека кодов неисправностей с описаниями.
Устройство отлично подойдет для полной диагностики автомобиля с OBD II: Считывание, удаление кодов неполадок, просмотр данных в реальном времени, построение графиков, просмотр стоп-кадров, получение статуса готовности I / M, диагностика системы отработавших газов, тестирование бортовой системы и проверка других компонентов. Крупные кнопки, большой экран и меню на русском языке позволяют комфортно просматривать данные прямо на устройстве и пользоваться автосканером в перчатках.
Konnwei KW808 совместим со следующими автомобилями:
Американские марки с 1996 по настоящее время: Chrysler, Ford, GM, Jeep.
Европейские марки с 2003 по настоящее время: Alfa Romeo, SAAB, Acura, Opel, Audi, Seat, Bentley, Skoda, Daewoo, Benz, Daihatsu, Land Rover, BMW, Vauxhall, Volvo, VW, Ford, Jaguar.
Французские марки после 2006: Citroen, Fiat, Renault, Peugeot. Не поддерживает Renault Clio 2/Megane/Dacia Logan.
Азиатские марки после 2007: KIA, Isuzu, Honda, Mitsubishi, Hyundai, Dacia, Lexus, Mazda, Nissan, Subaru, Suzuki, Toyota.
Не поддерживаются российские автомобили до 2012 года: ВАЗ, УАЗ, ЛАДА.
Особенности:
1. Считывает и удаляет общие коды неисправностей OBD II.
2. Выключает лампу check engine (MIL)
3. Отображает общие коды P0, P2, P3, U0 и специфические коды производителя P1, P3 и U1.
4. Получение статуса готовности I / M.
5. Определяет информацию о стоп-кадре OBD-II.
6. Считывает поток данных PCM в реальном времени.
7. Отображает данные датчика O2 в реальном времени.
8. Тестирование бортовой системы и проверка других компонентов.
9. Поддерживает CAN и другие протоколы OBD-II
10. Встроенная библиотека поиска DTC OBD-II
11. Проверка уровня выбросов (OBD2)
12. Получение информации об автомобиле (VIN, CID и CVN)
13. Определяет состояние контрольной лампы неисправности (MIL)
14. Определения кодов отображаются на экране устройства
15. Обновление прошивки через Интернет
16. Высокая надежность и точность
17. Легко читаемый кристально чистый большой ЖК-дисплей 128×64 с подсветкой
18. Надежная связь с бортовым компьютером
Комплектация: 1х автосканер KONNWEI KW808, 1х кабель OBD2, 1х инструкция на русском языке, 1х чехол (сумка).
Характеристики:
- Экран: ч/б дисплей 128х64pi с подсветкой и регулировкой контрастности
- Рабочая температура: 0 — 60 ° C
- Температура хранения: -20 — 70 ° C
- Питание: от автомобильного аккумулятора
- Размер: 11,5х8х2,5 см
- Вес: 85 гр. (без провода с разъемом)

Подходит для
Ford, Volkswagen, Audi, BMW, Kia, Nissan, Renault, Skoda, Toyota, Mitsubishi, Opel, Mazda, Honda
Языки
английский, немецкий, испанский, французский, голландский
Питание
8v .. 18v, обеспечиваемая через OBDII
* Информация о технических характеристиках, комплекте поставки, стране изготовления и внешнем виде товара носит справочный характер и основывается на последних доступных сведениях от продавца.
сканер konnwei
Видео
Описание
Автосканер Konnwei KW808 – устройство, используемое для проведения диагностики ЭБУ, поиска неисправностей и устранения ошибок в блоках управления транспортного средства. Поддерживает наиболее распространенные протоколы OBD II и EOBD, на базе которых работает большинство последних моделей автомобилей (Audi, Honda, Chevrolet, Volvo и т.д.). Прибор имеет достаточно компактные размеры, выполнен в черном прорезиненном корпусе с красными вставками из пластика. Имеет интуитивно понятный интерфейс, управляется с помощью кнопок на передней панели.
Поставляется в удобном кейсе, в комплектацию также входит шнур с адаптером для подключения к бортовой сети автомобиля. Купить недорого Автомобильный сканер диагностический инструмент Konnwei KW808. Описание товара Konnwei KW850 — это автосканер, предназначенный для чтения и сброса кодов неисправностей, также он в режиме «реального времени» отображает показания датчиков и параметры работы двигателя. Konnwei KW850 может считывать, сохранять и воспроизводить все показатели в виде графиков. Автосканер обладает большим информативным цветным дисплеем, поддерживает протоколы: J1850 PWM, J1850 VPW, ISO 9141, CAN, SAE J1850 и KWP2000, есть возможность просмотра отсканированных данных в режиме «стоп-кадр».
Автосканер совместим с автомобилями, которые поддерживают протоколы диагностики OBD II и CAN, были изготовлены после 1996 года, с бензиновыми или дизельными двигателями. Имеется возможность резервного копирования данных памяти ЭБУ и их вывод через компьютер, также через ПК производится обновление прошивки сканера. Автосканер Konnwei KW808 не требует дополнительного питания, прост в управлении, находится в съемном противоударном резиновом кожухе, поставляется с чехлом для переноски. На формирование и отправление заказа уходит, как правило, один рабочий день.
- Сканер может использоваться для выявления ошибок у машин иностранных разных марок.
- Считывает VIN, если авто выпущено после 2002 г.
- Универсальный автосканер KONNEWEI KW 808 используется для мониторинга ,чтения и удаления кодов ошибок двигателя.
- ✔Рекомендации по устранению неисправностей, полученные с помощью сканера позволят техническим специалистам быстрее справиться с основной причиной возникновения ошибки, сэкономив время диагностики и ремонта.
- Купить Konnwei KW808 2.8-дюймовый OBD Черный Белый Экран 12 В Бензиновый Детектор Автомобиля, распродажа скоро закончится.
Сканер находит и устраняет коды неисправностей, отображает текущие параметры системы, осуществляет мониторинг уровня масла. Прибор дает возможность получить данные о VIN, CIN и CVN-номерах транспортного средства. Для начала работы следует подключить кабель к OBD II-разъему и запустить процесс сканирования.
Полученные показатели отобразятся на встроенном мониторе с LCD-подсветкой, есть меню на русском языке. Сканер совместим с протоколами KWP2000 (14230), J1859-41.6, CAN (ISO 11898), подойдет для моделей европейского, японского, корейского, американского производства. Диагностический адаптер Konnwei KW808 будет полезен не только специалистам, работающим на станциях технического обслуживания автомобилей, но и обычным пользователям, которые желают получить возможность контролировать состояние своего транспортного средства.
Характеристики
Подходит для
Ford, Volkswagen, Audi, BMW, Kia, Nissan, Renault, Skoda, Toyota, Mitsubishi, Opel, Mazda, Honda
Языки
английский, немецкий, испанский, французский, голландский
Питание
8v .. 18v, обеспечиваемая через OBDII
* Информация о технических характеристиках, комплекте поставки, стране изготовления и внешнем виде товара носит справочный характер и основывается на последних доступных сведениях от продавца.