
Скачать
Operating instructions
for condenser tumble dryer
T 8812 C Edition 111
To avoid the risk of accidents
or damage to the appliance
it is essential to read these
instructions before it is installed
and used for the first time.
M.-Nr. 09 873 580
en — GB
T 8007 WP

SATISFAIT REMBOURSÉ,
2 pages
T 8402 C

Gebruiksaanwijzing condensdroger T 8402 C,
48 pages
T 8861 WP Edition 111
Gebruiksaanwijzing Warmtepompdroogautomaat T 8861 WP Edition,
64 pages
PT 8803

Инструкция по эксплуатации (2.30 Мб),
56 pages
PT 7331

Miele PT 7331 Operating instructions,
36 pages
T 8164 WP
Bruksanvisning Värmepumpstumlare T 8164 WP,
56 pages
T 8012 C
Bruksanvisning eFlow rapid,
34 pages
T 8860 WP

Gebrauchsanweisung Wärmepumpentrockner T 8860 WP Edition 111,
64 pages
T 4809 Ci
La Diglossie osque-latin à Teanum Sidicinum d`après les épitaphes,
9 pages
T 7744 C
Mode d`emploi Sèche-linge à condensation T 7744 C,
52 pages
T 4809 Ci
— mw,
5 pages
T 9820 VENT ED DRYER —
S:\Tech Writing\Data\Dryer\us\vp\T9820_IN_us.vp [en] ,
28 pages
T 294 C
T 294 C — Ubaldi,
1 pages
T 9822 VENT ED DRYER — OPERATING
Product and Cut-out Dimensions,
5 pages
T 7950 WP
Mode d`emploi Sèche-linge à pompe à chaleur T 7950 WP,
60 pages
52880705USA
Miele 52880705USA Operating Instructions,
116 pages
52830366USA
Miele 52830366USA Operating Instructions,
44 pages
T382C —
Miele T382C — Operating instructions,
28 pages
PT 5135 C
Bruks- og monteringsanvisning Kondenstørketrommel PT 5135 C,
48 pages
T 442 C
Miele T 442 C Operating instructions,
28 pages

Gebruiksaanwijzing
condensdroger
T 8812 C Edition 111
Lees absoluut uw gebruiksaanwijzing
voor u dit toestel installeert en in gebruik neemt.
Zo zorgt u voor uw eigen veiligheid
en vermijdt u schade aan uw toestel.
M.-Nr. 09 375 900
nl-BE
Recycleerbare verpakking
De verpakking behoedt het toestel voor
transportschade. Er werd materiaal ge
—
kozen, dat door het milieu wordt verdra
—
gen en opnieuw kan worden benut.
Door de verpakking weer in kringloop
te brengen, wordt er grondstof ge
—
spaard en verkleint de afvalberg. Geef
deze stoffen dus niet met het gewone
vuilnis mee. Breng ze liever naar het
dichtstbijzijnde gemeentelijk container
—
park. Waar u dat vindt, komt u zeker bij
uw gemeentebestuur aan de weet.
Het afdanken van het apparaat
Oude elektrische en elektronische ap-
paraten bevatten vaak nog waardevolle
materialen. Ze bevatten echter ook
schadelijke stoffen die voor het functio-
neren en de veiligheid van het apparaat
nodig waren. Als u het apparaat bij het
gewone afval doet of bij verkeerde be-
handeling kunnen deze stoffen schade-
lijk zijn voor de gezondheid en het mi-
lieu. Verwijder het afgedankte apparaat
dan ook nooit met het gewone afval.
Bij de aankoop van uw nieuw toestel
heeft u een bijdrage betaald. Die wordt
volledig gebruikt voor de toekomstige
recyclage van dat toestel. Dat bevat
trouwens nog waardevol materiaal.
Door te recycleren wordt er dan ook
minder verspild en vervuild.
Als u vragen heeft omtrent het af
—
danken van uw oud toestel, neem dan
contact op met
–
de handelaar bij wie u het kocht
of
–
de firma Recupel,
telefoon 02 706 86 10,
website: www.recupel.be
of
–
uw gemeentebestuur als u uw toestel
naar een containerpark brengt.
Zorg er ook voor dat het toestel intus
—
sen kindveilig wordt bewaard voor u het
laat wegbrengen.
Stroom sparen
Zo kan u vermijden dat de droogtijd on-
nodig langer duurt en er meer stroom
wordt verbruikt:
– Laat het wasgoed in de wasauto-
maat tegen het hoogste toerental
centrifugeren.
Zo spaart u bij het drogen ca. 30 %
stroom en tijd als u bv. bij
1600 t.p.m. in de plaats van bij
800 t.p.m. laat centrifugeren.
–
Gebruik tijdens elk droogprogramma
de volledige trommellading.
Dan is het stroomverbruik voor de
hele lading het gunstigst.
–
Zorg voor een degelijke ventilatie
van het vertrek waar het toestel moet
werken.
–
Maak na elke droogbeurt absoluut
de pluizenzeven schoon.
–
Controleer af en toe de warmtewisse
—
laar. Maak die schoon als dat nodig
blijkt.
Uw bijdrage tot bescherming van ons milieu
2

Uw bijdrage tot bescherming van ons milieu ………………………2
Opmerkingen omtrent uw veiligheid …………………………….5
Bediening van de droogautomaat ……………………………..13
Bedieningspaneel ………………………………………….13
Programmeerfuncties ……………………………………….13
Trommelverlichting …………………………………………13
Opmerkingen omtrent het wasgoed…………………………….14
Onderhoudssymbolen op het etiket ……………………………..14
Droogtips ………………………………………………..14
Zo droogt u juist…………………………………………..16
Korte handleiding ………………………………………….16
Programmaverloop wijzigen ………………………………….18
Lopend programma…………………………………………18
— veranderen ……………………………………………18
— afbreken en nieuw programma selecteren………………………18
— afbreken en wasgoed uit de trommel halen ……………………..18
Wasgoed toevoegen of uitnemen ……………………………….18
Programmaoverzicht ……………………………………….19
Katoen………………………………………………..19
Kreukherstellend…………………………………………19
Automatic + ……………………………………………20
Verluchten……………………………………………..20
Finish Wol ……………………………………………..20
Strijken ……………………………………………….20
Reiniging en onderhoud …………………………………….21
Het condenswaterreservoir leegmaken……………………………21
Pluizenzeven ……………………………………………..22
De zeven droog schoonmaken……………………………….22
De zeven vochtig schoonmaken ……………………………..23
De droogautomaat zelf ………………………………………23
De warmtewisselaar schoonmaken ………………………………24
De warmtewisselaar uitnemen ……………………………….24
De warmtewisselaar controleren ……………………………..25
De warmtewisselaar schoonmaken ……………………………25
De warmtewisselaar terugzetten ……………………………..26
Inhoud
3

Wat gedaan als…?……………………………………….27
Algemene storingen…………………………………………27
Controle- en storingsmeldingen ………………………………..30
Het lampje vervangen ……………………………………….32
Technische dienst …………………………………………33
Herstellingen ……………………………………………..33
Het programma updaten ……………………………………..33
Duur en voorwaarden van de waarborg …………………………..33
Mits toeslag verkrijgbaar toebehoren …………………………….33
Opstellen en aansluiten……………………………………..34
Vooraanzicht ……………………………………………..34
Achteraanzicht…………………………………………….35
Plaats van opstelling ………………………………………..35
Het toestel naar de plaats van opstelling dragen…………………..35
Inbouw onder een doorlopend werkblad ………………………..35
Het toestel waterpas zetten …………………………………36
Plaats van opstelling………………………………………36
Was- en droogzuil………………………………………..36
Voordat u het toestel transporteert …………………………….36
Het condenswater laten afvoeren ……………………………….37
De afvoerslang (in de wasbak/ afvoeropening in de vloer) hangen………38
Bijzondere aansluitomstandigheden …………………………..38
Elektrische aansluiting ……………………………………….40
Verbruiksgegevens ………………………………………..41
Technische gegevens ………………………………………42
Programmeerfuncties ………………………………………44
Restvochtigheid in het programma «Katoen» wijzigen ………………….44
Restvochtigheid in het programma «Kreukherstellend» wijzigen …………..45
Kreukbeveiliging instellen.…………………………………….46
Zoemer uit-/inschakelen ……………………………………..47
Programmakeuze «Automatic +» wijzigen ………………………….48
Verlenging van de afkoeltijd instellen …………………………….49
Stand-by instellen ………………………………………….50
Inhoud
4
~
Lees absoluut deze gebruiksaanwijzing.
Deze droogautomaat voldoet aan de voorgeschreven veiligheids
—
voorschriften. Bij ondeskundig gebruik kan er schade optreden
aan het toestel en kan de gebruiker gevaar lopen.
Lees deze gebruiksaanwijzing voor u deze droogautomaat voor
het eerst gebruikt. U vindt er belangrijke opmerkingen omtrent uw
veiligheid, het gebruik en het onderhoud van het toestel. Dat is
veiliger voor uzelf en u vermijdt schade aan de droogautomaat.
Bewaar deze gebruiksaanwijzing en geef ze door aan wie het
toestel eventueel na u gebruikt.
Juist gebruik
~
Deze droogautomaat is bedoeld voor gebruik in het huishouden
en in gelijkaardige omgevingen.
~
Deze droogautomaat is niet bestemd voor gebruik buitenshuis.
~
Gebruik de droogautomaat uitsluitend voor huishoudelijke toe
—
passing en uitsluitend voor het drogen van in water gewassen was
—
goed waarvan de fabrikant op het etiket heeft aangegeven dat deze
geschikt voor de droogautomaat is.
Gebruik voor andere doeleinden is niet toegelaten. Miele is niet ver
—
antwoordelijk voor schade die wordt veroorzaakt door een ander ge
—
bruik dan wat hier wordt vermeld of door foutieve bediening.
Opmerkingen omtrent uw veiligheid
5

~
Personen die door hun fysieke, zintuiglijke of geestelijke mogelijk
—
heden of hun onervarenheid of gebrek aan kennis niet in staat zijn
om deze droogautomaat veilig te bedienen, mogen deze droogauto
—
maat alleen onder het toezicht of de begeleiding van een verant
—
woordelijk iemand gebruiken.
Kinderen in het huishouden
~
Kinderen jonger dan acht jaar dienen uit de buurt van de droog
—
automaat te worden gehouden, tenzij ze constant in het oog worden
gehouden.
~
Kinderen vanaf acht jaar mogen de droogautomaat alleen zonder
toezicht bedienen, reinigen of onderhouden wanneer hen de wasau-
tomaat zodanig is toegelicht dat ze de droogautomaat veilig kunnen
bedienen, reinigen of onderhouden. Kinderen moeten de eventuele
risico’s van een foutieve hantering kunnen herkennen en begrijpen.
~
Let op kinderen die in de buurt van de droogautomaat komen.
Laat ze nooit met de droogautomaat spelen.
Opmerkingen omtrent uw veiligheid
6

Technische veiligheid
~
Controleer of het toestel geen uiterlijk zichtbare schade vertoont
voordat u het opstelt.
Beschadigde toestellen mag u nooit opstellen noch in gebruik ne
—
men.
~
Vergelijk de gegevens omtrent de aansluiting (smeltveiligheden,
spanning en frequentie) op het typeplaatje met die van het elektrici
—
teitsnet bij u ter plaatse voordat u het toestel aansluit. Vraag eventu
—
eel uitleg aan een elektricien als u niet zeker bent.
~
De elektrische veiligheid van dit toestel is enkel gewaarborgd zo
het op een volgens de voorschriften geïnstalleerd aardsysteem is
aangesloten. Het is heel belangrijk dat aan deze fundamentele vei-
ligheidsvoorwaarde is voldaan. In geval van twijfel dient u uw instal-
latie door een vakman of vakvrouw te laten nakijken. Miele kan niet
aansprakelijk gesteld worden voor schade die werd veroorzaakt
doordat de aardleiding onderbroken was of gewoon ontbrak.
~
Gebruik om veiligheidsredenen geen verlengsnoer. Gebruik van
een verlengsnoer verhoogt het risico op oververhitting en daarmee
op brand.
~
Is het aansluitsnoer beschadigd, laat het dan vervangen door
een vakman die door Miele erkend is. Zo vermijdt u risico’s voor wie
het toestel gebruikt.
~
Door ondeskundig uitgevoerde reparaties kunnen er onvoorziene
risico’s ontstaan voor de gebruiker. Daarvoor kan Miele niet aan
—
sprakelijk worden gesteld. Reparaties mag u uitsluitend laten uitvoe
—
ren door vakmensen die door Miele erkend zijn. Anders is er bij
schade achteraf geen aanspraak meer op waarborg.
Opmerkingen omtrent uw veiligheid
7

~
Defecte onderdelen mogen enkel worden vervangen door origi
—
nele Miele-vervangstukken. Enkel daardoor bent u zeker dat ze ten
volle voldoen aan de eisen die Miele op het stuk van veiligheid stelt.
~
Bij storingen of bij reiniging en onderhoud is deze droogautomaat
pas van het stroomnet losgekoppeld indien
–
u de stekker uit het stopcontact haalt of
–
de zekering op uw elektrische installatie is uitgeschakeld of
–
de schroefzekering op uw elektrische installatie helemaal uitge
—
draaid is.
~
Deze droogautomaat mag niet op niet-stationaire plaatsen (bijv.
schepen) worden gebruikt.
~
Voer geen veranderingen aan de droogautomaat uit die niet uit-
drukkelijk door Miele zijn toegestaan.
Opmerkingen omtrent uw veiligheid
8

Efficiënt gebruik
~
Wegens brandgevaar is het verboden textiel te drogen wanneer
–
dat niet is gewassen.
–
dat niet voldoende is gereinigd en sporen van olie, vethoudende
of andere substanties vertoont (bv. keuken- en cosmetica
—
wasgoed met restanten marineerolie, olie, vet of crème).
Bij niet voldoende gereinigd wasgoed bestaat er gevaar op brand
door zelfontbranding van het wasgoed, zelfs na beëindiging van
het drogen en buiten de droogautomaat.
–
dat sporen van brandgevaarlijke reinigingsmiddelen bevat, of res
—
tanten van aceton, alcohol, benzine, petroleum, kerosine,
vlekkenverwijderaar, terpentijn, was, wasverwijderaar of chemica-
liën (dit kan bv. het geval zijn bij moppen, dweilen en
poetsdoeken).
– waarop resten van een haarverstevigingsproduct, hairspray,
nagellakverwijderingsproduct of gelijkaardig product voorkomen.
Dergelijk sterk vervuild wasgoed moet u daarom bijzonder
grondig wassen: Gebruik hierbij extra wasmiddel en selecteer
een hoge temperatuur. Bij twijfel dient u het wasgoed verschei-
dene malen te wassen.
~
Verwijder alle voorwerpen uit de zakken (zoals aanstekers, luci
—
fers).
~
Waarschuwing: Schakel de droogautomaat nooit uit voor afloop
van een droogprogramma. Behalve dan, wanneer al het wasgoed
onmiddellijk uit de trommel kan worden genomen en zo uitgespreid
dat de warmte kan worden afgegeven.
~
Wasverzachters of vergelijkbare producten moeten steeds zo
worden gebruikt als vermeld in de gebruiksinstructies voor de was
—
verzachters.
Opmerkingen omtrent uw veiligheid
9

~
Brandgevaar!
Deze droogautomaat mag niet op een instelbaar stopcontact (bijv.
via een schakelklok of op een elektrische installatie met
piekbelastinguitschakeling) worden aangesloten.
Als het droogprogramma voor beëindiging van de afkoelfase is af
—
gebroken, dan bestaat het gevaar van zelfontbranding van het was
—
goed.
~
Wegens brandgevaar is het verboden textiel of producten te dro
—
gen:
–
wanneer industriële chemicaliën werden gebruikt voor de reini
—
ging (bv. bij een chemische reiniging).
– die hoofdzakelijk schuimrubberen, rubberen of rubberachtige de-
len bevatten. Het gaat hierbij bv. om schuimrubberlatex,
douchekappen, waterdichte stoffen, met rubber beklede artikelen
en kledingstukken en hoofdkussens met schuimrubbervlokken.
– die een vulling hebben en beschadigd zijn (bv. kussens of
jassen). Vulling die eruit valt kan brand veroorzaken.
~
Na de verwarmingsfase volgt bij veel programma’s de afkoelfase
om te garanderen dat de stukken wasgoed geen temperatuur be-
reiken waarbij ze mogelijk beschadigd worden (bv. het vermijden
van zelfontbranding van het wasgoed). Pas na deze afkoelfase is
het programma afgelopen.
Neem het wasgoed altijd direct en in zijn geheel uit het toestel na af
—
loop van het programma.
~
Leun niet op de toesteldeur. Deze droogautomaat kan anders
omkantelen.
~
Sluit de deur na elk gebruik. Zo voorkomt u dat
–
kinderen in het toestel proberen te kruipen of er voorwerpen in
verstoppen.
–
er kleine dieren in de trommel kruipen.
Opmerkingen omtrent uw veiligheid
10

~
Deze droogautomaat mag niet zonder pluizenfilters of met be
—
schadigde pluizenfilters worden gebruikt.
~
De pluizenfilters moeten regelmatig worden gereinigd!
~
Gebruik deze droogautomaat nooit zonder warmtewisselaar.
~
De pluizenfilters moeten na een vochtige reiniging goed worden
gedroogd. Door natte pluizenfilters kunnen er storingen in de wer
—
king van uw toestel optreden!
~
Stel uw droogautomaat niet op in een vertrek waar het kan vrie
—
zen. Temperaturen rond of onder het vriespunt brengen de goede
werking van het toestel in het gedrang. Bevroren condenswater in
pomp en afvoerslang kan schade veroorzaken.
De toegelaten kamertemperatuur mag tussen +2 °C en +35 °C lig-
gen.
~
Wanneer u een externe afvoerslang voor het condenswater aan-
sluit, moet u de slang vastmaken indien u die in een wasbak hangt.
Anders kan de slang wegglijden en kan het weglopende water
schade veroorzaken.
~
Condenswater is geen drinkwater.
Het kan de gezondheid van mens en dier schade toebrengen.
~
Houd de omgeving van het toestel steeds vrij van stof en pluizen.
Vuildeeltjes in de aangezogen koellucht kunnen na verloop van tijd
de warmtewisselaar verstoppen.
~
Spuit de droogautomaat niet nat af.
Opmerkingen omtrent uw veiligheid
11

Toebehoren
~
Alleen toebehoren die Miele uitdrukkelijk heeft goedgekeurd, mo
—
gen worden gemonteerd of ingebouwd.
Worden er andere onderdelen gemonteerd of ingebouwd, dan ver
—
valt het recht op waarborg en/of productaansprakelijkheid.
Miele is niet aansprakelijk voor schade die ontstaan is doordat
deze veiligheidsrichtlijnen niet in acht werden genomen.
Opmerkingen omtrent uw veiligheid
12

Bedieningspaneel
a Programmakiezer
Om het droogprogramma in te stellen.
De programmakiezer kunt u zowel naar rechts als naar links draaien.
b Programmaverloop- en controlelampjes
c Toets Start
Om een droogprogramma te starten.
Het controlelampje knippert als u het programma kunt starten. Na de start van
het programma blijft het branden.
d Toets Aan/Uit jk
Om het toestel in en uit te schakelen.
Het controlelampje Einde/Kreukbeveiliging gaat na het inschakelen aan als be-
vestiging.
e Toets Deur
Om de toesteldeur te openen en een programma af te breken.
De deur kan altijd open; de stroom hoeft niet ingeschakeld te zijn.
Programmeerfuncties
Als u dit wenst: Via het bedieningspaneel kunt u de elektronische besturing van
de droogautomaat aan uw specifieke wensen aanpassen. De programmeerfunc
—
ties zijn op het einde van deze gebruiksaanwijzing uitgelegd.
Trommelverlichting
Als het toestel ingeschakeld is en de toesteldeur openstaat, gaat de trommelver
—
lichting na enkele minuten uit (stroombesparing).
Bediening van de droogautomaat
13
Onderhoudssymbolen op het
etiket
Drogen
q normale/hogere temperatuur
r lagere temperatuur:
Temperatuur laag kiezen
(voor delicaat wasgoed)
s niet geschikt voor de droogauto
—
maat
strijken en mangelen
I zeer heet
H warm
G warm
J niet strijken/effenen
Droogtips
– Hou steeds rekening met de maxi-
mumlading die in de rubriek Pro-
grammaoverzicht wordt opgegeven.
Anders wordt de was niet zo be-
hoedzaam behandeld.
Bij een overladen trommel wordt het
wasgoed niet zo behoedzaam be
—
handeld. Het droogresultaat komt
hierbij in het gedrang en er kunnen
ook meer kreuken optreden.
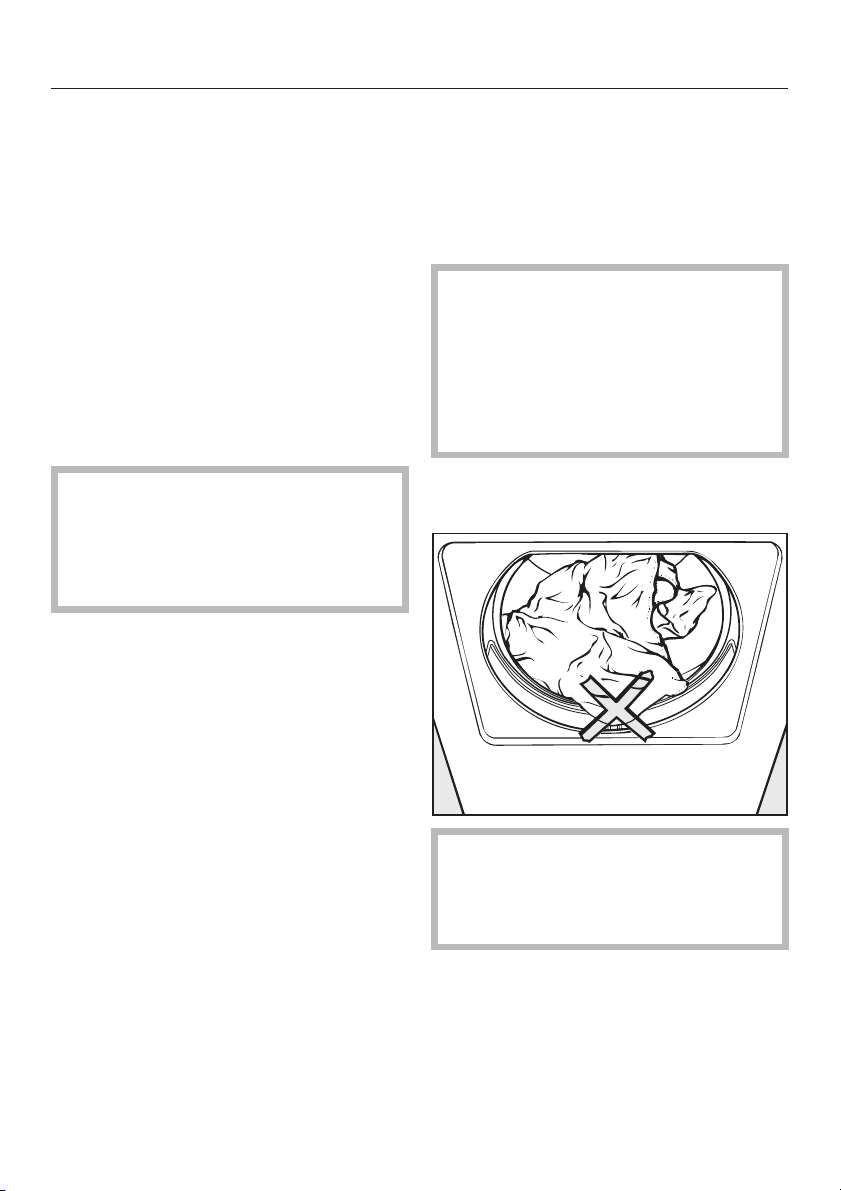
–
Stop geen drijfnat wasgoed in de
trommel! Textiel na het wassen min
—
stens 30 seconden laten centrifuge
—
ren.
–
Een gemengde lading van katoen,
bont wasgoed, kreukherstellend tex
—
tiel droogt u in het programma Auto
—
matic +.
–
Maak jasjes open
, zodat ze gelijkma
—
tig drogen.
–
Wol en gemengde weefsels die wol
bevatten hebben de neiging te vilten
of te krimpen. U kunt ze enkel dro
—
gen in het speciale programma
Finish wol.
–
Met dons gevuld textiel:
naargelang
van de kwaliteit heeft het fijne weef
—
sel binnenin de neiging te krimpen.
Het kan wel drogen in het speciaal
programma Strijken.
–
Zuiver linnen weefsel
: droog dit enkel
machinaal als de fabrikant dit op het
onderhoudsetiket vermeldt. Anders
kan het weefsel «ruig» worden. Het
kan wel drogen in het speciaal pro-
gramma Strijken.
– Machinaal gebreide textielsoorten
(bijv. T-shirts, ondergoed) neigen bij
de eerste wasbeurt te krimpen. Daar-
om: Het textiel niet te lang laten dro-
gen. Daarmee vermijdt u dat het ver-
der krimpt. Koop machinaal gebreid
textiel eventueel een of twee maten
groter.
–
Hoe meer kreukherstellend wasgoed
u in de trommel doet, hoe groter de
kans op kreuken. Dit geldt vooral
voor heel delicaat weefsel (bijv. over
—
hemden, bloezen).
In twijfelgevallen beperkt u de lading
door ze op te delen of gebruikt u het
programma Kreukherstellend strijk
—
vochtig.
Opmerkingen omtrent het wasgoed
14

–
Gesteven wasgoed
kan in de droog
—
automaat worden gedroogd. Om het
gewone glanseffect te verkrijgen
dient u wel de dosis stijfsel te ver
—
dubbelen.
–
Nieuw donker textiel
moet u voor de
eerste droogbeurt afzonderlijk
grondig wassen. Dit niet samen met
licht gekleurd textiel drogen, omdat
het kleur kan afgeven (ook op de
kunststofonderdelen in de droogau
—
tomaat). Er kunnen zich ook pluizen
van een andere kleur afzetten op het
textiel.
Opmerkingen omtrent het wasgoed
15
Korte handleiding
De zinnen met een getal (A, B, C …)
kan u gebruiken als een handleiding.
A De was voorbereiden
Maak het gewassen textiel luchtig en
sorteer het volgens…
. . . gewenste droogtegraad,
. . . vezel- en weefselsoort,
. . . gelijk formaat,
. . . dezelfde restvochtigheid na het
centrifugeren.
Zo verkrijgt u een gelijkmatig droogre
—
sultaat.
,
Verwijder wasmiddelkorfjes, do-
seerbekers e.d. uit het wasgoed.
Deze objecten kunnen tijdens het
drogen smelten en schade teweeg-
brengen aan toestel en wasgoed.
– Controleer zomen en naden, zodat er
geen voering kan uitvallen.
– Knoop dekbedovertrekken en kus-
senslopen dicht. Zo komen er geen
kleinere stukken wasgoed in terecht.
–
Doe ritsen, haken en ogen dicht.
–
Knoop rok-, broeksriemen en schort
—
banden samen.
–
Geloste bh-beugels kan u vastnaaien
of verwijderen.
B De droogautomaat inschakelen
^
Druk toets jk in.
U kan het toestel ook na het laden in
—
schakelen. Dan wordt de trommel even
—
wel niet verlicht (stroombesparing).
C De droogautomaat laden
^
Druk op toets Deur om de toesteldeur
te openen.
^
Leg het wasgoed losjes in de trom
—
mel.
Hou rekening met de maximumla
—
ding in de rubriek «Programmaover
—
zicht».
Bij een overladen trommel wordt het
wasgoed niet zo behoedzaam be
—
handeld en komt het droogresultaat
in het gedrang.
^ Kijk na of de pluizenzeef goed inge-
schoven zit voor u de deur sluit.
Laat bij het sluiten geen stukken
wasgoed tussen de deur geklemd
raken. Anders loopt het textiel scha
—
de op.
^
Zwaai de toesteldeur zachtjes dicht.
U kan ze ook laten aanleunen en
dichtdrukken.
Zo droogt u juist
16
 Loading…
-
Page 1: Miele T 8812 C Edition 111
Operating instructions for condenser tumble dryer T 8812 C Edition 111 To avoid the risk of accidents or damage to the appliance it is essential to read these instructions before it is installed and used for the first time. M.-Nr. 09 873 580 e n-G B[…]
-
Page 2: Miele T 8812 C Edition 111
Disposal of the packing material The transport and protective packing has been selected from materials which are environmentally friendly for disposal and should be recycled. Ensure that any plastic wrappings, bags, etc are disposed of safely and kept out of the reach of babies and young children. Danger of suffocation. Disposal of your old applian[…]
-
Page 3: Miele T 8812 C Edition 111
Caring for the environment ……………………………………2 Warning and Safety instructions ……………………………….5 Operating the tumble dryer …………………………………..1 4 Control panel ……………………………………………..1 4 Programmable functions ……………………………………[…]
-
Page 4: Miele T 8812 C Edition 111
Problem solving guide ……………………………………..2 8 General problems ………………………………………….2 8 Check and fault messages ……………………………………3 1 Changing the lamp …………………………………………3 3 After Sales service …………………………………………3[…]
-
Page 5: Miele T 8812 C Edition 111
~ It is essential to read these instructions. This tumble dryer complies with current safety requirements. Inappropriate use can, however, lead to personal injury and damage to property. To avoid the risk of accidents and damage to the tumble dryer, please read these instructions carefully before using it for the first time. They contain important […]
-
Page 6: Miele T 8812 C Edition 111
~ The tumble dryer can only be used by people with reduced physical, sensory or mental capabilities, or lack of experience or knowledge, if they are are supervised whilst using it or have been shown how to use it in a safe way and recognise and understand the consequences of incorrect operation. Safety with children ~ Children under 8 years of age […]
-
Page 7: Miele T 8812 C Edition 111
Technical safety ~ Before setting up the tumble dryer, check it for any externally visible damage. Do not install or use a damaged tumble dryer. ~ Before connecting the tumble dryer, ensure that the connection data on the data plate (fuse rating, voltage and frequency) match the mains electricity supply. If in any doubt, consult a qualified electri[…]
-
Page 8: Miele T 8812 C Edition 111
~ Faulty components must only be replaced by genuine Miele original spare parts. Only when these parts are fitted can the safety standards of the tumble dryer be guaranteed. ~ The tumble dryer must be isolated from the electricity supply in the event of a fault and during cleaning and maintenance. ~ The tumble dryer must not be used in a non-statio[…]
-
Page 9: Miele T 8812 C Edition 111
~ Please observe the instructions in «Installation and connection» and «Technical data». ~ The socket must be easily accessible after installation in order to disconnect the tumble dryer from the electricity supply. ~ Do not block the gap between the base of the tumble dryer and the floor with plinth facings, deep pile carpet et[…]
-
Page 10: Miele T 8812 C Edition 111
~ To prevent the risk of fire, the following textiles must not be dried in this appliance: – items which have not been washed. – items, such as workwear, which have not been thoroughly cleaned and which are still soiled with grease, oil or other deposits (such as cosmetics, lotions etc). If items have not been thoroughly cleaned there is a dang[…]
-
Page 11: Miele T 8812 C Edition 111
~ To prevent the risk of fire, the following must not be tumble dried: – items which have been cleaned using chemicals (e.g. professional dry-cleaning agents). – fabrics which contain a large proportion of rubber, foam rubber or rubber-like materials. For example, products made from latex foam rubber, shower caps, waterproof textiles, rubberise[…]
-
Page 12: Miele T 8812 C Edition 111
~ The tumble dryer must not be used without the fluff filters in place or if the fluff filters are damaged in any way. ~ The fluff filters must be cleaned regularly. ~ The tumble dryer must not be used without the condenser unit in place. ~ The fluff filters must be thoroughly dried after cleaning. Damp or wet filters could cause operational faults[…]
-
Page 13: Miele T 8812 C Edition 111
Accessories ~ Only use genuine Miele original spare parts and accessories with this tumble dryer. If non-Miele parts are used, guarantee, performance and product liability claims may be invalidated. ~ A Miele tumble dryer can be stacked on top of a Miele washing machine using the appropriate stacking kit (available as an optional accessory). Please[…]
-
Page 14: Miele T 8812 C Edition 111
Control panel a Programme selector For selecting the drying programme. The programme selector can be turned clockwise or anti-clockwise. b Programme sequence and check lights c Start button for starting a programme. The Start indicator light will flash as soon as a programme can be started. It lights up constantly once the programme has started. d […]
-
Page 15: Miele T 8812 C Edition 111
Garment care label symbols Drying q Normal/higher temperature r Reduced temperature: Select Low temperature (for delicate textiles) s Do not tumble dry Ironing I High H Medium G Low J Do not iron Tips on drying – Always observe the maximum recommended loads given in the «Programme chart». Do not overload the drum. Overloading can cause […]
-
Page 16: Miele T 8812 C Edition 111
Brief instructions The headings numbered ( A , B , C …) show the operating sequence and can be used as a brief guide to using your dryer. A Sort the laundry To ensure an even drying result separate the washed laundry and sort it according to: . . . the drying level required . . . the type of fibre or weave . . . size . . . the moisture content af[…]
-
Page 17: Miele T 8812 C Edition 111
D Select a programme ^ Turn the programme selector to the required programme. Tip: You can alter the residual moisture or programme selection individually for some programmes (see «Programmable functions»). E Start the programme ^ Press the Start button. The indicator light for the Start button will then change from flashing to being on c[…]
-
Page 18: Miele T 8812 C Edition 111
Once a programme has started — changing the programme You cannot change to another programme once a programme has started (this prevents unintentional alterations). If you try and change a programme the Finish/Anti-crease light will start flashing. You will need to cancel the current programme before you can select a new one. — cancelling the progr[…]
-
Page 19: Miele T 8812 C Edition 111
Cottons t ** Max. load 7 kg* Use for Cotton items such as those described under Cottons Normal with normal residual moisture levels. Notes – Items are dried to a Normal level only. – The Cottons t programme is the most energy-efficient for drying cotton items with normal residual moisture levels. Cottons Max. load 7 kg* Normal+, Normal Use for […]
-
Page 20: Miele T 8812 C Edition 111
Minimum iron Max. load 3 kg* Normal, Hand iron Use for Minimum iron cotton, synthetic and mixed fibre fabric, e.g. tops, dresses, trousers, skirts and table cloths. Note With the Hand iron drying level, items are dried with very little creasing, depending on fabric type and amount of laundry. Low temperature Use for All fabric with the r symbol on […]
-
Page 21: Miele T 8812 C Edition 111
Emptying the condensed water container The condensed water will be collected in the condensed water container unless the dryer has been connected for external drainage (see «Installation»). Empty the condensed water container after every drying programme. The Empty container indicator will light up if the maximum level of the condensed wa[…]
-
Page 22: Miele T 8812 C Edition 111
Cleaning the fluff filters The fluff which is created by the drying process is collected by the fluff filters in the door and the door opening. Clean the filters after each drying programme. Cleaning them whilst dry Tip: You can also use a vacuum cleaner. ^ Open the door and pull the fluff filter (1) out of the door as illustrated. ^ Use your finge[…]
-
Page 23: Miele T 8812 C Edition 111
Cleaning them with water If there is a great deal of compacted fluff on any of the filters, they can be removed and cleaned under hot running water. ^ Open the door and pull the fluff filter out of the door as described previously. The two filters in the door opening can also be removed if you need to clean them with water. ^ Turn dial a and pull t[…]
-
Page 24: Miele T 8812 C Edition 111
Cleaning the tumble dryer Disconnect the tumble dryer from the mains electricity supply. Miele branded cleaning and conditioning products are available to order via the internet on www.miele-shop.com. ^ Clean the housing and control panel with a slightly damp cloth and a mild detergent or soapy water. ^ The drum and other stainless steel parts can […]
-
Page 25: Miele T 8812 C Edition 111
Cleaning the condenser unit Detergent residue, hair and fine fluff from the dryer can get through the fluff filters and block the condenser unit. Dust from the room in which the dryer is installed can also get into the condenser unit and cause a blockage. Check the condenser unit at least once a year. If the dryer is used frequently then clean the […]
-
Page 26: Miele T 8812 C Edition 111
^ Pull the condenser unit out of its housing by the handle. Checking the condenser unit ^ Hold the condenser unit up to the light as shown . ^ Check to see if there is any fluff inside it. The arrows in the illustration above indicate where to look. If you cannot see any fluff: ^ Replace the condenser unit (see following page). If you can see some […]
-
Page 27: Miele T 8812 C Edition 111
^ Then flush the unit through from the front. ^ Check the condenser unit again for any visible fluff and if necessary flush it through again until it has all gone. ^ Repeat as required. ^ Also make sure the rubber seals are clean. The rubber seals must not be removed and must be free of kinks. ^ Shake the water off the condenser unit until no more […]
-
Page 28: Miele T 8812 C Edition 111
With the help of the following notes minor faults in the performance of the appliance, some of which may result from incorrect operation, can be put right without contacting the Service Department. , Repair work to electrical appliances should only be carried out by a suitably qualified person in strict accordance with current local and national sa[…]
-
Page 29: Miele T 8812 C Edition 111
Problem Possible cause Remedy There is a build-up of fluff. Fluff is principally the result of friction when garments are being worn and washed. Machine drying hardly causes any fluff to form and has been established by research institutes to have no appreciable effect on the lifetime of fabric. Fluff is collected by the fluff filters and can be ea[…]
-
Page 30: Miele T 8812 C Edition 111
Problem Possible cause Remedy Drying is taking too long, or the programme has been cancelled The dryer is not working efficiently or economically*. The most likely cause is a build-up of fluff, hair or detergent residue on the fluff filters. – Remove any fluff, hair or residual detergent. – Rinse the filters if necessary and then dry them thoro[…]
-
Page 31: Miele T 8812 C Edition 111
Check and fault messages Problem Possible cause Remedy The Empty container indicator light comes on. The condensed water container is full or there is kink in the drain hose. – Empty the condensed water container. – Check the drain hose. – The indicator light will go out if you open and close the door. The programme stops and the Machine iron[…]
-
Page 32: Miele T 8812 C Edition 111
Problem Possible cause Remedy The Start button indicator light flashes/does not flash. The flashing indicates that a programme can be started. After the programme has started, the flashing will change to a constant light. The Start button indicator light is flashing slowly. The dryer is in Standby mode. This is quite normal and not indicative of an[…]
-
Page 33: Miele T 8812 C Edition 111
Changing the lamp Disconnect the tumble dryer from the mains electricity supply. ^ Open the door. You will find the interior light cover at the top of the drum aperture. ^ Insert a suitable tool, such as a wide bladed screwdriver, under the side edge of the light cover as illustrated. ^ Apply a little pressure and whilst doing so turn your wrist in[…]
-
Page 34: Miele T 8812 C Edition 111
Repairs In the event of any faults which you cannot remedy yourself, please contact – your Miele dealer or – the Miele Service Department (see back cover for contact details). When contacting your dealer or the Service Department, please quote the model and serial number of your appliance, both of which are shown on the data plate. This is visi[…]
-
Page 35: Miele T 8812 C Edition 111
Front view a Mains connection cable b Condensed water container c Control panel d Door e Service panel for condenser unit f Four height-adjustable screw feet g External drainage options (e.g. via wash basin, wash basin drain outlet, or gully. See «External condensed water outlet»). Installation 35[…]
-
Page 36: Miele T 8812 C Edition 111
Rear view a Protruding lid for holding when moving the appliance (see arrows) b Air inlet vent for cooling the condenser unit c Mains connection cable d External drainage of the condensed water e Accessories for connection to a sink drain outlet Installation site , Make sure the dryer door can be opened without hindrance after installation. Transpo[…]
-
Page 37: Miele T 8812 C Edition 111
Levelling the tumble dryer The appliance must be perfectly level to ensure safe and proper operation. ^ The screw feet can be adjusted to compensate for any unevenness in the floor. , The air inlet and outlet vents on the front of the tumble dryer must not be covered as this would prevent sufficient ventilation for cooling the condenser unit. , Do […]
-
Page 38: Miele T 8812 C Edition 111
External condensed water outlet General notes When drying is in progress, condensed water is pumped into the condensed water container through the drain hose at the back of the dryer. The condensed water can also be drained off directly if the tumble dryer is installed near a sink, drain outlet etc. so that the condensed water container does not ha[…]
-
Page 39: Miele T 8812 C Edition 111
External drainage via a sink or gully ^ See «Front view» illustration. , If you want to drain the water off into a sink you will need to secure the hose carefully, e.g. by tying it to a tap to make sure it cannot slip during use. Otherwise there is a risk of overflowing water which could cause damage. ^ Use the bow-shaped guide to prevent[…]
-
Page 40: Miele T 8812 C Edition 111
1 Adapter 2 Nut 3 Hose clip 4 End of the hose 5 Non-return valve 6 Tumble dryer drain hose ^ Fit adapter 1 to the sink drain outlet using nut 2 . If this nut has a flat disc in it you should take the disc out first. ^ Attach the end of hose 4 to adapter 1 . ^ Use a screwdriver to tighten hose clip 3 up close to the nut. , Non-return valve 5 has to […]
-
Page 41: Miele T 8812 C Edition 111
Electrical connection U.K. All electrical work should be carried out by a suitably qualified and competent person, in strict accordance with current national and local safety regulations (BS 7671 in the UK). Ensure power is not supplied to the appliance until after installation work has been carried out. The appliance is supplied with a mains cable[…]
-
Page 42: Miele T 8812 C Edition 111
Load 1 Final spin speed in a domestic washing machine Residual moisture Energy Duration kg rpm % kWh Minutes Cottons t 2 7.0 3.5 1000 1000 60 60 4.14 2.28 109 65 Cottons Normal 7.0 7.0 7.0 7.0 1200 1400 1600 1800 53 50 44 43 3.75 3.55 3.15 3.10 100 95 86 84 Cottons Hand iron 7.0 7.0 7.0 7.0 7.0 1000 1200 1400 1600 1800 60 53 50 44 43 3.10 2.75 2.55[…]
-
Page 43: Miele T 8812 C Edition 111
Height 850 mm Width 595 mm Depth 587 mm Depth with door open 1060 mm Height for building under 820 mm Width for building under 600 mm Depth for building under 600 mm Suitable for pushing under a worktop Yes Suitable for stacking Yes Weight 51 kg Drum volume 111 litres Maximum capacity 7 kg dry weight Capacity of condensed water container approx. 3.[…]
-
Page 44: Miele T 8812 C Edition 111
Programmable functions for changing default settings The programmable functions are used to alter the tumble dryer´s electronics to suit changing requirements. Programmable functions can be altered at any time. 44[…]
-
Page 45: Miele T 8812 C Edition 111
Altering the residual moisture level in the Cottons programme The tumble dryer is designed to dry effectively using as little energy as possible. However, if you require the laundry to be drier or damper, you can reduce or increase the default residual moisture in the Cottons programme. Please note: The Cottons t programme will remain unchanged. Fo[…]
-
Page 46: Miele T 8812 C Edition 111
Altering the residual moisture level in the Minimum iron programme The tumble dryer is designed to dry effectively using as little energy as possible. However, if you require the laundry to be drier or damper, you can reduce or increase the default residual moisture in this programme. Follow the steps ( A , B , C …) using the Start button and pro[…]
-
Page 47: Miele T 8812 C Edition 111
Anti-crease If laundry is not removed as soon as the programme has finished, the drum will continue to rotate at intervals for two hours to prevent creasing. The anti-crease function – is activated when the tumble dryer is delivered. You can shorten the duration of the anti-crease phase or deactivate it if wished. – is used in all programmes ex[…]
-
Page 48: Miele T 8812 C Edition 111
Activating and deactivating the buzzer A buzzer sounds (at intervals for a maximum of 1 hour) to let you know the programme has finished. The tumble dryer is delivered with the buzzer activated but you can deactivate it if wished. If there is a fault, a continuous tone will sound even if the buzzer has been deactivated. Follow the steps ( A , B , C[…]
-
Page 49: Miele T 8812 C Edition 111
Altering the standard drying level in the Automatic plus programme The drying level for this programme is set at a standard Normal level. You have the option of changing this to Hand iron (damper than normal) or to Normal + (drier than normal). Follow the steps ( A , B , C …) using the Start button and programme selector to programme and store in[…]
-
Page 50: Miele T 8812 C Edition 111
Extending the cooling down time The cooling down phase which takes place before the end of a programme can be lengthened if required. This makes garments easier to handle. The dryer is delivered with the extended cooling down time option deactivated. You can extend the cooling down time by 5 minutes or 10 minutes. The option of extending the coolin[…]
-
Page 51: Miele T 8812 C Edition 111
Standby To save energy, the programme sequence/check lights go out and the indicator light for the Start button starts flashing slowly. To come out of standby mode ^ Turn the programme selector or press the Start button. Neither will have any effect if a programme is running. On The standby function is activated and the programme sequence/check lig[…]
-
Page 52: Miele T 8812 C Edition 111
Before you begin, ensure that: – The tumble dryer is switched off. – The door is closed. – The programme selector is at Finish . A Press the Start button and keep it pressed in whilst carrying out steps B — C . B Switch the dryer on. C Wait until the Start indicator light lights up constantl y… D . . . and then release the Start button. E T[…]
-
Page 53: Miele T 8812 C Edition 111
53[…]
-
Page 54: Miele T 8812 C Edition 111
54[…]
-
Page 55: Miele T 8812 C Edition 111
55[…]
-
Page 56: Miele T 8812 C Edition 111
Alteration rights reserved/2114 M.-Nr. 09 873 580 / 00 8QLWHG.LQJGRP -IELE#O,TD &AIRACRES-ARCHAM2OAD !BINGDON/XON/847 4EL #USTOMER#ONTACT#ENTRE4EL %MAILINFO MIELECOUK )NTERNETWWW[…]
-
Страница 1
Operating instructions for condenser tumble dryer T 8812 C Edition 111 To avoid the risk of accidents or damage to the appliance it is essential to read these instructions before it is installed and used for the first time. M.-Nr. 09 873 580 e n-G B[…]
-
Страница 2
Disposal of the packing material The transport and protective packing has been selected from materials which are environmentally friendly for disposal and should be recycled. Ensure that any plastic wrappings, bags, etc are disposed of safely and kept out of the reach of babies and young children. Danger of suffocation. Disposal of your old applian[…]
-
Страница 3
Caring for the environment ……………………………………2 Warning and Safety instructions ……………………………….5 Operating the tumble dryer …………………………………..1 4 Control panel ……………………………………………..1 4 Programmable functions ……………………………………[…]
-
Страница 4
Problem solving guide ……………………………………..2 8 General problems ………………………………………….2 8 Check and fault messages ……………………………………3 1 Changing the lamp …………………………………………3 3 After Sales service …………………………………………3[…]
-
Страница 5
~ It is essential to read these instructions. This tumble dryer complies with current safety requirements. Inappropriate use can, however, lead to personal injury and damage to property. To avoid the risk of accidents and damage to the tumble dryer, please read these instructions carefully before using it for the first time. They contain important […]
-
Страница 6
~ The tumble dryer can only be used by people with reduced physical, sensory or mental capabilities, or lack of experience or knowledge, if they are are supervised whilst using it or have been shown how to use it in a safe way and recognise and understand the consequences of incorrect operation. Safety with children ~ Children under 8 years of age […]
-
Страница 7
Technical safety ~ Before setting up the tumble dryer, check it for any externally visible damage. Do not install or use a damaged tumble dryer. ~ Before connecting the tumble dryer, ensure that the connection data on the data plate (fuse rating, voltage and frequency) match the mains electricity supply. If in any doubt, consult a qualified electri[…]
-
Страница 8
~ Faulty components must only be replaced by genuine Miele original spare parts. Only when these parts are fitted can the safety standards of the tumble dryer be guaranteed. ~ The tumble dryer must be isolated from the electricity supply in the event of a fault and during cleaning and maintenance. ~ The tumble dryer must not be used in a non-statio[…]
-
Страница 9
~ Please observe the instructions in «Installation and connection» and «Technical data». ~ The socket must be easily accessible after installation in order to disconnect the tumble dryer from the electricity supply. ~ Do not block the gap between the base of the tumble dryer and the floor with plinth facings, deep pile carpet et[…]
-
Страница 10
~ To prevent the risk of fire, the following textiles must not be dried in this appliance: – items which have not been washed. – items, such as workwear, which have not been thoroughly cleaned and which are still soiled with grease, oil or other deposits (such as cosmetics, lotions etc). If items have not been thoroughly cleaned there is a dang[…]
-
Страница 11
~ To prevent the risk of fire, the following must not be tumble dried: – items which have been cleaned using chemicals (e.g. professional dry-cleaning agents). – fabrics which contain a large proportion of rubber, foam rubber or rubber-like materials. For example, products made from latex foam rubber, shower caps, waterproof textiles, rubberise[…]
-
Страница 12
~ The tumble dryer must not be used without the fluff filters in place or if the fluff filters are damaged in any way. ~ The fluff filters must be cleaned regularly. ~ The tumble dryer must not be used without the condenser unit in place. ~ The fluff filters must be thoroughly dried after cleaning. Damp or wet filters could cause operational faults[…]
-
Страница 13
Accessories ~ Only use genuine Miele original spare parts and accessories with this tumble dryer. If non-Miele parts are used, guarantee, performance and product liability claims may be invalidated. ~ A Miele tumble dryer can be stacked on top of a Miele washing machine using the appropriate stacking kit (available as an optional accessory). Please[…]
-
Страница 14
Control panel a Programme selector For selecting the drying programme. The programme selector can be turned clockwise or anti-clockwise. b Programme sequence and check lights c Start button for starting a programme. The Start indicator light will flash as soon as a programme can be started. It lights up constantly once the programme has started. d […]
-
Страница 15
Garment care label symbols Drying q Normal/higher temperature r Reduced temperature: Select Low temperature (for delicate textiles) s Do not tumble dry Ironing I High H Medium G Low J Do not iron Tips on drying – Always observe the maximum recommended loads given in the «Programme chart». Do not overload the drum. Overloading can cause […]
-
Страница 16
Brief instructions The headings numbered ( A , B , C …) show the operating sequence and can be used as a brief guide to using your dryer. A Sort the laundry To ensure an even drying result separate the washed laundry and sort it according to: . . . the drying level required . . . the type of fibre or weave . . . size . . . the moisture content af[…]
-
Страница 17
D Select a programme ^ Turn the programme selector to the required programme. Tip: You can alter the residual moisture or programme selection individually for some programmes (see «Programmable functions»). E Start the programme ^ Press the Start button. The indicator light for the Start button will then change from flashing to being on c[…]
-
Страница 18
Once a programme has started — changing the programme You cannot change to another programme once a programme has started (this prevents unintentional alterations). If you try and change a programme the Finish/Anti-crease light will start flashing. You will need to cancel the current programme before you can select a new one. — cancelling the progr[…]
-
Страница 19
Cottons t ** Max. load 7 kg* Use for Cotton items such as those described under Cottons Normal with normal residual moisture levels. Notes – Items are dried to a Normal level only. – The Cottons t programme is the most energy-efficient for drying cotton items with normal residual moisture levels. Cottons Max. load 7 kg* Normal+, Normal Use for […]
-
Страница 20
Minimum iron Max. load 3 kg* Normal, Hand iron Use for Minimum iron cotton, synthetic and mixed fibre fabric, e.g. tops, dresses, trousers, skirts and table cloths. Note With the Hand iron drying level, items are dried with very little creasing, depending on fabric type and amount of laundry. Low temperature Use for All fabric with the r symbol on […]
-
Страница 21
Emptying the condensed water container The condensed water will be collected in the condensed water container unless the dryer has been connected for external drainage (see «Installation»). Empty the condensed water container after every drying programme. The Empty container indicator will light up if the maximum level of the condensed wa[…]
-
Страница 22
Cleaning the fluff filters The fluff which is created by the drying process is collected by the fluff filters in the door and the door opening. Clean the filters after each drying programme. Cleaning them whilst dry Tip: You can also use a vacuum cleaner. ^ Open the door and pull the fluff filter (1) out of the door as illustrated. ^ Use your finge[…]
-
Страница 23
Cleaning them with water If there is a great deal of compacted fluff on any of the filters, they can be removed and cleaned under hot running water. ^ Open the door and pull the fluff filter out of the door as described previously. The two filters in the door opening can also be removed if you need to clean them with water. ^ Turn dial a and pull t[…]
-
Страница 24
Cleaning the tumble dryer Disconnect the tumble dryer from the mains electricity supply. Miele branded cleaning and conditioning products are available to order via the internet on www.miele-shop.com. ^ Clean the housing and control panel with a slightly damp cloth and a mild detergent or soapy water. ^ The drum and other stainless steel parts can […]
-
Страница 25
Cleaning the condenser unit Detergent residue, hair and fine fluff from the dryer can get through the fluff filters and block the condenser unit. Dust from the room in which the dryer is installed can also get into the condenser unit and cause a blockage. Check the condenser unit at least once a year. If the dryer is used frequently then clean the […]
-
Страница 26
^ Pull the condenser unit out of its housing by the handle. Checking the condenser unit ^ Hold the condenser unit up to the light as shown . ^ Check to see if there is any fluff inside it. The arrows in the illustration above indicate where to look. If you cannot see any fluff: ^ Replace the condenser unit (see following page). If you can see some […]
-
Страница 27
^ Then flush the unit through from the front. ^ Check the condenser unit again for any visible fluff and if necessary flush it through again until it has all gone. ^ Repeat as required. ^ Also make sure the rubber seals are clean. The rubber seals must not be removed and must be free of kinks. ^ Shake the water off the condenser unit until no more […]
-
Страница 28
With the help of the following notes minor faults in the performance of the appliance, some of which may result from incorrect operation, can be put right without contacting the Service Department. , Repair work to electrical appliances should only be carried out by a suitably qualified person in strict accordance with current local and national sa[…]
-
Страница 29
Problem Possible cause Remedy There is a build-up of fluff. Fluff is principally the result of friction when garments are being worn and washed. Machine drying hardly causes any fluff to form and has been established by research institutes to have no appreciable effect on the lifetime of fabric. Fluff is collected by the fluff filters and can be ea[…]
-
Страница 30
Problem Possible cause Remedy Drying is taking too long, or the programme has been cancelled The dryer is not working efficiently or economically*. The most likely cause is a build-up of fluff, hair or detergent residue on the fluff filters. – Remove any fluff, hair or residual detergent. – Rinse the filters if necessary and then dry them thoro[…]
-
Страница 31
Check and fault messages Problem Possible cause Remedy The Empty container indicator light comes on. The condensed water container is full or there is kink in the drain hose. – Empty the condensed water container. – Check the drain hose. – The indicator light will go out if you open and close the door. The programme stops and the Machine iron[…]
-
Страница 32
Problem Possible cause Remedy The Start button indicator light flashes/does not flash. The flashing indicates that a programme can be started. After the programme has started, the flashing will change to a constant light. The Start button indicator light is flashing slowly. The dryer is in Standby mode. This is quite normal and not indicative of an[…]
-
Страница 33
Changing the lamp Disconnect the tumble dryer from the mains electricity supply. ^ Open the door. You will find the interior light cover at the top of the drum aperture. ^ Insert a suitable tool, such as a wide bladed screwdriver, under the side edge of the light cover as illustrated. ^ Apply a little pressure and whilst doing so turn your wrist in[…]
-
Страница 34
Repairs In the event of any faults which you cannot remedy yourself, please contact – your Miele dealer or – the Miele Service Department (see back cover for contact details). When contacting your dealer or the Service Department, please quote the model and serial number of your appliance, both of which are shown on the data plate. This is visi[…]
-
Страница 35
Front view a Mains connection cable b Condensed water container c Control panel d Door e Service panel for condenser unit f Four height-adjustable screw feet g External drainage options (e.g. via wash basin, wash basin drain outlet, or gully. See «External condensed water outlet»). Installation 35[…]
-
Страница 36
Rear view a Protruding lid for holding when moving the appliance (see arrows) b Air inlet vent for cooling the condenser unit c Mains connection cable d External drainage of the condensed water e Accessories for connection to a sink drain outlet Installation site , Make sure the dryer door can be opened without hindrance after installation. Transpo[…]
-
Страница 37
Levelling the tumble dryer The appliance must be perfectly level to ensure safe and proper operation. ^ The screw feet can be adjusted to compensate for any unevenness in the floor. , The air inlet and outlet vents on the front of the tumble dryer must not be covered as this would prevent sufficient ventilation for cooling the condenser unit. , Do […]
-
Страница 38
External condensed water outlet General notes When drying is in progress, condensed water is pumped into the condensed water container through the drain hose at the back of the dryer. The condensed water can also be drained off directly if the tumble dryer is installed near a sink, drain outlet etc. so that the condensed water container does not ha[…]
-
Страница 39
External drainage via a sink or gully ^ See «Front view» illustration. , If you want to drain the water off into a sink you will need to secure the hose carefully, e.g. by tying it to a tap to make sure it cannot slip during use. Otherwise there is a risk of overflowing water which could cause damage. ^ Use the bow-shaped guide to prevent[…]
-
Страница 40
1 Adapter 2 Nut 3 Hose clip 4 End of the hose 5 Non-return valve 6 Tumble dryer drain hose ^ Fit adapter 1 to the sink drain outlet using nut 2 . If this nut has a flat disc in it you should take the disc out first. ^ Attach the end of hose 4 to adapter 1 . ^ Use a screwdriver to tighten hose clip 3 up close to the nut. , Non-return valve 5 has to […]
-
Страница 41
Electrical connection U.K. All electrical work should be carried out by a suitably qualified and competent person, in strict accordance with current national and local safety regulations (BS 7671 in the UK). Ensure power is not supplied to the appliance until after installation work has been carried out. The appliance is supplied with a mains cable[…]
-
Страница 42
Load 1 Final spin speed in a domestic washing machine Residual moisture Energy Duration kg rpm % kWh Minutes Cottons t 2 7.0 3.5 1000 1000 60 60 4.14 2.28 109 65 Cottons Normal 7.0 7.0 7.0 7.0 1200 1400 1600 1800 53 50 44 43 3.75 3.55 3.15 3.10 100 95 86 84 Cottons Hand iron 7.0 7.0 7.0 7.0 7.0 1000 1200 1400 1600 1800 60 53 50 44 43 3.10 2.75 2.55[…]
-
Страница 43
Height 850 mm Width 595 mm Depth 587 mm Depth with door open 1060 mm Height for building under 820 mm Width for building under 600 mm Depth for building under 600 mm Suitable for pushing under a worktop Yes Suitable for stacking Yes Weight 51 kg Drum volume 111 litres Maximum capacity 7 kg dry weight Capacity of condensed water container approx. 3.[…]
-
Страница 44
Programmable functions for changing default settings The programmable functions are used to alter the tumble dryer´s electronics to suit changing requirements. Programmable functions can be altered at any time. 44[…]
-
Страница 45
Altering the residual moisture level in the Cottons programme The tumble dryer is designed to dry effectively using as little energy as possible. However, if you require the laundry to be drier or damper, you can reduce or increase the default residual moisture in the Cottons programme. Please note: The Cottons t programme will remain unchanged. Fo[…]
-
Страница 46
Altering the residual moisture level in the Minimum iron programme The tumble dryer is designed to dry effectively using as little energy as possible. However, if you require the laundry to be drier or damper, you can reduce or increase the default residual moisture in this programme. Follow the steps ( A , B , C …) using the Start button and pro[…]
-
Страница 47
Anti-crease If laundry is not removed as soon as the programme has finished, the drum will continue to rotate at intervals for two hours to prevent creasing. The anti-crease function – is activated when the tumble dryer is delivered. You can shorten the duration of the anti-crease phase or deactivate it if wished. – is used in all programmes ex[…]
-
Страница 48
Activating and deactivating the buzzer A buzzer sounds (at intervals for a maximum of 1 hour) to let you know the programme has finished. The tumble dryer is delivered with the buzzer activated but you can deactivate it if wished. If there is a fault, a continuous tone will sound even if the buzzer has been deactivated. Follow the steps ( A , B , C[…]
-
Страница 49
Altering the standard drying level in the Automatic plus programme The drying level for this programme is set at a standard Normal level. You have the option of changing this to Hand iron (damper than normal) or to Normal + (drier than normal). Follow the steps ( A , B , C …) using the Start button and programme selector to programme and store in[…]
-
Страница 50
Extending the cooling down time The cooling down phase which takes place before the end of a programme can be lengthened if required. This makes garments easier to handle. The dryer is delivered with the extended cooling down time option deactivated. You can extend the cooling down time by 5 minutes or 10 minutes. The option of extending the coolin[…]
-
Страница 51
Standby To save energy, the programme sequence/check lights go out and the indicator light for the Start button starts flashing slowly. To come out of standby mode ^ Turn the programme selector or press the Start button. Neither will have any effect if a programme is running. On The standby function is activated and the programme sequence/check lig[…]
-
Страница 52
Before you begin, ensure that: – The tumble dryer is switched off. – The door is closed. – The programme selector is at Finish . A Press the Start button and keep it pressed in whilst carrying out steps B — C . B Switch the dryer on. C Wait until the Start indicator light lights up constantl y… D . . . and then release the Start button. E T[…]
-
Страница 53
53[…]
-
Страница 54
54[…]
-
Страница 55
55[…]
-
Страница 56
Alteration rights reserved/2114 M.-Nr. 09 873 580 / 00 8QLWHG.LQJGRP -IELE#O,TD &AIRACRES-ARCHAM2OAD !BINGDON/XON/847 4EL #USTOMER#ONTACT#ENTRE4EL %MAILINFO MIELECOUK )NTERNETWWW[…]
-
Miele T 8812 C Edition 111 — page 1
Operating instructions for condenser tumble dryer T 8812 C Edition 111 To avoid the risk of accidents or damage to the appliance it is essential to read these instructions before it is installed and used for the first time. M.-Nr. 09 873 580 e n-G B …
-
Miele T 8812 C Edition 111 — page 2
Disposal of the packing material The transport and protective packing has been selected from materials which are environmentally friendly for disposal and should be recycled. Ensure that any plastic wrappings, bags, etc are disposed of safely and kept out of the reach of babies and young children. Danger of suffocation. Disposal of your old applian …
-
Miele T 8812 C Edition 111 — page 3
Caring for the environment ……………………………………2 Warning and Safety instructions ……………………………….5 Operating the tumble dryer …………………………………..1 4 Control panel ……………………………………………..1 4 Programmable functions …………………………………… …
-
Miele T 8812 C Edition 111 — page 4
Problem solving guide ……………………………………..2 8 General problems ………………………………………….2 8 Check and fault messages ……………………………………3 1 Changing the lamp …………………………………………3 3 After Sales service …………………………………………3 …
-
Miele T 8812 C Edition 111 — page 5
~ It is essential to read these instructions. This tumble dryer complies with current safety requirements. Inappropriate use can, however, lead to personal injury and damage to property. To avoid the risk of accidents and damage to the tumble dryer, please read these instructions carefully before using it for the first time. They contain important …
-
Miele T 8812 C Edition 111 — page 6
~ The tumble dryer can only be used by people with reduced physical, sensory or mental capabilities, or lack of experience or knowledge, if they are are supervised whilst using it or have been shown how to use it in a safe way and recognise and understand the consequences of incorrect operation. Safety with children ~ Children under 8 years of age …
-
Miele T 8812 C Edition 111 — page 7
Technical safety ~ Before setting up the tumble dryer, check it for any externally visible damage. Do not install or use a damaged tumble dryer. ~ Before connecting the tumble dryer, ensure that the connection data on the data plate (fuse rating, voltage and frequency) match the mains electricity supply. If in any doubt, consult a qualified electri …
-
Miele T 8812 C Edition 111 — page 8
~ Faulty components must only be replaced by genuine Miele original spare parts. Only when these parts are fitted can the safety standards of the tumble dryer be guaranteed. ~ The tumble dryer must be isolated from the electricity supply in the event of a fault and during cleaning and maintenance. ~ The tumble dryer must not be used in a non-statio …
-
Miele T 8812 C Edition 111 — page 9
~ Please observe the instructions in «Installation and connection» and «Technical data». ~ The socket must be easily accessible after installation in order to disconnect the tumble dryer from the electricity supply. ~ Do not block the gap between the base of the tumble dryer and the floor with plinth facings, deep pile carpet et …
-
Miele T 8812 C Edition 111 — page 10
~ To prevent the risk of fire, the following textiles must not be dried in this appliance: – items which have not been washed. – items, such as workwear, which have not been thoroughly cleaned and which are still soiled with grease, oil or other deposits (such as cosmetics, lotions etc). If items have not been thoroughly cleaned there is a dang …
-
Miele T 8812 C Edition 111 — page 11
~ To prevent the risk of fire, the following must not be tumble dried: – items which have been cleaned using chemicals (e.g. professional dry-cleaning agents). – fabrics which contain a large proportion of rubber, foam rubber or rubber-like materials. For example, products made from latex foam rubber, shower caps, waterproof textiles, rubberise …
-
Miele T 8812 C Edition 111 — page 12
~ The tumble dryer must not be used without the fluff filters in place or if the fluff filters are damaged in any way. ~ The fluff filters must be cleaned regularly. ~ The tumble dryer must not be used without the condenser unit in place. ~ The fluff filters must be thoroughly dried after cleaning. Damp or wet filters could cause operational faults …
-
Miele T 8812 C Edition 111 — page 13
Accessories ~ Only use genuine Miele original spare parts and accessories with this tumble dryer. If non-Miele parts are used, guarantee, performance and product liability claims may be invalidated. ~ A Miele tumble dryer can be stacked on top of a Miele washing machine using the appropriate stacking kit (available as an optional accessory). Please …
-
Miele T 8812 C Edition 111 — page 14
Control panel a Programme selector For selecting the drying programme. The programme selector can be turned clockwise or anti-clockwise. b Programme sequence and check lights c Start button for starting a programme. The Start indicator light will flash as soon as a programme can be started. It lights up constantly once the programme has started. d …
-
Miele T 8812 C Edition 111 — page 15
Garment care label symbols Drying q Normal/higher temperature r Reduced temperature: Select Low temperature (for delicate textiles) s Do not tumble dry Ironing I High H Medium G Low J Do not iron Tips on drying – Always observe the maximum recommended loads given in the «Programme chart». Do not overload the drum. Overloading can cause …
-
Miele T 8812 C Edition 111 — page 16
Brief instructions The headings numbered ( A , B , C …) show the operating sequence and can be used as a brief guide to using your dryer. A Sort the laundry To ensure an even drying result separate the washed laundry and sort it according to: . . . the drying level required . . . the type of fibre or weave . . . size . . . the moisture content af …
-
Miele T 8812 C Edition 111 — page 17
D Select a programme ^ Turn the programme selector to the required programme. Tip: You can alter the residual moisture or programme selection individually for some programmes (see «Programmable functions»). E Start the programme ^ Press the Start button. The indicator light for the Start button will then change from flashing to being on c …
-
Miele T 8812 C Edition 111 — page 18
Once a programme has started — changing the programme You cannot change to another programme once a programme has started (this prevents unintentional alterations). If you try and change a programme the Finish/Anti-crease light will start flashing. You will need to cancel the current programme before you can select a new one. — cancelling the progr …
-
Miele T 8812 C Edition 111 — page 19
Cottons t ** Max. load 7 kg* Use for Cotton items such as those described under Cottons Normal with normal residual moisture levels. Notes – Items are dried to a Normal level only. – The Cottons t programme is the most energy-efficient for drying cotton items with normal residual moisture levels. Cottons Max. load 7 kg* Normal+, Normal Use for …
-
Miele T 8812 C Edition 111 — page 20
Minimum iron Max. load 3 kg* Normal, Hand iron Use for Minimum iron cotton, synthetic and mixed fibre fabric, e.g. tops, dresses, trousers, skirts and table cloths. Note With the Hand iron drying level, items are dried with very little creasing, depending on fabric type and amount of laundry. Low temperature Use for All fabric with the r symbol on …
-
Miele T 8812 C Edition 111 — page 21
Emptying the condensed water container The condensed water will be collected in the condensed water container unless the dryer has been connected for external drainage (see «Installation»). Empty the condensed water container after every drying programme. The Empty container indicator will light up if the maximum level of the condensed wa …
-
Miele T 8812 C Edition 111 — page 22
Cleaning the fluff filters The fluff which is created by the drying process is collected by the fluff filters in the door and the door opening. Clean the filters after each drying programme. Cleaning them whilst dry Tip: You can also use a vacuum cleaner. ^ Open the door and pull the fluff filter (1) out of the door as illustrated. ^ Use your finge …
-
Miele T 8812 C Edition 111 — page 23
Cleaning them with water If there is a great deal of compacted fluff on any of the filters, they can be removed and cleaned under hot running water. ^ Open the door and pull the fluff filter out of the door as described previously. The two filters in the door opening can also be removed if you need to clean them with water. ^ Turn dial a and pull t …
-
Miele T 8812 C Edition 111 — page 24
Cleaning the tumble dryer Disconnect the tumble dryer from the mains electricity supply. Miele branded cleaning and conditioning products are available to order via the internet on www.miele-shop.com. ^ Clean the housing and control panel with a slightly damp cloth and a mild detergent or soapy water. ^ The drum and other stainless steel parts can …
-
Miele T 8812 C Edition 111 — page 25
Cleaning the condenser unit Detergent residue, hair and fine fluff from the dryer can get through the fluff filters and block the condenser unit. Dust from the room in which the dryer is installed can also get into the condenser unit and cause a blockage. Check the condenser unit at least once a year. If the dryer is used frequently then clean the …
-
Miele T 8812 C Edition 111 — page 26
^ Pull the condenser unit out of its housing by the handle. Checking the condenser unit ^ Hold the condenser unit up to the light as shown . ^ Check to see if there is any fluff inside it. The arrows in the illustration above indicate where to look. If you cannot see any fluff: ^ Replace the condenser unit (see following page). If you can see some …
-
Miele T 8812 C Edition 111 — page 27
^ Then flush the unit through from the front. ^ Check the condenser unit again for any visible fluff and if necessary flush it through again until it has all gone. ^ Repeat as required. ^ Also make sure the rubber seals are clean. The rubber seals must not be removed and must be free of kinks. ^ Shake the water off the condenser unit until no more …
-
Miele T 8812 C Edition 111 — page 28
With the help of the following notes minor faults in the performance of the appliance, some of which may result from incorrect operation, can be put right without contacting the Service Department. , Repair work to electrical appliances should only be carried out by a suitably qualified person in strict accordance with current local and national sa …
-
Miele T 8812 C Edition 111 — page 29
Problem Possible cause Remedy There is a build-up of fluff. Fluff is principally the result of friction when garments are being worn and washed. Machine drying hardly causes any fluff to form and has been established by research institutes to have no appreciable effect on the lifetime of fabric. Fluff is collected by the fluff filters and can be ea …
-
Miele T 8812 C Edition 111 — page 30
Problem Possible cause Remedy Drying is taking too long, or the programme has been cancelled The dryer is not working efficiently or economically*. The most likely cause is a build-up of fluff, hair or detergent residue on the fluff filters. – Remove any fluff, hair or residual detergent. – Rinse the filters if necessary and then dry them thoro …
-
Miele T 8812 C Edition 111 — page 31
Check and fault messages Problem Possible cause Remedy The Empty container indicator light comes on. The condensed water container is full or there is kink in the drain hose. – Empty the condensed water container. – Check the drain hose. – The indicator light will go out if you open and close the door. The programme stops and the Machine iron …
-
Miele T 8812 C Edition 111 — page 32
Problem Possible cause Remedy The Start button indicator light flashes/does not flash. The flashing indicates that a programme can be started. After the programme has started, the flashing will change to a constant light. The Start button indicator light is flashing slowly. The dryer is in Standby mode. This is quite normal and not indicative of an …
-
Miele T 8812 C Edition 111 — page 33
Changing the lamp Disconnect the tumble dryer from the mains electricity supply. ^ Open the door. You will find the interior light cover at the top of the drum aperture. ^ Insert a suitable tool, such as a wide bladed screwdriver, under the side edge of the light cover as illustrated. ^ Apply a little pressure and whilst doing so turn your wrist in …
-
Miele T 8812 C Edition 111 — page 34
Repairs In the event of any faults which you cannot remedy yourself, please contact – your Miele dealer or – the Miele Service Department (see back cover for contact details). When contacting your dealer or the Service Department, please quote the model and serial number of your appliance, both of which are shown on the data plate. This is visi …
-
Miele T 8812 C Edition 111 — page 35
Front view a Mains connection cable b Condensed water container c Control panel d Door e Service panel for condenser unit f Four height-adjustable screw feet g External drainage options (e.g. via wash basin, wash basin drain outlet, or gully. See «External condensed water outlet»). Installation 35 …
-
Miele T 8812 C Edition 111 — page 36
Rear view a Protruding lid for holding when moving the appliance (see arrows) b Air inlet vent for cooling the condenser unit c Mains connection cable d External drainage of the condensed water e Accessories for connection to a sink drain outlet Installation site , Make sure the dryer door can be opened without hindrance after installation. Transpo …
-
Miele T 8812 C Edition 111 — page 37
Levelling the tumble dryer The appliance must be perfectly level to ensure safe and proper operation. ^ The screw feet can be adjusted to compensate for any unevenness in the floor. , The air inlet and outlet vents on the front of the tumble dryer must not be covered as this would prevent sufficient ventilation for cooling the condenser unit. , Do …
-
Miele T 8812 C Edition 111 — page 38
External condensed water outlet General notes When drying is in progress, condensed water is pumped into the condensed water container through the drain hose at the back of the dryer. The condensed water can also be drained off directly if the tumble dryer is installed near a sink, drain outlet etc. so that the condensed water container does not ha …
-
Miele T 8812 C Edition 111 — page 39
External drainage via a sink or gully ^ See «Front view» illustration. , If you want to drain the water off into a sink you will need to secure the hose carefully, e.g. by tying it to a tap to make sure it cannot slip during use. Otherwise there is a risk of overflowing water which could cause damage. ^ Use the bow-shaped guide to prevent …
-
Miele T 8812 C Edition 111 — page 40
1 Adapter 2 Nut 3 Hose clip 4 End of the hose 5 Non-return valve 6 Tumble dryer drain hose ^ Fit adapter 1 to the sink drain outlet using nut 2 . If this nut has a flat disc in it you should take the disc out first. ^ Attach the end of hose 4 to adapter 1 . ^ Use a screwdriver to tighten hose clip 3 up close to the nut. , Non-return valve 5 has to …
-
Miele T 8812 C Edition 111 — page 41
Electrical connection U.K. All electrical work should be carried out by a suitably qualified and competent person, in strict accordance with current national and local safety regulations (BS 7671 in the UK). Ensure power is not supplied to the appliance until after installation work has been carried out. The appliance is supplied with a mains cable …
-
Miele T 8812 C Edition 111 — page 42
Load 1 Final spin speed in a domestic washing machine Residual moisture Energy Duration kg rpm % kWh Minutes Cottons t 2 7.0 3.5 1000 1000 60 60 4.14 2.28 109 65 Cottons Normal 7.0 7.0 7.0 7.0 1200 1400 1600 1800 53 50 44 43 3.75 3.55 3.15 3.10 100 95 86 84 Cottons Hand iron 7.0 7.0 7.0 7.0 7.0 1000 1200 1400 1600 1800 60 53 50 44 43 3.10 2.75 2.55 …
-
Miele T 8812 C Edition 111 — page 43
Height 850 mm Width 595 mm Depth 587 mm Depth with door open 1060 mm Height for building under 820 mm Width for building under 600 mm Depth for building under 600 mm Suitable for pushing under a worktop Yes Suitable for stacking Yes Weight 51 kg Drum volume 111 litres Maximum capacity 7 kg dry weight Capacity of condensed water container approx. 3. …
-
Miele T 8812 C Edition 111 — page 44
Programmable functions for changing default settings The programmable functions are used to alter the tumble dryer´s electronics to suit changing requirements. Programmable functions can be altered at any time. 44 …
-
Miele T 8812 C Edition 111 — page 45
Altering the residual moisture level in the Cottons programme The tumble dryer is designed to dry effectively using as little energy as possible. However, if you require the laundry to be drier or damper, you can reduce or increase the default residual moisture in the Cottons programme. Please note: The Cottons t programme will remain unchanged. Fo …
-
Miele T 8812 C Edition 111 — page 46
Altering the residual moisture level in the Minimum iron programme The tumble dryer is designed to dry effectively using as little energy as possible. However, if you require the laundry to be drier or damper, you can reduce or increase the default residual moisture in this programme. Follow the steps ( A , B , C …) using the Start button and pro …
-
Miele T 8812 C Edition 111 — page 47
Anti-crease If laundry is not removed as soon as the programme has finished, the drum will continue to rotate at intervals for two hours to prevent creasing. The anti-crease function – is activated when the tumble dryer is delivered. You can shorten the duration of the anti-crease phase or deactivate it if wished. – is used in all programmes ex …
-
Miele T 8812 C Edition 111 — page 48
Activating and deactivating the buzzer A buzzer sounds (at intervals for a maximum of 1 hour) to let you know the programme has finished. The tumble dryer is delivered with the buzzer activated but you can deactivate it if wished. If there is a fault, a continuous tone will sound even if the buzzer has been deactivated. Follow the steps ( A , B , C …
-
Miele T 8812 C Edition 111 — page 49
Altering the standard drying level in the Automatic plus programme The drying level for this programme is set at a standard Normal level. You have the option of changing this to Hand iron (damper than normal) or to Normal + (drier than normal). Follow the steps ( A , B , C …) using the Start button and programme selector to programme and store in …
-
Miele T 8812 C Edition 111 — page 50
Extending the cooling down time The cooling down phase which takes place before the end of a programme can be lengthened if required. This makes garments easier to handle. The dryer is delivered with the extended cooling down time option deactivated. You can extend the cooling down time by 5 minutes or 10 minutes. The option of extending the coolin …
-
Miele T 8812 C Edition 111 — page 51
Standby To save energy, the programme sequence/check lights go out and the indicator light for the Start button starts flashing slowly. To come out of standby mode ^ Turn the programme selector or press the Start button. Neither will have any effect if a programme is running. On The standby function is activated and the programme sequence/check lig …
-
Miele T 8812 C Edition 111 — page 52
Before you begin, ensure that: – The tumble dryer is switched off. – The door is closed. – The programme selector is at Finish . A Press the Start button and keep it pressed in whilst carrying out steps B — C . B Switch the dryer on. C Wait until the Start indicator light lights up constantl y… D . . . and then release the Start button. E T …
-
Miele T 8812 C Edition 111 — page 53
53 …
-
Miele T 8812 C Edition 111 — page 54
54 …
-
Miele T 8812 C Edition 111 — page 55
55 …
-
Miele T 8812 C Edition 111 — page 56
Alteration rights reserved/2114 M.-Nr. 09 873 580 / 00 8QLWHG.LQJGRP -IELE#O,TD &AIRACRES-ARCHAM2OAD !BINGDON/XON/847 4EL #USTOMER#ONTACT#ENTRE4EL %MAILINFO MIELECOUK )NTERNETWWW …