
Перед вами файл pdf, где представлена инструкция (руководство) на русском для NEKTAR Impact LX25. Вы можете скачать ее либо изучить в онлайн режиме.
Подробные сведения об инструкции:
Устройство из раздела: USB MIDI-контроллер
Бренд-производитель: NEKTAR
Наименование модели: NEKTAR Impact LX25
Инструкция на английском языке
Файл: pdf
Размер файла: 2,65 MB

Скачать инструкцию к HARPER HDT2-1110
ЗАГРУЗИТЬ
Просмотр инструкции онлайн
User Guide
www.nektartech.com
www.nektartech.com                                                                         Nektar Impact LX25 User Guide
Index Introduction 4 Box Content Impact LX Features Minimum System Requirements Getting Started 5 Connection and Power Nektar DAW integration Register for Updates Installing and Setting Up Studio One Artist 6 Installation Studio One Pro Studio One and Impact LX25 Working Together 7 All Working
Index Pads 17 Pad Maps Pad Learn Programming MIDI Messages to Pads Pad Velocity Curves Pad Maps Default Settings 18 Setup Menu 19 Assigning Controls to MIDI Messages 20-22 Control Assign MIDI Channel Assign Assignment Types Data 1 and Data 2 Values Drawbar (on/off) Save Presets and Pad Maps Load a
Introduction Thank you for buying our Impact LX controller keyboard from Nektar Technology. The Impact LX controllers are available in 25, 49 and 61 note versions and come with setup software for many of the most popular DAWs. This means that for supported DAWs, the setup work has largely been done
Getting Started Connection and Power The Impact LX25 is USB Class compliant. This means there is no driver to install to get the keyboard set up with your computer. Impact LX25 uses the built-in USB MIDI driver which is already part of your operating system on Windows and OS X. This makes the first
Installing and Setting Up Studio One Artist The included PreSonus Studio One Artist for OSX and Windows is a powerful and complete DAW that allows you to get started straight away with your Impact LX25 even if you don’t have any other music software. Installation The Studio One Artist 2.6 installer
Studio One Artist and Impact LX25 Working Together Presonus Studio One Artist comes with it’s own documentation which cover all its functionality and powerful features. It’s a good idea to read and reference the documentation regularly to get the most out of your Studio One Artist product. But
Studio One Mixer Control To control the Studio One mixer, press the [Mixer] button to select the mixer preset. The display’s left dot is illuminated while the preset is selected and the Studio One mixer is being controlled. Open/Close the Studio One Mixer Window If the Studio One mixer is not in
Studio One Instrument Control Press the [Inst] button to select the Instrument preset. The display’s center dot is illuminated while the preset is selected. To control an instrument you must however be on an instrument track. To create one, first click on “Instruments” in the Studio One browser
Viewing Assigned Controls The Studio One Focus window will show you what’s assigned to each of instrument presets controls. If you have space on your computer screen this can be a good window to keep in view. There are a few ways to open the Focus window. The below image shows 2 different ways: 1)
Studio One Impact Drum Instrument The Studio One Impact (no relation, really) Drum instrument can be played from the Impact LX25 keyboard or 8 pads. Operating the drum instrument works the same way as any other instrument and using the Pad maps 1+2 you are able to play drum sounds straight away.
Keyboard, Octave and Transpose The Impact LX25 features as 25note keyboard. Each key is velocity sensitive so you can play expressively with the instrument. There are 5 different velocity curves for the keyboard so you can chose a less or more dynamic curve to suit your playing style. In addition,
Wheels and Foot Switch Pitch bend and Modulation Wheels The two wheels below the Octave and Transpose buttons are typically used for Pitch bend and Modulation. The Pitch bend wheel is spring loaded and automatically reverts to it’s center position upon release. It’s ideal to bend notes when you are
Controlling MIDI Software Impact LX25 has incredible flexibility when it comes to controlling a DAW or other MIDI software. There are typically 4 different ways to set up Impact LX25 many controls though it’s not uncommon to use a combination of different approaches. 1. Install the included
Controlling MIDI Software (cont) Global Controls Global controls are controls that are not stored in a preset and therefore Pitch bend/Modulation wheels plus the Foot Switch fall in this category. The 6 transport buttons in addition, are also global controls and assignments are stored over power
Function Buttons The second row of buttons below the display contains 5 function and menu buttons. Each work a little different so here is an overview of what they do. Shift/Mute When you press and hold this button, the MIDI output from real-time controls is muted. This allows you to reposition
Pads The 8 pads are velocity sensitive and programmable with either note or MIDI switch messages. This means you can use them as regular MIDI buttons as well as to punch out your drum beats and percussive melody parts. In addition, the pads have 5 velocity curve options and 3 fixed value options
Pads Maps Default Settings Map 1 P1 P2 P3 P4 P5 P6 P7 P8 Note C1 C#1 D1 D#1 E1 F1 F#1 G1 Note No. 36 37 38 39 40 41 42 43 Data 1 0 0 0 0 0 0 0 0 Data 2 127 127 127 127 127 127 127 127 Data 3 0 0 0 0 0 0 0 0 Chan Global Global Global Global Global Global Global Global Note G#1 A1 A#1 B1 C2 C#2 D2
Setup Menu The Setup menu gives access to additional functions such as control assign, load, save, selecting velocity curves and more. To enter the menu, press the [Setup] button. This will mute the MIDI output of the keyboard and instead the keyboard now is used to select menus. When the Setup
Assigning Controls to MIDI messages Since the Mixer and Instrument presets are read-only, the first 4 functions C1-E1 applies only to Presets and cannot be selected if either Mixer or the Instrument [Inst.] preset is selected. To enter the Setup menu’s assign functions, please do the following:
Assignment Types (E3) Most of the controls in the default presets are assigned to MIDI CC messages. But there are several other options and the below chart shows you which are available for the two types of controls. Controller Type Assignment Type Pitch bend, Modulation Wheel, Fader, Pots 1-8 MIDI
Save Presets and Pad Maps (F3) When you make assignment changes to a control or pad, the changes are stored in a current working memory area and the settings are also stored over power cycling. However if you change preset or pad map your settings will be lost because the loaded data will overwrite
Global Functions and Options Unlike the Control Assign functions, Global functions can be accessed regardless of what preset has been selected. And just to recap: Pressing the [Setup] button will activate the Setup menu and the display will show {S.E.t.} with the 3 dots blinking for as long as the
Pads Velocity Curves (D4) There are 4 different pad velocity curves and 3 fixed velocity levels to choose between, depending on how sensitive and dynamic you want the Impact LX pads to play. Name Description Normal Focus on mid to high velocity levels Display abbreviation PC1 Soft The most dynamic
Bank LSB (F4) This function will send a Bank LSB MIDI message from the keyboard. Note, most software products don’t respond to Bank change messages but many MIDI hardware products do. Here is how you send out a Bank LSB message Press the F4 key on your keyboard to select Bank LSB. The display
User Preset 1 GM Instrument Pots Ctrl P1 P2 P3 P4 P5 P6 P7 P8 Msg Type MIDI CC MIDI CC MIDI CC MIDI CC MIDI CC MIDI CC MIDI CC MIDI CC CC 74 71 5 84 78 76 77 10 Data 1 127 127 127 127 127 127 127 127 Data 2 0 0 0 0 0 0 0 0 Chan Global Global Global Global Global Global Global Global Param
User Preset 4 “Learn Friendly” 1 Pots Ctrl P1 P2 P3 P4 P5 P6 P7 P8 Msg Type MIDI CC MIDI CC MIDI CC MIDI CC MIDI CC MIDI CC MIDI CC MIDI CC CC 89 90 96 97 116 117 118 119 Data 1 127 127 127 127 127 127 127 127 Data 2 0 0 0 0 0 0 0 0 Chan Global Global Global Global Global Global Global Global Fader
MIDI Implementation Chart Function Transmitted Recognized Notes Global Channel Default Changed 1 No 1-16 Mode 3 No 0-120 No After Touch No No Pitch Bend Yes No Control Change Yes No Program Change 1-128 No Yes Yes :Clock No No :Commands No No :Local on/off No No :All Notes off Yes No :Active Sense
Factory Restore If you need to restore factory settings for example if you by mistake managed to change the assignments needed for DAW integration files, here is how you do that. Make sure your Impact LX25 is switched off Press the [Octave up]+[Octave down] buttons and hold them Switch your
30 Nektar Impact LX25 User Guide www.nektartech.com
www.nektartech.com Nektar Impact LX25 User Guide 31
www.nektartech.com Designed by Nektar Technology, Inc, California Made in China 32 Nektar Impact LX25 User Guide www.nektartech.com
2
Nektar Impact LX25 User Guide www.nektartech.com
Index
Introduction
4
Box Content
Impact LX Features
Minimum System Requirements
Getting Started
5
Connection and Power
Nektar DAW integration
Register for Updates
Installing and Setting Up Studio One Artist
6
Installation
Studio One Pro
Studio One and Impact LX25 Working Together
7
All Working Fine?
Transport?
Studio One Mixer Control
8
Open/close the Studio One Mixer Window
Channel Volume & Pan
Mute & Solo
Bank Over (1-8), (9-16) etc
Master Volume
Studio One Instrument Control
9-10
First-time Setup
Open/close the Instrument Window
Changing Patches and Controlling an Instrument
Viewing Assigned Controls
Customizing Plug-in Mapping
Navigating Insert Plug-ins
Studio One Drum Instrument
11
“Learning” Studio One Impact Sounds to the Pads
Mixing Studio One Impact Drum Sounds
Keyboard, Octave and Transpose
12
Octave Shift
Program, MIDI Channel and Preset Control with the Octave Buttons
Transpose, Program, MIDI Channel and Preset Control with the Transpose Buttons
Wheels and Foot Switch
13
Pitch Bend and Modulation Wheels
Foot Switch
Controlling MIDI Software
14-15
Mixer, Instrument and Presets
Global Controls
Function Buttons
16
Shift/Mute
Snapshot
Null
Pad Learn
Setup

Код товара: 14641
Артикул: Impact LX 25+
Производитель:
Nektar
Цена
по запросу
В наличии
- Описание Impact LX 25+
- Характеристики Impact LX 25+
- Инструкции
- Отзывы Impact LX 25+
- Похожие
- Аксессуары
MIDI-клавиатура Nektar Impact LX 25+
<p>
Клавиатура 25 клавиш чувствительных к скорости нажатия 4 вида кривых velocity и 3 фиксированных значения Колеса высоты тона и модуляции Кнопки смещения октав Кнопки транспонирования
</p>
<p>
Управление 8 потенциометров 1 фейдер 30 мм 6 выделенных транспортных кнопок 5 расположений памяти для пользовательских настроек Кнопка Page (только для интеграции Nektar DAW) Интеграция Nektar DAW для основных DAW
</p>
<p>
Пэды 8 чувствительных к скорости нажатия пэдов Каждый пэд подсвечивается четырьмя цветовыми вариантами: зеленым, желтым, оранжевым и красным 4 вида кривых velocity и 3 фиксированных значения Функция запоминания Note-learn Назначение нот или MIDI сообщений на пэды Загрузка или Сохранение настроек в любой из 4 ячеек Pad maps Кнопки «Clips» и «Scenes» с LED-индикаторами
</p>
<p>
Подключения 1 вход 1/4″ TS джек для подключения ножного переключателя (MIDI назначаемый) USB-порт на задней панели и питание от USB Подключение iPad через адаптер Camera Connection Kit (не входит вкомплект)
</p>
<p>
Размер: 476 x 267 x 69 мм
</p>
<p>
Вес: 1,8 кг
</p>
<p>
Системные требования Класс совместимый с USB, не требует драйверов для операционных систем Apple iOS, Apple OSX, и Windows XP и выше Linux (требуется программный драйвер MIDI)
</p>
<p>
Интеграция Nektar DAW Mac OS X 10.7 или выше, Windows Vista, 7 & 8 или выше
</p>
Nektar Impact LX 25+ характеристики товара
| Серия | Impact |
| Количество клавиш | 25 клавиш (2 октавы) |
| Цвет | Серый |
| Функция обучения | Нет |
| USB разъем | USB type B |
| Разъем педали сустейна | Есть |
Nektar Impact LX 25+ инструкция на русском языке
На этот товар еще нет инструкций
Отзывы на Nektar Impact LX 25+
- На этот товар еще нет отзывов.
Сопутствующие товары Nektar Impact LX 25+ — USB MIDI клавиатура
Compact. Control. Creativity
The Impact LX25+ MIDI controller is compact and portable yet jam-packed with intelligent and expressive performance control not even available on many premium products. Ever wanted a controller that hooks up automatically to your DAW? Impact LX25+ does exactly that.
Nektar DAW Integration custom designed for Bitwig, Cakewalk, Cubase, Digital Performer, FL Studio, GarageBand, Logic, Nuendo, Reaper, Reason and Studio One takes Impact LX25+ way beyond functionality normally offered by a USB MIDI controller keyboard. With Impact LX25+ the hard work is done, so you can focus on your creativity.
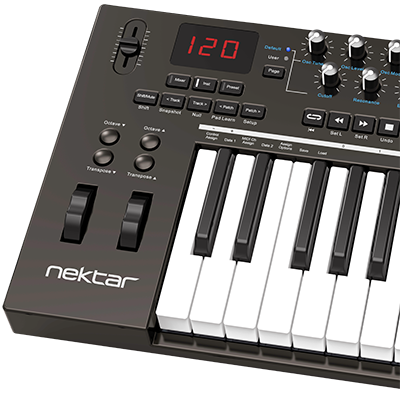
The 25 note velocity sensitive keyboard is a synth action with a medium tension. The full-size, piano-style keys are covered to protect against dirt and dust while also complementing the Impact LX design. With 4 velocity curves gradually increasing in dynamics there is a choice for any playing style. If you don’t need velocity, 3 fixed velocity levels cater for a consistent output. Octave and transpose buttons as well as pitch bend and modulation wheels are within reach, so you can quickly shift the keyboard up or down as needed, or apply additional articulation with the wheels.
OCTAVE & TRANSPOSE BUTTONS
There is more to the 4 Octave & Transpose buttons than meets the eye. 4 functions are selectable on the fly so you can make important changes at any time, even while you play. A key combination makes assignment quick and easy. Choices include sending out MIDI Program Messages, change the Global MIDI Channel or select any of Impact LX25+’s 5 user presets with either the Octave or Transpose buttons.

CONTROL CENTER
A 30mm fader and 8 pots are at the center of the Impact LX25+ control panel. Each control is fully programmable to send any MIDI CC message for use with hardware or software MIDI products. Used with Nektar DAW integration, the controls take on a life of their own, providing flexible pre-mapped DAW control giving you the best of both worlds. Control settings can be stored in any of the 5 Impact LX25+ presets for recall at any time. And if you switch Null on, any parameter values are stored when you change presets so you avoid parameter jumping.
PADS
For groove and beat creation, Impact LX25’+s 8 velocity sensitive pads make life easy. Calibrated to trigger at a light touch, finger drumming is suddenly well within reach with a nice and even velocity response. Each pad can be assigned any MIDI note number or MIDI cc message for use as MIDI trigger or toggle buttons. But the best part is the “Pad Learn“ feature, which allows you to just select a pad, play the note or drum sound you want on the keyboard and assignment is done. No complex menus for a task that’s essential to getting the most out of your pads. Assignments are stored over power cycling so you don’t lose your settings when you switch your system off for the night. In addition, 4 pad map locations can store your settings for future recall.
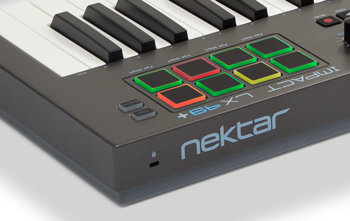
The 4 color LED illumination not only looks good but also indicate which pad map is currently loaded and can even tell you which type of MIDI message each pad sends. With Nektar DAW Integration, the pads are automatically mapped in for example Reason and Bitwig. The two Clips and Scenes buttons are used in Bitwig to trigger exactly these features. In Reason, a clever control of Reason’s location points create a similar experience with scenes triggering of any Reason song.
NEKTAR DAW INTEGRATION
Impact LX25+ software integration supports most of the popular DAWs. A common workflow gives access to many of the functions you are most likely to need when recording and performing with your Impact LX25+. The best part is that it’s all done for you: Simply complete the installation process and start making music! Impact LX25+ DAW integration currently supports Cubase, Cakewalk, Digital Performer, FL Studio, Garageband, Logic, Nuendo, Reaper, Reason and Studio One. Buttons and controls are labeled so you don’t have to remember how they are assigned. That’s why Impact LX25+ is a breeze to use but with enough extra features under the hood to challenge even the most experienced power user.

TRANSPORT & NAVIGATION
The 6 dedicated transport buttons are always within reach and mapped to control Cycle, Rewind, Forward, Stop, Play and Record. Press Shift to get access to alternate functions such as Goto L, Set L, Set R, Undo, Click and Mode. Dedicated Track up/down and Patch up/down buttons are located below the display.

MIXER CONTROL
Press mixer and the 8 Impact LX25+ potentiometers are assigned to control 8 channels of your DAW’s mixer. The alternate Bank up/down function moves control assignments to the next or previous group of 8 channels. The fader is assigned to the currently selected channel so you always know where to find it.
Holding the “Mixer” mode button, you switch the pots to control pan for a selected group of 8 channels and the 8 pads will control Mute. The fader is used to control volume of the current mixer channel as well as master volume.
To help you get the best out of your screen real estate, Impact LX+ also has shortcuts for opening and closing your DAW’s mixer window so you can see what’s going on.
INSTRUMENT PRESET
The Instrument button assigns all controls to instrument parameters once an instrument track is selected in your DAW. Nektar mapping ensures this is done automatically, so you can start tweaking immediately. Better still, many devices and plugins are pre-mapped to match the blue control labels on the Impact LX+.
The Page Button
With Nektar DAW Integration, a page button allows you to switch between Default settings and User settings with LEDs clearly indicating which page is active. Each page changes assignments of the 8 pots, leaving the User page for example for your own assignments. Many pre-mapped plugins take advantage of the two pages*. So you could use it for immediate access to both, oscillator 1 and oscillator 2 parameters from the pots, switching between oscillators using the Page button.
In addition, a typical control layout places amp and filter ADSR envelopes on the pots for instant access, when you hold the “Instrument” mode button, regardless of whether the Default or User page is selected.
“Grab” and Nektar Maps
The Nektar “Grab” mode allow you to temporarily assign parameters to controls as you work on your project. It’s as easy as holding down shift while moving the parameters on the instrument you want to control followed by moving the controls on Impact LX+ you want them assigned to. Some DAWs even supports saving “grabbed” parameters to a Nektar map* which means you can completely customize your assignments for future use.
* Implementation depends on the DAW. Check how Impact LX+ works with your DAW in the section below.
HOW DOES IMPACT LX25+ MAP FOR YOUR DAW?
Click the tab corresponding to your DAW below and learn more.
- BITWIG
- CAKEWALK
- CUBASE
- DIGITAL PERFORMER
- FL STUDIO
- GARAGEBAND
- LOGIC
- REAPER
- REASON
- STUDIO ONE

BITWIG STUDIO
NAVIGATION BUTTONS
TRANSPORT BUTTONS
|
INSTRUMENT
|
|
MIXER
|
PADS
|
![]()
SONAR
TRANSPORT BUTTONS
SOFT-TAKEOVER
|
NAVIGATION BUTTONS
INSTRUMENT
|
|
MIXER
|
![]()
CUBASE/NUENDO
TRANSPORT BUTTONS
SOFT-TAKEOVER
|
NAVIGATION BUTTONS
INSTRUMENT
|
|
MIXER
|
By loading the video, you agree to YouTube’s privacy policy. Load video Always unblock YouTube |

MOTU: DIGITAL PERFORMER
TRANSPORT BUTTONS
SOFT-TAKEOVER
|
NAVIGATION BUTTONS
INSTRUMENT
|
|
MIXER
|
![]()
IMAGE-LINE: FL STUDIO
TRANSPORT BUTTONS
|
NAVIGATION BUTTONS
|
|
MIXER
|
By loading the video, you agree to YouTube’s privacy policy. Load video Always unblock YouTube |
APPLE GARAGEBAND
TRANSPORT BUTTONS
|
NAVIGATION BUTTONS
|
|
MIXER
SMART PANE
|
By loading the video, you agree to YouTube’s privacy policy. Load video Always unblock YouTube |
APPLE LOGIC 9 & LOGIC PRO X
TRANSPORT BUTTONS
|
NAVIGATION BUTTONS
|
|
MIXER
SMART PANE
SOFT-TAKEOVER/PICKUP MODE
|
By loading the video, you agree to YouTube’s privacy policy. Load video Always unblock YouTube |
![]()
REAPER
TRANSPORT BUTTONS
SOFT-TAKEOVER
|
NAVIGATION BUTTONS
|
|
MIXER
|
![]()
PROPELLERHEAD SOFTWARE: REASON
NAVIGATION BUTTONS
TRANSPORT BUTTONS
|
INSTRUMENT
PADS
|
|
MIXER
SOFT-TAKEOVER
|
By loading the video, you agree to YouTube’s privacy policy. Load video Always unblock YouTube |
![]()
PRESONUS STUDIO ONE
TRANSPORT BUTTONS
NAVIGATION BUTTONS
|
INSTRUMENT
|
|
MIXER
|
By loading the video, you agree to YouTube’s privacy policy. Load video Always unblock YouTube |
USER PRESETS & PROGRAMMING MIDI
If you mainly want to use your DAW’s MIDI learn features, Impact LX25+ is easy to come to grips with.
There are 2 non-overlapping, read-only presets on the Mixer and Instrument buttons so you can quickly switch between independent and unique setups. These presets are also used for Impact LX25+’s integrated DAW support.
In addition, 5 user presets are programmed for GM compatible and “learn-friendly” setups plus they can of course be overwritten with your own settings. You could set up Impact LX25+ for use with Pro Tools or Ableton Live for example, both of which have limited integration options. Using Impact LX25+”s generic MIDI controller capabilities, setups can get you quite far. Here is a link to setup examples.
With the Impact LX25+’s “Null” function switched to on, parameter values are stored when you switch between presets so you avoid parameter jumping.


CONNECTIVITY & APPLE iOS
On the back of Impact LX25+ are the connection points including:
- USB port for power and data connection to your computer or iPad (via optional USB camera connection kit)
- Foot switch jack, assignable (pedal not included)
- On/Off switch
As a low powered USB device, Impact LX25+ works with all USB devices that feature a Class compliant MIDI driver. This includes all version of Windows from XP and higher, Apple OS X 10.5 and higher plus Linux (as long as a USB MIDI driver package is installed).
And if you are often on the move you can easily hook your Impact LX25+ keyboard to an Apple iPad using the iPad’s optional USB camera connection kit (optional). Of course the Impact LX is powered by the iPad so you can work away for as long as your iPad remains charged.
BITWIG 8-TRACK INCLUDED
Bitwig 8-Track is included with every Impact LX+ so you can start producing, performing, and designing sounds like a pro from day one. Bitwig 8-Track gives you access to over 50 software instruments and effects for use on up to 8 audio or MIDI project tracks, and you can use any 3rd party VST plug-ins you might own, too. The ‘Bitwig Essentials Package’, a highly versatile handpicked selection of loops, clips and samples, is also included to help you get started. So put all that together and you have a powerful sketchpad for your musical ideas featuring the acclaimed workflow of Bitwig Studio.
Nektar DAW Integration supports Bitwig 8-Track, so using Nektar Impact LX+ and Bitwig 8-Track together is a fantastic combination. If you are just starting out, you will find it’s the perfect way to take your first steps in the world of digital music creation. And if you’re already familiar with using computer software, then you’ll be amazed at what this combination has to offer!

SPECIFICATIONS
Keyboard
- 25note velocity-sensitive synth-action keyboard
- 4 velocity curves + 3 fixed
- Pitch bend & Modulation wheels
- Octave shift buttons
- Transpose shift buttons
Controls
- 8 potentiometers
- 1 30mm fader
- 6 dedicated transport buttons
- 5 preset locations store control settings
- Page button (for Nektar DAW Integration only)
- Nektar DAW Integration for major DAWs
Pads
- 8 velocity sensitive pads
- Each pad LED illuminated with 4 color options: Green, Yellow, Orange and Red
- 4 velocity curves plus 3 fixed
- Note-learn
- Pads assignable notes and MIDI cc messages
- Load or Save to any of 4 pad maps
- Clips and Scenes LED buttons
Connections
- 1/4” TS jack foot switch input (MIDI Assignable)
- USB port on rear panel, and USB bus powered
- Connects to iPad via Apple Camera Connection Kit (not supplied)
Weight & Dimensions
Dimensions (L x D x H):
18 3/4″ x 10 1/2″ x 2 3/4 “
47,6 cm x 26,6 cm x 7 cm
Weight: 4 Lbs / 1,8 kg
System Requirements
- USB Class compliant (no driver needed)
- USB Power Requirement: 500 mA (100 mA in low power mode)
- Impact LX+: Apple iOS, Apple OSX 10.5 or higher, Windows XP, or higher, Linux (MIDI driver software required)
- Nektar DAW Integration: Mac OS X 10.7 or higher, Windows Vista, 7 & 8 or higher
Controls
Просмотр
Доступно к просмотру 32 страницы. Рекомендуем вам скачать файл инструкции, поскольку онлайн просмотр документа может сильно отличаться от оригинала.
-
User Guide www.nektartech.com www.nektartech.com Nektar Impact LX25 User Guide
-
Index
Introduction                                                            4
Box Content
Impact LX Features
Minimum System Requirements
Getting Started                                                         5
Connection and Power
Nektar DAW integration
Register for Updates
Installing and Setting Up Studio One Artist                             6
Installation
Studio One Pro
Studio One and Impact LX25 Working Together                             7
All Working Fine?
Transport?
Studio One Mixer Control                                                8
Open/close the Studio One Mixer Window
Channel Volume & Pan
Mute & Solo
Bank Over (1-8), (9-16) etc
Master Volume
Studio One Instrument Control                                           9-10
First-time Setup
Open/close the Instrument Window
Changing Patches and Controlling an Instrument
Viewing Assigned Controls
Customizing Plug-in Mapping
Navigating Insert Plug-ins
Studio One Drum Instrument                                              11
“Learning” Studio One Impact Sounds to the Pads
Mixing Studio One Impact Drum Sounds
Keyboard, Octave and Transpose                                          12
Octave Shift
Program, MIDI Channel and Preset Control with the Octave Buttons
Transpose, Program, MIDI Channel and Preset Control with the Transpose Buttons
Wheels and Foot Switch                                                  13
Pitch Bend and Modulation Wheels
Foot Switch
Controlling MIDI Software                                               14-15
Mixer, Instrument and Presets
Global Controls
Function Buttons                                                        16
Shift/Mute
Snapshot
Null
Pad Learn
Setup
2    Nektar Impact LX25 User Guide                                                                      www.nektartech.com
-
Index
Pads                                                                    17
Pad Maps
Pad Learn
Programming MIDI Messages to Pads
Pad Velocity Curves
Pad Maps Default Settings                                               18
Setup Menu                                                              19
Assigning Controls to MIDI Messages                                     20-22
Control Assign
MIDI Channel Assign
Assignment Types
Data 1 and Data 2 Values
Drawbar (on/off)
Save Presets and Pad Maps
Load a Preset
Global Functions and Options                                            23-25
Global MIDI Channel
Keyboard Velocity Curves
Pads Velocity Curves
Panic
Program
Bank LSB
Bank MSB
Memory Dump
USB Port Setup
User Presets 1-5 Default Settings                                       26-27
MIDI Implementation Chart                                               28
Factory Restore                                                         29
CALIFORNIA PROP65 WARNING:  This product contains chemicals known to the State of California to cause cancer and birth defects or other reproductive harm.
For more information: www.nektartech.com/prop65
Dispose of product securely, avoiding exposure to food sources and ground water. Only use the product in accordance with the instructions.
Note: This equipment has been tested and found to comply with the limits for a Class B digital device, pursuant to part 15 of the FCC Rules. These limits are designed
to provide reasonable protection against harmful interference in a residential installation. This equipment generates, uses and can radiate radio frequency energy and,
if not installed and used in accordance with the instructions, may cause harmful interference to radio communications. However, there is no guarantee that interfer-
ence will not occur in a particular installation. If this equipment does cause harmful interference to radio or television reception, which can be determined by turning
the equipment off and on, the user is encouraged to try to correct the interference by one or more of the following measures:
—Reorient or relocate the receiving antenna.
—Increase the separation between the equipment and receiver.
—Connect the equipment into an outlet on a circuit different from that to which the receiver is connected.
—Consult the dealer or an experienced radio/TV technician for help.
Nektar Impact LX25
Impact firmware, software and documentation are the property of Nektar Technology, Inc and subject to a License Agreement.
© 2014 Nektar Technology, Inc. All specifications subject to change without notice. Nektar is a trademark of Nektar Technology, Inc.
Studio One is a trademark of PreSonus Software, Ltd., registered in the U.S. and other countries
www.nektartech.com                                                                         Nektar Impact LX25 User Guide    3
- 1
- 2
- 3
- 4
- 32