
Медицинская техника
для профессионалов
Медицинская техника и ветеринарное оборудование, доставка по России и СНГ
ООО «ПрофМТ», Санкт-Петербург, +7(812)946-03-27; +7(812)946-03-26, info@profmt.ru, пн-пт 900-1700 , сб-вс
Совместим со следующими моделями приборов:
Nihon Kohden Cardiofax Q, Cardiofax C, Cardiofax S, Cardiofax GEM, ECG-1150, ECG-1150A, ECG-1250, ECG-1250A, ECG-1250K, ECG-1350, ECG-1350A, ECG-1350K, ECG-8820, ECG-8820K, ECG-9010, ECG-9010K, ECG-9020, ECG-9022, ECG-9022K, ECG-9110, ECG-9110K, ECG-9130, ECG-9130K, ECG-9132, ECG-9620, ECG-9620L, ECG-9620M, K081;
Cardioline E1, E1R, E3, Delta 3, Delta 300, Delta 360 C3, AR600, AR600adv, AR600view, AR1200view, AR2100view;
Utas Юкард-100, Юкард-200;
CARDIORAPID K11, K111, K112, K131, K31, K33 и K36
Biocare ECG-101, ECG-101B, ECG-101G, ECG-300, ECG-300G, ECG-1200, ECG-1215, ECG 1230, ECG-6010, ECG-9803;
Beijing M&B Electronic ECG-1206а, ECG-1206d, ECG-1212, LPM-1212 i;
BTL BTL-08 LC, BTL-08 LT, BTL-08-SD ECG, BTL-08 МТ Plus, BTL-08 MD SPIRO;
Edan: SE-1, SE-100, SE-3, SE-300, SE- 6, SE-12, SE-12 Express, SE-600, SE-601, SE-1010, SE-1200, SE-1200 Express;
Newtech 1206; Del Mar Reynolds Voyager 12;
Carewell ECG 1101, 1103, 1106, 1112, 1112L, T12, AR 1200ADV;
CARDIETTE / ELETTRONICA TRENTINA AR-600; EXCELL 101,103,106;
DR. LEE ECG-310A и ECG-310B; CARDIOTEK.
В закладки
Сравнить
Количество:
—
+
Электрокардиограф ECG-1150 — 3-канальный, компактный прибор ЭКГ с ЖК-дисплеем и эффективной программой анализа и интерпретации ЭКГ. Данный прибор оснащен всеми необходимыми базовыми функциями и идеально подходит для эксплуатации в простых условиях.
Синхронное отображение 12-ти отведений ЭКГ на экране
ЖК-дисплей обеспечивает получение четкого изображения кривых в 12 отведениях ЭКГ для простой оценки. Отображение 12 отведений на дисплее позволяет пользователю оптимально принимать решение о выводе информации на печать. Перед выводом на печать пользователь имеет возможность удостовериться в качестве ЭКГ, устранить при необходимости помехи сигнала, что также позволяет экономить термобумагу.
3-ех канальная запись ЭКГ
Запись осуществляется на рулонной термобумаге. Термопринтер с высоким разрешением обеспечивает высокое качество и точность печати.
Особенности
- ЖК-дисплей с отображением до 12-ти ЭКГ отведений
- Трехканальный вывод на печать
- Программа измерения ЭКГ
- Программа интерпретации ЭКГ
- Работа от сети и от батареи
- Регистрация ЭКГ в ручном и автоматическом режимах
- Термопринтер 63 мм
- Сумка для переноски (дополн.)
- Тележка для кардиографа (дополн.).
Написать
Ваше Имя:
Ваш отзыв:
Внимание: HTML не поддерживается! Используйте обычный текст.
Оценка:
|
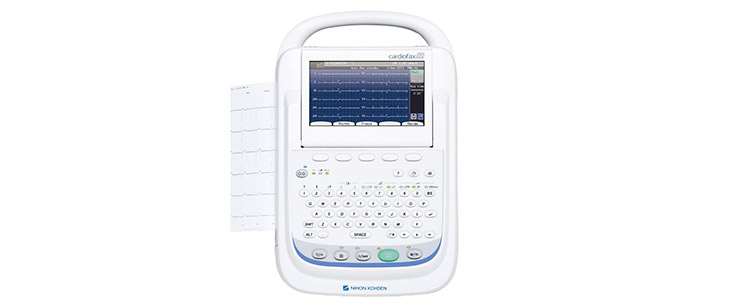
ЭКГ Cardiofax ECG-9620M |
||||||
|
||||||
|
||||||
|
||||||
|
||||||
|
||||||
|
||||||
|
||||||
|
||||||
|
||||||
|
||||||
|
||||||
|
||||||
|


ECG-1150 — внутренняя память, вмещающая данные о 40 исследованиях. Дополнительно можно использовать карту памяти SD. При емкости в 64 МБ она позволит сохранить порядка 3000 записей ЭКГ. В комплекте поставляет ПО для автоматической интерпретации сырых данных, опционально поставляется ПО для работы со снятым ЭКГ на компьютере. Оно же позволяет архивировать данные.
Особенности:
Синхронная регистрация 12 отведений
Фильтр низких частот 75,100,150 Гц
Сигнал отсоединения электрода
ПО для автоматической интерпретации
Категории пациентов: взрослые и дети от 3 лет
Ввод данных пациента, даты исследования
Малый вес и компактные размеры
Страна производства
Япония
Режим работы
Ручной/Автоматический
Ширина термобумаги, мм
63
Наша компания также осуществляет ремонт и сервисное обслуживание оборудования Nihon Kohden ECG-1150.
—
Для заказа свяжитесь с нашими специалистами по номеру 8-800-511-55-08 или оставьте заявку на info@sonography.ru
Skip to content
Электрокардиографы
Общая информация
Простота эксплуатации и эффективность процессов лежат в основе электрокардиографа Cardiofax M от компании Nihon Kohden. Большой 7-дюймовый цветной дисплей выводит показатели и предоставляет возможность предварительного просмотра данных ЭКГ перед записью. Cardiofax M поддерживает бумажный и безбумажный документооборот с возможностью передачи графиков и результатов анализа на ПК для просмотра.
Революционная технология компании Nihon Kohden помогает лечащему персоналу собирать для анализа расширенный спектр данных большего количества пациентов. Благодаря технологии synECi18 Cardiofax M предоставляет восемнадцати канальную электрокардиограмму с двенадцати канального электрокардиографа, оптимизируя безопасность пациента и представляя собой отличный инструмент для приемного отделения.
Ключевые параметры
- Буквенно-цифровая клавиатура и считыватель штрих-кода для легкого и безопасного управления данными.
- Интегрированный 3/6/12-канальный термограф формата А4.
- Надежная диагностика с помощью передовой аналитической программы (ECAPS12C), с замерами и отчетами.
- Сбор информации для полной отчетности с возможностью ретроспективного анализа.
- Большая емкость встроенной памяти с возможностью расширения посредством SD-карты.
- Дополнительная программа для управления, отчетности и архивирования на ПК (polaris.one).
- Экспорт данных в стандартные форматы (PDF, XML, DICOM и т. д.).
- Простота использования — с иллюстрированной онлайн-справкой в помощь оператору.
- Компактность и транспортабельность, длительное автономное питание от батареи.
- Соответствие стандарту IEC 60601-2-25:2011 для улучшенной фильтрации сигналов и большей точности автоматических измерений.
|
Название |
Скачать |
|
|
1. |
Agilent Pagewriter 100, 200, 300 ECG Service manual |
Скачать |
|
2. |
Burdick E350i ECG Service manual |
Скачать |
|
3. |
Burdick Atria 3000 Service Manual |
Скачать |
|
4. |
Burdick Atria 3100 6100 Service Manual |
Скачать |
|
5. |
Cardiette AR2100 Service manual |
Скачать |
|
6. |
Cardiocare EKG-2000 Service manual |
Скачать |
|
7. |
Cardiofax ECG-8110 Service manual |
Скачать |
|
8. |
Cardioline AR 1200 Service manual |
Скачать |
|
9. |
Cardioline AR600 AR600 ADV Technical Service Manual |
Скачать |
|
10. |
Cardioline Delta 60 Plus ECG Service Manual |
Скачать |
|
11. |
Critikon Dinamap Pro1000 Service manual |
Скачать |
|
12. |
Delmar Reynolds Lifecard CF12 Service manual |
Скачать |
|
13. |
Esaote P8000 Service Manual DE |
Скачать |
|
14. |
Edan SE-3&SE-300 Руководство по эксплуатации |
Скачать |
|
15. |
Fukuda Denshi FX-2111 ECG Service manual |
Скачать |
|
16. |
Fukuda Denshi FCP-2155 ECG Service manual |
Скачать |
|
17. |
GE MAC 1200 and 1200ST Service Manual |
Скачать |
|
18. |
GE MAC 1200 ECG Analysis System User manual |
Скачать |
|
19. |
GE MAC 1200 Service Manual |
Скачать |
|
20. |
GE MAC 3500 Service Manual |
Скачать |
|
21. |
HP PageWriter 100,200,300, M1770,M1771,M1772 ECG Service manual |
Скачать |
|
22. |
Mortara ELI 350 Service Manual |
Скачать |
|
23. |
Nihon Kohden cardiofax S ecg-1250 Service manual |
Скачать |
|
24. |
Nihon Kohden ECG-9020 ECG Monitor Service manual |
Скачать |
|
25. |
Schiller AT-1 smartprint Service Manual |
Скачать |
|
26. |
Schiller AT-102 Service Manual |
Скачать |
|
27. |
Schiller Cardiovit AT-I0 Service Handbook 1998 |
Скачать |
|
28. |
Schiller CS-200 Service Manual |
Скачать |
|
29. |
Biocare — ECG-300G Руководство пользователя |
Скачать |
|
30. |
Аксион Руководство по эксплуатации |
Скачать |
|
31. |
Аксион — ЭК1Т-1/3-07 Руководство по эксплуатации |
Скачать |
|
32. |
Аксион — ЭК1Т-07 Принципиальная схема |
Скачать |
|
33. |
Альтон-03 ЭК12Т Руководство по эксплуатации |
Скачать |
|
34. |
ЭК1Т-03 М ТЕХНИЧЕСКОЕ ОПИСАНИЕ И ИНСТРУКЦИЯ ПО ЭКСПЛУАТАЦИИ |
Скачать |
|
35. |
ЭК1Е-03 М Принципиальная схема |
Скачать |
|
36. |
ЭК3T-01-Р-Д Руководство по обслуживанию и ремонту |
Скачать |
|
37. |
ЭК3Т-12-01 Геолинк Руководство по эксплуатации, техническое описание |
Скачать |
Your Donation Will Be Matched 1-to-1! Can You Chip In?
Dear Patron: Please don’t scroll past this. The Internet Archive is a nonprofit fighting for universal access to quality information. We build and maintain all our own systems, but we don’t charge for access, sell user information, or run ads. Instead, we’re powered by online donations averaging about $14. We’d be deeply grateful if you’d join the one in a thousand users that support us financially.
Right now, we have a matching gift campaign that will double the impact of every donation. We understand that not everyone can donate right now, but if you can afford to contribute this Tuesday, we promise it will be put to good use. Our resources are crucial for knowledge lovers everywhere—so if you find all these bits and bytes useful, please pitch in.
Your Donation Will Be Matched! Can You Chip In?
Dear Patron: Please don’t scroll past this. Right now we have a matching gift campaign that will double the impact of every donation. We understand that not everyone can give right now, but if you can afford to contribute this Tuesday, we promise it will be put to good use. If you find all these bits and bytes useful, please pitch in.
CONTENTS |
||
|
Contents |
||
|
Conventions Used in this Manual and Instrument ………………………………………………………….. |
i |
|
|
Warnings, Cautions and Notes …………………………………………………………………………… |
i |
|
|
Explanations of the Symbols in this Manual and Instrument …………………………………… |
i |
|
|
Section 1 |
General ………………………………………………………………………. |
1C.1 |
|
Introduction ………………………………………………………………………………………………………….. |
1.1 |
|
|
Service Policy ………………………………………………………………………………………………………. |
1.2 |
|
|
Specifications ………………………………………………………………………………………………………. |
1.3 |
|
|
Panel Description ………………………………………………………………………………………………….. |
1.5 |
|
|
ECG-9010K Electrocardiograph ………………………………………………………………………. |
1.5 |
|
|
Top View …………………………………………………………………………………………….. |
1.5 |
|
|
Operation Panel…………………………………………………………………………………… |
1.6 |
|
|
Right Side Panel …………………………………………………………………………………. |
1.7 |
|
|
ECG-9020K/P Electrocardiograph …………………………………………………………………… |
1.8 |
|
|
Top View …………………………………………………………………………………………….. |
1.8 |
|
|
Operation Panel…………………………………………………………………………………… |
1.9 |
|
|
Right Side Panel ……………………………………………………………………………….. |
1.10 |
|
|
ECG-9022K Electrocardiograph …………………………………………………………………….. |
1.11 |
|
|
Top View …………………………………………………………………………………………… |
1.11 |
|
|
Operation Panel…………………………………………………………………………………. |
1.12 |
|
|
Right Side Panel ……………………………………………………………………………….. |
1.13 |
|
|
Composition ……………………………………………………………………………………………………….. |
1.14 |
|
|
ECG-9010K Electrocardiograph …………………………………………………………………….. |
1.14 |
|
|
ECG-9020K Electrocardiograph …………………………………………………………………….. |
1.15 |
|
|
ECG-9020P Electrocardiograph …………………………………………………………………….. |
1.16 |
|
|
ECG-9022K Electrocardiograph …………………………………………………………………….. |
1.17 |
|
|
Location ……………………………………………………………………………………………………………… |
1.18 |
|
|
Block Diagram …………………………………………………………………………………………………….. |
1.19 |
|
|
Connection Diagram …………………………………………………………………………………………….. |
1.20 |
|
|
Section 2 |
Maintenance ………………………………………………………………. |
2C.1 |
|
Replacement ………………………………………………………………………………………………………… |
2.1 |
|
|
Periodic Replacement Schedule ……………………………………………………………………… |
2.1 |
|
|
Cleaning ………………………………………………………………………………………………………………. |
2.2 |
|
|
Cleaning and Greasing Schedules…………………………………………………………………… |
2.2 |
|
|
Cleaning the Paper Mark Sensor and Paper Empty Sensor …………………………………. |
2.2 |
|
|
Cleaning the Motor Rotation Sensor and |
||
|
Greasing the Motor Gear and Gear Meshed with Motor Gear ………………………………. |
2.3 |
|
|
Section 3 Troubleshooting and System Error Message ……………… |
3C.1 |
|
|
Troubleshooting Flowchart ………………………………………………………………………………………. |
3.1 |
|
|
Troubleshooting Table …………………………………………………………………………………………….. |
3.4 |
|
Service Manual ECG-9010/9020 Rev B |
C.1 |
|
CONTENTS |
|
|
Troubleshooting General Operation Problem……………………………………………………… |
3.4 |
|
Troubleshooting Recording Problem ………………………………………………………………… |
3.6 |
|
System Error Message …………………………………………………………………………………………… |
3.7 |
|
Section 4 |
System Test, Adjustment and Setting………………………….. |
4C.1 |
|
System Test …………………………………………………………………………………………………………. |
4.1 |
|
|
Overall ………………………………………………………………………………………………………… |
4.1 |
|
|
Calling up the Test Level 1 …………………………………………………………………………….. |
4.2 |
|
|
Calling up the Test Level 2 …………………………………………………………………………….. |
4.3 |
|
|
Entering the System Test Number …………………………………………………………………… |
4.4 |
|
|
Executing the System Test ……………………………………………………………………………. |
4.5 |
|
|
Quitting the System Test ……………………………………………………………………………….. |
4.6 |
|
|
Exiting the System Test Mode ……………………………………………………………………….. |
4.6 |
|
|
Demonstration ………………………………………………………………………………………………………. |
4.7 |
|
|
Recorder ………………………………………………………………………………………………………………. |
4.8 |
|
|
Thermal Head ……………………………………………………………………………………………………… |
4.11 |
|
|
Key ……………………………………………………………………………………………………………………. |
4.12 |
|
|
Memory ……………………………………………………………………………………………………………… |
4.13 |
|
|
Single Memory Test Mode ……………………………………………………………………………. |
4.14 |
|
|
Continuous Memory Test Mode …………………………………………………………………….. |
4.14 |
|
|
LCD/LED ……………………………………………………………………………………………………………. |
4.15 |
|
|
Input Unit …………………………………………………………………………………………………………… |
4.17 |
|
|
Calibration ………………………………………………………………………………………………………….. |
4.18 |
|
|
Communication …………………………………………………………………………………………………… |
4.19 |
|
|
CRO/EXT1 …………………………………………………………………………………………………………. |
4.21 |
|
|
System Setup Initialization …………………………………………………………………………………… |
4.23 |
|
|
ECG Findings List Recording ………………………………………………………………………………… |
4.24 |
|
|
Recording Resolution Setting ………………………………………………………………………………… |
4.25 |
|
|
Cue Mark Adjustment …………………………………………………………………………………………… |
4.26 |
|
|
Date and Time Setting ………………………………………………………………………………………….. |
4.28 |
|
|
Setting the Date and Time ………………………………………………………………….. |
4.28 |
|
Section 5 |
Board/Unit Description …………………………………………………. |
5C.1 |
|
Block Diagram ……………………………………………………………………………………………………… |
5.1 |
|
|
Power Unit…………………………………………………………………………………………………………… |
5.2 |
|
|
ECG Control Board ………………………………………………………………………………………………. |
5.2 |
|
|
Flash ROM Board ………………………………………………………………………………………………… |
5.3 |
|
|
Inverter Board ……………………………………………………………………………………………………… |
5.3 |
|
Section 6 Disassembly and Assembly ………………………………………….. |
6C.1 |
|
Before You Begin ………………………………………………………………………………………………….. |
6.1 |
|
Warnings and Cautions ……………………………………………………………………………….. |
6.1 |
|
Required Tools ……………………………………………………………………………………………. |
6.1 |
|
Board and Unit Location ………………………………………………………………………………. |
6.2 |
|
Cable Connection ……………………………………………………………………………………….. |
6.3 |
|
Removing the Top Casing ……………………………………………………………………………………….. |
6.4 |
|
C.2 |
Service Manual ECG-9010/9020 Rev B |
|
CONTENTS |
||
|
Removing the LCD Assy ………………………………………………………………………………………… |
6.5 |
|
|
Removing the Thermal Head Assy …………………………………………………………………………… |
6.6 |
|
|
Removing the Motor Assy ………………………………………………………………………………………. |
6.8 |
|
|
Removing the Speaker Assy …………………………………………………………………………………… |
6.9 |
|
|
Removing the Inverter Board ………………………………………………………………………………… |
6.10 |
|
|
Removing the ECG Control Board ………………………………………………………………………….. |
6.11 |
|
|
Removing the Power Unit ……………………………………………………………………………………… |
6.12 |
|
|
Replacing the Thermistor and Termistor Cable …………………………………………………. |
6.14 |
|
|
Removing the Battery Terminal Assy ………………………………………………………………………. |
6.15 |
|
|
Removing the Magazine Assy ……………………………………………………………………………….. |
6.16 |
|
|
Removing the Bottom Casing ………………………………………………………………………………… |
6.17 |
|
|
Replacing the Fuse on the Power Board ………………………………………………………………….. |
6.18 |
|
|
Replacing the Lithium Battery on the ECG Control Board …………………………………………… |
6.19 |
|
|
Section 7 |
Replaceable Parts List………………………………………………… |
7C.1 |
|
General Parts List …………………………………………………………………………………………………. |
7.2 |
|
|
Top Casing Assy …………………………………………………………………………………………………… |
7.4 |
|
|
Top Casing Assy, RK-0007 for ECG-9010K ………………………………………………………. |
7.4 |
|
|
Top Casing Assy, RK-0009 for ECG-9020K ………………………………………………………. |
7.5 |
|
|
Top Casing Assy, RK-0044 for ECG-9020P ………………………………………………………. |
7.6 |
|
|
Top Casing Assy, RK-0058 for ECG-9022K ………………………………………………………. |
7.7 |
|
|
Thermal Head Assy, YZ-011H8 ……………………………………………………………………………….. |
7.8 |
|
|
Motor Assy, GC-0011 …………………………………………………………………………………………….. |
7.9 |
|
|
Speaker Assy, RK-0005 ……………………………………………………………………………………….. |
7.10 |
|
|
Magazine Assy, RH-0001 ……………………………………………………………………………………… |
7.11 |
|
|
Battery Terminal Assy, RK-0006 …………………………………………………………………………….. |
7.12 |
|
|
LCD Assy, VL-0001 ……………………………………………………………………………………………… |
7.13 |
|
|
Patient Cable Hanger ……………………………………………………………………………………………. |
7.14 |
|
|
Section 8 |
Connector Pin Assignment ………………………………………… |
8C.1 |
|
Power Unit ……………………………………………………………………………………………………………. |
8.1 |
|
|
CN11 (to AC Inlet) ………………………………………………………………………………………… |
8.1 |
|
|
CN21 (to ECG control board) ………………………………………………………………………….. |
8.1 |
|
|
CN31 (to Thermal Head) ………………………………………………………………………………… |
8.1 |
|
|
CN51 (to Battery) …………………………………………………………………………………………. |
8.1 |
|
|
ECG Control Board ………………………………………………………………………………………………… |
8.2 |
|
|
CNJ011 (to Thermal Head) …………………………………………………………………………….. |
8.2 |
|
|
CNJ012 (to Inverter Board) ……………………………………………………………………………. |
8.2 |
|
|
CNJ013 (to LCD) ………………………………………………………………………………………….. |
8.3 |
|
|
CNJ021 (to Flash ROM Board) ……………………………………………………………………….. |
8.3 |
|
|
CNJ031 (to SIO Connector) …………………………………………………………………………… |
8.5 |
|
|
CNJ032 (to Key Connector) ……………………………………………………………………………. |
8.5 |
|
|
CNJ033 (to Speaker) …………………………………………………………………………………….. |
8.6 |
|
|
CNJ035 (to Power Unit) …………………………………………………………………………………. |
8.7 |
|
|
CNJ036 (to Motor) ………………………………………………………………………………………… |
8.8 |
|
|
CNJ041 (to CRO Connector) ………………………………………………………………………….. |
8.8 |
|
|
CNJ043 (to EXT INPUT Connector) ………………………………………………………………… |
8.8 |
|
Service Manual ECG-9010/9020 Rev B |
C.3 |
CONTENTS
|
CNJ091 (to ECG Connector) ………………………………………………………………………….. |
8.9 |
|
Flash ROM Board ………………………………………………………………………………………………… |
8.10 |
|
CNJ021 (to ECG Control Board) ……………………………………………………………………. |
8.10 |
|
Inverter Board …………………………………………………………………………………………………….. |
8.12 |
|
CN1 (to ECG Control Borad) ………………………………………………………………………… |
8.12 |
|
CN2 (to LCD module) ………………………………………………………………………………….. |
8.12 |
|
External Input/Output Socket ………………………………………………………………………………… |
8.13 |
|
SIO Socket ……………………………………………………………………………………………….. |
8.13 |
|
EXT Input and CRO Output ………………………………………………………………………….. |
8.13 |
|
C.4 |
Service Manual ECG-9010/9020 Rev B |

Conventions Used in this Manual and Instrument
Warnings, Cautions and Notes
Warnings, cautions and notes are used in this manual to alert or signal the reader to specific information.
WARNING
A warning alerts the user to the possible injury or death associated with the use or misuse of the instrument.
CAUTION
A caution alerts the user to possible injury or problems with the instrument associated with its use or misuse such as instrument malfunction, instrument failure, damage to the instrument, or damage to other property.
NOTE
A note provides specific information, in the form of recommendations, prerequirements, alternative methods or supplemental information.
Explanations of the Symbols in this Manual and Instrument
The following symbols found in this manual/instrument bear the respective descriptions as given.
Cardiograph
|
Attention, consult |
Input terminal for analog |
Type CF applied part |
||
|
operator’s manual |
signal |
|||
|
Equipotential terminal |
Output terminal for analog |
The CE mark is a protected |
||
|
signal |
conformity mark of |
|||
|
European Community. |
||||
|
The products herewith |
||||
|
comply with the |
||||
|
Serial input/output terminal |
Eject (magazine release |
requirements of the |
||
|
button) |
Medical Device Directive |
|||
|
93/42/EEC. |
||||
|
Service Manual ECG-9010/9020 Rev A |
i |

Operation panel (for ECG-9010K onlly)
|
Alternating current |
Age |
Filter |
|
|
“On” only for a part of |
REST/PERIODIC |
Copy |
|
|
equipment |
recording |
||
|
“Off” only for a part of |
Paper speed |
Calibration |
|
|
equipment |
|||
|
Battery charging (lamp/on |
Gain |
START/STOP recording |
|
|
screen) |
|||
|
Battery check (lamp/on |
Paper feed |
Automatic control |
|
|
screen) |
|||
|
QRS sync lamp |
Mark |
Manual control |
Operation panel (for ECG-9020K only)
|
Alternating current |
Age |
Filter |
|
|
“On” only for a part of |
Sex |
Copy |
|
|
equipment |
|||
|
“Off” only for a part of |
Mode |
Calibration |
|
|
equipment |
|||
|
Battery charging (lamp/on |
Rhythm |
START/STOP recording |
|
|
screen) |
|||
|
Battery check (lamp/on |
Paper feed |
Automatic control |
|
|
screen) |
|||
|
Mark |
Manual control |
|
ii |
Service Manual ECG-9010/9020 Rev A |

Display (for ECG-9020K only)
QRS sync lamp
Patient cable
|
Attention, consult |
Defibrillation-proof |
|||||
|
operator’s manual |
Type CF applied part |
|||||
|
Service Manual ECG-9010/9020 Rev A |
iii |
Section 1 General
|
Introduction ………………………………………………………………………………………………………… |
1.1 |
|
Service Policy …………………………………………………………………………………………………….. |
1.2 |
|
Specifications ……………………………………………………………………………………………………… |
1.3 |
|
Panel Description ………………………………………………………………………………………………… |
1.5 |
|
ECG-9010K Electrocardiograph …………………………………………………………………… |
1.5 |
|
Top View ………………………………………………………………………………………….. |
1.5 |
|
Operation Panel ………………………………………………………………………………… |
1.6 |
|
Right Side Panel ……………………………………………………………………………….. |
1.7 |
|
ECG-9020K/P Electrocardiograph ………………………………………………………………… |
1.8 |
|
Top View ………………………………………………………………………………………….. |
1.8 |
|
Operation Panel ………………………………………………………………………………… |
1.9 |
|
Right Side Panel ……………………………………………………………………………… |
1.10 |
|
ECG-9022K Electrocardiograph …………………………………………………………………. |
1.11 |
|
Top View ………………………………………………………………………………………… |
1.11 |
|
Operation Panel ………………………………………………………………………………. |
1.12 |
|
Right Side Panel ……………………………………………………………………………… |
1.13 |
|
Composition ……………………………………………………………………………………………………… |
1.14 |
|
ECG-9010K Electrocardiograph …………………………………………………………………. |
1.14 |
|
ECG-9020K Electrocardiograph …………………………………………………………………. |
1.15 |
|
ECG-9020P Electrocardiograph …………………………………………………………………. |
1.16 |
|
ECG-9022K Electrocardiograph …………………………………………………………………. |
1.17 |
|
Location …………………………………………………………………………………………………………… |
1.18 |
|
Block Diagram …………………………………………………………………………………………………… |
1.19 |
|
Connection Diagram ………………………………………………………………………………………….. |
1.20 |
|
Service Manual ECG-9010/9020 Rev B |
1C.1 |

1. GENERAL
Introduction
This service manual provides useful information to qualified service personnel to understand, troubleshoot, service, maintain and repair the ECG-9010K, ECG9020K/P and ECG-9022K Electrocardiograph (referred to in this service manual as “the instrument”, “ECG-9010K” or “ECG-9020K” which includes ECG-9020P and ECG-9022K).
All replaceable parts or units of this instrument and its optional units are clearly listed with exploded illustration to help you locate the parts quickly.
The System test, Adjustment and Setting section in this service manual describes the maintenance that should be performed by qualified service personnel. The Maintenance section in the operator’s manual describes the maintenance that can be performed by the user.
The information in the operator’s manual is primarily for the user. However, it is important for service personnel to thoroughly read the operator’s manual and service manual before starting to troubleshoot, service, maintain or repair this instrument. This is because service personnel needs to understand the operation of the instrument in order to effectively use the information in the service manual.
|
Service Manual ECG-9010/9020 Rev B |
1.1 |
![]()
1. GENERAL
Service Policy
Nihon Kohden Corporation’s basic policy for technical service is to replace faulty units, printed circuit boards or parts. We do not support component-level repair of boards and units outside the factory for the following reasons:
•A special facility is necessary to repair multi-layer boards because most of the components on the board are SMD (surface mount devices) and most of the circuits employ a gate array method.
•To fulfill safety certification requirements, a special facility is necessary to verify safety as medical equipment after the power unit is repaired.
NOTE
•When ordering parts or accessories from your nearest Nihon Kohden Corporation’s distributor, please quote the NK code number and part name which is listed in this service manual, and the name or model of the unit in which the required part is located. This will help us to promptly attend to your needs.
•Always use parts and accessories recommended or supplied by Nihon Kohden Corporation to assure maximum performance from your instrument.
|
1.2 |
Service Manual ECG-9010/9020 Rev B |

1. GENERAL
Specifications
|
ECG input |
|
|
Input impedance |
10 MΩ or more |
|
Electrode offset tolerance |
±500 mV or more |
|
Input unit protection |
Isolated and defibrillator protected |
|
Standard sensitivity |
10 mm /mV ±2% |
|
Common mode rejection ratio |
100 dB or more |
|
Frequency response |
0.05 to 150 Hz (– 3 dB or more) |
|
Waveform data processor |
|
|
Sample rate |
500 samples/s (input unit: 8,000 samples/s) |
|
AC line filter |
50/60 Hz, OFF |
|
High-cut filter |
75, 100, 150 Hz |
|
EMG filter |
25/35 Hz |
|
Time constant |
3.2 s or more |
|
Waveform status detection |
Electrode detachment (polarization voltage), |
|
Noise (high frequency) |
|
|
Sensitivity selection |
5, 10 , 20 mm/mV |
LCD (monochrome with CCFT backlight) (for ECG-9020K/P, ECG-9022K only)
|
Size |
5.6 inch |
|
|
Number of dots |
320 × 240 |
|
|
ECG waveform |
3 channel:Real time 12 ECG lead complexes |
|
|
6 channel: 2.5 s |
||
|
Rhythm lead: 10 s |
||
|
Displayed data |
Waveform, patient information, recording settings, |
|
|
operation mode, heart rate, QRS sync mark, error message, |
||
|
electrode detachment, noise |
||
|
Recorder |
||
|
Printing method |
High resolution thermal printer head |
|
|
Printing density |
200 dpi (8 dots/mm) |
|
|
Scanning line density |
1 ms |
|
|
Recording width |
104 mm |
|
|
Number of recording channels |
2, 3, 4, 6 |
|
|
Paper speed |
10, 12.5, 25, 50 mm/s |
|
|
(10 and 12.5 mm/s available for ECG-9020K only) |
||
|
Printed data |
Program type, version, date and time, paper speed, sensitivity, |
|
|
lead name, filter, hospital name, patient information, |
||
|
timing mark, event mark, electrode detachment, noise |
||
|
Mechanical noise |
48 dB or less at paper speed 25 mm/s |
|
|
External input/output |
||
|
External input |
10 mm/0.5 V ±5%, input impedance 100 kΩ or more |
|
|
Signal output |
0.5 V/1 mV ±5%, output impedance 100 Ω or less |
|
|
Serial I/O |
Communication method: |
RS-232C |
|
Baud rate: |
2400, 4800, 9600, 19200, 38400, |
|
|
57600, 115200 |
||
|
Service Manual ECG-9010/9020 Rev B |
1.3 |
1. GENERAL
|
Power requirement |
|||
|
Line voltage |
100 to 127 VAC, 220 to 240 VAC ±10% |
||
|
Line frequency |
50 or 60 Hz |
||
|
Power input |
Up to 120 VA |
||
|
Power consumption |
49 W or less |
||
|
Built-in battery |
Voltage: 12 V |
||
|
(LCT-1912ANK) |
Current consumption: 6A or less |
||
|
Environment |
|||
|
Operating temperature |
10 to 40°C |
||
|
Operating humidity |
25 to 90% RH |
||
|
Operating atmospheric pressure |
70 to 106 kPa |
||
|
Storage duration and temperature |
2 weeks or less: |
−20 to 65°C |
|
|
(Depends on the battery) |
Between 2 weeks and One year: |
−15 to 40°C |
|
|
Over one year: |
−15 to 25°C |
||
|
Storage humidity |
10 to 95% RH (non condensing) |
||
|
Storage atmospheric pressure |
70 to 106 kPa |
||
|
Recording paper storage temperature |
−20 to 50°C |
||
|
Recording paper storage humidity |
25 to 90% RH |
||
|
Electromagnetic compatibility |
Class B |
||
|
Other |
Indoor portable |
Dimensions and weight
|
Dimensions |
280 W × 52 H × |
|
Weight |
ECG-9010K: |
|
ECG-9020K/P: |
|
|
ECG-9022K: |
216 D mm (excluding protrusions) Approx. 1.9 kg (without battery) Approx. 2.1 kg (without battery) Approx. 2.1 kg (without battery)
Safety
Safety standard:
IEC 60601-1 (1988), IEC 60601-1 Amendment 1 (1991), IEC 60601-1 Amendment 2 (1995) IEC 60601-2-25 (1993), IEC 60601-2-25 Amendment 1 (1999)
Type of protection against electric shock:
AC power: Class I
Batty power: Internally powered equipment
Degree of protection against electric shock:
Defibrillator proof type CF applied part when patient cable BJ-901D, BJ-902D or BJ-903D is used
Degree of protection against harmful ingress of water:
Ordinary equipment
Degree of safety of application in the presence of a flammable anaesthetic mixture with air, oxygen or nitrous oxide:
|
Not suitable for use in the presence of a flammable anaesthetic mixture with air, oxygen or |
|
|
nitrous oxide |
|
|
Mode of operation: Continuous |
|
|
Performance |
|
|
Performance standard: IEC 60601-2-51 (2003) |
|
|
1.4 |
Service Manual ECG-9010/9020 Rev B |

1. GENERAL
Panel Description
ECG-9010K
Electrocardiograph
2
1
Name
1.Operation panel
2.Magazine (recording paper container)
3.Magazine release button
|
Service Manual ECG-9010/9020 Rev B |
1.5 |

1. GENERAL
Operation Panel
14 13
18
4
5
6
7
|
15 |
16 |
17 |
8 |
9 |
10 |
|
|
12 |
||||||
|
11 |
Name
4.Battery charge lamp
5.Battery operation lamp
6.AC power lamp
7.POWER key/lamp
8.FEED/MARK key
9.FILTER key/lamp
10.COPY/CAL key/lamp
11.START/STOP key/lamp
12.AUTO/MANUAL key/lamp
13.REST/PERIODIC key/lamp
14.AGE key/lamp
15.SPEED key/lamp
16.GAIN key/lamp
17.LEAD keys/lamp
18.QRS sync lamp
|
1.6 |
Service Manual ECG-9010/9020 Rev B |

1. GENERAL
Right Side Panel
For the  mark, refer to the descriptions for the Right Side Panel in Section 1 “Panel Descriptions” of the ECG-9010K Operator’s Manual.
23
24
25
Name
19.Patient input connector
20.EXT-IN connector
21.CRO-OUT
22.SIO connector
23.AC power cord socket
24.Battery compartment
25.Equipotential ground terminal
|
Service Manual ECG-9010/9020 Rev B |
1.7 |

1. GENERAL
|
ECG-9020K/P |
Top View |
|
|
Electrocardiograph |
||
|
3 |
||
2
4
1
Name
1.Operation panel
2.Magazine (recording paper container)
3.Magazine release button
4.LCD screen
The keyswithes on the ECG-9020P have a name label instead of the symbol.
|
1.8 |
Service Manual ECG-9010/9020 Rev B |

1. GENERAL
Operation Panel
5
6
7
8
|
9 |
10 |
11 |
12 |
13 |
14 |
15
Name
5.Battery charge lamp
6.Battery operation lamp
7.AC power lamp
8.POWER key/lamp
9.MODE key
10 RHYTHM key/lamp
11.FEED/MARK key
12.FILTER key/lamp
13.COPY/CAL key/lamp
14.START/STOP key/lamp
15.AUTO/MANUAL key/lamp
16.F1, F2, F3 function keys
17.AGE key
18.SEX key
|
Service Manual ECG-9010/9020 Rev B |
1.9 |

1. GENERAL
Right Side Panel
For the  mark, refer to the descriptions for the Right Side Panel in Section 1 “Panel Descriptions” of the ECG-9020K or ECG 9020P Operator’s Manual.
23
24
25
Name
19.Patient input connector
20.EXT-IN connector
21.CRO-OUT
22.SIO connector
23.AC power cord socket
24.Battery compartment
25.Equipotential ground terminal
|
1.10 |
Service Manual ECG-9010/9020 Rev B |

ECG-9022K
Electrocardiograph
1. GENERAL
Top View
3
2
4
1
Name
1.Operation panel
2.Magazine (recording paper container)
3.Magazine release button
4.LCD screen
|
Service Manual ECG-9010/9020 Rev B |
1.11 |
![]()
1. GENERAL
Operation Panel
5
6
7
8
|
9 |
10 |
11 |
12 |
13 |
14 |
15
Name
5. Battery charge lamp
6. Battery operation lamp
7. AC power lamp
8. POWER key/lamp
9. MODE key
10 RHYTHM key/lamp
11. FEED/MARK key
12. FILTER key/lamp
13. COPY/CAL key/lamp
14. START/STOP key/lamp
15. AUTO/MANUAL key/lamp
16. F1, F2, F3 function keys
17. AGE key
18. SEX key
|
1.12 |
Service Manual ECG-9010/9020 Rev B |

1. GENERAL
Right Side Panel
For the  mark, refer to the descriptions for the Right Side Panel in Section 1 “Panel Descriptions” of the ECG-9022K Operator’s Manual.
23
24
25
Name
19.Patient input connector
20.EXT-IN connector
21.CRO-OUT
22.SIO connector
23.AC power cord socket
24.Battery compartment
25.Equipotential ground terminal
|
Service Manual ECG-9010/9020 Rev B |
1.13 |

1. GENERAL
Composition
ECG-9010K Electrocardiograph
|
ECG-9010K |
RK-0002 |
Bottom Casing Assy |
||||||
|
RK-0003 |
Internal Parts |
|||||||
|
GC-0011 |
Motor Assy |
|||||||
|
RH-0001 |
Magazine Assy |
|||||||
|
RK-0004 |
Thermal Head Assy |
|||||||
|
RK-0005 |
Speaker Assy |
|||||||
|
RK-0006 |
Battom Terminal Assy |
|||||||
|
RK-0007 |
ECG-9010K Top Casing Assy |
|||||||
|
SC-903D |
Power Unit |
|||||||
|
UT-23561 |
ECG Control Board |
|||||||
|
UT-2357 |
Flash ROM Board |
|||||||
|
(Optional) |
||||||||
|
KD-104E |
Cart |
|||||||
|
KH-801E |
Patinet Cable Hanger |
|||||||
|
DI-106D |
Fixing Plate for Cart |
|||||||
|
YC-901D |
Carrying Case |
|||||||
•To order a replacement assembly above, use the Code No.
•To order a replacement component inside an assembly, refer to “Section 7 Replaceablet Parts List”.
|
1.14 |
Service Manual ECG-9010/9020 Rev B |

1. GENERAL
ECG-9020K Electrocardiograph
|
ECG-9020K |
RK-0002 |
Bottom Casing Assy |
||||||
|
RK-0003 |
Internal Parts |
|||||||
|
GC-0011 |
Motor Assy |
|||||||
|
RH-0001 |
Magazine Assy |
|||||||
|
RK-0004 |
Thermal Head Assy |
|||||||
|
RK-0005 |
Speaker Assy |
|||||||
|
RK-0006 |
Battom Terminal Assy |
|||||||
|
RK-0009 |
ECG-9020K Top Casing Assy |
|||||||
|
SC-903D |
Power Unit |
|||||||
|
UT-23561 |
ECG Control Board |
|||||||
|
UT-2357 |
Flash ROM Board |
|||||||
|
VL-0001 |
LCD Assy |
|||||||
|
(Optional) |
||||||||
|
KD-104E |
Cart |
|||||||
|
KH-801E |
Patinet Cable Hanger |
|||||||
|
DI-106D |
Fixing Plate for Cart |
|||||||
|
YC-901D |
Carrying Case |
|||||||
•To order a replacement assembly above, use the Code No.
•To order a replacement component inside an assembly, refer to “Section 7 Replaceablet Parts List”.
|
Service Manual ECG-9010/9020 Rev B |
1.15 |

1. GENERAL
ECG-9020P Electrocardiograph
|
ECG-9020P |
RK-0002 |
Bottom Casing Assy |
||||||
|
RK-0003 |
Internal Parts |
|||||||
|
GC-0011 |
Motor Assy |
|||||||
|
RH-0001 |
Magazine Assy |
|||||||
|
RK-0004 |
Thermal Head Assy |
|||||||
|
RK-0005 |
Speaker Assy |
|||||||
|
RK-0006 |
Battom Terminal Assy |
|||||||
|
RK-0044 |
ECG-9020P Top Casing Assy |
|||||||
|
SC-903D |
Power Unit |
|||||||
|
UT-23563 |
ECG Control Board |
|||||||
|
UT-23577 |
Flash ROM Board |
|||||||
|
VL-0001 |
LCD Assy |
|||||||
|
(Optional) |
||||||||
|
KD-104E |
Cart |
|||||||
|
KH-801E |
Patinet Cable Hanger |
|||||||
|
DI-106D |
Fixing Plate for Cart |
|||||||
|
YC-901D |
Carrying Case |
|||||||
•To order a replacement assembly above, use the Code No.
•To order a replacement component inside an assembly, refer to “Section 7 Replaceablet Parts List”.
|
1.16 |
Service Manual ECG-9010/9020 Rev B |

1. GENERAL
ECG-9022K Electrocardiograph
|
ECG-9022K |
RK-0002 |
Bottom Casing Assy |
||||||
|
RK-0003 |
Internal Parts |
|||||||
|
GC-0011 |
Motor Assy |
|||||||
|
RH-0001 |
Magazine Assy |
|||||||
|
RK-0004 |
Thermal Head Assy |
|||||||
|
RK-0005 |
Speaker Assy |
|||||||
|
RK-0006 |
Battom Terminal Assy |
|||||||
|
RK-0058 |
ECG-9022K Top Casing Assy |
|||||||
|
SC-903D |
Power Unit |
|||||||
|
UT-23564 |
ECG Control Board |
|||||||
|
UT-2357D |
Flash ROM Board |
|||||||
|
VL-0001 |
LCD Assy |
|||||||
|
(Optional) |
||||||||
|
KD-104E |
Cart |
|||||||
|
KH-801E |
Patinet Cable Hanger |
|||||||
|
DI-106D |
Fixing Plate for Cart |
|||||||
|
YC-901D |
Carrying Case |
|||||||
•To order a replacement assembly above, use the Code No.
•To order a replacement component inside an assembly, refer to “Section 7 Replaceablet Parts List”.
|
Service Manual ECG-9010/9020 Rev B |
1.17 |

1. GENERAL
Location
|
Thermal Head Assy |
LCD Assy (for ECG-9020K/9020P/9022K only) |
|
|
Motor Assy |
Flash ROM Board |
|
|
Inverter Board |
||
|
(for ECG-9020K/9020P/9022K only) |
||
|
Speaker Assy |
ECG Control Board
Power Unit
|
1.18 |
Service Manual ECG-9010/9020 Rev B |

1. GENERAL
Block Diagram
NOTE
The LCD module and inverter board are used for the ECG-9020K,
ECG-9020P and ECG-9022K only.
|
Piezo-electric |
CNA011 |
CNJ032 (2pin) |
||||||||||||||||||||||
|
buzzer |
Flash ROM Board |
|||||||||||||||||||||||
|
Motor, Motor sensor, |
CNA012 |
|||||||||||||||||||||||
|
CNJ036 (12pin) |
||||||||||||||||||||||||
|
Mark sensor |
||||||||||||||||||||||||
|
CNJ011 (80pin) |
||||||||||||||||||||||||
|
Membrane key |
CNJ033 (40pin) |
|||||||||||||||||||||||
|
CNJ021 (80pin) |
||||||||||||||||||||||||
|
LCD module |
CNJ012 (12pin) |
CNJ031 (D-SUB 9pin) |
||||||||||||||||||||||
|
ECG Control Board |
||||||||||||||||||||||||
|
2 pin |
5 pin |
CNA015 |
CNJ013 (6pin) |
|||||||||||||||||||||
|
Inverter board |
CNJ043 (mini jack) |
|||||||||||||||||||||||
|
CNA013 |
CNJ041 (mini jack) |
|||||||||||||||||||||||
|
Thermal head |
CNJ011 (12pin) |
|||||||||||||||||||||||
|
CN11 (3pin) |
CN31 (16pin) |
|||||||||||||||||||||||
|
AC |
||||||||||||||||||||||||
|
Power Unit |
CN021 |
CNJ035 (30pin) |
CNJ091 (D-SUB15pin) |
|||||||||||||||||||||
|
source |
||||||||||||||||||||||||
|
(30pin) |
||||||||||||||||||||||||
SIO
EXT-IN
CRO
Patient Input
CN51 (4pin)
CNA014
Battery
|
Service Manual ECG-9010/9020 Rev B |
1.19 |

1. GENERAL
Connection Diagram
|
Index |
Connector No. |
NK Code No. |
Description |
|
1* |
CNA011 |
543993A |
ZHR-2 speaker cable (L50) |
|
2 |
CNA012 |
544002A |
ZHR-12 motor cable (L120, 65) |
|
3 |
CNA013 |
544029B |
FCN723/DF11(100)/51021(40) |
|
4 |
CNA014 |
544011A |
EHR-4 battery terminal cable (L150) |
|
5 |
CNA015 |
544038A |
51021-0500/51021-0600 (L50) |
*We cannot provide this cable seperately; we can only provide it as part of a complete Speaker assy. Refer to “Speaker Assy” in Section 8.
CNA013
CNA012
CNA015
CNA011
CNA014
|
1.20 |
Service Manual ECG-9010/9020 Rev B |
Section 2 Maintenance
|
Replacement ………………………………………………………………………………………………………. |
2.1 |
|
Periodic Replacement Schedule …………………………………………………………………… |
2.1 |
|
Cleaning …………………………………………………………………………………………………………….. |
2.2 |
|
Cleaning and Greasing Schedules ……………………………………………………………….. |
2.2 |
|
Cleaning the Paper Mark Sensor and Paper Empty Sensor ……………………………… |
2.2 |
|
Cleaning the Motor Rotation Sensor and |
|
|
Greasing the Motor Gear and Gear Meshed with Motor Gear …………………………… |
2.3 |
|
Service Manual ECG-9010/9020 Rev A |
2C.1 |
![]()
2. MAINTENANCE
This section describes the periodic replacement and cleaning of parts which are required to maintain the instrument in good working condition.
Replacement
This subsection only describes replacement schedule for parts that need to be periodically replaced. The actual replacement procedures are described in the section for Disassembly and Assembly. Read the whole “Disassembly and Assembly” section, especially its Warnings and Cautions, before replacing any of the parts described here.
Periodic Replacement
Schedule
To maintain the performance of the instrument, the parts listed in the table below must be periodically replaced by qualified service personnel.
|
Part |
NK Code No. Description Recommendation |
|
LCT-1912ANK |
332543B |
|
KPT-104-8MGF1-NKC 541816 |
|
|
LM32019T |
545946 |
|
Motor ASSY |
GC-0011 |
|
BR2032/1F2 |
390765 |
|
Battery |
* See below. |
|
Thermal head |
After 30 km of |
|
recording |
|
|
LCD Module |
After 10000 hours |
|
Motor ASSY |
After 1000 hours |
Lithium battery ** See below.
*Replace the battery when it cannot last for 30 minutes during battery operation at the temperatures between 20 and30° C.
**Replace the lithium battery on the ECG control board when the No. 08 or 09 system error message appears or after the lithium battery is used for 7 years. The life time of the battery is approx. 7 years.
|
Service Manual ECG-9010/9020 Rev A |
2.1 |

2. MAINTENANCE
Cleaning and Greasing
Cleaning and Greasing
Schedules
Cleaning the Paper Mark
Sensor and Paper Empty
Sensor
This subsection describes the cleaning and greasing procedures for parts that must be cleaned and greased by qualified service personnel. The cleaning procedures for parts that can be cleaned by the user are described in the Operator’s Manual.
To maintain the performance of the instrument, the parts listed in the table below must be regularly cleaned or greased.
|
Part |
Frequency |
Performed by |
|
Instrument (external) |
After each use |
User |
|
Thermal Head |
Once a month |
User |
|
Platen Roller assy |
Once a year |
User |
|
Paper Mark Detection Sensor |
Once a month |
Qualified service personnel |
|
Paper Empty Sensor |
Once a month |
Qualified service personnel |
|
Motor Sensor |
Once a year |
Qualified service personnel |
|
Motor Gear and Gear |
Once a year |
Qualified service personnel |
|
Meshed with Motor Gear |
1.Remove the magazine. The illustration below shows the location of the paper mark sensor and paper empty sensor.
2.Use a piece of cotton moistened with alcohol to clean both sensors.
Paper mark sensor
Paper empty sensor
|
2.2 |
Service Manual ECG-9010/9020 Rev A |

Cleaning the Motor Rotation Sensor and Greasing the Motor Gear and Gear Meshed with Motor Gear
2. MAINTENANCE
1.Detach the top casing from the bottom casing as described in the “Disassembly and Assembly” section.
2.Remove the two screws holding the motor assy to the bottom casing and remove the motor assy.
3.Remove the two screws to expose the motor rotation sensor and photodiode.
|
Motor assy |
Motor rotation sensor and |
|
photodiode |
Motor SENS board
Bottom casing
4.Use a piece of cotton moistened with alcohol to clean the sensor and photodiode.
5.Use a brush to clean the holes in the gear.
|
Service Manual ECG-9010/9020 Rev A |
2.3 |

2. MAINTENANCE
6.Use EM-50L (NK code No. 547712) grease to grease the motor gear and the gear which directly meshes with the motor gear as shown below.
Top view
Motor gear
|
Gear meshed |
Motor |
|
with motor gear |
7.Reattach the MOTOR SENS board to the motor with the two screws.
8.Reattach the motor assy to the bottom casing with the two screws.
9.Reattach the top casing to the bottom casing as described in the “Disassembly and Assembly” section.
|
2.4 |
Service Manual ECG-9010/9020 Rev A |
Section 3 Troubleshooting and
System Error Message
|
Troubleshooting Flowchart ……………………………………………………………………………………. |
3.1 |
|
Troubleshooting Table…………………………………………………………………………………………… |
3.4 |
|
Troubleshooting General Operation Problem ………………………………………………….. |
3.4 |
|
Troubleshooting Recording Problem ……………………………………………………………… |
3.6 |
|
System Error Message ………………………………………………………………………………………… |
3.7 |
|
Service Manual ECG-9010/9020 Rev A |
3C.1 |

3. TROUBLESHOOTING AND SYSTEM ERROR MESSAGE
This section describes how to troubleshoot the instrument, using the following:
—flowchart
—troubleshooting table
—system error messages at power-up
Troubleshooting Flowchart
Use the troubleshooting flowchart to find the possible sources of a problem.
Troubleshooting Flowchart
<ECG-9020K only>
The power LED is on but there is no LCD display.
No
Is the LCD backlight on?
Yes
Is there any response when No any switch is pressed?
Yes
Check the cable connection to the CNJ012 connector on the ECG control board.
Normal
The LCD unit is faulty.
|
Is the cable firmly |
Yes |
The ECG control board is faulty. |
|
|
connected to the CNJ013 |
The Inverter board is faulty. |
||
|
connector on the ECG |
|||
|
control board? |
|||
|
The ECG control board |
|||
|
is faulty. |
|||
|
Service Manual ECG-9010/9020 Rev A |
3.1 |

3. TROUBLESHOOTING AND SYSTEM ERROR MESSAGE
The power of the instrument does not turn on.
|
Does the instrument |
No |
||||||||||||||||||
|
operate during AC |
|||||||||||||||||||
|
power operation? |
|||||||||||||||||||
|
Yes |
|||||||||||||||||||
|
Does the LED of the AC power |
No |
Check the cable connections |
|||||||||||||||||
|
light? |
to the CNJ013 connector on |
||||||||||||||||||
|
the ECG control board and |
|||||||||||||||||||
|
Yes |
|||||||||||||||||||
|
the connector on the Inverter |
|||||||||||||||||||
|
board. |
|||||||||||||||||||
|
The membrane key is faulty. |
|||||||||||||||||||
|
Normal |
|||||||||||||||||||
|
The ECG control board is faulty. |
|||||||||||||||||||
|
The power board is faulty. |
|||||||||||||||||||
|
Check the F0102 battery |
|||||||||||||||||||
|
fuse on the power board. |
|||||||||||||||||||
|
Normal |
|||||||||||||||||||
|
The instrument does not |
|||||||||||||||||||
|
operate during battery |
|||||||||||||||||||
|
power operation. |
No |
The power board is faulty. |
|||||||||||||||||
|
Is the battery charged? |
Charge the battery. |
||||||||||||||||||
|
Yes |
|||||||||||||||||||
|
Check the cable connection |
|||||||||||||||||||
|
to the CN51 connector on |
|||||||||||||||||||
|
the power board. |
|||||||||||||||||||
|
Normal |
|||||||||||||||||||
|
Yes |
|||||||||||||||||||
|
Is the F0102 battery fuse |
Replace the F0102 battery |
||||||||||||||||||
|
on the power board blown?. |
fuse on the power board. |
||||||||||||||||||
|
No |
|||||||||||||||||||
The power unit is faulty.
|
3.2 |
Service Manual ECG-9010/9020 Rev A |

The recorder does not feed the recording paper when the Start switch is pressed.
Does the LED for the Start No switch light up?
Yes
Does the recorder print when the recording paper is manually pulled out from under the thermal head?
Yes
Check the cable connection to the CNJ036 connector on the ECG control board.
Normal
 The motor is faulty.
  The ECG control board is faulty.
3. TROUBLESHOOTING AND SYSTEM ERROR MESSAGE
|
Does the recorder print |
Yes |
||
|
in manual mode? |
|||
|
No |
|||
|
Does the paper empty |
Yes |
||
|
mark blink? |
|||
|
No |
|||
|
The ECG control board is |
|||
|
faulty. |
|||
Normal
Check the cable connection  to the CNJ036 connector
on the ECG control board.
Normal
 The ECG control board is faulty.
 The paper mark sensor is faulty.
|
Service Manual ECG-9010/9020 Rev A |
3.3 |

3. TROUBLESHOOTING AND SYSTEM ERROR MESSAGE
Troubleshooting Table
Use the troubleshooting table to locate, identify and solve a problem in the instrument. The problems are divided into general operation and recording. Each category has its own troubleshooting table for fast and easy troubleshooting.
How to use the troubleshooting table
1.Determine which troubleshooting table to use.
2.In the “Problem” column find the trouble item that matches the problem.
3.Do the action recommended in the “Corrective Action” column.
4.If the problem is not solved, do the action for the next possible cause or criteria.
5.If none of the actions solve the problem, contact your nearest Nihon Kohden dealer.
Troubleshooting General
Operation Problem
|
Problem |
Possible Cause/Criteria |
Action |
|
The power LED lights but there |
Faulty connection to the CN012 |
Check the connection to the CNJ012 |
|
is no display or backlight on the |
or CNJ013 connector on the ECG |
and CNJ013 connector on the ECG |
|
LCD screen. |
control board. |
control board. |
|
Faulty Inverter board. |
Replace the Inverter board. |
|
|
Faulty LCD module. |
Replace the LCD module. |
|
|
The instrument does not operate |
Blown F011 or F012 power unit |
Replace the F011 or F012 power unit |
|
during AC power operation. |
fuse. |
fuse. |
|
Faulty connection to the CN033 |
Check the connection to the CNJ033 |
|
|
or CNJ035 connector on the ECG |
and CNJ035 connector on the ECG |
|
|
control board. |
control board. |
|
|
Damaged power cord. |
Replace the power cord. |
|
|
Faulty power unit. |
Replace the power unit. |
|
|
Faulty ECG control board. |
Replace the ECG control board. |
|
|
Damaged membrane key. |
Replace the membrane key. |
|
|
The instrument does not operate |
The battery is not charged. |
Charge the battery. |
|
on battery power. |
||
|
Blown F051 battery fuse. |
Replace the F051 battery fuse. |
|
|
Damaged battery. |
Replace the battery. |
|
|
Faulty connection to the CNJ033 |
Check the connection to the CNJ033 |
|
|
or CNJ035 connector on the ECG |
and CNJ035 connector on the ECG |
|
|
control board or the CN031 or |
control board and the CN031 and |
|
|
CN051 connector on the power |
CN01 connector on the power unit. |
|
|
unit. |
||
|
3.4 |
Service Manual ECG-9010/9020 Rev A |