
Видео
Видео инструкции для пылесоса Кирби на KIRBY-RUSSIA.RU

Правильная установка приводного ремня KIRBY 301291

Кирби Авалир — Kirby Avalir — последняя модель пылесоса Кирби
Часть 1. Основные характеристики
Часть 2. Коробка автомат, замена ремня, замена мешка

Часть 3. Турбощетка. Трансф. в портативный пылесос. Чистка матрасов
Часть 4. Основные насадки (из ящика). Генеральная уборка
Часть 5. Распылитель. Портативная химчистка
Часть 6. Химчистка ковров специальной насадкой
Часть 7. Дополнительная насадка — полиш полов Kirby. Полировка полов
OUR KIRBY HOW-TO VIDEOS HAVE ANSWERS TO YOUR QUESTIONS
We want to make sure your Kirby system is always used to its fullest potential. While our home cleaning systems are built to last, we understand that questions and concerns pop up. From learning how to replace or change your Kirby filter bag to learning how to change a brush roll, our Kirby how-to vacuum videos will show you the right way to use your Kirby to keep your house spotless!
KIRBY HOW-TO VACUUM VIDEOS
Set Up Your Kirby

How-To Vacuum Videos

Play Video about Nothing vacuums like a Kirby.
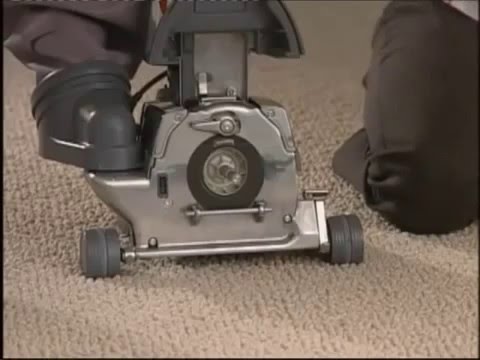
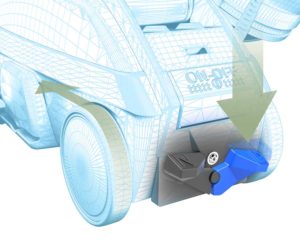
How to change the belt on your Kirby system:
-
- With the Power Nozzle off, rotate the belt lifter clockwise until the green arrows line up. Unlock the Rug Plate by unhooking the two latches on the rear of the Power Nozzle. Pull on the rear edge of the Rug Plate to remove.
- Slide off the old belt and replace with a new one.
- Make sure the numbers on the Brush Roll end caps are the same on both sides before inserting it into the Power Nozzle. Place the belt and Brush Roll back into the Power Nozzle. One of the Brush Roll ends is larger than the other. The Brush Roll will only fit in the Power Nozzle one way. Center the belt on the Brush Roll.
- Place the Rug Plate on the front of the Bumper first and then pull it over the rear. Secure it in place with the two latches.
- Turn the Belt Lifter counterclockwise until the red arrows line up. The belt should catch on the hook inside the nozzle. Reattach the Power Nozzle to the unit.
- Turn the Belt Lifter clockwise until the green arrows line up.
- Turn the unit on and check that the Brush Roll Indicator Light is on. This means that the brush roll is spinning.
Play Video about «Man easily installing Kirby HEPA filter bag into vacuum cleaner.»
How to change Kirby bag:
-
- First make sure your outer bag is unzipped and the top adaptor is pulled out.
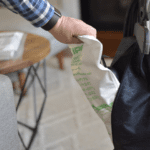
- Take a new disposable bag out of the packaging.
- Rest the cardboard faceplate of the disposable filter bag against the bottom of the adaptor. Pivot the faceplate against the flat surface of the adaptor and bend and press the tab at the top of the faceplate until it’s secure. The bag support strap should be connected through the small hole on the adaptor, which is over the stud.
- Once connected, place the whole bag inside the outer bag and close the zipper.
Play Video about Buy the Kirby heavy duty vacuum cleaner.
How to install the Power Nozzle:
-
- First, you’ll want to pull the belt lifter handle on the Power Nozzle, or the head of the vacuum, toward you and turn it counterclockwise until the red arrows line up. The hook should catch and stretch the belt inside the nozzle.
- Raise the headlight hood.
- Reset the two hooks on the back of the nozzle on the attaching bar, which is located on the front of the unit.
- Press the nozzle against the unit and secure with the Accessory Lock.
- Pull the belt lifter handle toward you again and turn it clockwise until the green arrows line up. (See page 22 of the owner manual).

Play Video about Adjust your Kirby vacuum with the easy-to-use Toe Touch height adjustment.
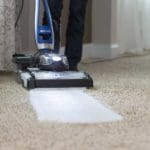
How to adjust the Power Nozzle height:
-
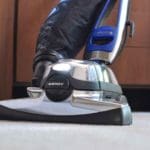
- To adjust the height of your vacuum, use the toe-touch control that is located over the front wheel. The numbered settings are for carpet and floors.
The dotted settings are for accessories and other cleaning needs. - Turn the unit on and press the toe-touch upper control pedal as often as necessary to lower the Power Nozzle to its lowest setting.
- Press the toe-touch lower control pedal one notch at a time to raise it to your preferred height. Listen for each click as it raises or lowers.
- To adjust the height of your vacuum, use the toe-touch control that is located over the front wheel. The numbered settings are for carpet and floors.
One-click is for deep pile carpeting.
Two clicks are for long fiber carpeting.
Three clicks are for pet hair removal.
Four clicks and up are for hose and attachments.
Play Video
How to install the hose:
-
- Make sure your unit is turned off and is unplugged, and the Power Nozzle is removed (see page 22 of the owner manual).
- Once removed, wipe down the motor shaft.
- Place the hooks of the attachment hose over the attaching bar.
- Push the hose against the unit and turn the accessory lock clockwise to lock it in place.
- Lower the headlight hood and turn unit on for use.
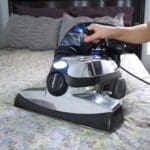
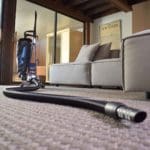
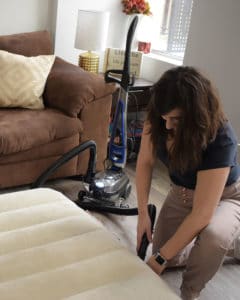
Play Video about Convert the Kirby to handheld mode to clean your stairs, rugs, mattress, and more.
How to install the handheld:
Converting your upright vacuum into a portal cleaner gives you the power to conveniently clean your stairs or bed mattresses.
-
- First, make sure your unit is turned off and unplugged. The Tech Drive Power Assist should also be in neutral.
- Take off the outer bag by pressing the Bag Release Button.
- Remove the cord from the handle and push the handle release button at the bottom of the unit as you pull the the upright handle straight up and out of the slot.
- Once those are removed, insert the portable handle into the slot where the upright handle was connected.
- Bend the the outer bag in half and insert the bag latch tab into the slot of the handle with the zipper facing up.
Play Video about Use the TechDrive to make cleaning a breeze!
How to use the Tech Drive (Drive Mode):
Tech Drive Power Assist will make it easy to push and pull the vacuum when in use.
-
- First, turn the Tech Drive Power Assist on by pressing down on the side of the pedal marked as “D” for drive. This makes it easy to use while operating the unit.
- Easily move the Kirby system while vacuuming, shampooing carpet or scrubbing hard floors.
- Turn the Tech Drive Power Assist back to neutral “N” when off and moving the Kirby room to room.
Play Video about Use the TechDrive to make cleaning a breeze!
How to use the Tech Drive (Neutral Mode):
-
- Put the Tech Drive in neutral by pressing down on the side of the pedal marked “N”. The unit will move easily in neutral when turned off.
-
- Easily move the Kirby system while not in operation
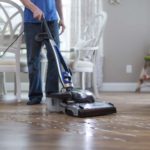
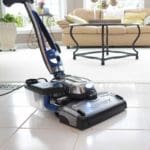
- Vacuum hard floors
- Polishing hardwood floors with Miracle Shine High Gloss Floor Finish
How-To Shampoo Videos
Play Video about Shampoo carpet and remove difficult stains with the Kirby.
How to install the Multi-Surface Shampoo System:
Use the MSSS for shampooing your carpets and cleaning your hard surface floors.
-
- First, remove the Power Nozzle, then remove the outer bag.
- Lift and remove the waste tray from the MSSS and set aside for now.
- The carpet brush roll must be used when shampooing carpet.
- Insert the baffle strip if necessary with the flat side facing the brush roll.
- Press the toe-touch control bottom pedal all of the way down to raise the front of the unit.
- Once that’s down, connect the hooks on the rear of the MSSS to the attaching bar.
- Push the MSSS up against the unit and turn the Accessory Lock clockwise to lock in place.
- Turn the nozzle belt lifter clockwise until green arrows line up, and lower the headlight hood.
- Lastly, insert the waste tray.
How-To Hard Floor Cleaning Videos
Play Video about Scrub hard floors with the Kirby System.
Install the Hard Floor Brush Roll:
-
- When you are converting your machine to clean hard surface floors, you first need to remove the power nozzle, or head of the machine, and the outer bag.
- Then, remove the Waste Tray from the MSSS.
- To remove the carpet brush roll and insert the Rotary Mop, turn the MSSS nozzle belt handle clockwise until the green arrows line up.
- Turn the nozzle upside down and pull on the belt until it’s lose and remove the carpet brush roll.
- Take the belt off the carpet brush roll and place onto the Rotary Mop.
- Once the belt is on the appropriate brush roll, insert it back into the MSSS.
- Push up on the belt with your finger and turn the belt lifter handle counterclockwise until the red arrows line up.
- Raise the unit by pressing all the way down on the toe-touch pedal. Then, connect the hooks on the back of the MSSS to the attaching bar.
- Push the MSSS up against the unit, turn the Accessory Lock clockwise, and turn the belt lifter clockwise until the green arrows line up.
- Lower the hood and put on the waste tray.
How-To Vacuum Accessories Videos
Play Video about Easily blow out dirt, dust, food crumbs and more from keyboards, car doors, and other tight spots.
Convert to Air Pump (Inflater):
To convert your vacuum to a blower, simply attach the hose to the exhaust port.
-
- First, remove the power nozzle, or front head of the vacuum (see page 22 of the owner manual).
- Place the hooks on the back of the air guard over the attaching bar located on the front of the unit.
- Push the air guard against the unit and turn the accessory lock clockwise to secure it in place.
- Remove the outer bag by pressing the bag release button on the top of the bag and rotating the bottom base of the bag away from the unit to remove.
- Connect the hose to the air exhaust port. Simply line up the arrow on the end of the hose with the arrow on the port; twist the hose clockwise until it locks.
Play Video about Remove dirt and grime for tile and grout with your Kirby.
Install the Tile & Grout Brush Roll:
-
- When you are converting your machine to clean tile & grout, you first need to remove the power nozzle, or head of the machine, and the outer bag (see page 22 of the owner manual).
- Remove the Waste Tray from the MSSS.
- Insert the Tile & Grout Brush Roll.
- Once the belt is on the appropriate brush roll, insert it back into the MSSS.
- Push up on the belt with your finger and turn the belt lifter handle counterclockwise until the red arrows line up.
- Raise the unit by pressing all the way down on the toe-touch pedal. Then, connect the hooks on the back of the MSSS to the attaching bar.
- Push the MSSS up against the unit and turn the Accessory Lock clockwise, and turn the belt lifter clockwise until the green arrows line up.
- Lower the hood and put on the waste tray.
Play Video about Easily blow out dirt, dust, food crumbs and more from keyboards, car doors, and other tight spots.
Convert to Air Pump (Deflater):
To convert your vacuum to a blower, simply attach the hose to the exhaust port.
-
- First, remove the power nozzle, or front head of the vacuum, (see page 22 of the owner manual).
- Place the hooks on the back of the air guard over the attaching bar located on the front of the unit.
- Push the air guard against the unit and turn the accessory lock clockwise to secure in it in place.
- Remove the outer bag by pressing the bag release button on the top of the bag, and rotating the bottom base of the bag away from the unit to remove.
- Connect the hose to the air exhaust port. Simply line up the arrow on the end of the hose with the arrow on the port; twist the hose clockwise until it locks.
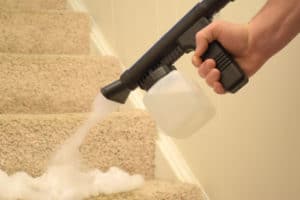
Play Video about Easily remove carpet stains with the Kirby Multi Surface Shampoo System.
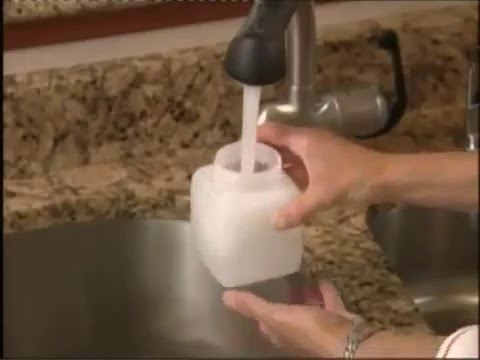
How to install the portable sprayer:
The portable sprayer can only be used in the blower mode, so please visit page 26 of your owner manual first.
-
- Once your unit is set up in the blower mode, it’s time to set up your sprayer.
- Unscrew the jar and fill it ¾ full with non-flammable liquid. The dip tube needs to be attached to the sprayer before screwing in the jar.
- Next, attach the sprayer to the end of the hose.
- Hold sprayer horizontally and turn the unit on. Squeeze the trigger to spray the solution onto a newspaper to check that it works.
- Turn the control on the trigger to adjust the spray pattern.
Play Video
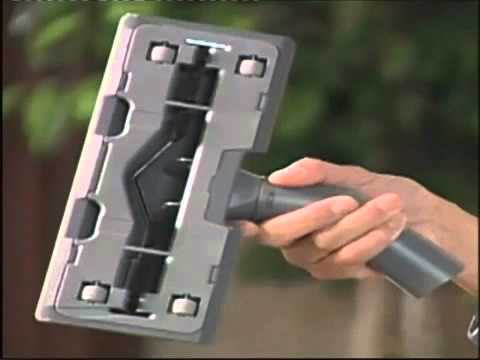
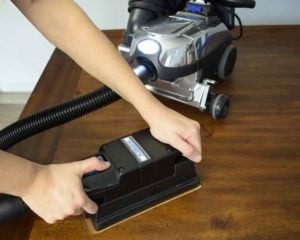
How to install the Turbo Accessory:
The Turbo Accessory can be used as a sander, polisher, or for scrubbing. It is used with the hose on the front of the unit.
-
- First, assemble the turbo sander and unsnap the sander dust shroud and lift off.
- Rotate the clamp levers up on the side of the turbo accessory, slide a sheet of sandpaper into the front clap and lock lever.
- Tightly wrap the sandpaper around the bottom of the turbo accessory and tuck the end into the rear clamp and lock.
- On a level surface, reattach the sander dust shroud with the opening to the back, and insert the hose.
- Hold the turbo accessory at the top and bottom and turn your Kirby on.
- Finally, turn the turbo accessory on.
KIRBY HOW-TO VACUUM VIDEOS NOT HELPING?
За сто лет совершенствования, инженеры американской компании Kirby превратили многофункциональный вертикальный пылесос в отличное орудие для профессиональной уборки. В России инструмент распространяется по сетевому маркетингу, с предварительной демонстрации возможностей аппарата и с пожизненным техническим сопровождением. Каждый аппарат имеет уникальный номер, зарегистрированный на владельца. Были случаи, когда по сбыту украденного пылесоса устанавливали и задерживали квартирных воров. С инструментом каждый владелец получает красочную инструкцию с пошаговым руководством по применению пылесоса «Кирби».

За столетнюю историю, американская компания, основанная инженером Джимом Кирби, создала 40 моделей пылесосов. Каждый из них уникален, собран вручную. Причем в продаже остается только последняя, наиболее совершенная модель. При такой политике, пылесос Кирби в России стоит не менее 100 тысяч рублей.
Продажа инструмента происходит с предварительной демонстрацией возможностей аппарата и психологической подготовкой клиента к покупке. Сила убеждения в наглядности опций пылесоса. Это потом, уже после покупки, клиент понимает, накручивать шнур на кронштейны – вчерашний день. Мешочный пылесборник объемом в 13 литров в квартире не нужен. Вес инструмента 13 кг избыточный, для слабых женских рук. Многочисленные насадки в коробках и навесах требуют отдельного большого шкафа. Да, аппарат мощный, но он скорее, предназначен для профессионального применения клининговой службой.

Технические характеристики:
- Потребляемая из сети энергия зависит от режима работы, составляет 0,64- 0,78 кВт.
- Сила всасывания 660 – 939 мм рт. ст.
- Объем пылесборника вмещает до 8 кг пыли.
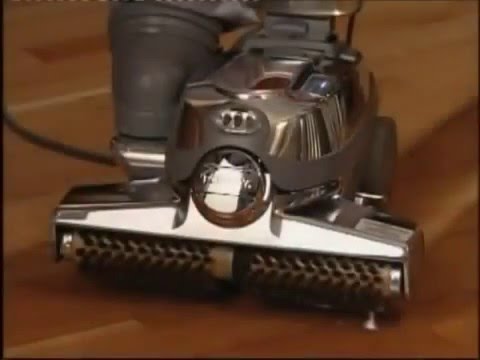
- Основная насадка шириной 38 см, производительна.
- Вес корпуса с основной насадкой – 10,5 – 13 кг.
- Высота 124 и 110 см.
- Шумность высокая, в соседней комнате разговаривать приходится очень громко.
Глубина очистки поверхностей до 50 см, дезодорация и мойка воздуха, полировка вертикальных поверхностей, химчистка мебели специальным составом – далеко не полный перечень способностей инструмента.
В продаже с 2017 года Kirby Avalir 2, мощный, с усовершенствованной системой фильтрования. Моторесурс модели увеличен, дизайн изменился, но и стоимость инструмента заявлена в 2 раза выше, чем в предыдущих моделях. Предыдущий пылесос, выпускавшийся в 2014-2016 году – Kirby Avalir.
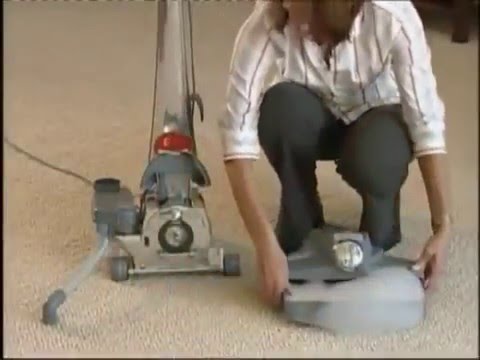
В российских домах в 2012-2014 году продавалась модель Kirby Sentria 2, она и изображена на прилагаемых фото. Стоимость агрегата в США была 500 $, в России за 100 тысяч рублей. Сейчас этот пылесос на вторичном рынке стоит около 50 тысяч рублей.

Инструкция к пылесосу Sentria Kirby
Каждый комплект вакуум машины для уборки содержит подробную инструкцию, как подготовить аппарат к работе, признаки неисправности, сроки технического обслуживания. Реализаторы не теряют связь с клиентом, периодически интересуются состоянием прибора. Раз в несколько лет они проводят ТО, меняют расходники (не бесплатно). Для длительной работы установки необходимо соблюдать инструкцию к пылесосу Кирби. Особенно важна безопасность:
- Перед включением аппарата необходимо осмотреть состояние кабеля и вилки. Неисправности устраняются только в сервисном центре.
- Не перегибать кабель во время работы, не допускать соприкосновение его с горячими поверхностями.
- Работать с инструментом должны освоившие операции, взрослые люди.
- Пылесосом нельзя собирать стекло и другие колюще — режущие остатки, может быть порезан пылеприемник.
- Выполняя влажную уборку, не допускать попадания на корпус пены или жидкости. Если такое произошло, прибор обесточить, протереть сухой тряпкой.

Как моющий, пылесос Кирби в инструкции описан с пошаговым выполнением операций. Каждая из них демонстрируется на фото и в прилагаемом видео. В документе подробно описано, как пользоваться системой влажной очистки ковров, применять защитное и моющее средство Кирби в комплекте. Каждое действие сопровождается пояснениями. Следуя указаниям легко собрать систему, заправить моющим составом, а после окончания работы помыть компоненты.
Не мене подробно написано, как пользоваться массажером, компрессором на надувания матрасов и шариков. Предусмотрено использование прибора для нанесения фирменной мастики с последующей полировкой поверхностей – мрамора, паркета.
Применить в действии все заложенные в прибор возможности могут профессионалы. В отзывах частных лиц, отмечается, до 70 % насадок хранится без использования.
Видео
Пылесос Кирби сопровождает видео инструкция по применению, с подробным разъяснением каждой операции. Как пример, посмотрите, как нужно готовить инструмент к сухой уборке.


Introduction: How to Use a Kirby Vacuum
In this video I show you how to use a G-series Kirby Vacuum with a TEK drive (Self propelled).The TEK drive is not a constant drive, it only moved when you apply pressure forward or backward, its super convenient. Now Kirbys are different then other vacuums. They are made out of all metal and steel, very little if any plastic so they are heavy but super durable. They can have every attachment that you can imagine, Example being a back massager… Yea a Back massager! The best part of it is that It has more suction than any other highend vacuum. So this film shows basic Kirby usage with a little humor attached. Theres lots than can be said but the video speaks for itself. Enjoy.
Кирби инструкция
Пылесос Кирби: инструкция
Наша компания является официальным сервисным центром Kirby и в рамках клиентской поддержки предлагает инструкцию по применению Кирби для решения различных задач и ситуаций. Пылесос Кирби представляет собой высокотехнологичное устройство, своеобразную универсальную станцию с функционалом чистоты, безопасности и эстетики пространства. И мы готовы помочь вам использовать его потенциал на все 100%.
Преимущества нашего сервиса
Уже в момент приобретения пылесоса вы можете заказать демонстрацию возможностей Кирби по своему адресу. Наш специалист подробно и понятно покажет предназначение и возможности применения каждой насадки или положения регулятора. Однако создатели данного агрегата предусмотрели его функциональность практически в любых бытовых ситуациях.
Поэтому мы позаботились о том, чтобы предоставить вам:
- Подробную инструкцию по применению пылесоса Кирби для удаления пыли и неприятных запахов – она всегда доступна на нашем сайте.
- Видео инструкцию по работе пылесоса Кирби в качестве домашней станции химчистки для удаления застарелых пятен и других сложных загрязнений.
- Видео инструкцию по использованию различных насадок Кирби для глубокой очистки длинноворсовых ковров и других труднодоступных мест.
- Инструкцию по использованию пылесоса Кирби для вакуумизации и других высокотехнологичных процедур.
- Фирменную инструкцию Kirby по мерам предосторожности для максимально длительного поддержания функциональности всех элементов конструкции.
Вы всегда можете обратиться в наш сервисный центр с любым вопросом по бесплатному многоканальному телефону, и наши специалисты предоставят исчерпывающую консультацию или помогут найти соответствующие материалы на нашем сайте. Каждый элемент конструкции Кирби многофункционален и может значительно повысить эффективность работы устройства при правильном применении.
Высокая квалификация наших специалистов и наличие всех соответствующих сертификатов позволяют им проводить демонстрацию возможностей техники Кирби и обучение вашего персонала. Они всегда готовы помочь в максимальном использовании потенциала, предоставляемого уникальной наукоемкой конструкцией пылесоса Кирби.
Создайте свое индивидуальное пространство Кирби с идеальным сочетанием чистоты, красоты и благоприятных для здоровья человека факторов.
Сервисный центр
Интернет-магазин
Запчасти