
В какие сроки происходит доставка техники Miele?
Товар из наличия доставят завтра в удобное для вас время или передадут в транспортную компанию, в случае отправки товара в другие регионы России. При наличии свободного транспорта возможна доставка в течение 2-5 часов, необходимо уточнить у оператора. Товар под заказ согласовывается дополнительно и в некоторых случаях требует частичную предоплату, обычно срок поставки занимает 1-4 недели.
Мы непрерывно работаем с 2010 года, наш магазин был среди первых официальных фирменных интернет магазинов Miele в России

Откуда бытовая техника? Это оригинал?
Вся техника оригинальная, привозится из Евросоюза и стран СНГ в заводской упаковке и обрешетке для большей безопасности ее сохранности.


Возможны установка и подключение техники?
Да. Техника будет установлена и подключена специалистами сервисного центра, тарифы подразумевают установку на готовые коммуникации. Все необходимые дополнительные работы согласовываются на месте с мастером.
Где можно посмотреть товары? Есть ли самовывоз?
Ознакомиться с товаром вы можете в нашем магазине на Рублевке, там же находится наш склад, который мы с радостью покажем. Посетив склад, вы сможете лично убедиться в широком ассортименте, качестве товара и его происхождении. При желании можно забрать товар со склада самостоятельно.
Действует ли гарантия на товар?
На все приборы действует гарантия 1 год. При желании за дополнительную плату +5% к стоимости товара, можно приобрести продленную гарантию общим сроком в 2 года. В этот период мы ремонтируем технику Miele за свой счет или меняем ее на новую в случае, если она не подлежит ремонту.
Как можно оплатить товар, и когда внести оплату?
После доставки и приема товара оплату можно совершить наличным средствами или банковской картой (предварительно требуется уведомить оператора для выделения экипажа с терминалом).Так же можно произвести оплату по выставленному банковскому счету (отправка товаров в регионы России осуществляется после полной предоплаты).
Техника в наличии в России или это предзаказ?
На складе в Москве хранится около 1500 — 2500 ед техники Miele в наличии. Это позволяет оперативно собирать полноценные комплекты для покупателей. При необходимости так же возможна поставка практически любого товара из ЕС в максимально короткие сроки, 1-4 недели.


Operating instructions
Cordless stick vacuum cleaner
en-GB
HS19
M.-Nr. 11 419 150

|
Contents |
|
|
Warning and Safety instructions……………………………………………………………. |
4 |
|
Caring for the environment …………………………………………………………………… |
11 |
|
Guide to the appliance………………………………………………………………………….. |
12 |
|
Installation and connection …………………………………………………………………… |
14 |
|
Assembling the vacuum cleaner ………………………………………………………………. |
14 |
|
Connecting the Comfort handle……………………………………………………………….. |
15 |
|
Connecting the PowerUnit and the suction tube ………………………………………… |
15 |
|
Inserting the battery ……………………………………………………………………………….. |
16 |
|
Connecting the Electrobrush……………………………………………………………………. |
17 |
|
General battery information……………………………………………………………………… |
17 |
|
Charging the battery (without wall mounting)……………………………………………… |
18 |
|
Charging the battery (with wall mounting)………………………………………………….. |
18 |
|
Wall mounting………………………………………………………………………………………… |
19 |
|
Attaching the mounting plate …………………………………………………………………… |
20 |
|
Connecting the accessories holder (if required)………………………………………….. |
20 |
|
Connecting the wall bracket…………………………………………………………………….. |
21 |
|
Battery charging state indicator (while charging) ………………………………………… |
21 |
|
Battery charging state indicator (while in use)…………………………………………….. |
22 |
|
Using the accessories supplied …………………………………………………………….. |
22 |
|
Electrobrush Multi Floor XXL (SEB 430 or SEB 435)……………………………………. |
23 |
|
Electro Compact handheld brush (SEB 23)………………………………………………… |
23 |
|
Additional AP01 battery and LS03 charger cradle ………………………………………. |
23 |
|
Use………………………………………………………………………………………………………. |
24 |
|
Switching on and off ………………………………………………………………………………. |
24 |
|
Regulating the suction power ………………………………………………………………….. |
24 |
|
Illuminating the work area ……………………………………………………………………….. |
25 |
|
Self-standing function for short pauses in vacuuming…………………………………. |
25 |
|
Maintenance ………………………………………………………………………………………… |
25 |
|
Emptying the dust container ……………………………………………………………………. |
25 |
|
Cleaning the fine dust filter………………………………………………………………………. |
27 |
|
Cleaning the pre-filter……………………………………………………………………………… |
27 |
|
Cleaning the dust container …………………………………………………………………….. |
29 |
|
Cleaning the Electrobrush/handheld brush………………………………………………… |
29 |
|
Replacing the rechargeable battery ………………………………………………………….. |
30 |
|
Problem solving guide ………………………………………………………………………….. |
31 |
|
Error messages ……………………………………………………………………………………. |
33 |
|
Cleaning and care ………………………………………………………………………………… |
34 |
2

|
Contents |
|
|
Service…………………………………………………………………………………………………. |
34 |
|
Contact in case of malfunction ………………………………………………………………… |
34 |
|
Warranty ……………………………………………………………………………………………….. |
34 |
|
Warranty in the UAE ……………………………………………………………………………….. |
34 |
|
Optional accessories ……………………………………………………………………………. |
35 |
|
Purchasing accessories ………………………………………………………………………….. |
35 |
|
Electrical connection for the UK……………………………………………………………. |
36 |
3
Warning and Safety instructions
This vacuum cleaner conforms to current safety requirements. Inappropriate use can lead to personal injury and damage to property.
Please read the operating instructions before using the vacuum cleaner and charging the battery for the first time. They contain important information on the safety, use and maintenance of the vacuum cleaner. This will prevent both personal injury and damage to the appliance.
In accordance with standard IEC 60335-1, Miele expressly and strongly advises that you read and follow the instructions in the “Installation and connection” chapter as well as the safety instructions and warnings.
Miele cannot be held liable for injury or damage caused by noncompliance with these instructions.
Keep these operating instructions in a safe place and pass them on to any future owner.
Always disconnect the vacuum cleaner from the power supply when you have finished using it, before changing any accessories, as well as for maintenance work, cleaning and troubleshooting. Use the On/Off switch on the Comfort handle to do this.
Correct application
This vacuum cleaner is intended for cleaning flooring in domestic households and similar residential environments. This vacuum cleaner is not suitable for use on construction sites.
This vacuum cleaner is not intended for outdoor use.
This vacuum cleaner can be used for all normal cleaning of carpets, rugs and robust hard flooring.
This vacuum cleaner is intended for use at altitudes of up to 4000 m above sea level.
4

Warning and Safety instructions
The vacuum cleaner must only be used to vacuum dry floor surfaces. Do not vacuum people or animals. Any other types of use, modifications or alterations are not permitted.
This vacuum cleaner can only be used by people with reduced physical, sensory or mental capabilities, or lack of experience or knowledge, if they are supervised whilst using it or have been shown how to use it in a safe way and understand and recognise the consequences of incorrect operation.
The packaging material protects the vacuum cleaner from transport damage. We recommend you keep the packaging for transport purposes.
Safety with children
Children under 8 years of age must be kept away from the vacuum cleaner unless they are constantly supervised.
Children aged 8 and older may only use the vacuum cleaner without supervision if they have been shown how to use it in a safe manner. Children must be able to understand and recognise the possible dangers caused by incorrect operation.
Children must not be allowed to clean or maintain the vacuum cleaner unsupervised.
Please supervise children in the vicinity of the vacuum cleaner and do not let them play with it.
Danger of suffocation. Packaging, e.g. plastic wrappings, must be kept out of the reach of babies and children. Whilst playing, children could become entangled in packaging or pull it over their head and suffocate.
5

Warning and Safety instructions
Technical safety
The vacuum cleaner operates at 25.2 V.
It is classified as a class III appliance.
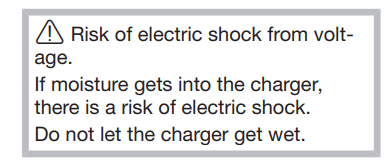
This appliance is supplied by a safety extra-low voltage (SELV) power source where the voltage is low enough to protect users from the risk of electrical shock. A Class II charger is used for supplying power to charge the vacuum cleaner.
Before using the vacuum cleaner and its accessories, check for any visible signs of damage. Do not use a damaged appliance.
Compare the connection data on the data plate of the charger (voltage and frequency) with that of the mains electricity supply. This data must match exactly. Without modifications, the charger is suitable for 50 Hz and 60 Hz.
The mains electrical plug must be fitted with an appropriate fuse.
The Miele Multi Floor XXL Electrobrush and the Miele Elec-
tro Compact handheld brush (varies according to the model) are additional motor-driven devices designed specially for this Miele vacuum cleaner. For safety reasons, the vacuum cleaner must not be used with a different Miele Electrobrush/handheld brush or an Electrobrush/handheld brush produced by another manufacturer.
Store the vacuum cleaner at an ambient temperature between 0 °C and 45 °C.
While the vacuum cleaner is under warranty, repairs should only be undertaken by a Miele authorised service technician. Otherwise the warranty will be invalidated.
Repairs should only be carried out by a Miele authorised service technician. Repairs and other work by unqualified persons can cause considerable danger to users.
6

Warning and Safety instructions
Miele can only guarantee the safety of the appliance when genuine Miele replacement parts are used. Faulty components must only be replaced with genuine Miele replacement parts.
Cleaning
Do not immerse the vacuum cleaner or any accessories supplied with it in water.
The Electrobrush/handheld brush (depending on the model), the PowerUnit, the suction tube, the body and the Comfort handle contain electrical wires. The plug connectors must not come into contact with water. Danger of electric shock. They should only be cleaned with a dry cloth.
Clean the vacuum cleaner and accessories only with a dry or slightly damp cloth when disconnected from the power supply. Exception:
—Dust container: empty the dust container and remove the pre-fil- ter. Clean the dust container using water and mild washing-up liquid only. Then dry the dust container carefully. Replace the prefilter in the dust container.
Correct use
Do not use the vacuum cleaner without the dust container, pre-fil- ter, fine dust filter and motor protection filter fitted.
Do not vacuum up anything which has been burning or is still glowing e.g. cigarettes, ashes or coal, whether glowing or apparently extinguished.
Do not use the vacuum cleaner to vacuum up any water, liquid or damp dirt. Wait until any freshly cleaned or shampooed rugs or carpets are completely dry before attempting to vacuum.
Do not use the vacuum cleaner to vacuum toner dust. Toner, such as that used in printers and photocopiers, can conduct electricity.
7

Warning and Safety instructions
Do not vacuum up any inflammable or combustible liquids or gases and do not vacuum in areas where such substances are stored.
Never touch the Electrobrush/handheld brush (varies according to the model) while it is rotating.
Do not use the Electrobrush/handheld brush (varies according to the model) at head height.
Do not vacuum at head height and do not let the suction get anywhere near a person’s head.
Accessories
Only use genuine accessories with the “ORIGINAL Miele” logo on
the packaging. The manufacturer cannot otherwise guarantee the
safety of the product.
Safety instructions and warnings for AP01 battery, LG01
charger, LS03 charger cradle (depending on the model)
Safety with children
People (including children) with reduced physical, sensory or mental capabilities, or lack of experience or knowledge, who are unable to use the LG01 charger/LS03 charger cradle safely may only use this vacuum cleaner if they are supervised whilst using it or have been shown how to use it in a safe way and understand and recognise the consequences of incorrect operation.
Keep the AP01 battery out of the reach of children.
Children must be kept away from the LG01 charger/LS03 charger cradle unless they are constantly supervised.
8
Warning and Safety instructions
Technical safety
The AP01 battery, the LG01 charger and the LS03 charger cradle are designed for use with the Miele HS19 vacuum cleaner. For safety reasons, the vacuum cleaner must not be used with a battery, charger or charger cradle produced by another manufacturer.
Only the LG01/xx charger or the LS03/xx charger cradle supplied with the vacuum cleaner can be used to charge the AP01 battery. Do not use the LG01/xx charger or LS03/xx charger cradle to charge any other batteries.
xx stands for 01, 02, 03, 04, 05, 06, 07 or 08; these numbers identify
the version of your LG01 charger and your LS03 charger cradle:
XX
01AT, BE, BG, CH, CL, CZ, DE, DK, EE, ES, FI, FR, GR, HR, HU, IT, KZ, LT, LU, LV, NL, NO, PL, PT, RO, RS, RU, SE, SI, SK, TR, UA, ZA
02 AE, GB, HK, IE, MY, SG
03 CA, MX, US
04 AU, NZ
05 CN
06 KR
07 JP
08IN
If you are using a mains plug adapter, make sure that it is approved for continuous operation.
Reliable and safe operation of this vacuum cleaner can only be assured if the LG01 charger/LS03 charger cradle has been connected to the mains electricity supply.
Charge the vacuum cleaner at an ambient temperature between 0 °C and 45 °C. During charging, the AP01 battery must be placed in a well ventilated area.
9

Warning and Safety instructions
Stop using the AP01 battery immediately if you notice an unusual smell from it, if liquid is leaking from it, if it is significantly overheating or if it is discoloured or deformed. Dispose of the AP01 battery immediately (see safety notice “Disposing of the AP01 battery” at the end of this chapter as well as “Caring for the environment” – “Disposing of old batteries”).
Batteries will deplete over time. They can then leak corrosive fluids. Avoid contact with the eyes and skin. In the event of contact, rinse thoroughly with water and seek medical advice.
Please contact Miele Service before sending the AP01 battery.
Correct use
Do not drop or throw the AP01 battery. For safety reasons, do not continue to use an AP01 battery which has been damaged.
Keep the AP01 battery away from naked flames or other heat sources. Do not heat the AP01 battery. Do not expose the rechargeable battery to direct sunlight.
Do not dismantle the AP01 battery.
Do not cause a short circuit by bridging the contacts of the AP01 battery, either unintentionally or deliberately.
Do not allow the AP01 battery to come into contact with liquids.
Disposing of the AP01 battery: remove the AP01 battery from the vacuum cleaner. Insulate the metal contacts with adhesive tape to prevent short circuits. Dispose of the AP01 battery in a municipal recycling facility. Do not dispose of the AP01 battery with your household waste.
10
![]()
Caring for the environment
Disposal of the packing mater-
ial
The packaging is designed to protect the appliance from damage during transportation. The packaging materials used are selected from materials which are environmentally friendly for disposal and should be recycled.
Recycling the packaging reduces the use of raw materials in the manufacturing process and also reduces the amount of waste in landfill sites.
Disposing of your old appli-
ance
Before disposing of your old vacuum cleaner, remove the fine dust filter and dispose of it with your household waste.
Electronic and electrical appliances contain many valuable materials. They also contain certain materials, compounds and components which were essential for their correct functioning and safety. These could be hazardous to your health and to the environment if disposed of with general waste or if handled incorrectly. Please do not, therefore, dispose of your old vacuum cleaner with your household waste.
Instead, please make use of officially designated collection and disposal points to dispose of and recycle electrical and electronic appliances in your local community, with your dealer or
with Miele. Ensure that it presents no
danger to children while being stored
for disposal.
Disposing of old batteries
In many cases, electrical and electronic appliances contain batteries which must not be disposed of with household waste after use. You are legally obliged (depending on country) to remove any old batteries which are not securely enclosed by the vacuum cleaner and to take them to a suitable collection point (e.g. retailer) where they can be handed in free of charge. Insulate the metal contacts with adhesive tape to prevent short circuits. Batteries may contain substances which can be hazardous to human health and the environment.
The labelling on the battery will provide further information. The bin symbol with a cross through it means that the batteries must not be disposed of in household waste. A bin with a cross through it which also has one or more chemical symbols on it indicates that the battery contains lead (Pb), cadmium (Cd) and/or mercury (Hg).
3E &G +J
Old batteries contain valuable raw materials which can be recycled. Disposing of batteries separately makes them easier to handle and recycle.
11

Guide to the appliance
12
 Loading…
manualMiele Triflex HX1

de Gebrauchsanweisung Akkustaubsauger
en Operating instructions Cordless vacuum cleaner
es Instrucciones de manejo Aspiradores sin cable
fr Mode d’emploi Aspirateur balai sans fil
it Istruzioni d’uso Scopa elettrica senza filo
nl Gebruiksaanwijzing Snoerloze stofzuiger
pt Instruções de utilização Aspiradores sem fios
M.-Nr. 11 815 101
HS19
View the manual for the Miele Triflex HX1 here, for free. This user manual comes under the category vacuum cleaners and has been rated by 39 people with an average of a 8.2. This manual is available in the following languages: English. Do you have a question about the Miele Triflex HX1? Ask your question here
- Titelseite
- Inhalt
- Leere Seite
- Leere Seite
- Leere Seite
- Leere Seite
The Miele Triflex HX1 is a rechargeable, cordless vacuum cleaner that comes with three different speed settings. Its battery-powered source makes it easy to maneuver around the house, reaching tight spaces without requiring a power outlet nearby. It operates using 170 W of power, making it energy-efficient. Its filtration system ensures that dust and allergens are captured while cleaning, and the hygiene filter that comes with the vacuum further ensures that the air that’s expelled during the cleaning process is clean. The dirt separation method is cyclonic, meaning that it separates the dirt and dust from the air in its dust container, which boasts a dry capacity of 0.5 L. The vacuum cleaner is bagless, meaning that it is easy to clean and maintain. Its battery voltage is 25.2 V, providing enough power to clean a room effectively. The dimensions of the product are 1297 mm in length, 260 mm in height and 3640 g in weight, making it relatively lightweight and effortless to operate. Its sleek design and compact size make it easy to store in small spaces. Overall, the Miele Triflex HX1 vacuum cleaner is a reliable and efficient cleaning option for those looking for a cordless vacuum cleaner with high-powered suction capacity, easy-to-use controls and advanced filtration to cover the cleaning needs of all household members.

General
| Miele | |
| Triflex HX1 | 11333350 | |
| vacuum cleaner | |
| 4002516237426 | |
| English | |
| User manual (PDF), Installation Guide (PDF), Use and Care Manual (PDF), Quickstart Guide (PDF), Datasheet (PDF) |
Performance
| Number of speeds | 3 |
| Cleaning type | Dry |
| Filtration system | Yes |
| Vacuum air filtering | Hygiene Filter |
| Dirt separating method | Cyclonic |
| Variable power | Yes |
| Power control | Mechanical |
Power
| Power source | Battery |
| Battery technology | Lithium-Ion (Li-Ion) |
| Power consumption (typical) | 170 W |
| Battery voltage | 25.2 V |
| Runtime | 60 min |
| Runtime with motorized brush (medium speed) | 44 min |
| Runtime with motorized brush (high speed) | 14 min |
| Charging time | 4 h |
| Battery capacity | 2.5 Ah |
Design
| Product colour | Graphite, Grey |
| Dust container type | Bagless |
| Dirt capacity dry | 0.5 L |
Weight & dimensions
| Depth | 1297 mm |
| Height | 260 mm |
| Weight | 3640 g |
Ergonomics
Packaging content
| Vacuum wand assembly | Yes |
| Upholstery nozzle included | Yes |
| Crevice tool | Yes |
| Telescopic wand | No |
show more
Can’t find the answer to your question in the manual? You may find the answer to your question in the FAQs about the Miele Triflex HX1 below.
My Miele vacuum is losing suction. Why is that?
Your Miele vacuum cleaner losing suction power can be due to the following causes: — The suction power is not set to maximum — The dust container or dust bag is full — The hose, brush or tube is clogged
How often should I check the filter?
A clean filter is important to maintain the vacuum cleaner’s suction power. Therefore, check the filter regularly. When a filter is clogged, dust absorption decreases and energy consumption increases.
What do I do with a smelly vacuum cleaner?
A commonly used method is to put a little washing powder in the dust container or the dust bag.
How often should I vacuum my house?
For allergy sufferers, vacuuming the house at least twice a week is recommended.
What is the weight of the Miele Triflex HX1?
The Miele Triflex HX1 has a weight of 3640 g.
What is the height of the Miele Triflex HX1?
The Miele Triflex HX1 has a height of 260 mm.
What is the depth of the Miele Triflex HX1?
The Miele Triflex HX1 has a depth of 1297 mm.
Is the manual of the Miele Triflex HX1 available in English?
Yes, the manual of the Miele Triflex HX1 is available in English .
Is your question not listed? Ask your question here
Miele TRIFLEX HX1 — SMUL0 Pro cordless vacuum — Use Manual — Use Guide PDF.
Documents: Go to download!
- User Manual — (English, French, Spanish)
- Appliance description
- References to illustrations
- Installation and connection
- Using the accessories supplied (Fig. 25)
- Use
- Maintenance
- Frequently Asked Questions
- Fault messages
- Cleaning and care
- Customer Service
- Optional accessories
Table of contents
User Manual Vacuun Cleaner
Appliance description

1 Comfort handle
2 Release catch for Comfort handle (on the back)
3 Dust container handle
4 Dust container with pre-filter, fine dust filter, and motor protection filter
5 PowerUnit with battery connection and connections for Comfort handle, suction wand, Electrobrush, and dust container
6 Release catches for battery (on both sides of the battery)
7 Charging socket (at the bottom of the battery)
8 AP01 lithium-ion battery
9 Connector
10 Multi Floor XXL Electrobrush (some models feature BrilliantLight lighting)
11 Removable roller brush
12 Flap
13 Release catch for removing the roller brush
14 Release buttons
15 Battery charging state indicator
16 Suction wand
17 On/Off switch with suction power selecto
References to illustrations
The illustrations referred to in the text are shown on the fold-out pages at the end of these Operating Instructions.
Installation and connection
Assembling the vacuum cleaner (Figs. 01 + 02)
You can assemble the vacuum cleaner in 2 different ways.
- You can place the suction wand either above or below the PowerUnit.
The advantages of placing the PowerUnit at the bottom of the vacuum cleaner are as follows:
- secure self-standing function possible (see “Use” – “Self-standing function for short pauses in vacuuming”)
- ergonomic (reduced strain on the wrist)
- convenient cleaning of large surfaces
The advantages of placing the PowerUnit at the top of the vacuum cleaner are as follows:
- convenient cleaning underneath furniture
- PowerUnit can be removed quickly
PowerUnit solo
The PowerUnit can be used on its own without the suction wand and Electrobrush as a quick way of vacuuming up crumbs and lint in specific areas.
Tip: This configuration is particularly suitable when using the three-piece accessory set (see “Using the accessories supplied”).
Connecting the Comfort handle (Figs. 03 + 04)
Depending on how your vacuum cleaner is configured, you can connect the Comfort handle to either the suction wand or the PowerUnit.
- Push the Comfort handle down on to the suction wand connection from above until it audibly clicks into place (left image detail).
- Slide the Comfort handle along the guide line on the dust container handle and down on to the PowerUnit connector from above until it audibly clicks into place (right image detail).
- Switch off the vacuum cleaner using the On/Off switch on the front of the Comfort handle if you want to separate the sections.
- Press the release catch and remove the Comfort handle by pulling upwards.
Connecting the PowerUnit and the suction wand (Figs. 05 + 06)
Depending on how your vacuum cleaner is configured, the suction wand is located either above or below the PowerUnit.
- Slide the suction wand along the guide line on the dust container handle and down on to the PowerUnit connector from above until it audibly clicks into place (left image detail).
- Push the PowerUnit connector down on to the suction wand from above until it audibly clicks into place (right image detail).
- Press the release catch to separate the individual sections from each other.
Inserting the battery (Figs. 07, 08 + 09)
- Remove the sticker from the battery.
- Push the battery along the guide lines until it audibly clicks into place in the PowerUnit.
- If you want to separate the sections again, press both release catches at the side of the battery to remove the battery
Connecting the Electrobrush (Fig. 10)
Depending on how your vacuum cleaner is configured, you can connect either the PowerUnit connector or the suction wand connector to the Electrobrush.
- Insert the connector down into the Electrobrush from above until it audibly clicks into place.
- To separate the individual sections from each other, press the release catch on the Electrobrush and pull the connector out of the Electrobrush (Fig. 06).
General battery information
The rechargeable battery is supplied not fully charged.
Charge the battery completely before using it for the first time. Allow approximately 4 hours for this.
It is essential to charge the battery for the first time in the PowerUnit in order to activate maximum power in the battery
Once the battery is fully charged, the battery charging state indicator switches off after 10 minutes to conserve energy.
You can use the vacuum cleaner for up to 14 minutes if you are using it in its fully assembled state at the maximum power level.
If, however, you are using the PowerUnit on its own and select the lowest power level, you can vacuum for up to 60 minutes.
Charging the battery (without wall mounting) (Fig. 11)
You can store the vacuum cleaner upright and charge the battery directly.
- Connect the PowerUnit to the Electrobrush to provide a secure base for the vacuum cleaner.
- Swing the vacuum cleaner forwards until the Electrobrush connector audibly clicks into place.
- Plug the supplied charging cable into the charging socket on the bottom of the battery.
- Plug the charger into an electrical outlet.
The charging process will start.
You can read more about this in “Battery charging state indicator”.
Charging the battery (with wall mounting) (Figs. 12 + 13)
There are 2 ways to store and charge the vacuum cleaner in the supplied wall bracket.
You will need a suitable location near a free electrical outlet for mounting the appliance on the wall.
Wall mounting (Figs. 14 + 15)
The supplied wall bracket has a mounting plate with a bag of screws attached to the back.
Attach the mounting plate to the point on the wall where you want the wall mounting to be.
- Remove the bag of screws.
- Press the release catch at the bottom of the wall bracket.
- Remove the mounting plate from the wall bracket by sliding it downwards.
Attaching the mounting plate (Figs. 16 + 17)
2 plugs and 2 T20 TORX screws are supplied for attaching the mounting plate to the wall.
You will also need an electric screwdriver or a drill (with a 1/4″ drill bit).
Depending on how your vacuum cleaner is configured, select a distance of 17 3/4″ or 38 1/2″ (45 cm or 98 cm) between the bottom edge of the mounting plate and the floor.
Be careful not to damage any electrical in the wall.
- Attach the mounting plate to the wall.
Attaching the charging cable to the wall bracket (Figs. 18, 19 + 20)
A cable compartment is located on the underside of the wall bracket.
- Press both release catches on the underside of the wall bracket and remove the cable compartment cover.
- Plug the supplied charging cable into the opening from above.
- Lay the charging cable in its guide.
- Refit the cover and close the cable compartment.
Connecting the accessories holder (if required) (Fig. 21)
An accessories holder is supplied for storing the three-piece accessory set (see “Using the accessories supplied”).
- Push the accessories holder on to the wall bracket as far as it will go.
Connecting the wall bracket (Figs. 22 + 23)
- Slide the wall bracket down into the mounting plate from above until it audibly clicks into place.
- Slide the PowerUnit of the fully assembled vacuum cleaner, with the battery inserted, down into the wall bracket from above.
- Plug the charger into the power socket.
The charging process will start.
Battery charging state indicator (while charging) (Fig. 24)
The battery charging state is displayed on the PowerUnit.
Battery life and Display
- Approx. 0–34%
- Bottom light flashes slowly
- Approx. 35–69%
- Bottom light is lit up; middle light flashes slowly
- Approx. 70–90%
- Bottom and middle lights are lit up; top light flashes slowly
- Approx. 91–100%
- Bottom, middle, and top lights are lit up
Once the battery is fully charged, the battery charging state indicator switches off after 10 minutes to conserve energy.
You can display the charging state for 4 seconds at any time by pressing the On/Off switch on the Comfort handle.
If the battery has not been used for a long time and has run down, it will go into safe mode. As a result, the battery charging state indicator will only respond after approximately 30–60 minutes when charging in the PowerUnit.
Battery charging state indicator (while in use) (Fig. 24)
The battery charging state is displayed on the PowerUnit.
- Approx. 100–70%
- Top, middle, and bottom lights are lit up
- Approx. 69–35%
- Middle and bottom lights are lit up
- Approx. 34–11%
- Bottom light is lit up
- Approx. 10–0%
- Bottom light flashes slowly
Using the accessories supplied (Fig. 25)
1 Upholstery nozzle
- Accessory for cleaning upholstery, mattresses, and cushions.
2 Crevice nozzle
- Accessory for cleaning in folds, crevices, or corners.
3 Dusting brush
- Accessory for vacuuming skirting boards, carved furniture, or ornaments.
- The head can be swiveled to adjust the angle.
4 Accessories holder
- For storing the three-piece accessory set.
Symbols on the holder show where to attach the different accessories. You can fit the accessories holder to the wall bracket (see “Installation and connection – Connecting the accessories holder”).
Electrobrush Multi Floor XXL (Fig. 26)
Follow the flooring manufacturer’s cleaning and care instructions.
The Electrobrush can be used for all normal cleaning of carpets, rugs, and hard flooring.
Tip: The suction wand is not the best option for cleaning carpeted stairs.
Miele offers a range of suitable accessories for many Special Modes (see “Optional accessories”).
Electro Compact handheld brush (Fig. 27)
(depending on model)
Follow the flooring manufacturer’s cleaning and care instructions.
The handheld brush is particularly suitable for intensive cleaning of upholstery and car seats.
Tip: The suction wand is not the best option for cleaning upholstery or car seats.
Additional battery and charger cradle (Fig. 28)
(depending on model)
Using the additional battery doubles the amount of time the vacuum cleaner can be used for.
Before charging for the first time, please note the information in “Installation and connection – General battery information”.
- Once the battery has been charged twice, push it into the charger cradle until it audibly clicks into place.
- Insert the plug into an electrical outlet.
The charging process will start. The battery charging state indicator flashes on the left.
You can find out more about the battery charging state indicator in “Installation and connection – Battery charging state indicator”.
If you place the run-down battery in the charger cradle straight after use, it will only start charging once the battery has cooled down.
The cooling process can take up to 60 minutes. The battery charging state indicator on the charger cradle will not respond during this time.
Use
Switching on and off
- Pull the charger out of the charging socket on the battery if you have charged the battery directly.
- If you have charged the battery in the wall bracket, take the vacuum cleaner out of the wall bracket.
- Press the On/Off switch on the Comfort handle
 .
.
 .
.Regulating the suction power
The suction power can be regulated to suit the type of flooring being cleaned. Reducing the suction power reduces the amount of effort required to maneuver the Electrobrush.
There are 3 power levels to choose from on the Comfort handle:
1 Lowest power level for light soiling
2 Medium power level for normal soiling
Max. Highest power level for heavy soiling
The floor covering detection function is activated in the medium and highest power levels.
The Electrobrush power output is automatically set to the optimum level based on the type of flooring – this can lead to a change in the operating noise.
Illuminating the work area
(depending on model)
The Electrobrush on your vacuum cleaner is equipped with BrilliantLight to illuminate the work area.
Self-standing function for short pauses in vacuuming
(For safety reasons, this function can only be used when the PowerUnit is fitted at the bottom of the vacuum cleaner)
If you are vacuuming with the PowerUnit fitted at the bottom of the vacuum cleaner, you can easily interrupt operation while the appliance is switched on.
- Swing the vacuum cleaner forwards until the Electrobrush connector audibly clicks into place.
The vacuum cleaner stays securely upright, the Electrobrush switches itself off and the battery is conserved.
If you then unlock the connector on the Electrobrush, the Electrobrush will switch on again.
Maintenance
Replacement parts are available from your Miele dealer or through Miele Service.
Emptying the dust container (Fig. 30–34)
Empty the dust container before the dust has reached the max marking on the dust container.
- Turn the lid of the dust container in the direction of the arrow as far as the first stop.
- Remove the dust container upward.
The contents of the dust compartment can be disposed of with the normal household trash, providing it contains general household dust only.
- Hold the dust container close to the trash can so that as little dust as possible excapes.
- Turn the lid of the dust container in the direction of the arrow as far as the next stop.
The flap at the bottom of the dust container will open and the dust will fall out.
- Turn the lid of the dust container back to its original position.
- Close the flap
- Slide the dust container handle along the guide line and down on to the PowerUnit connector from above until it audibly clicks into place.
Cleaning the fine dust filter (Fig. 35)
The fine dust filter is located in the dust container.
Clean the fine dust filter at least once a month.
- Remove the dust container.
- Lift the fine dust filter upwards to remove it
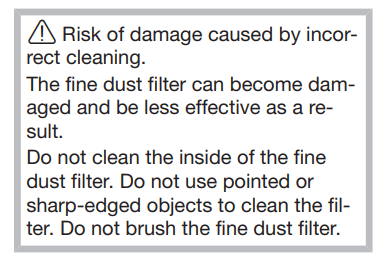
- Hold the fine dust filter over a bin.
- Carefully knock the fine dust filter with the rubberized lower edge.
- Turn the fine dust filter slightly while you do this to free the dirt from all of the crevices.
- Once it is clean, replace the fine dust filter in its position in the dust container.
- Replace the dust container on the PowerUnit connector.
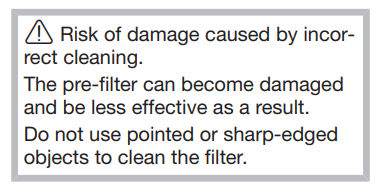
Cleaning the pre-filter (Fig. 36–39)
The pre-filter is located in the dust container.
Clean the pre-filter when required
- Remove the dust container.
- Remove the fine dust filter (Fig. 35).
- Empty the dust container over a trash can and lift the pre-filter upwards to remove it.
- Unlock the motor protection filter by turning it counterclockwise and lift it upwards to remove it.
- Carefully knock the dust out of the pre-filter over a bin.
Tip: Use a tool like a fine cleaning brush to clean the inside of the pre-filter thoroughly. You do not need to clean the motor protection filter.
It can be removed so that the inside of the pre-filter is easier to reach.
- After cleaning the pre-filter, place the motor protection filter back into the pre-filter securely, making sure it is properly positioned.
- Lock the motor protection filter by turning it clockwise as far as it will go.
- Replace the pre-filter in the dust container
- To do this, line up the guide lines on the two sections and turn the dust container lid back to its original position.
- Close the cover at the bottom of the dust container, making sure it clicks into place.
- Replace the fine dust filter.
- Replace the dust container on the PowerUnit connector.
Cleaning the dust container
Clean the dust container as required.
- Remove the dust container.
- Empty the dust container over a trash can and lift the pre-filter upwards to remove it (Fig. 36).
- Clean the dust container using water and liquid dish soap.
- Dry the dust container carefully.
- Replace the pre-filter in the dust container.
- Replace the dust container on the PowerUnit connector (Figs. 38 + 39).
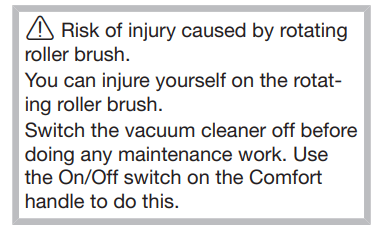
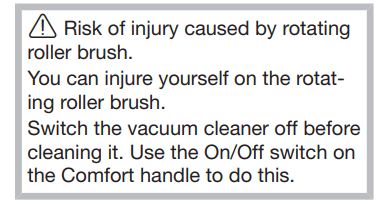
Cleaning the Electrobrush/handheld brush (Fig. 06)
(The availability of the handheld brush depends on the model)
- Separate the Electrobrush/handheld brush from the vacuum cleaner connection.
Removing threads and hairs (Fig. 40)
- Place the Electrobrush/handheld brush upside down on a level, clean surface.
- Use a pair of scissors to cut any threads or hairs that have wound themselves around the roller brush. To guide the scissors, move along the guide track on the roller brush.
Then run the vacuum cleaner to vacuum up the cut threads and hairs.
Removing the roller brush (Fig. 41)
(Not possible with the handheld brush)
You can take the roller brush out of the Electrobrush in order to remove stubborn soiling and clean the inside of the Electrobrush.
- Unlock the flap on the side of the Electrobrush so that the symbol becomes visible.
- Lift the flap up as far as it will go.
- Remove the roller brush.
- Clean the roller brush and remove any stubborn dirt inside the Electrobrush.
- Reassemble the Electrobrush in reverse order.
Replacing the rechargeable battery
An original Miele AP01 lithium-ion rechargeable battery (HX LA) is required.
Follow the instructions regarding the handling and disposal of rechargeable batteries found in the following sections: “IMPORTANT SAFETY INSTRUCTIONS”, “Caring for the environment”, and “Installation and connection” (“General battery information”).
Frequently Asked Questions
With the help of the following guide minor faults in the performance of the machine, some of which may result from incorrect operation, can be remedied without contacting the Service Department.
This guide may help you to find the reason for the fault, and how to correct it.
The cleaning performance is poor.
The dust container is full.
- Empty and clean the dust container.
The Electrobrush is dirty/blocked.
- Clean the roller brush and the inside of the Electrobrush (see “Maintenance – Cleaning the Electrobrush”).
Cleaning performance is reduced.
The fine dust filter is dirty.
- Clean the fine dust filter (see “Maintenance – Cleaning the fine dust filter”).
The pre-filter is dirty.
- Clean the pre-filter (see “Maintenance – Cleaning the pre-filter”).
The Electrobrush switches itself off.
The Electrobrush is overloaded – this can happen on surfaces like deep-pile carpet.
- Switch the vacuum cleaner off and switch it on again at a reduced suction power level. Use the On/Off switch on the Comfort handle to do this.
The operating noise is changing during vacuuming.
The floor covering detection function is activated in the medium and highest power levels. The Electrobrush power rating is automatically set to the optimum level based on the type of flooring.
- The noise is not unusual – the vacuum cleaner is functioning normally.
The vacuum cleaner does not start when it is switched on.
There is no battery inserted or the battery is inserted incorrectly.
- Insert the battery or check how the battery is positioned (see “Installation and connection – Inserting the battery”).
The rechargeable battery is not sufficiently charged.
- Charge the battery exactly as described in these operating instructions (see “Installation and connection – Charging the battery”).
An original Miele battery has not been inserted.
- Insert an original Miele AP01 lithium-ion rechargeable battery (HX LA).
The charger is still plugged in.
- Pull the plug out of the charging socket on the battery
Fault messages

Fault messages are displayed with a quick flashing light on the battery charging state indicator on the PowerUnit.
Bottom light flashes quickly
Internal system fault
- Remove the battery, wait for 10 seconds, reinsert it and charge it.
Bottom and middle lights flash quickly
“Battery overheating” error
- Wait for approximately 30 minutes before switching the vacuum cleaner back on again.
Middle and top lights flash quickly
“Battery not recognized” error
- Insert an original Miele AP01 lithium-ion rechargeable battery (HX LA).
Top light flashes quickly
“Comfort handle not recognized” error
- Remove the Comfort handle and reconnect it (see “Installation and connection – Connecting the Comfort handle”).
- Remove the battery, wait for 10 seconds, then reinsert it.
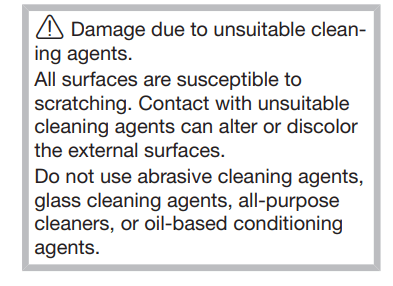
Cleaning and care
Vacuum cleaner and accessories
Follow the special cleaning instructions for the dust container in the “Maintenance” section.
The vacuum cleaner and all plastic accessories can be cleaned with a commercially available cleaner suitable for plastic.
Customer Service
Contact in case of fault
In the event of a fault which you cannot remedy yourself, please contact your Miele dealer or Miele Service.
Contact information for Miele Service can be found at the end of this document.
Optional accessories
Follow the flooring manufacturer’s cleaning and care instructions.
We recommend using only genuine Miele accessories bearing the “ORIGINAL Miele” logo on the packaging. Only these will guarantee the optimum performance of your vacuum cleaner and the best possible cleaning results.
Please note that faults and damage caused by use of accessories which do not bear the “ORIGINAL Miele” logo are not covered by the vacuum cleaner warranty.
Purchasing accessories
Original Miele accessories are available from the Miele Webshop, Miele Service, and your Miele dealer.
Original Miele accessories are identified by the “ORIGINAL Miele” logo on the packaging.

Certain models are supplied as standard with one or more of the following accessories.
Electro Compact handheld brush (HX SEB)
For intensive cleaning of upholstery and car seats.
Radiator brush (SHB 30)
For dusting radiators, narrow shelves and crevices.
Mattress tool (SMD 10)
For vacuuming upholstery, mattresses, cushions, curtains, covers, etc.
Crevice nozzle, 12″ (300 mm) (SFD 10)
Extra long crevice nozzle for cleaning in folds, crevices and corners.
Crevice nozzle, 22″ (560 mm) (SFD 20)
Flexible crevice nozzle for vacuuming hard to reach places.
AP01 additional battery (HX LA)
For doubling the amount of time the vacuum cleaner can be used for.
LS03 (HX LS) charger cradle
For charging the additional battery independently of the appliance, i.e., while the appliance is in use.
See other models: CVA4066 K1803SF HS07 DA 2518 DA6698D
Бесплатная доставка
По Москве и большинству городов России
Подробнее
Бесплатное подключение
Профессионально установим технику на готовые коммуникации
Подробнее
Бесплатное хранение
До 365 дней — купите сегодня, а получите когда удобно
Подробнее
Простой возврат и обмен
Что-то не так? Обменяем товар или вернем деньги
Подробнее