
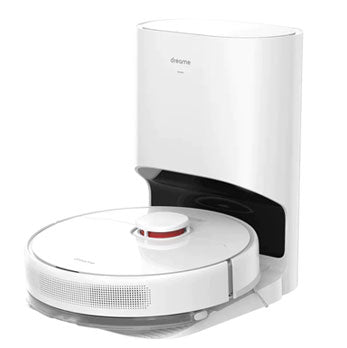
Dreame T30 Cordless Stick Vacuum — Use Manual — Use Guide PDF.
Documents: Go to download!
- Owner’s manual — (English, French, Spanish, German, Arabic, Hebrew — Israel, Italian, Russian)

- Product Overview
- Installation
- Charging
- How to Use
- Care & Maintenance
- Troubleshooting
Table of contents
Owner Manual Vacuum Cleaner
Product Overview
Accessories

Flexible Adapter

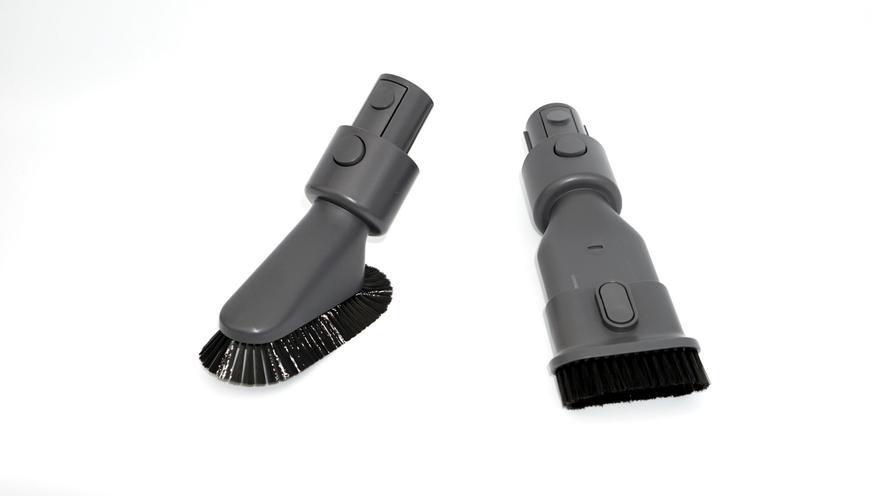
2-in-1 Brush Nozzle

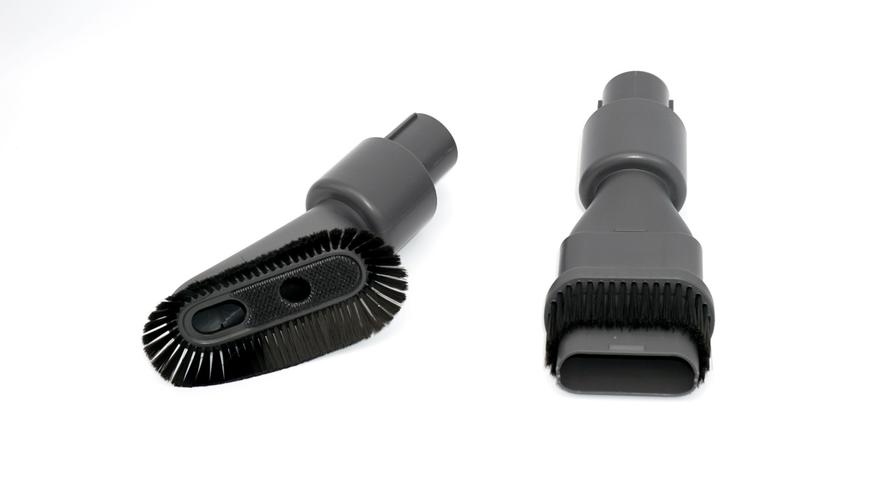
Soft Dusting Brush

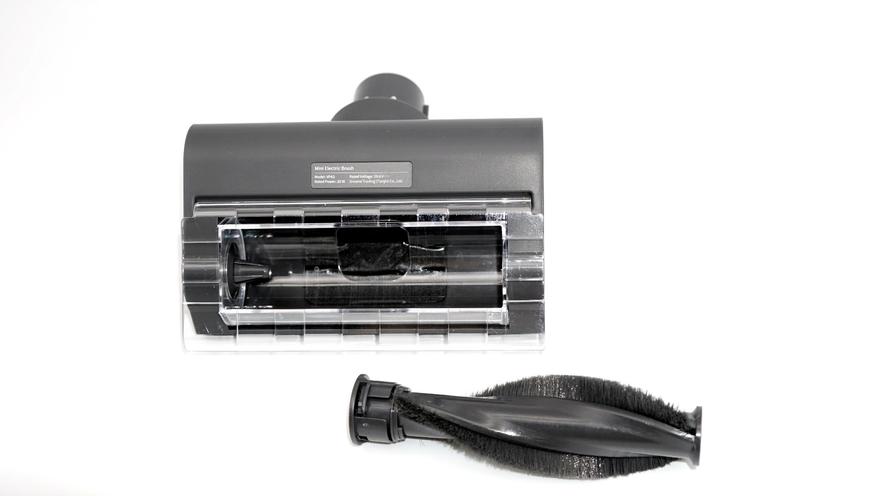
Mini Electric Brush

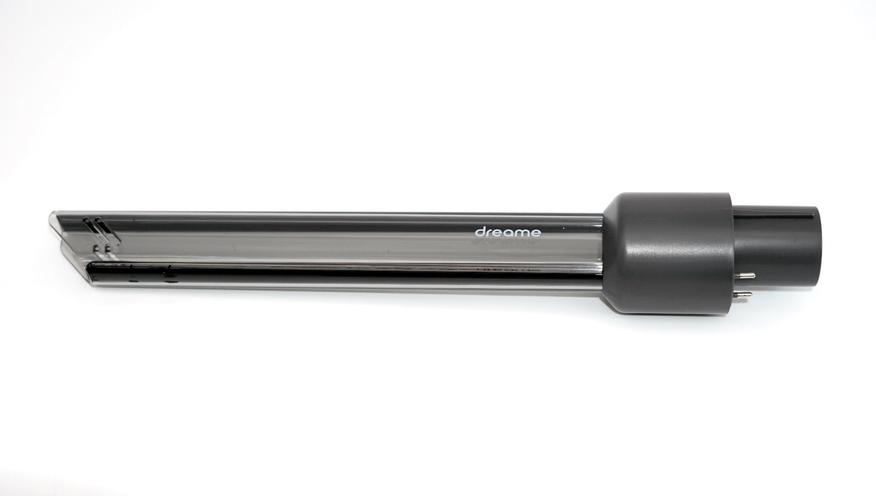
Carbon Fiber Rod

Extension Hose

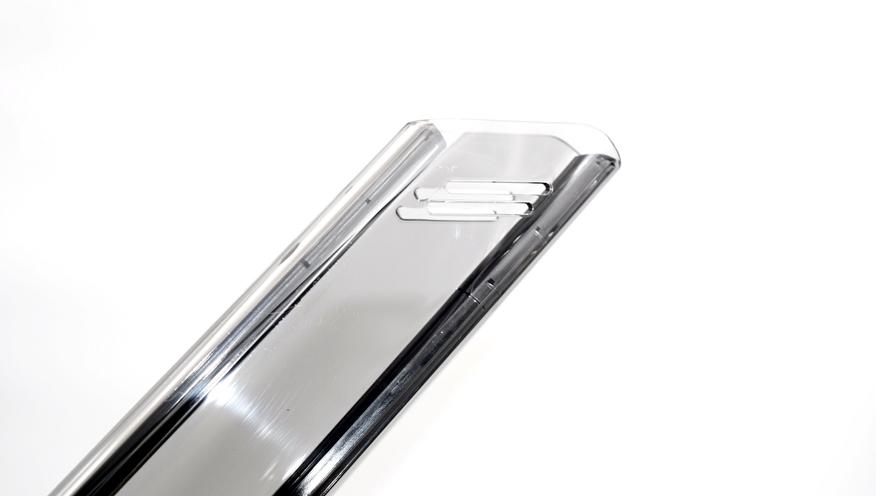
LED Crevice Nozzle

Charger

2-in-1 Charging & Storage Mount (Including screws ×2, wall plugs ×2, and mounting template sticker )

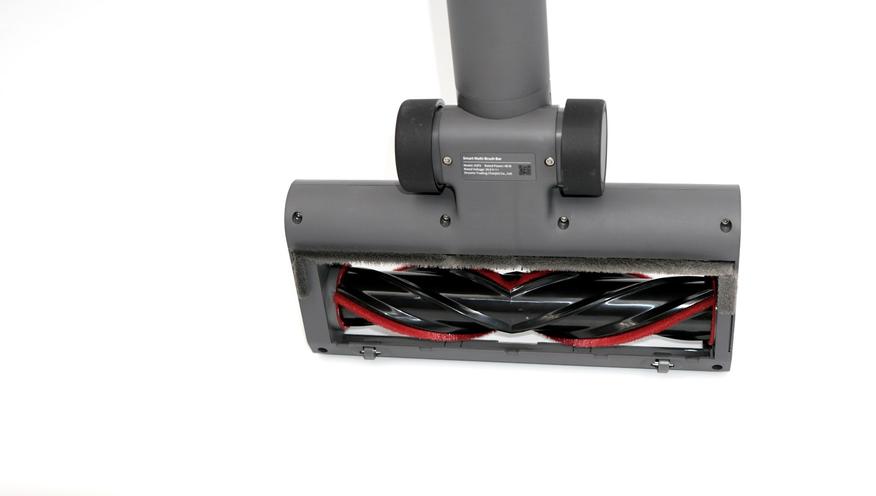
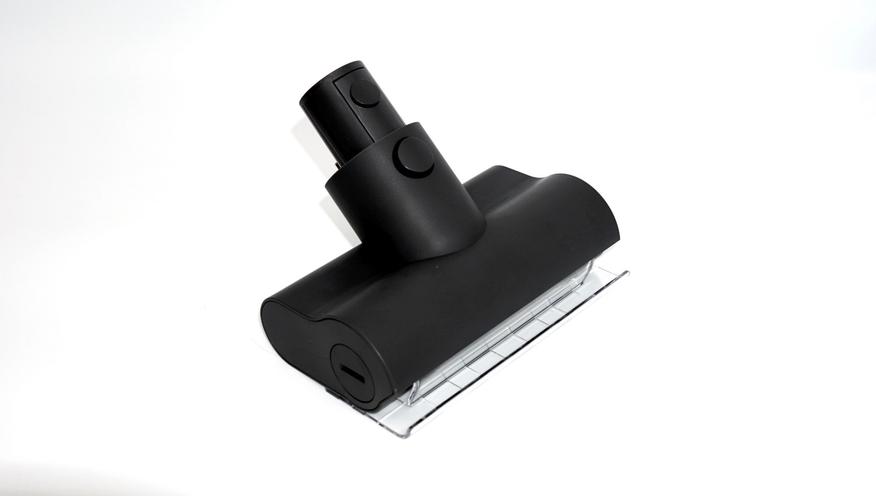
Smart Multi-Brush Bar
Note: The images in this manual are for illustrative purposes only. The actual product may differ.
Component Names

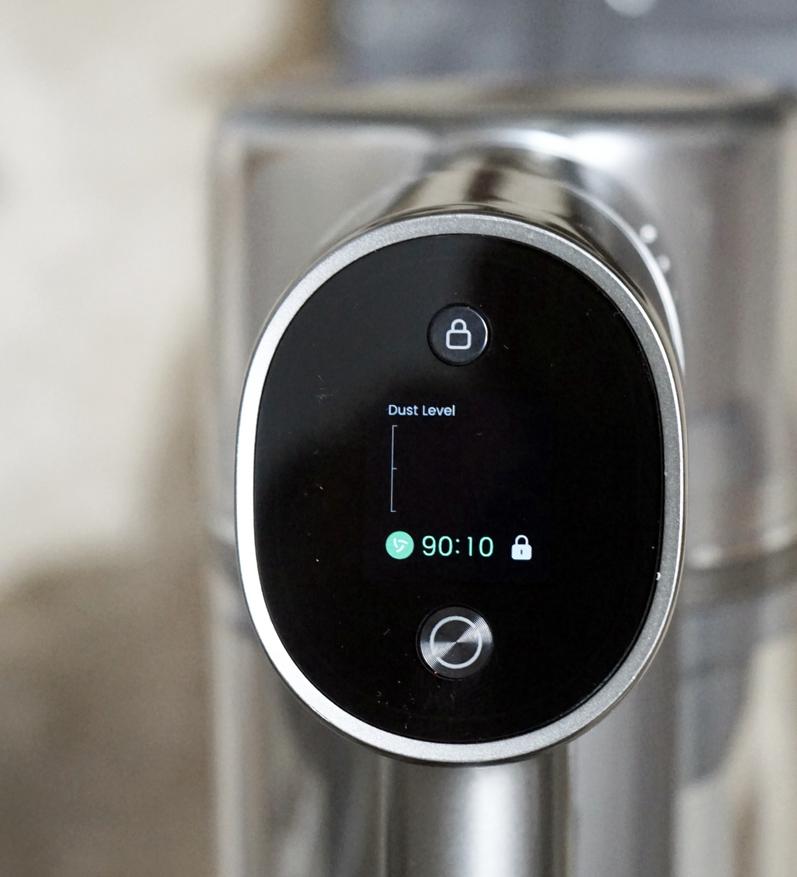
Introduction of Display Screen

Note:
- The color of dust level indicator changes with the amount of inhaled dust.
- Residual time is for reference only and it may be different from the actual time.
Installation
Vacuum Installation Diagram

Accessories Installation Diagram

Accessories Installation Diagram

2-in-1 Charging & Storage Mount Installation Diagram
(The 2-in-1 charging & storage mount is an optional accessory. You can install it based on your needs.)
Note: The 2-in-1 charging & storage mount should be installed in a cool, dry place with an electrical outlet nearby. Prior to installing, ensure that there are no electrical wires or pipes in the space directly behind where the mount will be installed.
- The bottom of the mounting template sticker should be level and at least 103cm from the ground. The top should have at least 30cm* of clearance above it.
- Use a power drill with an 8mm drill bit to drill a hole into each marker on the mounting template sticker, then insert a wall plug into each hole.
- Align the locating holes on the mount with the holes on the wall. Fasten it to the wall with the included screws.
*30cm: Leave enough space just in case you may need to purchase the replaceable battery in the future.

Charging
Fully charge the vacuum before using it for the first time.
Note:
- A full charge will take approx. 4 hours.
- Vacuuming in Turbo Mode for a prolonged period will cause the battery to heat up, which increases charging time. Allow the vacuum to cool down for 30 minutes before charging it.
Charging Methods
Charging the vacuum with the charger
Charging the vacuum on the charging mount
Battery Status Display
Display Screen
The number on the display screen represents the current battery level in a percentage during charging. When the number becomes 100, the battery is fully charged.

LED Battery Status Indicator
When charging, the indicators blink white. When the charging is completed, the indicators keep solid white.

Note: Once the vacuum is fully charged, the indicator will turn off after 5 minutes, and the vacuum will enter energy-saving mode.
How to Use
Setting Language
Press and hold the button  for 3 seconds to enter the menu interface. Click
  the button to swtich to «Language». Press the button for 1 second to enter the language selection interface. Click to scroll through the language list, select a language, and then press
  and hold for 3 seconds to save your setting.

Cleaning Record
Press and hold the button  for 3 seconds to enter the menu interface. Click the button
  to swtich to «Cleaning Record» and press the button
  for 1 second to enter the cleaning record interface. Then you will see the cleaning record of the last 7 days.

Note:
- The display screen will return to the main page if there is no operation for more than 15 seconds.
- To exit the menu interface, click the button
 to select «Exit».
 to select «Exit».
Switching Suction Level
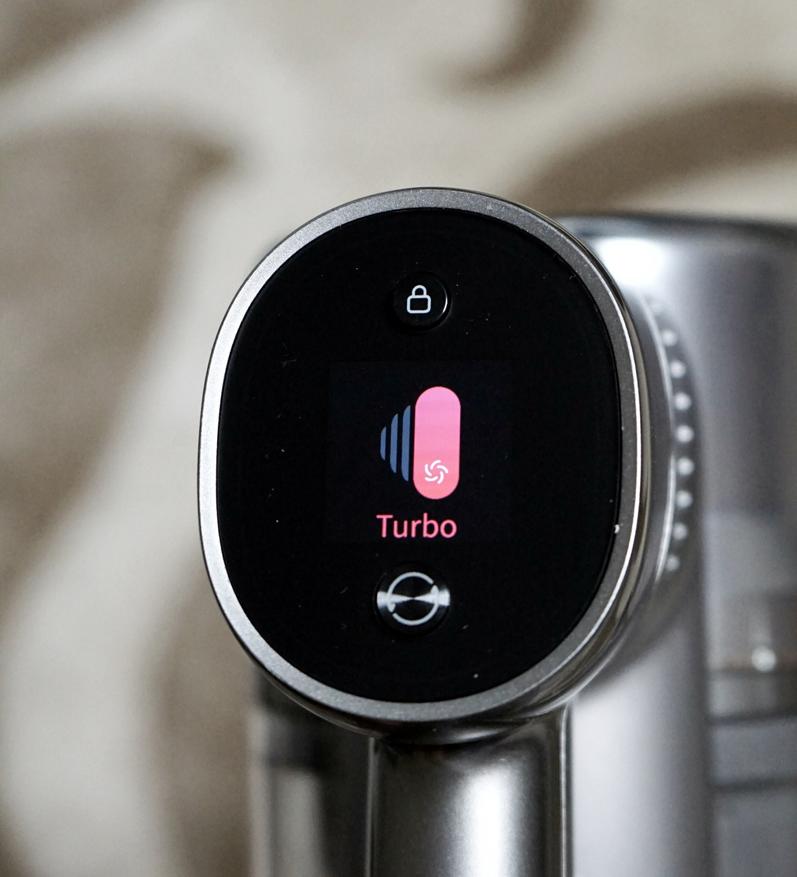
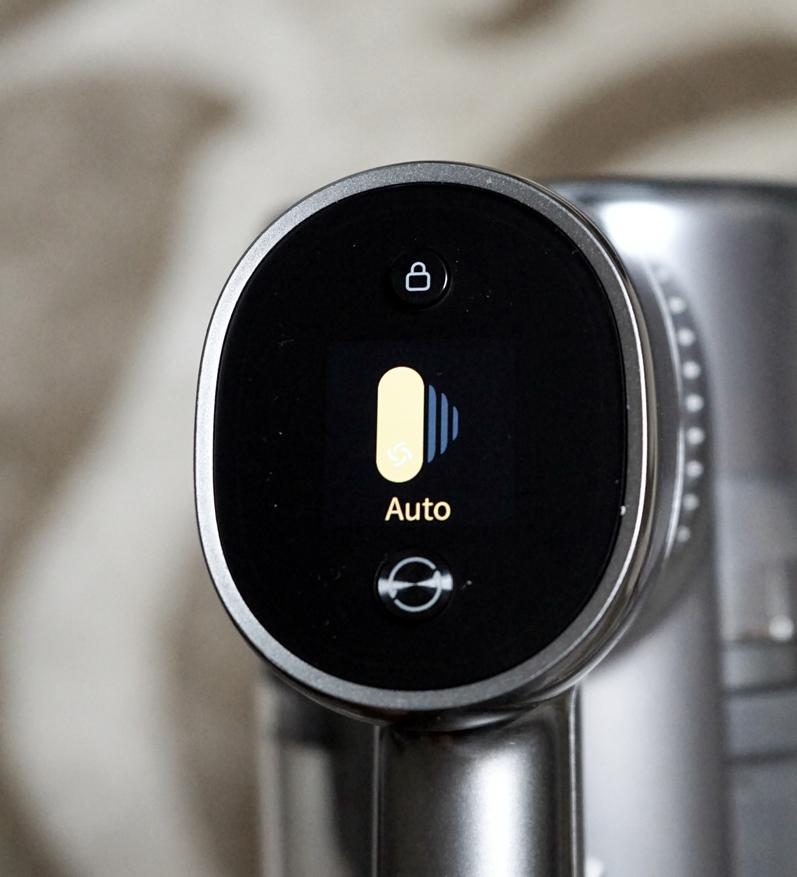
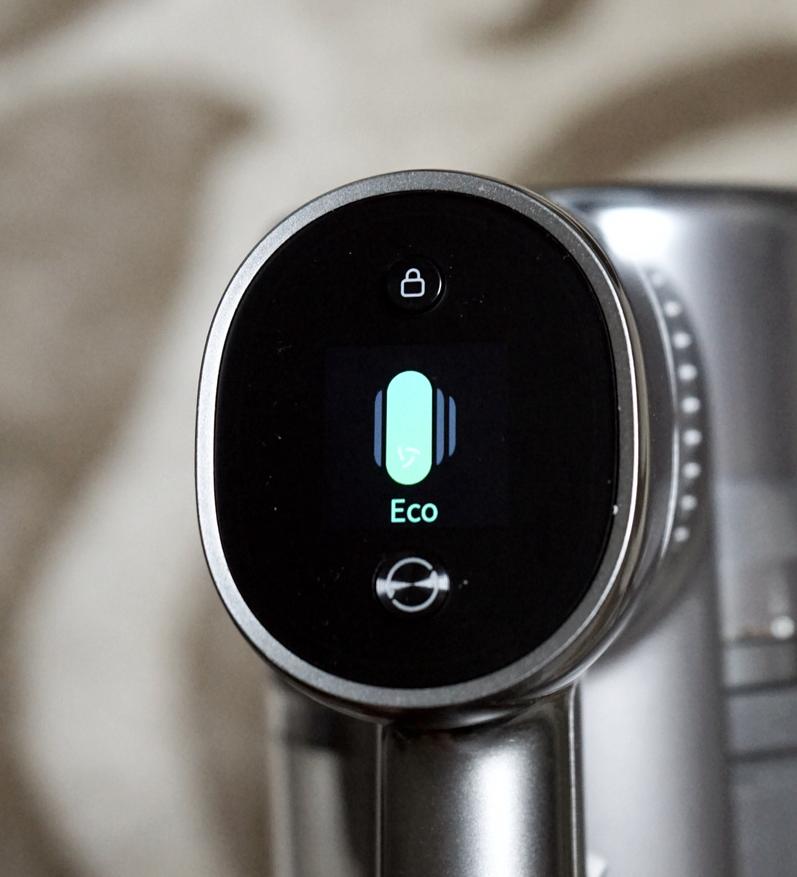
Press the button  to switch between four suction levels of auto, eco, med and turbo. The corresponding suction level will be highlighted on the display screen.
The color of dust level indicator changes with the amount of inhaled dust. When the smart multi-brush bar is attached, the vacuum will automatically switch the suction level between the floor/tile and the carpet.
Note: Stop the vacuum at any time while cleaning. It will continue to use the last selected suction level when starting again.
Working Methods
Select from two working methods for the vacuum, which can be selected based on your own needs.
When the vacuum is running, it will monitor the amout of inhaled dust within 1 second. The amount of dust will be displayed by the color of dust level monitoring curve on the screen in real time.
Method 1: Discontinuous Cleaning Mode
Press and hold the switch of the vacuum to enable this mode, and release it to stop immediately.

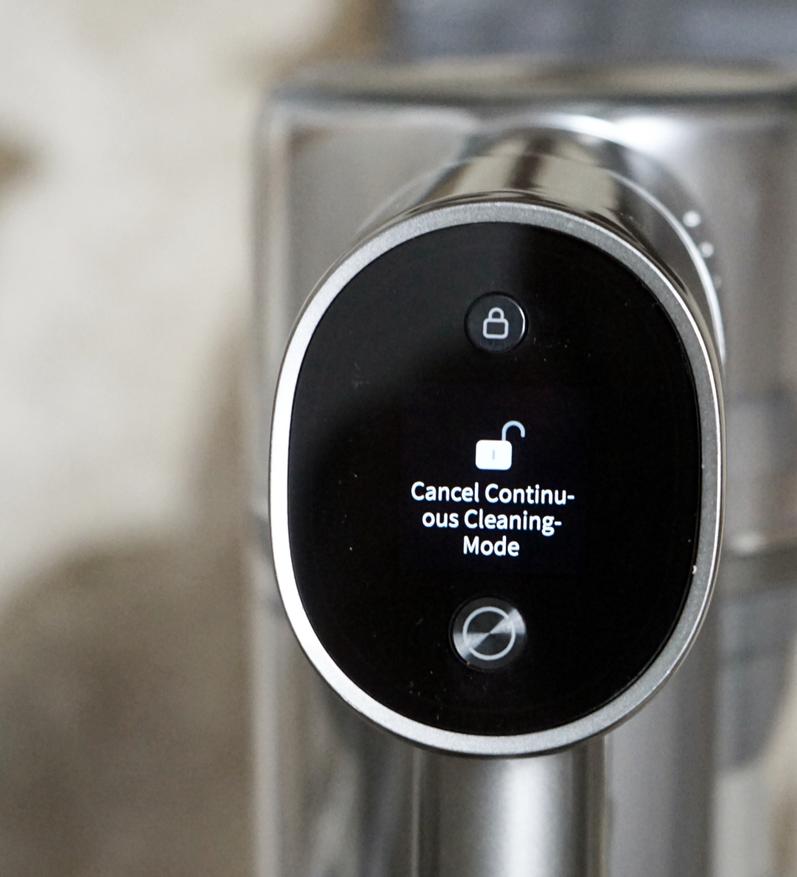
Method 2: Continuous Cleaning Mode (Electronic Lock)
Click the electronic lock key to switch to Continuous Cleaning Mode, and then briefly press the on/off switch to keep the vacuum in Continuous Cleaning Mode.
Use the electronic lock to free your fingers from fatigue caused by holding the switch.

Note:
- In this mode, briefly press the on/off switch to suspend the operation or start again and the working mode of the vacuum will not change.
- Click the electronic lock again to quit Continuous Cleaning Mode.
Using Different Accessories
Smart Multi-Brush Bar
For cleaning floors such as marble, tile, and low pile carpet. When Auto Mode is activated, the vacuum will automatically adjust its suction level depending on the surface type.
Note: The smart multi-brush bar can be attached directly to the vacuum.

Mini Electric Brush
For vacuuming dirt, pet hair, and other stubborn debris from sofas, bedding, and other fabric surfaces.
Note: It is not recommended to vacuum on fragile surfaces, such as silk.

2-in-1 Brush Nozzle
For vacuuming dust from curtains, keyboards, ceilings, sofas, vehicle interiors, coffee tables, etc.

Soft Dusting Brush
Suitable for vacuuming on LCDs, keyboards, lampshades, curtains, shutters and other surfaces of fragile objects.

Extension Hose
It is suitable for vacuuming the corners that are not easily accessible such as drawers, cars interior, and in the bottom of sofa when used with soft dusting brush or 2-in-1 brush nozzle.

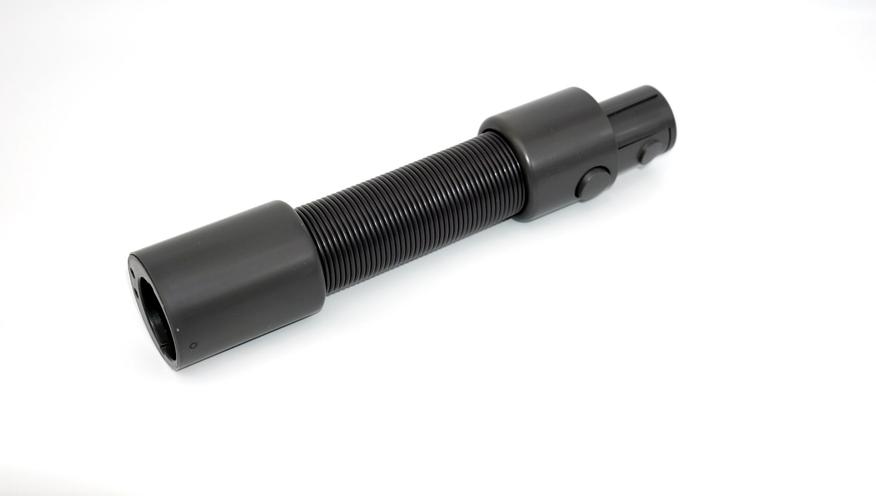
Flexible Adapter
Bending and extending the rod with one click can easily reach under low-lying furniture, such as bed and sofa.

LED Crevice Nozzle
The nozzle is equipped with a thin suction opening and LED light. It is suitable for vacuuming the debris in the narrow places.

Note:
- If any rotating part becomes stuck, the vacuum may shut off automatically. Remove any trapped objects so the device can function normally.
- When the battery becomes overheated, the vacuum will automatically shut off. Wait until the battery temperature returns to normal, then the vacuum will work normally.
Care & Maintenance
Tips:
- Always use genuine parts to keep your warranty from becoming void.
- If the filter or nozzle becomes clogged, the vacuum will stop working shortly after being turned on. To restore normal functions, clean the filter and/or nozzle.
- If the vacuum is not be used for an extended period, fully charge it, unplug its charger, and store it in a cool, low-humidity environment away from direct sunlight. To avoid over-discharging the battery, recharge the vacuum at least once every three months.
Cleaning the Vacuum
Wipe the vacuum with a soft dry cloth.
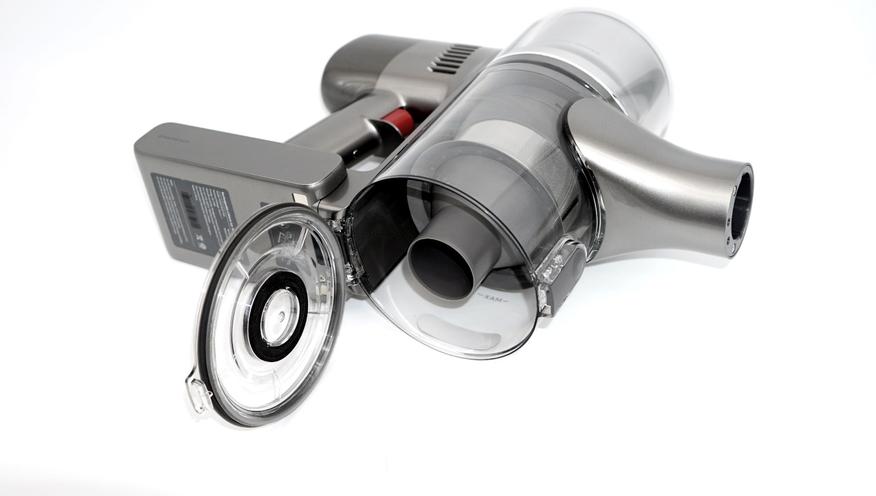
Cleaning the Dust Cup, Pre-Filter, and Cyclone Assembly
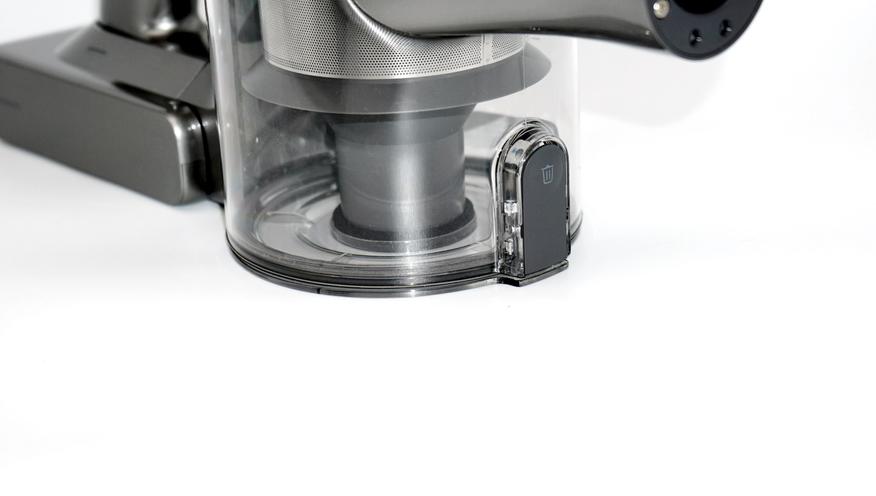
The vacuum’s cleaning ability will be reduced if the dust cup is filled to the «MAX» mark. To regain performance, empty the dust cup in a timely manner. Before emptying the cup, make sure the vacuum is disconnected from the power, and do not press its power button.
- Press the dust cup bottom cover release button, then empty the contents.
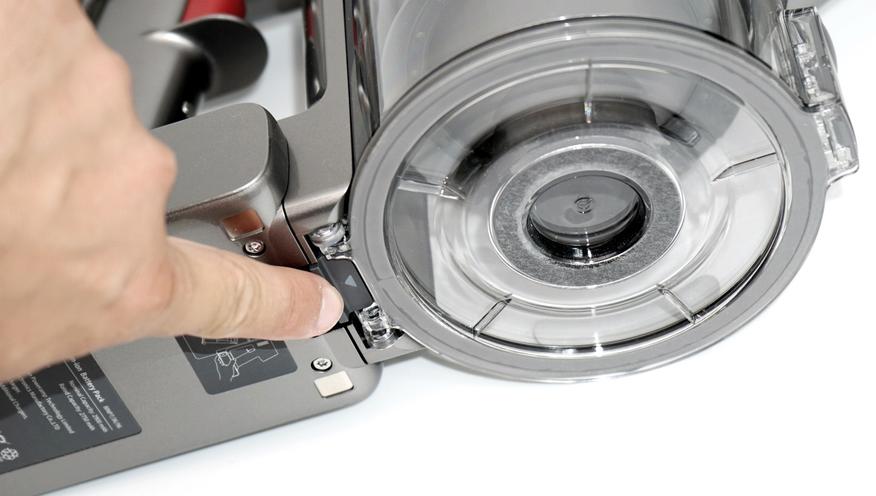
- Push the dust cup release switch in the direction indicated by the arrow, then gently remove the dust cup from the vacuum.
- Remove the pre-filter first, then lift the handle of the cyclone assembly and turn it counterclockwise until it stops, then pull to lift out the cyclone assembly.
- Wipe the dust cup with a soft wet cloth. Pay attention to wring out the discloth before using.
WARNING: To reduce the risk of electric shock, do not rinse the dust cup with water. - Rinse the cyclone assembly and pre-filter until they are clean. After washing, air dry for at least 24 hours .


Note: It is recommended to clean the pre-filter at least once every 3 months and the cyclone system at least once every 6 months.
Installing the Dust Cup, Pre-Filter, and Cyclone Assembly
- Insert the cyclone assembly vertically into the dust cup, and make sure that the handle of the cyclone assembly line up with the slot on the left side of the dust cup. Turn the handle clockwise until it locks, then flip the handle down.
- Place the pre-filter with its front side facing up into the cyclone assembly.
- Slightly tilt the dust cup so its slot aligns with the clip on the vacuum. Then gently push the dust cup until it clicks into place.


Cleaning the Filter
It is recommended to clean the filter once every 4 to 6 months.
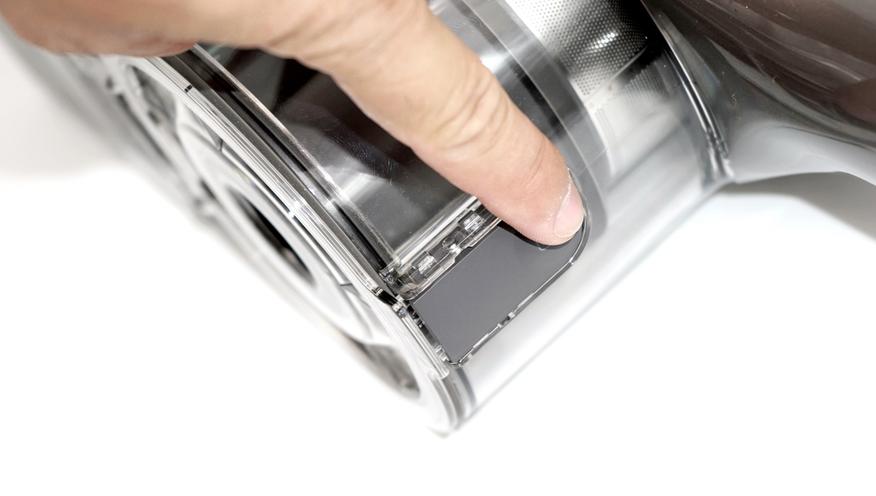
- Remove the dust cup as shown in the figure.
- Remove the filter from the vacuum by pulling it down in the direction shown in the figure.
- Clean the filter with clean water. Make sure you rotate the filter 360° to thoroughly and remove all dust caught in the filter. Lightly tap the filter several times to remove any excess dirt.
- Allow the filter to air dry for 24 hours.


Note:
- Only use clean water to wash the filter. Do not use detergent.
- Do not attempt to clean the filter with a brush or finger.
Installing the Filter
- Insert the filter into the vacuum and gently press down, as illustrated.
- Reinstall the dust cup.


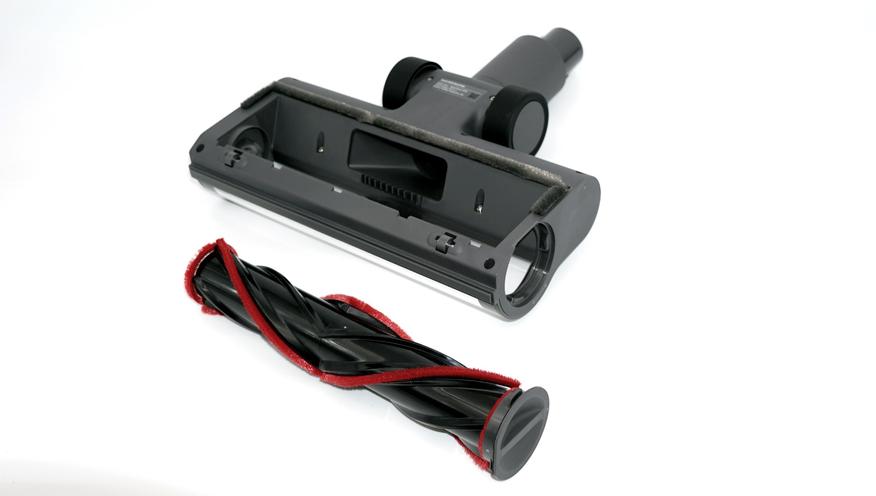
Cleaning the Smart Multi-Brush Bar
- Turn the lock counterclockwise until it stops, then remove the roller brush from the smart multi-brush bar.
- Use scissor to cut off the hairs and fibers that get stuck on the brush bar head. Wipe the dust from the notch and transparent cover with a dry cloth or paper towel. Thoroughly dry before use.
- When it is dirty, rinse the roller brush with clean water until it is clean.
- Stand the roller brush upright for at least 24 hours until it is fully dry.


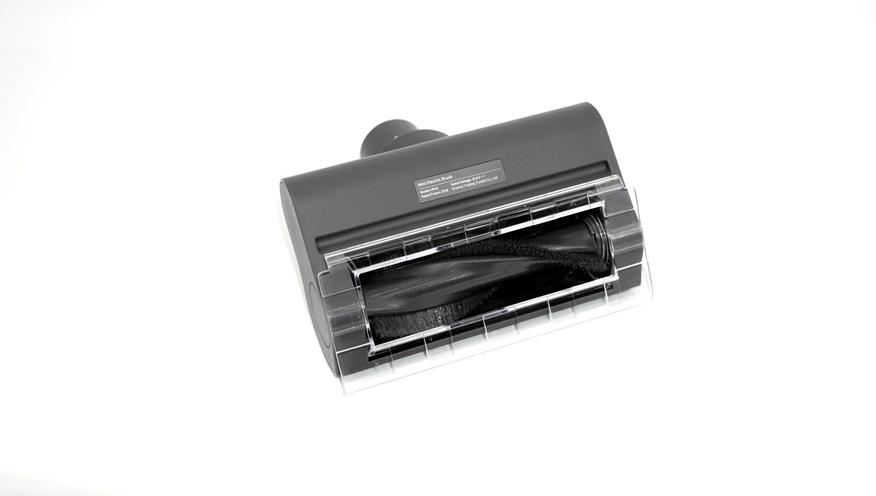
Cleaning the Mini Electric Brush
- Use a coin as illustrated to rotate the lock counterclockwise until you hear a click.
- After unlocking the mini roller brush, remove it from the mini electric brush, then rinse and clean the brush head.
- Stand the mini roller brush upright in a well-ventilated area for at least 24 hours until it is fully dry.
- Once the mini roller brush is dry, reinstall it by following the disassembly steps in reverse.


Battery Pack
The vacuum contains a removable rechargeable lithium-ion battery pack which has a limited number of recharge cycles. After extended use, the battery pack may no longer hold a charge. If this happens, it means the battery pack has reached the end of its life cycle and needs to be replaced.
- Press down the battery pack release button and slide the battery pack to the right, as illustrated, to remove it.
- Install the new battery pack.

Troubleshooting
If the vacuum is not working properly, please refer to the table below.
| Errors | Possible Causes | Solutions |
| Vacuum does not work. | Vacuum is out of battery or low on power. | Fully charge the vacuum, then continue to use it. |
| Overheat protection mode triggered by a blockage. | Clean the suction openings or air duct. Wait until the vacuum cools down, then reactivate it. | |
| The suction opening or air duct is blocked. | Clear any blockage from suction opening or air duct. | |
| Weak suction force. | Dust cup is full and/or filter assembly is clogged. | Empty the dust cup and clean the filter assembly. |
| Attachment is blocked. | Clear any blockage in the attachment. | |
| Motor is making a strange noise. | Main suction opening or carbon fiber rod is blocked. | Clear any blockage in the main suction opening or extension rod. |
| The battery indicator does not light up when charging. | The charger does not plug into the vacuum well. | Check whether the charger is properly plugged into the vacuum. |
| The battery is fully charged and went into sleep mode. | The vacuum can be used normally. | |
| If the problem persists after ruling out the above two possibilities. | Please contact the after- sales service department for maintenance. | |
| The vacuum charges slowly. | Battery temperature is too low or too high. | Wait until the battery’s temperature returns normal, then continue to use the vacuum. |
If you need to pay attention to any abnormality during the use of the product, a prompt will be shown on the screen. You should follow the instructions on the screen to keep the performance normal.
| Error Icon | Error Message | Solutions |
|---|---|---|
 |
Battery overheating | Please wait and continue to use after motor temperature is normal. |
 |
Roller brush stuck | Refer to the maintenance guide [Cleaning the Smart Multi-Brush Bar] section to clean the fiber material and hairs wrapped around the roller brush. |
 |
Air duct blocked | Check whether the dust cup, carbon fiber rod, and smart multi-brush bar are blocked. |
 |
Error | Please contact the after-sales department for maintenance. |
 |
Low battery | Recharge soon. |
 |
The battery runs out | Recharge soon. |
 |
Filter is expiring | Please replace the filter in time. |
 |
Filter uninstalled | Ensure that the filter and pre-filter are installed correctly. |
 |
Replace the filter | Refer to the maintenance manual [Cleaning Filter] section to remove the filter and replace it. After replacing the filter, press and hold the button  for 1.5 seconds to enter the countdown to reset the filter, then hold the button for another 5 seconds until for 1.5 seconds to enter the countdown to reset the filter, then hold the button for another 5 seconds until  appears on the screen. appears on the screen. |
![]()
Login


Global (EN)
-
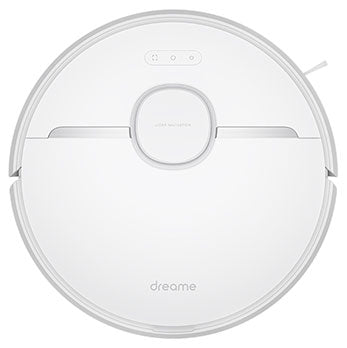
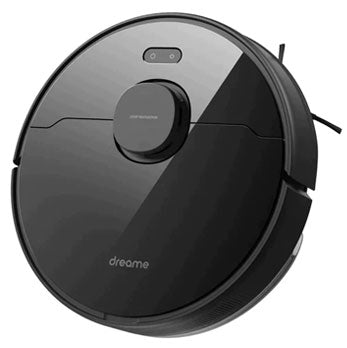
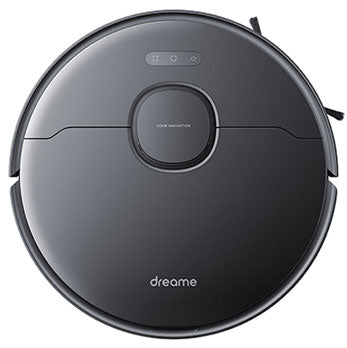
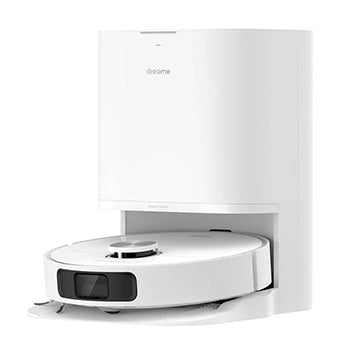
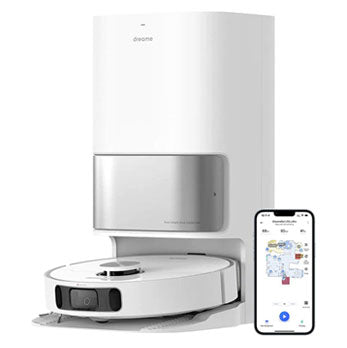
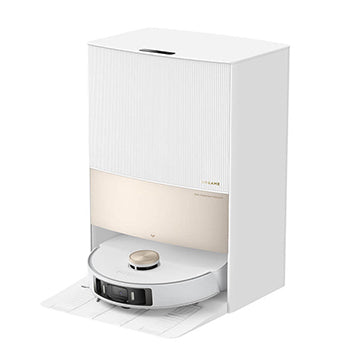
Robot Vacuum
- L20 Ultra
- L10s Ultra
- L10 Ultra
- L10s Pro
- L10 Pro
- L10 Prime
- W10 Pro
- W10
- Z10 Pro
- D10s Plus
- D10s Pro
- D10s
- D10 Plus
- D9 Pro
- D9 Max
- D9
- F9
-
Wet and Dry Vacuum
- H12 Dual
- H12 Pro
- M12
- H12
- H11 Max
- H11 core
- H11
-
Cordless Stick Vacuum
- R20
- R10 Pro
- R10
- P10 Pro
- P10
- T30 Neo
- T30
- T20
- T10
- V12 Pro
- V11
- V10
- V9
-
Hair Dryer
- Hair Glory
- Hair Artist
- Hair Gleam
-
Roboticmower
- A1
-
About Us
- Our Story
- Where to Buy Dreame
-
Login -
Language
Currency

Search
New snacks on sale now for a limited time! Use code NEW for 15% off.
We use cookies on our website to give you the best shopping experience. By using this site, you agree to its use of cookies.
I agree
Search our shop
What are you looking for?
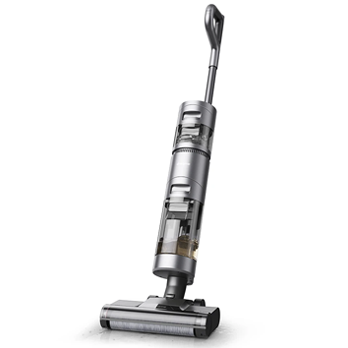
Пылесос вертикальный Dreame T30 серебристый
питание — от аккумулятора, 550 Вт, уборка: сухая, пылесборник — 0.6 л, работа от АКБ max — 90 мин
подробнее

9
Цвет:
Код товара: 4887177
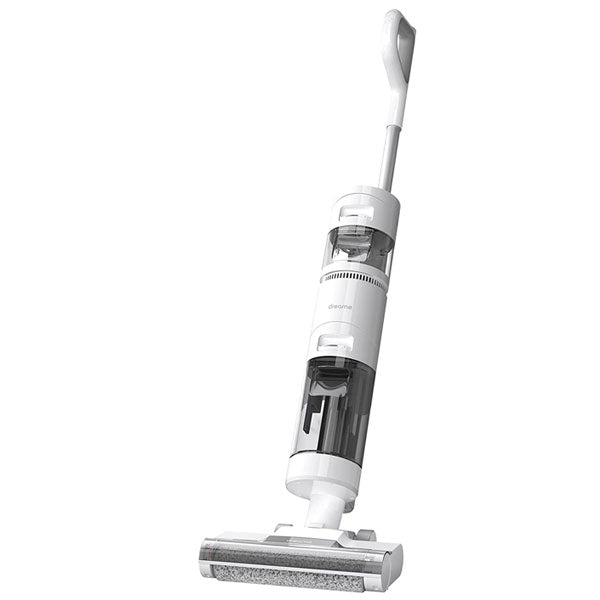
Cordless Stick Vacuum
Dreame T10
Dreame T20
Dreame T30
Dreame V11
Robot Vacuum
Dreame D9
Dreame D9 Max
Dreame L10 Pro
Dreame D10 Plus
Dreame Z10 Pro
Dreame D10s Plus
Dreame W10
Dreame L10 Prime
Dreame L10s Ultra
Dreame L20 Ultra
Wet & Dry Vacuum
Dreame H11
Dreame H11 Max
Для работы проектов iXBT.com нужны файлы cookie и сервисы аналитики.
Продолжая посещать сайты проектов вы соглашаетесь с нашей
Политикой в отношении файлов cookie
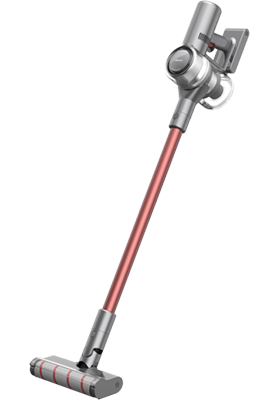
Можно сказать, что товарищи из Поднебесной вполне достигли уровень инженерии Dyson. Они не просто скопировали удачные модели, но поняли и улучшили технические решения, использовали качественные материалы. Модель T30 — недорогой и качественный пылесос на аккумуляторах и с приводной турбощеткой, который сделает уборку дома в радость.
Содержание
- Характеристики пылесоса
- Комплектация пылесоса
- Внешний вид Dreame T30 и составные части
- Насадки из комплекта
- Настенное крепление, зарядка и аккумулятор
- Сборка и использование пылесоса
- Цветной дисплей Dreame T30
- Сравнение пылесоса с Dyson и Bissel
- Видеообзор и демонстрация работы Dreame T30
- Заключение и выводы
Характеристики пылесоса
- Бренд: Dreame (XIAOMI ECO SYSTEM)
- Модель: Dreame T30
- Тип: беспроводной вертикальный пылесос
- Мощность двигателя: 550 Вт (150’000 об/мин)
- Мощность всасывания: 27000 Па
- Тип щетки: электроприводная турбо-щетка, 2 шт
- Тип фильтра: мультициклон, HEPA
- Ёмкость контейнера для сбора пыли: 600 мл
- Напряжение аккумулятора: 29.6 В (2900 мАч 8S1P)
- Время работы: до 90 минут
- Масса в сборе: 1,76 кг
- Особенности: автоматический детектор типа поверхности, степени загрязнения, цветной экран, три режима работы (90 минут на экономичном, 35 минут на среднем и 7.5 минут в турборежиме), фиксация режима

Комплектация пылесоса
Упаковка приличная — коробка из темного матового картона с дизайнерским изображением внешнего вида пылесоса и наименованием модели. Имеется ручка для переноски. Пылесос Dreame T30 — неплохой подарок друзьям, коллегам или родственникам.
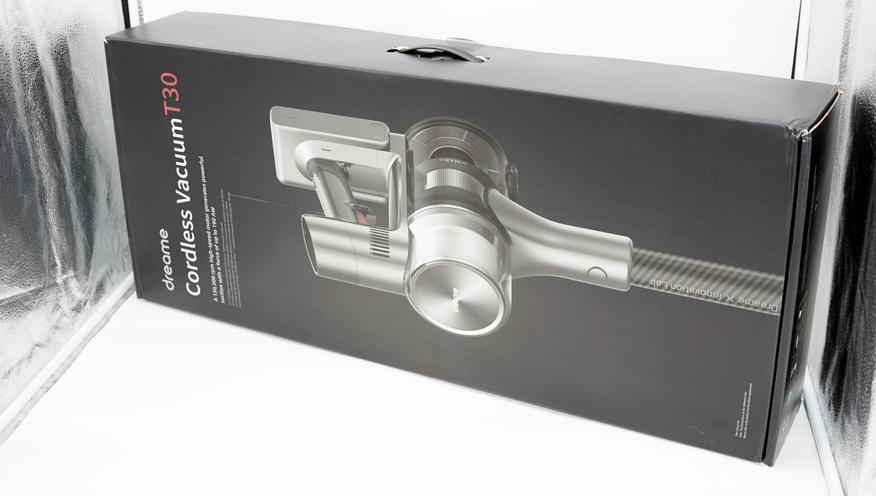
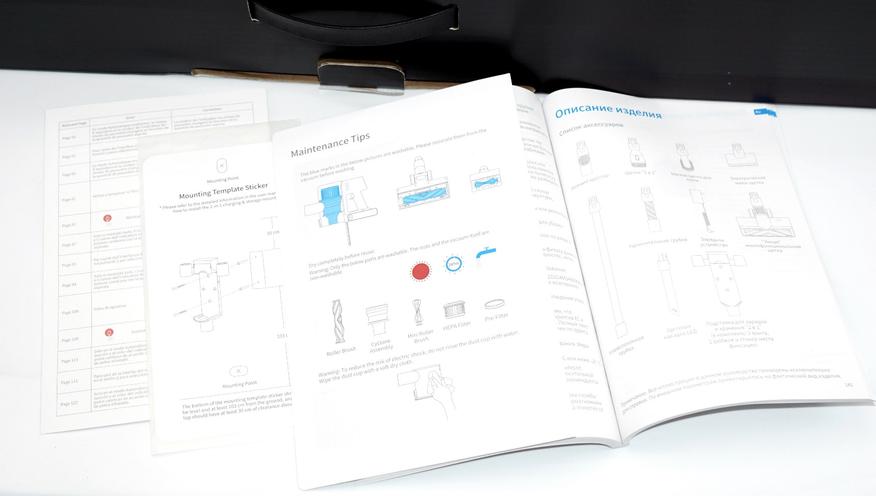
Внутри упаковки по ячейкам разложена комплектация пылесоса. Каждая деталь отдельно обернута в белую ингибиторную пленку. Имеются руководства по использованию и уходу, а также краткая инструкция по эксплуатации.
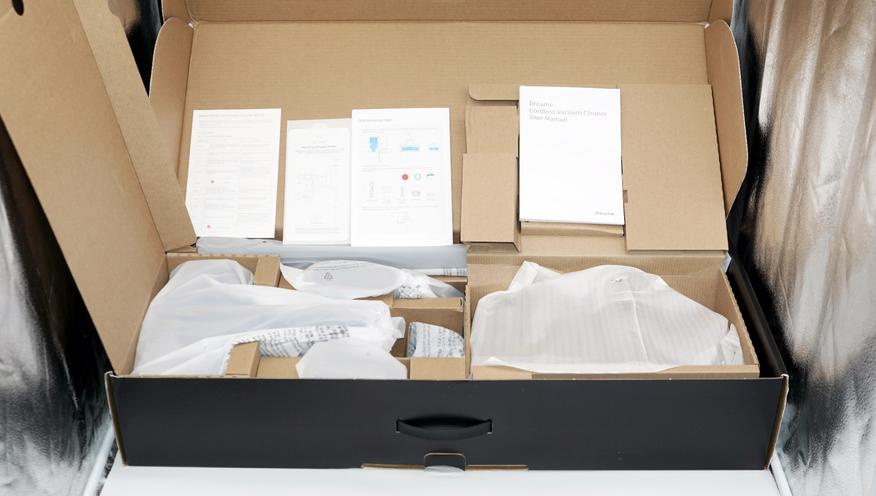
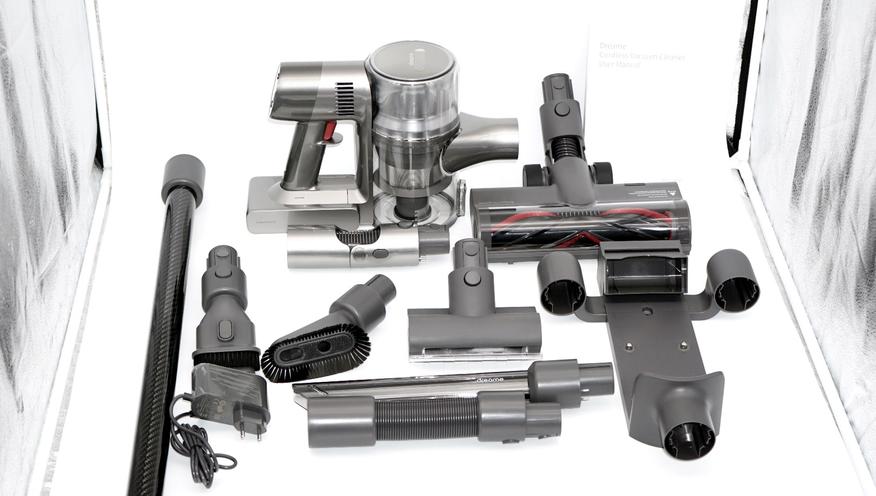
Комплект поставки пылесоса Dreame T30 включается в себя: основной модуль пылесоса со съёмной батареей, основную турбощетку, малую приводную щетку, трубку-удлинитель, три узких насадки (продольная щетка, поперечная щетка, щелевая насадка), гибкая насадка-удлинитель, насадка-колено, настенная база-органайзер с контактами и зарядное устройство.
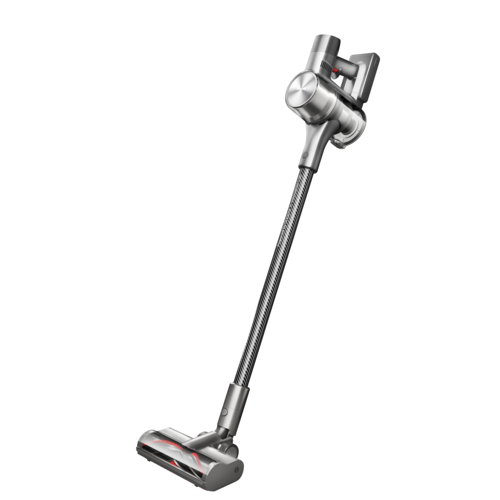
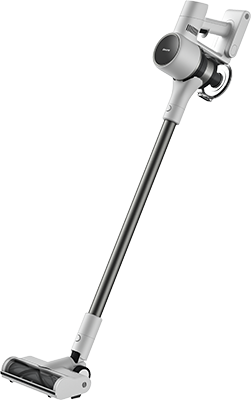
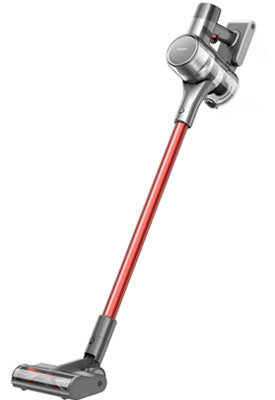
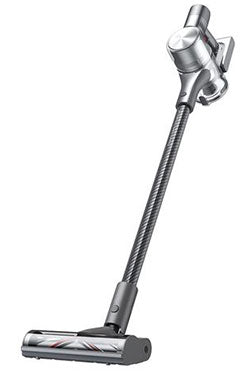
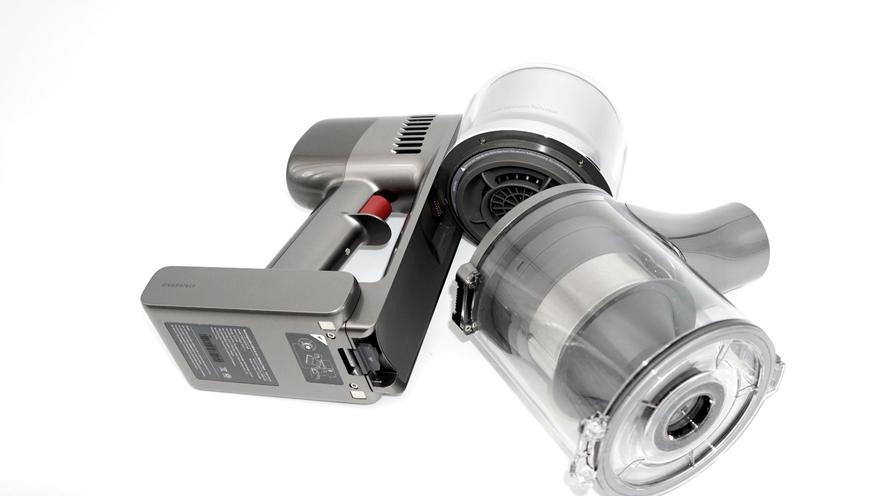
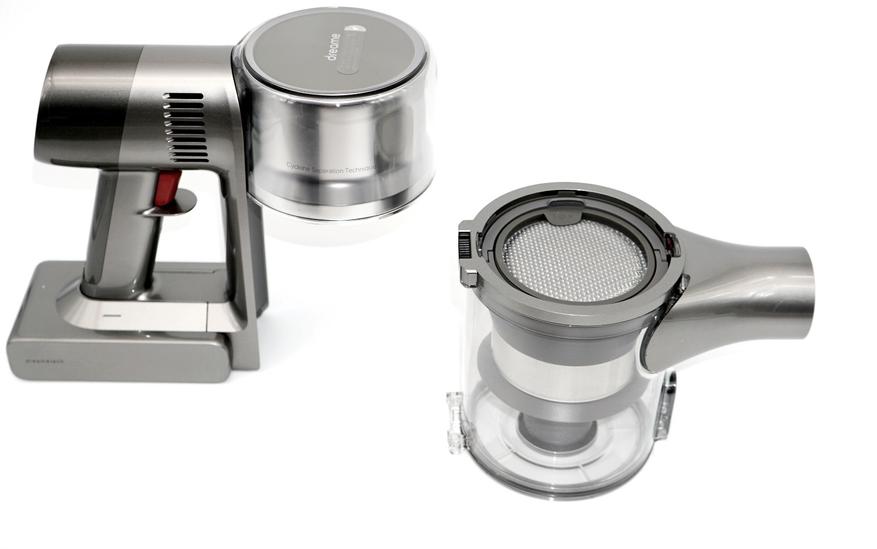
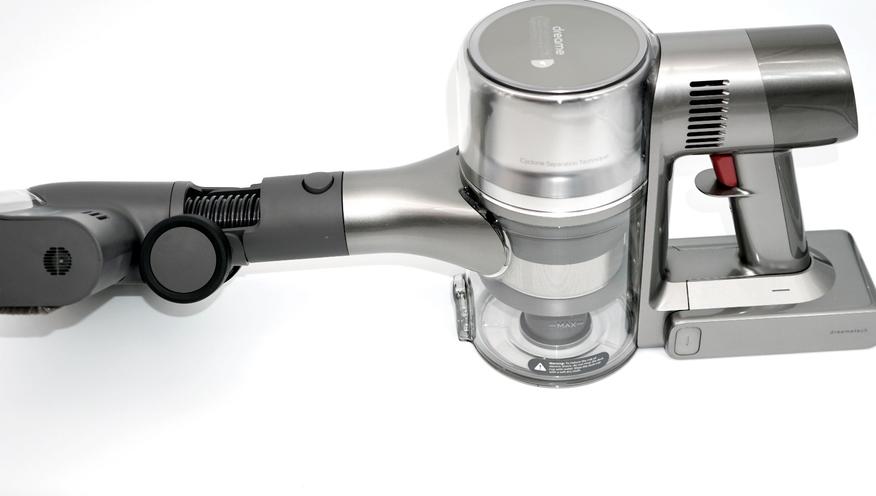
Внешний вид Dreame T30 и составные части
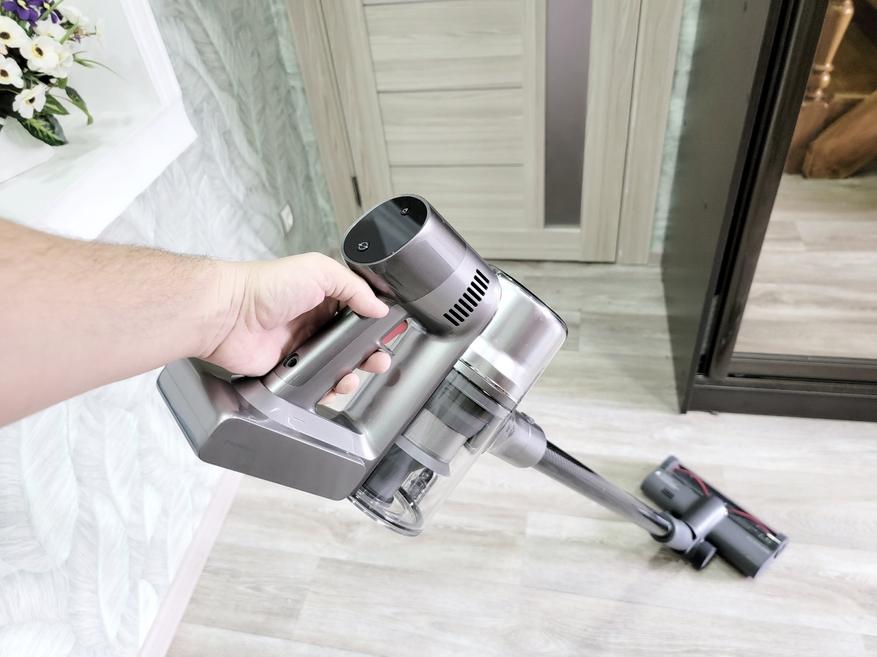
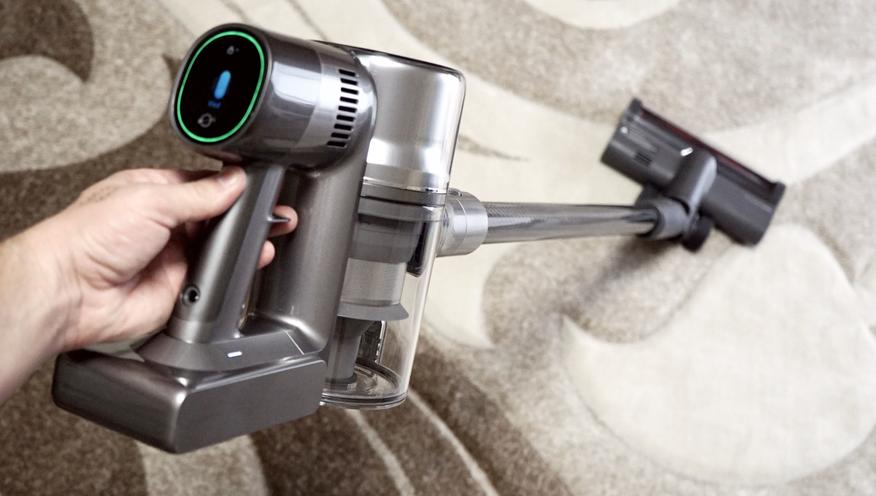
Основной модуль пылесоса напоминает аналогичный для моделей Dyson V7/V8, с поперечным расположением ёмкости для мусора. Рукоятка имеет небольшой наклон, курок не имеет механической фиксации, но предусмотрена электронная фиксация режима работы.
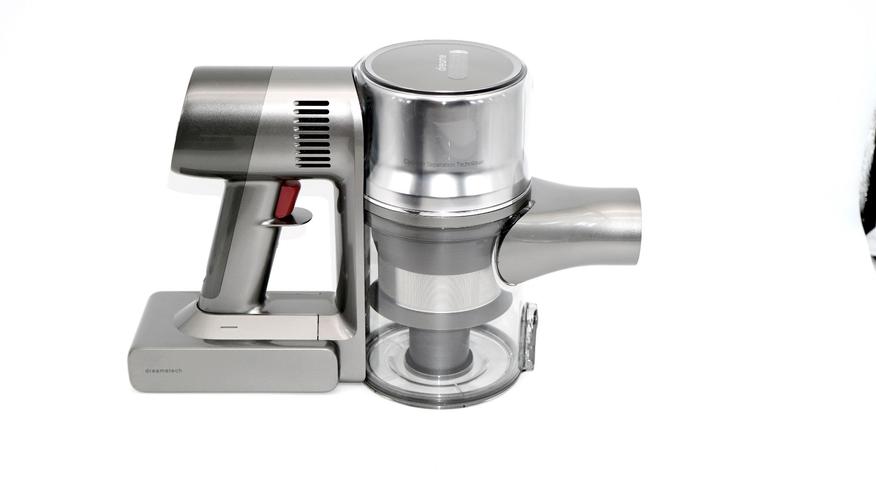
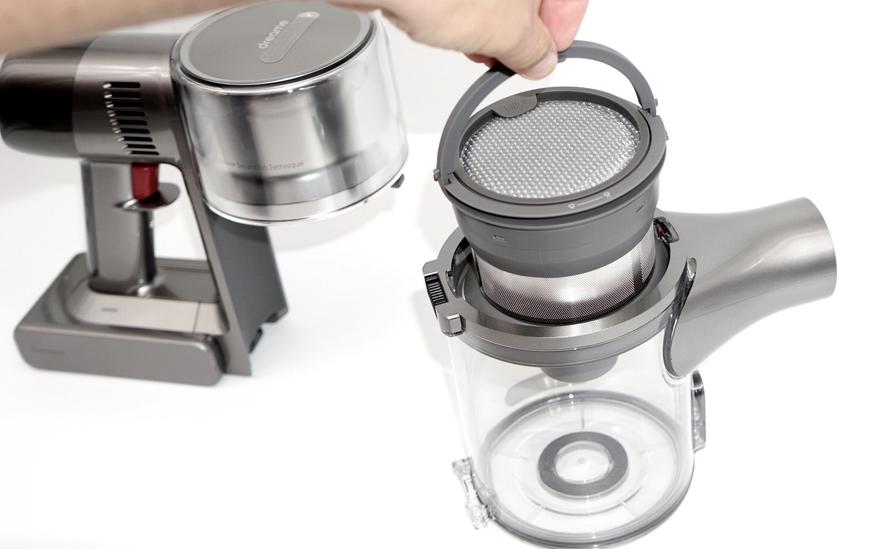
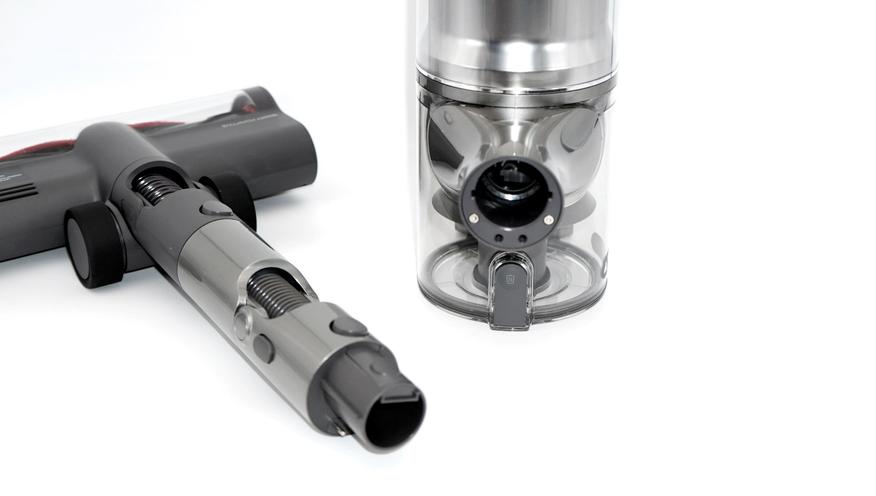
Система фильтрации многоступенчатая, тип сбора — без мешка, с очищаемой ёмкостью. Достаточно нажать на кнопку для открытия нижней крышки.
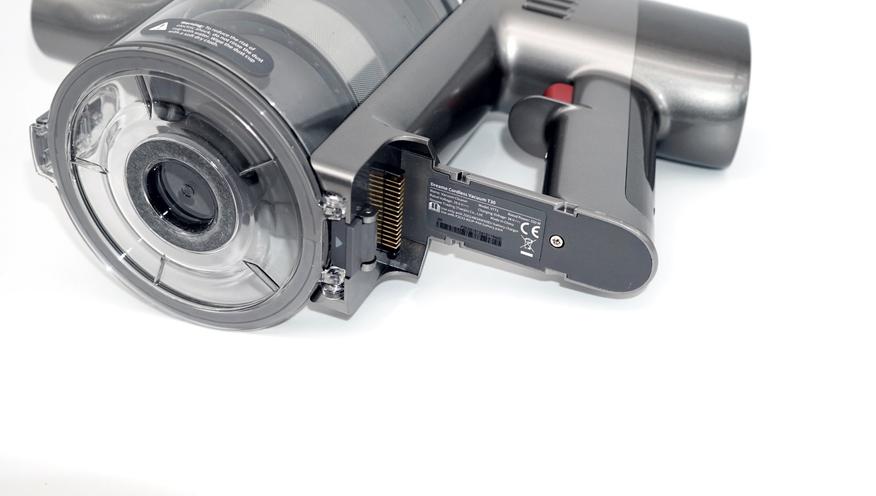
Внутри расположен конус циклонного фильтра. Крышка по краю имеет силиконовый уплотнитель. Ёмкость для мусора можно полностью отстегнуть от основного моторного модуля. Для этого нажимаем на кнопку в основании аккумулятора.
Перед мотором расположена грубая сетка, прикрывающая крыльчатку. Перед мотором расположены фильтры Hepa.
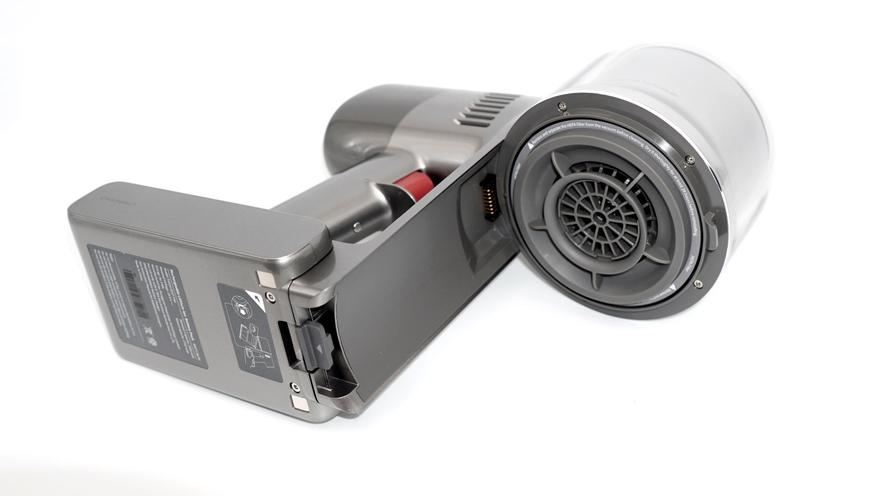
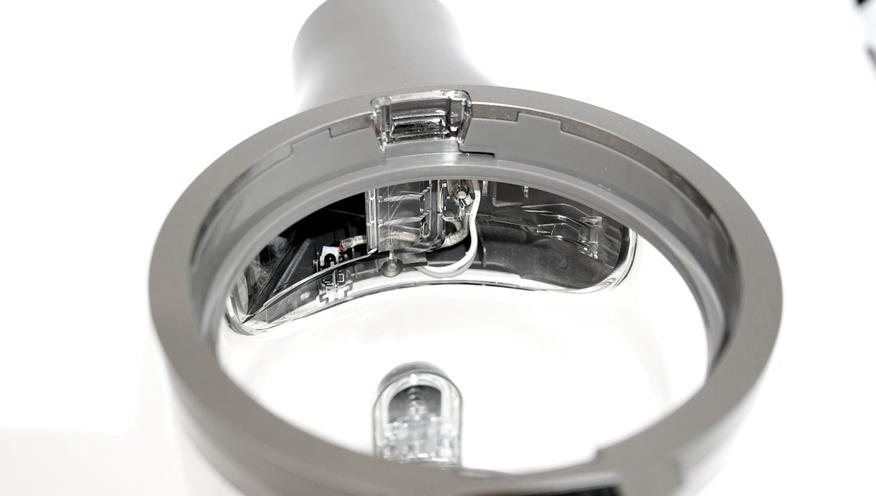
Тип основного фильтра — мультициклон на 12 потоков. Хорошо видны отверстия для завихрения нескольких потоков воздуха внутри контейнера. Если посмотреть в место крепления трубы-удлинителя, то можно увидеть оптический датчик, сигнализирующий о степень загрязненности, как и в передовых моделях пылесосов. Это один из сложной системы сенсоров, обеспечивающих работу пылесоса в автоматическом режиме.
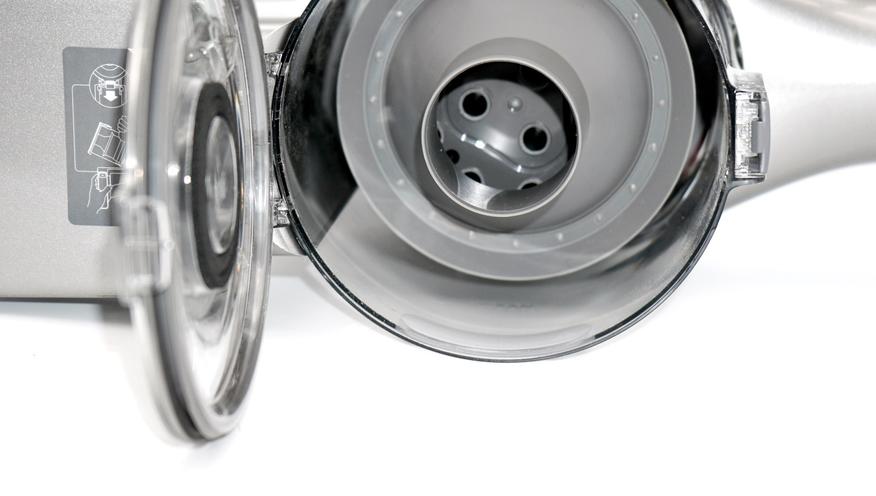
Достаточно потянуть на себя фильтр для того, чтобы извлечь всю конструкцию. Как хорошо видно, дополнительно используется фильтр тонкой очистки выпускаемого воздуха.
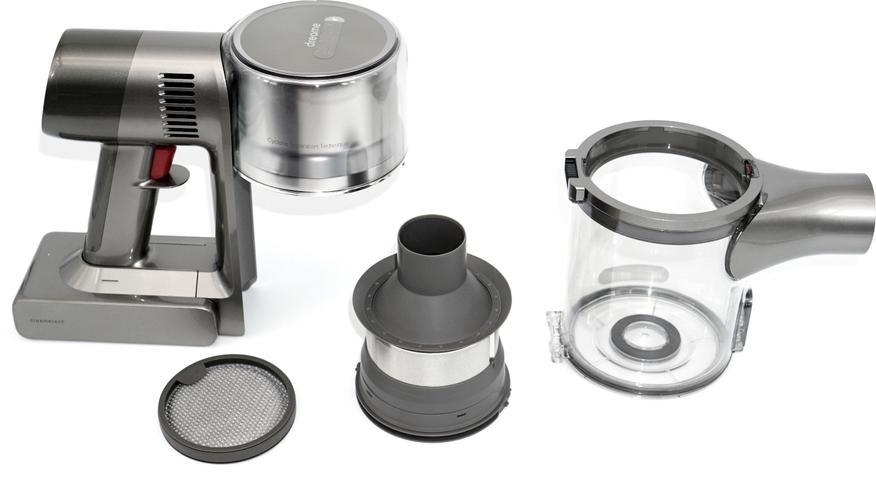
Конус, а также фильтр тонкой очистки можно промывать проточной водой с последующей просушкой. Все элементы имеют силиконовые уплотнения, а это значит, что мелкие частицы пыли будут удерживаться и не попадать в выпускаемый воздух.
Насадки из комплекта
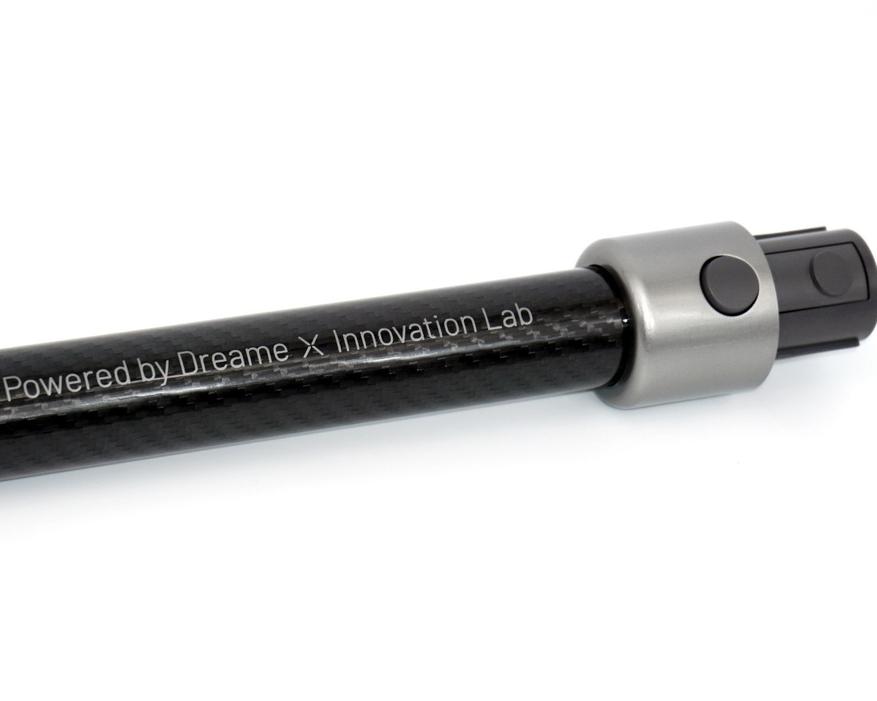
Труба-штанга из комплекта используется в качестве удлинителя для насадок. В обычном варианте к ней крепится основная щетка или узкие насадки. Пылесос можно использовать и без этого удлинителя. Внутри трубки проходят электрические контакты для моторов приводных насадок.
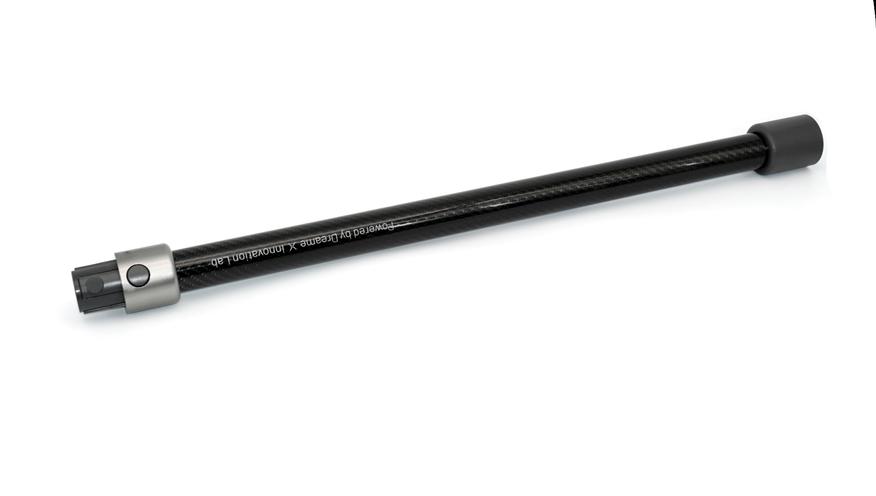
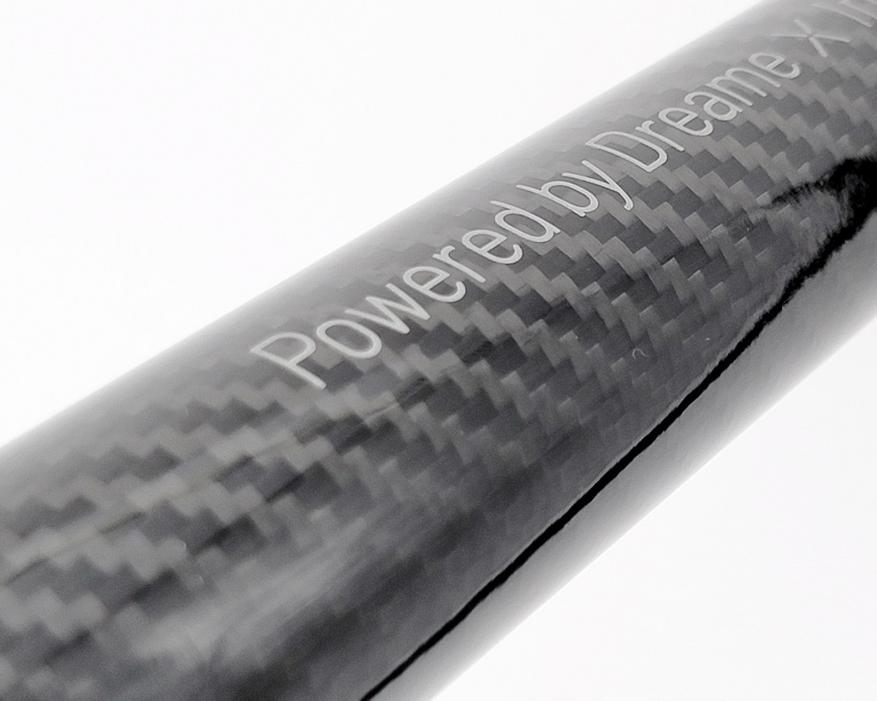
Трубка выполнена в особом дизайне. Заявлены такие материалы, как углепластик, что является достаточно серьезным подходом к разработке. Поверх трубки расположена надпись «Powered by Dreame X Innovation Lab», что отсылает к передовым китайским разработкам.
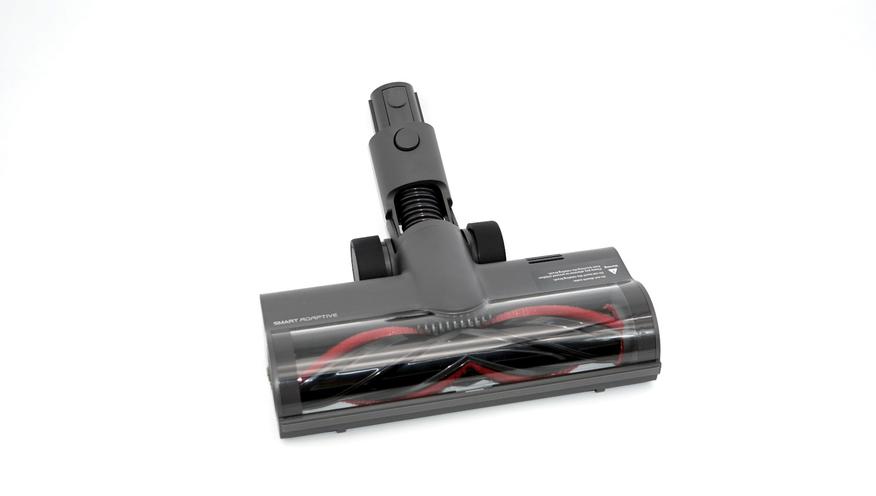
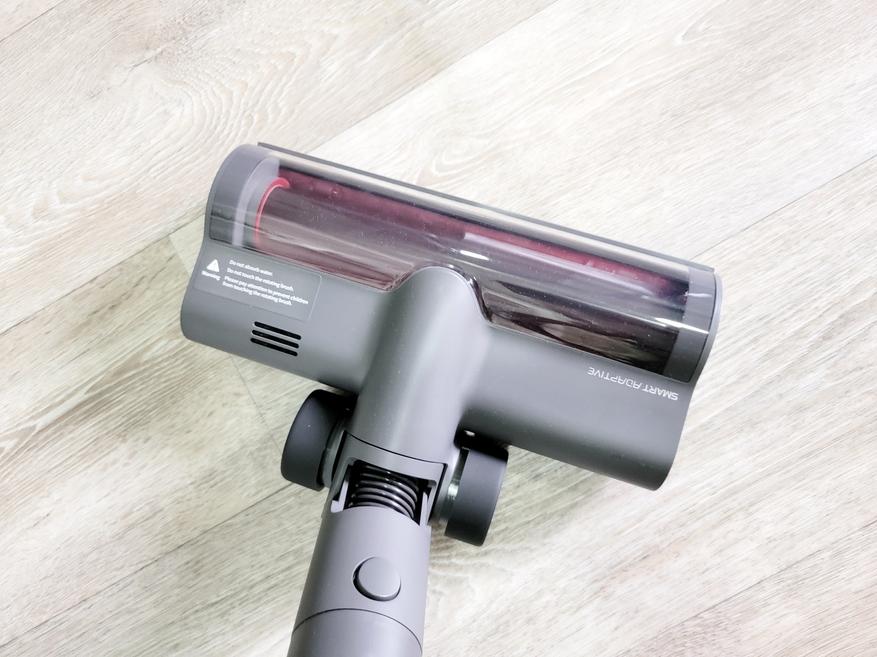
Основная насадка-щетка моторизирована и в широком корпусе. Корпус прозрачный и можно визуально наблюдать загрязнение ролика и выполнять очистку при необходимости. Моторный отсек не имеет защиты от воды, так что аккуратнее с очисткой.
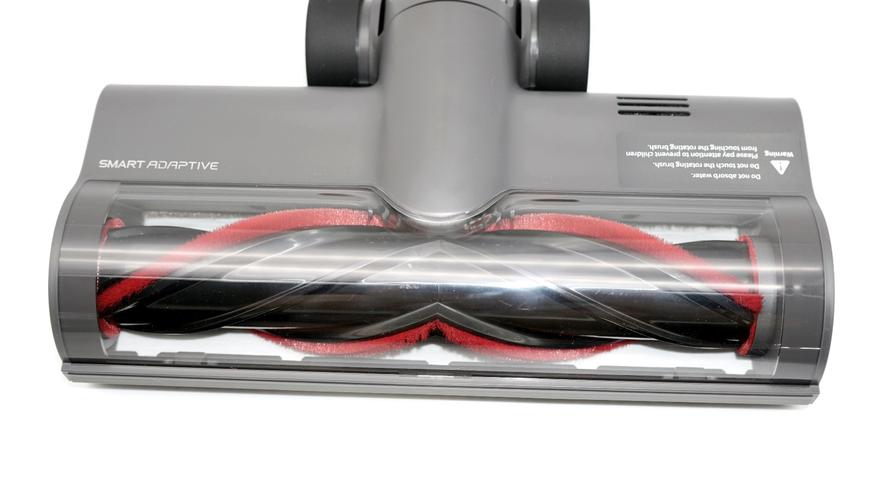
Внутри установлена комбинированная щетка-ролик с резиновыми вставками жесткой щетиной для сбора мусора и шерсти. Основание насадки выполнено на шарнире, может вращаться и наклоняться в стороны. При необходимости можно извлечь ролик для очистки.
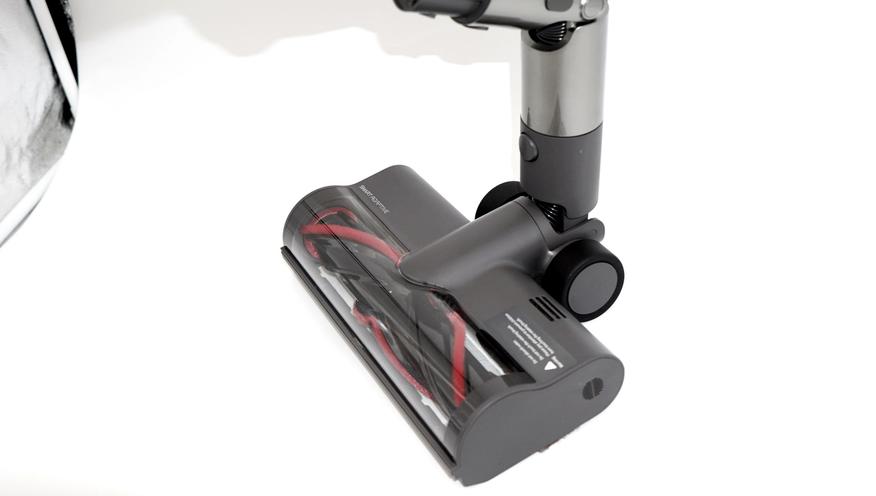
Малая моторизированная щетка предназначена для чистки мебели, подушек и матрасов. Имеет наклоняемый модуль, с небольшим турбо-роликом. Помогает устранить излишек пыли и пылевых клещей.
Узкие насадки (продольная и поперечная) с щетиной помогают убираться в труднодоступных местах, а также проводить очистку ковровых
В комплекте также имеются весьма полезные удлинители, позволяющие наклонять и поворачивать насадки. Это угловое колено и гибкая насадка-шланг. Особенность данных удлинителей — поддержка электрического питания, то есть провода пробрасывают питания от основного модуля до моторизированных щеток.

Для труднодоступных мест имеется дополнительная щелевая насадка, позволяющая проводить уборку в углах, под и над мебелью, в узких местах. Данная насадка выполнена из дымчатого акрила с маркировкой Dreame.
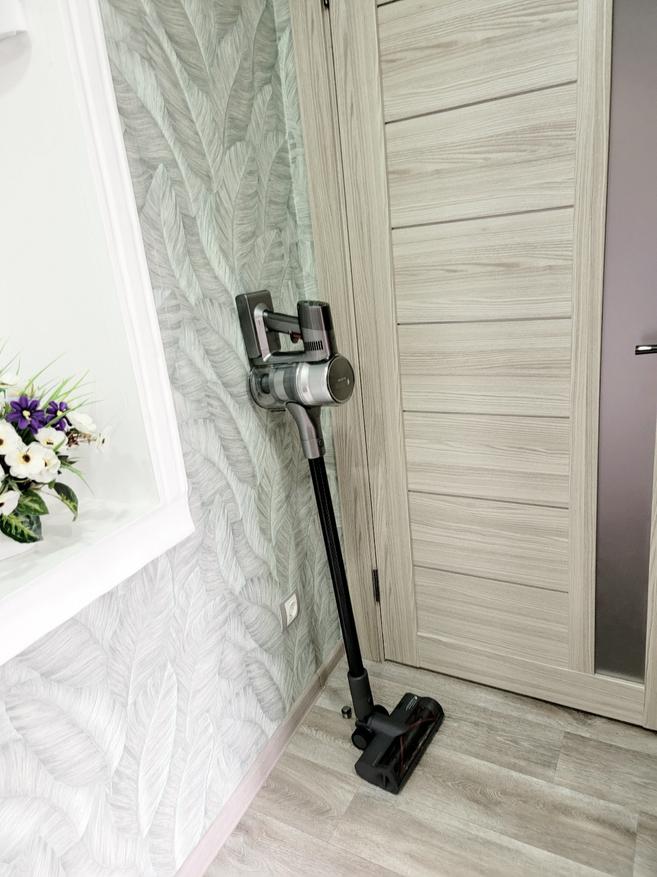
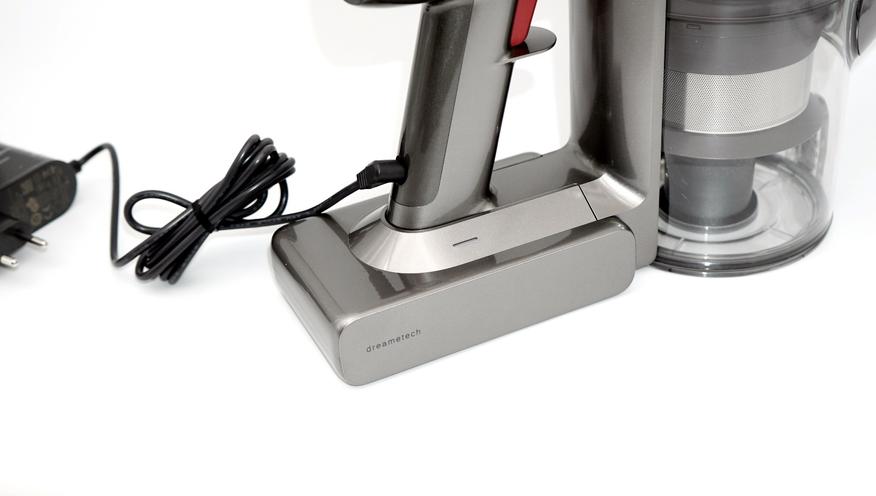
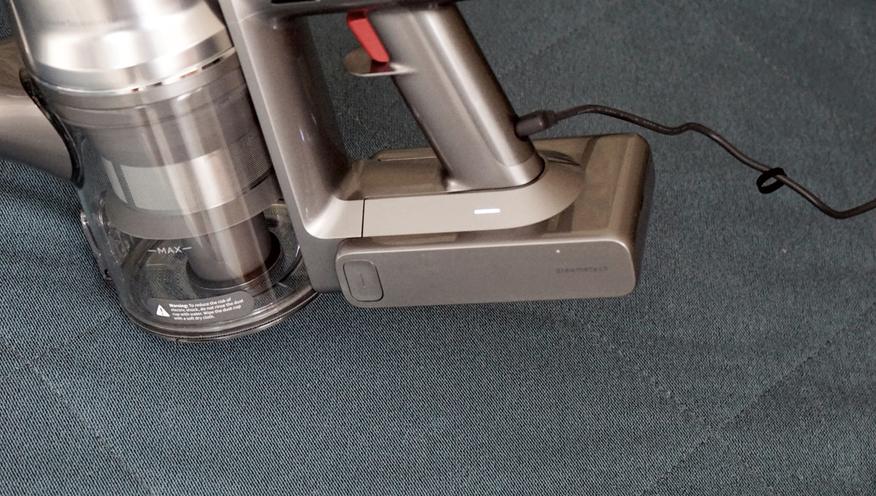
Настенное крепление, зарядка и аккумулятор
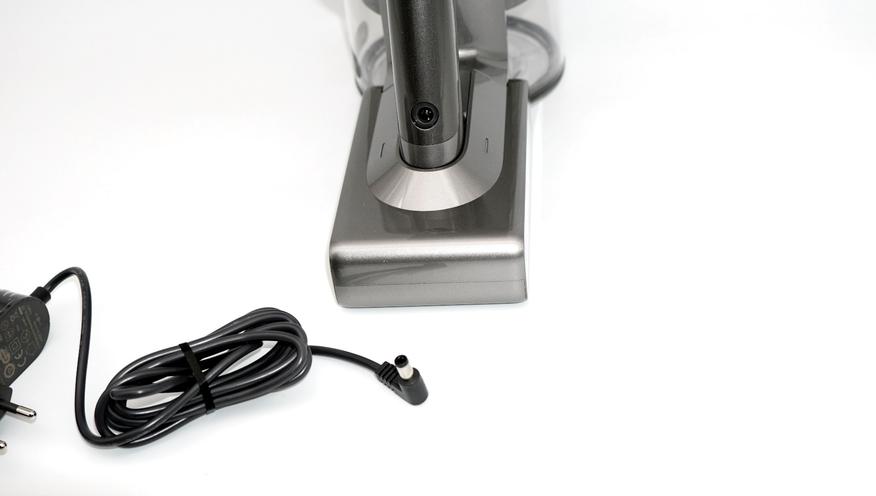
Что касается организации места хранения, то у Dreame T30 продуман и этот момент. Комплектное настенное крепление предусматривает не только установку пылесоса в сборе, но и его подзарядку через подпружиненные контакты, а также хранение двух аксессуаров по бокам крепления.
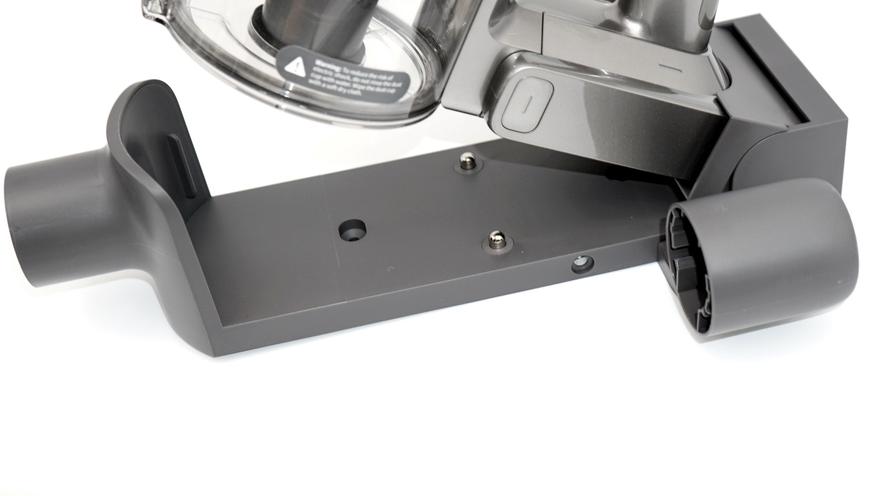

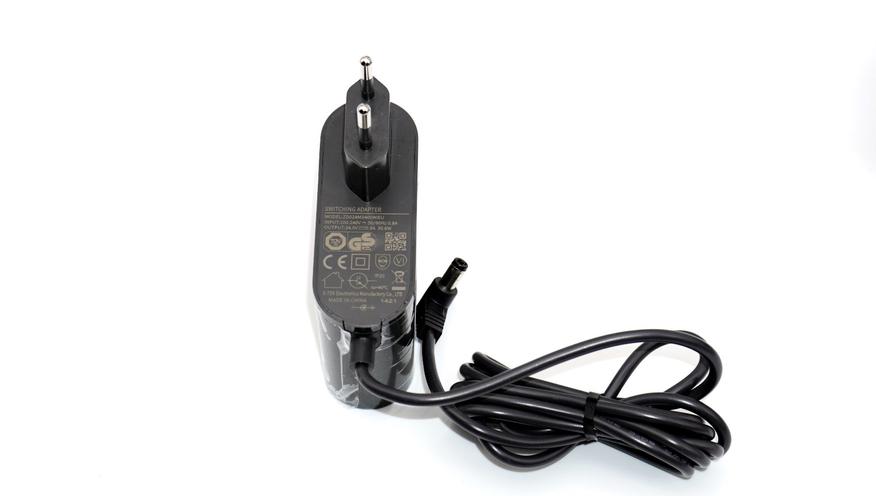
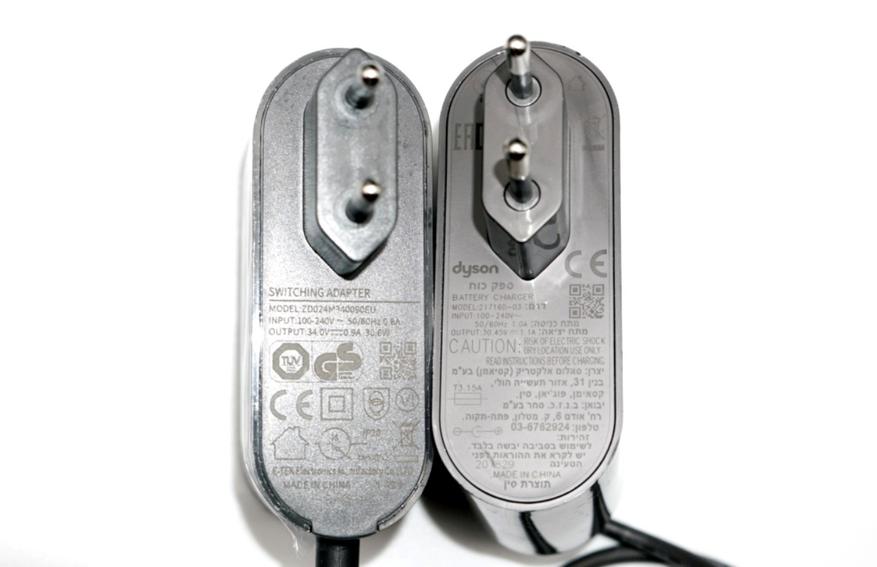
Маркировка сетевого зарядного устройства говорит о выходном напряжении в 34В при 30 Вт (0.9А). Под батареей размещена маркировка основного модуля с указанием мощности двигателя (550 Вт).
Заряжать пылесос можно не только в настенном креплении, но и напрямую. Коннектор (круглый джек) предусматривает подключение прямо к основанию ручки пылесоса.
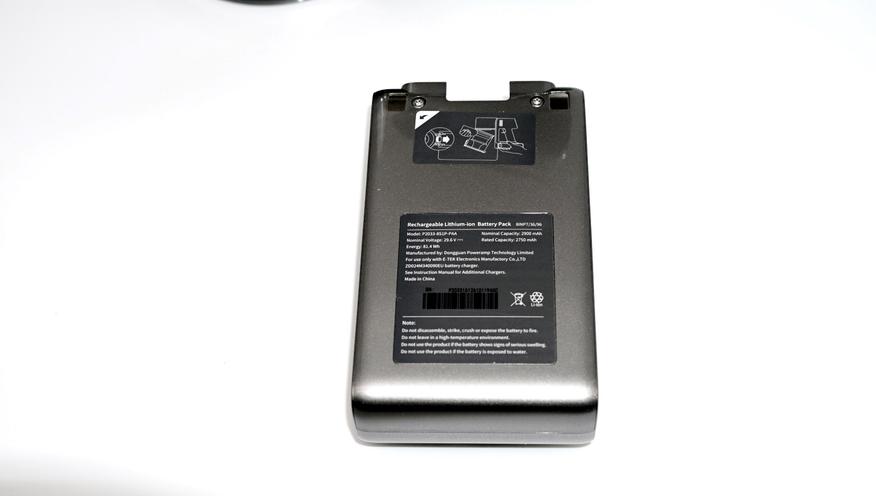
Выше я упоминал, что аккумулятор пылесоса съемный. Так вот, если нажать на боковой фиксатор и сдвинуть в сторону по салазкам, можно извлечь аккумуляторный модуль целиком. Во время процесса зарядки присутствует индикация на самом аккумуляторе (светодиод).

В батарее использованы 8 типовых ячеек (18650) суммарной ёмкостью 2900 мАч. Съемный аккумулятор — это удобно, если у вас два и более аккумулятора, а также для замены старого после длительного использования. Кстати, Dyson имеют несъемные батареи, что приводит к быстрому старению пылесоса в целом и является проблемой серий V7/V8.

Сборка и использование пылесоса
Вертикальный пылесос обычно собирается с удлинителем и основной турбонасадкой. Можно использовать угловую или гибкую трубку для удобства уборки, например, на шкафах или под мебелью. Необязательно устанавливать длинную трубку, можно вполне работать и с короткими удлинителями или с приводными щетками напрямую от основного модуля.

Такой вариант будет уместен как для уборки в автомобиле, так и для уборки мебели. Получается пылесос типа 2-в-1, вертикальный пылесос-стик и ручной короткий пылесос.
Ролик основной насадки выполнен в «V»-дизайне, что позволяет более эффективно собирать волосы и шерсть с покрытия. Также удобно очищать насадку после уборки при необходимости. Прозрачный корпус насадки позволяет контролировать вращение во время работы.
Сама по себе насадка маневренная, позволяет убирать у мебели, под мебелью, в углах и т.д.

Пылесос в меру легкий (~ 1.7 кг), удобно работать одной рукой. Dreame T30 будет по силам даже хрупкой девушке.
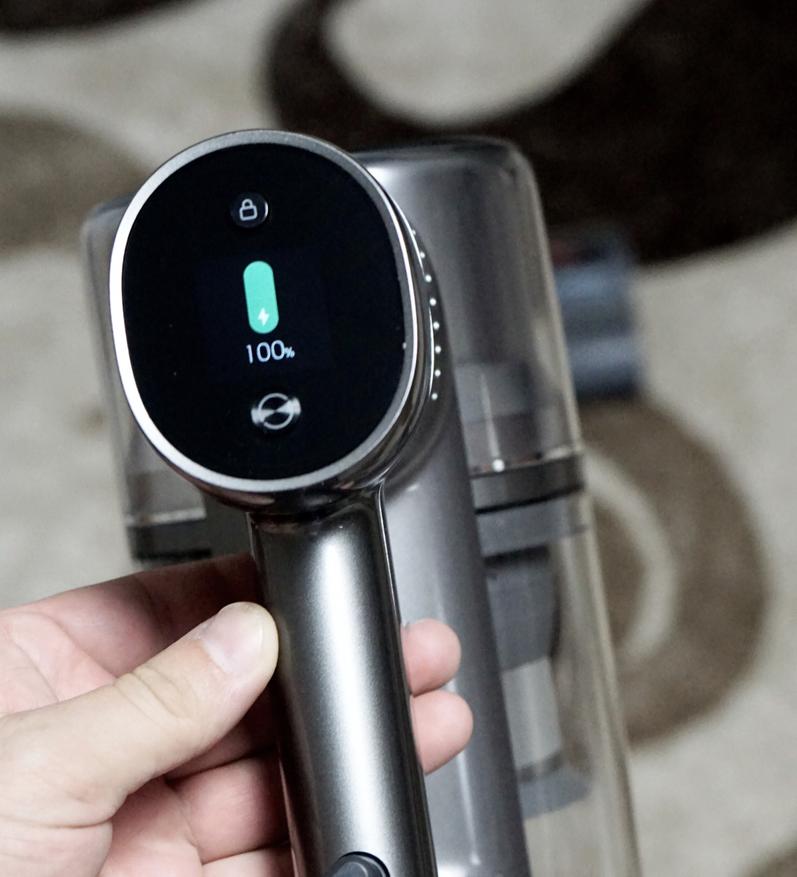
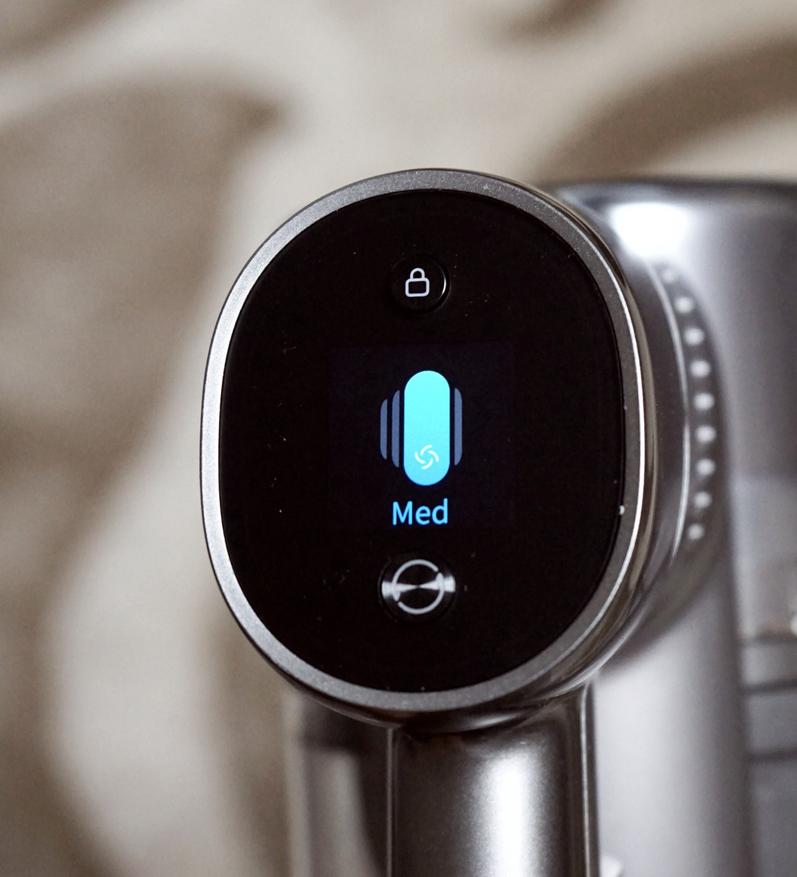
Цветной дисплей Dreame T30
Изюминка модели — умный цветной дисплей с возможностью переключения режимов работы (Eco/Mid/Turbo/Auto). В режиме «Авто» пылесос автоматически распознает тип поверхности и увеличивает силу всасывания для ковровых покрытий. Также предусмотрена фиксация кнопки — можно запустить пылесос, нажать кнопку «Lock» на дисплее и далее непрерывно работать.

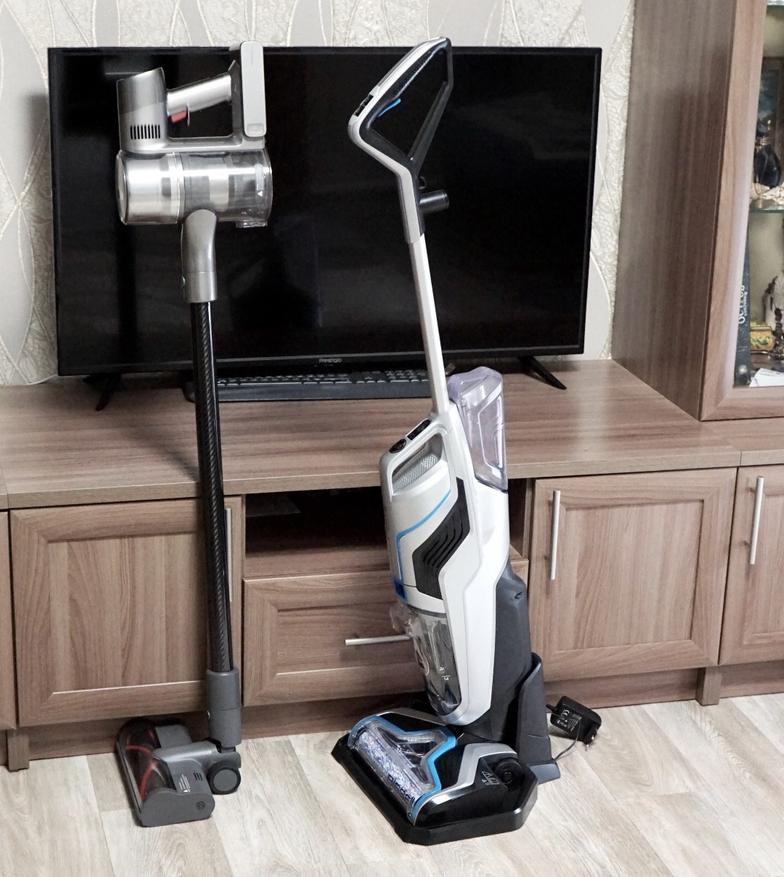
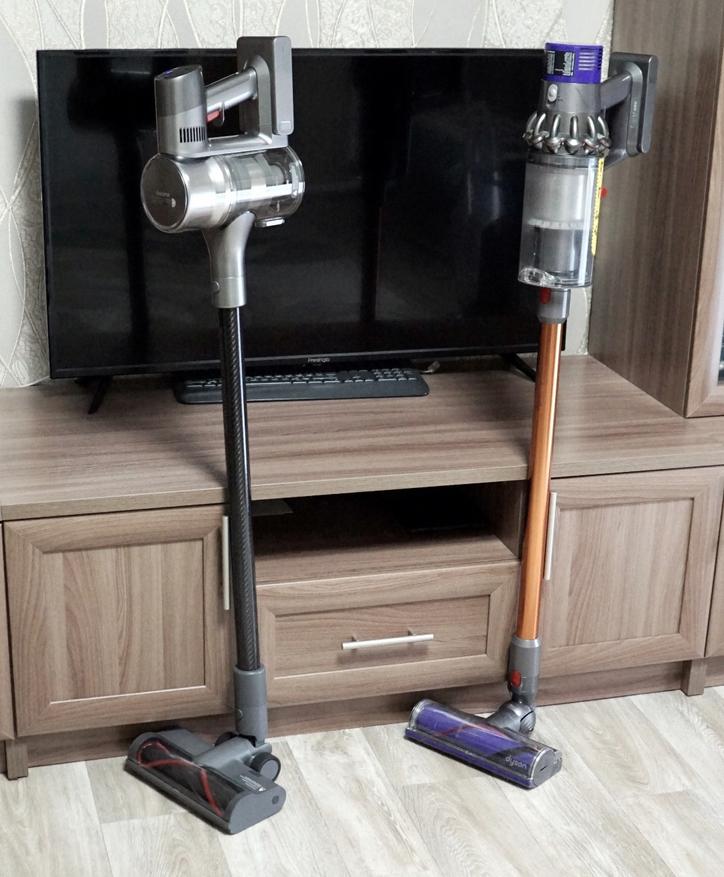
Сравнение пылесоса с Dyson и Bissel
На мой взгляд, модели Dreame T30 сильно не хватает модуля для влажной уборки в комплекте. Для сравнения — комбинированный пылесос для сухой и влажной уборки Bissell Crosswave.
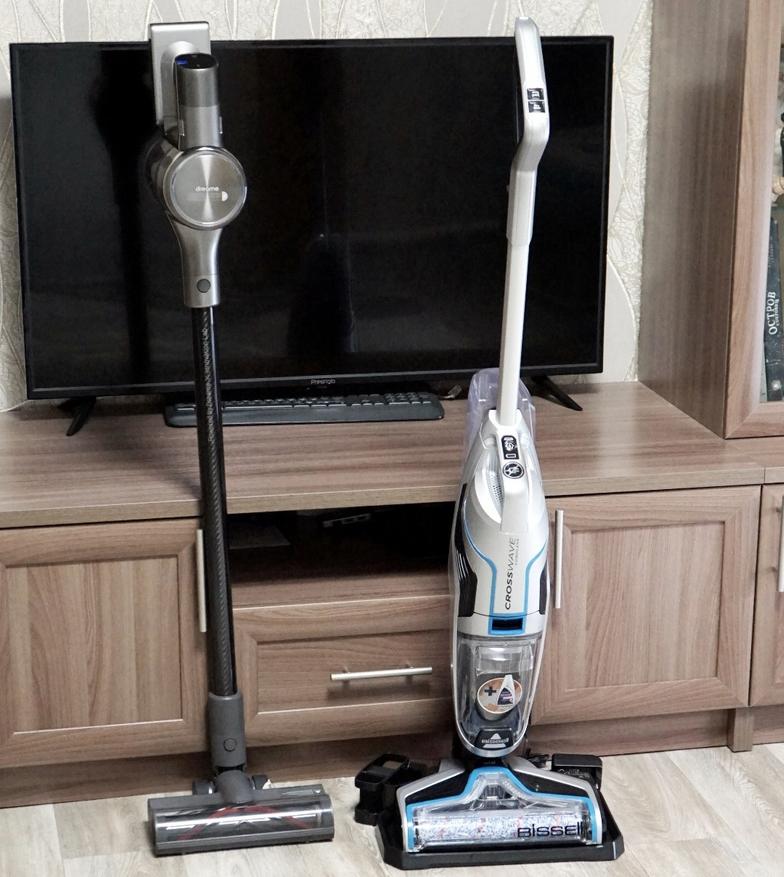
А вот для пылесоса Dyson предусмотрена отдельная съемная насадка для влажной уборки. На фотографии Dyson V10.
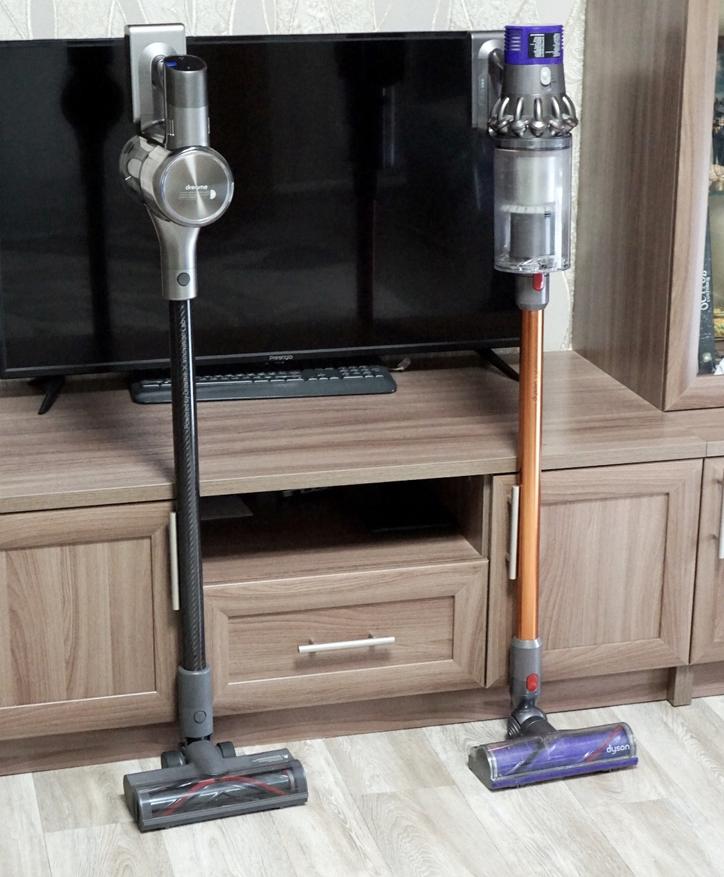
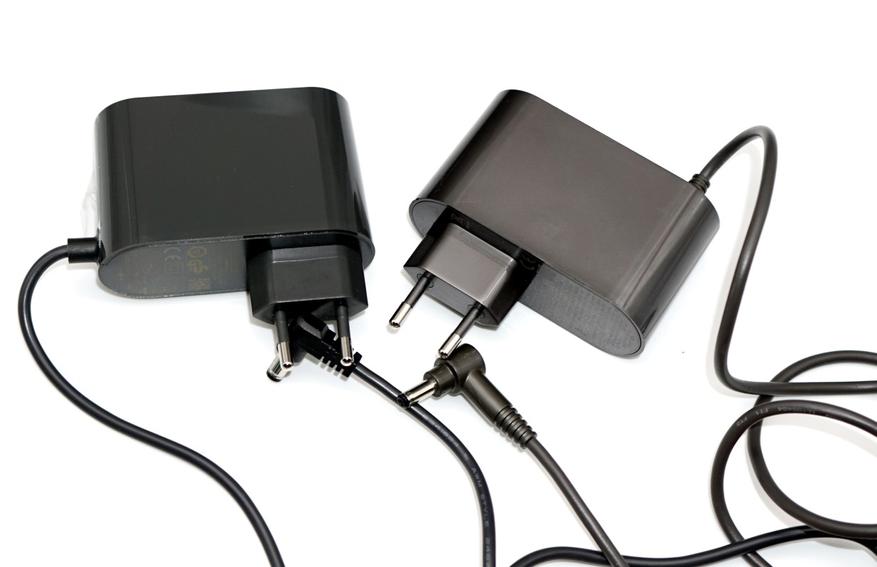
Можно смело говорить, что товарищи из Dreame T30 переплюнули Dyson. Вот просто обратите внимание на эти два зарядных устройства. Слева — от Т30, справа — от оригинального V10. Совпадает все до мелочей в дизайне и цвете. Так что с позиционированием все понятно.
А что касается технологий? Китайцы продвинулись далеко, и Dyson приходится совсем не просто. В новой модели V15 им пришлось вставить лазерные датчики частиц пыли (PM2.5), чтобы хоть как то дифференцироваться от удачных китайских моделей, которые в 3-4 раза дешевле при тех же характеристиках. Но и тут китайцы догнали, установив в T30 оптический сенсор запыленности.
Видеообзор и демонстрация работы Dreame T30
Заключение и выводы
Вертикальный пылесос Dreame T30 — это достойный вариант для дома, который подойдет как для ежедневной уборки, в качестве пылесоса «для крошек», который всегда под рукой, а также для тщательной уборки. Автоматический и турборежимы обеспечивают удобство работы и качественную уборку мусора, включая шерсть животных. Пылесос справляется с любыми поверхностями, будь то ламинат или ковролин. Можно смело рекомендовать к покупке. Отмечу, что пылесос Dreame T30 станет хорошим подарком на новоселье. Есть смысл сразу приобрести сменные элементры фильтров для этого пылесоса.
Другие типы насадок, крепления и держатели аксессуаров, а также отдельные пылесосы для влажной уборки можно посмотреть в подборках по ссылкам:
Подборка аксессуаров, дополнительных насадок и держателей для пылесосов Dyson.
Подборка аппаратов для влажной уборки: 8 моющих моделей беспроводных, проводных пылесосов и электрошвабр.
Какой робот-пылесос выбрать для системы умного дома? 10 актуальных моделей по доступным ценам.
Другие обзоры и тесты смартфонов, инструмента и гаджетов вы можете найти в моем профиле и по ссылкам ниже.
Спасибо за внимание!