
![]()
Download Article
![]()
Download Article
Shark steam mops promise a fast and thorough clean, but how do you use one for the best results? Cleaning your floors with a Shark steam mop is a breeze—all you need is water and an outlet. We’ve put together a handy guide to using a Shark steam mop, including instructions on putting the mop together and choosing the right mop setting for your floors. If you’re ready to have sparkling clean floors, keep scrolling!
-

First, slide the handle into the opening on the mop, making sure to push it past the line on the handle. Keep pushing until you hear or feel the handle click into place.[1]
- On some models, there is a large attachment screw that holds the handle in place. Use a flathead screwdriver to twist the screw until it’s firm.[2]
- Consult your user manual for assembly instructions that are specific to your model.
- On some models, there is a large attachment screw that holds the handle in place. Use a flathead screwdriver to twist the screw until it’s firm.[2]
-
Use the lavender loop on the side of the cleaning pad to slide the pad over the mophead. Then use the fasteners around the mophead to keep the pad in place. Once the pad is locked in, snap the mophead into the base of the mop.[3]
- Make sure the cleaning pad is attached striped-side down. Both sides can be used for cleaning, but there is only one way to correctly put it on.[4]
- Put the cleaning pad on while your steam mop is turned off.
Advertisement
- Make sure the cleaning pad is attached striped-side down. Both sides can be used for cleaning, but there is only one way to correctly put it on.[4]
-
While the mop is unplugged, pull or twist the cap on the water tank to open it. Then fill the included measuring cup up to the line with distilled or soft tap water and pour it into the tank. Replace the cap to finish assembling your shark steam mop.[5]
- Distilled water reduces mineral buildup that can clog the steam nozzle or leave streaks on the floor while you clean.
- Make sure not to overfill the mop or it will start dripping onto your floors while you use it.
- Only fill the tank with water. Cleaning chemicals, scented perfumes, or even vinegar might damage the mop.[6]
- If your model has a removable water tank, make sure it’s securely snapped back into place before you begin mopping.


Advertisement
-
Sweep or vacuum the floor before steam mopping. Remove as much loose dust and dirt as possible so the steam mop can work its best. The mop might scratch your floor if there’s too much debris on it, or the water might mix with dirt and spread over the floor.[7]
- If you’re mopping tile floors in moisture-heavy rooms like the bathroom or kitchen, wipe away any surface grime on the tiles or grout beforehand to make your cleaning pad last longer.[8]
- If you’re mopping tile floors in moisture-heavy rooms like the bathroom or kitchen, wipe away any surface grime on the tiles or grout beforehand to make your cleaning pad last longer.[8]
-
Pull the wound-up power cord out of the mop and plug it into a 120-volt outlet. The on/standby button will start flashing blue. The mop only takes about 30 seconds to fully heat up.[9]
- Since the mop heats up so quickly, wait until you are 100% ready to begin mopping before plugging it in.
-
Use the on/standby button to select the dust, mop, and scrub settings. Once you choose a setting, the button will change from blinking to solid. Choose between:[10]
- Dust (light cleaning and dusting): This setting lifts light dirt and sanitizes the floor. Use this setting for laminate, bamboo, hardwood, or marble floors. Press the on/standby button once to activate.
- Mop (everyday cleaning): Choose «mop» to clean and sanitize small messes and heavily trafficked floors. This setting is meant for hardwood, marble, tile, and stone. Press the on/standby button twice to activate.
- Scrub (deep cleaning): Select «scrub» to sanitize floors and remove tough messes and stains on tile, stone, linoleum, or carpet (with a carpet glider attachment). Press the on/standby button three times to activate.
- To clean hardwood, use a highly absorbent microfiber cleaning pad to keep the floors dry. Don’t add any cleaning chemicals that might break the protective seal on the floorboards. The dust setting is safest.[11]
-
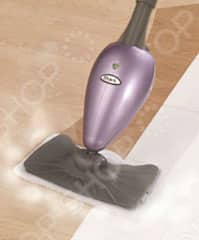
Pump the handle to dampen the cleaning pad, then push the mop back and forth in small sections (just like a traditional mop) to begin cleaning. Start in the corner of your room furthest from the exit and work toward the door. The sloshing of the water in the tank will naturally produce steam while you clean.[12]
- Pump the handle again while mopping to produce extra steam for stubborn or stuck-on messes.
- Mop with the grain of the floor if you’re cleaning laminate or hardwood.
- Keep the mop moving at all times. If it’s left to idle in one spot too long, the excess heat and moisture can damage that spot on your floor, especially if it’s made of wood.
-
Quickly swivel the mophead around to use the other side of the pad to keep mopping.[13]
If you need to replace the pad, unplug the mop and wait 2 or 3 minutes for it to cool down. Then you can safely handle the mophead and put on a new pad.[14]
-
If you run out of water, unplug the mop and wait 2 or 3 minutes for it to cool. Then refill the tank with the included measuring cup, making sure not to overfill it.[15]
-
First, press and hold the on/standby button until it starts flashing blue to stop steaming. Then unplug the mop and let it stand upright for 2 or 3 minutes while it cools. When it’s cool to the touch, it’s safe to disassemble and store.[16]
- Press the power cord release button to wind the cord back inside the mop.
-
Release the fasteners holding the pad in place and pull on the lavender loop to slide the pad off. Always remove the damp pad before storing the mop to avoid mildew or mold.[17]
- Some models have a no-touch release button or switch that ejects the cleaning pad without having to touch it.
- Shark steam mop pads are reusable and machine washable. Shake away loose dirt and snip off loose threads before washing.
-
First, unscrew the water tank cap and pour out any leftover water into a sink or tub. Replace the cap when you’re done.[18]
Then remove the mophead by pressing the release button near the bottom of the mop body.[19]
Hang the mop vertically from a large hook to store it, keeping the mophead separate.[20]


Advertisement
Ask a Question
200 characters left
Include your email address to get a message when this question is answered.
Submit
Advertisement
-
Shark steam mops come in a variety of models. To get the most out of your mop, consult the user’s manual for model-specific instructions.
-
Use a paper clip or nozzle cleaning tool to remove buildup in the opening of the steam nozzle. Buildup forms when your water is hard or you’ve added other cleaners into the water tank.
Thanks for submitting a tip for review!
Advertisement
-
Only handle the plug with dry hands to avoid the risk of electric shock.
-
Only use the mop with water. It will overheat and get damaged if you turn it on with an empty water tank.[22]
-
When you’re mopping in the bathroom, keep the mophead a few inches away from toilets and tubs. The cold porcelain might crack with an abrupt temperature change.
Advertisement
References
About This Article
Thanks to all authors for creating a page that has been read 49,277 times.
Reader Success Stories
-

«Got good info here. Cleaned ceramic tile well.»
Did this article help you?
РУКОВОДСТВО ПОЛЬЗОВАТЕЛЯ Швабра паровая Shark Original Steam Mop S3101SL (100619077) Интернет-магазин www.top-shop.ru
ВНИМАНИЕ: Ознакомьтесь со всеми инструкциями перед использованием паровой швабры. ПРАВИЛА БЕЗОПАСНОСТИ Только для домашнего использования При использовании паровой швабры Shark Original Steam Mop необходимо соблюдать основные меры безопасности, включая следующие: Риск возникновения ожогов. Будьте
разбирать или ремонтировать прибор самостоятельно. Во избежание несчастных случаев, при повреждении электрошнура, последний должен быть заменен путем обращения к квалифицированному электрику. Некорректная сборка или ремонт могут вызвать риск возникновения электрошока или травмы в процессе
19.НИКОГДА НЕ ОСТАВЛЯТЬ ВКЛЮЧЕННУЮ ПАРОВУЮ ШВАБРУ НА ДОЛГОЕ ВРЕМЯ НА ОДНОМ МЕСТЕ КАКОЙЛИБО ПОВЕРХНОСТИ С ЗАКРЕПЕЛННОЙ НА НЕЙ ПОДУШКОЙ ИЗ МИКРОФИБРЫ. 20.Для очистки паровой швабры отключить электрошнур от сети и протереть сухой или влажной тряпкой. Не заливать водой и не использовать спирт, бензин
также рекомендуем соблюдать инструкции по использованию и обслуживанию, выданные производителем напольного покрытия. НАЧАЛО РАБОТЫ Собрать Вашу паровую швабру Shark Original очень просто: Для начала извлеките все элементы из упаковки. Мы знаем, Вы воодушевлены приобретением Паровой Швабры Shark
СБОРКА 1. Вставьте верхнюю расширительную трубу (труба с ручкой) в нижнюю расширительную трубу (короткая труба). Соедините обе расширительные трубы, щелчок будет означать фиксацию труб в правильном положении. Для наглядного примера взгляните на рисунок. Вставьте элементы, собранные в шаге 1, в
ВНИМАНИЕ: Каждый раз перед тем, как надеть чистящую подушечку из микрофибры на швабру, следите, чтобы Ваша паровая швабра была отключена от сети. 3.Снимите крышку, чтобы наполнить резервуар для воды. На крышке резервуара для воды имеется стрелка для обозначения положений фиксации. При помощи
!!! Если через несколько минут пар так и не появился, ознакомьтесь с разделом «Решение проблем» на стр. 10. ВНИМАНИЕ: Никогда не используйте Паровую Швабру без воды в резервуаре. Когда Ваш пол засияет чистотой и уборка будет завершена, отключите Паровую Швабру от электрической розетки, дайте ей
выделяет пар. Паровая Швабра оставляет воду на полу. Паровая Швабра оставляет белые пятна на полу. Пол покрыт разводами, полосками или пятнами после парообработки. согласно инструкциям. Проверьте, не слишком ли мокрая чистящая подушечка из микрофибры? Почему бы не отключить Паровую Швабру от сети и
Данный знак означает, что изделие нельзя выбрасывать с бытовым мусором на всей территории ЕС. Во избежание возможного вреда окружающей среде или здоровью людей в результате неконтролируемого захоронения отходов, их необходимо перерабатывать ответственно для обеспечения должного повторного
-
Инструкции по эксплуатации
1

Shark Original Steam Mop S3101SL инструкция по эксплуатации
(10 страниц)
- Языки:Русский
-
Тип:
PDF -
Размер:
302.34 KB -
Описание:
Швабра паровая
Просмотр
На NoDevice можно скачать инструкцию по эксплуатации для Shark Original Steam Mop S3101SL. Руководство пользователя необходимо для ознакомления с правилами установки и эксплуатации Shark Original Steam Mop S3101SL. Инструкции по использованию помогут правильно настроить Shark Original Steam Mop S3101SL, исправить ошибки и выявить неполадки.
- Manuals
- Brands
- Shark Manuals
- Steam Cleaner
- S3101 series
- Owner’s manual
-
Contents
-
Table of Contents
-
Troubleshooting
-
Bookmarks
Quick Links
OWNER’S GUIDE
S3101 series
S3202 series
S3101_SERIES-S3202_SERIES_11_ENG_IB_100909.indd 1
08/09/10 4:33 PM
Related Manuals for Shark S3101 series
Summary of Contents for Shark S3101 series
-
Page 1
OWNER’S GUIDE S3101 series S3202 series S3101_SERIES-S3202_SERIES_11_ENG_IB_100909.indd 1 08/09/10 4:33 PM… -
Page 2: Important Safety Instructions
SAVE THESE INSTRUCTIONS power cord. To unplug, grasp the exercised when using this plug not the power cord. Do not appliance to clean stairs. For Household Use Only use extension cords or outlets 22. Never use steam mop without with inadequate current carrying micro-fiber pad attached. 1. Use the system only for its capacity. WHEN USING YOUR SHARK ® intended use. 23. Keep your work area well lit. 12. DO NOT put any objects into STEAM MOP, BASIC SAFETY 2. DO NOT use outdoors. openings. Do not use with any 24. S tore steam mop indoors in a PRECAUTIONS SHOULD opening blocked. cool, dry place.
-
Page 3: Quick Start
Quick Start ASSEMBLE 1 Fit together the extension tubes as shown in the illustration. See page 2 for more detailed assembly instructions. 2 Place the micro-fiber cleaning cloth underneath the mop head, with quick fastener strips facing up. Simply press the pad to the mop to attach it. ADJUST PRIME STEAM 4 For your comfort, you can adjust 5 Plug in the mop. Wait 30 seconds for the unit to heat up and the the height of the mop. Just lift FILL the latch on the tube 90 degrees steam to be ready. 3 Remove the cap to fill the to the open position. Holding Push the handle toward the mop Water Tank. Using the filling the handle, extend the tube to head in a pumping motion. To flask and funnel, fill the tank, the height that’s right for you prime simply pump the handle keeping the water under the and then close latch to locked 10-15 times to generate the “MAX FILL” line. Don’t forget to position.
-
Page 4: Table Of Contents
English Contents Thank you for GETTING STARTED …………..2 purchasing USING YOUR STEAM MOP ………..6 the Shark ® USING YOUR ACCESSORIES ……….8 Steam Mop. CARE OF YOUR STEAM MOP ……….9 TROUBLESHOOTING …………10 WARRANTY AND REGISTRATION ……..11 This manual covers model numbers: S3101 11 S3101A 11 S3101C 11 S3101CO 11 S3101CP 11…
-
Page 5: Getting Started
FIRST THINGS FIRST, YOU NEED TO YOUR SHARK STEAM MOP IS 3 Insert the pieces you assembled in IMPORTANT: Always make sure that KNOW WHAT’S IN THE BOX YOU EASY TO ASSEMBLE your Steam Mop is unplugged from Step 2 into the pump actuator (the JUST OPENED: 1 First remove all the parts from the tube that leads to the tank). Push the the wall before you attach the package. We know you’re excited…
-
Page 6
Getting Started English The water tank cap has an Each micro-fiber cleaning pad arrow to indicate the locked has a colored tab so that you and unlocked position. can use a different pad for different tasks. Use one color for tough grime on tile floors, another color for stubborn spots on linoleum and another color for pet stains. Keep your floors happy! Always attach the micro-fiber cleaning pad to the mop head or you may scratch your floor surface. PLACING THE MICRO-FIBER PAD NOTE: Don’t be alarmed if the first FILLING THE WATER TANK 2 The filling flask and funnel included with your Steam Mop make filling time you use your Steam Mop, you 1 Place the micro-fiber cleaning cloth IMPORTANT: Before you fill up the notice water inside the water tank or the water tank as simple as getting a underneath the mop head, with tank, make sure your Steam Mop is glass of water from the sink. Fill the drops of water in the packaging. It’s the quick fastener strips facing up. -
Page 7: Using Your Steam Mop
Using Your Steam Mop English Now comes the part you’ve been waiting for – it’s time to use your steam mop. When you use your steam mop for When your Steam Mop stops the first time or haven’t used the unit steaming, it could be out of in awhile, it may take a minute or two water. Unplug the power cord for the water to make its way through from the electrical outlet the pump and into the heater to create and refill the water tank at steam. Get it started by pumping the anytime. handle a few times. If you’ve waited a few minutes and you still don’t see any steam, reference the troubleshooting section on page 10. IMPORTANT: Your Steam Mop needs 1 Pull and twist the quick release 3 It takes about 30 seconds for the IMPORTANT: When your floors are cord holder to unwrap the power steam to get going. Now pump the sparkling clean and you’re finished water to make steam! Never use your cord completely. Plug into a 120- Steam Mop without water in the tank. handle a few times to prime the with your Steam Mop, unplug it from volt electrical outlet. The “On” light pump and activate steam. the electrical outlet and carefully Sweep or vacuum your floors will turn green. Success! If your remove the micro-fiber cleaning…
-
Page 8: Using Your Accessories
Using Your Accessories Care of Your Steam Mop English (optional) The Steam Mop won’t clean your carpeting or areas rugs, but it’s great for deodorizing and freshening carpets and Always remove the micro- area rugs. fiber cleaning pad from the Steam Mop head when you store your Steam Mop to avoid damage to your floors. KEEPING YOUR MICRO-FIBER KEEPING YOUR STEAM MOP CLEANING PAD AS GOOD AS NEW IN TIP-TOP SHAPE Your steam activated micro-fiber If you love your Steam Mop, let it cleaning pad works wonders for you, show. Caring for your Steam Mop so return the favor by giving it the and properly storing it means you’ll care it deserves.
-
Page 9: Troubleshooting
Trouble Shooting Ordering Replacement Parts English PROBLEM POSSIBLE REASONS & SOLUTIONS Your steam-mop should be securely plugged into a 120V AC electrical outlet only. The Steam Mop will not turn-on. Check your fuse or breaker. If your unit still doesn’t work, give us a call 1-800-798-7398. Steam Mop will not Is there water in the water tank? If not, add water to your make steam. Steam Mop following instructions. Is your micro-fiber cleaning pad too wet? Why don’t Steam Mop leaves you unplug your Steam Mop and change the micro-fiber water on the floor. cleaning pad. Don’t leave your steam-mop on the floor with a damp or Steam Mop left white wet cleaning pad.
-
Page 10
Notes English ONE (1) YEAR LIMITED WARRANTY EURO-PRO Operating LLC warrants this product to be free from defects in material and workmanship for a period of one (1) year from the date of the original purchase, when utilized for normal household use, subject to the following conditions, exclusions and exceptions. If your appliance fails to operate properly while in use under normal household conditions within the warranty period, return the complete appliance and accessories, freight prepaid. For Customer Service support, call 1 (800) 798-7398 or visit our website www.sharkclean.com. If the appliance is found to be defective in material or workmanship, EURO-PRO Operating LLC will repair or replace it free of charge. Proof of purchase date and a check made payable to EURO-PRO Operating LLC in the amount of $ 9.95 to cover the cost of return shipping and handling must be included. * The liability of EURO-PRO Operating LLC is limited solely to the cost of the repair or replacement of the unit at our option. This warranty does not cover normal wear of parts and does not apply to any unit that has been tampered with or used for commercial purposes. This limited warranty does not cover damage caused by misuse, abuse, negligent handling or damage due to faulty packaging or mishandling in transit. This warranty does not cover damage or defects caused by or resulting from damages from shipping or repairs, service or alterations to the product or any of its parts, which have been performed by a repair person not authorized by EURO-PRO Operating LLC. This warranty is extended to the original purchaser of the unit and excludes all other legal and/or conventional warranties. The responsibility of EURO-PRO Operating LLC if any, is limited to the specific obligations expressly assumed by it under the terms of the limited warranty. In no event is EURO-PRO Operating LLC liable for incidental or consequential damages of any nature whatsoever. Some states/provinces do not permit the exclusion or limitation of incidental or… -
Page 11
U.S.: EURO-PRO Operating LLC Newton, MA 02459 Canada: EURO-PRO Operating LLC 4400 Bois Franc Ville St. Laurent, Québec H4S 1A7 1-800-798-7398 www.sharkclean.com COPYRIGHT© EURO-PRO OPERATING LLC 2010 PRINTED IN CHINA S3101.SERIES.EF.100908 S3202.SERIES.EF.100908 Illustrations may differ from actual product. S3101_SERIES-S3202_SERIES_11_ENG_IB_100909.indd 14 08/09/10 4:33 PM…
![]()
STEAM MOP
TRAPEADOR A VAPOR VADROUILLE À VAPEUR
OWNER’S MANUAL MANUAL DEL USUARIO GUIDE DU PROPRIÉTAIRE
Models-Modelos-Modèles: S3101 N – S3101W N
120V., 60Hz, 1550 Watts/Vatios
EURO-PRO Operating LLC
Boston, MA, 02465
1 (800) 798-7398 www.sharkcompany.com
COPYRIGHT© EURO-PRO OPERATING LLC 2008

IMPORTANT SAFETY INSTRUCTIONS
When using your SHARK Steam Mop, basic safety precautions should always be observed, including the following:
Warning: To reduce the risk of fire, electrical shock, or injury:
1.Read all instructions before using your steam mop.
2.Use the system only for its intended use.
3.Do not use outdoors.
4.Do not leave the appliance unattended when plugged in. Always unplug the power cord from the electrical outlet when not in use and before servicing.
5.Do not allow the appliance to be used as a toy. Close attention is necessary when used by or near children, pets or plants. Do not leave appliance unattended while connected.
6.Use only as described in this manual.
7.Use only manufacturer’s recommended accessories.
8.Do not operate the appliance with a damaged plug or cord, or if the unit has been dropped or damaged. To avoid the risk of electric shock, do not disassemble or attempt to repair the appliance on your own. Return the appliance to EURO-PRO Operating LLC (see warranty) for examination and repair. Incorrect re-assembly or repair can cause a risk of electrical shock or injury to persons when the appliance
is used.
9.To protect against a risk of electric shock, do not immerse the steam mop into water or any other liquids.
10.Do not pull or carry by power cord, use power cord as handle, close a door on the power cord, or pull the power cord around sharp edges or corners. Keep power cord away from heated surfaces.
11.Do not unplug by pulling on power cord. To unplug, grasp the plug not the power cord. Do not use extension cords or outlets with inadequate current carrying capacity.
12.Do not handle plug or steam mop with wet hands or operate appliance without shoes.
13.Do not put any objects into openings. Do not use with any opening blocked.
14.Do not put hands or feet under the steam mop. Unit gets very hot.
15.Use ONLY on flat, horizontal
surfaces. use on walls, counters or windows.
16.Do not use on leather, wax polished
furnitureDo not or floors, synthetic fabrics, velvet or other delicate, steam sensitive materials.
17.Do not add cleaning solutions, scented perfumes, oils or any other chemicals to the water used in this appliance as this may damage the unit or make it unsafe for use. If you live in a hard water area, we recommend using distilled water in your steam mop.
18.When in use, NEVER turn the appliance over or on its side.
NEVER DIRECT STEAM TOWARDS PEOPLE, ANIMALS OR PLANTS.
19.NEVER LEAVE THE STEAM MOP IN ONE SPOT ON ANY SURFACE FOR ANY PERIOD OF TIME WHEN MICRO-FIBER PAD IS ATTACHED.
20.Carefully remove the micro-fiber pad immediately after you have finished using the steam mop.
21.When cleaning the steam mop, unplug the power cord from the electrical outlet and clean with a dry or damp cloth. Do not pour water or use alcohol, benzene or paint thinner on the unit.
22.Extreme caution should be exercised when using this appliance to clean stairs.
23.Never use steam mop without micro-fiber pad attached.
24.Keep your work area well lit.
25.Store steam mop indoors in a cool, dry place.
SAVE THESE INSTRUCTIONS
For Household Use Only
ADDITIONAL IMPORTANT SAFEGUARDS
1.To avoid circuit overload, do not operate another appliance on the same socket (circuit) as the steam cleaner.
2.If an extension cord is absolutely necessary, an extension cord rated a minimum of 15 ampere, 14 gage cord should be used. Cords rated for less amperage may overheat. Care should be taken to arrange cord so that it cannot be pulled or tripped over.
3.Do not leave unattended when the system is connected to a power supply/electrical outlet.
WARNING: To reduce the risk of electric shock, this appliance has a polarized
plug (one blade is wider than the other). Th
one way. If the plug does not fit fully in the outlet, reverse the plug. If it still does not fit, contact a qualified electrician to install the proper outlet. Do NOT modify the plug in any way.
WARNING: Your steam mop is designed to clean hard floor surfaces that will withstand high heat. Do not use on unsealed wood or unglazed ceramic floors. On surfaces that have been treated with wax or some no wax floors, the sheen may be removed by the heat and steam action. It is always recommended to test an isolated area of the surface to be cleaned before proceeding. We also recommend that you check the use and
manufacturer.
is plug will fit in a polarized outlet only
IMPORTANT: Do not store unit with damp/wet micro-fiber cleaning pad attached. Never leave the steam mop in one spot on any surface for any period of time with a damp or wet micro-fiber cleaning pad attached as this will damage your floors.
IMPORTANT: Do NOT add cleaning solutions, scented perfumes, oils or any other chemicals to the water used in this appliance. If you live in a hard
water area, we recommend using distilled water in your steam mop. care instructions from the floor
WARNING: Danger of Scalding. Please use caution when using the steam mop. The steam emitted from the openings is very hot.
SAVE THESE INSTRUCTIONS
FOR HOUSEHOLD USE ONLY
2
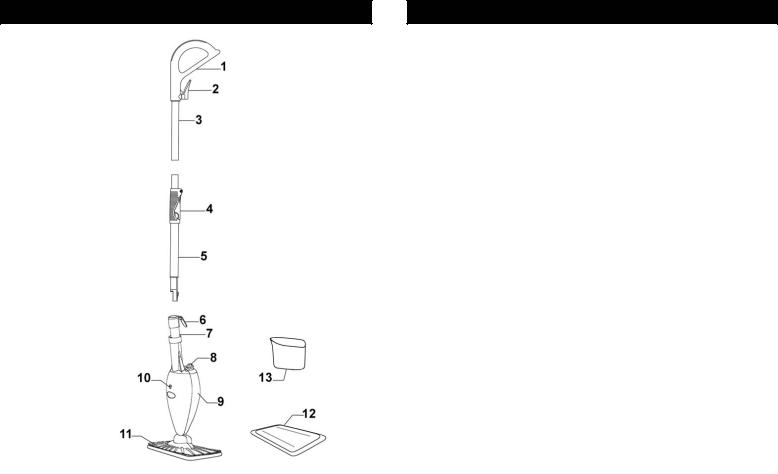
GETTING TO KNOW YOUR STEAM MOP
1.Ergonomic Hand Grip
2.Quick Release Cord Wrap
3.Upper Extension Tube
4.Locking Latch
5.Telescopic Tube
6.Lower Cord Wrap
7.Pump Actuator
8.Water Tank Cap
9.Water Tank
10.Power “On” Light (Green)
11.Mop Head
12.Micro-Fiber Cleaning Pad (x2)
13.Filling Flask
14.Funnel
15.Power Cord (not shown)
 14
14
Technical Specifications
|
Voltage: |
120V., 60Hz. |
|
Power: |
1550 Watts |
|
Water Capacity: |
8 U.S. Fl. Oz. (250ml) |
*Note: Illustrations may differ from actual unit.
3
FEATURES
Your Shark Steam Mop utilizes steam to remove tough grease,dirt and grime. Steam is nature’s purest and most powerful cleaner for safely cleaning all hard floor surfaces in your home without harsh chemicals, thus being perfectly ecological. Cleans your tile, hardwood, linoleum and vinyl floors.
1.Quick & Easy
Eliminates rinsing, wringing, carrying buckets of water and redistributing the dirt on the floor.
2.Powerful
Powerful steam dries quickly unlike traditional mopping. Uses powerful steam for superior cleaning and sanitizing.
3.No Harsh Chemicals
Use plain tap water or distilled water. Leaves no chemical residue behind.
4.Lightweight
No heavy buckets to carry. The Shark Steam Mop weighs only 3 lbs. Only one third the weight of carrying a bucket of water and a mop.
5.Ergonomic Soft Grip Handle
Comfortable design makes it easy to maneuver without physical strain.
6.Quick Start-Up
Steam is ready in just 30 seconds.
7.Power “On” Light
The power “On” light will turn green when the unit is plugged in.
8.Reusable Cleaning Pad
Durable triple layer micro-fiber cleaning pad loosens, lifts and locks in dirt. Just toss in the washing machine when done.
4

MAX
Fig. 4
OPERATING INSTRUCTIONS
How To Assemble Your Steam Mop
1.Remove all the parts from the packaging.
2.Insert the upper extension tube into the lower telescopic tube. (Fig. 1) Push it in until you
hear it click into place.
3.Insert the extension tube assembly into the pump actuator. Make sure that the locking tab snaps into place. (Fig. 1)
4.Place the micro-fiber
|
cleaning pad underneath |
Pump |
|
|
the mop head. Make |
actuator |
|
|
sure that the hook |
||
|
and latch strips are |
||
|
facing up. (Fig. 2) |
||
|
Press to secure. |
||
|
TIP: The micro-fiber |
Fig. 1 |
|
|
cleaning pads have |
||
|
a colored tab so that |
||
|
a different pad can |
||
|
be assigned to |
Mop |
|
|
different tasks or |
head |
|
|
rooms in the |
||
|
house. |
||
|
Hook & latch |
||
|
strips |
||
|
Fig. 2 |
To Extend the Telescopic Tube
1.Lift the locking latch up 90°. (Fig. 3)
2.Holding the handle, extend the telescopic tube to the desired length. (Fig. 3)
3.When you have the telescopic tube to the length that you
want, close the locking latch.
HELPFUL HINT: If you find the Steam Mop difficult to push/pull during use, then simply increase the height of the pole.
Fig. 3
5
Filling the Water Tank IMPORTANT: Always insure that the unit is “UNPLUGGED” from the wall receptacle prior to filling and before attaching the micro-fiber cleaning pad to the bottom of the mop head. Never use the steam mop without the micro-fiber cleaning pad attached to the mop head. NOTE: When using your new steam mop for the first time you may notice water residue inside of the unit. Water drops can also be found in the packaging. This is normal and you should not be alarmed. Each steam mop is 100% tested in the factory to ensure product performance and safety. Sometimes
water is left in the unit from these test procedures. 1. Turn the cap
counter clockwise and then lift up to remove from the water tank. (Fig. 4)
2.Using the filling flask and funnel, pour one flask of water into the water tank. Do not overfill the unit past the “MAX” fill line on the water tank. (Fig. 4)
3.Replace the cap onto the water tank.
Using the Steam Mop
IMPORTANT: Never use the steam mop without the micro-fiber cleaning pad attached to the mop head or without water in the water tank.
Please note that when using for the first time, the appliance may take longer than the normal 30 second startup time to steam. You may need to pump the handle a few times before the steam is released. This is due to the water making its way from the water tank through the pump and into the heater. This will only occur during the first use.
1.Sweep or vacuum floors before using the steam mop.
2.Twist the quick release cord holder to unwrap the power cord completely.
3.Plug into a 120-volt electrical outlet.
4.The power “On” light will turn green.
5.It takes approximately 30 seconds for the unit to heat up and the steam to be ready.
6.Pump the handle a few times to dampen the micro-fiber cleaning pad. Begin mopping with a forward and backward motion, this pumping action will release steam as you mop.
OPERATING INSTRUCTIONS
7.When the water tank is empty, the steam mop will stop emitting steam. Unplug the power cord from the electrical outlet and refill the water tank following the instructions above.
8.When you have finished using the steam mop, unplug the unit from the electrical outlet and carefully remove the micro-fiber cleaning pad from the mop head. Please note that the microfiber cleaning pad gets very hot with the steam. Always use caution when removing.
9.Never leave the micro-fiber cleaning pad on the steam mop head when you have finished using the steam mop. Always remove the micro-fiber cleaning pad and wash in warm water with a mild detergent. Never use bleach or fabric softener when washing the reusable micro-fiber cleaning pad. The micro-fiber cleaning pad may be washed in a washing machine and dried in a clothes drier on low heat. We recommend that you air dry.
IMPORTANT: Be careful when machine washing or drying with mixed fabrics as micro-fiber pads will pick up lint from other fabrics and the hook and latch strips will stick to other garments. We recommend washing the micro-fiber cleaning pads separately or placing them in a garment bag first.
CAUTION: Never store the steam mop with a wet or damp micro-fiber cleaning pad still attached as this will damage your floors.
Care & Maintenance of the MicroFiber Cleaning Pad
Due to the unique cleaning ability of this pad, proper care of your micro-fiber cleaning pad is required to ensure long life and continued cleaning ability.
•The first thing you should do when you get a new micro-fiber cleaning pad is to wash and dry it. During the manufacturing process the fabric has a tendency to become flat as it picks up contaminants from the air and machinery. There will also be a number of loose threads that, while they cause no harm, can be annoying the first time you use the pad.
•To wash the micro-fiber cleaning pad, simply put it in your washing machine using the warm water setting or hand wash.
•We recommend washing your microfiber cleaning pads separately from other fabrics or placing them in a garment bag first if washing by machine. They have a tendency to pick up lint and other particles from other fabrics and the next time you use your micro-fiber cleaning pad, this lint will transfer to the surface being cleaned.
•ONLY USE LIQUID DETERGENTS, never use dry detergents as many times the granules do not fully dissolve and become trapped in the cleaning pad. This can scratch the surface that you are cleaning.
•NEVER USE BLEACH OR FABRIC SOFTENERS! Bleach will damage the micro-fiber fabric and fabric softeners deposit a coating on the micro-fiber fabric what will not allow the pad to clean efficiently.
•We recommend that you air dry the micro-fiber cleaning pad. If using a clothes dryer, do not put on a high heat setting as high heat will cause the micro-fiber pad to shrink and the micro-fibers to break down.
•Wash the micro-fiber cleaning pads regularly and don’t allow them get too dirty so that they will last much longer. As with any fabric, dirt particles, grease and other contaminants can cause the fibers to break down, therefore regular cleaning will help preserve your micro-fiber cleaning pads.
•As you use the micro-fiber cleaning pad, you will notice that sometimes a thread will loosen or pull out. This is normal and you should NEVER PULL AT THE LOOSE THREAD! Pulling the thread can cause the weave to come undone. Instead, simply trim the thread with a pair of sharp scissors.
6

OPERATING INSTRUCTIONS
Helpful Hints
1.Always vacuum or sweep before using the steam mop.
2.The easiest way to use the steam mop is to tilt the ergonomic handle to a 45° angle and clean slowly.
3.Hand wash or machine wash the micro-fiber cleaning pad in a delicate cycle with a mild liquid detergent.
4.We recommend air drying the microfiber cleaning pads for 24 hours, but they could be dried in a dryer on a low heat setting.
5.A good amount of steam passes through the micro-fiber cleaning pad. We recommend that the cleaning pad be changed when it gets too wet. These need to be replaced as necessary.
6.To remove stubborn stains from vinyl or linoleum floors, pre-treat with a mild detergent and some water before using the steam mop.
IMPORTANT: Never leave the steam mop in one spot on any surface for any period of time with a damp or wet micro-fiber cleaning pad attached as this will damage your floors.
Care and Maintenance
If you consistently use distilled water, cleaning the water tank is unnecessary.
CAUTION: This appliance must be unplugged from the electrical outlet before performing any cleaning or maintenance tasks on the unit.
Rinsing Out the Steam Mop
1.Let the appliance cool down completely before cleaning or storing.
2.Empty all water from the water tank after each use.
Water
•Use tap water for all your cleaning needs.
•However, if you live in an area with hard water, it is recommended that you use distilled water
IMPORTANT: Do NOT add cleaning solutions, scented perfumes, oils or any other chemicals to the water used in this appliance, as this may damage it or make it unsafe for use. Use distilled water if the tap water in your area is very hard.
7
TROUBLE SHOOTING
|
PROBLEM |
POSSIBLE CAUSE |
POSSIBLE SOLUTION |
|||
|
1. Power cord not firmly |
1. |
Plug unit in firmly. |
|||
|
STEAM MOP |
2. |
Check fuse or breaker. |
|||
|
plugged into outlet. |
|||||
|
WILL NOT |
Replace fuse/reset |
||||
|
2. No power in wall outlet. |
|||||
|
OPERATE |
breaker. |
||||
|
3. |
Needs servicing. |
||||
|
3. |
Call 1 (800) 798-7398. |
||||
|
STEAM MOP |
1. |
Add water to the water |
|||
|
WILL NOT MAKE |
1. |
No water in water tank. |
tank following |
||
|
STEAM |
instructions. |
||||
|
STEAM MOP |
1. Micro-fiber cleaning pad is |
1. |
Unplug unit from power |
||
|
LEAVES WATER |
outlet and change the |
||||
|
too wet. |
|||||
|
ON THE FLOOR |
micro-fiber cleaning pad. |
||||
|
1. Never leave the steam |
|||||
|
STEAM MOP |
1. Steam mop left in one |
mop on the floor with a |
|||
|
LEFT WHITE |
damp or wet cleaning |
||||
|
spot too long. |
|||||
|
SPOT ON |
pad still attached when |
||||
|
2. |
Hard water. |
||||
|
FLOOR |
not in use. |
||||
|
2. |
Use distilled water. |
||||
To Order Replacement Micro-Fiber Pads for Models S3101 N — S3101W N
Item # XT3101
Call: 1 (800)798-7398
Monday to Friday 8:30 A.M. — 5:00 P.M. Eastern Standard Time Or visit our website: www.sharkcompany.com
FOR TECHNICAL SUPPORT for Models S3101 N — S3101W N
Call: 1 (800) 798-7398
Monday to Friday 8:30 A.M. — 5:00 P.M. Eastern Standard Time
8
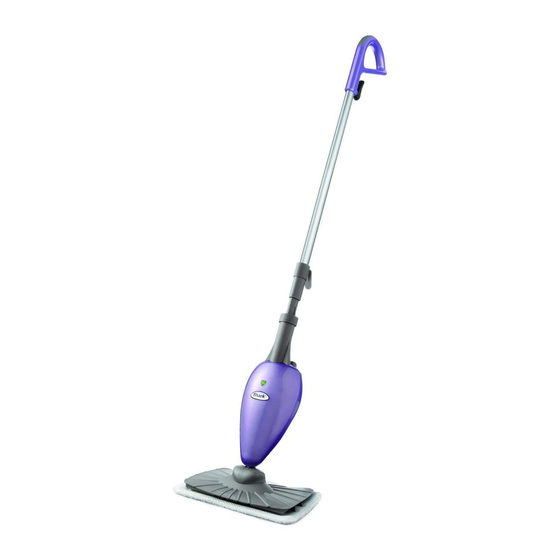
Всем известно, что чистота помещения, где вы живете — это основа вашего драгоценного здоровья. Именно поэтому любая хозяйка хочет и стремится к тому, чтобы ее дом сверкал и был чистый. Вы думаете, что такого эффекта достичь очень сложно? Все вовсе не так. Вы сможете приблизится к своей мечте, если воспользуетесь паровой шваброй Shark Original Steam Mop S3101SL.
Именно этот аппарат сможет привести ваш дом к безупречной частоте и свежести в каждом уголке. Благодаря усовершенствованной системе очистки разных типов поверхности, она не оставит грязи никаких шансов. Эта модель шарк стим моп является полифункциональным продуктом, поскольку в ней сконцентрировано пять приборов в одном.
Для начала ее можно использовать как швабра-универсал для мытья полов. Она удобная и легкая в использовании. К тому же к ней прилагается несколько видов насадок, которые упростят вам работу. Именно эта машина превосходно подойдет к чистке полов из различных материалов. Дерево, линолеум, натуральный камень или керамическая плитка, все это будет сверкать и сохранять на долгое время чистоту.
Также паровую швабру Shark Steam Mop можно использовать для чистки ковров. Эта паровая швабра сможет вернуть свежесть не только гладким покрытиям, но также и ковровым. Благодаря ей вы сможете вывести грязь даже из самым пильных и старых ковров.
Также паровая швабра Shark может служить вам в виде пароочистителя. С ее помощью вы без проблем отчистите вашу кухонную и ванную комнаты от налета, грибков и пригорелого жира.
- Безопасность. Эта машина использует горячий пар, а он не вредит здоровью человека по сравнению с другими химикатами.
- Вы существенно сэкономите на моющих средствах, которые на сегодняшний день не дешевые.
- Удобство конструкции. Позволяет превратить процесс уборки в приятное времяпровождение.
- Мощность прибора столь велика, что полная очистка любой поверхности, будь это камень или дерево, осуществляется всего за одну минуту.
- Маневренность и компактность позволяет осуществлять уборку всего дома за небольшой промежуток времени.
Основное преимущество швабры Шарк Стим Моп состоит в том, что этим аппаратом можно чистить стекло. Все это осуществляется благодаря специальной насадке, которая поможет быстро и с легкостью справится с разводами на стекле и различными пятнами. С помощью Shark Original Steam Mop S3101SL вам не нужно будет тратить деньги на дорогие средства на чистку, которые вредят вашему здоровью. К тому же вы можете использовать эту паровую швабру для очистки домашнего текстиля.
Но, конечно, есть один небольшой минус, цена на это прибор составляет примерно четыре тысячи рублей. Это стоит того, поскольку с помощью этой швабры вы сможете сэкономить намного больше и на разных вещах, которыми вы бы пользовались во время уборки. Ведь этот прибор имеет пять разных режимов работы, которые упростят вам жизнь и сделают дом чистым.
Для того чтобы начать уборку с этим аппаратом, то вам достаточно просто залить в специальное отверстие воду, потом включить швабру, подождать примерно 30 секунд, чтобы вода превратилась в пар под воздействием температуры, и тогда вы можете смело приступать к работе.
ВНИМАНИЕ: Ознакомьтесь со всеми инструкциями перед
использованием паровой швабры.
ПРАВИЛА БЕЗОПАСНОСТИ
Только для домашнего использования
При использовании паровой швабры Shark Original Steam Mop
необходимо соблюдать основные меры безопасности, включая
следующие:
Риск возникновения ожогов.
Будьте аккуратны во время использования паровой швабры. Пар,
поступающий из отверстий, очень горячий.
Примечание:
Данный прибор не предназначен для использования лицами (включая
детей)
с
ограниченными
физическими,
сенсорными
или
умственными способностями, а также лицами, не обладающими
достаточным опытом или знаниями, без должного контроля или
инструктажа
по
вопросу
использования
прибора
лицом,
ответственным за их безопасность. Необходимо следить за детьми во
избежание игр с прибором.
ВНИМАНИЕ:
Во избежание риска возникновения пожара, электрошока или травм:
1.Использовать прибор только по назначению.
2.НЕ использовать прибор вне помещения.
3.НЕ оставлять прибор, подключенный к сети, без внимания. Всегда
отсоединять электрошнур от розетки, если прибор не используется, а
также перед его обслуживанием.
4.НЕДОПУСТИМО использование прибора в качестве игрушки.
Необходимо пристальное внимание при использовании прибора
детьми или около них, а также около домашних питомцев или
растений.
5.Использовать только рекомендуемые производителем аксессуары.
6.НЕ использовать прибор с поврежденным электрошнуром или
вилкой, а также в случае падения или повреждения прибора. Во
избежание риска возникновения электрошока, не пытайтесь
-
Инструкции по эксплуатации
1
Shark Original Steam Mop S3101SL инструкция по эксплуатации
(10 страниц)
- Языки:Русский
-
Тип:
PDF -
Размер:
302.34 KB -
Описание:
Швабра паровая
Просмотр
На NoDevice можно скачать инструкцию по эксплуатации для Shark Original Steam Mop S3101SL. Руководство пользователя необходимо для ознакомления с правилами установки и эксплуатации Shark Original Steam Mop S3101SL. Инструкции по использованию помогут правильно настроить Shark Original Steam Mop S3101SL, исправить ошибки и выявить неполадки.