
Table of Contents: Husqvarna Viking H Class 100Q Sewing Machine Owner’s Manual
-
2. SET UP 15 THREADING FOR TWIN NEEDLE Turn off the main switch 1. Insert a twin needle. 2. Thread the machine as explained under “Threading the upper thread” (page 12), and thread the left needle. 3. Place the auxiliary vertical spool pin in the hole for auxiliary spool pin and place the large spool cap on the spool pin. Place a thread spool or wind a bobbin with the thread you are going to use as the second upper thread. Thread the machine as before and thread the right needle. Note: Only use twin needle 1,6mm and the maximum
-
Husqvarna Viking H Class 100Q 24 WARNING MESSAGES/SOUND Main Motor Overloaded Your sewing machine can get overloaded when sewing on heavy fabrics e.g,. the thread gets twisted or jammed or the hand wheel axle cannot move. When the sewing machine cannot sew you will hear a monotone sound in 8 seconds and the InfoDisplay will blink on and off displaying «EL». Look through the Trouble shooting guide on page 39/40 to À nd a recommended solution. After the problem has been solved, the machine will continue to sew. Note: During the sewing, if the thread get jammed inside the hook stopping the needle from moving and you continue pressing
-
2. SET UP 19 LOWER THE FEED TEETH To lower the feed teeth you need to remove the accessory box. The feed teeth lever is located on the back of the machine at the base of the free-arm. Slide the lever to the right (A) to lower the feed teeth. The feed teeth are raised when you move the lever to the left (B). The feed teeth will come up when you begin to sew or turn the handwheel towards you one full revolution. The feed teeth should be lowered when sewing on buttons.
-
Husqvarna Viking H Class 100Q 4 ACCESSORIES 1. INSPIRA™ needles 2. Bobbins 3. Seam Ripper/brush 4. Auxiliary spool pin 5. Edge/Quilting guide 6. Spool cap large 7. Felt pad 8. Screwdriver 9. Hard cover (not in picture) PRESSER FEET 7 Utility Foot A Attached on the machine upon delivery. This foot is used mainly for straight stitching and zigzag stitching with a stitch length longer than 1.0. 7 Presser Foot B This foot is used when sewing short zigzag stitches, other utility or decorative stitches and satin stitches with less than 1.0mm stitch length. The tunnel on the underside of the foot is designed to feed smoothly over the stitches. Blind H
-
Husqvarna Viking H Class 100Q 2. SET UP 7 UNPACKING Place the machine on a sturdy, Á at surface, remove the packaging and lift off the cover. The machine is delivered with an accessory bag, a main cord, a foot control cord and a hard cover. Wipe the machine, particularly around the needle and needle plate to remove any oil before sewing. CONNECT TO THE POWER SUPPLY Among the accessories you will À nd the power cord and the foot control. Note: Before connecting the power supply, make sure that the voltage and frequency shown on the machine are conforming with you
-
Husqvarna Viking H Class 100Q 2. SET UP 11 SPOOL PINS Your sewing machine has two spool pins, a main spool pin and an auxiliary spool pin. The main horizontal spool pin (A) is used for sewing with normal threads. The auxiliary vertical spool pin (B) can be used for large spools of thread or specialty threads. Horizontal Position Place the thread spool on the spool pin and slide on the large spool cap. Make sure that the spool cap is slightly larger than the thread spool. Also make sure that the thread reels over the top. The the spool cap should be placed À rmly against the spoo
-
Husqvarna Viking H Class 100Q 26 SEAM AND OVERCAST The Seam/Overcast stitch sews the seam and overcasts the edge all at one time. Your machine has a stretch seam overcast stitch. EDGE/QUILTING GUIDE The Edge/Quilting Guide is used for wide seam allowances, topstitching, or channel quilting. Slide the guide into the clip on the ankle. Adjust to the desired position. SATIN STITCH This is a closely spaced stitch used for appliqué, bar-tacking, etc. Slightly loosen the top thread tension for satin stitching. Set the stitch length between 0.7 and 2.0, depending on the weight of thread being used. Use a backing of stabilizer or interfacing
-
Husqvarna Viking H Class 100Q 1. GET TO KNOW YOUR MACHINE 3 MACHINE OVERVIEW 1. Thread tension dial 2. Bobbin winder tension disc 3. Presser foot pressure dial 4. Speed control slide 5. Needle stop up/down 6. FIX button 7. Reverse button 8. START/STOP button 9. Thread cutter 10. Built-in needle threader 11. Needle plate 12. Sewing table and accessory box 13. Bobbin winder spindle 14. InfoDisplay 15. Control Panel 16. Bobbin winding lever 17. Hole for auxiliary spool pin 18. Handwheel 19. Power/light switch 20. Power cord socket 21. Foot control socket 22. Horizontal spool pin 23. Handle 24. Presser foot lifter 25. Buttonhole lever 26. Drop feed l
-
TABLE OF CONTENTS GET TO KNOW YOUR MACHINE 3 Machine overview ……………………………………..3 Accessories …………………………………………………..4 Presser feet …………………………………………………. 4 Stitches …………………………………………………………..5 SET UP 7 Unpacking……………………………………………………..7 Connect to the power supply ……………….7 Pack away after sewing……………..
-
Husqvarna Viking H Class 100Q 1. GET TO KNOW YOUR MACHINE 5 STITCHES On the following pages you will À nd information about the stitches included in your sewing machine. Next to each stitch you can À nd information about the stitch number and pre-set values (default) for stitch width and length. Also provided are the recommended thread tension setting and presser foot for each stitch. For details on how to adjust the stitch length and stitch width, see chapter 3. STITCH No. LENGTH (mm) WIDTH (mm) THREAD TENSION PRESSER FOOT Default Min-Max Default Min-Max 01 2.5 0.5-4.5 Centre 0-7 3-5 A 02 4 0.75-9
-
Husqvarna Viking H Class 100Q 40 Upper Thread Breaks? • Does the thread feed smoothly and not catching? • Use quality thread. For special threads such as metallic, etc, please consult your Authorized HUSQVARNA VIKING® Dealer for special needle recommendations. • Rethread top and bobbin threads — check for correct threading. • Try different spool pin positions (horizontal or vertical). • If stitch plate hole is damaged, replace stitch plate. • Is the correct size of spool cap used in front of the thread? Fabric Does Not Move? • Feed teeth are set in dow
-
Husqvarna Viking H Class 100Q 5. CARE OF YOUR MACHINE 37 5 CARE OF YOUR MACHINE CHANGING THE LIGHT BULB Only use light bulbs of a type as indicated on the front of the machine (12V, 5W). They are available at your authorized HUSQVARNA VIKING® dealer. Turn off the main switch 1. Remove the plug (A) and loosen the screw (B) on the left side of the sewing head. Remove the face plate (C) on the machine. 2. To remove the light bulb, pull it downwards. Replace the bulb with the same type rated 5W. Replace the face plate, tighten the screw and insert plug. Note: Make sure that the light bulb has cooled down before touching it. CLEANING THE SURFA
-
12 THREADING THE UPPER THREAD Make sure the presser foot is raised and the needle is in the highest position. It is important to thread correctly to minimize several sewing problems. Turn off the main switch. 1. Lightly lift up the spool pin. Place the thread on the spool pin. Place the large spool cap on the spool pin (A). 2. Holding the thread with both hands, bring the thread into guide (B) from the back, then pull toward you to snap it in place. 3. Bring the thread under the secon
-
4. BASIC SEWING TECHNIQUES 33 DECORATIVE SEWING Use Decorative Stitch Foot B. 10 different types of decorative stitches are available on your machine. You can use other stitches in the same way. • You should test sew on a scrap piece of the fabric being sewn, to check the stitch pattern to be used. • Before starting to sew, check that there is enough thread wound onto the bobbin to make sure that the thread will not run out during sewing. • Slightly loosen top thread tension.
-
8 PACK AWAY AFTER SEWING 1. Press the power switch to OFF (O). 2. Unplug the cord from the wall socket and then from the machine. 3. Unplug the foot control cord from the machine. 4. Place all accessories in the accessory tray. Slide the tray onto your machine around the free arm. Polarized plug information (For the USA and Canada) This appliance has a polarized plug (one blade wider than the other), to reduce the risk of electrical shock. This plug will À t in a polarized outlet only one way. If the plug does not À t fully in the outlet, reverse the pl
-
Husqvarna Viking H Class 100Q 2. SET UP 13 4. Bring the thread down between the thread tension discs (D). 5. Continue threading the thread around the check spring holder (E). 6. Bring the thread from right to the left through the slot on the take-up lever (F) and then downwards again. 7. Bring the thread downwards and insert the thread from the right through the thread guide and the wire loop (G). 8. Use the needle threader (H) to thread the needle (see needle threader instructions on the next page). Place the thread under the presser foot. D E F G H
-
We reserve the right to change the machine equipment and the ass ort ment of accessories without prior notice, or make modiÀ cations to the performance or design. Such modiÀ cations, however, will always be to the beneÀ t of the user and the product. INTELLECTUAL PROPERTY VIKING, KEEPING THE WORLD SEWING & Design, H|CLASS and INSPIRA are trademarks of KSIN Luxembourg II, S.ar.l. HUSQVARNA and the “crowned H-mark” are trademarks of Husqvarna AB. All trademarks are used under license by VSM Group AB. Please note that on disposal, this product must be safely recycled
-
Husqvarna Viking H Class 100Q 28 SEWING ZIPPERS The Zipper Foot E can be snapped on either the right or the left of the needle, making it easy to sew both sides of the zipper from the same direction. To sew the other side of the zipper, reposition the Zipper Foot. Inserting Zippers To sew down the right side of the zipper, attach the left side of the zipper foot to the presser foot holder so that the needle passes through the opening on the left side of the foot. Adjust the needle position to the left or right with Stitch Width button. To sew down the left side, attach right side of the zipper foot to the pre
-
6 STITCH No. LENGTH (mm) WIDTH (mm) THREAD TENSION PRESSER FOOT Default Min-Max Default Min-Max 10 0.75 0.75-3 4 0.5-7 2-4 B 11 17 10-21 7 0-7 3-5 B 12 7.5 4-9 4 1.5-7 3-5 B 13 9 4-9 7 2-7 3-5 B 14 3.5 2-6 7 3-7 3-5 B 15 7.5 4-10 7 4-7 3-5 B 16 14 9-14 7 4-7 3-5 B 17 7.5 5-10 7 5-7 3-5 B 18 5 3-5 7 4-7 3-5 B 19 14 10-21 7 4-7 3-5 B 20 12 8-12 7 4-7 3-5 B
-
www.husqvarnaviking.com 413 31 68-26D • InHouse • © 2012 KSIN Luxembourg II, S.ar.l. • All rights reserved • Printed in Sweden on environmentally-friendly paper
-
Husqvarna Viking H Class 100Q 16 WIND THE BOBBIN 1. Place the thread and a spool cap on the spool pin. For smaller spools of thread, place the spool cap with the smaller side next to the thread (A). 2. Snap the thread into the thread guide (B). 3. Bring the thread counterclockwise around the bobbin winder tension discs (C). 4. Insert the thread though the hole in the bobbin from the inside to the outside. Place the bobbin on the bobbin winder spindle with the free end of the thread at the top (D). B C D
-
Husqvarna Viking H Class 100Q 18 Place the Bobbin in the Machine Turn off the main switch 1. Make sure that the needle is fully raised before inserting or removing the bobbin. Open the bobbin cover by moving the release button to the right (A). Remove the cover (B). 2. Place the bobbin in the bobbin case so that the thread is running in a counterclockwise direction (C). 3. Pull the thread though the slit and pull it to the left and along the inside of the spring until it slips into the notch. Be sure that the thread does not slip out of the slit (D). 4. Pull out about 15cm (6 inches) of thread and attach the bobbin cover plate (E).
-
3. MACHINE FUNCTIONS 21 SPEED CONTROL SLIDE With the speed control slide, you can change the maximum sewing speed to suit your needs. The slide limits how fast you can sew. To increase the sewing speed, slide the bar to the right. To reduce the sewing speed, slide the bar to the left. FOOT CONTROL You can control the sewing speed by using the foot control. The harder you press the foot control, the faster the machine sews. If you press the foot control all the way, the machine runs at the maximum speed set by the speed control slide. MACHINE SOUND It is possible to turn off the
-
Husqvarna Viking H Class 100Q 36 HELPFUL TECHNIQUES Sewing corners Stop the sewing machine when you reach a corner. Lower the needle into the fabric by turning the handwheel or pressing the Needle Stop Up/Down button once. Raise the presser foot. Use the needle as a pivot and turn the fabric. Lower the presser foot and resume sewing. Reverse button It is a good idea to begin and end seams (only available on stitch 01, 02 and 08) with reverse stitches to reinforce the seams in order to prevent unraveling. Press Reverse button. The machine will sew in reverse until you release the button and then stop. Press the foot control or START/STOP button to sew for
-
Husqvarna Viking H Class 100Q 2. SET UP 9 CHANGING THE NEEDLE Turn off the main switch 1. Loosen the needle screw. 2. Remove the needle. 3. Insert the new needle and push upwards with the Á at side away from you until the needle will go no further. 4. Tighten the needle screw. PRESSER FOOT LIFTER The presser foot is lowered or raised with the presser foot lifter. If you are sewing on heavy fabric or several layers of fabric, the presser foot can be raised higher to make it easier to place the fabric underneath the presser foot. PRESSER FO
-
Husqvarna Viking H Class 100Q USER’S GUIDE
-
Husqvarna Viking H Class 100Q 14 Needle Threader The needle must be in the highest position to use the built-in needle threader. We also recommend lowering the presser foot. Turn off the main switch. 1. Use the handle to pull the needle threader down, catching the thread under the guide (A). 2. Push the needle threader all the way down until the metal Á anges cover the needle. A small hook will pass through the needle eye. Bring the thread under the hook, as shown (B). 3. Let the needle threader gently swing back. The hook pulls the thread through the needle eye a
-
3. MACHINE FUNCTIONS 23 Needle Stop Up/Down (D) Press this button to choose between two options for the needle position when sewing: 1. The needle will always be lowered when you release the foot control or press START/STOP button to stop sewing. 2. The needle will always be raised up when you release the foot control or press START/STOP button to stop sewing. This function can be useful when turning a corner on your garment or project. Stitch Length (E) When you select a stitch, the machine automatically s
-
This houshold sewing machine is designed to comply with IEC/EN 60335-2-28 and UL1594 IMPORTANT SAFETY INSTRUCTIONS When using an electrical appliance, basic safety precautions should always be followed, including the following: Read all instructions before using this household sewing machine. DANGER — To reduce the risk of electric shock: • A sewing machine should never be left unattended when plugged in. Always unplug this sewing machine from the electric outlet immediately after using and
-
Husqvarna Viking H Class 100Q 30 BUTTONHOLES Use the Buttonhole foot. Buttonhole stitch 6 is for thin and medium fabric and buttonhole stitch 7 is for suits or overcoats. 1. Insert a button in between tab A and tab B. 2. Buttonholes can be sewn to match the size of the button. Procedure • Use stabilizer in the area of the garment where the buttonholes are placed. Stabilizer or regular interfacing can be used. • Use a scrap piece of the fabric you are going to use, to test the buttonhole. 1. Select one of the two buttonhole stitches (06 or 07). 2. Attach the buttonhole foot. 3. Insert the button into the buttonhole foot. 4. Carefully mark t
-
Husqvarna Viking H Class 100Q 4. BASIC SEWING TECHNIQUES 35 Free-Motion — Machine Set Up When sewing free-motion, it is necessary to use an Open Toe Free-Motion Spring Foot. This foot is not included with this machine, but is available for purchase at your Authorized HUSQVARNA VIKING® Dealer. 1. Lower the feed teeth as explained in chapter 2. 2. Remove the presser foot ankle with the screwdriver. 3. Place the Open Toe Free Motion Spring Foot from behind. The wire guide of the presser foot (A) should rest on top of the needle clamp screw (B). Insert the screw and tighten the screw with a screwdriver (C). Free-Motion Stippling Free-moti
-
Husqvarna Viking H Class 100Q 2. SET UP 17 5. Push the bobbin to the right (E). 6. When the bobbin winder spindle is pushed to the right, the InfoDisplay will blink on and off displaying “SP“ (F). 7. Hold the thread end and press the foot control (or press START/STOP button) to start the bobbin winding (G). 8. After a few turns of the bobbin, cut off the thread end. When the bobbin is full it will stop rotating. Push the bobbin winder spindle to the left and remove the bobbin. Cut off the thread (H). Note: When the bobbin winder spindle is pushed to
-
38 CLEAN THE BOBBIN AREA Turn off the main switch 1. Remove the presser foot, the bobbin cover and bobbin. 2. Clean the feed teeth with the brush. Cleaning Under the Bobbin Area Turn off the main switch After sewing several projects or any time you notice an accumulation of lint in the bobbin case area, the area under the bobbin case must be cleaned. 1. Remove the needle, presser foot, bobbin cover and bobbin. 2. Remove stitch plate by removing the two screws in the stitchplate. Lift up the stitchplate. 3. Lift the bobbin case upwards and remove it. 4. Clean
-
34 QUILTING A quilt usually consists of three layers; two layers of fabric with a layer of batting sandwiched between. Piecing a Quilt Block Select Straight Stitch (01). Snap on the Quilter’s 1/4” Piecing Foot. Align the edges of the two fabric pieces with the right hand edge of the foot. Handlook Quilting Stitch Snap on Utility Foot A. Select the Handlook Quilting Stitch (08). Thread the top with transparent thread, and the bobbin with 40wt. rayon thread. Increase the thread tension to 7,
-
Husqvarna Viking H Class 100Q 4. BASIC SEWING TECHNIQUES 31 7. Position the fabric under the presserfoot so that the centerlines mark is align with the center of the buttonhole foot. 8. While holding the top thread, start the machine. Sewing will be completed automatically in the following order: 9. When sewing is À nished, raise the presser foot and buttonhole lever. Use the seam ripper to open up the fabric in the center of the buttonhole. Be careful not to cut any of the bartack threads.
-
22 FUNCTION BUTTONS START/STOP button (A) Touch this button to start and stop sewing without using the foot control. Touch START/STOP button to begin and touch again to stop. You can increase and decrease the sewing speed by sliding the Speed Control Slide to the right and to the left. Reverse button (B) Reverse is used to secure the thread at the beginning and at the end of a seam. Press the reverse button and sew 4-5 stitches. The machine will sew forward when the button is released. Only use Reverse button on stitch
-
Husqvarna Viking H Class 100Q 4. BASIC SEWING TECHNIQUES 25 4 BASIC SEWING TECHNIQUES SEAM A seam is formed when two pieces of fabric are stitched together with a seam allowance that usually will be pressed open. In most cases edges of the seam allowance are À nished with an overcast stitch before sewing the seam. ZIGZAG The ZigZag stitch is most often used for decorative work and machine applique. The top thread may appear on the bottom depending on the thread, fabric, type of stitch and sewing speed, but the bobbin thread must never appear on top of the fabric. THREE-STEP ZIGZAG This is a st
-
Husqvarna Viking H Class 100Q 10 NEEDLES The sewing machine needle plays an important role in successful sewing. To ensure you will get a quality needle, we recommend INSPIRA™ needles of system 130/705H. Below, À nd a description of the most frequently used needles for sewing on woven and stretch fabrics. Universal needle (A) Universal needles have a slightly rounded point and come in a variety of sizes. For general sewing in a variety of fabric types and weights. Stretch needle (B) Stretch needles have a special shaft to eliminate skipped stitches when there is a Á ex in the fabric. For knits, swimwear, Á eece, synthetic sued
-
Husqvarna Viking H Class 100Q 4. BASIC SEWING TECHNIQUES 27 BLIND HEM The blind hem creates an invisible hem on garments. Fold the fabric as illustrated. Make sure the folded edge of the fabric follows the inside of the right “toe” of Blind Hem Foot D. Lower the presser foot and step on the foot control. The left swing of the needle should just catch the edge of the folded fabric. If neccessary, adjust the stitch width as needed to barely “catch” the fold. Note: The blind hem technique is not recommended for light weight fabric. Top side Under side Under side
-
Husqvarna Viking H Class 100Q 4. BASIC SEWING TECHNIQUES 29 3. Place fabric under the foot right side up. Begin stitching across the bottom, turn the fabric and stitch the right side of the zipper to the top. 4. To avoid fabric shifting, sew the left side of the zipper in the same direction. Snap on the Zipper Foot E so the needle is on the right side of the foot. Move the needle position to the right. 5. Begin stitching across the bottom, turn the fabric and stitch the left side of the zipper sewing from the bottom to the top. 6. Remove the basting stitches.
-
32 Corded Buttonholes When sewing buttonholes in stretch fabrics we recommend cording the buttonhole to increase the stability and to keep the buttonhole from stretching out. Loop a piece of heavy thread or pearl cotton over the À nger at the back of the buttonhole foot. Pull both ends of the cord forward under the foot and tie off the cord as shown in the illustration. Sew buttonhole so that zigzag stitches cover the cord. When completed, release the cord from foot.
-
20 RAISE THE BOBBIN THREAD 1. Hold the upper thread with the left hand. Turn the handwheel towards you counterclockwise to lower the needle and keep turning counterclockwise to raise the needle (A). 2. Gently pull the upper thread to bring the bobbin thread up through the needle plate hole. The bobbin thread will come up in a loop (B). 3. Pull both threads to the back under the presser foot (C). ADJUST THE PRESSER FOOT PRESSURE When sewing on light or heavy weight fabric you may need to adjust the presser foot pressure. Turn the presser foot pressure dial. The standard se
-
Husqvarna Viking H Class 100Q 5. CARE OF YOUR MACHINE 39 TROUBLE SHOOTING If you have followed the below trouble shooting information and still are having sewing problems, take the sewing machine to your Authorized HUSQVARNA VIKING® Dealer. Non-Original Parts and Accessories The warranty does not cover any defect or damage caused by use of non-original accessories or parts. Any Time You Experience a Problem When Sewing: • Rethread the top and bobbin threads. • Use different spool pin positions (vertical or horizontal). • Use quality thread. We recommend the same sewing thread on top a
Table of Contents: Husqvarna Viking H Class E10 Sewing Machine Owner’s Manual
-
Husqvarna Viking H Class E10 24 Tips — Slightly reduce upper thread tension to produce a satin stitch on top. 3ODFHVWDELOL]HUXQGHUQHDWKIRU¿QHDQG stretchy fabrics. — It is best to sew a cord for a buttonhole on a stretch or knit fabrics. The buttonhole colomns should sew over the cord. (5)
-
Husqvarna Viking H Class E10 28 STITCH SELECTION Triple straight stitch: (1) For reinforced seams. Turn the stitch length dial to “S1”. The machine sews two stitches forwards and one stitch backwards. This gives triple reinforcement. Triple zig-zag: (2) For hardwearing seams, hems and decorative seams. Turn the stitch length dial to “S1”. 7ULSOH]LJ]DJLVVXLWDEOHIRU¿UP fabrics like denim, corduroy, etc. Stitch length dial Stitch length dial
-
22 ZIGZAG STITCHING Turn the stitch selector dial so that the stitch display shows “C”-zig-zag. Turning the stitch selector dial will increase or decrease the zig zag width. Snap on the standard foot. Function of stitch length dial while zigzaging The density of zigzag stitches increase as the setting of stitch length dial approaches “0”. Zigzag stitches are usually sewn at “2.5” or less. Dense zigzag stitches (close together) are referred to as a satin stitch. Stitch length dial
-
Husqvarna Viking H Class E10 E10 USER’S GUIDE
-
Husqvarna Viking H Class E10 needle to break. • Do not use bent needles. ’RQRWSXOORUSXVKIDEULFZKLOHVWLWFKLQJ,WPD\GHÁHFWWKHQHHGOH causing it to break. • Wear safety glasses. 6ZLWFKWKHVHZLQJPDFKLQHRII´µZKHQPDNLQJDQ\DGMXVW- ment in the needle area, such as threading needle, changing needle, threading bobbin, or changing presser foot, etc. • Never drop or insert any object into any opening. • Do not use outdoors. • Do not operate where aerosol (spray) products are being used or where oxygen is being administrated. 7RGL
-
17 A B A A B C C B B BUILT-IN NEEDLE THREADER The needle must be in the up position to use the built-in needle threader. We also recommend lowering the presser foot. 1a. Use the handle to pull the needle threader down, catching the thread under the guide. 1b. Push the needle threader all the way GRZQXQWLOWKHPHWDOÀDQJHVFRYHU the needle. A small hook will pass through the needle eye. F 3ODFHWKHWKUHDGXQGHUWKHÀDQJHV in front of the needle, so the thread
-
Husqvarna Viking H Class E10 31 Problem Cause Correction The machine is noisy 1. The machine must be lubricated. 2. Lint or oil have collected on the hook or needle bar. 3. Poor quality oil has been used. 4. The needle is damaged. 1. Lubricate as described. 2. Clean the hook and feed dog as described. 3. Only use good quality sewing machine oil. 4. Replace the needle. The machine jams Thread is caught in the hook. Remove the upper thread and bobbin case, turn the handwheel backwards and forwards by hand and remove the thread. Lubricate as described.
-
Husqvarna Viking H Class E10 8 FITTING THE SNAP-IN ACCESSORY BOX Keep the snap-in accessory box horizontal, and push it in the direction of the arrow. (1) To open, lift up at the point of the arrow. (2) Note: Your H|CLASS™ E10 sewing machine is adjusted to provide the best stitch result at normal room temperature. Extreme hot and cold temperatures can affect the sewn result.
-
Husqvarna Viking H Class E10 Congratulations! As the owner of a new sewing machine, you will enjoy precision quality stitching on all types of fabrics, from multiple layers of denim to delicate silks. Your sewing machine offers the ultimate in simplicity and ease of operation. For your safety and to fully enjoy the many advantages and ease of operation of your sewing machine, we recommend that you read all the important safeguards and use and care instructions in this instruction book. May we suggest that before you start to use your sewing machine, you discover the many features and advantages by going through this inst
-
413 40 54-26B • English • Inhouse production • © 2014 KSIN Luxembourg II, S.ar.l. • All rights reserved • Printed in Germany on environmental-friendly paper • www.husqvarnaviking.com
-
Husqvarna Viking H Class E10 For Europe only: The noise level under normal operating conditions is less than 75dB(A). The machine must only be used with foot control of type KD-2902/ FC-2902A/FC-2902D manufactured by ZHEJIANG FOUNDER MOTOR CORPORATION LTD. For outside Europe: This sewing machine is not intended for use by persons (including children) with reduced physical, sensory or mental capabilities, or lack of experience and knowledge, unless they have been given supervi- sion or instruction concerning use of the sewing machine by a person responsible f
-
Husqvarna Viking H Class E10 4 LIST OF CONTENTS PRINCIPAL PARTS OF THE MACHINE ……………………………………………………………………5 ACCESSORIES……………………………………………………………………………………………………..7 FITTING THE SNAP-IN ACCESSORY BOX ………………………………………………………………8 CONNECTING THE MACHINE TO POWER SOURCE ……………………………………………….9 Foot control………………………………………………………………………………………………..
-
Husqvarna Viking H Class E10 6 13 14 15 16 17 18 19 20 21 22 23 13. Spool pin 14. Bobbin winder 15. Hole for second spool pin 16. Hand wheel 17. Stitch selector dial 18. Power switch 19. Main plug socket 20. Bobbin thread guide 21. Upper thread guide 22. Handle 23. Presser foot lever
-
Husqvarna Viking H Class E10 30 TROUBLE SHOOTING GUIDE Problem Cause Correction Upper thread breaks 1. The machine is not threaded correctly. 2. The thread tension is too tight. 3. The thread is too thick for the needle. 4. The needle is not inserted correctly. 5. The thread is wound around the spool holder pin. 6. The needle is damaged. 1. Rethread the machine. 2. Reduce the thread tension. (lower number) 3. Select a larger needle. 5HPRYHDQGUHLQVHUWWKHQHHGOHÀDW side towards the back) 5. Remove the spool and wind thread onto
-
12 ATTACHING THE PRESSER FOOT SHANK/ ANKLE Attaching the presser foot holder Raise the presser foot bar (a). (1) Attach the presser foot shank/ankle (b) as illustrated. Attaching the presser foot Lower the presser foot shank/ankle (b) until the cut-out (c) is directly above the pin on the foot (d). (2) Raise the lever (e). Lower the presser foot shank/ankle (b) and the presser foot (f) will engage automatically. Removing the presser foot Raise the presser foot. (3) Raise the lever (e) and the foot di
-
Husqvarna Viking H Class E10 16 THREADING THE UPPER THREAD Threading is simple but it is important to thread correctly to prevent sewing problems could result. — Start by raising the needle to its highest point (1), and also raise the presser foot to release the tension discs. (2) Attention: For safety, it is strongly suggested you turn off the power before threading. — Lift up the spool pin. Place the spool of thread on the holder with the thread coming off the spool as shown. For small thread spools, place small side of spool holder n
-
Husqvarna Viking H Class E10 29 Attention: Disconnect the machine from the electricity supply by removing the plug from the main socket. When cleaning the machine, it must always be disconnected from the electricity supply. Remove the stitch plate Turn the handwheel until the needle is fully raised. Open the hinged front cover and unscrew the needle plate screw withe the screw driver.(1) Cleaning the feed dog Remove the bobbin case and use the brush supplied to clean the whole area.(2) Cleaning and lubricating the hook (3) Remove the bobbin case. Snap the two h
-
11 + — TWO-STEP PRESSER FOOT LEVER When sewing several layers or thick fabrics, the presser foot can be raised to extra high for easy positioning of the work. (A) The presser foot pressure of the machine has been pre-set and usually requires no readjustment for most fabrics (light-or-heavy weight). However, if you need to adjust the presser foot pressure, turn the presser adjusting screw with a coin. For sewing very thin fabric, loosen the pressure by turning the screw counter clockwise for
-
26 ZIPPERS AND PIPING Set the machine as illustrated. (1) The zipper foot can be snapped onto the right or left, depending on which side of the foot you are going to place against the zipper or piping. (2) To sew past the zipper pull, lower the needle into the fabric, raise the presser foot and push the zipper pull behind the presser foot. Lower the foot and continue to sew. The zipper foot is also used to sew cord into a bias strip to form a piping and to s
-
10 1 2 CHANGING THE BULB Attention:Disconnect the machine from the power supply by removing the plug from the main socket! Replace bulb with same type rated 10 watts (110-120V) or 15 watts (220-240V). — Loosen screw (A) as illustrated. (1) — Remove the cover (B). 8QVFUHZWKHEXOEDQG¿WQHZRQH& (2) — Replace the cover and tighten screw. Should there be any problem, ask your local dealer for advice.
-
14 INSERTING THE BOBBIN When inserting or removing the bobbin, the foot and needle must be fully raised. 1. Open the hinged cover. 2. Hold the bobbin case with one hand. Insert the bobbin so that the thread runs in a clockwise direction (arrow). 3. Put the thread under the tension spring. 4. Hold the bobbin case by the hinged latch. 5. Insert it into the shuttle. Attention: Turn power switch to off (“O”).
-
7 123 4 567 89 10 11 12 14 13 ACCESSORIES 1. All purpose foot 2. Zipper foot 3. Satin stitch foot 4. Blind hem foot 5 Buttonhole foot 6. L-screwdriver 7. Seam ripper/ brush 8. Second spool pin 9. Spool holders (2x) 10. Pack of needles 11. Seam guide 12. Bobbins (3x) 13. Darning plate 14. Felt pad
-
Husqvarna Viking H Class E10 27 3-STEP ZIG-ZAG Sewing on lace and elastic, darning, PHQGLQJ¿QLVKLQJHGJHV Set the machine as illustrated. (1) Patching: Place the patch in position and stitch around edges. The stitch length can be shortened to produce very close stitches. (A) When mending tears, it is advisable to use a piece of backing fabric to reinforce. The stitch density can be varied by adjusting the stitch length. Begin by sewing over the center and then overlap on both sides. Depending on the type of fabric and damage, sew betw
-
18 2 THREAD TENSION / BRINGING UP THE BOBBIN THREAD Hold the upper thread with the left hand. Turn the handwheel towards you until the needle is raised. (1) Pull on the upper thread to bring the bobbin thread up through the stitch plate hole. Place both threads to the back under the presser foot. (2) Basic thread tension setting: “4” To increase the tension, turn the dial to the next number up. To reduce the tension, turn the dial to the next number down. Note: The weight and irregular surf
-
Husqvarna Viking H Class E10 25 BLIND HEM For hems, curtains, trousers, skirts, etc. Select Blind hem for stretch fabrics. Select Blind hem for woven fabrics. Snap on Blind hem foot. (1) Stitch length 1.5-2.5 Note: It takes practice to sew blind hems. $OZD\VPDNHDVHZLQJWHVW¿UVW Fold the fabric as illustrated with the wrong side up. (2) Place the fabric under the foot. Turn the handwheel forwards by hand until the needle swings fully to the left. It should just pierce the fold of the fabric. (3) Adjust the guide on the foot (4) by turning the knob (5) so that the guide just res
-
15 1 2 INSERTING THE NEEDLE Change the needle regularly, especially if it is showing signs of wear and causing problems. Insert the needle following the illustrated instructions. A. Loosen the needle clamp screw and tighten again after inserting the new needle. (1) % 7KHÀDWVLGHRIWKHQHHGOHVKDIW should be towards the back. C/D.Insert the needle as far up as it will go. Attention: Turn power switch to off (“O”). Needles must be in perfect condition. (2) Problems can occur with: A. Bent needles B. Damaged points C. Blunt needles
-
Husqvarna Viking H Class E10 23 HOW TO SEW BUTTONHOLES Preparation Select buttonhole with the stitch Selection dial. Snap on The buttonhole foot. Adjust the stitch length dial between “0.5” — “1”. The density of the stitch depends on thickness of the fabric. Note: Always test sew a buttonhole. To prepare the fabric Measure the diameter of the button and add 0.3 cm (1/8”) for the bartacks. If you have a very thick button, add more to the diameter measurement. Mark the position and length of the buttonhole on the fabric. Position the fabric so that the needle is on the mark that is furthest from you. Pull the buttonhole foot towards you as far as i
-
Husqvarna Viking H Class E10 We reserve the right to change the machine equipment and the assortment of DFFHVVRULHVZLWKRXWSULRUQRWLFHRUPDNHPRGL¿FDWLRQVWRWKHSHUIRUPDQFHRUGHVLJQ 6XFKPRGL¿FDWLRQVKRZHYHUZLOODOZD\VEHWRWKHEHQH¿WRIWKHXVHUDQGWKHSURGXFW Intellectual Property VIKING, KEEPING THE WORLD SEWING & design and H|CLASS, are trademarks of KSIN Luxembourg II, S.ar.l. HUSQVARNA and the “crowned H-mark” are trademarks of Husqvarna AB. All trademarks are used under license by VSM Group AB. CE
-
This household sewing machine is designed to comply with IEC/EN 60335-2-28 and UL1594. IMPORTANT SAFETY INSTRUCTIONS When using an electrical appliance, basic safety precautions should always be followed, including the following: Read all instructions before using this household sewing machine. Keep the instructions in a suitable place close to the machine. Make sure to hand them over if the machine is given to a third party. DANGER – To reduce the risk of electric shock
-
Husqvarna Viking H Class E10 5 PRINCIPAL PARTS OF THE MACHINE 1. Thread tension dial 2. Presser foot pressure 3. Thread take-up lever 4. Thread cutting 5. Built-in needle threader 6. Presser foot 7. Needle plate 8. Accessories box 9. Bobbin stop 10. Stitch length dial 11. Stitch display 12. Reverse sewing lever
-
Husqvarna Viking H Class E10 9 1 3 CONNECTING THE MACHINE TO POWER SOURCE Connect the machine to a power source as illustrated. (1) A polarized plug must be used with the appropriate polarized outlet. (2) Attention: Unplug power cord when machine is not in use. Foot control Foot control regulates the sewing speed. (3) Attention: &RQVXOWDTXDOL¿HGHOHFWULFLDQLILQGRXEWDVWRKRZWRFRQQHFWPDFKLQHWR power source. Unplug power cord when machine is not in use.The appliance must be used with the fo
-
Husqvarna Viking H Class E10 19 REVERSE SEWING At the end of a seam, press down the reverse sewing lever. Sew a few reverse stitches to “the tie off” the thread ends. Release the lever and the machine will sew forwards again. (1/A) REMOVING THE FABRIC Turn the handwheel toward you to bring the thread take up lever to its highest position, raise the presser foot and remove fabric to the back. (2) CUTTING THE THREAD Hold the threads behind the presser foot with both hands, pull them into the thread cutter (B) and down (3) to cut.
-
21 STRAIGHT STITCHING Straight stitching center needle position Turn the stitch selector dial so that the “A” appears in the stitch display window. Snap on the standard presser foot. Adjust the stitch length by turning the stitch length dial to the desired stitch length. 2.5 is standard stitch length. To get the reinforced triple straight stitch, turn the stitch length dial to position “S1”. Straight stitching right needle position Turn the stitch selector dial so tha
-
Husqvarna Viking H Class E10 20 MATCHING NEEDLE / FABRIC / THREAD NEEDLE, FABRIC SELECTION NEEDLE SIZE FABRICS THREAD 9-11(65-75) Lightweight fabrics-thin cottons, voile, silk , muslin, interlocks, cotton knits, tricots, jerseys, crepes, woven polyester, shirt & blouse fabrics. Light-duty thread in cotton, nylon or polyester. 12(80) Medium weight fabrics-cotton, satin, kettlecloth, sailcloth, double knits, lightweight wool. Most threads sold are medium size and suitable for these fabrics and needle sizes. Use polyester threads on synthetic materials
Questions, Opinions and Exploitation Impressions:
You can ask a question, express your opinion or share our experience of Husqvarna Viking H Class E10 device using right now.
-
Page 1
E10 USER’S GUIDE[…]
-
Page 2
This houshold sewing machine is designed to comply with IEC/EN 60335-2-28 and UL1594 IMPORT ANT SAFETY INSTRUCTIONS When using an electrical appliance, basic safety precautions should always be followed, including the following: Read all instructions before using this household sewing machine. DANGER — T o reduce the risk of electric shock: • A s[…]
-
Page 3
Congratulations! As the owner of a new sewing machine, you will enjoy precision quality stitching on all types of fabrics, from multiple layers of denim to delicate silks. Y our sewing machine offers the ultimate in simplicity and ease of operation. For your safety and to fully enjoy the many advantages and ease of operation of your sewing machine,[…]
-
Page 4
4 LIST OF CONTENTS PRINCIP AL P ARTS OF THE MACHINE …………………………………………………………..5 ACCESSORIES…………………………………………………………………………………………… 7 FITTING THE SNAP-IN ACCESSORY BOX ……………………………………………………. 8 CONNECTING […]
-
Page 5
5 PRINCIP AL P ARTS OF THE MACHINE 1. Thread tension dial 2. Presser foot pressure 3. Thread take-up lever 4. Thread cutting 5. Presser foot 6. Needle plate 7. Accessories box 8. Bobbin stop 9. Stitch length dial 10. Stitch display 1 1. Reverse sewing lever[…]
-
Page 6
6 12. Spool pin 13. Bobbin winder 14. Hole for second spool pin 15. Hand wheel 16. Stitch selector dial 17. Power switch 18. Main plug socket 19. Bobbin thread guide 20. Upper thread guide 21. Handle 22. Presser foot lever[…]
-
Page 7
7 12 3 4 56 7 89 1 0 1 1 12 14 13 15 ACCESSORIES 1. All purpose foot 2. Zipper foot 3. Satin stitch foot 4. Blind hem foot 5 Buttonhole foot 6. L-screwdriver 7. Seam ripper/ brush 8. Oil bottle 9. Second spool pin 10. Spool holders (2x) 1 1. Pack of needles 12. Seam guide 13. Bobbins (3x) 14. Darning plate 15. Felt pad[…]
-
Page 8
8 FITTING THE SNAP-IN ACCESSOR Y BOX Keep the snap-in accessory box horizontal, and push it in the direction of the arrow . (1) T o open, lift up at the point of the arrow . (2)[…]
-
Page 9
9 1 3 CONNECTING THE MACHINE TO POWER SOURCE Connect the machine to a power source as illustrated. (1) A polarized plug must be used with the appropriate polarized outlet. (2) Attention: Unplug power cord when machine is not in use. Foot control Foot control regulates the sewing speed. (3) Attention: Consult a quali ¿ ed electrician if in doubt as[…]
-
Page 10
10 CHANGING THE BULB Attention: Disconnect the machine from the power supply by removing the plug from the main socket! Replace bulb with same type rated 10 watts (1 10-120V) or 15 watts (220-240V). — Loosen screw (A) as illustrated. (1) — Remove the cover (B). — Unscrew the bulb and ¿ t new one (C). (2) — Replace the cover and tighten screw . Sho[…]
-
Page 11
11 + — TWO-STEP PRESSER FOOT LEVER When sewing several layers or thick fabrics, the presser foot can be raised to extra high for easy positioning of the work. (A) The presser foot pressure of the machine has been pre-set and usually requires no readjustment for most fabrics (light-or-heavy weight). However , if you need to adjust the presser foot p[…]
-
Page 12
12 A TT ACHING THE PRESSER FOOT SHANK/ ANKLE Attaching the presser foot holder Raise the presser foot bar (a). (1) Attach the presser foot shank/ankle (b) as illustrated. Attaching the presser foot Lower the presser foot shank/ankle (b) until the cut-out (c) is directly above the pin on the foot (d). (2) Raise the lever (e). Lower the presser foot […]
-
Page 13
13 WINDING THE BOBBIN Place thread and spool holder onto spool pin (1). — For smaller spools of thread place spool holder with small side next to spool (2). — Wind thread clockwise around bobbin winder tension discs (3). — Thread bobbin as illustrated and place on spindle (4). — Push bobbin to right (5). — Hold thread end (6). — Step on foot contro[…]
-
Page 14
14 INSERTING THE BOBBIN When inserting or removing the bobbin, the foot and needle must be fully raised. 1. Open the hinged cover . 2. Hold the bobbin case with one hand. Insert the bobbin so that the thread runs in a clockwise direction (arrow). 3. Put the thread under the tension spring. 4. Hold the bobbin case by the hinged latch. 5. Insert it i[…]
-
Page 15
15 INSERTING THE NEEDLE Change the needle regularly , especially if it is showing signs of wear and causing problems. Insert the needle following the illustrated instructions. A. Loosen the needle clamp screw and tighten again after inserting the new needle. (1) B. The À at side of the needle shaft should be towards the back. C/D.Insert the needle[…]
-
Page 16
16 THREADING THE UPPER THREAD Threading is simple but it is important to thread correctly to prevent sewing problems could result. — Start by raising the needle to its highest point (1), and also raise the presser foot to release the tension discs. (2) Attention: For safety , it is strongly suggested you turn off the power before threading. — Lift […]
-
Page 17
17 THREAD TENSION Basic thread tension setting: “4” T o increase the tension, turn the dial to the next number up. T o reduce the tension, turn the dial to the next number down. A. Normal thread tension — upper and bobbin thread join in fabric B. Upper thread tension too loose — upper thread “loops” on the underside of fabric C. Upper threa[…]
-
Page 18
18 BRINGING UP THE BOBBIN THREAD Hold the upper thread with the left hand. T urn the handwheel towards you until the needle is raised. (1) Pull on the upper thread to bring the bobbin thread up through the stitch plate hole. Place both threads to the back under the presser foot. (2)[…]
-
Page 19
19 REVERSE SEWING At the end of a seam, press down the reverse sewing lever . Sew a few reverse stitches to “the tie off” the thread ends. Release the lever and the machine will sew forwards again. (1/A) REMOVING THE F ABRIC T urn the handwheel toward you to bring the thread take up lever to its highest position, raise the presser foot and remo[…]
-
Page 20
20 MA TCHING NEEDLE / F ABRIC / THREAD NEEDLE, F ABRIC SELECTION NEEDLE SIZE F ABRICS THREAD 9-1 1(65-75) Lightweight fabrics-thin cottons, voile, silk , muslin, interlocks, cotton knits, tricots, jerseys, crepes, woven polyester , shirt & blouse fabrics. Light-duty thread in cotton, nylon or polyester . 12(80) Medium weight fabrics-cotton, sat[…]
-
Page 21
21 STRAIGHT STITCHING Straight stitching center needle position T urn the stitch selector dial so that the “A” appears in the stitch display window . Snap on the standard presser foot. Adjust the stitch length by turning the stitch length dial to the desired stitch length. 2.5 is standard stitch length. T o get the reinforced triple straight st[…]
-
Page 22
22 ZIGZAG STITCHING T urn the stitch selector dial so that the stitch display shows “C”-zig- zag. T urning the stitch selector dial will increase or decrease the zig zag width. Snap on the standard foot. Function of stitch length dial while zigzaging The density of zigzag stitches increase as the setting of stitch length dial approaches “0”[…]
-
Page 23
23 HOW TO SEW BUTT ONHOLES Preparation Select buttonhole with the stitch Selection dial. Snap on The buttonhole foot. Adjust the stitch length dial between “0.5” — “1”. The density of the stitch depends on thickness of the fabric. Note: Always test sew a buttonhole. T o prepare the fabric Measure the diameter of the button and add 0.3 cm (1[…]
-
Page 24
24 Tips — Slightly reduce upper thread tension to produce a satin stitch on top. — Place stabilizer underneath for ¿ ne and stretchy fabrics. — It is best to sew a cord for a buttonhole on a stretch or knit fabrics. The buttonhole colomns should sew over the cord. (5)[…]
-
Page 25
25 BLIND HEM For hems, curtains, trousers, skirts, etc. Select Blind hem for stretch fabrics. Select Blind hem for woven fabrics. Snap on Blind hem foot. (1) Stitch length 1.5-2.5 Note: It takes practice to sew blind hems. Always make a sewing test ¿ rst. Fold the fabric as illustrated with the wrong side up. (2) Place the fabric under the foot. T[…]
-
Page 26
26 ZIPPERS AND PIPING Set the machine as illustrated. (1) The zipper foot can be snapped onto the right or left, depending on which side of the foot you are going to place against the zipper or piping. (2) T o sew past the zipper pull, lower the needle into the fabric, raise the presser foot and push the zipper pull behind the presser foot. Lower t[…]
-
Page 27
27 3-STEP ZIG-ZAG Sewing on lace and elastic, darning, mending, ¿ nishing edges. Set the machine as illustrated. (1) Patching: Place the patch in position and stitch around edges. The stitch length can be shortened to produce very close stitches. (A) When mending tears, it is advisable to use a piece of backing fabric to reinforce. The stitch dens[…]
-
Page 28
28 STITCH SELECTION T riple straight stitch: (1) For reinforced seams. T urn the stitch length dial to “S1”. The machine sews two stitches forwards and one stitch backwards. This gives triple reinforcement. T riple zig-zag: (2) For hardwearing seams, hems and decorative seams. T urn the stitch length dial to “S1”. T riple zig-zag is suitabl[…]
-
Page 29
29 Attention: Disconnect the machine from the electricity supply by removing the plug from the main socket. When cleaning the machine, it must always be disconnected from the electricity supply . Remove the stitch plate T urn the handwheel until the needle is fully raised. Open the hinged front cover and unscrew the needle plate screw withe the scr[…]
-
Page 30
30 TROUBLE SHOOTING GUIDE Problem Cause Correction Upper thread breaks 1. The machine is not threaded correctly . 2. The thread tension is too tight. 3. The thread is too thick for the needle. 4. The needle is not inserted correctly . 5. The thread is wound around the spool holder pin. 6. The needle is damaged. 1. Rethread the machine. 2. Reduce th[…]
-
Page 31
Please note that on disposal, this product must be safely recycled in accordance with relevant National legislation relating to electrical/electronic products. If in doubt please contact your retailer for guidance[…]
-
Page 32
VSM Group AB • SE-561 84 Huskvarna • SWEDEN www .husqvarnaviking.com 412 97 80 — 26C • English • Inhouse production • © 2005 VSM Group AB • All statements valid at time of printing • Printed in Sweden on environmental-friendly paper •[…]
![]()
Компания Husqvarna сумела выстроить на машинки широкий ценовой диапазон, что значительно повысило спрос на продукцию. Это нисколько не повлияло на качество работы машин, выставленных по вполне демократической стоимости – экономия стала возможной благодаря некоторому уменьшению рабочих операций.
История швейных машин Хускварна
Более 300 лет назад король Швеции велел построть фабрику по производству огнестрельного оружия в живописном местечке Хускварна, однако спустя 200 лет знаменитый производитель перешел на вполне мирное производство. Несмотря на то, что современный ассортимент продукции Husqvarna весьма разнообразен, название компании из Швеции ассоциируется не только с бензопилами, садовой техникой и мотоциклами, но и качественными швейными машинами.
Даже модели швейных машин Husqvarna с богатыми техническими возможностями просты в управлении, которое может быть и электромеханическим, и полностью электронным.
Модели
Швейная машина Husqvarna Emerald 118
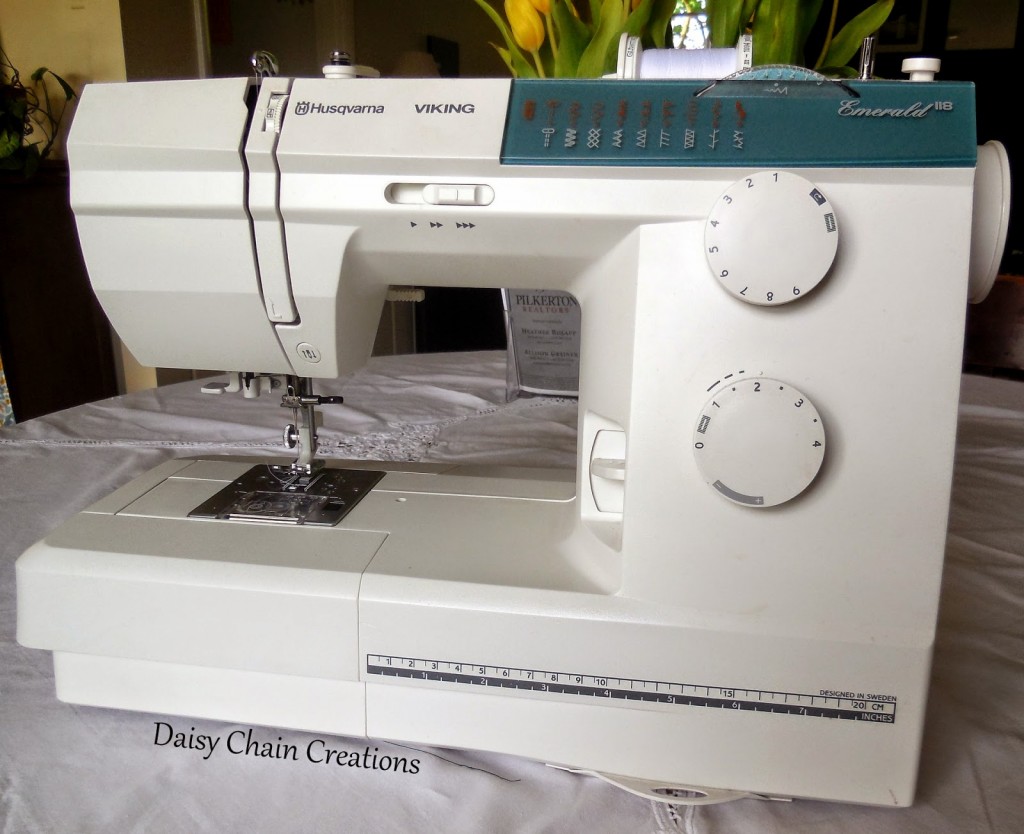
- Тип: электромеханическая швейная машина
- Тип челнока: горизонтальный
- Кол-во швейных операций: 18
- Длина/ширина стежка: 4/5 мм. (макс.)
- Регулировка давления лапки: есть
- Строчки: потайная, обмёточная, эластичная
Среди всех швейных машин от производителя, модель Emerald 118, по отзывам пользователей, считается одной из самых производительных и популярных. Признание и любовь опытных мастериц машинка завоевала благодаря следующим техническим характеристикам:
- плавный ход работы без рывков и вибрации;
- наличие электронного стабилизатора, регулирующего усилие прокола;
- наличие системы измерения размера пуговиц;
- возможность регулировки скорости;
- возможность автостопа при намотке нити на шпульку;
- горизонтальное положение катушки.
Несмотря на отсутствие вышивального блока и электронного дисплея, Эмеральд 118 покоряет мастериц богатой дополнительной комплектацией лапок. Кроме стандартного варианта, здесь присутствуют обметочная лапка, для подрубки ткани и вшивания молнии.
Весь рабочий арсенал легко помещается в просторном отсеке для аксессуаров, а на самом корпусе присутствует измерительная линейка.
Представленную модель можно с уверенностью назвать оптимальным сочетанием привлекательной цены, качества и богатого функционала.
- Тип челнока: вертикальный, качающийся
- Длина/ширина стежка: 4/5 мм. (макс.)
- Кол-во швейных операций: 21
- Режим вымётывания петель: полуавтомат
- Мощность: 85 Вт.
- Освещение: лампа 15 Вт.
- Масса: 7,1 кг.
- Где купить педаль – https://aliexpress.ru/item/32922519297.html;
- Где купить винт иглодержателя – https://aliexpress.ru/item/32954311692.html.
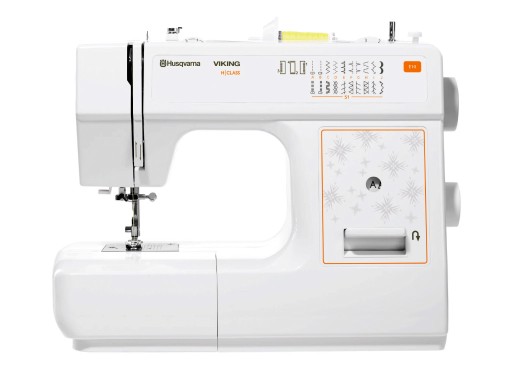
Модель швейной машины Викинг Е10 предусматривает электромеханическое управление при отсутствии электронного дисплея. К её основным техническим параметрам относятся следующие характеристики:
- возможность полуавтоматического выполнения петли;
- наличие рукавной платформы;
- металлическая внутренняя конструкция;
- наличие дополнительного освещения и кнопки реверса;
- выполнение потайной и эластичной строчки;
- возможность обметки.
Чехол жёсткий, вышивальный блок отсутствует.
Инструкция к швейной машине Husqvarna Viking E10
Скачать инструкцию к швейной машинке Хускварна Викинг Е10
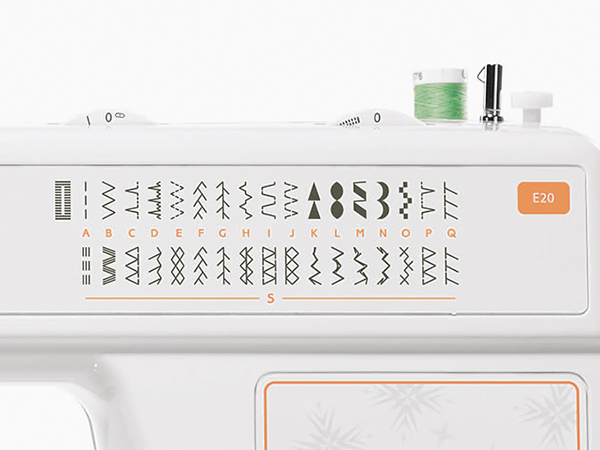
Швейная машина Husqvarna Viking E20
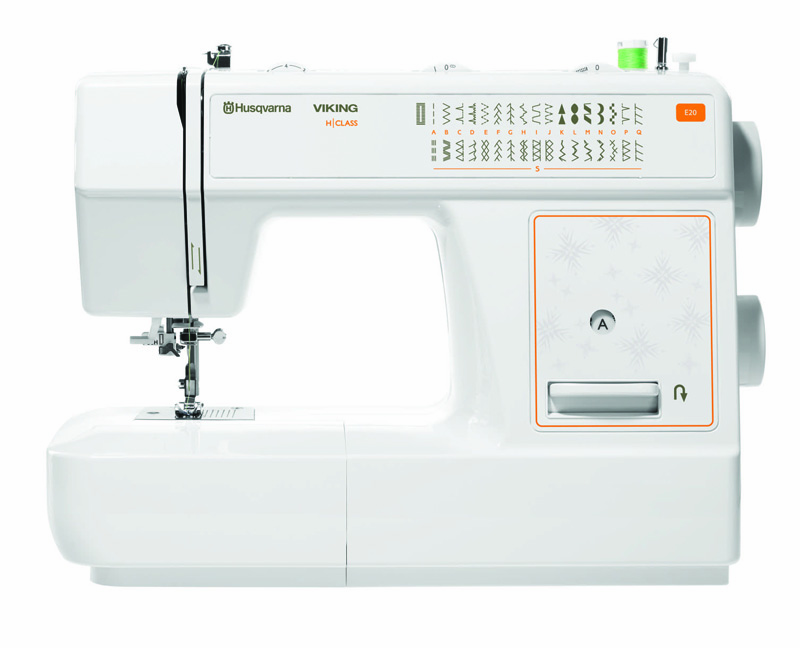
- Тип: электромеханическая швейная машина
- Длина/ширина стежка: 4/5 мм. (макс.)
- Кол-во швейных операций: 34
- Режим вымётывания петель: автоматический
- Вышивальный блок: отсутствует
- Встроенный заправщик нити: да
- Освещение: светодиод
- Мощность: 70 Вт.
- Масса: 6,4 кг.
Viking E 20 – улучшенный и усовершенствованный аналог Е10. Количество швейных операций увеличилось до 34, а выполнение петли стало полностью автоматическим. У обеих моделей отсутствует вышивальный блок, они обе довольно тяжелые благодаря металлическим внутренним деталям. Существует и внешнее различие – чехол E 20 стал мягким в отличие жесткого E 10. При этом максимальная длина и ширина стежка не изменились.
Машинка имеет очень большой набор рабочих и декоративных строчек, и поможет Вам создать настоящий шедевр!
Инструкция к швейной машине Husqvarna Viking E20
Скачать инструкцию к швейной машинке Хускварна Викинг Е20
Швейная машина Husqvarna Opal 670
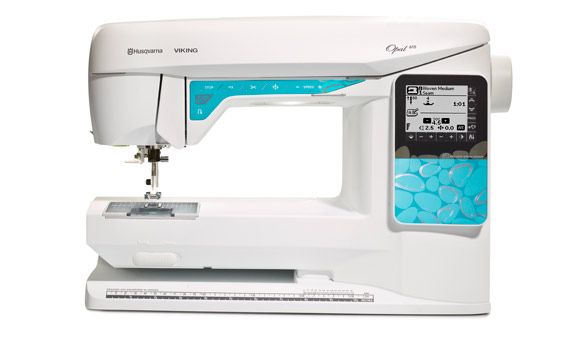
- Тип: электронная швейная машина
- Челнок: горизонтальный ротационный
- Выполнение петли: автомат
- Кол-во швейных операций: 200
- Кол-во видов петель: 7 шт.
- Переключатель положения иглы: есть
- Мощность: 90 Вт.
- Масса: 10 кг.
Для профессиональной швейной деятельности идеальным вариантом станет Опал 670. Опытные мастерицы смогут по достоинству оценить все положительные качества модели:
- Возможность определять длину стежка;
- Регулировка длины стежка с максимальным шагом в 6 мм;
- Дополнительная комплектация нитевдевателем и лапками для вшивания молнии и обметки;
- Возможность регулирования давления лапки на ткань;
- Легко справляется даже с очень плотными тканями.
Машинка работает тихо и плавно, без вибрации. Необычный современный дизайн, измерительная линейка на корпусе и освещение – дополнительные приятные бонусы. Единственное, чего не предусматривает данная модель – это вышивальный блок.
Благодаря многовековому опыту торговая марка “Хускварна” стала достойным конкурентом современным производителям аналогичной продукции.
-
Page 1
E10 USER’S GUIDE[…]
-
Page 2
This houshold sewing machine is designed to comply with IEC/EN 60335-2-28 and UL1594 IMPORT ANT SAFETY INSTRUCTIONS When using an electrical appliance, basic safety precautions should always be followed, including the following: Read all instructions before using this household sewing machine. DANGER — T o reduce the risk of electric shock: • A s[…]
-
Page 3
Congratulations! As the owner of a new sewing machine, you will enjoy precision quality stitching on all types of fabrics, from multiple layers of denim to delicate silks. Y our sewing machine offers the ultimate in simplicity and ease of operation. For your safety and to fully enjoy the many advantages and ease of operation of your sewing machine,[…]
-
Page 4
4 LIST OF CONTENTS PRINCIP AL P ARTS OF THE MACHINE …………………………………………………………..5 ACCESSORIES…………………………………………………………………………………………… 7 FITTING THE SNAP-IN ACCESSORY BOX ……………………………………………………. 8 CONNECTING […]
-
Page 5
5 PRINCIP AL P ARTS OF THE MACHINE 1. Thread tension dial 2. Presser foot pressure 3. Thread take-up lever 4. Thread cutting 5. Presser foot 6. Needle plate 7. Accessories box 8. Bobbin stop 9. Stitch length dial 10. Stitch display 1 1. Reverse sewing lever[…]
-
Page 6
6 12. Spool pin 13. Bobbin winder 14. Hole for second spool pin 15. Hand wheel 16. Stitch selector dial 17. Power switch 18. Main plug socket 19. Bobbin thread guide 20. Upper thread guide 21. Handle 22. Presser foot lever[…]
-
Page 7
7 12 3 4 56 7 89 1 0 1 1 12 14 13 15 ACCESSORIES 1. All purpose foot 2. Zipper foot 3. Satin stitch foot 4. Blind hem foot 5 Buttonhole foot 6. L-screwdriver 7. Seam ripper/ brush 8. Oil bottle 9. Second spool pin 10. Spool holders (2x) 1 1. Pack of needles 12. Seam guide 13. Bobbins (3x) 14. Darning plate 15. Felt pad[…]
-
Page 8
8 FITTING THE SNAP-IN ACCESSOR Y BOX Keep the snap-in accessory box horizontal, and push it in the direction of the arrow . (1) T o open, lift up at the point of the arrow . (2)[…]
-
Page 9
9 1 3 CONNECTING THE MACHINE TO POWER SOURCE Connect the machine to a power source as illustrated. (1) A polarized plug must be used with the appropriate polarized outlet. (2) Attention: Unplug power cord when machine is not in use. Foot control Foot control regulates the sewing speed. (3) Attention: Consult a quali ¿ ed electrician if in doubt as[…]
-
Page 10
10 CHANGING THE BULB Attention: Disconnect the machine from the power supply by removing the plug from the main socket! Replace bulb with same type rated 10 watts (1 10-120V) or 15 watts (220-240V). — Loosen screw (A) as illustrated. (1) — Remove the cover (B). — Unscrew the bulb and ¿ t new one (C). (2) — Replace the cover and tighten screw . Sho[…]
-
Page 11
11 + — TWO-STEP PRESSER FOOT LEVER When sewing several layers or thick fabrics, the presser foot can be raised to extra high for easy positioning of the work. (A) The presser foot pressure of the machine has been pre-set and usually requires no readjustment for most fabrics (light-or-heavy weight). However , if you need to adjust the presser foot p[…]
-
Page 12
12 A TT ACHING THE PRESSER FOOT SHANK/ ANKLE Attaching the presser foot holder Raise the presser foot bar (a). (1) Attach the presser foot shank/ankle (b) as illustrated. Attaching the presser foot Lower the presser foot shank/ankle (b) until the cut-out (c) is directly above the pin on the foot (d). (2) Raise the lever (e). Lower the presser foot […]
-
Page 13
13 WINDING THE BOBBIN Place thread and spool holder onto spool pin (1). — For smaller spools of thread place spool holder with small side next to spool (2). — Wind thread clockwise around bobbin winder tension discs (3). — Thread bobbin as illustrated and place on spindle (4). — Push bobbin to right (5). — Hold thread end (6). — Step on foot contro[…]
-
Page 14
14 INSERTING THE BOBBIN When inserting or removing the bobbin, the foot and needle must be fully raised. 1. Open the hinged cover . 2. Hold the bobbin case with one hand. Insert the bobbin so that the thread runs in a clockwise direction (arrow). 3. Put the thread under the tension spring. 4. Hold the bobbin case by the hinged latch. 5. Insert it i[…]
-
Page 15
15 INSERTING THE NEEDLE Change the needle regularly , especially if it is showing signs of wear and causing problems. Insert the needle following the illustrated instructions. A. Loosen the needle clamp screw and tighten again after inserting the new needle. (1) B. The À at side of the needle shaft should be towards the back. C/D.Insert the needle[…]
-
Page 16
16 THREADING THE UPPER THREAD Threading is simple but it is important to thread correctly to prevent sewing problems could result. — Start by raising the needle to its highest point (1), and also raise the presser foot to release the tension discs. (2) Attention: For safety , it is strongly suggested you turn off the power before threading. — Lift […]
-
Page 17
17 THREAD TENSION Basic thread tension setting: “4” T o increase the tension, turn the dial to the next number up. T o reduce the tension, turn the dial to the next number down. A. Normal thread tension — upper and bobbin thread join in fabric B. Upper thread tension too loose — upper thread “loops” on the underside of fabric C. Upper threa[…]
-
Page 18
18 BRINGING UP THE BOBBIN THREAD Hold the upper thread with the left hand. T urn the handwheel towards you until the needle is raised. (1) Pull on the upper thread to bring the bobbin thread up through the stitch plate hole. Place both threads to the back under the presser foot. (2)[…]
-
Page 19
19 REVERSE SEWING At the end of a seam, press down the reverse sewing lever . Sew a few reverse stitches to “the tie off” the thread ends. Release the lever and the machine will sew forwards again. (1/A) REMOVING THE F ABRIC T urn the handwheel toward you to bring the thread take up lever to its highest position, raise the presser foot and remo[…]
-
Page 20
20 MA TCHING NEEDLE / F ABRIC / THREAD NEEDLE, F ABRIC SELECTION NEEDLE SIZE F ABRICS THREAD 9-1 1(65-75) Lightweight fabrics-thin cottons, voile, silk , muslin, interlocks, cotton knits, tricots, jerseys, crepes, woven polyester , shirt & blouse fabrics. Light-duty thread in cotton, nylon or polyester . 12(80) Medium weight fabrics-cotton, sat[…]
-
Page 21
21 STRAIGHT STITCHING Straight stitching center needle position T urn the stitch selector dial so that the “A” appears in the stitch display window . Snap on the standard presser foot. Adjust the stitch length by turning the stitch length dial to the desired stitch length. 2.5 is standard stitch length. T o get the reinforced triple straight st[…]
-
Page 22
22 ZIGZAG STITCHING T urn the stitch selector dial so that the stitch display shows “C”-zig- zag. T urning the stitch selector dial will increase or decrease the zig zag width. Snap on the standard foot. Function of stitch length dial while zigzaging The density of zigzag stitches increase as the setting of stitch length dial approaches “0”[…]
-
Page 23
23 HOW TO SEW BUTT ONHOLES Preparation Select buttonhole with the stitch Selection dial. Snap on The buttonhole foot. Adjust the stitch length dial between “0.5” — “1”. The density of the stitch depends on thickness of the fabric. Note: Always test sew a buttonhole. T o prepare the fabric Measure the diameter of the button and add 0.3 cm (1[…]
-
Page 24
24 Tips — Slightly reduce upper thread tension to produce a satin stitch on top. — Place stabilizer underneath for ¿ ne and stretchy fabrics. — It is best to sew a cord for a buttonhole on a stretch or knit fabrics. The buttonhole colomns should sew over the cord. (5)[…]
-
Page 25
25 BLIND HEM For hems, curtains, trousers, skirts, etc. Select Blind hem for stretch fabrics. Select Blind hem for woven fabrics. Snap on Blind hem foot. (1) Stitch length 1.5-2.5 Note: It takes practice to sew blind hems. Always make a sewing test ¿ rst. Fold the fabric as illustrated with the wrong side up. (2) Place the fabric under the foot. T[…]
-
Page 26
26 ZIPPERS AND PIPING Set the machine as illustrated. (1) The zipper foot can be snapped onto the right or left, depending on which side of the foot you are going to place against the zipper or piping. (2) T o sew past the zipper pull, lower the needle into the fabric, raise the presser foot and push the zipper pull behind the presser foot. Lower t[…]
-
Page 27
27 3-STEP ZIG-ZAG Sewing on lace and elastic, darning, mending, ¿ nishing edges. Set the machine as illustrated. (1) Patching: Place the patch in position and stitch around edges. The stitch length can be shortened to produce very close stitches. (A) When mending tears, it is advisable to use a piece of backing fabric to reinforce. The stitch dens[…]
-
Page 28
28 STITCH SELECTION T riple straight stitch: (1) For reinforced seams. T urn the stitch length dial to “S1”. The machine sews two stitches forwards and one stitch backwards. This gives triple reinforcement. T riple zig-zag: (2) For hardwearing seams, hems and decorative seams. T urn the stitch length dial to “S1”. T riple zig-zag is suitabl[…]
-
Page 29
29 Attention: Disconnect the machine from the electricity supply by removing the plug from the main socket. When cleaning the machine, it must always be disconnected from the electricity supply . Remove the stitch plate T urn the handwheel until the needle is fully raised. Open the hinged front cover and unscrew the needle plate screw withe the scr[…]
-
Page 30
30 TROUBLE SHOOTING GUIDE Problem Cause Correction Upper thread breaks 1. The machine is not threaded correctly . 2. The thread tension is too tight. 3. The thread is too thick for the needle. 4. The needle is not inserted correctly . 5. The thread is wound around the spool holder pin. 6. The needle is damaged. 1. Rethread the machine. 2. Reduce th[…]
-
Page 31
Please note that on disposal, this product must be safely recycled in accordance with relevant National legislation relating to electrical/electronic products. If in doubt please contact your retailer for guidance[…]
-
Page 32
VSM Group AB • SE-561 84 Huskvarna • SWEDEN www .husqvarnaviking.com 412 97 80 — 26C • English • Inhouse production • © 2005 VSM Group AB • All statements valid at time of printing • Printed in Sweden on environmental-friendly paper •[…]
-
Husqvarna Viking H Class E 10 — page 1
E10 USER’S GUIDE …
-
Husqvarna Viking H Class E 10 — page 2
This houshold sewing machine is designed to comply with IEC/EN 60335-2-28 and UL1594 IMPORT ANT SAFETY INSTRUCTIONS When using an electrical appliance, basic safety precautions should always be followed, including the following: Read all instructions before using this household sewing machine. DANGER — T o reduce the risk of electric shock: • A s …
-
Husqvarna Viking H Class E 10 — page 3
Congratulations! As the owner of a new sewing machine, you will enjoy precision quality stitching on all types of fabrics, from multiple layers of denim to delicate silks. Y our sewing machine offers the ultimate in simplicity and ease of operation. For your safety and to fully enjoy the many advantages and ease of operation of your sewing machine, …
-
Husqvarna Viking H Class E 10 — page 4
4 LIST OF CONTENTS PRINCIP AL P ARTS OF THE MACHINE …………………………………………………………..5 ACCESSORIES…………………………………………………………………………………………… 7 FITTING THE SNAP-IN ACCESSORY BOX ……………………………………………………. 8 CONNECTING …
-
Husqvarna Viking H Class E 10 — page 5
5 PRINCIP AL P ARTS OF THE MACHINE 1. Thread tension dial 2. Presser foot pressure 3. Thread take-up lever 4. Thread cutting 5. Presser foot 6. Needle plate 7. Accessories box 8. Bobbin stop 9. Stitch length dial 10. Stitch display 1 1. Reverse sewing lever …
-
Husqvarna Viking H Class E 10 — page 6
6 12. Spool pin 13. Bobbin winder 14. Hole for second spool pin 15. Hand wheel 16. Stitch selector dial 17. Power switch 18. Main plug socket 19. Bobbin thread guide 20. Upper thread guide 21. Handle 22. Presser foot lever …
-
Husqvarna Viking H Class E 10 — page 7
7 12 3 4 56 7 89 1 0 1 1 12 14 13 15 ACCESSORIES 1. All purpose foot 2. Zipper foot 3. Satin stitch foot 4. Blind hem foot 5 Buttonhole foot 6. L-screwdriver 7. Seam ripper/ brush 8. Oil bottle 9. Second spool pin 10. Spool holders (2x) 1 1. Pack of needles 12. Seam guide 13. Bobbins (3x) 14. Darning plate 15. Felt pad …
-
Husqvarna Viking H Class E 10 — page 8
8 FITTING THE SNAP-IN ACCESSOR Y BOX Keep the snap-in accessory box horizontal, and push it in the direction of the arrow . (1) T o open, lift up at the point of the arrow . (2) …
-
Husqvarna Viking H Class E 10 — page 9
9 1 3 CONNECTING THE MACHINE TO POWER SOURCE Connect the machine to a power source as illustrated. (1) A polarized plug must be used with the appropriate polarized outlet. (2) Attention: Unplug power cord when machine is not in use. Foot control Foot control regulates the sewing speed. (3) Attention: Consult a quali ¿ ed electrician if in doubt as …
-
Husqvarna Viking H Class E 10 — page 10
10 CHANGING THE BULB Attention: Disconnect the machine from the power supply by removing the plug from the main socket! Replace bulb with same type rated 10 watts (1 10-120V) or 15 watts (220-240V). — Loosen screw (A) as illustrated. (1) — Remove the cover (B). — Unscrew the bulb and ¿ t new one (C). (2) — Replace the cover and tighten screw . Sho …
-
Husqvarna Viking H Class E 10 — page 11
11 + — TWO-STEP PRESSER FOOT LEVER When sewing several layers or thick fabrics, the presser foot can be raised to extra high for easy positioning of the work. (A) The presser foot pressure of the machine has been pre-set and usually requires no readjustment for most fabrics (light-or-heavy weight). However , if you need to adjust the presser foot p …
-
Husqvarna Viking H Class E 10 — page 12
12 A TT ACHING THE PRESSER FOOT SHANK/ ANKLE Attaching the presser foot holder Raise the presser foot bar (a). (1) Attach the presser foot shank/ankle (b) as illustrated. Attaching the presser foot Lower the presser foot shank/ankle (b) until the cut-out (c) is directly above the pin on the foot (d). (2) Raise the lever (e). Lower the presser foot …
-
Husqvarna Viking H Class E 10 — page 13
13 WINDING THE BOBBIN Place thread and spool holder onto spool pin (1). — For smaller spools of thread place spool holder with small side next to spool (2). — Wind thread clockwise around bobbin winder tension discs (3). — Thread bobbin as illustrated and place on spindle (4). — Push bobbin to right (5). — Hold thread end (6). — Step on foot contro …
-
Husqvarna Viking H Class E 10 — page 14
14 INSERTING THE BOBBIN When inserting or removing the bobbin, the foot and needle must be fully raised. 1. Open the hinged cover . 2. Hold the bobbin case with one hand. Insert the bobbin so that the thread runs in a clockwise direction (arrow). 3. Put the thread under the tension spring. 4. Hold the bobbin case by the hinged latch. 5. Insert it i …
-
Husqvarna Viking H Class E 10 — page 15
15 INSERTING THE NEEDLE Change the needle regularly , especially if it is showing signs of wear and causing problems. Insert the needle following the illustrated instructions. A. Loosen the needle clamp screw and tighten again after inserting the new needle. (1) B. The À at side of the needle shaft should be towards the back. C/D.Insert the needle …
-
Husqvarna Viking H Class E 10 — page 16
16 THREADING THE UPPER THREAD Threading is simple but it is important to thread correctly to prevent sewing problems could result. — Start by raising the needle to its highest point (1), and also raise the presser foot to release the tension discs. (2) Attention: For safety , it is strongly suggested you turn off the power before threading. — Lift …
-
Husqvarna Viking H Class E 10 — page 17
17 THREAD TENSION Basic thread tension setting: “4” T o increase the tension, turn the dial to the next number up. T o reduce the tension, turn the dial to the next number down. A. Normal thread tension — upper and bobbin thread join in fabric B. Upper thread tension too loose — upper thread “loops” on the underside of fabric C. Upper threa …
-
Husqvarna Viking H Class E 10 — page 18
18 BRINGING UP THE BOBBIN THREAD Hold the upper thread with the left hand. T urn the handwheel towards you until the needle is raised. (1) Pull on the upper thread to bring the bobbin thread up through the stitch plate hole. Place both threads to the back under the presser foot. (2) …
-
Husqvarna Viking H Class E 10 — page 19
19 REVERSE SEWING At the end of a seam, press down the reverse sewing lever . Sew a few reverse stitches to “the tie off” the thread ends. Release the lever and the machine will sew forwards again. (1/A) REMOVING THE F ABRIC T urn the handwheel toward you to bring the thread take up lever to its highest position, raise the presser foot and remo …
-
Husqvarna Viking H Class E 10 — page 20
20 MA TCHING NEEDLE / F ABRIC / THREAD NEEDLE, F ABRIC SELECTION NEEDLE SIZE F ABRICS THREAD 9-1 1(65-75) Lightweight fabrics-thin cottons, voile, silk , muslin, interlocks, cotton knits, tricots, jerseys, crepes, woven polyester , shirt & blouse fabrics. Light-duty thread in cotton, nylon or polyester . 12(80) Medium weight fabrics-cotton, sat …
-
Husqvarna Viking H Class E 10 — page 21
21 STRAIGHT STITCHING Straight stitching center needle position T urn the stitch selector dial so that the “A” appears in the stitch display window . Snap on the standard presser foot. Adjust the stitch length by turning the stitch length dial to the desired stitch length. 2.5 is standard stitch length. T o get the reinforced triple straight st …
-
Husqvarna Viking H Class E 10 — page 22
22 ZIGZAG STITCHING T urn the stitch selector dial so that the stitch display shows “C”-zig- zag. T urning the stitch selector dial will increase or decrease the zig zag width. Snap on the standard foot. Function of stitch length dial while zigzaging The density of zigzag stitches increase as the setting of stitch length dial approaches “0” …
-
Husqvarna Viking H Class E 10 — page 23
23 HOW TO SEW BUTT ONHOLES Preparation Select buttonhole with the stitch Selection dial. Snap on The buttonhole foot. Adjust the stitch length dial between “0.5” — “1”. The density of the stitch depends on thickness of the fabric. Note: Always test sew a buttonhole. T o prepare the fabric Measure the diameter of the button and add 0.3 cm (1 …
-
Husqvarna Viking H Class E 10 — page 24
24 Tips — Slightly reduce upper thread tension to produce a satin stitch on top. — Place stabilizer underneath for ¿ ne and stretchy fabrics. — It is best to sew a cord for a buttonhole on a stretch or knit fabrics. The buttonhole colomns should sew over the cord. (5) …
-
Husqvarna Viking H Class E 10 — page 25
25 BLIND HEM For hems, curtains, trousers, skirts, etc. Select Blind hem for stretch fabrics. Select Blind hem for woven fabrics. Snap on Blind hem foot. (1) Stitch length 1.5-2.5 Note: It takes practice to sew blind hems. Always make a sewing test ¿ rst. Fold the fabric as illustrated with the wrong side up. (2) Place the fabric under the foot. T …
-
Husqvarna Viking H Class E 10 — page 26
26 ZIPPERS AND PIPING Set the machine as illustrated. (1) The zipper foot can be snapped onto the right or left, depending on which side of the foot you are going to place against the zipper or piping. (2) T o sew past the zipper pull, lower the needle into the fabric, raise the presser foot and push the zipper pull behind the presser foot. Lower t …
-
Husqvarna Viking H Class E 10 — page 27
27 3-STEP ZIG-ZAG Sewing on lace and elastic, darning, mending, ¿ nishing edges. Set the machine as illustrated. (1) Patching: Place the patch in position and stitch around edges. The stitch length can be shortened to produce very close stitches. (A) When mending tears, it is advisable to use a piece of backing fabric to reinforce. The stitch dens …
-
Husqvarna Viking H Class E 10 — page 28
28 STITCH SELECTION T riple straight stitch: (1) For reinforced seams. T urn the stitch length dial to “S1”. The machine sews two stitches forwards and one stitch backwards. This gives triple reinforcement. T riple zig-zag: (2) For hardwearing seams, hems and decorative seams. T urn the stitch length dial to “S1”. T riple zig-zag is suitabl …
-
Husqvarna Viking H Class E 10 — page 29
29 Attention: Disconnect the machine from the electricity supply by removing the plug from the main socket. When cleaning the machine, it must always be disconnected from the electricity supply . Remove the stitch plate T urn the handwheel until the needle is fully raised. Open the hinged front cover and unscrew the needle plate screw withe the scr …
-
Husqvarna Viking H Class E 10 — page 30
30 TROUBLE SHOOTING GUIDE Problem Cause Correction Upper thread breaks 1. The machine is not threaded correctly . 2. The thread tension is too tight. 3. The thread is too thick for the needle. 4. The needle is not inserted correctly . 5. The thread is wound around the spool holder pin. 6. The needle is damaged. 1. Rethread the machine. 2. Reduce th …
-
Husqvarna Viking H Class E 10 — page 31
Please note that on disposal, this product must be safely recycled in accordance with relevant National legislation relating to electrical/electronic products. If in doubt please contact your retailer for guidance …
-
Husqvarna Viking H Class E 10 — page 32
VSM Group AB • SE-561 84 Huskvarna • SWEDEN www .husqvarnaviking.com 412 97 80 — 26C • English • Inhouse production • © 2005 VSM Group AB • All statements valid at time of printing • Printed in Sweden on environmental-friendly paper • …

Производитель: Husqvarna
9 обзоров:
4.9 (Отличный товар)
Электромеханическая швейная машина Хускварна E 20 H|Class
Эта классическая электромеханическая машина станет хорошим выбором для тех, кто планирует регулярно заниматься шитьем, в то же время не превращая это занятие в серьезное хобби или профессию. Husqvarna Viking H | Class E20 оснащена традиционным качающимся челноком, имеет очень большой набор рабочих и декоративных строчек, а также позволяет выметывать прямую бельевую петлю в автоматическом режиме.
Особенности:
32 строчки
Увеличенный набор строчек по сравнению с моделью E10 дает вам больший простор для творчества, ведь здесь вы найдете еще больше декоративных строчек. Вы сможете не только шить, но и украшать изделия необычными деталями.
Автоматическая петля
Еще одно преимущество модели E20 — возможность выполнения прямой петли в автоматическом режиме без поворота ткани.
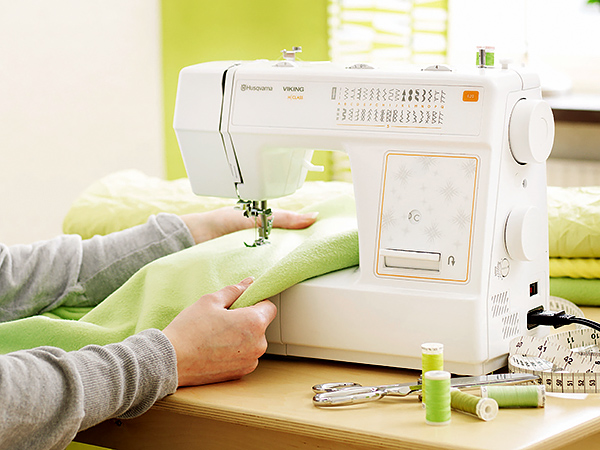
Регулировка ширины и давления лапки
У вас также будет возможность изменять ширину любой строчки до 5 мм, а функция регулировки давления лапки позволит добиться максимально хороших результатов при шитье как легких, так и тяжелых тканей, а также при квилтинге или выполнении эластичных швов.
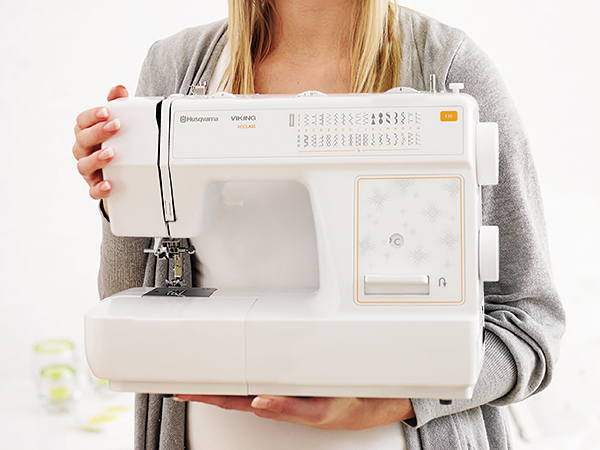
Легкая и компактная
Небольшой вес 7 кг модели E20 позволит без труда переносить машину, брать ее с собой на обучающие курсы и мастер-классы. Отличный вариант для тех, кто только начался заниматься шитьем.
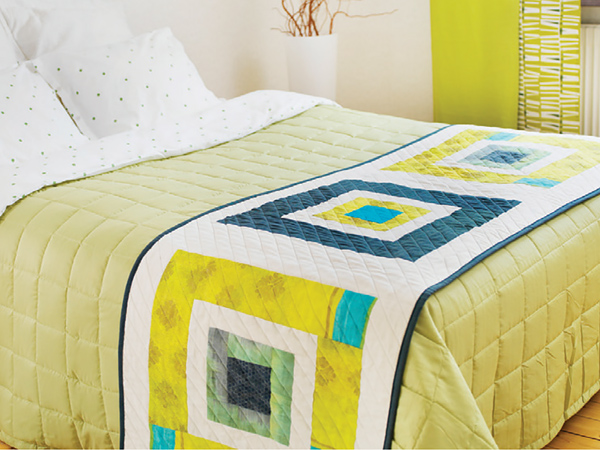
Опускание зубцов транспортера
Вы сможете шить в технике свободного перемещения ткани, просто опустив зубцы транспортера с помощью специального переключателя. Нет необходимости устанавливать пластину для штопки.
![]() Быстрый тест Husqvarna Viking E20
Быстрый тест Husqvarna Viking E20
Инструкции для Husqvarna Viking E20:
![]() Инструкция по эксплуатации Husqvarna Viking H | Class E20 (PDF, 10MB, рус)
Инструкция по эксплуатации Husqvarna Viking H | Class E20 (PDF, 10MB, рус)
Характеристики Husqvarna Viking E20:
- Диапазон прошиваемых материалов

- Очень легкие – 4
Легкие – 5
Средние и умеренно тяжелые – 5
Тяжелые – 4
Трикотаж – 3 - Тип челнока
- Вертикальный качающийся челнок
- Максимальная ширина строчки
- 5 мм
- Максимальная длина стежка
- 4 мм
- Количество строчек
- 32
- Режим вымётывания петли
- Автоматическое выметывание прямой бельевой петли под размер пуговицы
- Верхний транспортёр
- нет
- Длина платформы
- 15 см
- Размеры рукавной платформы (длина/обхват)
- 9/28 см
- Ширина гребёнки транспортера
- 14 мм
- Высота подъема лапки (нормальная/максимальная)
- 6/12
- Электронный стабилизатор усилия прокола
- нет
- Регулятор (ограничитель) максимальной скорости
- нет
- Программируемая остановка иглы в верхнем/нижнем положении
- нет
- Нитевдеватель
- есть
- Горизонтальное расположение катушки
- нет
- Регулятор давления лапки
- есть
- Потребляемая мощность
- 70 Вт
- Тип освещения
- Светодиодное
- Органайзер
- нет
- Автостоп при намотке нитки на шпульку
- есть
- Линейка на корпусе
- нет
- Чехол
- Мягкий
- Швейный советник
- нет
- Стандарт игл
- 130/705H
- Страна разработки
- Швеция
- Страна производства
- Китай
- Гарантия
- 3 года
- Вес без упаковки
- 6,4 кг
- Вес с упаковкой
- 7,9 кг
Строчки Husqvarna Viking E20:
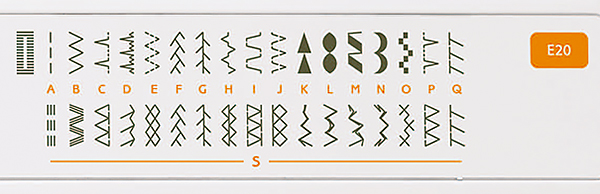
Комплектация
- Педаль
- Мягкий чехол
- Стандартная лапка
- Лапка для молнии
- Лапка для декоративных швов
- Лапка для петли
- Лапка для квилтинга
- Лапка для штопки
- Лапка для невидимой подгибки
- Отвертка для игольной пластины
- Распарыватель/щетка
- Набор игл
- Шпульки
- Линейка-направитель
- Фетровые прокладки
Популярные аксессуары для Husqvarna Viking E20

Наличие:
есть

Наличие:
есть

Наличие:
есть

Наличие:
есть

Наличие:
есть

Наличие:
есть

Наличие:
есть

Наличие:
есть

Наличие:
есть

Наличие:
есть
Обратите внимание!
«Швейный Мир» является официальным дистрибьютором швейных машин фирмы Husqvarna Viking. Покупая продукцию Husqvarna Viking в наших магазинах, Вы получите качественную машину, обеспеченную гарантийным и сервисным обслуживанием.
Отзывы о товаре Husqvarna Viking E20
-
Гончарова Наталья Михайловна
-
Отличный товар
Машинка действительно отличная! Благодарю магазин и производителя!
-
Николай (Консультант)
-
Отличный товар
— отзыв эксперта
Роза, зубцы транспортера поднимутся после первого полного оборота маховика. Просто переведите переключатель в положение поднятых зубцов и начните шить. А чтобы машина в начале строчки не путала нитки, надо придерживать длинные кончики нитей пальцами.
-
Роза Загидуллина
-
Отличный товар
Здравствуйте. Купила данную машинку совсем недавно, в марте) Спасибо, очень классная, все нравится.
Но у меня возникла проблема с переключателем зубцов транспортера. Он опускает транспортер, а обратно уже не поднимает, как будто не захватывает его и он остается внизу даже если я его вернула в верхнее положение. Что делать при такой ситуации?
и еще бывает когда только начинаю шить, строчу медленно то нижнюю нить он зажевывает. От чего такое может происходить? натяжение нити плохое или что? Спасибо. -
Aleshka
-
Отличный товар
Здравствуйте. Получили заказ быстро. Машинка качественная, без дефектов. Шьет тихо. Брал жене в подарок. Она не на радуется на нее. Спасибо большое.
-
Овчарова Елена Петровна
-
Хороший товар
-
Усенко Евгения Анатольевна
-
Отличный товар
Очень хорошая машинка. Я новичок,мне шьётся легко. Всем советую.
-
lana
-
Хороший товар
— отзыв покупателя
-
Оксана С.
-
Отличный товар
Отличная машина. Проста в управлении, мягкий ход, удобна в использовании. Всё продумано. Шить одно удовольствие! Рекомендую для начинающих и уверенных пользователей швейных машин.
-
Надежда С.
-
Отличный товар
Замечательная машинка! Лет 8 служит верой и правдой! Ни одной поломки за это время.


Отзывы о товаре могут оставлять только зарегистрированные покупатели.
![]()
Компания Husqvarna сумела выстроить на машинки широкий ценовой диапазон, что значительно повысило спрос на продукцию. Это нисколько не повлияло на качество работы машин, выставленных по вполне демократической стоимости – экономия стала возможной благодаря некоторому уменьшению рабочих операций.
История швейных машин Хускварна
Более 300 лет назад король Швеции велел построть фабрику по производству огнестрельного оружия в живописном местечке Хускварна, однако спустя 200 лет знаменитый производитель перешел на вполне мирное производство. Несмотря на то, что современный ассортимент продукции Husqvarna весьма разнообразен, название компании из Швеции ассоциируется не только с бензопилами, садовой техникой и мотоциклами, но и качественными швейными машинами.
Даже модели швейных машин Husqvarna с богатыми техническими возможностями просты в управлении, которое может быть и электромеханическим, и полностью электронным.
Модели
Швейная машина Husqvarna Emerald 118
- Тип: электромеханическая швейная машина
- Тип челнока: горизонтальный
- Кол-во швейных операций: 18
- Длина/ширина стежка: 4/5 мм. (макс.)
- Регулировка давления лапки: есть
- Строчки: потайная, обмёточная, эластичная
Среди всех швейных машин от производителя, модель Emerald 118, по отзывам пользователей, считается одной из самых производительных и популярных. Признание и любовь опытных мастериц машинка завоевала благодаря следующим техническим характеристикам:
- плавный ход работы без рывков и вибрации;
- наличие электронного стабилизатора, регулирующего усилие прокола;
- наличие системы измерения размера пуговиц;
- возможность регулировки скорости;
- возможность автостопа при намотке нити на шпульку;
- горизонтальное положение катушки.
Несмотря на отсутствие вышивального блока и электронного дисплея, Эмеральд 118 покоряет мастериц богатой дополнительной комплектацией лапок. Кроме стандартного варианта, здесь присутствуют обметочная лапка, для подрубки ткани и вшивания молнии.
Весь рабочий арсенал легко помещается в просторном отсеке для аксессуаров, а на самом корпусе присутствует измерительная линейка.
Представленную модель можно с уверенностью назвать оптимальным сочетанием привлекательной цены, качества и богатого функционала.
Швейная машина Husqvarna Viking E10
- Тип челнока: вертикальный, качающийся
- Длина/ширина стежка: 4/5 мм. (макс.)
- Кол-во швейных операций: 21
- Режим вымётывания петель: полуавтомат
- Мощность: 85 Вт.
- Освещение: лампа 15 Вт.
- Масса: 7,1 кг.
- Где купить педаль – https://aliexpress.ru/item/32922519297.html;
- Где купить винт иглодержателя – https://aliexpress.ru/item/32954311692.html.
Модель швейной машины Викинг Е10 предусматривает электромеханическое управление при отсутствии электронного дисплея. К её основным техническим параметрам относятся следующие характеристики:
- возможность полуавтоматического выполнения петли;
- наличие рукавной платформы;
- металлическая внутренняя конструкция;
- наличие дополнительного освещения и кнопки реверса;
- выполнение потайной и эластичной строчки;
- возможность обметки.
Чехол жёсткий, вышивальный блок отсутствует.
Инструкция к швейной машине Husqvarna Viking E10
Скачать инструкцию к швейной машинке Хускварна Викинг Е10
Швейная машина Husqvarna Viking E20
- Тип: электромеханическая швейная машина
- Длина/ширина стежка: 4/5 мм. (макс.)
- Кол-во швейных операций: 34
- Режим вымётывания петель: автоматический
- Вышивальный блок: отсутствует
- Встроенный заправщик нити: да
- Освещение: светодиод
- Мощность: 70 Вт.
- Масса: 6,4 кг.
Viking E 20 – улучшенный и усовершенствованный аналог Е10. Количество швейных операций увеличилось до 34, а выполнение петли стало полностью автоматическим. У обеих моделей отсутствует вышивальный блок, они обе довольно тяжелые благодаря металлическим внутренним деталям. Существует и внешнее различие – чехол E 20 стал мягким в отличие жесткого E 10. При этом максимальная длина и ширина стежка не изменились.
Машинка имеет очень большой набор рабочих и декоративных строчек, и поможет Вам создать настоящий шедевр!
Инструкция к швейной машине Husqvarna Viking E20
Скачать инструкцию к швейной машинке Хускварна Викинг Е20
Швейная машина Husqvarna Opal 670
- Тип: электронная швейная машина
- Челнок: горизонтальный ротационный
- Выполнение петли: автомат
- Кол-во швейных операций: 200
- Кол-во видов петель: 7 шт.
- Переключатель положения иглы: есть
- Мощность: 90 Вт.
- Масса: 10 кг.
Для профессиональной швейной деятельности идеальным вариантом станет Опал 670. Опытные мастерицы смогут по достоинству оценить все положительные качества модели:
- Возможность определять длину стежка;
- Регулировка длины стежка с максимальным шагом в 6 мм;
- Дополнительная комплектация нитевдевателем и лапками для вшивания молнии и обметки;
- Возможность регулирования давления лапки на ткань;
- Легко справляется даже с очень плотными тканями.
Машинка работает тихо и плавно, без вибрации. Необычный современный дизайн, измерительная линейка на корпусе и освещение – дополнительные приятные бонусы. Единственное, чего не предусматривает данная модель – это вышивальный блок.
Благодаря многовековому опыту торговая марка “Хускварна” стала достойным конкурентом современным производителям аналогичной продукции.