
Раздел: Бытовая, кухонная техника, электроника и оборудование
Тип: Встраиваемая Посудомоечная Машина
Характеристики, спецификации
Корзина для стол. приборов:
Да
Инд. времени до конца программы:
Да
Индикация режима работы:
Да
Инд. включ. «луч на полу»:
Да
Тип управления:
электронный
Самодиагностика неисправн.:
Да
Защита от протечек:
полная
Наим. защиты от протечек:
AquaStop
Потребляемая мощность:
2200 Вт
Цвет панели управления:
черный
Складные держатели тарелок:
Да
Регулировка высоты короба:
Да
Верхний разбрызгиватель:
Да
Максимальная вместимость:
9 комплектов
Габаритные размеры (В*Ш*Г):
818*446*550 мм
Размер ниши (В*Ш*Г):
820*450*270 мм
Энергопотребление за цикл:
0.8 кВтч
Класс энергоэффективности:
A
Отключение звук. сигнала:
Да
Автоматич. программа мытья:
1
Количество программ мойки:
5
Отложенный старт:
до 19 часов
Инструкция к Встраивающей Посудомоечной Машиной Electrolux ESL 46010

Руководство по
эксплуатации
Посудомоечная машина
ESL 46010

We were thinking of you
when we made this product

Добро пожаловать в мир Electrolux electrolux 3
Добро пожаловать в мир Electrolux
Вы выбрали первоклассный продукт от
Electrolux, который, мы надеемся, доставит Вам
много радости в будущем. Electrolux стремится
предложить как можно более широкий
ассортимент качественной продукции, который
сможет сделать Вашу жизнь еще более
удобной. Вы можете увидеть несколько
экземпляров на обложке этой инструкции.
Внимательно изучите данное руководство,
чтобы правильно использовать Ваш новый
прибор и наслаждаться его преимуществами.
Мы гарантируем, что он сделает Вашу жизнь
намного легче благодаря легкости в
использовании. Удачи!
Оглавление
Аннотации для Встраивающей Посудомоечной Машиной Electrolux ESL 46010 в формате PDF
Топ 10 инструкций
Другие инструкции
![]()
user manual
dishwasher
ESL 46010

We were thinking of you when we made this product

|
welcome to the world of Electrolux |
electrolux 3 |
Welcome to the world of Electrolux
Thank you for choosing a first class product from Electrolux, which hopefully will provide you with lots of pleasure in the future. The Electrolux ambition is to offer a wide variety of quality products that make your life more comfortable. You find some examples on the cover in this manual. Please take a few minutes to study this manual so that you can take advantage of the benefits of your new machine. We promise that it will provide a superior User Experience delivering Ease-of-Mind. Good luck!
117989 54/0

4 electrolux contents
Contents
|
Safety information |
5 |
|
Product description |
7 |
|
Control panel |
8 |
|
First use |
12 |
|
Daily use |
16 |
|
Washing programmes |
27 |
|
Care and cleaning |
28 |
|
Something not working |
30 |
|
Technical data |
33 |
|
Hints for test institutes |
35 |
|
Installation |
36 |
|
Environment concerns |
40 |
|
Guarantee/Customer Service |
41 |
The following symbols are used in this manual:
Important information concerning your personal safety and information on how to avoid damaging the appliance.
General information and tips
Environmental information

Safety information
In the interest of your safety and to ensure the correct use, before installing and first using the appliance, read this user manual carefully, including its hints and warnings. To avoid unnecessary mistakes and accidents, it is important to ensure that all people using the appliance are thoroughly familiar with its operation and safety features. Save these instructions and make sure that
they remain with the appliance if it is moved or sold, so that everyone using it through its life will be properly informed on appliance use and safety.
Correct use
●This dishwasher is only intended for washing household utensils suitable for machine washing.
●Do not put any solvents in the dishwasher. This could cause an explosion.
●Knives and other items with sharp points must be loaded in the cutlery basket with their points down or placed in a horizontal position in the upper basket.
●Only use products (detergent, salt and rinse aid) suitable for dishwashers.
●Avoid opening the door whilst the appliance is in operation, hot steam may escape.
|
safety information |
electrolux 5 |
●Do not take any dishes out of the dishwasher before the end of the dishwashing cycle.
●After use, isolate the appliance from the power supply and turn off the water supply.
●This product should be serviced only by an authorised service engineer, and only genuine spare parts should be used.
●Under no circumstances should you attempt to repair the machine yourself. Repairs carried out by inexperienced persons will cause injury or serious malfunctioning. Contact your local Service Force Centre. Always insist on genuine spare parts.
General safety
●Dishwasher detergents can cause chemical burns to eyes, mouth and throat. Could endanger life! Comply with the safety instructions of the dishwasher detergent manufacturer.
●The water in your dishwasher is not for drinking. Detergent residues may still be present in your machine.
●Ensure that the door of the dishwasher is always closed when it is not being loaded or unloaded. In this way you will avoid anybody tripping over the open door and hurting themselves.
●Do not sit or stand on the open door.

6 electrolux safety information
Child safety
●This appliance is designed to be operated by adults. Don’t allow children to use the dishwasher unsupervised.
●Keep all packaging well away from children. There is risk of suffocation.
●Keep all detergents in a safe place out of children’s reach.
●Keep children well away from the dishwasher when the door is open.
Installation
●Check your dishwasher for any transport damage. Never connect a damaged machine. If your dishwasher is damaged contact your supplier.
●All packaging must be removed before use.
●Any electrical and plumbing work required to install this appliance must be carried out by a qualified and competent person.
●For safety reasons it is dangerous to alter the specifications or attempt to modify this product in any way.
●Never use the dishwasher if the electrical supply cable and water hoses are damaged; or if the control panel, work top or plinth area are damaged such that the inside of the appliance is freely accessible. Contact your local Service Force centre, in order to avoid hazard.
●All sides of the dishwasher must never be drilled to prevent damage to hydraulic and electric components.
For electrical and water connection carefully follow the instructions given in specific paragraphs.

|
product description |
electrolux 7 |
Product description
1Upper basket
2Water hardness dial
3Salt container
4Detergent dispenser
5Rinse aid dispenser
6Rating plate
7Filters
8Lower spray arm
9Upper spray arm
8 electrolux control panel
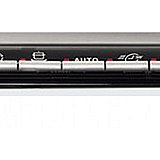
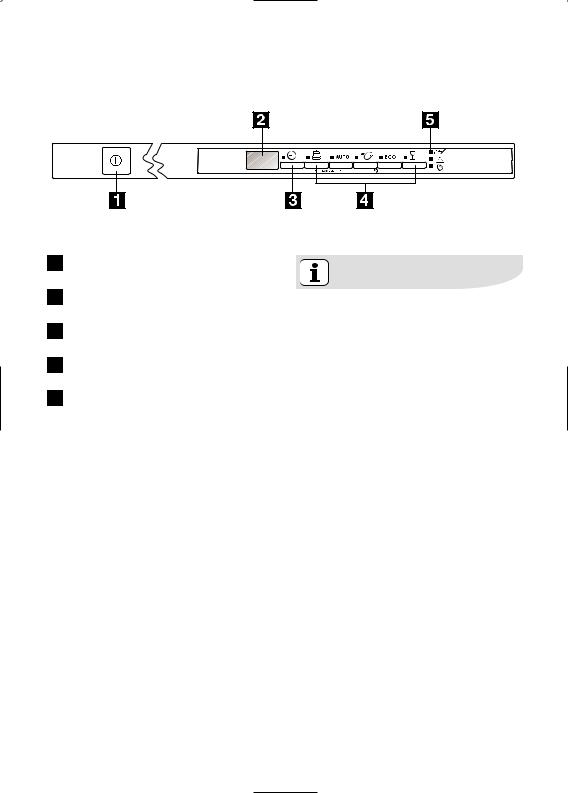
Control panel
1On/Off button
2Digital display
3Delay start button
4Programme selection buttons
5Indicator lights
The digital display indicates:
—the level of hardness to which the water softener is set,
—the approximate remaining time of the running programme,
—activation/deactivation of the rinse
|
aid dispenser (ONLY |
with «Multi- |
|
tab» function active), |
—the end of a washing programme (a zero will appear in the digital display),
—the countdown of the delay start,
—fault codes concerning malfunction of the dishwasher,
—if the audible signals are activated/deactivated,
|
control panel |
electrolux 9 |
|
|
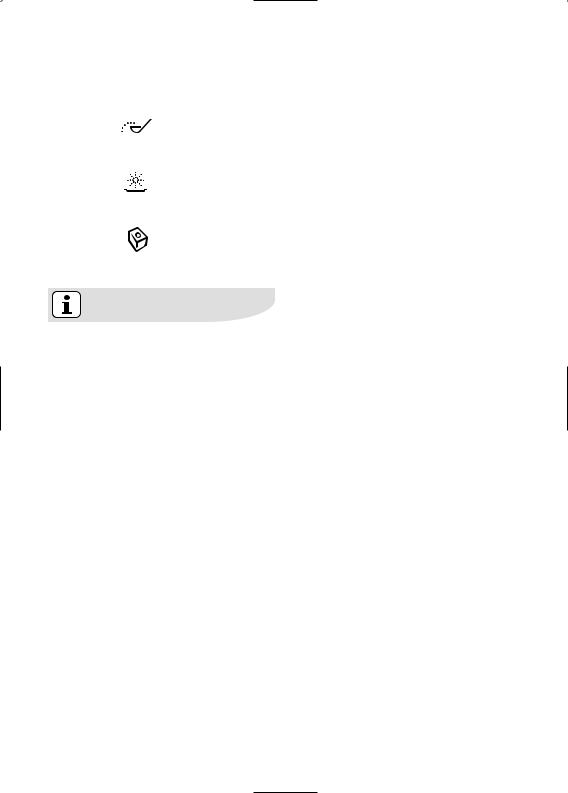
Indicator lights |
||
|
Salt |
Illuminates when the special salt has run out. |
|
|
Rinse aid |
Illuminates when the rinse aid has run out. |
|
|
Multi-tab function |
Indicates the activation/deactivation of the |
|
|
«Multi-tab function» (see «Multi-tab function»). |
||
The salt indicator light on the control panel can remain
illuminated for 2-6 hours after the salt has been replenished,
assuming the dishwasher remains switched on. If you are using salts that take longer to dissolve then this can take longer. The function of the machine is not affected.
10 electrolux control panel
Setting mode
Always remember that when:
—setting the water softener,
—activating/deactivating the audible signals,
—activating/deactivating the rinse aid dispenser,
the appliance MUST be in setting mode:
●Press On/Off button, ALL programme button lights are illuminated = appliance in setting mode.
● Press On/Off button, ONLY a programme button light is illuminated = last performed or selected programme still set. In this case, to return to setting
mode, the programme has to be cancelled.
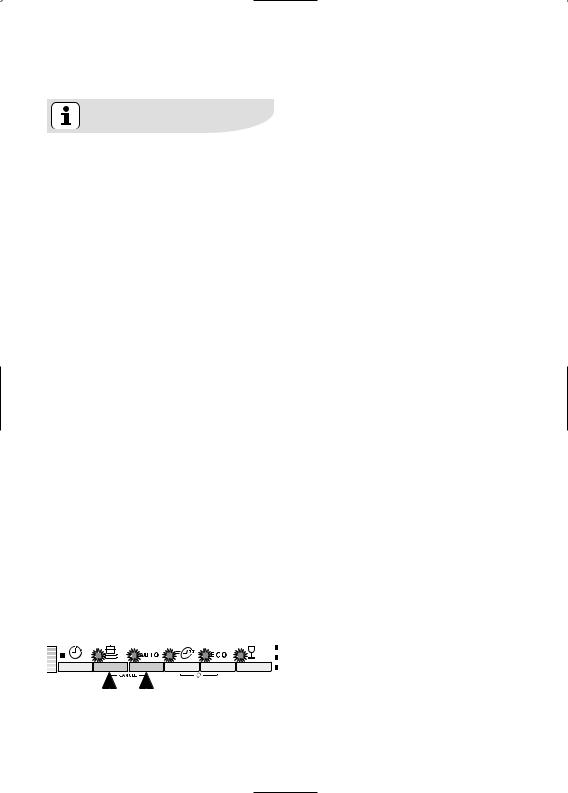
To cancel a set programme or a programme in progress
Simultaneously press and hold the two programme buttons positioned over the word Cancel , until all the programme button lights will illuminate. The programme has been cancelled and the machine is now in setting mode.
![]()
Audible signals
Audible signals have been introduced to help indicate which operations the dishwasher is performing:
—setting of the water softener
—end of programme
—intervention of an alarm due to malfunction
It is possible to deactvate the audible signals, using some of the programme buttons on the control panel.
|
Factory setting: |
audible signals |
|
activated |
Deactivation/activation of the audible signals
1.Press the On/Off button. The dishwasher must be in setting mode.
2.Press simultaneously and keep pressed buttons 2 and 3 until the lights of the buttons 1, 2 and 3 start flashing.
3.Press button 3, the lights of buttons 1 and 2 turn off while the light of button 3 goes on flashing. The digital display indicates the current setting.
|
control panel |
electrolux 11 |
4.To change the current setting, press again button 3, the digital display will indicate the new setting.


 Audible signals deactivated
Audible signals activated (factory set)
5.To memorise the operation, switch off the dishwasher by pressing the On/Off button.
12 electrolux first use
First use
Before using your dishwasher for the first time:
●Ensure that the electrical and water connections comply with the installation instructions
●Remove all packaging from inside the appliance
●Set the water softener
●Pour 1 litre of water inside the salt container and then fill with dishwasher salt
●Fill the rinse aid dispenser
If you want to use combi detergent tablets such as: «3 in 1», «4 in 1», «5 in 1» etc… set the Multi-tab function (see «Multi-tab function»).
Set the water softener
The dishwasher is equipped with a water softener designed to remove minerals and salts from the water supply, which would have a detrimental or adverse effect on the operation of the appliance.
The higher the content of these minerals and salts, the harder your water is.
Water hardness is measured in equivalent scales, Clarke degrees, French degrees (°TH) and mmol/l (millimol per litre — international unit for the hardness of water).
The softener should be adjusted according to the hardness of the water in your area. Your local Water Authority can advise you on the hardness of the water in your area.
|
Water hardness |
Adjusting the water |
Use of |
||||
|
hardness setting |
salt |
|||||
|
Clarke |
°TH |
mmol/l |
manually |
electronically |
||
|
64 — 88 91 — 125 |
9.0 — 12.5 |
2 |
level 10 |
yes |
||
|
53 — 63 |
76 — 90 |
7.6 — 8.9 |
2 |
level 9 |
yes |
|
|
46 — 52 |
65 — 75 |
6.5 — 7.5 |
2 |
level 8 |
yes |
|
|
36 — 45 |
51 — 64 |
5.1 — 6.4 |
2 |
level 7 |
yes |
|
|
28 — 35 |
40 — 50 |
4.0 — 5.0 |
2 |
level 6 |
yes |
|
|
23 — 27 |
33 — 39 |
3.3 — 3.9 |
2 |
level 5 |
yes |
|
|
18 — 22 |
26 — 32 |
2.6 — 3.2 |
1 |
level 4 |
yes |
|
|
13 — 17 |
19 — 25 |
1.9 — 2.5 |
1 |
level 3 |
yes |
|
|
5 — 12 |
7 — 18 |
0.7 — 1.8 |
1 |
level 2 |
yes |
|
|
< 5 |
< 7 |
< 0.7 |
1 |
level 1 |
no * |
|
* no salt is necessary

The water softener must be set in both ways: manually, using the water hardness dial and electronically, using some of the programme buttons on the control panel
Setting manually
The dishwasher is factory set at position 2.
1.Open the dishwasher door.
2.Remove the lower basket from the dishwasher.
3.Turn the water hardness dial to position 1 or 2 (see table).
4.Replace the lower basket.
Setting electronically
The dishwasher is factory set at level 5.
1.Press the On/Off button. The dishwasher must be in setting mode.
2.Press simultaneously and keep pressed buttons 2 and 3, until the lights of buttons 1, 2 and 3 start flashing.
first use electrolux 13
3.Press button 1, the lights of buttons 2 and 3 turn off while the light of button 1 goes on flashing. In the digital display is visible the current level and a sequence of intermittent audible signals are heard.
The current level is indicated by the number visible in the digital display and the number of intermittent audible signals.
Examples:


 displayed, 5 intermittent audible signals, pause, etc… = level 5


 displayed, 10 intermittent audible signals, pause, etc… = level 10
4.To change the level, press button 1. Each time the button is pressed the level changes. (For the selection of the new level see the chart).
Examples:
if the current level is 5, by pressing button 1 once, level 6 is selected. if the current level is 10, by pressing button 1 once, level 1 is selected.
5.To memorise the operation, switch off the dishwasher by pressing the On/Off button.
14 electrolux first use
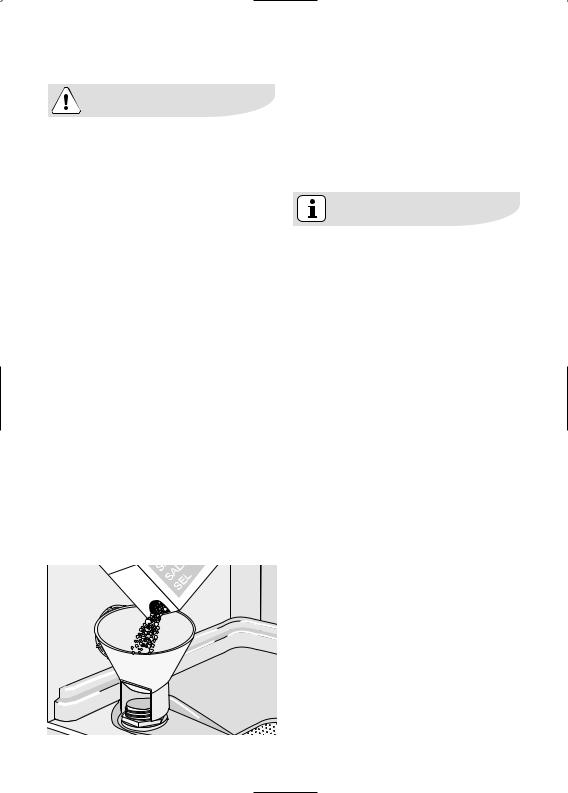
Filling with dishwasher salt
Only use salt specifically designed for use in dishwashers.
All other types of salt not specifically designed for use in a dishwasher, especially table salt, will damage the water softener.
Only fill with salt just before starting one of the complete washing programmes.
This will prevent any grains of salt or salty water, which may have been spilt, remaining on the bottom of the machine for any period of time, which may cause corrosion.
To fill:
1.Open the door, remove the lower basket and unscrew the cap of the salt container by turning it anticlockwise.
2.Pour 1 litre of water inside the container (this is necessary only
before filling with salt for the first time).
3.Using the funnel provided, pour in the salt until the container is full.
4.Replace the cap making sure that there is no trace of salt on the screw thread or on the gasket.
5.Replace the cap tightly turning it clockwise until it stops with a click.
Do not worry if water overflows from the unit when filling with salt, this is quite normal.
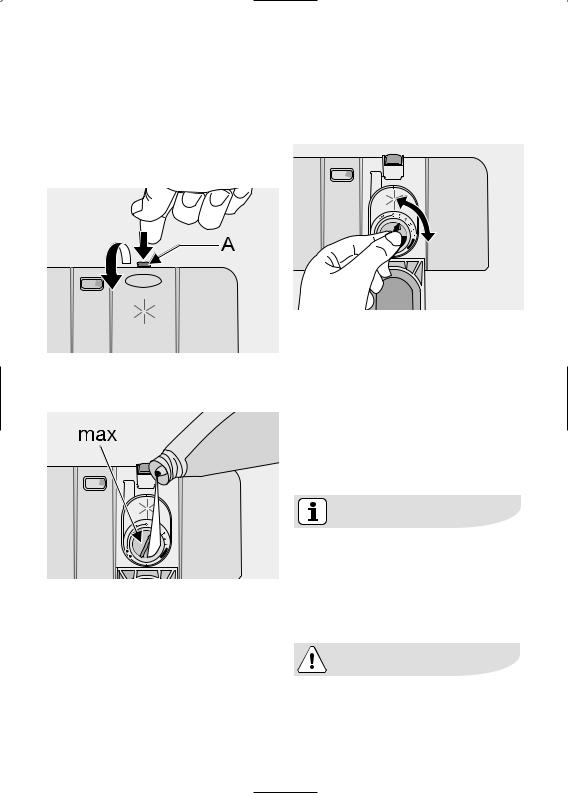
Filling with rinse aid
Rinse aid ensures thorough rinsing, and spot and streak free drying.
Rinse aid is automatically added during the last rinse.
1.Open the container by pressing the release button (A).
2.Add the rinse aid in the container. The maximum level for filling is indicated by ‘max’.
first use electrolux 15
According to the finish and drying results obtained, adjust the dose of rinse aid by means of the 6 position selector (position 1 minimum dosage, position 6 maximum dosage).
The dose is factory set in position 4.
Increase the dose if there are drops of water or lime spots on the dishes after washing.
Reduce it if there are sticky whitish streaks on the dishes or a bluish film on glassware or knife blades.
3.Ensure that the lid is closed after every refill.
The dispenser holds about 110 ml of rinse aid, which is sufficient for between 16 and 40 dishwashing cycles, depending upon the dosage setting.
Clean up any rinse aid spilt during filling with an absorbent cloth to avoid excess foaming during the next wash.
Only use branded rinse aid for dishwashers.
Never fill the rinse aid dispenser with any other substances (e.g. dishwasher cleaning agent, liquid detergent). This would damage the appliance.
 Loading…
Page 1 — ESL 46010
user manualESL 46010dishwasher117989 54/0en 20-02-2007 15:12 Pagina 1
Page 2 — We were thinking of you
10 electrolux control panelSetting modeAlways remember that when:- setting the water softener,- activating/deactivating the audiblesignals,- activatin
Page 3 — 117989 54/0
control panel electrolux 11Audible signalsAudible signals have been introducedto help indicate which operations thedishwasher is performing:- setting
Page 4 — Contents
12 electrolux first useBefore using your dishwasher for thefirst time:● Ensure that the electrical andwater connections comply with theinstallation in
Page 5 — Safety information
first use electrolux 13The water softener must be set inboth ways: manually, using the waterhardness dial and electronically, usingsome of the progra
Page 6
14 electrolux first useFilling with dishwasher saltOnly use salt specifically designed foruse in dishwashers.All other types of salt not specificallyd
Page 7 — Product description
first use electrolux 15Filling with rinse aidRinse aid ensures thorough rinsing,and spot and streak free drying. Rinse aid is automatically addedduri
Page 8 — Control panel
16 electrolux daily use● Check if it’s necessary to refill withdishwasher salt or rinse aid● Load cutlery and dishes into thedishwasher.● Fill with di
Page 9
daily use electrolux 17For washing in the dishwasher the following cutlery and dishesare not suitable: — Cutlery with wooden, horn, china or mother-o
Page 10 — 10 electrolux control panel
18 electrolux daily useOpen the door and slide out thebaskets to load the dishes.The lower basketThe lower basket is designed to takesaucepans, lids,
Page 11
daily use electrolux 19To make loading of the cutlery basketeasier, lower the cutlery baskethandle (fig.2).For best results we recommend youto use th
Page 12 — First use
We were thinking of youwhen we made this product117989 54/0en 20-02-2007 15:12 Pagina 2
Page 13
20 electrolux daily useThe upper basket The upper basket is designed forplates (dessert plates, saucers, dinnerplates of up to 24 cm in diameter),sala
Page 14 — 14 electrolux first use
daily use electrolux 21Adjusting the height of the upper basket If washing very large plates you can load them in the lower basket after movingthe up
Page 15
22 electrolux daily useUse of detergent Only use detergents specificallydesigned for use in dishwashers.Please observe the manufacturer’sdosing and st
Page 16 — Daily use
daily use electrolux 23Activation/deactivation of the Multi-tab functionSimultaneously press and hold thetwo buttons positioned over thesymbol Multi-
Page 17
24 electrolux daily useIf you decide to turn back to theuse of standard detergent systemwe advise that you:1. Deactivate the «Multi-tab function&
Page 18 — 18 electrolux daily use
daily use electrolux 25Select and start a washingprogrammeSelect the washing programme anddelay start with the door slightlyopened. The start of thep
Page 19
26 electrolux daily useCancelling the «delay start»To cancel a delay start in progressyou have to reset the dishwasher.Simultaneously press
Page 20 — 20 electrolux daily use
washing programmes electrolux 27Washing programmesProgrammeIntensiveHeavy soilCrockery,cutlery, potsand pansPrewashMain wash up to 70°C2 intermediate
Page 21
28 electrolux care and cleaningCleaning the filtersThe filters must be checked andcleaned from time to time. Dirty filterswill degrade the washing res
Page 22 — 22 electrolux daily use
care and cleaning electrolux 29Frost precautions Avoid placing the machine in alocation where the temperature isbelow 0°C. If this is unavoidable,emp
Page 23
welcome to the world of Electrolux electrolux 3Thank you for choosing a first class product from Electrolux, whichhopefully will provide you with lot
Page 24 — 24 electrolux daily use
30 electrolux something not workingSomething not workingThe dishwasher will not start or stops during operation. Certain problems are due to the lack
Page 25
something not working electrolux 31Malfunction Possible cause and solutionThe programme does not start ● The dishwasher’s door has not beenproperly c
Page 26 — 26 electrolux daily use
32 electrolux something not workingIf after all these checks, the problempersists, contact your local ServiceForce Centre.The wash results are not sat
Page 27 — Washing programmes
technical data electrolux 33Technical dataDimensions Width 44.6 cm81.8 — 87.8 cm55.5 cmHeightDepthWater supply pressure Minimum 0.05 MPa (0.5 bar)0.8
Page 28 — Care and cleaning
34 electrolux technical dataThe consumption values are intendedas a guide and depends on thepressure and the temperature of thewater and also by the v
Page 29
hints for test institutes electrolux 35Hints for test institutesTesting in accordance with EN 60704must be carried out with appliancefully loaded and
Page 30 — Something not working
36 electrolux installationAny electrical and/or plumbingwork required to install thisappliance should be carried out bya qualified electrician and/orp
Page 31 — ● Delay start has been set
installation electrolux 37This appliance has been fitted withsafety features which will prevent thewater used in the appliance fromreturning back int
Page 32
38 electrolux installationWater outlet hose connectionThe end of the drain hose can beconnected in the following ways: 1. To the sink outlet spigot, s
Page 33 — Technical data
installation electrolux 39Electrical connectionSafety standards require theappliance to be earthed. Prior to using the appliance for thefirst time, e
Page 34 — (Test programme
Safety information 5Product description 7Control panel 8First use 12Daily use 16Washing programmes 27Care and cleaning 28Something not working 30Techn
Page 35 — Hints for test institutes
40 electrolux environment concernsPackaging materialThe packaging materials areenvironmentally friendly and can berecycled. The plastic components are
Page 36 — Installation
guarantee/customer service electrolux 41Guarantee/Customer ServiceStandard guarantee conditionsWe, Electrolux, undertake that ifwithin 12 months of t
Page 37
42 electrolux guarantee/customer service4. The model and Serial number ofthe appliance (found on the ratingplate).5. The purchase date.Please note a v
Page 38 — 38 electrolux installation
guarantee/customer service electrolux 43www.electrolux.comAlbania +35 5 4 261 450 Rr . Pjeter Bogdani Nr . 7 TiraneBelgique/Belgi /Belgien +32 2 363
Page 39
44 electroluxNotes. . . . . . . . . . . . . . . . . . . . . . . . . . . . . . . . . . . . . . . . . . . . . . . . . . . . . . . . . . . . . . . . . .
Page 40 — Environment concerns
electrolux 45Notes. . . . . . . . . . . . . . . . . . . . . . . . . . . . . . . . . . . . . . . . . . . . . . . . . . . . . . . . . . . . . . . . . .
Page 41 — Guarantee/Customer Service
Notes. . . . . . . . . . . . . . . . . . . . . . . . . . . . . . . . . . . . . . . . . . . . . . . . . . . . . . . . . . . . . . . . . . . . . . . . .
Page 42
117989 54/0en 20-02-2007 15:12 Pagina 47
Page 43
117989 54/0-00-21022007www.electrolux.comwww.electrolux.co.uk117989 54/0en 20-02-2007 15:12 Pagina 48
Page 44 — 44 electrolux
safety information electrolux 5In the interest of your safety and toensure the correct use, beforeinstalling and first using theappliance, read this
Page 45
6 electrolux safety informationChild safety● This appliance is designed to beoperated by adults. Don’t allowchildren to use the dishwasherunsupervised
Page 46 — 46 electrolux
product description electrolux 7Product descriptionUpper basketWater hardness dialSalt containerDetergent dispenserRinse aid dispenserRating plateFil
Page 47
8 electrolux control panelControl panelThe digital display indicates:- the level of hardness to which thewater softener is set,- the approximate remai
Page 48 — 117989 54/0-00-21022007
control panel electrolux 9The salt indicator light on thecontrol panel can remainilluminated for 2-6 hours after thesalt has been replenished,assumin
Перейти к контенту
Посудомоечные машины Electrolux

- Размер инструкции: 1.02 Мб
- Формат файла: pdf
Если вы потеряли инструкцию от посудомоечной машины Electrolux ESL 46010, можете скачать файл для просмотра на компьютере или печати.
Инструкция для посудомоечной машины Electrolux ESL 46010 на русском языке. В руководстве описаны возможности и полезные функции, а также правила эксплуатации. Перед использованием внимательно ознакомьтесь с инструкцией.
Чтобы не читать всю инструкцию вы можете выполнить поиск по содержимому внутри инструкции и быстро найти необходимую информацию. Рекомендации по использованию помогут увеличить срок службы посудомоечной машины Electrolux ESL 46010. Если у вас появилась проблема, то найдите раздел с описанием неисправностей и способами их решения. В нем указаны типичные поломки и способы их решения.