Всем привет! Пару дней назад ко мне приехал долгожданный комбик Yamaha THR 10II, который я заказал себе из интернет-магазина. Брал по скидке за 22 тысячи. В общем, я им немного уже попользовался и сейчас расскажу все нюансы, с которыми может столкнуться будущий владелец квартирного комбика.
Брал я его себе для домашней игры на гитаре. Среди отзывов профессиональных гитаристов, данная модель имеет отличный звук при достаточно низкой цене, но не все так гладко – поэтому давайте разбираться вместе.
Содержание
- Распаковка
- Индикаторы, кнопки, регуляторы
- Подключение
- Характеристики
- Отличие от версий Wireless
- Сброс настроек до заводских
- Подключение к компьютеру
- Программа для компьютера
- Подключение к телефону
- Как записывать сухой звук без эффектов
- Звук начинает хрипеть (отваливается драйвер)
- Как уменьшить задержку или отклик?
- Плюсы, минусы и мой личный отзыв
- Руководство пользователя на русском языке
- Схема подключения (Быстрый старт)
- Задать вопрос автору статьи
Распаковка
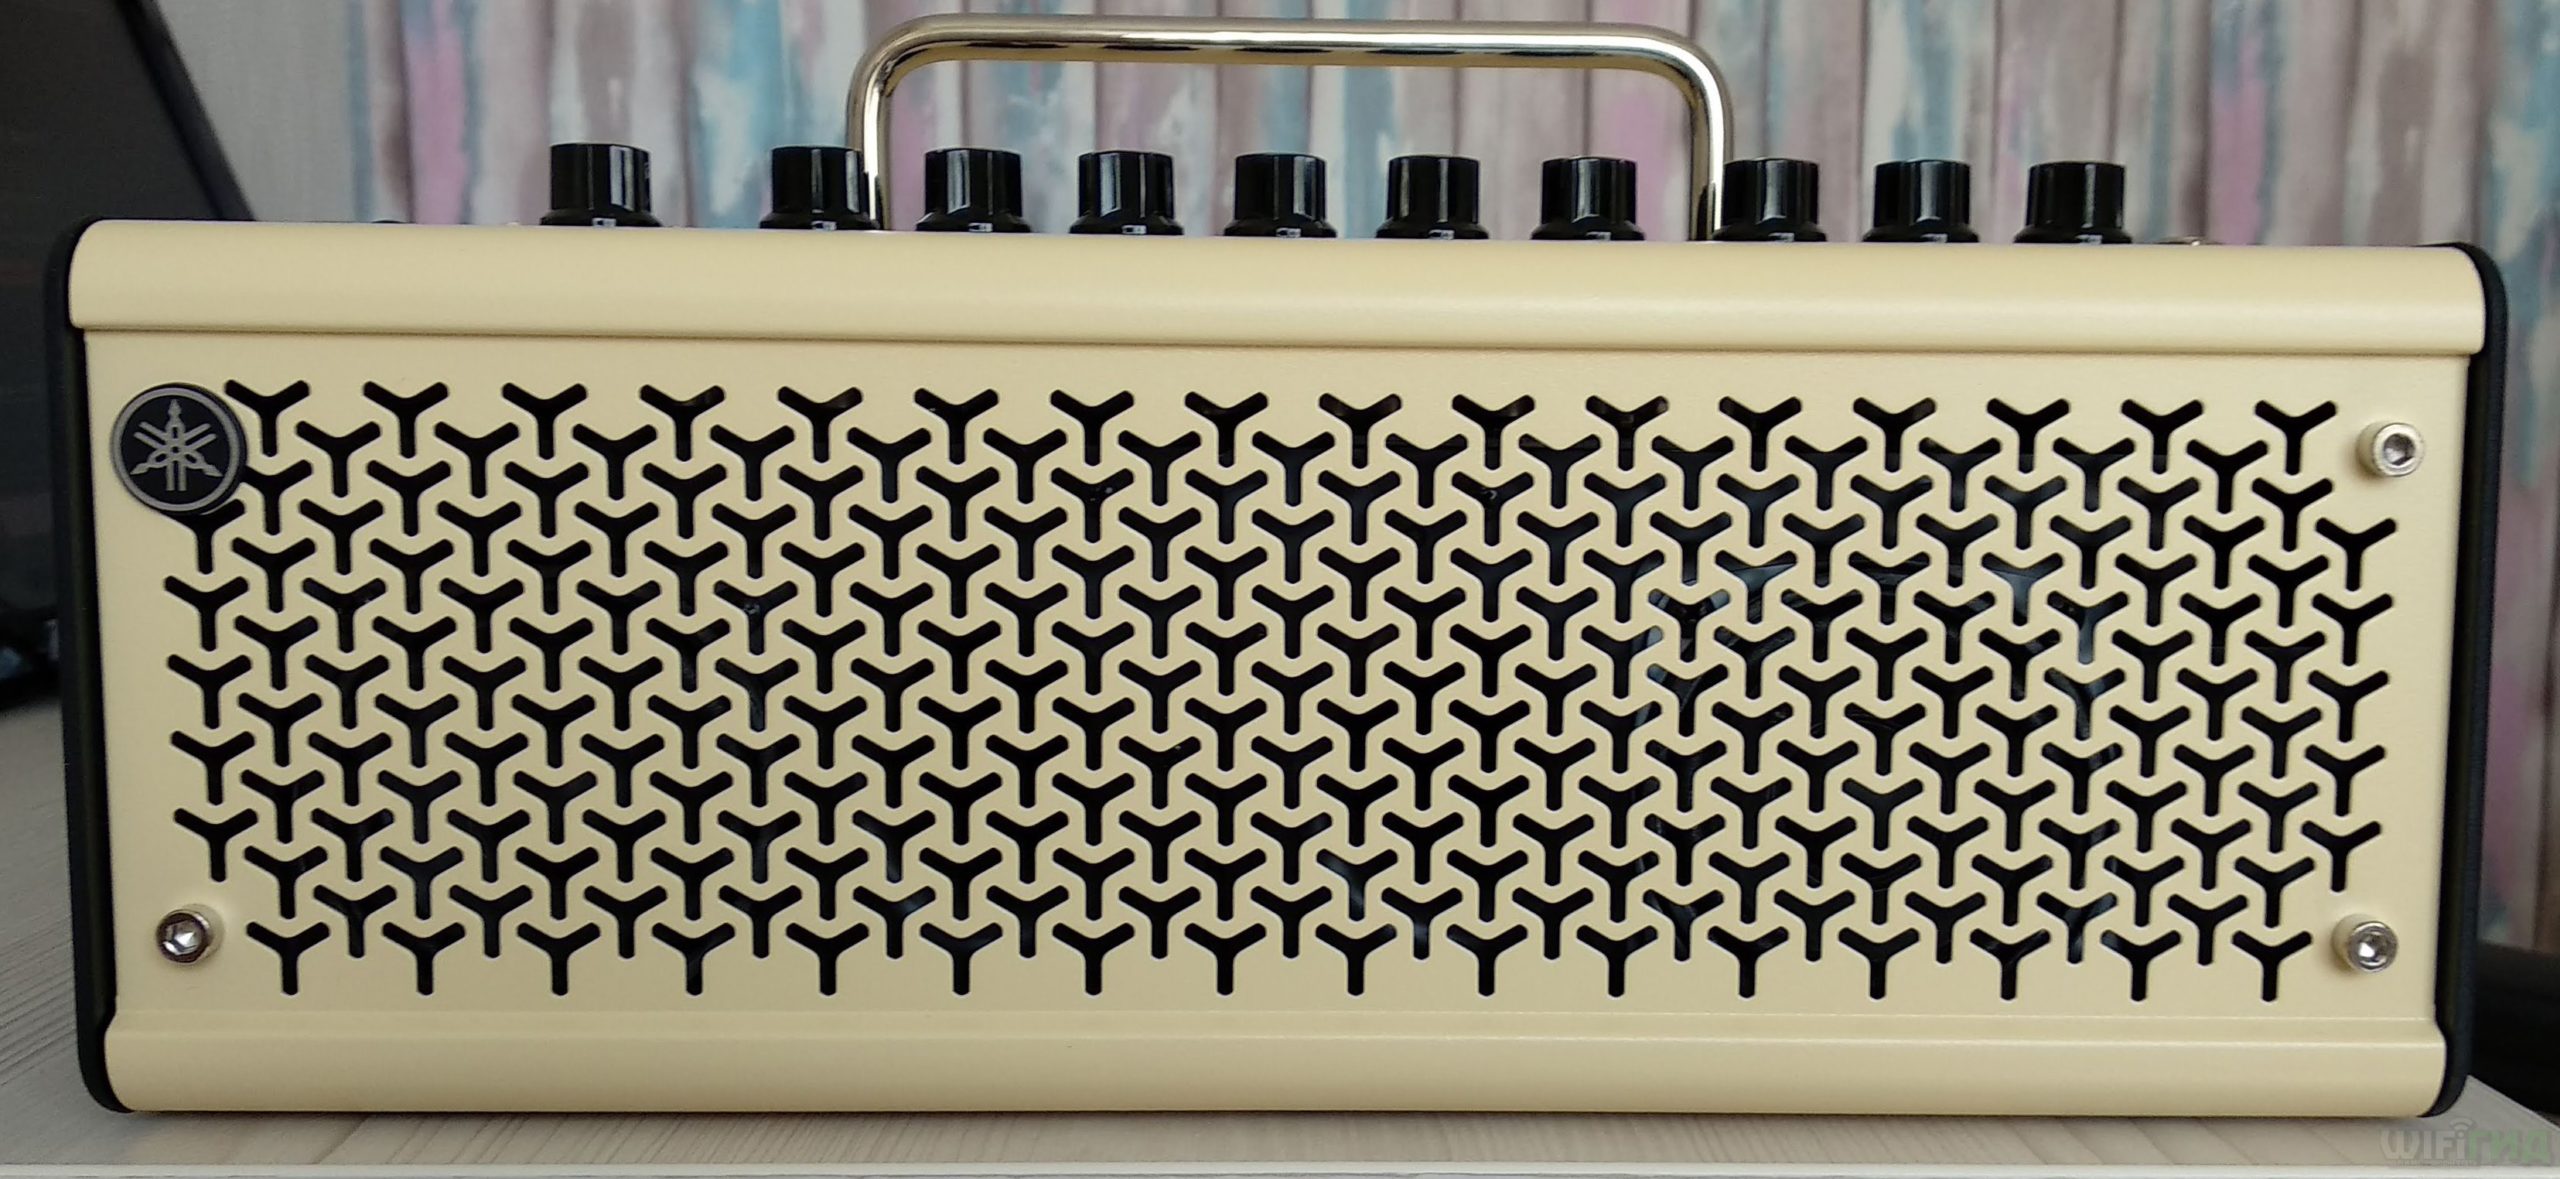
Аппарат выглядит очень круто – стилизован под старину. Если честно выглядит лучше, чем модели прошлой серии.
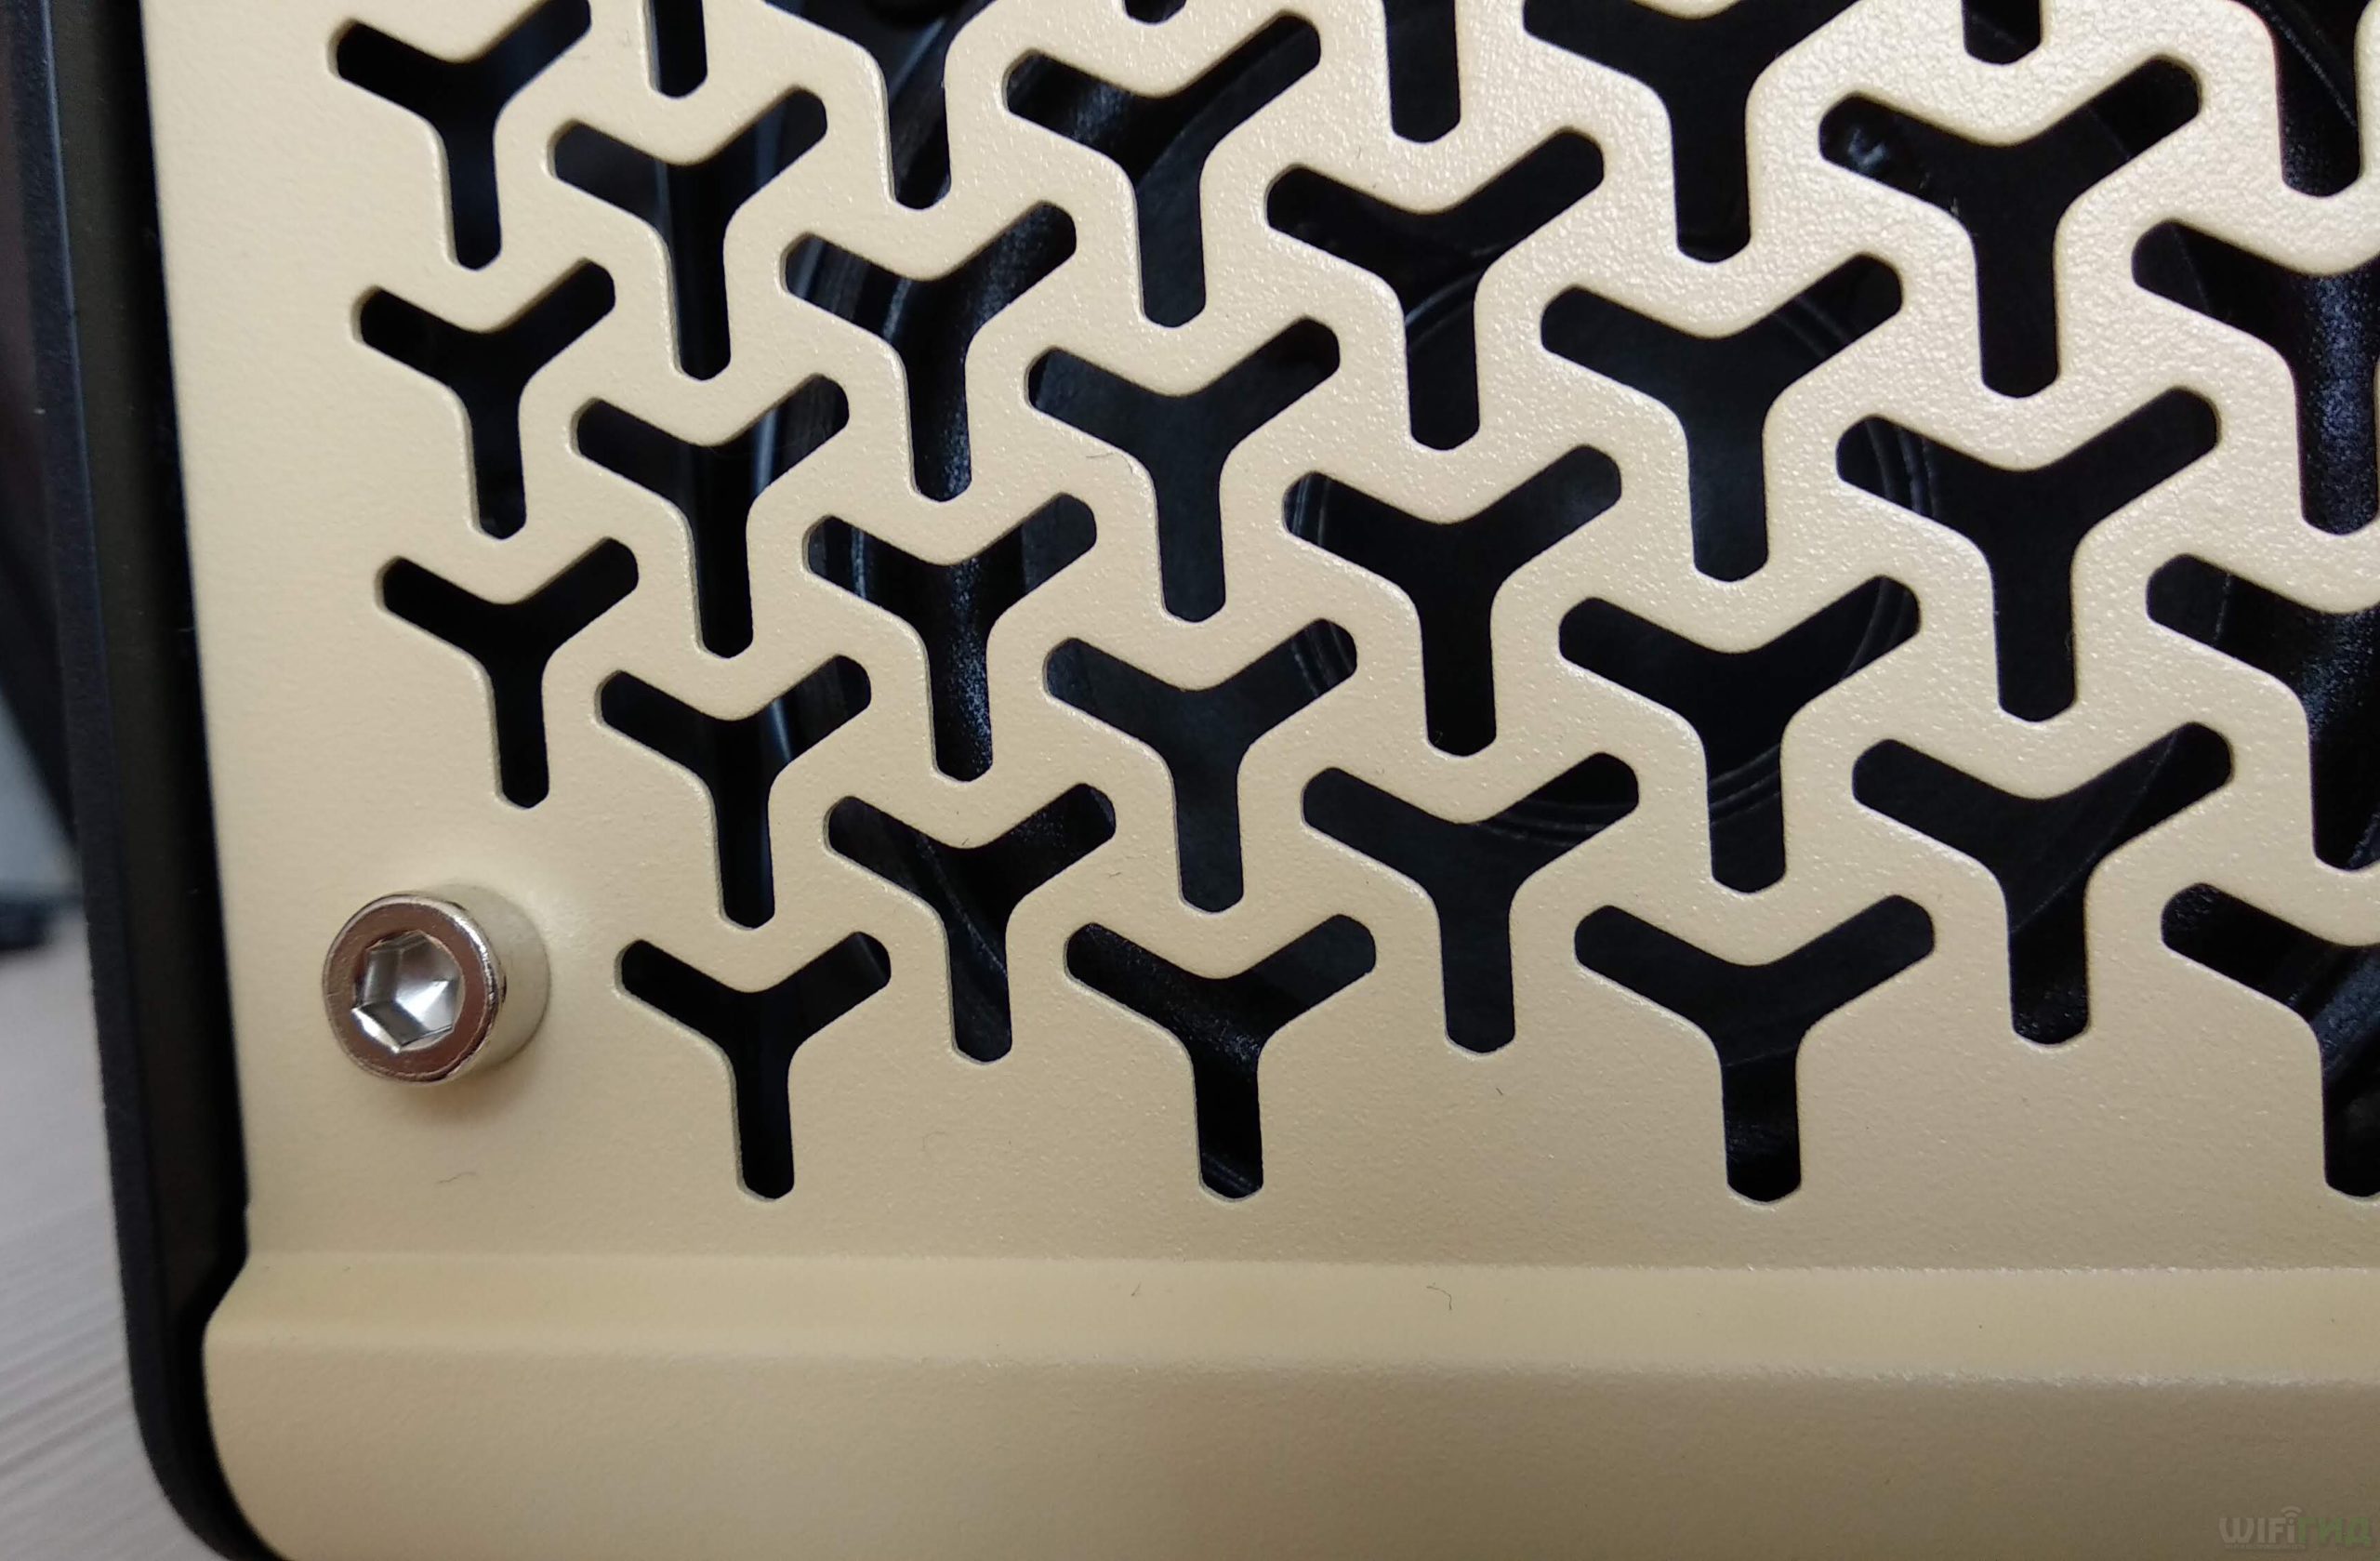
Передняя панель прикручена на вот такие болты. Внутри стоят два основных динамика. Они небольшие, но дают неплохие басы.
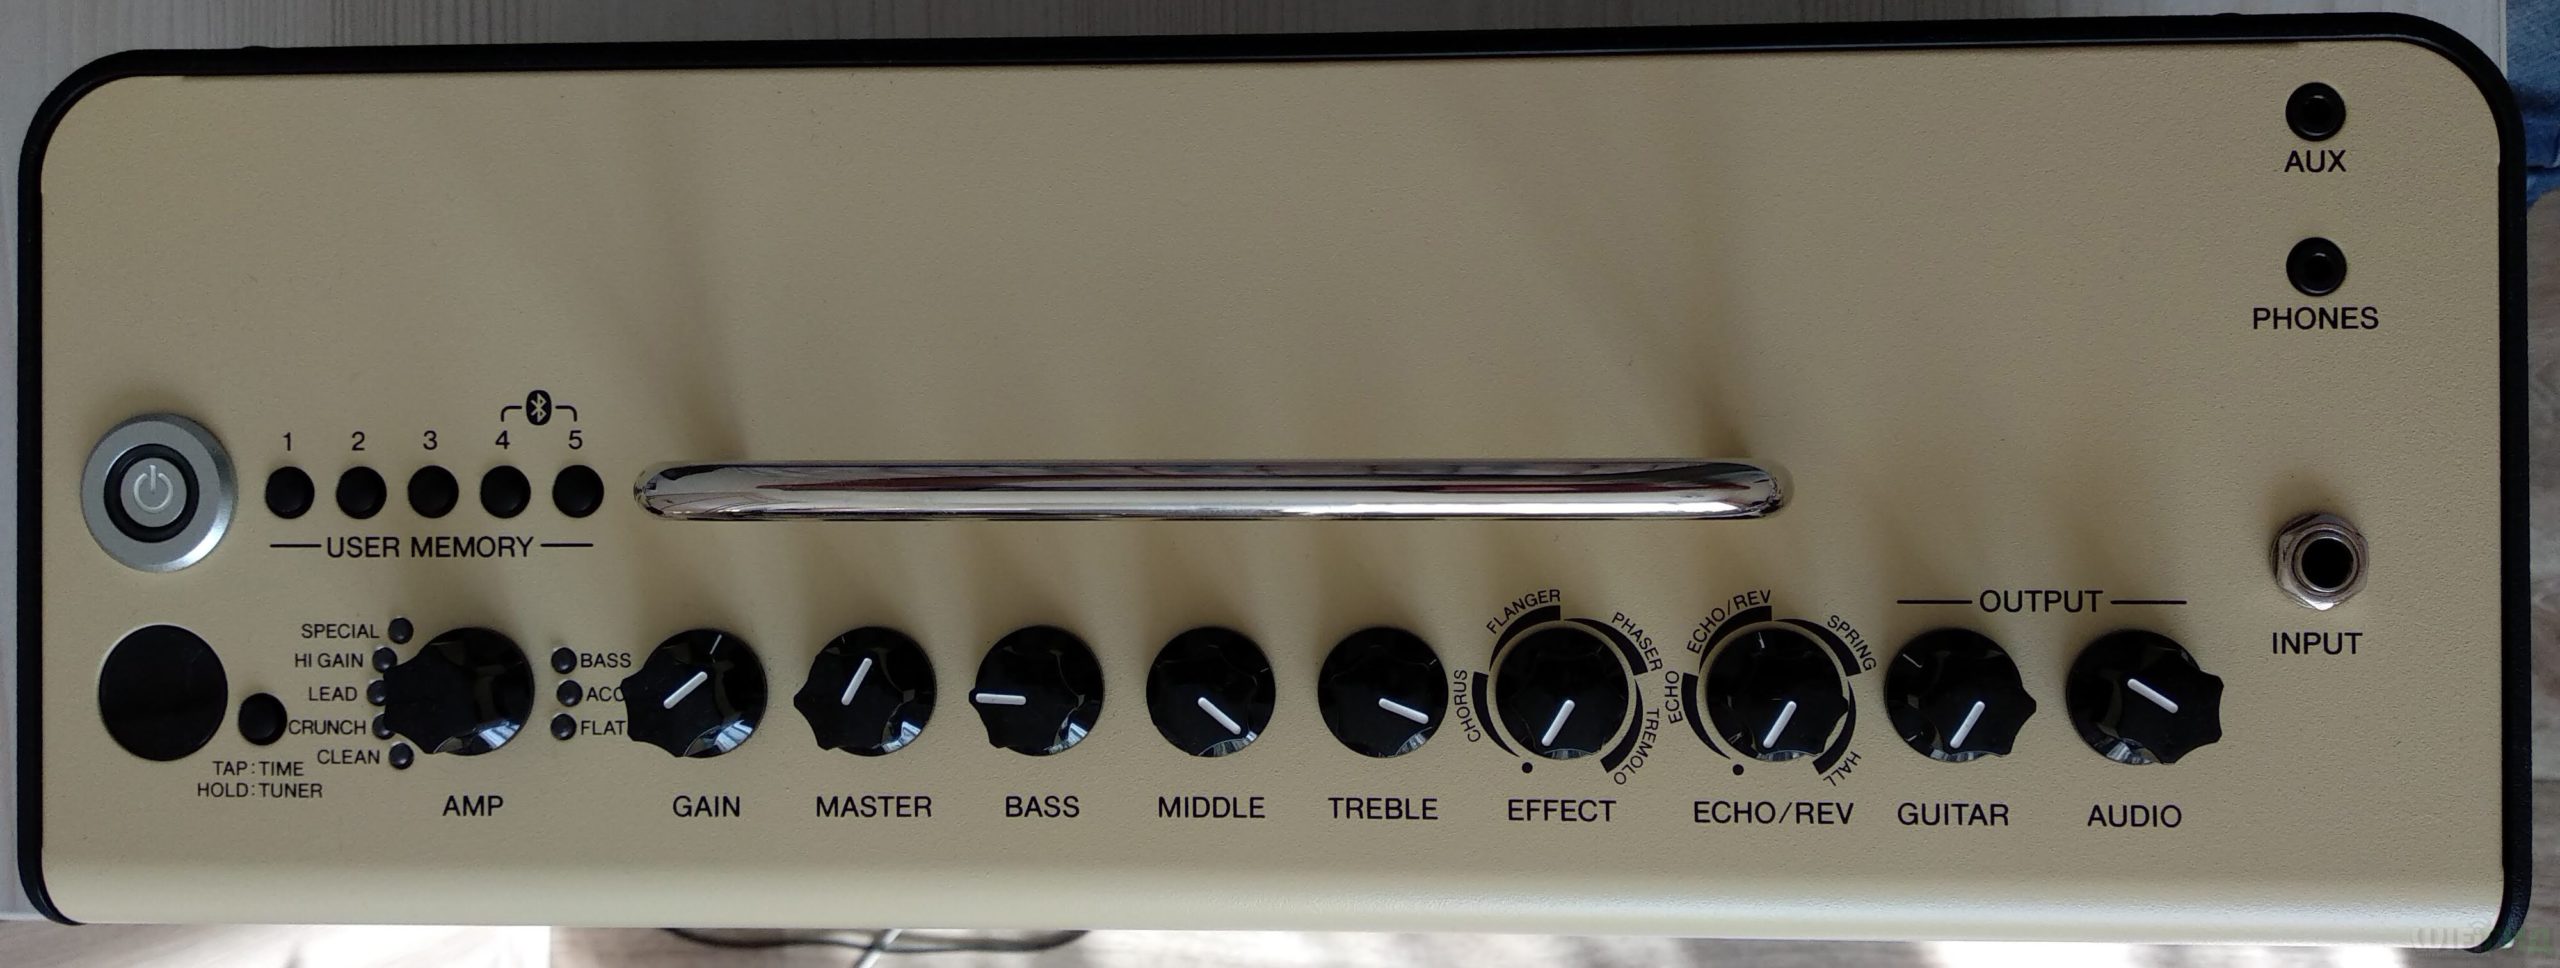
Сверху идет основная панель с настройками, вертушками и индикаторами. Про них я напишу чуть подробнее далее.
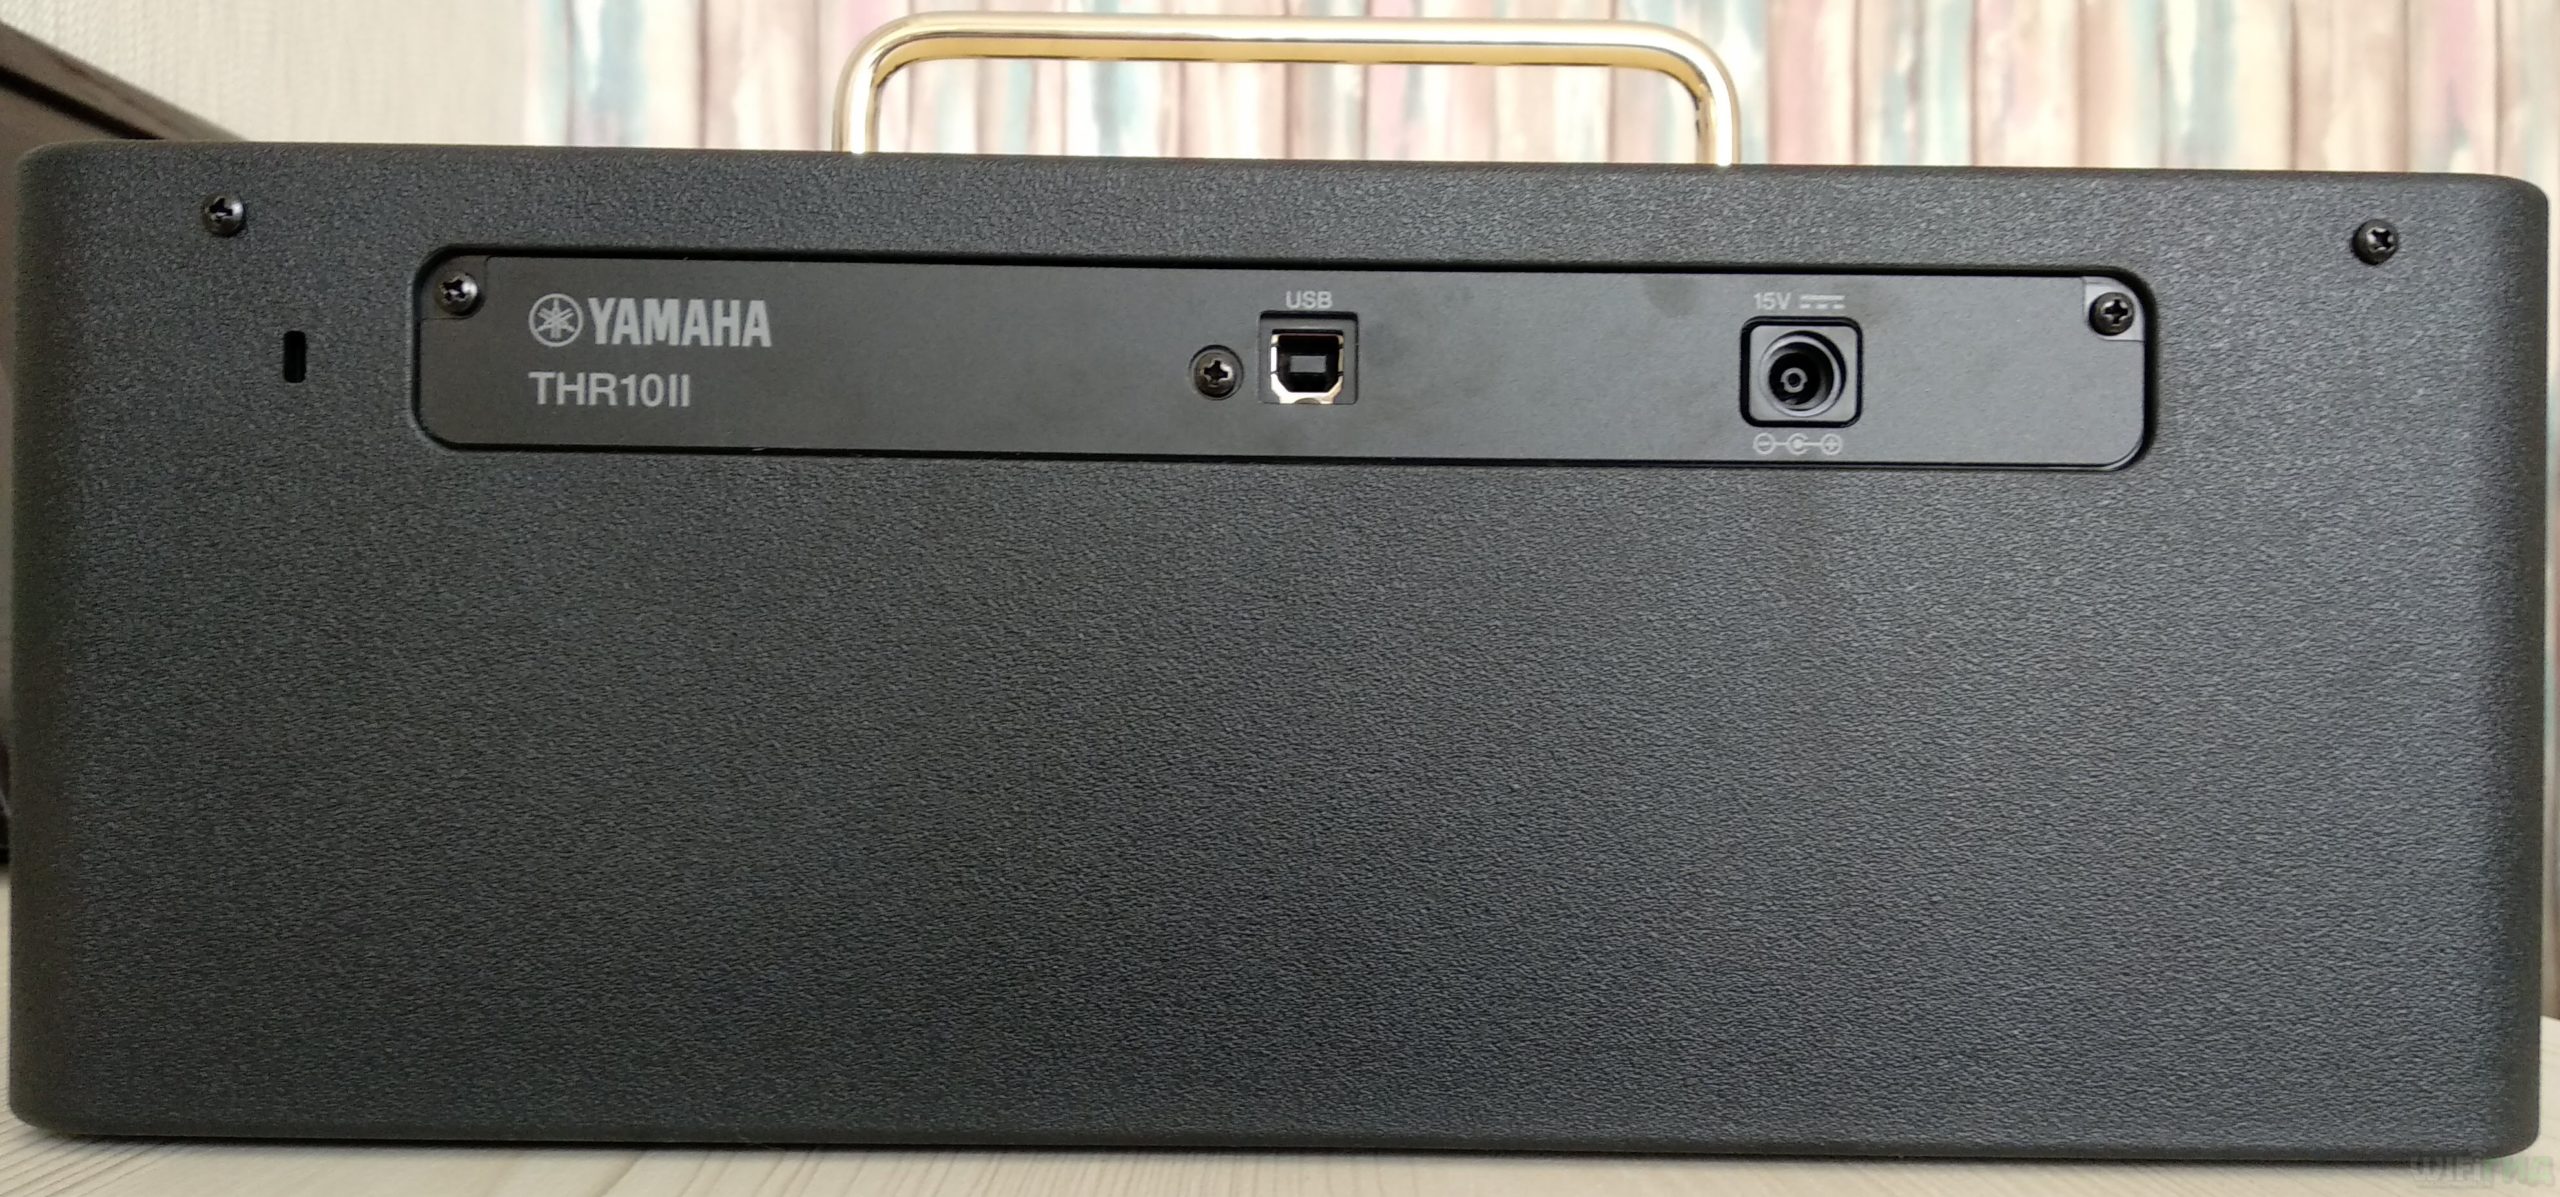
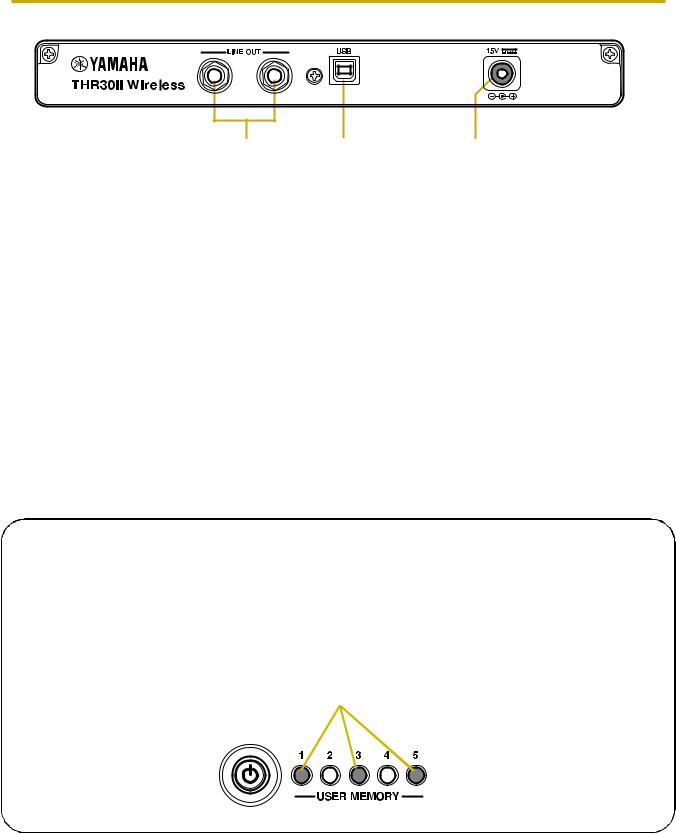
Сзади идут два подключения:
- Вход для блока питания.
- USB – для подключения к компьютеру.
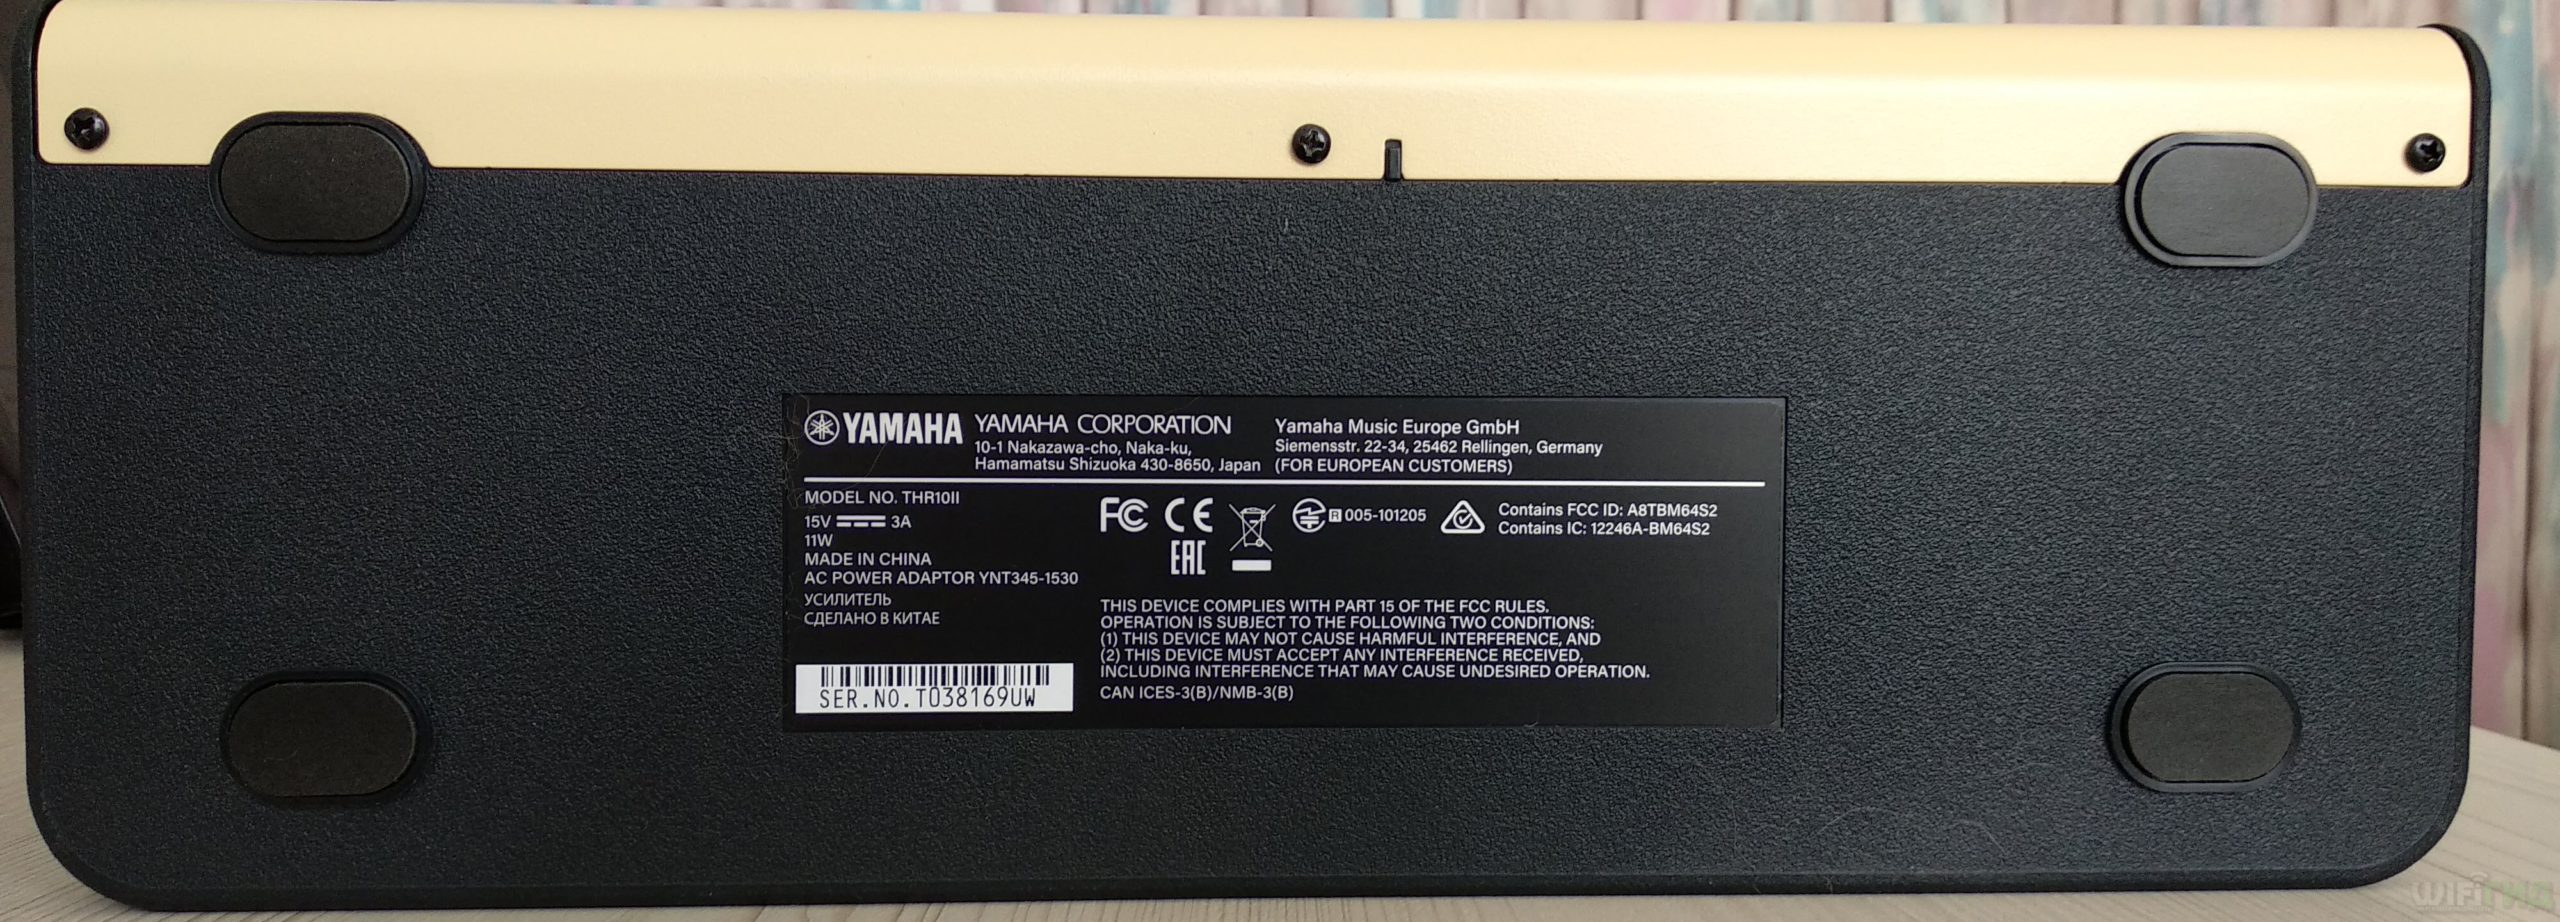
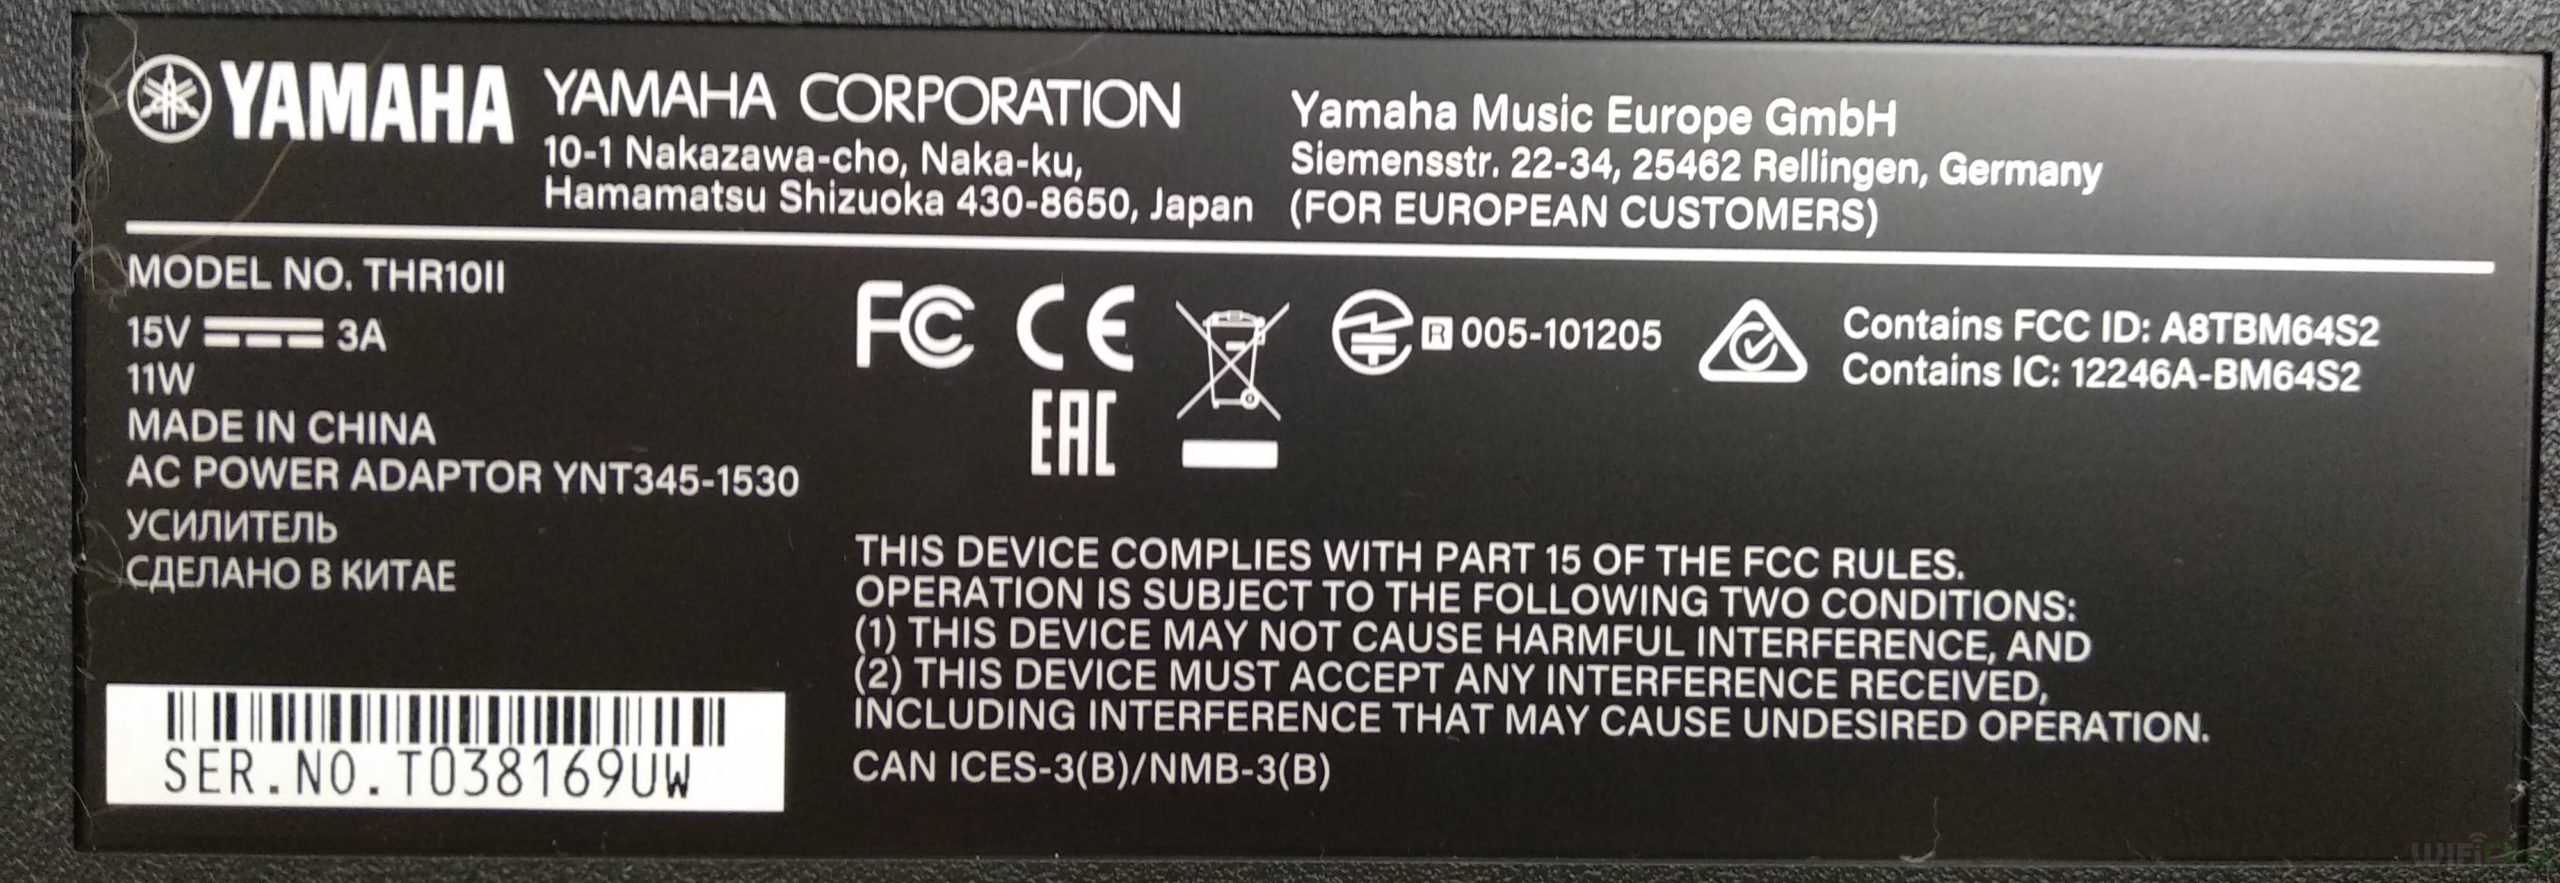
Внизу идет полная информация о модели. Сам комбик стоит на резиновых ножках.
На всякий случай оставлю фото с информацией тут, вдруг кому понадобится.
В комплекте идет:
- Блок питания.
- Комбик.
- Гарантия.
- Руководство пользователя.
- Ключ для Cubase AI и инструкция для скачивания и использования программы.
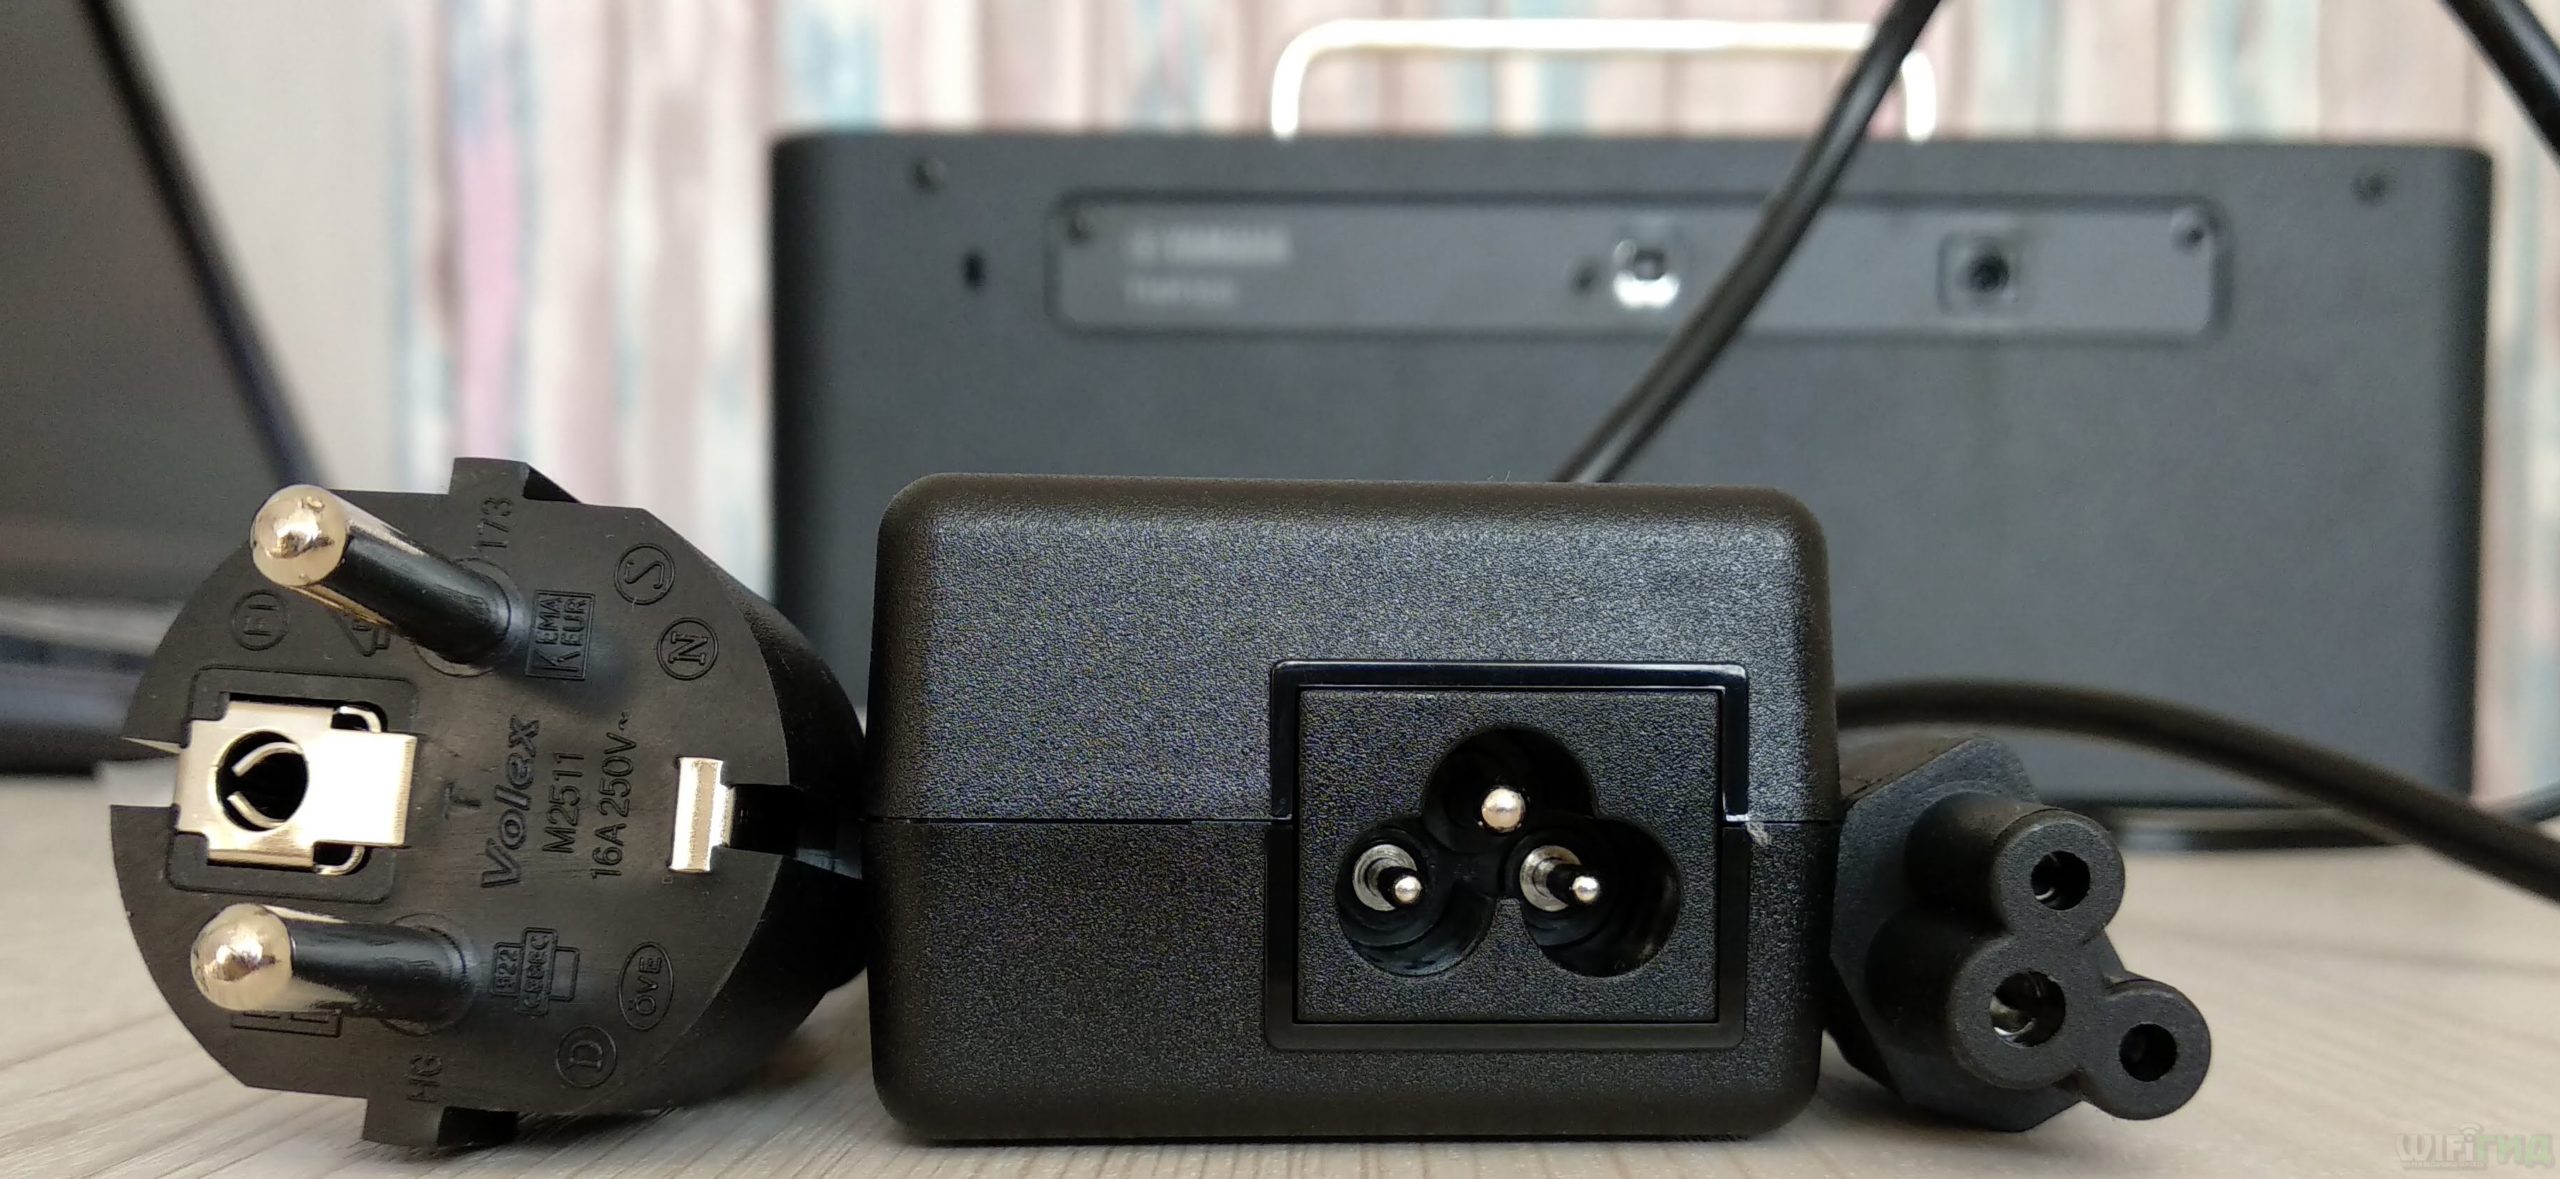
Вот и сам блок питания и кабель для подключения к розетке.
Также на всякий случай оставлю характеристики блока питания, если кому нужно.
Индикаторы, кнопки, регуляторы
- Первая кнопка питания – для включения нужно зажать её на 1-2 секунды.
- Экран состояния – при переключении эффектов, а также при настройке гитары, с помощью тюнера, вы увидите нужную информацию.
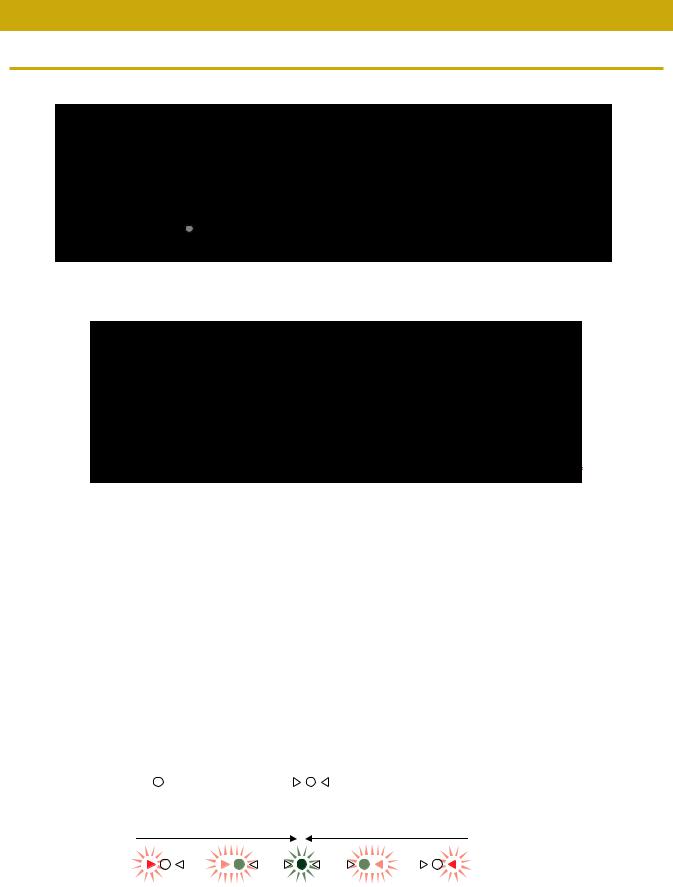
- Тюнер – для включения зажимаем эту кнопку. При этом звук из динамиков или наушников перестанет звучать. Тут все интуитивно понятно: стрелочка указывает вправо – натягиваем струну, если указывает влево, то струну надо расслабить. Настройка будет закончена, как только вы увидите горящий кружок.
- Тип усилителя (AMP) – тут у нас есть: SPECIAL, HI GAIN, LEAD, CRUNCH, CLEAN, BASS, ACO, FLAT.
- GAIN – усиления сигнала с предусилителя.
- MASTER – также влияет на звук и перегруз выбранного усилителя. Кроме BASS, ACO и FLAT – в данных случаях будет просто усиливаться звук, а искажения никакого не будет.
- BASS – низкие частоты.
- MIDDLE – средние частоты.
- TREBLE – высокие частоты.
- EFFECT – эффекты: CHORUS, FLANGER, PHASER или
- ECHO/REV – эффекты: ECHO (tape echo), ECHO/REV (tape echo/reverb), SPRING (spring reverb) и HALL (hall reverb).
- GUITAR – уровень громкости гитары. Данный уровень влияет на громкость, которая идет в наушники или на динамики. Сигнал, который идет на компьютер по USB не меняется от этого регулятора.
- AUDIO – все входные сигналы от компьютера, по Bluetooth или от AUX подключения. Очень удобная штука, включили музыку на компьютере и регулируете громкость звука. Аналогично при подключении телефона или планшета по Bluetooth.
- INPUT – стандартный джек-вход. Сюда мы подключаем гитару.
- PHONES – сюда подключаем наушники. При подключении звук на динамики не идет.
- AUX – подключение внешних устройств для приема звукового сигнала.
- USER MEMORY (1-5) – кнопки памяти. Сюда вы можете сохранить настроенные вами пресеты. Для сохранения нужно зажать нужную кнопку на 2 секунды. Чтобы загрузить пресет, просто нажмите один раз на кнопку. Также кнопки 4 и 5 при одновременном нажатии запускают Bluetooth, но об этом я чуть подробнее расскажу дальше.
- USB порт типа AB – как в принтерах.
- DC IN [15V] – подключение блока питания, который идет в комплекте.
Подключение
Все достаточно просто, берем блок питания из коробки и подключаем сначала в розетку, а потом в сам аппарат. Подключите гитару с помощью стандартного кабеля. Для того чтобы звук пошел на динамики, нужно покрутить кнопку «GUITAR». Если у вас стоит «AMP» на «CLEAN», то покрутите ещё «MASTER» и «GAIN». Можете попробовать стандартные пресеты из памяти «USER MEMORY» – понажимайте на цифры.
Характеристики
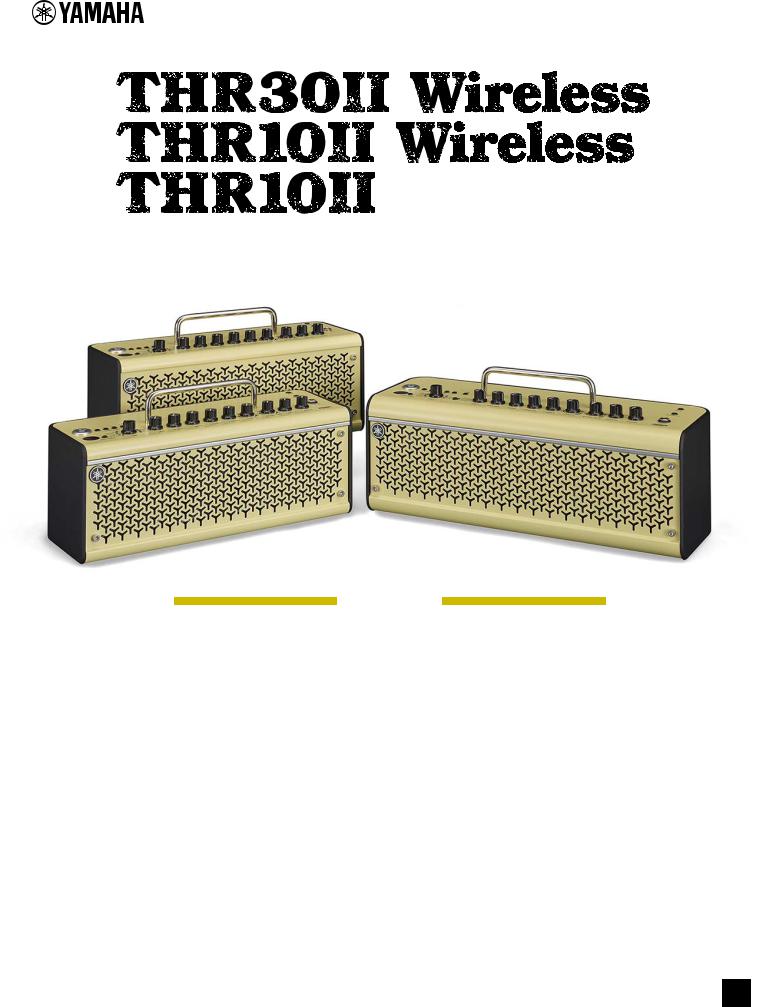
Напомню, что на рынке сейчас есть три версии THR-II:
- Обычная как у меня.
- Wireless.
- THR30-II.
Для удобства я напишу характеристики обычной версии, а потом опишу несколько пунктов, которые есть в других версиях (Wireless и THR 30-II).
| Встроенные эмуляции усилителя | CLEAN, CRUNCH, LEAD, HI GAIN, SPECIAL, BASS, ACO*, FLAT
Для каждого типа усилителя предусмотрен режим усилителя: MODERN, BOUTIQUE и CLASSIC. |
| Встроенные эффекты | CHORUS, FLANGER, PHASER, TREMOLO, ECHO, ECHO/REVERB, SPRING REVERB, HALL, REVERB |
| Эффекты доступные только из приложения THR Remote | COMPRESSOR NOISE GATE |
| Подключения | INPUT (стандартный монофонический штекерный разъем, несбалансированный),
LINE OUT (стандартный разъем, сбалансированный/несбалансированный), PHONES (для наушников или другого выходного канала), AUX, USB TYPE B,DC IN (15V) |
| АЦП | 24-разрядный + 3 разряда плавающие |
| ЦАП | 24-разрядный |
| Частота сэмплирования | 48 кГц |
| Уровень входного сигнала | GUITAR IN: -10 дБ(u)
AUX IN: -10 дБ(u) |
| Уровень выходного сигнала PHONES | 10 мВт |
| Мощность | 20 Вт (10 Вт + 10 Вт) |
| Адаптер питания | YNT345-1530 |
| Потребляемая мощность | 11 Вт |
| Bluetooth | Версия Bluetooth: Bluetooth 4.2
Поддерживаемый профиль: A2DP Совместимый кодек: SBC Выходная радиочастотная мощность: Bluetooth класса 2 Максимальная дальность связи: 10 м (без препятствий) |
| Габариты | 368 x 183 x 140 мм |
| Динамики | 2 штуки (3,1 дюйма (8 см)) |
| Вес | 3 кг. |
| Стоимость | 26 990 (Я брал по скидке за 22 850) |
Отличие от версий Wireless
THR10II Wireless – весит на 200 грамм больше. Приблизительная стоимость – 37 990 рублей.
THR30II Wireless – имеет более крупные динамики (3,5 дюйма (9 см)), что улучшает передачу баса. Также имеет выходную мощность на каждый динамик по 15 Вт, в итоге выходит – 30 Вт. Больший вес – 4,3 кг и большие габариты (368 x 183 x 140 мм). На задней панели есть дополнительный линейный выход (LINE OUT) с двумя каналами для подключения к другим аудиоустройствам. Что превращает данную модель в реально-походную, так как вы можете спокойно её брать на репетиционную базу и подключать к комбику или микшеру.
На панели есть дополнительная кнопка для переключения режима усилителя (MODERN, BOUTIQUE, CLASSIC) – на остальных же аппаратах все это переключается через приложение. И есть дополнительная кнопка Bluetooth. Приблизительная стоимость – 41 990 рублей.
У остальных версий есть поддержка Line 6 G10T* (именно поэтому они и называются «Беспроводными») – это специальный беспроводной адаптер, который можно втыкать в гитару, не используя шнур. Достаточно удобно, но и без этого можно обойтись. Плюс стоит она достаточно дорого – от 11 800 рублей. Также у Wireless моделей есть аккумуляторная батарея, которая позволяет превратить аппарат в переносной и играть в любом месте. Заряда хватает приблизительно на 5 часов активной игры.
Есть также некоторые отличия в спецификации, о них мы поговорим чуть дальше. Но в остальном они приблизительно одинаковые.
Line 6 G10T
Line 6 G10T – это специальный беспроводной модуль, который можно подключить к гитарному выходу и играть через совместимые комбики: Relay G10 и Relay G10S, а также с усилителями Line 6, Spider: V 60, 120, 240 и 240 HC (как оригинальной, так и версии MkII) и Yamaha THR-II Wireless. Плюс от версии THR Wireless можно заряжать данный модуль, просто подключив его к входу INPUT.
Если говорить про существенные отличия, то это только поддержка беспроводной связи, аккумуляторная батарея и LINE OUT на 30II. В плане звука, а также технических характеристик, они примерно все одинаковые. Возможно только у «тридцатки» более мощные и крупные динамики, которые позволяют более точно передавать басы.
Сброс настроек до заводских
Для сброса всех настроек (в том числе памяти) к заводской конфигурации вам нужно включить аппарат и зажать кнопки на панели управления USER MEMORY: 1, 3 и 5.
Подключение к компьютеру
Для этого используется кабель USB типа AB – как при подключении принтера. Он в комплекте не идет, поэтому его нужно будет покупать отдельно. Также в инструкции сказано, что провод должен быть не больше 3-х метров в длину.
После подключения драйвера установятся автоматически, можете включить какую-нибудь музыку, чтобы это проверить.
Нет звука, не устанавливаются драйвера
- Нажмите правой кнопкой по иконке «Компьютера» и зайдите в «Свойства».
- Переходим в «Диспетчер устройств».
- Устройство должно отображаться в разделе «Звуковые, игровые и видеоустройства».
- Если комбика там нет, нажмите на кнопку «Обновить конфигурацию оборудования». При этом вы должны быть подключены к интернету. Вы также можете обновить драйвера вручную, нажав по устройству правой кнопкой мыши и выбрав пункт «Обновить драйвер».
- Также нажмите правой кнопкой мыши по динамику в трее и выберите «Звуки». Если у вас Windows 7, то выбираем «Устройства воспроизведения» или «Записи».
- Убедитесь, что на вкладке «Воспроизведения» THR10II используется по умолчанию. Для активации устройства нажмите ПКМ и выберите соответствующий пункт.
- Тоже самое нужно сделать и для микрофона на вкладке «Запись», но это не обязательно делать, так как в программах все равно делается все вручную.
Программа для компьютера
На официальном сайте никакого драйвера кстати нет, откуда он скачивается – не понятно. Но есть специальная программа THR Remote, которую можно скачать для ПК:
ВНИМАНИЕ! Приложение работает только с Windows 10.
- Windows
- MacOS
После запуска программы вы увидите достаточно удобное и интуитивно понятно меню. Рассказывать про все нет смысла, просто поиграйтесь.
Подключение к телефону
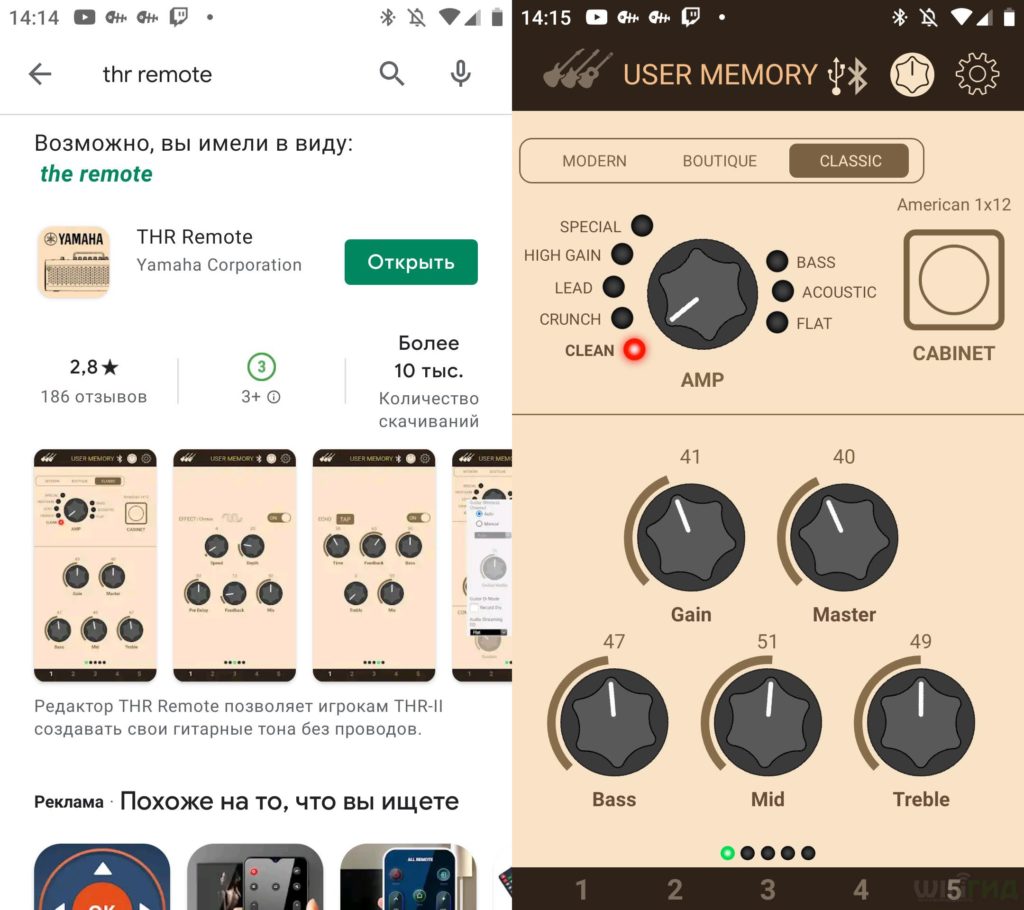
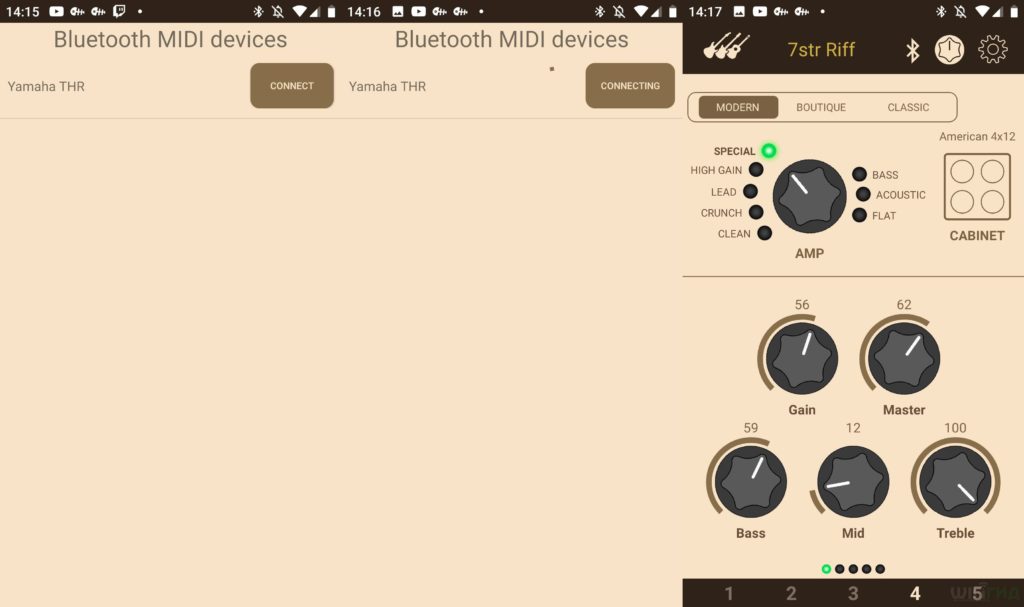
Аналогичное приложение есть и на телефон. Заходим в App Store или Google Play и ищем программу «THR Remote». Послу установки запускаем её. На телефоне автоматически должен включиться Bluetooth – смотрим на панель управления.
Чтобы включить «Голубой зуб» на комбике, зажмите кнопки «4» и «5» в разделе «USER MEMORY», пока точка на экране не начнет мигать. После этого в приложении нажмите по значку Bluetooth, далее нажимаем по кнопке «Connect». И тут мы сталкиваемся с первой проблемой – комбик THR 10II не подключается к телефону по Bluetooth. Но стоит выдернуть USB кабель из комбика и коннект происходит. Почему так происходит? – мне не понятно, но говорят, что этим страдают только пользователи Android.
Функционал у приложения примерно такой же как и на ПК, поэтому рассказывать про него особого смысла нет. Также вы можете использовать комбик как Bluetooth колонку.
Как записывать сухой звук без эффектов
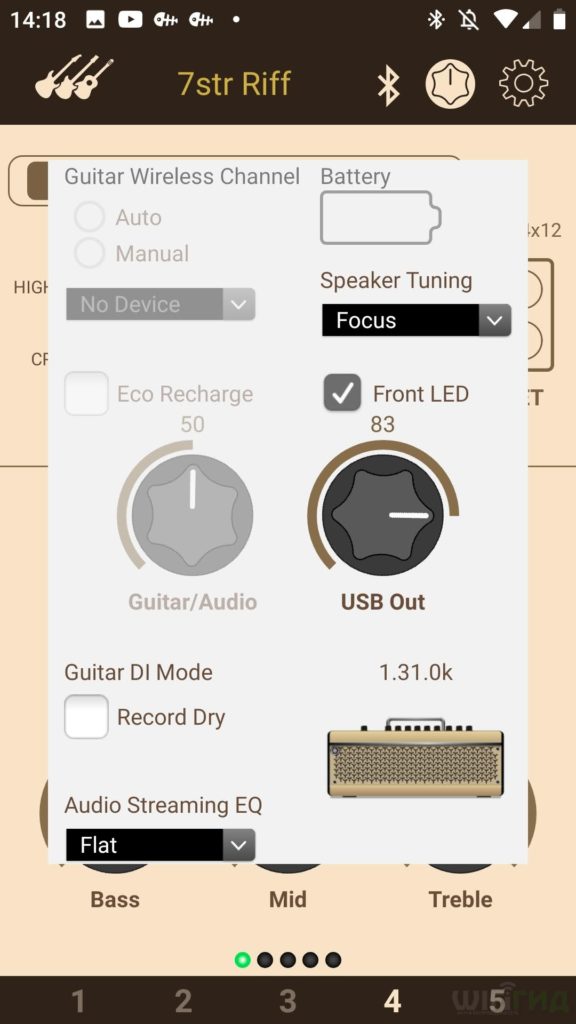
Сухой звук можно активировать в приложении THR Remote. Нажимаем по шестеренке и выбираем «Record Dry».
Звук начинает хрипеть (отваливается драйвер)
С этой проблемой я столкнулся почти сразу. Слушаешь звук из динамиков или через наушники и через какое-то время он начинает хрипеть, искажаться, свистеть, кряхтеть (звучание начинает как бы захлебываться). Аналогично происходит и при записи. Вроде сидишь записываешь партию, а когда начинаешь слушать, то слышишь только скрежет.
Проблема решается перезагрузкой устройства в операционной системе. Заходим в «Звук», находим наш комбик, выключаем, а потом включаем. Если же проблема с записью, то тоже самое делаем с микрофоном на вкладке «Запись».
Еще проблема в том, что при такой перезагрузке нужно еще перезапускать программу, которую вы используете для записи (это не очень удобно). Так и не понял из-за чего так происходит. Сначала думал, что проблема в том, что я использовал Windows 7 на моем старом компе.
Но когда я купил себе новый ноутбук с Windows 10 – проблема никуда не исчезла и осталась. Драйвер может отвалиться в любой момент. Мне не удалось выяснить какие события являются спусковым механизмом. Чаще всего драйвер отваливается во время записи. К слову, на официальной странице драйвера я так и не нашел, он устанавливается с серверов Microsoft.
Если вы думаете, что мне просто не повезло, то можете почитать отзывы от других пользователей. Некоторые ребята вообще не смогли его запустить. Возможно проблема совместимости некоторых материнских плат, но это не точно.
Как уменьшить задержку или отклик?
Я задавался этим вопросом достаточно долго, искал информацию на форумах на Youtube, пока не понял, что это не нужно. Комбик выступает в качестве монитора, и вы сразу слышите звук через наушники или колонки. При записи все программы автоматически высчитывают отклик и сдвигают запись как нужно. Именно поэтому вам не нужно париться над тем, чтобы уменьшить отклик.
Плюсы, минусы и мой личный отзыв
- Отличная качественная сборка, ничего не скрипит, нет люфтов. Все материалы приятные на ощупь и на вид очень прочные.
- Сравнивать мне не с чем, так как я впервые покупаю себе такое оборудование. Но мне его посоветовал профессиональный музыкант. Много отзывов в интернете, что звук у него почти такой же как на ламповых комбиках. Спорить не буду – обработка звука для гитары мне нравится.
- Динамики хоть и маленькие, но имеют очень жирный звук и хорошие басы. Кстати, через наушники звук более четкий и лучше подходит для обучения и отработки рифов и соло, так как ты слышишь все нюансы и косяки.
- Удобное приложение, которое позволяет настроить звуковые эффекты ещё более точно.
- В комплекте идет ключ для Cubase AI, я его ставил на Windows 7, где у меня вообще драйвера не запустились. Пользовался я программой Reaper.
- Не нужны мониторы – они сразу встроены.
- Проблема с подключение Android телефонов по Bluetooth – не очень удобно постоянно отключать кабель, чтобы подключить смартфон. Кто-то скажет, ну так настраивай все через комп, и тут мы подходим к второй проблеме.
- Windows 7 не поддерживает приложение и приходится работать с телефона.
- Частота сэмплирования, как на свой дешевой звуковой карте – всего 48 кГц. И это ой как сильно слышно. Учитывая, что на звуковых картах, которые стоят в 3 раза дешевле этот показатель выше – 192 кГц. То есть вы будете слышать не все звуки при прослушивании полноценных композиций.
- Ну и самая главная проблема – отваливается драйвер. Драйвер для динамиков отваливается редко, а вот при записи будьте готовы постоянно перезагружать оборудование и программу для записи.
В общем у нас есть полноценный комбик, с неплохой обработкой звука гитары. Если прикупить аппарат подороже, то там будет ещё и аккумулятор. Если вы будете использовать его только как комбарь, то можете смело брать – для домашнего использования аппарат неплохой. Если же вы будете записывать через него и использовать как звуковую карту, то вы можете столкнуться с теми же проблемами, как и у меня.
Я до сих пор не могу понять, почему компания Yamaha, выпуская такие неплохие продукты (в плане железа), абсолютно забивает на программное обеспечение и драйвера. Толку с вашего комбика, если он постоянно отваливается и зависает. Для компьютера – можно присмотреть что-то другое. И если вы играете исключительно через наушники, то я бы взял звуковую карту или процессор, так как частота семплирования слишком маленькая и это отлично слышно, особенно через хорошие наушники. Считаю, что цена слегка завышена.
Руководство пользователя на русском языке
Схема подключения (Быстрый старт)
Guitar Amplifier
Reference Manual
|
Contents |
|
|
Introduction ………………………………………………………………… |
2 |
|
Main Features ………………………………………………………………….. |
2 |
|
Accessories …………………………………………………………………….. |
2 |
|
Names and Functions …………………………………………………. |
3 |
|
Control Panel …………………………………………………………………… |
3 |
|
Rear Panel ………………………………………………………………………. |
6 |
|
Connection …………………………………………………………………. |
7 |
|
Connection Example (on THR30II Wireless) ………………………… |
7 |
|
Power …………………………………………………………………………….. |
8 |
|
Connecting to guitar by wireless (THR-II Wireless only) ………… |
9 |
|
Connecting to a smart device …………………………………………… |
10 |
|
Connecting to a computer ……………………………………………….. |
12 |
|
Troubleshooting ……………………………………………………….. |
14 |
|
Specifications …………………………………………………………… |
16 |
|
Technical Specifications ………………………………………………….. |
16 |
|
THR30II Wireless, THR10II Wireless* |
|
|
Power Button LED status list …………………………………….. |
17 |
|
Signal Flow Diagrams ……………………………………………………… |
18 |
|
Amp Modeling List ………………………………………………………….. |
19 |
EN
THR30II Wireless THR10II Wireless THR10II Reference Manual 1

Introduction
Thank you for purchasing this Yamaha product.
This product is an exceptionally versatile and compact guitar amplifier designed for use in your home, rehearsal spaces, and other places—virtually anywhere you want it!
We recommend that you read this manual carefully so that you can fully take advantage of the advanced and convenient functions of the product. We also recommend that you keep this manual in a safe and handy place for future reference
Main Features
•Sophisticated guitar amplifier utilizing advanced amp modeling, made possible with Yamaha’s original VCM technology
•Advanced wireless guitar transmitter Relay G10T (made by LINE6) for wireless use (THR30II Wireless and THR10II Wireless only)
•Bluetooth® capability enables playing music and editing sound settings from a smart device and a computer.
•Built in rechargeable battery enables use without power adaptor.
•Yamaha’s original Extended Stereo technology enables an exceptionally wide stereo image, much wider than the unit’s compact size.
•The audio interface capability enables recording your guitar to computer via USB.
•Incorporates a chromatic auto tuner.
* What is VCM Technology?
An original physical modeling technology developed by Yamaha, VCM Technology reproduces the characteristics of analog circuitry at a micro level to accurately reproduce the sound of the modeled equipment.
Accessories
•Power Adaptor
•Quick Guide
•Safety Instructions Sheet
•Service Offices list
•Cubase AI Download Information
In this document, the THR30II Wireless, THR10II Wireless and THR10II are collectively called THR-II. The THR30II Wireless and THR10II Wireless are called THR-II Wireless.
THR30II Wireless THR10II Wireless THR10II Reference Manual 2
Names and Functions
Control Panel
|
THR30II Wireless |
||
|
!7 |
||
|
!8 |
!9 |
|
|
!6 |
||
|
q |
||
|
w |
!5 |
|
|
e r |
t y u i |
o !0 !1 !2 !3 !4 |
|
THR10II Wireless |
!7 |
|
|
THR10II |
||
|
!8 |
!6 |
q
!5
w
e r y u i o !0 !1 !2 !3 !4 * THR10II Wireless only
q [ 
This is the unit’s power button.
When the power is ON, the Power Button LED, the lamp corresponding to the selected amp type and the Power Lamp in the speaker cabinet light.
w LED Display
Indicates each of the THR-II’s settings and conditions.
e[TAP/TUNER] button
Tuner Function
Holding the switch for 1 second engages the tuner function and lights the 
The tuner is calibrated to A4=440Hz. Tune the guitar until the desired pitch appears in the LED display.
|
When only the circle ( ) in the center of the |
display is visible, tuning is accurate. |
|
|
Pitch is low |
In tune |
Pitch is high |
Press the [TAP/TUNER] button (less than one second) to turn OFF the tuner function.
*When the tuner function is set to ON, the guitar sound to the main speaker, [PHONES] jack, and [USB] jack is muted. The sounds from the [AUX] jack, [USB] jack and Bluetooth are output to the main speaker and [PHONES] jack.
THR30II Wireless THR10II Wireless THR10II Reference Manual 3
Names and Functions
Tap Tempo Function
When an ECHO or ECHO/REV effect is selected with the [ECHO/REV] knob !2control, the tempo of the delay can be set by tapping (more than twice) on the switch.
Extended Stereo Setting
Hold the switch for more than three seconds to switch the Extended Stereo* function ON/OFF. ON: “#” on LED Display w is off (default setting).
OFF: “#” on LED Display w is lit.
*Extended Stereo: The Extended Stereo function produces a much wider stereo field. Extended Stereo affects the sounds from the [AUX] jack, [USB] jack and Bluetooth as well as the guitar sounds with reverb effects applied.
*The Extended Stereo setting (ON/OFF) is saved when the power is turned OFF.
r [AMP] knob
Selects the amp type. The lamp for the corresponding amp type lights.
*When the power is turned ON, the most recent amp type is selected.
Tips on Creating Sound
Using the [GAIN] knob y and [MASTER] knob u in combination gives you broad control over the sound for each amp type, except ACO and FLAT. Setting the [GAIN] knob and [MASTER] knob properly provides the desired amount of distortion on the power amp. Once you have the desired sound, use the [GUITAR] knob !3 to set the overall volume of the guitar sound.
t [AMP] switch (THR30II Wireless only)
Selects the amp mode. Selects the amp modeling by combination of amp mode and amp type. The [AMP] knob r lamp lights for the corresponding amp mode color.
For further details of amp modeling settings that can be selected by combining the amp mode and amp type, refer to the Amp Modeling List (page 19)
y [GAIN] knob
Adjusts the amount of guitar distortion. Turn the knob to the right to increase the amount of distortion.
*When ACO is selected with the [AMP] knob r, the modeled sound is a mixture of the front-mic’d sound and pickup sound of an acoustic electric guitar. (Minimum setting produces the direct pickup sound only. Maximum setting produces the mic sound only.)
u [MASTER] knob
Adjusts the volume for the guitar sound. Turn the knob to the right to increase the volume and create power amp distortion and change in the low-range frequency.
*When BASS, ACO or FLAT is selected with the [AMP] knob r, this only adjusts the volume.
i[BASS] knob
Tone adjustment for the guitar’s sound. Turn the knob to the right to enhance the low-range frequencies.
o [MIDDLE] knob
Tone adjustment for the guitar’s sound. Turn the knob to the right to enhance the mid-range frequencies.
!0[TREBLE] knob
Tone adjustment for the guitar’s sound. Turn the knob to the right to enhance the high-range frequencies.
!1[EFFECT] knob
Selects one of four different effects: CHORUS, FLANGER, PHASER, or TREMOLO. Turn the knob to the right to increase the amount of each effect.
* Turn the knob fully to the left to set the effect OFF.
THR30II Wireless THR10II Wireless THR10II Reference Manual 4
Names and Functions
!2[ECHO /REV] knob
Selects one of four different effects: ECHO (tape echo), ECHO/REV (tape echo/reverb), SPRING (spring reverb), and HALL (hall reverb).
Turn the knob to the right to increase the amount of each effect.
*Turn the knob fully to the left to set the effect OFF.
*When ECHO or ECHO/REV is selected, the [TAP/TUNER] button e can be used to set the delay time.
!3[GUITAR] knob
Adjusts the overall volume of the guitar sound.
*This knob’s setting has no effect on the signal sent to the [USB] jack @0.
*The volume output to the [LINE OUT] [L] [R] jack (THR30II Wireless only) is constant regardless of the setting of the [GUITAR] knob.
!4[AUDIO] knob
Adjusts the audio playback volume for audio from the computer connected to the [USB] jack @0, an audio device connected to the [AUX] jack !7, or a smart device connected by Bluetooth (page 10).
!5[INPUT] jack
This is a standard phone jack used to connect a guitar to the THR-II.
*Connecting the Relay G10T to the [INPUT] jack starts charging that device automatically. (THR-II Wireless only)
*The optimal channel is set automatically by connecting the Relay G10T to the [INPUT] jack for at least 10 seconds. (THR-II Wireless only)
!6[PHONES] jack
This is a stereo mini phone jack used to connect stereo headphones to the THR-II.
* Speaker sound is muted when a plug is inserted into the [PHONES] jack.
!7[AUX] jack
This is a stereo mini phone jack used to connect an external audio device to the THR-II.
* The signal received at the [AUX] jack is not sent to the [USB] jack @0.
!8[USER MEMORY] [1] [2] [3] [4] [5] button
Saves up to five sets of amp section controller settings (GAIN, MASTER, BASS, MIDDLE, TREBLE, EFFECT, ECHO/REV).
Press and hold the number of the desired [USER MEMORY] button for saving your settings to (about 2 seconds). The save operation is complete when the memory number for the button being pushed appears in the LED Display w. Press one of the numbered buttons (less than 2 seconds) to recall the saved settings.
*On the THR10II Wireless and THR10II, enable Bluetooth by pressing the [USER MEMORY] button [4] and [5] simultaneously.(Same as [Bluetooth] button !9)
!9[Bluetooth]button (THR30II Wireless only)
Set the Bluetooth. Hold the Bluetooth button (for more than three seconds) to switch the pairing mode (the LED Display w flashes in green).
For further details of Bluetooth connecting, refer to the Connecting to a smart device. (page 10)
THR30II Wireless THR10II Wireless THR10II Reference Manual 5
Names and Functions
Rear Panel
@0 @1 @2
@0[LINE OUT] [L] [R] jack (THR30II Wireless only)
These are standard phone jacks used to output line level audio signals.
For connection to external devices with line level signals.These jacks can be connected to phone-type (balanced/unbalanced) plugs.
@1[USB] jack
This jack is used to connect THR-II to a computer via a USB cable.
@2[15V] DC IN connector
Connects the supplied power adaptor.
About the Default Settings
To reset all contents stored in the user memory, switch on the power while holding down [USER MEMORY] buttons [1], [3], and [5].
NOTICE
All contents stored in the user memory will return to factory defaults when the unit is initialized.
Hold down switches [1], [3], and [5].
Switch on the power.
THR30II Wireless THR10II Wireless THR10II Reference Manual 6

Summary of Content for Yamaha THR10II Amplifier Reference Manual PDF
THR30II Wireless THR10II Wireless THR10II Reference Manual 1
EN
Reference Manual
Guitar Amplifier
Contents
Introduction …………………………………………………………………2 Main Features ………………………………………………………………….. 2 Accessories …………………………………………………………………….. 2
Names and Functions ………………………………………………….3 Control Panel …………………………………………………………………… 3 Rear Panel ………………………………………………………………………. 6
Connection ………………………………………………………………….7 Connection Example (on THR30II Wireless) ………………………… 7 Power …………………………………………………………………………….. 8 Connecting to guitar by wireless (THR-II Wireless only) ………… 9 Connecting to a smart device …………………………………………… 10 Connecting to a computer ……………………………………………….. 12
Troubleshooting ………………………………………………………..14
Specifications ……………………………………………………………16 Technical Specifications ………………………………………………….. 16 THR30II Wireless, THR10II Wireless*
Power Button LED status list …………………………………….. 17 Signal Flow Diagrams ……………………………………………………… 18 Amp Modeling List ………………………………………………………….. 19
Thank you for purchasing this Yamaha product. This product is an exceptionally versatile and compact guitar amplifier designed for use in your home, rehearsal spaces, and other placesvirtually anywhere you want it! We recommend that you read this manual carefully so that you can fully take advantage of the advanced and convenient functions of the product. We also recommend that you keep this manual for future reference.
Main Features
Sophisticated guitar amplifier utilizing advanced amp modeling, made possible with Yamahas origi- nal VCM technology.
Built-in wireless receiver works with the Line 6 Relay G10T transmitter for wireless use (THR30II Wire- less and THR10II Wireless only).
Bluetooth capability enables playing music and editing sound settings from a smart device and a computer.
Builtin rechargeable battery enables use without power adaptor (THR30II Wireless and THR10II Wire- less only).
Yamahas original Extended Stereo technology enables an exceptionally wide stereo image, much wider than the units compact size.
The audio interface capability enables recording your guitar to computer via USB. Incorporates a chromatic tuner.
* What is VCM Technology? An original physical modeling technology developed by Yamaha, VCM Technology reproduces the characteristics of analog circuitry at the component level to accurately reproduce the sound of the modeled equipment.
Accessories
Power Adaptor Quick Guide Safety Instructions Sheet Service Offices list Cubase AI Download Information
* In this document, the THR30II Wireless, THR10II Wireless and THR10II are collectively called THR-II.
The THR30II Wireless and THR10II Wireless are called THR-II Wireless.
* The LINE 6 wireless transmitters described in this document refer to the Relay G10T and the Relay
G10TII (hereinafter abbreviated as the Relay G10T.)
Introduction
THR30II Wireless THR10II Wireless THR10II Reference Manual 2
Control Panel
q [ ] (Power Button) / Power Button LED
This is the units power button.
When the power is ON, the Power Button LED, the lamp corresponding to the selected amp type and the Power Lamp in the speaker cabinet light up.
w LED Display
Indicates each of the THR-IIs settings and conditions.
e [TAP/TUNER] button
Tuner Function Holding the switch for 1 second engages the tuner function and lights the indicators.
The tuner is calibrated to A4=440Hz. Tune the guitar until the desired pitch appears in the LED display.
When only the circle ( ) in the center of the display is visible, tuning is accurate.
Press the [TAP/TUNER] button (less than one second) to turn OFF the tuner function. * When the tuner function is set to ON, the guitar sound to the main speaker, [PHONES] jack, and [USB] jack is muted. The
sounds from the [AUX] jack, [USB] jack and Bluetooth are output to the main speaker and [PHONES] jack.
Names and Functions
q
w
!5
!6
!7
e y u i o !0 !1 !2 !3 !4r
!8
q
w !5
!6
!7
e t y u i o !0 !1 !2 !3 !4r
!8 !9
THR30II Wireless
THR10II Wireless THR10II
* THR10II Wireless only
Pitch is low Pitch is highIn tune
THR30II Wireless THR10II Wireless THR10II Reference Manual 3
Tap Tempo Function When an ECHO or ECHO/REV effect is selected with the [ECHO/REV] knob !2 control, the tempo of the delay can be set by tapping (more than twice) on the switch.
Extended Stereo Setting Hold the switch for more than three seconds to switch the Extended Stereo* function ON/OFF.
ON: # on LED Display w is off (default setting).
OFF: # on LED Display w is lit. * Extended Stereo: The Extended Stereo function produces a much wider stereo field. Extended Stereo affects the sounds
from the [AUX] jack, [USB] jack and Bluetooth as well as the reverb effect. * The Extended Stereo setting (ON/OFF) is saved when the power is turned OFF.
r [AMP] knob
Selects the amp type. The lamp for the corresponding amp type lights. * When the power is turned ON, the most recent amp type is selected.
Tips on Creating Sound Using the [GAIN] knob y and [MASTER] knob u in combination gives you broad control over the sound for each amp type, except ACO and FLAT. Setting the [GAIN] knob and [MASTER] knob adjusts the amount of preamp and power amp saturation. Once you have the desired sound, use the [GUITAR] knob !3 to set the overall volume of the guitar sound.
t [AMP] switch (THR30II Wireless only) Selects the amp mode. Selects the amp modeling by combination of amp mode and amp type. The [AMP] knob r lamp lights for the corresponding amp mode color.
For further details of amp modeling settings that can be selected by combining the amp mode and amp type, refer to the Amp Modeling List (page 19)
y [GAIN] knob Adjusts the amount of preamp gain. Turn the knob clockwise to increase the amount of gain.
* When ACO is selected with the [AMP] knob r, the modeled sound is a mixture of the front-micd sound and pickup sound of an acoustic electric guitar. (Minimum setting produces the direct pickup sound only. Maximum setting produces the mic sound only.)
u [MASTER] knob Adjusts the volume for the guitar sound. Turn the knob clockwise to increase the volume and create power amp distortion and change in the low-range frequency.
* When BASS, ACO or FLAT is selected with the [AMP] knob r, this only adjusts the volume.
i [BASS] knob Tone adjustment for the guitars sound. Turn the knob clockwise to enhance the low-range frequencies.
o [MIDDLE] knob
Tone adjustment for the guitars sound. Turn the knob clockwise to enhance the mid-range frequencies.
!0 [TREBLE] knob Tone adjustment for the guitars sound. Turn the knob clockwise to enhance the high-range frequencies.
!1 [EFFECT] knob Selects one of four different effects: CHORUS, FLANGER, PHASER, or TREMOLO. Turn the knob clockwise to increase the amount of each effect.
* Turn the knob fully counterclockwise to set the effect OFF.
THR30II Wireless THR10II Wireless THR10II Reference Manual 4
!2 [ECHO /REV] knob Selects one of four different effects: ECHO (tape echo), ECHO/REV (tape echo/reverb), SPRING (spring reverb), and HALL (hall reverb).
Turn the knob clockwise to increase the amount of each effect. * Turn the knob fully counterclockwise to set the effect OFF. * When ECHO or ECHO/REV is selected, the [TAP/TUNER] button e can be used to set the delay time.
!3 [GUITAR] knob
Adjusts the overall volume of the guitar sound. * This knobs setting has no effect on the signal sent to the [USB] jack @0. * The volume output to the [LINE OUT] [L] [R] jack (THR30II Wireless only) is constant regardless of the setting of the [GUI-
TAR] knob.
!4 [AUDIO] knob Adjusts the audio playback volume for audio from the computer connected to the [USB] jack @0, an audio device connected to the [AUX] jack !7, or a smart device connected by Bluetooth (page 10).
!5 [INPUT] jack This is a standard phone jack used to connect a guitar to the THR-II.
* Connecting the Relay G10T to the [INPUT] jack starts charging that device automatically. (THR-II Wireless only) * The optimal channel is set automatically by connecting the Relay G10T to the [INPUT] jack for at least 10 seconds. (THR-II
Wireless only)
!6 [PHONES] jack
This is a stereo mini phone jack used to connect stereo headphones to the THR-II. * Speaker sound is muted when a plug is inserted into the [PHONES] jack.
!7 [AUX] jack This is a stereo mini phone jack used to connect an external audio device to the THR-II.
* The signal received at the [AUX] jack is not sent to the [USB] jack @0.
!8 [USER MEMORY] [1] [2] [3] [4] [5] button Saves up to five sets of amp section controller settings (GAIN, MASTER, BASS, MIDDLE, TREBLE, EFFECT, ECHO/REV). Press and hold the number of the desired [USER MEMORY] button for saving your settings to (about 2 seconds). The save operation is complete when the memory number for the button being pushed appears in the LED Display w. Press one of the numbered buttons (less than 2 seconds) to recall the saved settings.
* On the THR10II Wireless and THR10II, enable Bluetooth by pressing the [USER MEMORY] button [4] and [5] simultane- ously.(Same as [Bluetooth] button !9)
!9 [Bluetooth]button (THR30II Wireless only)
Set the Bluetooth. Press and hold for three seconds to activate Bluetooth pairing. The LED display w will flash in green. For further details, refer to the section Connecting to a smart device on page 10.
THR30II Wireless THR10II Wireless THR10II Reference Manual 5
Rear Panel
@0 [LINE OUT] [L] [R] jack (THR30II Wireless only)
The line outputs are impedance-balanced phone jacks for connection to external devices. These jacks can be connected to TRS phone or mono-type phone plugs.
@1 [USB] jack This jack is used to connect THR-II to a computer via a USB cable.
@2 [15V] DC IN connector
Connects the supplied power adaptor.
@0 @1 @2
L R
THR30II Wireless THR10II Wireless THR10II Reference Manual 6
About the Default Settings To reset all contents stored in the user memory, switch on the power while holding down [USER MEM- ORY] buttons [1], [3], and [5].
NOTICE All contents stored in the user memory will return to factory defaults when the unit is initialized.
Hold down switches [1], [3], and [5].
Switch on the power.
The THR-II can be used either with a conventional wired connection with an appropriate cable, or with a wireless connection.
Connection Example (on THR30II Wireless)
Make sure that all devices to be connected to the unit by cable are turned off. When connecting the unit to an external device, always use an appropriate cable that matches the
jacks specifications and connect it securely.
Precautions for using the USB jack Make sure to follow the points at next page when connecting a computer to the THR-II USB jack, to avoid loss of data by the computer and prevent the THR-II from freezing or shutting down.
Connection
L R
* The illustrations and LCD screens as shown in this manual are for instructional purposes only, and may appear somewhat different from those on your instrument.
NOTE If a cable is connected to the INPUT jack, the wireless guitar receiver can- not be used.
Playing music/audio NOTE Make sure to adjust the devices level appropriately to avoid distortion.
Wireless tone editing with the iOS/ Android app (THR Remote).
Wireless control with a third-party Bluetooth footswitch (via THR Remote).
Wireless Connection
Audio output from an audio player or computer
Computer, Tablets and Smartphones
USB Cable
Power Adaptor
LED display When connecting Blue- tooth, check LED light- ing in this area.
Order for turning the power on THR30II Wireless Mixer Amp (or powered speaker)
Order for turning the power off Amp (or powered speaker) Mixer THR30II Wireless
External Audio Devices
Power Outlet
Bluetooth
THR30II Wireless THR10II Wireless THR10II Reference Manual 7
NOTICE Use an AB type USB cable of less than 3 meters. USB 3.0 cables cannot be used.
Be sure to wake the computer from suspended/sleep/standby mode before connecting a computer to the USB jack.
Always quit all applications that are running on the computer before connecting or disconnecting the USB cable and set the volume output on the computer to its minimum level.
When connecting or disconnecting the USB cable, be sure to set the OUTPUT controls ([GUITAR] knob and [AUDIO] knob) on the THR-II to their minimum levels.
Wait at least 6 seconds between connecting or disconnecting the USB cable.
Power
The THR-II Wireless can operate on either DC power (via the power adaptor) or with the builtin rechargeable battery. The THR10II can operate on DC power (via the power adaptor).
* When you use the THR-II Wireless with the built-in rechargeable battery, the maximum output volume is reduced. (page 16)
When using the power adaptor Connect the supplied power cord to the power adapter. Connect the supplied power adaptor to the [15V] DC IN jack located on the rear panel of the THR-II. Connect the AC plug to a power outlet.
* Follow the bundled Safety Instruction Sheet before making connections.
Turning the power on and off Press the [ ] power button on the top of THR-II for one second to turn the power on. The LED of the power button lights when turning the power button on. The LED of the THR-II Wireless lights in green while charging. Otherwise, it lights in red.
* Follow the bundled Safety Instruction Sheet before making connections.
Checking the battery level (THR-II Wireless only) Press the [ ] button on top of the THR-II Wireless for less than one second to check the battery level. The remaining battery capacity is displayed in four levels of 3, 2, 1 and L (Low).
Power Adaptor (supplied) Power Outlet
DC IN Jack
DC plug
the supplied power cord
Battery full No battery remaining
THR30II Wireless THR10II Wireless THR10II Reference Manual 8
Charging the built-in battery (THR-II Wireless only) Connect the supplied power adaptor to the DC IN jack located on the rear side of the THR-II Wireless. The LED of the power button lights in green while charging.
* For further details of the Power Button LED state, refer to the THR30II Wireless, THR10II Wireless* Power Button LED status list (page 17).
NOTICE When you use the THR-II Wireless in an environment of extreme temperatures, charging may not be
possible.
Charge the built-in rechargeable battery once every six months to maintain the function.
Charging the Relay G10T (THR-II Wireless only) Connect the Relay G10T *1 to the [INPUT] jack located on the top of the THR-II Wireless. The builtin recharge- able battery starts *2 charging automatically. If you have disconnected the Relay G10T from the [GUITAR] jack of the THR-II Wireless and want to resume charging, wait for more than two seconds before reconnecting the device to the [GUITAR] jack.
*1 Refer to the manual of Relay G10T for explanations of LED display indications on the Relay G10T. *2 If the supplied power adapter is not connected to the THR-II Wireless, charging of the Relay G10T will not start.
NOTICE After charging, unplug the Relay G10T from the THR-II Wireless.
When the THR-II Wireless is turned off and the power adapter is connected, the Relay G10T is charged by simply connecting. However, the THR-II Wireless is set to stop supplying power to the Relay G10T when the Relay G10T charging is finished. In this state, leaving the Relay G10T con- nected to the THR-II Wireless may result in depletion of the Relay G10Ts battery power. Turn off the THR-II Wirelesss ECO setting to prevent this.
Changing the Relay G10Ts ECO setting *1 *2
1. Switch on the power of THR-II Wireless
2. Switch off the power of THR-II Wireless while holding the [TAP/TUNER] button *3
*1 You can change the ECO setting from the THR Remote. *2 ECO on and ECO off are toggle. When you change the ECO setting, perform the steps 1 to 2 again. *3 Since the ECO setting changes to ECO off when charging is started on the Relay G10T, C will appear on the LED
display.
Connecting to guitar by wireless (THR-II Wireless only)
The THR-II Wireless can connect with the Relay G10T wireless guitar transmitter (made by Line 6) by wireless. Moreover, the optimal channel is set automatically by connecting the Relay G10T to the [INPUT] jack located on the top of the THR-II Wireless for at least 10 seconds. For details on wireless connection, refer to the Relay G10Ts manual.
Switch off the power while holding the [TAP/TUNER] button.
THR30II Wireless THR10II Wireless THR10II Reference Manual 9
Connecting to a smart device
By connecting a smart device to the THR-II, you can: Play audio files from a smart device via Bluetooth. Edit effect and tone controls from a smart device.
Playing audio files on a smart device via Bluetooth To play audio from a smart device via Bluetooth, configure Bluetooth on the smart device while in the pairing mode.
Setting the THR-II to pairing mode
1. Check that the at the top of the LED DISPLAY is unlit (disconnected).
2. Press and hold the [Bluetooth] button* located on the top of the THR-II for three seconds.
3. Check that the LED DISPLAY flashes in green (pairing mode).
Configuring Bluetooth on the smart device
4. Complete the Bluetooth configuration of the smart device within 3 minutes after entering pairing mode. * For details on Bluetooth configuration, refer to the manual of your smart device.
5. Check that the LED DISPLAY is lightning in green (connected).
Confirm sound output from the THR-II by playing music from the smart device.
NOTE When the Bluetooth connection record remains on both the THR-II and smart device, they will
reconnect automatically when the THR-II power is turned on.
Play audio from the smart device.
5. Check that the LED is lit in green (connected).
4. Complete the Blue- tooth configura- tion within 3 minutes.
3. Check that the LED flashes in green (pairing mode).
1. Unlit (disconnected)
2. Press and hold the Bluetooth button* for three seconds (pairing).
* On the THR10II Wireless and THR10II,
enable Bluetooth by pressing the [USER
MEMORY] button [4] and [5] simultane-
ously.
Press the Bluetooth button* once then disconnected. (reconnect)
Press the Bluetooth button*. (disconnect)
THR30II Wireless THR10II Wireless THR10II Reference Manual 10
Editing effects and tone controls on a smart device Install the THR Remote app to the smart device to allow editing of effects and tone controls on that device.
Installing THR Remote (Android, iOS)
1. Access the app distribution service on the smart device. Android devices: Google Play* iOS devices: App Store
2. Search for the THR Remote app.
3. Download and install the THR Remote app following the onscreen instructions.
Configuring Bluetooth MIDI
1. Start the THR Remote.
2. Touch the Bluetooth icon on the display.
3. Connect to LE_THRII following the onscreen instructions.
Starting the THR Remote app
Start the THR Remote app on the smart device.
Press the desired [USER MEMORY] button for 2 seconds to save the settings made with THR Remote to the THR-IIs built-in user memory (page 5).
For connecting Android devices, refer to Smart Device Connection Manual for Android.
For connecting iOS devices, refer to iPhone/iPad Connection Manual.
Yamaha Downloads. https://download.yamaha.com/
* Google Play and the Google Play logo are trademarks of Google LLC.
THR30II Wireless THR10II Wireless THR10II Reference Manual 11
Connecting to a computer
Connecting a computer to the THR-II makes the following possible: Playing back audio files from a computer through the THR-II. Recording with Cubase AI. Editing amp and effect settings using the THR Remote desktop editor.
Playing back audio files from a computer through the THR-II.
Configuring and Operating
Select the model name (THR30II WIRELESS, THR10II WIRELESS, THR10II) of the connected THR-II as the computers audio output setting.
Windows Control Panel Sound Sound tab
Macintosh System Preferences Sound Output tab
Connect the computers USB connector to the USB connector on the THR-II as shown in the diagram below.
You can play a guitar along to the audio played on the computer.
Use the [AUDIO] knob to adjust the volume of the audio played from a computer.
USB Connection diagram
[AUDIO] knob
Playback an audio file on the computer.
Guitar sound +
audio playback
[USB] jack
THR30II Wireless THR10II Wireless THR10II Reference Manual 12
Recording with Cubase AI
Installing Cubase AI
A download access code for Cubase AI music production software is included with the THR-II. Cubase AI enables you to record, edit, mix and play back audio through your THR-II.
Cubase AI System Requirements
For the latest information, refer to the Steinberg website below.
https://www.steinberg.net/
Installing Cubase AI
To install Cubase AI, an active Internet connection is required. Follow the instructions provided in the Cubase AI Download Information sheet to download, install and activate the software.
Connecting to the THR-II
Connect the computers USB connector to the USB connector on the THR-II as shown in the diagram below. (See the USB Connection diagram on page 12.)
* For more information on operating, refer to the Cubase AIs Help Menu (see the illustration below).
Editing effects and tone controls on a computer
Installing the THR Remote app (Windows, Mac)
1. Access the following website and extract the THR Remote file after downloading.
https://download.yamaha.com/ * Check the above website for information on system requirements. * The THR Remote may be updated without notice. Check the above website for the latest details and updates.
2. Install the THR Remote app to your computer.
Configuring and Operating after Installing
Connect the computers USB connector to the [USB] connector on the THR-II as shown in the diagram below. (See the USB Connection diagram on page 12.)
Press the desired [USER MEMORY] button for 2 seconds to save the settings made with THR Remote to the THR-IIs built-in user memory (page 5).
to the [USB] jack on THR-II
Help
THR30II Wireless THR10II Wireless THR10II Reference Manual 13
No power Connect the power adaptor properly (see page 8).
Make sure that the THR-II Wireless been prop- erly charged, when the power adapter is discon- nected (see page 8).
No sound No guitar sound is output (wired connection) Connect the guitar to [INPUT] jack properly (see
page 7).
Make sure that the volume control on the guitar is turned up properly.
Make sure that the [GAIN] knob, [MASTER] knob and [GUITAR] knob are not set to mini- mum (see pages 4, 5).
When the [AMP] knob is set to CLEAN, make sure that all of the [BASS] knob, [MIDDLE] knob and [TREBLE] knobs are not set to minimum (see page 4).
Dont connect the headphones to [PHONES] jack to outputs from the speaker on THR-II (see page 5).
Make sure that the COMPRESSOR Level is not set to 0 on the THR Remote app (see pages 11, 13).
Set the Tuner function OFF (see page 3).
Make sure that the cable connecting the guitar is not damaged.
No guitar sound is output (wireless con- nection) Use the Relay G10T. THR-II Wireless cannot
connect to any guitar wireless transmitter other than the Relay G10T.
Connect the Relay G10T to the INPUT jack located on the top of the THR-II Wireless for at least 10 seconds. The appropriate channel is set automatically.
Make sure that the volume control on the guitar is turned up.
Set the Tuner function OFF (see page 3).
No audio sound is output by Bluetooth Confirm the status of LED display. When the
LED is unlit or flashing in green, the devices are not connected via Bluetooth (see page 17).
When the Bluetooth configuration on the smart device is ON, turn it OFF once and configure «Playing audio files on a smart device via Blue- tooth» (see page 10).
Delete the Bluetooth registration once on the Bluetooth configuration screen on the smart device and configure «Playing audio files on a smart device via Bluetooth» (see page 10).
Move the smart device and the THR-II closer together.
Turn off the power of the THR-II. (see page 
Restart the smart device.
* For details on Bluetooth configuration, refer to the manual of the smart device.
Disconnect any other Wi-Fi and Bluetooth devices. The connection may be broken due to the influence of other nearby Wi-Fi or Bluetooth devices.
No audio sound is output from a computer by USB connection Connect the USB cable properly (see page 12).
Confirm the configuration of the audio output port on the computer (see page 12).
Confirm the configuration of the computer on the computer or that audio is not muted on the application.
Make sure the [AUDIO] knob is turned up (see page 5).
Make sure the USB cable connecting the devices is not damaged.
No audio sound is output from an external device by AUX connection Connect the cable to the external device prop-
erly (see page 7).
Make sure that the volume control on the exter- nal device is turned up.
Make sure the [AUDIO] knob is turned up (see page 5).
Make sure the cable connecting the devices is not damaged.
Troubleshooting
THR30II Wireless THR10II Wireless THR10II Reference Manual 14
Others Tap Tempo cannot be set Select ECHO or ECHO/REV. The tap tempo can-
not be set with SPRING or HALL (see page 4).
A # appears in the LED display When Extended Stereo is set to OFF, a #
appears in the LED display (see page 4).
THR-II Wireless cannot be charged Keep the THR-II Wireless at room temperature
and dont use it until the built-in rechargeable battery reaches a suitable temperature. If charg- ing cannot be performed after a sufficient time, there may be a problem with the built-in rechargeable battery. If the problem persists, consult your Yamaha dealer (see page 17).
Relay G10T cannot be charged When Relay G10T is disconnected from the
[INPUT] jack, connect to the [INPUT] jack on THR-II Wireless again after 2 seconds.
Volume is low Keep the THR-II Wireless at room temperature
and dont use it until the built-in rechargeable battery reaches a suitable temperature. For safety reasons, the built-in rechargeable battery is designed to limit the volume when the built-in rechargeable battery’s temperature rises.
The built-in rechargeable battery charge does not last THR-II Wireless’s built-in rechargeable battery
may have reached the end of its life. If the prob- lem persists, consult your Yamaha dealer.
Charge the battery every six months to maintain the battery power function.
The built-in rechargeable battery has a limited life- time. The capacity decreases gradually with the number of times of use and the passage of time.
The lifetime of the built-in rechargeable battery depends on the storage method, usage and envi- ronment.
THR30II Wireless THR10II Wireless THR10II Reference Manual 15
Technical Specifications
Digital Section Built-in Amp Simulations
CLEAN, CRUNCH, LEAD, HI GAIN, SPECIAL, BASS, ACO*, FLAT There is an amp mode MODERN, BOUTIQUE, and CLASSIC for each amp type (THR10II Wireless and THR10II can switch the amp mode by THR Remote) * Mic simulation
Built-in Effects CHORUS, FLANGER, PHASER, TREMOLO ECHO, ECHO/REVERB, SPRING REVERB, HALL
REVERB In addition to the above, Room and Plate reverbs are also available in the THR Remote editor. COMPRESSOR* NOISE GATE* * Only available from THR Remote.
Built-in Chromatic Auto Tuner
Knob/Switch AMP, GAIN, MASTER, BASS, MIDDLE, TREBLE, EFFECT, ECHO/REV, GUITAR, AUDIO, USER MEM- ORY button x 5, TAP/TUNER button, Amp switch*, Bluetooth button*
* Only THR30II Wireless
Display LED 1
Connections INPUT (standard mono-type phone jack, unbalanced), LINE OUT (standard phone jack, impedance-balanced), PHONES (stereo mini jack), AUX (stereo mini jack), USB TYPE B, DC IN (15V)
A/D Converter 24-bit + 3 Bit Floating
D/A Converter 24-bit
Sampling Frequency 48 kHz
Memory Allocations User Memory: 5
Input Level GUITAR IN : -10 dBu AUX IN : -10 dBu
PHONES Output Level 10 mW
Rated Output THR30II Wireless: 30 W (15 W + 15 W) THR10II Wireless, THR10II: 20 W (10 W + 10 W)
Maximum output during built-in recharge- able battery operation
THR30II Wireless, THR10II Wireless: 15 W (7.5W + 7.5W)
Power Source Power Adaptor or built-in rechargeable battery
Power Adaptor (YNT345-1530) Built-in rechargeable battery
Battery life*: About 5 hours * Depends on usage situation
Power Consumption THR30II Wireless, THR10II Wireless: 22 W THR10II: 11 W
Dimensions (W x H x D) THR30II Wireless: 420 x 195 x 155 mm (16.5 7.7 6.1) THR10II Wireless, THR10II: 368 x 183 x 140 mm (14.5 7.2 5.5)
Weight THR30II Wireless: 4.3 kg (9 lbs. 8 oz.) THR10II Wireless: 3.2 kg (7 lbs) THR10II: 3.0 kg (6 lbs. 1 oz.)
Accessories Power Adaptor (YNT345-1530) Quick Guide Safety Instructions Sheet Service offices list Cubase AI Download Information
Bluetooth Bluetooth Version: Bluetooth Ver. 4.2 Supported Profile: A2DP Compatible Codec: SBC RF Outout Power: Bluetooth class 2 Maximum Communication Range: 10m (33ft) (without obstacles)
* The contents of this manual apply to the latest specifications as of the publishing date. To obtain the latest manual, access the Yamaha website then download the manual file. Since specifications, equipment or separately sold accessories may not be the same in every locale, please check with your Yamaha dealer.
Specifications
THR30II Wireless THR10II Wireless THR10II Reference Manual 16
THR30II Wireless, THR10II Wireless* Power Button LED status list
* Since the THR-10II does not have a built-in rechargeable battery, the power button LED status is only red (ON) and off (OFF).
When not using the power adaptor
The power is ON
The power is OFF
When using the power adaptor
Charging
The battery is full and the power is ON
The battery is full and the power is OFF
Red
Unlit
Green
Red
Unlit
Charging error indication
When the power is on Indicates charging error
When the power is off Indicates charging error
If the built-in rechargeable battery has a charging error, immediately turn off the THR-II Wireless power, unplug the power adapter, and consult your Yamaha dealer.
Flashes (green red)
Flashes (green unlit)
THR30II Wireless THR10II Wireless THR10II Reference Manual 17
Signal Flow Diagrams
+
Guitar In
Extended StereoBluetooth In
USB In
Speakers & Headphones Out
USB Out
Line Out
Wet GUITAR
Knob
Sync
Compressor (FX1)
Speaker Simulator
Simulator
(FX2)
Delay (FX3)
AUX In
Reverb (FX4)
AUDIO Knob
USB
Dry
Output gain App. control
Noise Gate
Mix gain App. control
Sync
Direct Switch
THR30II Only
Variable gain
THR30II Wireless THR10II Wireless THR10II Reference Manual 18
Amp Modeling List
Mode Amp Type Description
Classic
Clean A low-gain preamp for sparkling American-style cleans, with 6L6 tubes in the output stage for brightness and a strong midrange.
Crunch EL84 power tubes in a true Class-A configuration with a highly responsive EQ for rich, complex harmonic tones and warm overdrive. Inspired by British chime.
Lead A low-gain preamp with an EL34-based power section that breaks into classic British over- drive as the master volume is pushed.
Hi Gain Powerful modern distortion that fills out as the high-gain preamp is pushed. Tread carefully after 12 o’clock.
Special 12AX7 and 6L6 tubes in pursuit of the «Brown» sound. Set the gain around 11 o’clock for classic rock crunch, or crank it for saturated rhythm tones.
Bass Woody, vintage tone with late breakup.
Acoustic Designed for acoustic-electric guitar, modeling the response of a boutique condenser microphone.
Flat A neutral tone with no amp or speaker modeling. Great for connecting other instruments to your THR.
Boutique
Clean A low-watt EL34 design. Turning up the preamp gain will thicken up the cleans, then push into bluesy overdrive.
Crunch A deceptively simple amp circuit with just a single 12AX7 and EL84. A full, no-frills tone that is highly responsive to picking dynamics.
Lead A version of the Classic/Lead circuit, modified for extra gain with a darker tone and scooped mids.
Hi Gain ECC83s into 6L6s for high gain with a highly responsive EQ, inspired by German engineer- ing.
Special Four 12AX7 preamp tubes into 6L6 output tubes. Tight, fast tracking for crushing high- gain.
Bass Full, modern tone that breaks into a fuzz-like overdrive when pushed hard.
Acoustic Designed for acoustic-electric guitar, modeling the response of a boutique tube micro- phone.
Flat A neutral tone with no amp or speaker modeling, and a slight bass boost. Great for con- necting other instruments to your THR.
Modern
Clean A boutique, low-watt EL84 design that adds fullness and sustain as the master volume is turned up. A great match for neck pickups.
Crunch A mid-volume boutique design with 6550 power tubes. Listen for tight bass response and a singing sustain.
Lead A high-gain design with 12AX7s into EL34s, for the tone that defined 1980s hard rock and heavy metal.
Hi Gain A boosted version of the Classic/Special amp, with even more gain for aggressive rhythms or searing leads.
Special A classic overdrive circuit before the preamp tightens low-frequency response and provides even more gain. Ideal for extended-range guitars.
Bass Vintage voicing with early breakup for overdrive that works well with bass or guitar.
Acoustic Designed for acoustic-electric guitar, modeling the response of a boutique dynamic micro- phone.
Flat A neutral tone with no amp or speaker modeling, and a slight mid scoop. Great for con- necting other instruments to your THR.
THR30II Wireless THR10II Wireless THR10II Reference Manual 19
Manual Development Department 2019 Yamaha Corporation
Manualsnet FAQs
If you want to find out how the THR10II Yamaha works, you can view and download the Yamaha THR10II Amplifier Reference Manual on the Manualsnet website.
Yes, we have the Reference Manual for Yamaha THR10II as well as other Yamaha manuals. All you need to do is to use our search bar and find the user manual that you are looking for.
The Reference Manual should include all the details that are needed to use a Yamaha THR10II. Full manuals and user guide PDFs can be downloaded from Manualsnet.com.
The best way to navigate the Yamaha THR10II Amplifier Reference Manual is by checking the Table of Contents at the top of the page where available. This allows you to navigate a manual by jumping to the section you are looking for.
This Yamaha THR10II Amplifier Reference Manual consists of sections like Table of Contents, to name a few. For easier navigation, use the Table of Contents in the upper left corner.
You can download Yamaha THR10II Amplifier Reference Manual free of charge simply by clicking the “download” button in the upper right corner of any manuals page. This feature allows you to download any manual in a couple of seconds and is generally in PDF format. You can also save a manual for later by adding it to your saved documents in the user profile.
To be able to print Yamaha THR10II Amplifier Reference Manual, simply download the document to your computer. Once downloaded, open the PDF file and print the Yamaha THR10II Amplifier Reference Manual as you would any other document. This can usually be achieved by clicking on “File” and then “Print” from the menu bar.
3.0
Rated 3.0 out of 5
3.0 out of 5 stars (based on 1 review)
Your overall rating
YAMAHA THR10II WIRELESS (01) PDF MANUAL
Click here to download YAMAHA THR10II WIRELESS (01) PDF MANUAL
YAMAHA THR10II WIRELESS (01) PDF MANUAL
FREE ENGLISH PDF
OPERATING INSTRUCTIONS
USER GUIDE – USER MANUAL
OWNER GUIDE – OWNER MANUAL
REFERENCE GUIDE – REFERENCE MANUAL
INSTRUCTION GUIDE – INSTRUCTION MANUAL
Your overall rating
- YouTube
YAMAHA THR10II WIRELESS (01) PDF MANUAL
YAMAHA THR10II WIRELESS (01) PDF MANUAL

